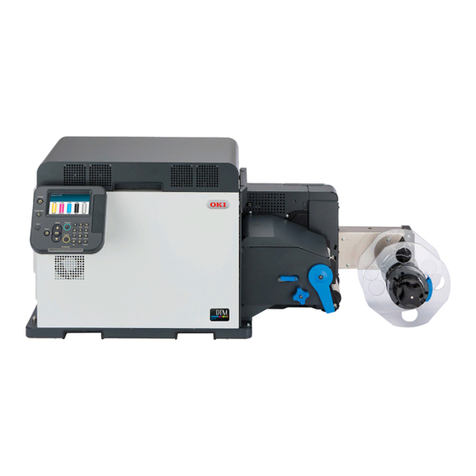
Oki PRO330S User manual

Pro330S
Label Printing Manual

- 2 -
Table of Contents
1 Getting started........................................................................ 5
Safety precautions ....................................................................6
General precautions ..................................................................7
About this manual.....................................................................9
About this manual .......................................................................... 9
Copyrights ...................................................................................... 9
About the description..............................................................10
About marks ................................................................................. 10
About symbols .............................................................................. 10
About illustrations ........................................................................ 10
2 Installation ........................................................................... 11
About installation....................................................................12
Installation environment .............................................................. 12
Installation space ......................................................................... 13
Unpacking ...............................................................................14
Unpacking the machine ................................................................ 14
Unpacking the roll paper holder.................................................... 15
Checking the accessories ........................................................16
Supplied accessories..................................................................... 16
Accessories of the roll paper holder.............................................. 18
Installing consumables ...........................................................20
Assembling the holder ............................................................24
Attaching the roll paper holder to the main unit......................27
Removing the roll paper holder from the main unit.................30
3 Setting up ............................................................................. 31
Turning the power on/o........................................................32
About the power supply................................................................ 32
Turning the power on ................................................................... 33
Turning the power o ................................................................... 34
Installing optional accessories................................................35
Installing the wireless LAN module .............................................. 35
Installing the presenter unit......................................................... 38
Connecting the LAN cable .......................................................42
Connecting via a wireless LAN ................................................44
Preparing to connect via wireless LAN.......................................... 44
Connecting via an access point (Infrastructure) ........................... 44
Connecting directly with this machine (AP mode) ........................ 49
Using wired LAN and wireless LAN at the same time...............50
Connecting the USB cable .......................................................51
Installing the printer driver on a PC........................................52
4 Paper settings ....................................................................... 53
Applicable paper .....................................................................54
Paper type, paper size, and paper thickness ................................. 54

- 3 -
Paper specications...................................................................... 56
Paper storage .........................................................................62
Preparing paper ......................................................................63
Flow of loading paper..............................................................65
Setting paper information from the operator panel.................66
Aligning the paper sensor .......................................................68
Checking the position of paper sensor .......................................... 68
Adjusting the position of paper sensor ......................................... 70
Loading paper .........................................................................73
Aligning the TOP position of the paper ....................................79
5 Printing ................................................................................. 80
Registering paper information in the printer driver.................81
Adjusting the paper sensor (Sensor calibration) .....................83
Changing color settings...........................................................85
6 Troubleshooting .................................................................... 86
When the LED indicator lights up ............................................87
When a paper jam occurs........................................................88
For error code "381" "730-06" (when a paper jam occurs to
the belt unit) ................................................................................ 88
For error code "382" (when a paper jam occurs to
the fuser unit) .............................................................................. 91
For error code "380"/"390" (when a paper jam occurs to
the cutter) .................................................................................... 95
Troubleshooting for printing results........................................97
List of troubles with printing results............................................. 97
White streaks appear in the vertical direction .............................. 98
Horizontal white streaks appear in the paper feed direction
periodically ................................................................................... 98
Printing is faint in the vertical direction........................................ 99
Printing is light ............................................................................. 99
White dots or lines appear.......................................................... 100
Condensation occurs on printed paper........................................ 100
Vertical streaks appear............................................................... 100
Dots and horizontal streaks appear in the paper feeding
direction periodically .................................................................. 101
White area is lightly stained ....................................................... 101
Edges of text are blurred ............................................................ 102
Toner comes o due to rubbing .................................................. 102
Specks appear on glossy paper................................................... 103
Black or white dots appear ......................................................... 103
Stains are printed ....................................................................... 103
The entire paper is printed in black ............................................ 104
Nothing is printed....................................................................... 104
White streaks occur .................................................................... 104
The peripheral area is dirty......................................................... 104
The color of images does not come as expected ......................... 105
- 4 -
CMY100% black is light .............................................................. 105
The accuracy of reading barcode is low ...................................... 106
Output position shifts ...........................................................107
Paper does not feed well.......................................................108
7 Maintenance........................................................................ 110
Cleaning................................................................................111
Preparations ............................................................................... 111
Cleaning cycle............................................................................. 111
Cleaning the roll paper holder ...............................................112
Cleaning the surface of the roll paper holder .............................. 112
Cleaning the inside of the roll paper holder ................................ 113
Cleaning the main unit ..........................................................115
Cleaning the surface of the main unit ......................................... 115
Cleaning the paper transfer roller of the main unit ..................... 116
Cleaning the paper feed roller of the main unit........................... 123
Cleaning the paper sensor .......................................................... 124
Cleaning the LED head ................................................................ 125
Cleaning the fuser unit ............................................................... 127
Cleaning the cutter unit .............................................................. 129
Cleaning the surface of the belt unit ........................................... 136

1
Safety precautions ................................................................... 6
General precautions ................................................................. 7
About this manual .................................................................... 9
About the description ............................................................. 10
Getting started

- 6 -
Safety precautions
WARNING
Mishandling due to ignoring this indication may cause major
injuries or even death.
CAUTION
Mishandling due to ignoring this indication may cause personal
injury.

- 7 -
General precautions
WARNING
Do not touch the safety switch inside the machine. High voltage may occur
and electric shock may be caused. In addition, gears can rotate, which may
result in personal injury.
Do not use any inammable spray near the machine. Doing so may cause a
re since there are high-temperature parts inside the machine.
Disconnect the power plug from the outlet and contact your dealer if the
cover becomes abnormally hot, emits smoke, gives o an odor, or makes an
abnormal noise.
Failure to do so may cause a re.
Disconnect the power plug from the outlet and contact your dealer if water or
other liquid gets into the machine.
Failure to do so may cause a re.
If paper clips or other foreign objects enter the machine, disconnect the power
plug from the outlet and remove the foreign objects if any.
Failure to do so may cause electric shock, re or injury.
Do not disassemble the machine or perform any operations other than those
specied in the User's Manual.
Failure to do so may cause electric shock, re or injury.
Disconnect the power plug from the outlet and contact your dealer if the
machine is dropped or the cover is damaged.
Failure to do so may cause electric shock, re or injury.
Periodically disconnect the power plug from the outlet and clean the base of
the prongs and between the prongs.
Leaving the power plug inside the outlet for a long period of time may cause a
re due to short circuit caused by collection of dust at the base of the prongs.
Do not clean up spilled toner using an electric vacuum cleaner. When spilled
toner is cleaned up using an electric vacuum cleaner, re may be caused due
to sparks from electrical contacts.
If toner is spilled on the oor, wipe the toner up carefully using a damp cloth
to prevent toner scattering.
Do not insert objects into the air vents.
Failure to do so may cause electric shock, re or injury.

- 8 -
WARNING
Do not place any containers like cups containing water on the machine.
Doing so may cause electric shock or re.
Make sure that no urine from pets on top of this machine wet or enter this
machine.
Failure to do so may cause electric shock or re.
When the covers of this machine are open, do not touch the fuser unit.
Doing so may cause burns.
Do not throw toner cartridges or image drums into re.
Doing so may cause burns due to dust explosion.
Do not connect the power cord and cables other than those specied in the
User's Manual.
Failure to do so may cause a re.
Operations using an uninterruptible power supply (UPS) or an inverter are not
guaranteed. Do not use an uninterruptible power supply or inverter.
Failure to do so may cause a re.
CAUTION
Do not approach the paper discharger when the power is on or during printing.
Doing so may cause injury.
Do not touch a broken liquid crystal display. Doing so may cause injury. If any
liquid (liquid crystal) leaking from the liquid crystal display entered the eyes
or mouth, wash promptly using copious amounts of water. Consult a physician
as necessary.
Do not disassemble or forcibly open the image drum or toner cartridge. Doing
so may scatter the toner, which may be inhaled by people or may stain clothes
or hands.

- 9 -
About this manual
This section lists a variety of information about this manual. Please read this manual before
using the machine.
About this manual
• The reproduction of this manual, in whole or in part, without permission is strictly
prohibited.
• The content of this manual may be changed without a prior notice in the future.
• Eorts have been exerted to make the content of this manual as complete as possible.
However, should you notice any errors, omissions or other problems, contact the retail
store where you made the purchase.
• Notwithstanding the foregoing, we shall not have any liability in regard to any operational
eect related to the instructions contained in this manual.
Copyrights
All rights belong to Oki Electric Industry Co., Ltd. This manual may not be reproduced,
transcribed or translated without permission. Be sure to obtain the written approval from Oki
Electric Industry Co., Ltd.
© 2021 Oki Electric Industry Co., Ltd.

- 10 -
About the description
This manual uses screens of the following operating systems unless otherwise specied.
• Windows 10
Depending on the used OS, model and version, the description in this manual may dier.
About marks
This manual uses the following marks.
Symbols Meaning
Indicates cautions and restrictions for the correct operation of this
machine. Be sure to read them to avoid misoperation.
Indicates useful tips and references on how to use this machine. We
recommend you read them.
Indicates reference items. Please read them to learn the detailed
information.
About symbols
This section describes the symbols used in this manual and their meanings.
Symbols Meaning
« » Indicates buttons/keys on the operator panel of this machine.
[ ]
Indicates menu names, item names, options, etc. displayed on the
operator panel.
Indicates menus, windows and dialog box names displayed on the PC
screen.
" "
Indicates messages and input texts displayed on the operator panel.
Indicates le names on the PC.
Indicates item titles of link destinations.
« » Indicates keys on the PC keyboard.
-Indicates the menu path of this machine or the PC.
About illustrations
The displayed screens on the operator panel used in this manual are based on the default
settings.

2
About installation ................................................................... 12
Unpacking .............................................................................. 14
Checking the accessories ....................................................... 16
Installing consumables .......................................................... 20
Assembling the holder............................................................ 24
Attaching the roll paper holder to the main unit..................... 27
Removing the roll paper holder from the main unit ................ 30
Installation

- 12 -
About installation
Installation environment
Install this machine in the following environment.
Ambient temperature: 10 °C - 32 °C
Ambient humidity: 20% - 80% RH (relative humidity)
Max. wet-bulb temperature: 25 °C
• Make sure there is no condensation. Otherwise malfunction may be caused.
• If the ambient relative humidity is 30% or less, use a humidier or static prevention mat.
• The operating noise of this machine may be a concern depending on the installation environment. If the operating
noise is a concern, it is recommended to install this machine in a remote location or in a separate room.
WARNING
• Do not install it close to high-temperature locations or naked ames.
• Do not install it in locations where chemical reactions occur (e.g. laboratories).
• Do not install it close to combustible solutions such as alcohol and thinners.
• Do not install it within the reach of children or infants.
• Do not install it in an unstable location (e.g., an unsteady table or an inclined surface).
• Do not install it in a humid or dusty place, or in a place exposed to direct sunlight.
• Do not install it in an environment with salt air or corrosive gas.
• Do not install it in a place subject to frequent vibration.
• Do not install it in a place where the air vents of this machine are blocked.
CAUTION
• Do not install it directly on a shaggy rug or carpet.
• Do not install it in a place with poor air circulation or ventilation like in a sealed room.
• Ensure adequate ventilation if using it continuously for long hours in a small room.
• Keep it away from strong magnetic elds and noise sources.
• Keep it away from monitors and TVs.

- 13 -
Installation space
The installation space shall be large enough to attach the optional roll paper holder to the main
unit.
Install this machine on a at desk large enough to support its base.
Allow sucient space around this machine as shown in the following gures.
• Plan view
0mm
0mm
100mm
198mm
311mm 380mm
Random
• Side view
439mm
232mm 195mm
253mm
448mm

- 14 -
Unpacking
Unpacking the machine
• The packing case and buer materials are required to ship this machine. Keep them properly instead of discarding
them.
1 Take out this machine out of the packing case, and remove the buer
materials and the plastic bag.
2 Lift the machine and place it in the installation location.
• For details about the installation location, see "About installation" (Page 12).

- 15 -
Unpacking the roll paper holder
• The roll paper holder is sold separately.
• The packing case and buer materials are required to ship the roll paper holder. Keep them properly instead of
discarding them.
1 Open the top cover of the packing box, and take out the stand, plates (x2)
and shaft (x1).
2 Take the stand out of the bag, and remove the accessories and ground
pins.

- 16 -
Checking the accessories
Supplied accessories
Make sure that you have all the accessories supplied with the machine.
• Be sure to start with the consumables that come with this machine. If you install consumables other than the
accessories rst, the service life may not be displayed correctly, or the accessories may not be usable later.
• Main unit
• Toner cartridge
• The number of printable pages of a toner cartridge is approximately 5,000 (which is the reference value in
our in-house test of printing 25.4 mm (1 inch) black square blocks on 216 mm x 58 mm paper).
• Guide rib x4
x 4
• The guide rib is a part that prevents the front edge of the paper from falling into the gap near the paper sen-
sor and thus causing a paper jam. For details, refer to the "Pro330S User's Manual".

- 17 -
• Software DVD-ROM
• Set-up Guide
• Power cord
• LAN cables and USB cables are not supplied. Please prepare them separately according to the connection
environment.
• The packing case, buer materials and toner covers are required to ship this machine. Keep them properly instead
of discarding them.

- 18 -
Accessories of the roll paper holder
The roll paper holder is sold separately.
Make sure that you have all the accessories supplied with the machine.
• Stand
• Plate x2
• Flange lock x2
• Flange (large (3 inches)) x2
• Flange (small (2 inches)) x2

- 19 -
• Shaft x1
• Ground pin
• Roll Paper Holder Setup Guide

- 20 -
Installing consumables
• Do not power on the machine.
• Check that the machine is not turned on before installing consumables.
• Because the image drum (i.e. the glossy cylinder) can easily get damaged, handle with adequate care.
• Do not expose the image drum to direct sunlight or strong light (approx. 1,500 lux or above). Do not leave it
uncovered for more than 5 minutes even under room lighting.
1 Put your nger inside the recess on the top of the machine, and pull the
lever up.
2 Open the top cover until it stops.
Other manuals for PRO330S
1
Table of contents
Other Oki Label Maker manuals

Oki
Oki proColor Pro510DW User manual

Oki
Oki LD630 Series Use and care manual

Oki
Oki LD670 User manual

Oki
Oki LD610 T Use and care manual

Oki
Oki Pro1040 User manual

Oki
Oki C824 Setup guide

Oki
Oki LE850 Use and care manual

Oki
Oki LD630 Series Installation and operation manual

Oki
Oki LD630 Series Use and care manual