Novopro CDJ WS1 WORKSTATION
Thank you for purchasing the Novopro CDJ WS1 WORKSTATION
All Novopro products are thoroughly QC checked prior to dispatch but should you
have any queries or questions then please contact your place of purchase or
contact us at: info@novopro.co.uk
Novopro is a trade only supplier and only supply wholesale to trade resellers.
Novopro products are designed and engineered in the UK and manufactured in China.
Email: info@novopro.co.uk Web: www.novopro.co.uk
Due to continuous product developments & improvements, specifications and
appearance are subject to change.
© Copyright Novopro Ltd 2014. E&OE.
This user manual will help you to assemble this product safely & quickly, so please
spend a few minutes to read through this assembly information.
NOTE: WE HIGHLY RECOMMEND THAT TWO PEOPLE ARE AVAILABLE FOR STEP 4 OF
THE ASSEMBLY STAGE.
Due to continuous product developments, please check for the latest updated
version of this product manual at: www.novopro.co.uk
Step 1 Step 2
Step 3 Step 4
Step 5
Step 6
6M8*40 bolt
4Washer
4
Nut
6M6*10 bolt
2M6*40 bolt
1
1
1Wrench
1
1
1
1
1
1
1
1
1
6
M4 allen key
M5 allen key
Top plate
Left L-shape leg
Middle back panel
Mixer shelf
Foam pad
Foam pad
Rubber edging
Cable clamp
Right L-shape leg
Steel half circle
1
1
Small cover
Big cover
The contents of the WS1 are:
Position the two L-shape legs and insert the 6 x bolts through the
middle back panel. PLEASE LEAVE THE VERY BOLTS LOOSE AT
THIS STAGE – DO NOT TIGHTEN UNTIL THE FINAL END STAGE.
Mount the mixer shelf between the two L-shape legs after you have
selected the desired mixer angle from the 5 mounting positions and
insert the bolts and washers as shown above.
PLEASE LEAVE THE VERY BOLTS LOOSE AT THIS STAGE –
DO NOT TIGHTEN UNTIL THE FINAL END STAGE.
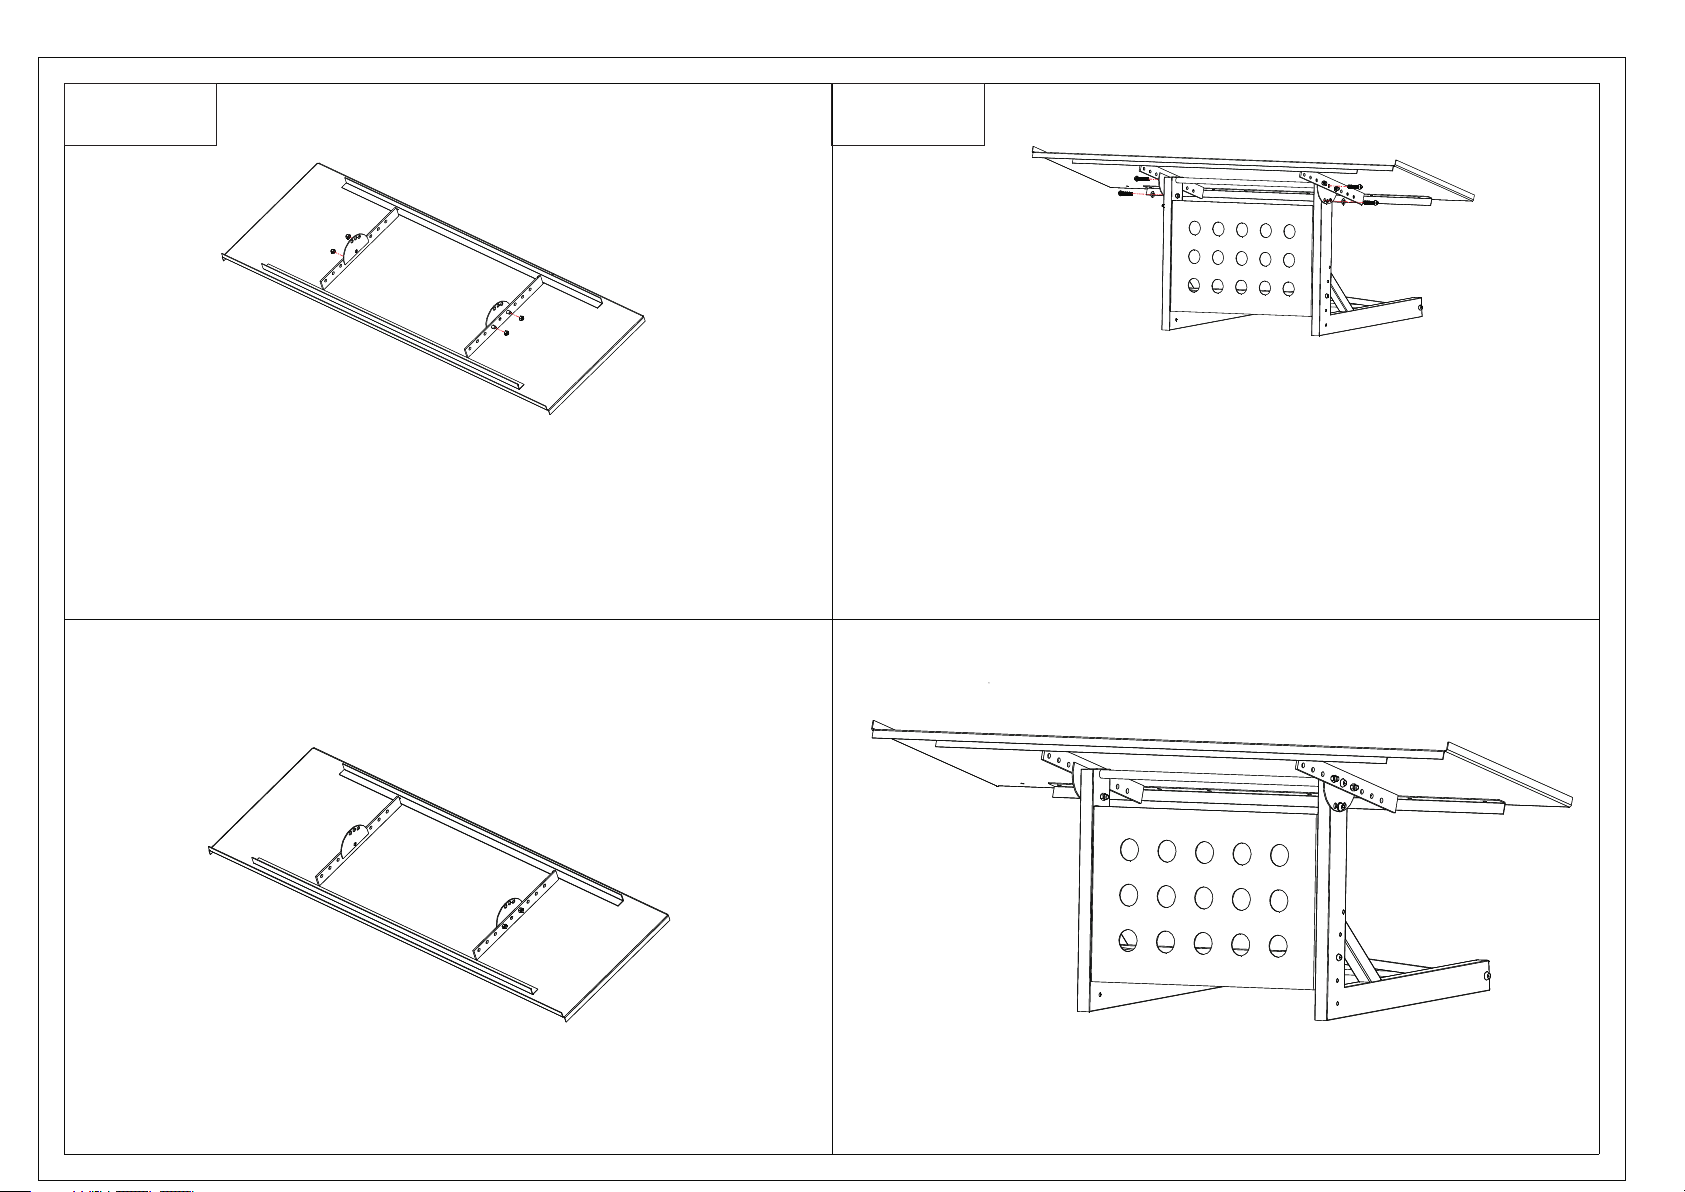
Now position and bolt in the two steel circular plates to the top plate;
it is at this point that you select the depth of the top shelf before you
bolt on these plates. IMPORTANT: these circular plates must be
mounted on the INSIDE of the rail and the holes in the circular plates
MUST FACE towards the FRONT edge of the top plate – as shown in the
image above)
NOTE: THIS STEP WILL REQUIRE TWO PEOPLE IN ORDER TO HOLD AND
ASSEMBLE THE WS1. DO NOT ATTEMPT THIS STAGE WITHOUT ASSIST-
ANCE.
Position the round tube in the top middle section of the two L-shape
legs. The bolt fits through the central hole on the circular panel.
As shown, the angle of the shelf is now selected from using the pre-
drilled holes and the other two bolts and washers lock this angle in
place.
Attach the rubber protection edging to the lip of the top plate.
You may need to lay the edging in place first and bend the corners
to assist the fixing around the corners.
If required, attach the double sided foam EVA pads to the top and
bottom panels and attach the non-slip rubber feet to the underside of
the frame as shown.
Now securely tighten all the bolts - BUT DO NOT OVERTIGHTEN AND
THREAD THE SOCKETS.
A cable clamp is included to position where required.
Your Novopro WS1 is now ready to use and we hope you enjoy the
use of this product.
6Non-slip rubber feet
1Round tube