NTW-1000 USER MANUAL
NTW-1000 UM.E 20181219-04
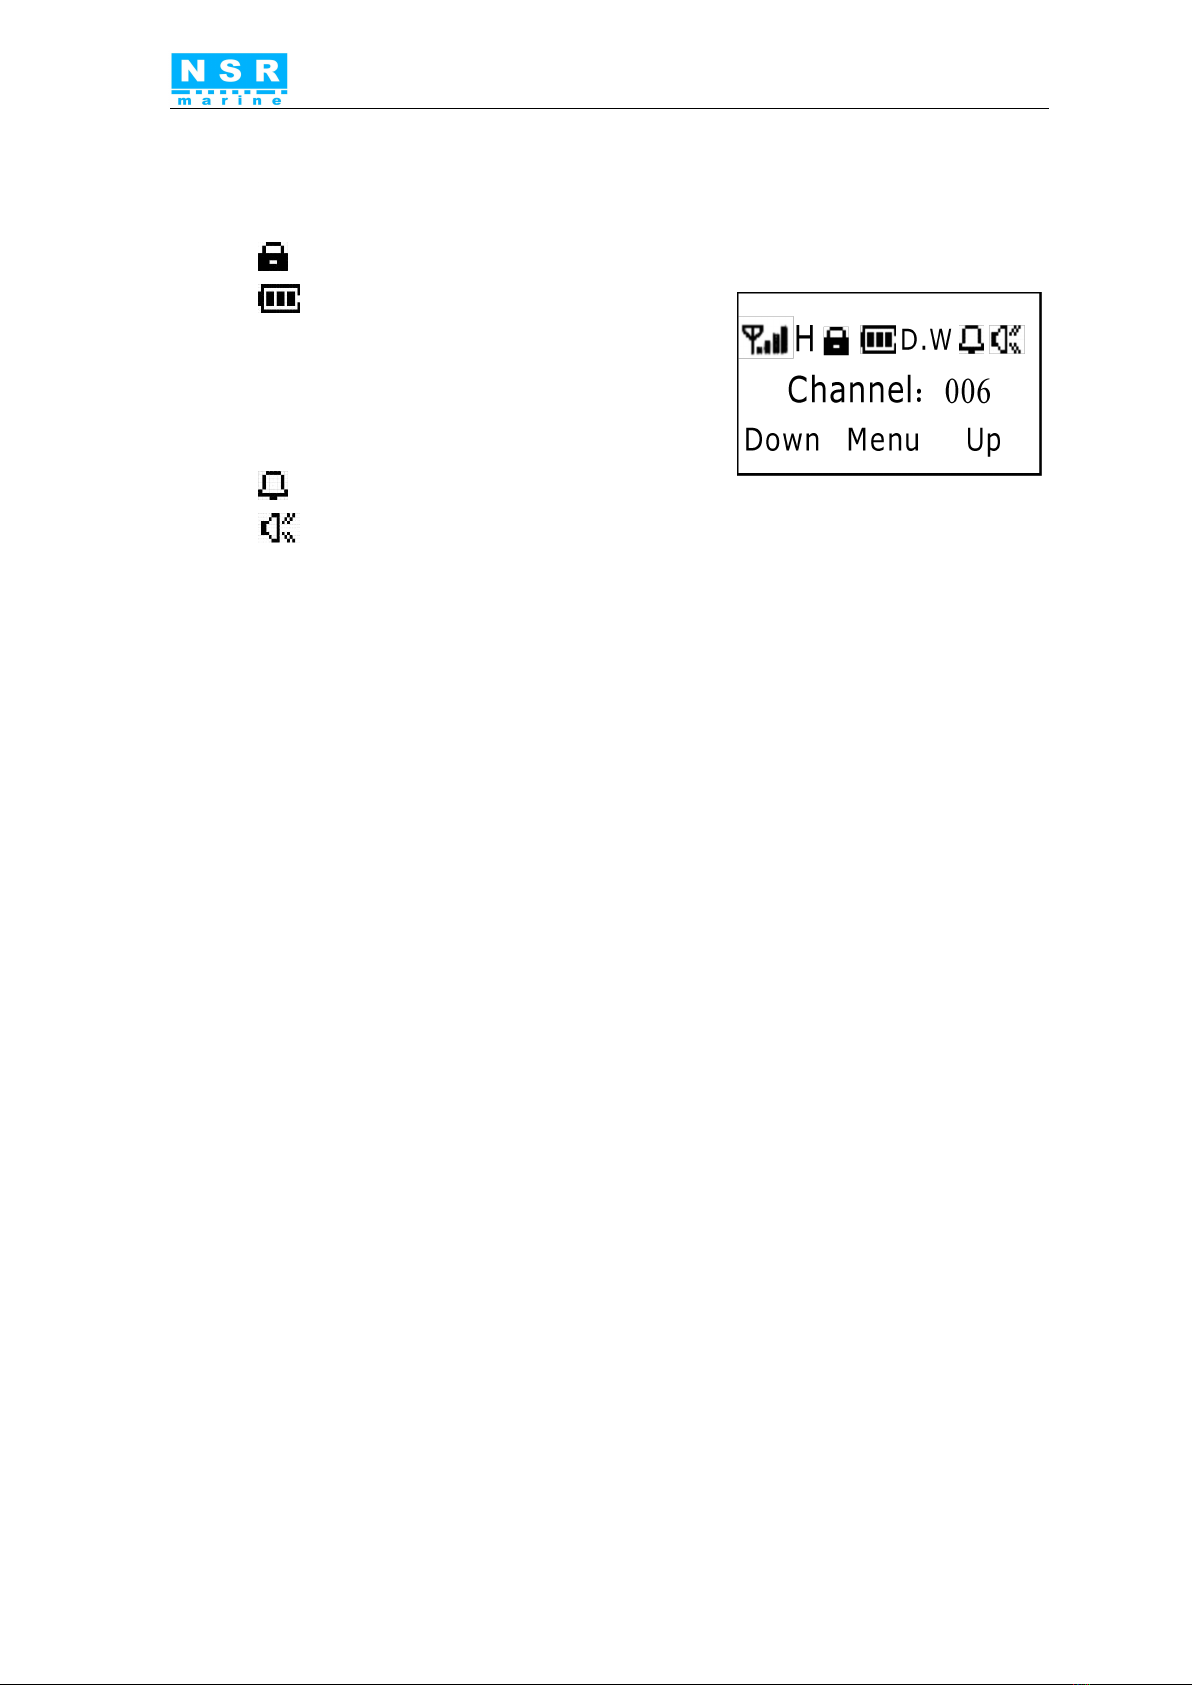
4.3 Squelch Level Adjustment
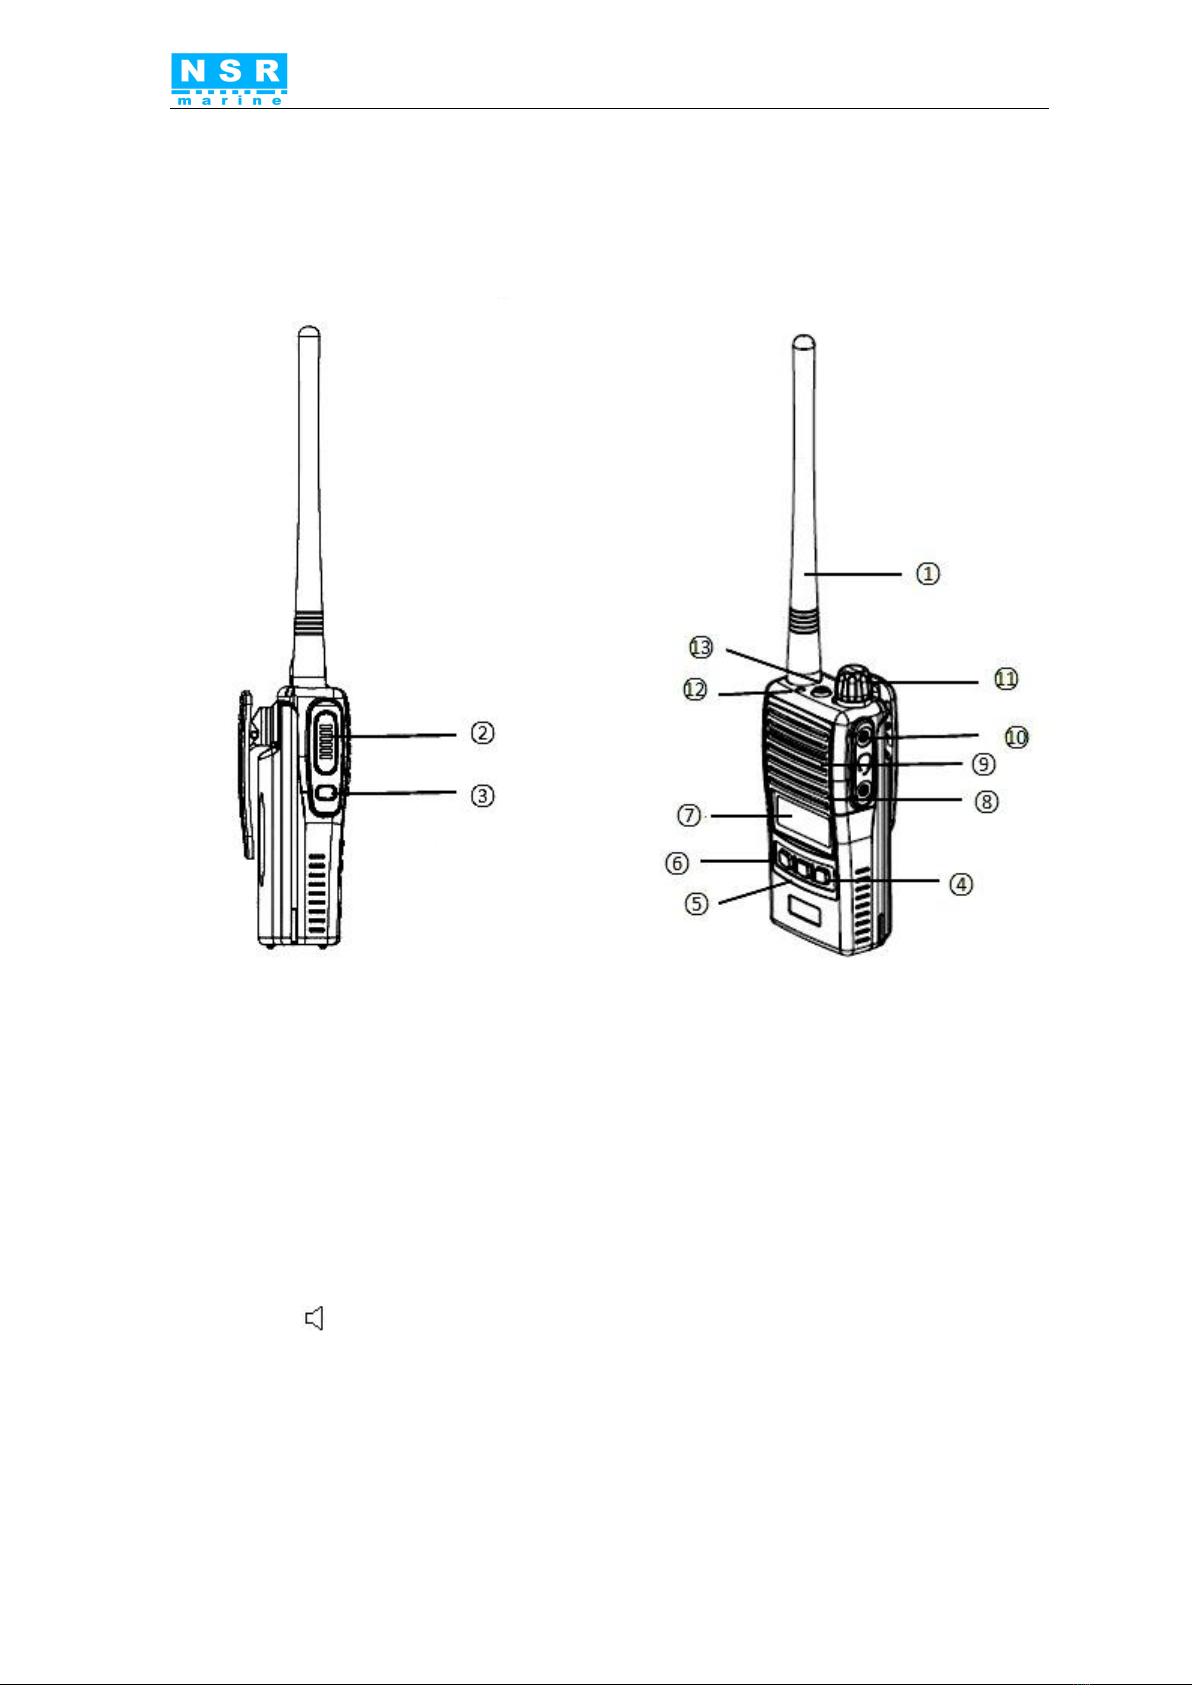
Press SQ key located on the left side of the equipment. The squelch level is
ready to be adjusted.
Select a desired squelch level by using or key and press
(Enter) key to ensure selected squelch level. Then display will return to initial
screen.
Attention:
1 . If or key is not pressed consequently, the value on the
display will be established as a squelch level automatically and then
the status of the initial screen will return.
2.Value of squelch level has been established at 8 by default.
4.4 Transmission
To transmit on the current channel in receiving or standby mode, press
(PTT) key on the left side of the equipment and communicate simultaneously
by positioning the microphone near to your mouth.
Release (PTT) key to stop speaking and return to receiving or standby
mode.
By pressing (PTT) key for transmission of a message. Tx/Rx indicator will
be lit up with red color on the upper right of the front.
4.5 Reception
To receive on currently established channel, doesn't need to press any key.
If any signal has been detected in standby mode, TX/RX indicator will be lit
up with green color and mark appears on the display.
Attention:Receiving is impossible while PTT key pressed.
4.6 Receiving Function Check
This function allows ensuring that the receiving function is activating.
Press SQ key more than 2 Sec to activate receiving and press SQ key for a
second time to stop receiving.