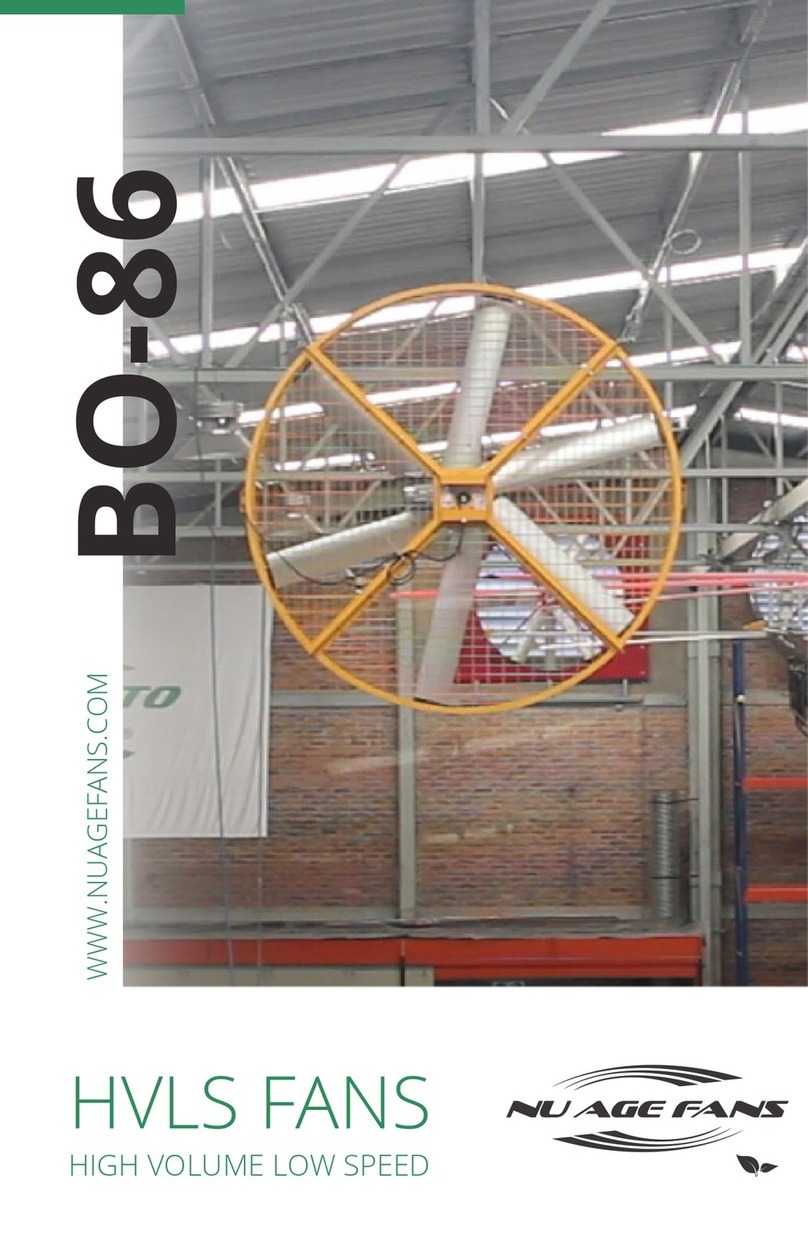
Nu Age Fans NB-98 User manual

NB-98
WWW.NUAGEFANS.COM
HVLS FANS
HIGH VOLUME LOW SPEED

Thank You!
You have just acquired the most ecient and robust industrial ceiling
fan. We appreciate your condence in our products; our quality
management system focuses on your satisfaction; this is why we
manufacture every part of our fans with the highest quality materials,
controls, and techniques, including unique safety features.
Nu Age Fans brand represents the commitment made by our entire
team to guarantee our product is the best choice in safety, durability,
price, operating cost, and eciency.
All of our fans have been rigorously tested before shipment to ensure
mechanical and electrical compliance.
VMG Ventilation Services S.A. de C.V.’s fan, parts and trademarks are
covered the following patents and marks:
35552, 36328, 35653, 37260, 39566, 38886, 39150, 38723, 1340093,
3087, 47497, 40670, 38723, 1340093, 46431, 1594230, 1596295,
1594688, 1692098, 1690006 and others in process.
Failure to follow the required installation procedures specied in
this installation guide will constitute a breach of and will void all
warranties. Due to continuous process improvement, this user’s guide
specications and information are subject to change, cancelation, or
modication without prior notice.
All rights reserved. No part of these pages, either text or image, may
be used for any purpose other than personal use. Reproduction,
modication, storage in a retrieval system or retransmission, in any
form or by any means, electronic, mechanical or otherwise, for reasons
other than personal use, is strictly prohibited without prior written
permission from the owners of this material.
Nu Age Fans

Content
SAFETY INFORMATION
I. INSTALLATION SAFETY INFORMATION...........................................4
FAN INSTALLATION
1. TECHNICAL SPECIFICATIONS.................................................................................9
2. FAN PARTS..................................………………....……................................................10
3. FAN COMPONENTS INCLUDED......…..………..…………….....................................11
4. INSTALLATION TEMPLATE FOR SIDE YOKE......................................................13
5. INSTALLATION TEMPLATE FOR RACK................................................................14
6. STEP BY STEP INSTALLATION.............................................................................15
7. MOUNT INSTALLATION.........................................................................................16
8. INSTALLATION IN “I” BEAM..................................................................................18
9. AUTOVENT BREATHER..........................................................................................19
10. ELECTRICAL CONNECTIONS...............................................................................20
11. MOTOR WIRING DIAGRAM.....................................................................................22
12. SHROUD INSTALLATION.....................................................................................23
13. DOME INSTALLATION..........................................................................................24
14. CONTROL PANEL ASSEMBLY.............................................................................25
15. WIRING DIAGRAM...............................................................................................27
16. ELECTRIC FORCE CONNECTIONS......................................................................28
17. AIRFOILS INSTALLATION.....................................................................................29
18. DOUBLE-CHECK CLEARANCE SPACE................................................................30
19. CHECK OPERATION.............................................................................................31
20. MAINTENANCE......................................................................................................33
21. TROUBLESHOOTING............................................................................................34
22. APENDIX.................................................................................................................35
23. RELEVANT INSTALLATION INFORMATION......................................................37
Nu Age Fans

www.nuagefans.com
Nu Age Fans
4
I. INSTALLATION SAFETY INFORMATION
WARNING AND CAUTION SYMBOL
Indicates a hazard with a medium level of risk that could result in injury or
death or damage to property if not avoided
ELECTRICAL WARNING SYMBOL
Indicates an electrical hazard with a medium level of risk that could result in
death or serious injury if not avoided
READ AND SAVE THESE INSTRUCTIONS
TO REDUCE THE RISK OF FIRE, ELECTRIC SHOCK OR PERSONAL INJURY
FOLLOW THIS INSTRUCTIONS:
a) Use this equipment only as specied by the manufacturer. If you have any
questions, please contact the supplier.
b) Before servicing or cleaning the unit, disconnect from electrical power and
lock-out & tag-out the disconnect switch to prevent the fan’s accidental restoration
of power.
c) The equipment should not be used by people (including children) with reduced
physical, sensory or mental capabilities, or lack of experience and knowledge
unless they are being supervised or provided with instruction.
Children must be supervised and not allowed to play with the equipment under
any circumstances.
d) Do not use if the disconnect switch is not a highly visible.
e) If a safety device is removed or disconnected during maintenance or repair,
reinstall as per manufacture guidelines.
f) To reduce personal injury risk, do not bend airfoils or supports when installing,
balancing, or cleaning the fan.
g) Do not insert foreign objects between the airfoils when they are rotating.
h) To reduce the risk of re or electric shock, do not use this fan with a motor drive
dierent than the one initially supplied by the manufacturer.
WARNING!

www.nuagefans.com Nu Age Fans 5
I. INSTALLATION SAFETY INFORMATION
SAFETY CONSIDERATIONS
This manual oers general guidelines for installing the fan; however, it is the property
owner, installers, and customers sole responsibility to ensure the correct assembly,
the structure to be sound, and compliant with the relevant mechanical standards.
Fixing means for ceiling installation such as beams, steel proles, or other devices
should be sound to hold the fan’s weight four times. You can found the information
per fan’s model at the end of this manual. The recommended torque supported by
the structure is 300 ft-lb; the fan never reaches this force since the VFD controls the
acceleration and deceleration ramp.
IMPORTANT COMPONENTS OF THE SAFETY SYSTEM
Nu Age Fans are designed with essential safety features to prevent the fan’s
components from detaching and falling to the ground in an equipment failure’s
unlikely event. Utilizing all the safety devices included in the kit will provide essential
protection for people, equipment, and property. It is required to follow all fan
installation instructions, including installing all fan safety wires. When adequately
installed as specied in this manual, these wires will prevent any component from
detaching and falling, in case of a mounting system failure or accident. Install steel
guy wires to support the fan (included with a long extension tube).
If the fan is installed with a long extension tube (more than 1.20m), it is necessary
to install steel guy wires to limit the fan’s lateral movement. It is also mandatory to
use steel guy wires when the equipment is attached to a light I-beam, standard in
steel buildings, as this structure may ex up and down.
This additional safety information is essential to keep the fan stable during an
earthquake or limit movement caused by heavy wind, especially when the fan
is installed outdoors. Install all airfoil retainers, which connect each airfoil to
its adjacent airfoil and strengthen the areas between the mounting holes. This
important precautionary measure will prevent an airfoil from detaching and falling
in the unlikely case of a fan hub failure.

www.nuagefans.com
Nu Age Fans
6
I. INSTALLATION SAFETY INFORMATION
LOCATION AND FREE SPACE
Check the area where the fan will be mounted to determine vertical and horizontal
free space. The fan performs well at a minimum height of 3.05m (10-ft) and
a maximum height of 20.1m (66-ft) from the oor. The fan diameter and its
coverage area will determine the ideal performance height. Air movement and
coverage area for each size fan was determined through company testing and may
vary or change due to continuous process improvements and fan development. If
possible, avoid installing the fan directly under lights or skylights to prevent the
potential for stroboscopic eects due to the fan airfoils movement through the
light path. If the building has a mezzanine, the user must mount the fans in a
place where no one can reach the equipment in any way. Ensure that the fan
is positioned so that the airfoils tips are withdrawn at least 91.5cm (3-ft) from
a person’s reach. In some cases, space considerations dictate that the airfoils
are close to beams, joists, lights, and other obstacles; if so, consult a specialist to
determine installation safety.
It is important that the structure where the equipment will be mounted is rigid
enough to prevent even a strong force like an earthquake or a vehicle crashing into
the building from causing movement and airfoil contact with any obstacles.
NOTE: You must consider the airfoil clearance during fan operation; this will vary
not only with the length of the airfoils and their deection but also on fan operation.
The longer the airfoils, the more they will deect (hang down). A downward-blowing
fan will cause the airfoils to deect upwards, and an upward-blowing fan (reverse
operation) will cause the airfoils to deect downwards.
Take distance recommendations from the following illustrated image (Fig. I.I) to
avoid possible structural contact between the airfoils and surrounding objects.
WARNING: If an unusual oscillating movement is observed, immediately
turn the power o to the ceiling fan and contact the manufacturer, its
service agent, or licensed and qualied trained individual.

www.nuagefans.com Nu Age Fans 7
Fig I.I
BEAM
FLOOR
Fan diameter
Minimum
I. INSTALLATION SAFETY INFORMATION
10 ft.
(3.05 m)
Minimum
0.98 ft.
(30 cm)
INSTALLATION CLEARANCE
Install the fan leaving the frame completely visible.
Fans should be installed, giving enough distance from surrounding walls, the
minimum distance between the airfoil tips to the walls must be equivalent to the
fan diameter.
Due to the frame/mounting design, the airfoils will always be located at least 1m
(3-ft) away, provided that installation is under a horizontal roofs (see Fig. I.I)
Fans should be installed suciently far from surrounding walls, with the minimum
distance between the airfoil tips to the walls equivalent to the diameter of the fan.

www.nuagefans.com
Nu Age Fans
8
I. INSTALLATION SAFETY INFORMATION
FIRE SYSTEMS AND FAN INSTALLATION
THE FAN MUST BE INSTALLED PER THE NATIONAL FIRE PROTECTION
ASSOCIATION (NFPA) GUIDELINES.
In locations with sprinklers, fan installation and operation should not
interfere with the re system’s proper function and centered approximately
between four adjacent sprinklers. Fans should be placed at least 3ft
(91.4cm) below the sprinklers and centered in the same quadrant.
The user must connect the control panel system to a re suppression system that
will immediately turn the fan o upon receiving a water ow signal from the alarm
system.
Refer to the wiring diagram inside the control panel for proper connection.
Before installing any fan, it is recommended to review all applicable re sprinkler
system codes to ensure compliance with all regulations.
LOCATION OF CONTROL PANEL
Each fan has its control panel. Ensure the disconnect, located
on one side of the cabinet, is visible at the control panel’s
installation site so you can immediately identify it in an emergency.
Consider the control panel’s weight of 22.70 lb (10.30 kg). The user must install the
control panel on the wall (review cap. 14 for more information about control panel
installation).
REVIEW OF FEDERAL, STATE AND LOCAL CODES
It is essential to review and ensure your full compliance adherence
with all codes and ensure that electrical and mechanical standards
allow for the safe and proper installation of the fan in the property.
Compliance with all existing codes is the responsibility of the end-user customer
and the installer
GENERAL MECHANICAL CONSIDERATIONS
Before installing any fan, you must receive approval and conrmation from any
authorized individual, including but not limited to the contractor, property owner,
engineer, and architect, as may be required by law that the building structure can
bear the weight of the equipment.

www.nuagefans.com Nu Age Fans 9
1. TECHNICAL SPECIFICATIONS
4 A
6 A
16 A
2.5 m0.5 hp
(0.36 kW)
460 V
230 V
230 V
NB-98-XA0506 172 RPM
14
14
14
MODEL DIAMETER HP VOLTAGE PHASESRPM AMPS
MAX ENTRY AWG
THERMAL
SWITCH
9.5 A
4.9 A
3.2 A

www.nuagefans.com
Nu Age Fans
10
MOUNTING SYSTEM
(P/N: 04001B)
SHROUD
(P/N: 0400212)
AIRFOIL
(P/N: 0400301)
AIRFOIL CAP
(P/N: 0100304)
MOTOR
(P/N: 0400201)
FRAME
(P/N: 0400202B)
AIRFOIL RETAINER
(P/N: 0400306)
2. FAN PARTS

www.nuagefans.com Nu Age Fans 11
POWDER UNIT (P/N: 04002B)....................................................................
a) Motor (P/N: 0400201)
b) Frame (P/N: 0400202B)
c) Center (P/N: 0500208)
MOUNTING SYSTEM (P/N: 04001B)..................................................
a) Side yoke (P/N: 0400101B)
SHROUD (P/N: 0400212).......................................................................
AIRFOIL RETAINER (P/N: 0400306).............................................................
3. FAN COMPONENTS INCLUDED
DOME MOUNTING (P/N: 0400210B2).........................................................
DOME (P/N: 0400210B).............................................................................
AIRFOIL (P/N: 0400301)............................................................

www.nuagefans.com
Nu Age Fans
12
04TOR01B KIT FROM SIDE YOKE TO FRAME
4X BOLT 5/16” 18 UNC X 1” GRADE 8
8X WASHER FLAT 5/16”
4X SPRING LOCK WASHER 5/16”
4X SAFETY NUTS 5/16”
04TOR10 KIT#10 AIRFOIL BOLTS
12X BOLT 5/16” 18 UNC X 2” 18 ALLEN BUTON
24X WASHER FLAT 5/16”
12X SPRING LOCK WASHER 5/16”
12X SAFETY NUTS 5/16”
01TOR07 KIT#7 PARA MAMPARA
10X SELF DRILLING SCREWS #8 X 1/2”
04TOR08 KIT#8 FOR DOME
3X BOLT #6 32 UNC 1/2”
3X CROWN BOLT #6 X 3/8”
3. FAN COMPONENTS INCLUDED

www.nuagefans.com Nu Age Fans 13
SCALE 1:3
4. INSTALLATION TEMPLATE FOR SIDE YOKE
152.400mm
55.454mm
114.300mm
225.425mm
114.300mm
6.0000”
2.1832”
4.5000”
8.8750”
4.5000”
1.1250”1 .1250”

www.nuagefans.com
Nu Age Fans
14
SCALE 1:3
5. INSTALLATION TEMPLATE FOR RACK
28.575mm
28.575mm
52.388mm
104.775mm
52.388mm
33.734mm63.103mm
96.838mm
460.423mm
2.0625”
4.1250”
2.063”
1.3281”
2.4844”
3.8125”
18.1269”

www.nuagefans.com Nu Age Fans 15
6. STEP-BY-STEP INSTALLATION
6.1 TO REDUCE THE RISK OF FIRE, ELECTRIC SHOCK OR PERSONAL INJURY
FOLLOW THESE INSTRUCTIONS:
The user must install the fans with the correct airfoil sizes, fan hub, and motor
controller. If the fan includes any mounting kit, the user must install it with all
included safety accessories.
FAN PARTS CANNOT BE SUBSTITUTED OR CHANGED
The assembly, installation, electrical wiring, and maintenance shall be performed
by QUALIFIED, TRAINED, AND AUTHORIZED INDIVIDUALS following the relevant
codes and standards, including the re classication of the construction.
When cutting or drilling in a wall or ceiling, do not damage electrical wiring and/or
other hidden utilities.
It is necessary to OBSERVE / RESPECT / APPLY THE TIGHTENING TORQUE INDICATED
ON THE FOLLOWING CHART, FOR ALL SCREWS WITH THREADS included in the
equipment, to avoid accidents that harm people and/or equipment.
WARNING!
When more than two fans are connected to a single control panel by customer
request, IT IS NECESSARY TO INSTALL A THERMAL SWITCH AT THE CONTROL
PANEL OUTPUT BETWEEN EACH FAN AND THE CONTROL PANEL to protect each
fan individually against the risk of overloading.
TORQUE
Pounds - Foot
NUT SIZE
(IN)
USES
BOLTS FOR
AIRFOILS
MOUNTING
BOLTS
5/16 “ (grade 8)
5/16” (Stainless)
1/2’’
Nm
27
15
94-130
20
11
70-96
RECOMMENDED TORQUE FOR FASTENERS
Depends on the surface where it is installed

www.nuagefans.com
Nu Age Fans
16
7.1 MOUNT INSTALLATION WOOD DEAM
1. Wooden beam installation, at beams with a max width of 10.8” and a min width
8.8”, motor frame must be installed using 5/16” long screws or threaded rod. The
screw or the rod must perforate at least 30% of the wooden beam or as a specialist
engineer recommends
2. Next, the lateral yoke shall be installed as shown on gure 7.1
NOTE: The beam shall not exceed a 45cm height. Note that the distance between
the blades and the beam must be at least 8cm.
Fig. 7.1
SIDE MOUNTING SYSTEM
(P/N:04001B)
STUD ANCHORS
(PROVIDED BY THE CUSTOMER)
Min - 8.8”
Max - 10.8”
NOT LONGER
17.7”
7. MOUNT INSTALLATION
WARNING: It is very important to ensure that the beam or wooden
structure supports the weight of the fan.

www.nuagefans.com Nu Age Fans 17
3. Install power unit aligning it with the lateral yoke, once it has been installed
properly. Tighten bolt kit #1B adjusting distance between the frame and beam.
Fasten applying proper torque.
MOTOR
KIT BOLT#1B SIDE YOKE
(P/N: 0400101B)
HOLES
SIDEYOKE MOUNTINSTALLATION
7. MOUNT INSTALLATION
Fig. 7.2

www.nuagefans.com
Nu Age Fans
18
NOTE: It is very important to ensure that the beam or structure supports the fan´s
weight. When the installation is performed on “I” beams, lateral yoke is not required.
Please consider the minimum distance between plades and beam is 8 cm.
TO INSTALL IN A “I” BEAM PERFORM THE FOLLOWING STEPS:
8.1 Install iron angles on the beam and drill the holes required to install the frame.
The recommended size is 3/8”.
8.2 Insert 3/8” bolts or a 3/8” threaded rod (not included) in the iron angles holes,
so the nuts remain in the frontal face of the frame.
8.2 Align the frame holes to the 3/8” bolts, place the fan and tighten the nuts.
Fig. 8.1
BOLTS 3/8 O “SET SCROWS” 3/8
8. INSTALLATION IN “I” BEAM

www.nuagefans.com Nu Age Fans 19
9. AUTOVENT BREATHER
Fig. 9.1
9.1 TAKE THE PLASTIC SEAL OFF THE VENT CAP BEFORE STARTING UP THE
FAN FOR FIRST TIME (FIG. 9.1)
Failure to follow these instructions will invalidate the warranties.
Not removing the rubber strip will cause damage to the speed reducer, which will
invalidate applicable warranties due to customer negligence.

www.nuagefans.com
Nu Age Fans
20
10. ELECTRICAL CONNECTIONS
10.1 MOTOR ELECTRICAL CONNECTIONS
10.2 Use appropriate conduits and enough electrical conductors to handle the
electrical load required by the equipment.
10.3 Be sure to install the physical ground line for personal protection; this ground
line must interconnect the motor and the control panel.
10.4 Make connections to the frequency drive’s corresponding terminals located
inside the control panel, indicated in this manual’s wiring diagram, and supplied
within the cabinet.
NOTE: The maximum distance allowed for the connection run between motor and
control panel shall be 98 ft (30m) maximum. If the length exceeds this range, the
supplier can’t guarantee the proper operation of the equipment.
10.5 Remember to fully route the electrical wire within pipes, trays, walls, by-passes,
etc., before making the nal connection to the drive.
10.6 Take one of the wire openings in the motor terminal box to introduce the
power supply cord.
10.7 Make necessary connections to the motor’s connection box corresponding
terminals according to the supply voltage required by the fan, following the wiring
diagram in chapter 15, depending on the power supply.
10.8 Keep the path of the circuit wiring at the motor as far as possible from the
supply circuits of other equipment in the building, maintaining a distance of at least
6 in (16 cm).
NOTE: When the circuit wiring or control wires must cross the power supply, they
do so at 90° angles to minimize interference on the control line.
This manual suits for next models
1
Table of contents
Other Nu Age Fans Fan manuals