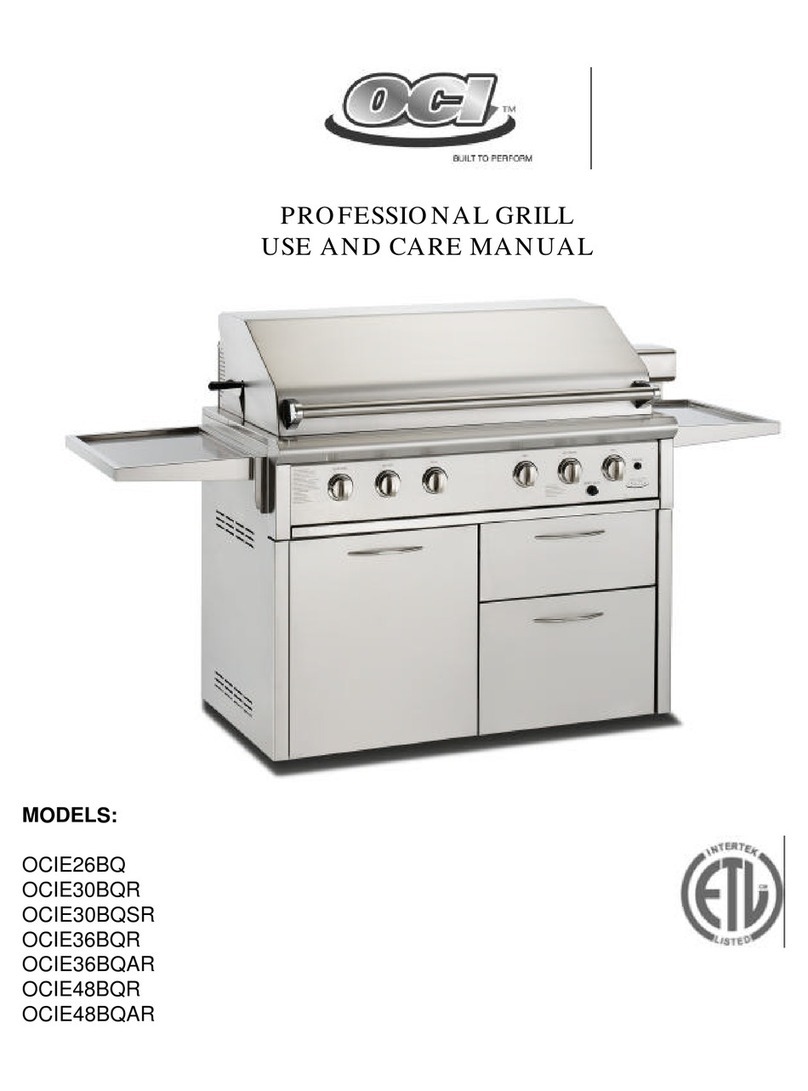
OCI PRO-Performance Series -26BQP User manual

1
USE AND CARE MANUAL
MODELS:
OCI-26BQ / OCI-30BQR / OCI-40BQR
LP GAS and NATURAL GAS MODELS
R = Rotisserie Burner included on Grill.
INSTALLERS please hand this manual to Home Owner for Safety and Care Instructions.

2
A MESSAGE TO OUR CUSTOMERS
Thank you for selecting the OCI PRO-PERFORMANCE Grill. We have worked hand in
hand with top designers to create a product that meets exacting standards and will provide
Years of pleasurable, outdoor grilling with exceptional results.
Because the grill has features not found on any other, we recommend that you read this entire
booklet before your first use. Then, keep it in a handy place along with your sales receipt as it
has an answer to many questions that may arise during use. There is also important safety information in the manual
that you must read for correct built in gas grill installation.
Please contact us at any time if we can help you with questions about parts and use at
1 (888) 419-0888
To register your grill please go to OCIPROGRILL.COM and fill out the quick registration form.
CALIFORNIA PROPOSITION 65 - WARNING
The Burning of gas cooking fuel generates some by products which are on the list of substances which are known
by the State of California to cause cancer or reproductive harm. California law requires businesses to warn cus-
tomers of potential exposure to such substances. To minimize exposure to these substances, always operate this
unit according to the use and care manual, ensuring you provide good ventilation when cooking with gas.
TESTED IN ACCORDANCE WITH ANSI Z21.58a-1998/CGA 1.6a-M98 STANDARD FOR OUTDOOR
COOKING GAS APPLIANCES. THIS GRILL IS FOR OUTDOOR USE ONLY.
Check your local building codes for the proper method of installation. In the absence of local codes, this unit
should be installed in accordance with the National Fuel Gas Code No. Z223.1-1988 and the National
Electrical Code ANSI/NFPA No. 70-1990.
NOTE: This product cannot be place near or under combustible material.
Before installation consult your local city and fire department for direction.

3
Read this Care and Use Manual carefully and completely before using your
grill to reduce the risk of fire, burn hazard or other bodily injury.
Begin by ensuring proper assembly.
Do not repair or replace any part of the grill unless specifically
recommended in this manual. All other service should be referred to a
qualified technician and contractor / city and fire department.
Children should not be left alone or unattended in an area where
the grill is being used. Never allow them to sit, stand or play on or
around the grill at any time.
Do not store items of interest to children around or below the grill
or in the cart. Never allow children to crawl inside of acart.
Never let clothing, potholders or other flammable materials come in
contact with or too close to any grate, burner or hot surface until it has
cooled. Fabric may ignite and result in personal injury. For personal
safety, wear proper apparel. Loose fitting garments or sleeves should
never be worn while using this appliance. Some synthetic fabrics are
highly flammable and should not be worn while cooking.
Only certain types of glass, heat-proof glass ceramic, earthenware, or
other glazed utensils are suitable for grill use. Use of these types of
materials may break with sudden temperature changes. Use only on low
or medium heat settings according to the manufacturer’s directions.
Do not heat unopened food containers as a build-up of pressure may
cause the container to burst.
Use a covered hand when opening the grill lid. Never lean over an
open grill.
When lighting aburner, always pay close attention to what you
are doing.
When using the grill: do not touch the grill rack, burner grate or
immediate surrounding area as these areas become extremely hot and
could cause burns.
Do not use the grill for cooking excessively fatty meats or products
which promote flare-ups.
Use only dry potholders: moist or damp potholders on hot surfaces
may cause burns from steam. Do not use a towel or bulky cloth in place
of potholders. Do not let potholders touch hot portions of the grill rack.
Grease is flammable. Let hot grease cool before attempting to handle it.
Avoid letting grease deposits collect in the bottom of the grill. Clean
often.
Do not use aluminum foil to line the grill racks or grill bottom. This
can severely upset combustion air flow or trap excessive heat in the
control area. The result of this can be melted knobs, and increased
chance of personal injury.

4
Always inspect the gas hose(s) before each use. If the hose shows evidence of
excessive abrasion or wear, or the hose is cut; it must be replaced prior to operating
the appliance. Any replacement must be that specified by the manufacturer.
The pressure regulator and hose assembly supplied with the unit must be used.
Replacements regulators and hoses must be those specified by the manufacturer.
For proper lighting and performance of the burners keep the ports clean. It is necessary to clean them periodical-
ly for optimum performance. The burners will only operate in one position and must be mounted correctly for safe
operation.
Clean the grill with caution. Avoid steam burns; do not use a wet sponge or cloth to clean the grill while it is hot.
Some cleaners produce noxious fumes or can ignite if applied to a hot surface.
Insect Warning!!! Spiders and insects can nest in the burners of this and any other grill, and cause the gas
to flow from the front of the burner. This is avery dangerous condition which can cause afire to occur
behind the valve panel, thereby damaging the grill and making it unsafe to operate. Inspect the grill at least
twice ayear.
Be sure all grill controls are turned off and the grill is cool before using any type of aerosol cleaner on or around
the grill. The chemical that produces the spraying action could, in the presence of heat, ignite or cause metal parts
to corrode.
Do not operate the grill under unprotected combustible construction. Use only in well ventilated areas. Do not
use in buildings, garages, sheds, breezeways or other such enclosed areas. This unit is for outdoor use only.
Keep the area surrounding the grill free from combustible materials, trash, or combustible fluids and vapors such
as gasoline or charcoal lighter fluid. Do not obstruct the flow of combustion and ventilation air.
If the unit is stored indoors ensure that it is cool. If propane is used, the cylinder must be unhooked and the
propane cylinder stored outside in a well ventilated area, out of reach of children.
Keep the back of the cart free and clear from debris.
Keep any electrical supply cord, or the Rotisserie motor cord away from the heated areas of the grill.
Never use the grill in windy conditions. If located in a consistently windy area (oceanfront, mountaintop, etc.) a
wind break will be required. Always adhere to the specified clearances.
Never use adented or rusty propane tank.

5
IMPORTANT SAFETY NOTICE:
Certain Liquid Propane dealers may fill liquid propane cylinders for
use in the grill beyond cylinder filling capacity. This “Overfilling”
may create adangerous condition.
“Overfilled” tanks can build up excess pressure. As a safety device, the tanks pressure relief
valve will vent propane gas vapor to relieve this excess pressure. This vapor is combustible
and therefore can be ignited. To reduce this danger, you should take the following safety pre-
cautions:
1. When you have your tank filled, be sure you tell the supplier to fill it to no more than 3/4
(75%) of its total capacity.
2. If you own or use an extra spare tank, or have adisconnected tank, you should NEVER store
it near or under the grill unit or near any other ignition or heat source.

6
OCI-26BQP / OCI-26BQN OCI-32BQRP / OCI-32BQRN
OCI-40BQRP / OCI-40BQRN

7
CLEARANCE to Non-Combustible Construction:
A minimum of 16" clearance from the back of the grill to non-combustible construction is required for the
lid to open fully.
To Combustible Construction:
below the cooking surface, maintain a minimum of 16" from the sides and a minimum
of 14" from the back to adjacent vertical combustible construction.
Do not install this unit into combustible enclosures without an OCI insulated jacket!
LOCATION
When determining a suitable location take into account concerns such as exposure to wind, proximity to
traffic paths and keeping any gas supply lines as short as possible. Locate the grill only in a well ventilated area.
Never locate the grill in a building, garage, breezeway, shed or other such enclosed areas without an approved venti-
lation system. During heavy use, the grill will produce a lot of smoke.
Before any gas connections can be made, the cart must be assembled and the grill head mounted correctly
to the cart. Never connect an unregulated gas line to the appliance.
The installation of this appliance must conform with local codes or, in the
absence of local codes, with the national fuel gas code, ANSI Z223.1a-
1988. Installation in Canada must be in accordance with the Standard
Can1-b149.1 and/or .2 (installation code for gas burning appliances and
equipment) and local codes.
L.P. TANK REQUIREMENTS
A dented or rusty L.P. tank may be hazardous and should be checked by your L.P. supplier. Never use a
cylinder with a damaged valve. The L.P. gas cylinder must be constructed and marked in accordance with the speci-
fications for L.P. gas cylinders of the U.S. Department of Transportation (DOT).The cylinder must be provided with
a shut off valve terminating in an L.P. gas supply cylinder valve outlet specified, as applicable, for connection type
Qcc1 in the standard for compressed gas cylinder valve outlet and inlet connection ANSI/CGA-V-1.
Manifold pressure: 11" W.C.
L.P. GAS HOOK-UP:
Ensure that the black plastic grommets are in place and that the hose does not come into contact with the
grill head or the heat shield.
CONNECTION:
Grill orifice for use with L.P. gas comes equipped with a high capacity hose/regulator assembly for
connection to a standard 20 lb. L.P. cylinder (18-1/4" high, 12-1/4" diameter).
Main Burner
Back Burner
26" Grill
42000
N/A
32" Grill
56000
10,000
40" Grill
70000
10,000

8
L.P. Gas Hook Up (Type 1
or QCC-1 regulator):
Grill orificed for use with
L.P. gas come equipped with an L.P.
hose/regulator assembly for connec-
tion to a standard 20 lb. L.P. cylinder
(Type 1). The L.P. tank is not
included.
Connection: 1/2” NPT male with a
3/8” Flare adapter. L.P. Hose with a
quick disconnect and fittings are
included.
Operating pressure: 11.0” W.C.
Connect the 3/8” flare end of the L.P
Hose to the brass adapter on the
Manifold (underneath bottom left cor-
ner). Connect the Regulator to the tank (with the tank valve fully closed). Although the flow of gas is stopped when
the Type 1 system is disconnected; you should always turn the L.P. tank main valve off after each use and during
transport of the tank or unit. Insert the regulator inlet into the tank valve and turn the black coupler clockwise until
the coupler tightens up.
Do not over tighten the coupler.
Purging the system: Turn the main tank valve on and turn the burner control valves on the unit to the “light”
position for about 20 seconds to allow the air in the system to purge before attempting to light the burners.
Do not attempt lighting the grill within 10 minutes after purging!
To disconnect the coupler, first make sure the main tank valve is turned off. Grasp the coupler and turn
counter clockwise. The inlet will then disengage, remove the inlet from the tank valve opening if it has not already
done so when it was disengaged. Your local L.P. filling station should be equipped with the proper equipment to fill
your tank. If trading your tank in, always ensure to obtain only Type 1 20 lb cylinders with an overfill protection
device.

9
NATURAL GAS HOOK-UP
CONNECTION: 1/2” NPT male with 1/2”flare adapter and SS corrugated gas line.
OPERATING PRESSURE: 4.0” W.C.
SUPPLY PRESSURE: 5” TO 4” W.C. if in excess of 4” W.C. a step down regulator is required.
Check with your local gas utility company or with local codes for instructions on installing gas supply
lines. Be sure to check on type and size of run, and how deep to bury the line. If the gas line is too small the
Grill unit will not function properly.
To hook-up the fittings supplied with the Elite Grill unit: Assemble as shown in figure to the right. Use
joint compound on male threads only.
Do not use joint compound on the flare end of the 1/2” NPT to 1/2”flare adapter. Ensure that the regu-
lator arrow points in the direction of gas flow-towards the unit, away from the supply.
Do not forget to place an installer-supplied gas valve in an accessible location.

10
GENERAL
Although all gas connections on the grill are leak tested at the
factory prior to shipment, a complete gas tightness
check must be performed at the installation site due to possible
mishandling in shipment, or excessive pressure unknowingly
being applied to the unit. Periodically check the whole system
for leaks, or immediately check if the smell of gas is detected.
Check all gas supply fittings for leaks before each use.
It is handy to keep aspray bottle of soapy water near the shut-
off valve of the gas supply line. Spray all the fittings. Bubbles
indicate leaks. Always check for leaks after every L.P. tank
change.
BEFORE TESTING
Make sure that all packing material is removed from the grill. Make a soap solution of one part liquid detergent and
one part water. You will need a spray bottle, brush, or rag to apply the solution to the fittings. For L.P. units, check
with a full cylinder.
Do not smoke while leak testing.
Never leak test with an open flame.
TO TEST
Make sure all control valves are in the "OFF" position. Turn the gas supply on. Check all connections
from the supply line, or L.P. cylinder up to and including the manifold pipe assembly. Soap bubbles will appear
where a leak is present. If a leak is present, immediately turn off gas supply, tighten any leaking fittings, turn gas
on, and recheck. If you cannot stop a gas leak turn off the gas supply and call your dealer where you purchased
your grill . Only those parts recommended by the manufacturer should be used on the grill. Substitution can void
the warranty. Do not use the grill until all connections have been checked and do not leak.
Disconnected L.P. cylinders must have threaded valve plugs tightly installed, and must not be stored in a build-
ing, garage or any other enclosed area. The gas must be turned off at the supply cylinder when the unit is not in use. If
the appliance is stored indoors the cylinder must be disconnected and removed from the appliance.Cylinders must be
stored outdoors in a well ventilated area out of the reach of children.

11
WARNING: IMPORTANT!
Before lighting ...Inspect the gas supply piping or hose prior to turning the gas “ON”. If there is evidence of
Cuts, wear, or abrasion, it must be replaced prior to use. Do not use the grill if the odor of gas is present while the
knobs are in the OFF position. The pressure regulator and hose assembly supplied with the unit must be used.
Never substitute regulators for those supplied with the grill. If a replacement is necessary, contact the factory for
proper replacement. Screw the regulator (Type QCC1) into the tank. Leak check the hose and regulator connec-
tions with a soap and water solution before operating the grill.
To Light Grill: Turn all knobs to “OFF” then turn on the gas supply. Always keep your face and body as far
away from the grill as possible when lighting. Open the lid, push and turn the control knob to the “HIGH” position
before the “CLICK” and wait until you hear gas then turn to the left and the gas will ignite automatically after
the click. If the gas does not ignite redo the steps. MAKE SURE you wait until you hear the gas before you CLICK.
Match lighting: If the burner will not light after several attempts then the burner can be match lit. If you’ve
just attempted to light the burner with the igniter, allow 5 minutes for any accumulated gas to dissipate. Keep your
face as far away from the grill as possible and hold a lit match over the FLASH TUBE located on the right of the main
grills. This tube leads gas up to be lit. Push and turn the right control knob which is centered on the burner to “HIGH”.
If the burner does not light in 4 seconds turn the knob “OFF”, wait 5 minutes and try again. Make sure you check the
ignition system for blockage or call a certified service agent to service the grill.
WARNING: Keep hands and face away from front of burner! STAND TO THE SIDE WHEN LIGHTING.
ONCE LIT MOVE HAND AWAY QUICKLY.
Cross lighting: Once the left or right burner is lit, the adjacent burner(s) can be lit by the cross lighting
method. Push and turn the control knob for the desired center burner to “HI”. The gas will be ignited by the adja-
cent burner’s flame and crossfires. If the burner does not light in 4 seconds, turn knob off, wait 5 minutes and try again.
Please note: cross lighting agrill burner next to an infra-red sear burner will not work!
Always cross light from the right burner to the left burner. The sear -burner cannot in any way be lit with
the cross lighting method! Please use the match lighting or normal ignition method for the sear burner if
your unit is equipped with an infra-red sear burner.
Please Note: Do not leave the hood in the DOWN POSITION for any length of time. Gas will build up and a
potential for explosion will occur when ignited. DO NOT leave the grill unattended with minors. ALWAYS
place the gas in the OFF POSITION when completed and turn off the gas supply to the GRILL
To Light Rotisserie: Open the lid, push and turn the control knob SLOWLY to the “HI” position and you will
hear a clicking noise. At this time, a spark will be provided at the Rotisserie igniter. Once lit, turn
control knob to desired setting. If the burner does not light within 4 seconds, turn control knob to “OFF”. If the
igniter does not function, the burner can be lit by holding a lit match to the burner ( with the control knob at
“HIGH”).
Do not attempt to “LIGHT” the grill if the odor of gas is present. Call for service.
Keep aspray bottle of soapy water near thegas supply valve and check the connections before each use.
Always ensure that the burner is properly resting on the orifice prior to lighting the burner.

12
TO MATCH LIGHT THE OPTIONAL SEAR BURNER:
If you are unable to light Sear Burner using the “TURN AND CLICK” you can utilize a long match to
match light the sear burner. Fit the match between the wire loops.
Position the lit LONG match down between the cooking grill rack approximately 1/4” above the burner. Turn the
Valve to the lite/hi position to release gas to the burner. If burner does not light within 5 seconds, turn off burner,
wait 5 minutes and try again. If you are unable to light the burner within three attempts call a service representa-
tive.
NOTE: While holding match holder stick be careful not to hold hand over burner area as this may
cause serious burns or other personal injury.

13
BURNER AIR ADJUSTMENT: FIG.01
Each grill burner is tested and adjusted at the facto-
ry prior to shipment; however, variations in the local gas
supply may make it necessary to adjust the burners. The
flames of the burners should be visually checked and com-
pared with Figure 01. Flames should be blue and stable
with no yellow tips, excessive noise or lifting. If any of these
conditions exist, check to see if the air shutter or burner ports
are blocked by dirt, debris, spider webs, etc. Proceed with air
shutter adjustment.
The amount of air, which is entrained into a burner
is governed by a sheet metal cup at the inlet of the burner
called an air shutter. It is locked in place by a set screw which must be loosened prior to lighting the burner for
adjustment. The air shutter adjustment screws are accessible with a Philips screwdriver, remove the burner by lift-
ing rear end first. Loosen the lock screw of the air shutter. Make certain that the burners are sitting properly
on the orifices and light the burners. Adjust according to the following directions.
TO ADJUST GRILL BURNER FLAME:
Be careful as the burner may be very hot.
If the flame is yellow, indicating insufficient air, turn the air shutter clockwise to allow more air to the burner. If
the flame is noisy and tends to lift away from the burner, indicating too much air, turn the air shutter counter-
clockwise.
INSTALLER FINAL CHECKLIST
Specified clearances maintained
to combustibles.
All internal packaging removed.
Knobs turn freely.
Burners are sitting properly on
orifices.
Each burner lights satisfactorily,
individually or with adjacent
burner lit.
Air shutters adjusted.
Pressure regulator connected and
set for 11"W.C. L.P. gas.
Unit tested and free of leaks.
User informed of gas supply shut
off valve location.
USER, PLEASE RETAIN
THESE INSTRUCTIONS FOR
FUTURE REFERENCE

14
NOTE: THIS ADJUSTMENT SHOULD BE DONE WHEN CONVERTING TO
NATURAL IF LP GAS AS WELL AS UPON FIRST USE.
LOW SETTING ADJUSTMENTS:
The valves on the Professional Grill features an
Adjustable low setting. Due to fluctuations in gas pres-
sure, heating value or gas conversion, you may feel it
necessary to increase or decrease gas flow in the low
position.
TO ADJUST:
1. Light the burner.
2. Turn the control knob to the lowest setting (all
the way counter-clockwise)
3. Remove the knob.
4. Insert a thin tipped screwdriver into the screw and
while viewing the flame adjust to a minimum
stable flame.
WHAT A “GOOD” FLAME SHOULD LOOK LIKE.

15
Each main burner is rated at 14,000 BTU. The grill burners encompass the entire cooking area. Above the burners
are stainless steel briquette systems. The igniter button is built into the valves.
NOTE: Ahot grill sears the food, sealing in the juices. The longer the preheat, the faster the meat
browns and the darker the grill marks.
DO NOT leave the grill unattended while cooking. If you put the gas on and walk away from the grill there is
a potential of the grill building up gas and an explosion can occur. ALWAYS switch gas off with hood open.
USING THE GRILL:
Grilling requires high heat for searing and proper browning. Most foods are cooked at the “HI” heat set-
ting for Searing and then turned down to medium. However, when grilling large pieces of meat or poultry, it may
be necessary to turn the heat to a lower setting after the initial browning. This cooks the food through without
burning the outside. Foods cooked for a long time or basted with a sugary marinade may need a lower heat setting
near the end of the cooking time.
1. Make sure the grill has been gas leak tested and is properly located.
2. Remove any packing material.
3. Light the grill burners using the instructions in this manual.
4. Turn the control knob to “HI” and preheat the grill for 15 minutes. The grill lid is to be closed during the
appliance preheats period.
5. Place the food on the grill and cook to the desired doneness. Adjust heat setting, if necessary. The control
knob may be set to any position between “HI” and “LO”.
NOTE: The grill must not be left alone while not lit. Gas will build up under the hood and a potential explosion
may occur if you ignite the grill. Make sure that you never leave unattended with children.
WARNING: When using grill burners DO NOT use rotisserie burner as this may cause injury or
severe burns. ALWAYS remove the Warming rack when using your Rotisserie system.

16
USING THE GRIDDLE
SYSTEM
The PRO- PERFORMANCE grill includes a Griddle that can replace two grills on the bbq. Make sure that
you wash this griddle for the first time as well as ONLY USE FIREPROOF GLOVES to pick the griddle
up due to the extreme heat of the metal and you will burn your hands. The Griddle is 304 Stainless Steel
and is rust resistant but surface rust may occur that is easily cleaned. Please store the Griddle inside the
house for better protection. The griddle can be used for food that will fall through the grill such as fish,
vegetables and breakfast bacon.
To minimize burn potential do not remove the griddle while HOT.
TO PRE-HEAT THE GRIDDLE:
Place the griddle in place or on top of the two cooking grills and remove the two briquette trays from
above the burners. Place the unused grills and briquette system in a safe place. Preheat Griddle and
clean down before use using a wet rag. Make sure that you do not use bare hands on the griddle for you
will burn your hands or body. Make sure that you do not leave the grill unattended with minors for the
griddle stays hot for a long time. To clean griddle use a wet rag and scraper and use caution for the
material will stay hot.
WOOD CHIPS & OPTIONAL ACCESSORY SMOKER BOX:
There are many wood chips available for purchase and selection is based on personal taste. The most
common wood chips used are mesquite or hickory. Mesquite has a sweeter taste and is commonly used with
poultry and seafood. Hickory is best suited for red meats. Use of oak, cherry, maple, aspen or apple is also
common while aromatic herbs like sage, bay leaves, thyme or basil may also be used. A accessory Smoker Box
is available to place underneath the grills and enhance the flavor of your food. When smoking, the lid should
remain closed as much as possible to maximize the effect. During extended roasting periods it is normal to add
fresh wood chips to the tray several times.
ZONE GRILLING:
OCI Pro Performance Series grills are designed with the executive chef in mind. We consulted a number of
restaurant chefs who make their living providing their discerning customers with 5 star grilled entrées. Their
conclusion is that our OCI Pro Performance Grills provide exceptional searing power from the 14,000 BTU
stainless steel main burners and
The Optional Sear Burner on all grills makes for a perfect grilling combination. We have also incorporated
"zone grilling" into our line of OCI Grills. Each of our burner areas is sectioned off by a “heat separator” to
provide the most efficient heat use of any grill on the market today. These removable stainless steel heat shields
direct the heat upwards to the cooking surface and not outwards across the grill. The result is our OCI Pro-
Performance grills are built to perform.

17
Your Grill is capable of performing back burner Rotisserie cooking. The location of the rear burner allows the
placement of a Rotisserie basting pan (not included) beneath the food to collect juices and drippings for basting
and gravy. To flavor the contents of the basting pan, you can add herbs, onion, garlic, or spices. Hams are
especially good with the addition of pineapple slices and brown sugar to the basting pan. Light the rear burner as
described in the lighting instructions. Once lit, the Rotisserie burner will reach cooking temperatures in about
1minute. The orange/red glow will even out in about 5 minutes. The Rotisserie motor is equipped with metal gears
and is capable of turning up to a 15 lb. cut of meat or poultry. Make sure you remove the warming rack before use
of Rotisserie.
WARNING: When using Rotisserie burner DO NOT use grill burners as this may cause injury or
severe burns
The motor is mounted to a metal channel which attaches to the right / left side of the grill.
The Rotisserie motor must be electrically grounded in accordance with local codes or, in the absence of local codes,
with the National Electrical Code, ANSI/NFPA 70-1990. The skewer for the Rotisserie e is assembled into the motor
assembly by placing the pointed end into the motor, and resting the grooved bushing on the support at the opposite
side of the grill. With the skewer pushed as far as possible into the motor, the skewer should rest on the opposite
side of the grill body.
To load the skewer begin with the handle in place, and slide one of the meat holders (prongs facing away
from the handle) onto the skewer. Push the skewer through the center of the food, then slide the second meat hold-
er (prongs toward the food) onto the skewer. Center the product to be cooked on the skewer then push the meat
holders firmly together. Tighten the wing nuts with pliers. It may also be necessary to wrap the food with butchers
string (never use nylon or plastic string) to secure any loose portions. Once the food is secure insert the skewer
into the motor. It is normal for the skewer to flex when larger cuts of meat are being cooked.
After your first use of the Rotisserie burner it is likely that the stainless steel adjacent to the burner will
darken to adark blue color. This is anormal property of the stainless steel used on the Grill and does not
weaken the Metal.
WARNING: Keep the Rotisserie motor electric cord away from the heated surfaces of the grill.
When not in useremove and store the motor in adry location.
WARNING:Electrical Grounding Instructions this appliance (Rotisserie motor) is equipped with a
three-prong (grounding) plug for your protection against shock hazard and should be plugged directly
into aproperly grounded three-prong receptacle. Do not cut or remove the grounding prong from this
plug.

18
MANUAL LIGHTING:
To manually light the Rotisserie, place a butane lighter or long handled match near the tip of the thermo-
Couple & Turn the control knob to “HI. Once lit, turn the control knob to desired setting. If the burner does not light
within 4 seconds, release the safety valve button and turn the control knob to “OFF” and wait 5 minutes before trying
again.
IMPORTANT SAFETY NOTICE:
Do NOT have the back burner on with the warming rack in place. Remove warming
rack before you uses the Rotisserie burner.
BBQ DIMENSIONS

19
NATURAL GAS CONNECTION:
The Gas grill will be clearly marked on the outer package NATURAL GAS and on the RATING PLATE located on
the side of the BBQ. Please make sure that you DO NOT hook up the wrong Gas Type. All Gas Grills are pre-
equipped with an approved Natural Gas Regulator preset –do Not change any settings unless you are converting the
gas grill from one gas type to another. The diagram below will show you the approved hook up information and you
must use a professional plumber or licensed gas installer to install and check the gas connection. IF YOU SMELL
GAS immediately turn off gas to house and call the gas company to check the connections for leaks. If the BBQ is
in a built in island, venting must be built into the island for safety.
LP GAS CONNECTION:
The gas grill will be clearly market as LP or Liquid Propane gas on the grill rating plate as well as the box. Refer to
the below hook up information for the approved LP gas connection. Please note the Island MUST HAVE VENTING
for LP gas and the absence of venting will have a potential for explosion if the gas builds up inside the island.
NOTE: never leave the gas on with the hood closed and the bbq not lit. this will allow the buildup of gas inside
the bbq and island and when ignited will cause an explosion and equipment and bodily harm.

20
The self-contained LP system appliance is design certified to be used with a standard 20 lb., 12 1/4"
diameter;
18" high cylinder with right handed connection threads and this is the maximum size LP tank
to be used. The
cylinder must be marked in accordance with the latest U.S. Department of
Transportation specifications for LP
gas cylinders. (DOT. CFR49 or National Standards of Canada
CAN/CSA-B359 Cylinders, Spheres and Tubes for
the Transportation of Dangerous Goods) a Propane
Tank with an ODP) Overfill Prevention Device) must be used
at all times.
IMPORTANT: Never connect the appliance to an unregulated gas supply.
The installation of this appliance must conform with local codes or in the absence of local codes, to the
national
fuel gas code, ANSI Z223.1a-1998. Installation in Canada must be in accordance with the
standard CAN/CGA-
B149.2, Propane Installation Code.
A licensed contractor or local gas company representative must perform all natural gas
connections.
Ensure that the service supplying the appliance is fitted with a shut off valve conveniently positioned
near the
appliance and giving ease of access.
The appliance must be isolated from the gas supply piping system by closing its individual manual
shutoff valve
during any pressure testing of the gas supply piping system at test pressures equal to or
less than 0.5 psi (3.5
kPa).
The appliance and its individual shutoff valve must be disconnected from the gas supply piping
system during
any pressure testing of that system at test pressure in excess of 0.5 psi (3.5 kPa).
Checking for Gas Leaks
Perform a leak test at least once a year whether the gas supply cylinder has been disconnected or
not. In
addition, whenever the gas cylinder is connected to the regulator or whenever any part of the
gas system is
disconnected or replaced, perform a leak test.
As a safety precaution, remember to always leak test your appliance outdoors in a well-ventilated
area. Never
smoke or permit sources of ignition in the area while doing a leak test. Do not use a
flame, such as a lighted
match to test for leaks. Use a solution of soapy water.
This manual suits for next models
5
Table of contents
Other OCI Grill manuals
Popular Grill manuals by other brands

höfats
höfats CRATE quick start guide

HAEGER
HAEGER New Alabama GR-240.013A Instructions for use

Dansons Group
Dansons Group Pit Boss Austin XL PB1000XLW1 Assembly and operation instructions

Char-Broil
Char-Broil 463269311 Product guide

TEFAL
TEFAL OPTIGRILL Instructions for use

Universal Innovations
Universal Innovations Sahara X Series Assembly instructions

Caso
Caso BQ 2200 operating manual

Tasty Trotter
Tasty Trotter KYQ-C001 Assembly and operation instructions

Cuisinart
Cuisinart CCG-100 Assembly and operating instructions

RUSTA
RUSTA COMPACT manual

Jula
Jula Axley 004331 operating instructions

Bakers Pride
Bakers Pride COUNTERTOP GAS RADIANT XX-10 Specifications