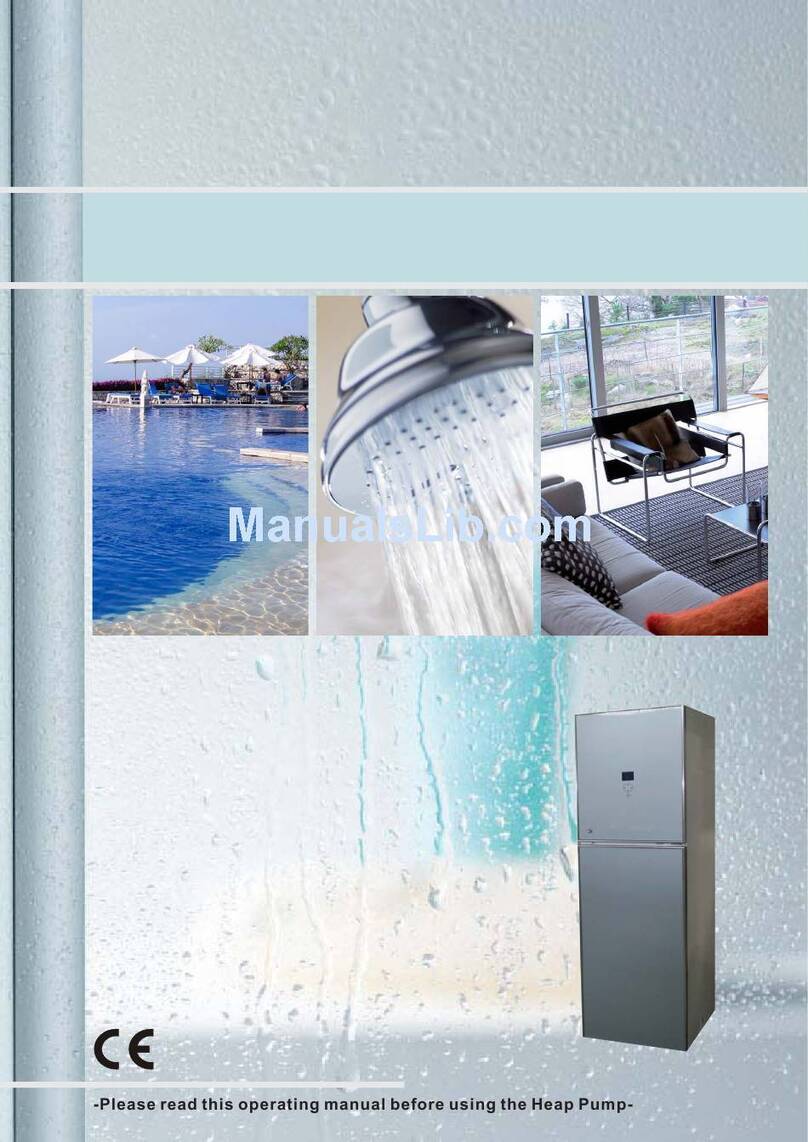
OEM KS25-C120 User manual

AIR
SOURCE
HEAT
PUMP
(
All
in
one
type
)
TOP
DISCHARGE
WITH
DOUBLE
DUCTS
Installation And Operating Instructions
MODEL
:
KS25-C120
/
KS25-C150
/
KS25-C200
KS35-C300
FEB 2010

THE 6 ESSENTIAL POINTS
Control
the
delivery:
before
any
handling,
to
check
the
state
of
the
heat
pump
after
having
removed
the
packing
of
protection.
Any
degradation
related
to
transport
will
have
to
be
announced
on
the
form
of
transport
and
by
Letter
Registered
AR
under
48
hours
to
the
conveyor.
Importance
of
this
note:
it
is
essential
that
it
is
given
to
the
fitter.
We
advise
to
read
and
follow
with
attention
the
entirety
of
the
instructions
appearing
there.
Preserve
this
note
for
being
able
to
consult
it
constantly.
Standards
of
installation:
the
installation
must
be
carried
out
in
accordance
with
the
standards
in
force
for
this
type
of
apparatus,
and
by
respecting
the
instructions
of
the
manufacturer,
a
person
qualified
in
the
handling
of thermodynamic
machines
or
air-conditioning.
The
person
must
have
the
lawful
material
and
guarantee
of
a
training
of
approved
refrigeration
technician.
Any
defect
in
the
installation
can
cause
damage
on
the
individuals,
the
animals or
the
objects.
On
no
account,
the
importer
of
this
apparatus
could
not
be
made
responsible
for
this
damage.
Use
of
the
heat
pump:
this
heat
pump
is
intended
exclusively
with
use
for
which
it
was
conceived.
Any
other
use
non
in
conformity
and
random
will
be
regarded
as
dangerous
and
unsuitable.
Maximum
temperature
of
the
water
of
swimming
pool:
It
is
essential
to
maintain
the
temperature
of
water
below
the
value
recommended
by
the
manufacturer
of
the
swimming
pool,
in
order
not
to
deteriorate
its
lining
(liner
PVC).
Breakdown:
not
consider
any
attempt
at
breakdown
service;
any
even
inopportune
breakdown
will
have
to
be
announced
to
your
retailer
or
your
fitter.
Wintering,
maintenance:
instructions
appear
in
this
note,
it
is
essential
to
conform
to
it;
before
these
operations,
the
power
supply
of
the
heat
pump
must
be
cut.
Maintenance:
To
perpetuate
and
guarantee
the
performances
of
the
heat
pump,
it
is
necessary
to
make
carry
out
a
regular maintenance;
to
refer
for
that
to
the
instructions
of
maintenance.
In
the
event
of
resale
with
a
third,
it
is
imperative
that
this
note
is
included
with
the
material
if
the
new
owner
or
the
fitter
wishes
to
consult
it.
2

CONTENTS
1.
Security
consign
….………………………………………………….……..……………………….…………p
4
2.
Description
of
the
heat
pump
2-1
Outside..……………….………………….…………………………………………………….……….
p
6
2-2
Inside
..……………….………………….…………………………………………………….……….
p
7
2-3
Dimensional
and
technical
characteristics
…..…………….…………………………………………….
p
8
3.
Fitting
and
putting
into
service
of
the
heat
pump
3-1
Rules
of
establishment
……………………….………………………………………..………………
p
9
3-2
Hydraulic
connections…………..…….………………..……...…………………….…………..……
p10
3-3
Electric
connections…...
….…………………………..………………………………........................
p12
3-4
Running
of
reversible
heat
pump…...
….…..………………………………………….........................
p12
3-5
Description
of
the
screen
of
display
and
control………………………………….….............…...........
p13
4.
Use
in
standard
mode
……………………………………….…………………….……..……….……..
p14
5.
Instruction
for
the
fitter
5-1
Devices
of
control
and
safety……………………………….…………………...………...…………………
p16
5-2
Defrost
operation………………….…………………………...…………………………………………….…p16
5-3
Instruction
of
the
solar
coil
……………………………………................….…………………………...…p16
5-4
The
defaults
messages
and
what
to
do……………………………………….…………………………...…p17
6.
Instructions
of
maintenance..…………………………………….………………… …...…………....…………p17
7.
The
three
electric
heaters
…………………………………….……………………...…………........…………p17
8.
Gas
flow
diagram………………………………………….….…………………………………..……….......
p18
9.
Wiring
Diagram…………………………………………............
….……...…………………........................
p19
10.
Problems
/
solutions…………………………………………............
….…………………….........................
p20
3

Any
wrong
handling
can
cause
an
important
risk
being
1-Security consign
Any wrong handling can cause an important risk
being able to result in death
Any wrong handling can cause serious damage to
the user and the machine
TO NOT DO
To follow attentively
To be sure of the electric connections
To be sure of the disconnection of the plug
Never climb, rest on or put on something on the unit
Caution DANGER: electrocution risk
Do not put hands, do not touch
4

CAUTION
Do
not
climb
on
the
unit
or
try
to
move
it
when
installed.
Keep
out
of
the
reach
of
children
do
not
let
us
playing
near
the
unit.
Never
introduce
a
stick,
your
finger
or
others
in
the
air
inlet/outlet.
The
ventilator
runs
at
high
speed:
that
would
cause
a
very
serious
incident.
Important:
Well
clean
the
plug
If
dirtiness
adheres
to
the
plug
or
if
it
is
badly
inserted:
that
can
cause
a
fire
or
electric
shocks.
If
an
abnormality
(smell
of
burning
…
)
occurs,
stop
the
unit,
unplug
or
switch
off
the
electricity.
Do
not
clean
the
appliance
with
water.
Water
will
go
into
the
unit
and
will
destroy
the
insulation.
Do
not
connect
/
unconnected
the
unit
when
running
;
press
before
all
the
button
OFF.
Do
not
draw
on
the
power
supply
cable.
Well
have
in
hand
the
plug
to
disconnect
it.
Fire
hazard
could
occur due
to
the
wrenching
of
the
electric
cable.
Do
not
touch
the
plug
with
wet
hands.
It
will
caused
an
electric
shock.
By
stormy
weather,
cut
off
the
pump
to
avoid
the
damaged
caused
by
the
lightning.
First
off
all
the
heat
pump
is
stopped,
put
out
leaves
or
others
little
particles
blocking
the
air
inlet
vanes.
Verify
the
compatibility
of
the
network
with
the
data
written
on
the
heat
pump
before
beginning
the
installation.
The
other
disinfection
systems
such
as
electrolysis,
chemical…
are
not
recommended
for
a
good
running
of
the
pump.
The
pump
must
be
ready
before
these
systems.
For
an
optimal
running
of
the
heating
pump,
many
rules
must
been
respected:
A.
Use
of
free
chlorine
:
max
:
2.6mg/l
B.
Total
bromine
:
max
:
5.6mg/l
C.
pH
:
between
6.5
et
8.
5

2- Description of the heat pump
2-1 Outside:
4 3
9
2
8
5
1 11
12
10 7
6
Power Plug
Control pannel
Air Inlet
Air Outlet
Temperature Sensor
Drainage hole
Cold Water Inlet
Hot Water Oulet
9 Service valve
10 solar coil inlet *
11 solar coil outlet *
12 Electrical heater *
6

2-2 Inside:
1
Control
panel
cover
15
Gas
returning
pipe
29
Drainage
Pipe
2
Power
plug
16
Exhaust
pipe
30
Rubber
Cover
3
Clip
of
Power
Cable
17
Filter
31
4
Electrical
heater
*
18
Auxilliary
capillary
32
5
Plastic
Base
19
Capillary
33
6
Water
tank
20
Defrost
sensor
34
7
Motor
Capacitor
21
Assistant
unit
of
air
outlet
35
8
Compressor
capacitor
22
Fan
motor
36
9
Compressor
23
Electrical
Box
37
10
Circuit
Board
24
Circuit
board
base
38
11
Condenser
25
Barrier
board
39
12
Condenser
top
polyfoam
26
Condenser
heater
40
13
Four
way
valve
1
27
Control
panel
41
14
Four
way
valve
2
28
Plastic
shell
42
7

2-3 Dimensional and technical characteristics:
Sort Code
KS25 KS35
Model Code
C120/C150/C200 C300
Rating Heating Capacity (KW)
2.68 3.40
Rating Heating Power Input (KW)
0.85 1.09
Heating Current (A)
4.0 5.0
Refrigerant (g) ( R410A )
550 900
Compressor Quantity
1 1
Fan Quantity
1 1
Noise dB(A)
47 47
Temperature of output water
10-60 10-60
Unit Net Dimension (D X H)
Φ
570X 1415/(1515)/(1745)
Φ
680X 1775
Unit Shipping Dimension (L/W/H)
640/620/1430(1530)(1760) 695/695/1825
Air ducts Dimension ( mm )
Φ
150
Φ
150
Net weight / Gross weight (kg)
55/64 66/75 73/82 81/90
Water Connection (Inch)
1 1
Capacity of the water tank (L)
120/150/200 300
Power Supply (V/Ph/Hz)
220-240/1/50 220-240/1/50
Ambient Temperature (℃)
-10--35 -10--35
Electricity Control Way
Mini-computer intelligent control
Controller
LE D
Display
Wire Control
Yes
*
according
to
climatic
conditions;
no contractual
document.
N.B.
:
Sound
measurement
is
made
in
laboratory
before
leaving
the
factory.
In
the
event
of
difference
between
the
table
of
the
technical
data
and
the
descriptive
plate
of
the
machine,
it
is
necessary
to
refer
to
the
data
posted
on
this
plate.
8

3- Fitting and putting into service of the heat pump
3-1 Rules of establishment:
Many
measures
define
the
place
of
the
appliance;
it
is
essential
to
respect
them:
Electric
and
hydraulic
connections
must
be
carried
out
according
to
national
wiring
regulation.
The
appliance
must
be
installed
outside.
The
appliance
must
be
put
on
its
antivibratory
studs,
regulated
with
horizontal
and
on
a
massive
base
(concrete
stone
or
steel
frame);
this
base
must
have
a
sufficient
height
to
prevent
entering
of
water
by
the
bottom
of
the appliance;
to
regulate
the
height
with
the
studs
so
as
to
be
able
to
connect
the
connection
collecting
the condensates.
The
obstacles
such
as
wall
and
vegetation
must
be
separated
from
the
apparatus
as
indicated
on
the
diagram
below.
0.5m
UNIT
0.5m
0.5m
0.5m
The
ventilator
should
not
blow
towards
the
windows
or
crossing
place.
There
must
be
more
than
1.5M
space
on
the
top
of
the
unit.
The
fixing
board
of
the
unit
must
be
fixed
by
bracket.
Connect
drainpip
e
t
o
the
outlet
of
cond
ensate
wat
er,
then
d
raw
the
drai
npipe
i
n
to
blowoff
p
ipe.
Other
precautions
of
establishment:
-
Do
not
install
the
appliance
near
a
way
with
circulation
of
cars
in
order
to
avoid
mud
projections.
-
Avoid
directing
blowing
counters
the
dominant
winds.
-
If
the
appliance
is
intended
to
be
used
in
period
winter,
put
it
at
the
shelter
of
the
falls
of
snow.
-
The
appliance
must
be
able
to
be
watch
on
especially
so
that
children
do
not
play
around.
Attention:
When install pipeline for heat pump, user need to install an additional pressure reducing valve
(working pressure is less or equal to 3bar) in the water inlet pipe, for pressure reduction
and pressure stabilizing in the water supply system.
9

3-2 Hydraulic connections:
Refer
imperatively
to
the
diagram
below:
1.
Connect
the
mouth
for
hot-
water-
in
to
the
water
tank
with
PP-R
pipe,
with
other
metal
pipe.
Pay
attention
to
heat
preservation
if
use
metal
pipe.
2.
Install
water
filter
and
one-way
valve
in
the
Tap
water
pipe,
then
connect
the
tap
water
pipe
to
the
tank
mouth
of
tap
water
inlet.
3.
Fill
water
into
the
tank:
Open
the
tap-
water-in
valve
to
fill
water;
Meanwhile,
open
the
hot
water-out
valve,
till
water
spill
over
from
the
hot-water-out
valve.
It
means
the
tank
is
full
of
water.
Close
the
tap-water-in
valve,
check
leakage
by
storing
full
water,
Ensure
there
is
no
water
leakage
in
the
all
system.
Attention:
be
sure
the
tank
is
full
of
water
before
it
is
switched
on
to
run.
150cm
W The flexible pipe's diameter is
Φ
150mm.
A you can fix it according to your system
L design.( Detail in next page )
L
50cm
Hot
water
in
Tap
water
in
Wat
er
faucet
Wat
er
faucet
One-way
valve
Wat
er
fi
lter
Tap
water
in
TECHNIC
AL
R
OOM
Wat
er
faucet
Wat
er
faucet
10

Many system-design options for architects
Option A:
-Installation in the heating room.
-Hot water heating from room air.
-Optional use:
cooling of the food storage or wire cellar.
cooling of the room of your choice.
Option B:
-Installation in the laundry washing room.
-Hot water heating from room air.
-Optional use:
laundry-drying, decalcified water for steam-iron.
-Dehumidification,
Option C:
-Installation in the same room as heating
heat pump.
-Heat recovery from return air; sanitary hot
water production.
-Optional use:
Removal of used,humid,charged air from
bath,toilet,kitchen;
Fresh ambient air enter home by slots.
11

3-3 Electric connections:
CAUTION:
before
connecting
the
appliance,
make
sure
that
the
supply
power
line
is
disconnected
from
the
network.
Characteristics
of
the
general
power
supply:
mode
of
neutral
TT
and
TN.S;
the
circuit
of
heat
pump
must
be
connected
to
an
earthing
circuit
Connections:
The
electric
installation
must
be
carried
out
by
a
professional
qualified
(like
an
electrician)
according
to
the
rules
and
standards
in
force
in
the
country
of
installation.
The
power
supply
of
the
heat
pump
must
come
preferably
from
an
exclusive
circuit
and
having
the
bodies
of
lawful
protection.
Controller
must
be
installed
or
indoor
wall
and
the
place
is
easy
for
use.
Electric
protection
of
which
must
lay
out
the
heat
pump:
circuit
breaker
curves
D
or
standard
fuse
of
protection
Am,
gauged
with
16A
differential
protection
of
30
mA
In
the
event
of
connection
to
an
electrical
plug
by
the
user:
-
-
The
heat
pump
is
being
provided
with
an
electric
cable,
it
is
possible
to
connect
it
with
a
plug.
-
The
plug
must
be
checked
in
conformity
with
the
power
of
the
appliance
by
a
qualified
technician.
-
The
plug
must
be
safe
from
the
rain,
of
easy
access
to
be
cleaned
and
one
will
have
to
regularly
check
the
good
condition
of
this
plug.
BEFORE
THE
STARTUP
OF
HEAT
PUMP,
IT
IS
SIGNIFICANT
TO
INCLUDE/UNDERSTAND
THE
OPERATING
AND
THE
SETTINGS
OF
WHICH
YOU
WILL
TAKE
NOTE
IN
THE
FOLLOWING
PARAGRAPHS
3-4 Running of reversible heat pump :
By
using
the
free
energy
contained
in
the
ambient
air,
the
heat
pump
enables
to
heat
the
water
of
the
water
in
a
very
economic
way.
Your
heat
pump
is
a
heat
machine
that
can
transfer
the
heat
from
a
low
temperature
place
(ambient
air)
to
a
higher
temperature
place.
Running in heating mode :
The
heat
of
the
air
is
absorbed
by
the
cold,
liquid
refrigerant,
through
the
evaporator
(radiator
with
wings),
in
which
it’s
vaporized;
then
the
compressor
increases
the
pressure
and
the
temperature,
and
sends
it
into
the
condenser
(exchanger)
where
it
loses
its
heat
by
transmitting
it
to
the
water
and
it
comes
back
in
the
liquid
state;
it
loses
its
pressure
and
cools
again
into
the
pressure
reducer
before
returning
to
the
evaporator
for
a
new
cycle.
Running in cooling mode or defrosting mode
:
4
way
valve
enables
to
reverse
the
cycle
of
the
refrigerant
;
the
liquid
fluid
is
vaporized
into
the
exchanger
(that
becomes
the
evaporator)
by
taking
the
heat
of
the
water
of
the
water,
passes
into
the
compressor
which
heats
it
then
into
the
radiator
(which
becomes
the
condenser)
where
it
comes
back
at
the
liquid
state.
Note:
Single
water
heater
without
cooling
water
mode;
Single
water
chiller
without
heating
water
mode
and
defrosting
mode.
12

3-5 Description of the screen of display and control:
1
)
WITH
WATER
TANK
ASSISTANT
ELECTRICAL
HEATER
Description
of
the
order
and
display
panel
:
Two
figures
on
the
left
:
current
temperature
of
the
water
tank
Or
two
figures
on
the
right
:
desired
temperature
Defrost
Setting
and
Electric
heater
Forced
35 45
Light
of
heat
pump
running
Light
of
electric
heater
running
TIMER
TIMER
HEATER
HEAT
I
N
G
HEATER
DEFROST
Button
for
coercive
defrosting
It
is
used
to
ser
up
the
function
of
coercive
defrosting.
ON
Buttor
for
Temperature
up
and
down
It
sets
the
temperature
of
water
and
time
of
dose
the
heater.
OFF
CLOCK
On
/
off
To
adjust
the
current
hour
and
functioning
timetable
To
adjust
the
hour
2
)
WITHOUT
WATER
TANK
ASSISTANT
ELECTRICAL
HEATER
Description
of
the
order
and
display
panel
:
Two
figures
on
the
left
:
current
temperature
of
the
water
tank
Or
two
figures
on
the
right
:
desired
temperature
Defrost
Setting
35 45
Light
of
heat
pump
running
TIMER
TIMER
MODE
HEAT
DEFROST
Button
for
coercive
defrosting
It
is
used
to
ser
up
the
function
of
coercive
defrosting.
ON
Buttor
for
Temperature
up
and
down
It
sets
the
temperature
of
water
and
time
of
dose
the
heater.
OFF
CLOCK
On
/
off
To
adjust
the
current
hour
and
functioning
timetable
13
To
adjust
the
hour

4- Use in standard mode
Starting
Operation
Press " " button, and when the unit receives the signal, it gives out two " beep " tones, the operation
is on and the heat pump water heater stars operation.
If the interval shorter than 3 minutes from last shut down to the present switch-on, the compressor only restarts
after 3 minutes to protect the system.
Temperature
Setting
Selection
Press " " to set temperature 1 degree
higher. Press " " to set temperature 1
degree lower.
Temperature range set in heating mode: 10oC ~ 60oC. (Single water chiller without this function)
Setting
right
the
hour
of
the
Heat
pump
The Heat pump must not run. If it is running, press on " " for stopping it.
Press 5 seconds on " ", the left display ( = the hour ) lights
Press the button " " or " " for increasing or decreasing the hour.
Press again on " ", the left display ( =the minutes ) lights
Press the button " " or " " for increasing or decreasing the minutes.
Validate in pressing on " " ( or wait 10 seconds ; the display will leave this setting mode by it self )
Setting
of
running
selected
periods
(TIMER):
Press on " ", the left display ( = the hour ) lights
Press the button " " or " " for increasing or decreasing the hour.
Press again on " ", the left display ( = the minutes ) lights
Press the button " " or " " for increasing or decreasing the minutes.
Validate in pressing on " " ; The light " "switches on.
For
setting
the
hour
of
stopping
running
(TIMER):
Press on " " and set the hour & the minutes as done before...
The light " "switches on.
Cancelling
this
programming:
Press on "
" The light "
" light. Press on "
".
Press on "
" The light "
" light. Press on "
".
Coercive
Defrosting
1. Press" " Button, the heater go to defrost state.
2. After 3 minutes , when coil temperature up to 10oC or the time of defrost reaches 8 minutes, defrost is stopped.
3. After exiting the state of defrost, then heater will stop operation for 3 minutes , then it will run as the state before defrost.
14

Adjustment
of
the
defrosting
1-Press
on
“
HEATER
or
MODE
”
for
3
seconds
,
you
can
see
1.
-7
(for
example)
The
first
number
is
the
symbol
of
the
item;
and
the
second
value
is
the
setting
value
of
the
current
item.
Press
the
button
“
”
or
“
”
for
increasing
or
decreasing
the
value.
2-Press
on
“
HEATER
or
MODE
”
again
to
enter
next
item,
just
like:
2. 10
The
content
of
each
item
:
Number
0
stand
for
<<
Flow
switch
detection
>>:
(0,1)
adjustable
(
invalidation
in
this
system
)
Number
1
stand
for
<<Defrost
starts
temperature>>:
(-30°C
to
0°C)
adjustable
Number
2
stand
for
<<Defrost
stops
temperature>>:
(0°C
to
30°C)
adjustable
Number
3
stand
for
<<Interval
of
defrost>>:
(30
min
to
90
min)
adjustable
Number
4
stand
for
<<Time
of
defrost>>:
(1
min
to
20
min)
adjustable
Number
5
stand
for
<<The
time
of
water
temperature
up
1
°C
>>:
(
1
min
to
10
min)
adjustable
Number
6
stand
for
<<The
minimum
temperature
difference
of
compressor
star>>:
(
3
°C
to
15
°C
)
adjustable
3-After
setting
the
value,
the
defrosting
setting
will
exit
automatically
after
several
seconds.
And
the
system
will
memorize
the
last
value
of
each
setting.
Temperature
Display
You
can
check
the
correlative
temperature
by
following
step:
1-Press
on
“
”
for
4
seconds
,
you
can
see
A.
45
(for
example)
The
first
letter
is
the
symbol
of
the
item;
and
the
second
value
is
the
temperature
of
the
current
item.
2-Press
on
“
”
again
to
enter
next
item.
A
stand
for
<<
Temperature
of
the
water>>
B
stand
for
<<Temperature
of
the
ambient>>
C
stand
for
<<Coil
temperature
in
outdoor
heat
exchanger>>
D
stand
for
<<Exhaust
temperature
from
compressor>>
Reset
button
when
press
the
button
for
4
seconds,
and
the
following
points
will
return
to
initial
state
(Windows
default):
0.
Flow
switch
detection
:
0
1.
Enter
defrost
temperature:
-7
℃
2.
Exit
defrost
temperature
:
10
℃
3.
Defrost
interval
:
45
minutes
4.
Defrost
time:
8
minutes
5.
The
time
of
water
temperature
up
1
°C
:
3
minutes
6.
The
minimum
temperature
difference
of
compressor
star
:
5
℃
15

5- Instruction for the fitter:
The fitter has to read the following notice and explain the instructions to the user.
5-1 Devices of control and safety:
The
heat
pump
is
equipped
with:
2
control
devices:
A
defrost
temperature
probe
located
on
the
evaporator,
starts
the
defrost
sequence.
A
thermal
probe
located
on
the
exchanger,
ensures
the
cut
of
the
heat
pump
when
the
temperature
of
the
water
reaches
the
temperature
instructed
The
meaning
of
code
name:
T1:
water
temperature
T2:
ambient
temperature
T3:
exhaust
temperature
from
compressor
T4:
coil
temperature
in
outdoor
heat
exchanger
TC:
water
temperature
setting
Control
function:
1.
TC
can
be
set
between
10
℃
-60
℃
in
heating
mode.
Original
TC
is
45
℃
.
When
T1≤TC-1
℃
,
Compressor
and
fan
motor
start;
When
T1≥TC+1
℃
,
Compressor
and
fan
motor
stop.
When
compressor
is
running,
if
T2≤14
℃
,
the
four
way
valve2
on;
if
T2≥16
℃
,
the
four
way
valve2
off.
5-2 Defrost operation:
1.
Defrost:
The
system
begins
to
defrost
if
the
following
three
terms
are
met
in
the
same
time:
a.
T4
≤
-7
℃
lasts
for
a
while;
b.
compressor
runs
continuously
for
more
than
5
minutes
c.
Compressor
runs
accumulative
total
for
45
minutes(the
interval
between
two
defrost
is
a
cycle,
time
accumulates)
While
the
system
begin
to
defrost,
compressor
and
fan
motor
stop
at
first
and
four
way
valve1
is
on
after
1
minutes
and
begins
to
work,
compressor
restarts
after
it
stop
for
3
minutes.
If
the
sensor
for
T4
is
damaged,
the
system
begins
defrosting
after
compressor
runs
continuously
for
45
minutes.
2.
Terms
of
defrost
exiting:
When
defrosting
time
reach
3
minutes
and
T4
reaches
10
℃
or
defrosting
time
reaches
8
minutes,
defrost
exits
and
enter
heating
water
mode.
While
defrost
exiting,
after
compressor
and
fan
motor
stop
for
1
minute,
four
way
valve1
is
off.
Compress
restart
after
it
stops
for
3
minutes,
the
system
will
run
the
mode
the
same
as
before
defrost.
5-3 Instruction of the solar coil
Instruction
of
the
solar
coil
Type
Data
150L
200L
300L
Thickness (mm)
1.0
1.0
1.0
Length (m)
19
19
19
Diameter(mm)
15.88
15.88
15.88
Connecting Size (inch)
1/2’ male thread
1/2’ male thread
1/2’ male thread
16

5-4 The defaults messages and what to do:
Failure
code:
E1:
sensor
for
T1(water
temperature)
failure
E2:
sensor
for
T2(ambient
temperature)
failure
E3:
sensor
for
T3(exhaust
temperature
from
compressor)
failure
E4:
sensor
for
T4(coil
temperature
in
condenser)
failure
E5:
Compressor
stops
three
times
in
24
hours
because
the
current
is
too
high.
E.01
HEATER
HEAT
I
N
G
HEATER
DEFROST
E6:
While
heating
water,
there
is
three
times
of
T3
≥
100
℃
in
24
hours.
E7:
There
is
electric
leakage
in
Compress
or
outdoor
motor,
four
way
valve.
Recommendation:
Call
your
fitter
to
check
or
change
the
controller
of
flow.
6 - Instructions of maintenance:
This
operation
must
be
done
by
a
professional,
qualified
person,
each
year.
TIMER
ON
TIMER
OFF
CLOCK
Clean
the
back
evaporator
with
a
delicate
brush
and
a
water
jet
without
any
pressure
(karcher
prohibited).
Check
the
instructions
and
working
points
of
the
apparatus
Check
the
safety
measures
Check
the
pressure
of
the
refrigerating
gas
Clean
the
electic
box
and
control
the
connections
Check
the
connections
of
the
masses
to
the
earth
7 - The three electric heaters:
1.Condenser
electric
heater
*
Working
conditions:
During
the
compressor
running:
A
.the
heater
start
in
defrosting
period,
to
Speed
up
defrosting,
to
reduce
defrosting
time
;
B
.When
ambient
temperature
is
less
than
2
℃
,
the
heater
start,
and
it
stop
when
ambient
temperature
is
more
than
4
℃
.
2.
Compressor
electric
heater
*
Working
conditions:
A
When
the
compressor
is
not
working
and
ambient
temperature
is
less
than
0
℃
,
electric
heater
will
start
;
B
When
ambient
temperature
is
more
than
2
℃
or
compressor
is
working,
electric
heater
will
stop.
3.
Water
tank
electrical
heater
(only
for
heat
pump
with
assistant
electrical
heater)
The
electrical
heater
of
water
tank
has
two
mode:
manual
or
automatic
(1)
Automatic:
precondition
is
under
compressor
running:
if
the
water
temperature
does
not
up
1
℃
or
temperature
remain
or
down
in
a
certain
time
(the
certain
time
is
adjustable
from
1
to
10
minutes,
windows
default
is
3
minutes),
then
the
heater
will
start,
until
reach
the
setting
temperature. The
heater
can
not
be
stop
forcedly
when
the
electric
heater
in
the
automatic
mode.
The
heater
will
be
start
forcedly
during
defrosting.
(2)
Manual:
press
the
button
HEATER
once
to
start
the
heater
forcedly,
until
reach
the
setting
temperature
it
closes.
Or
press
HEATER
again
to
stop
the
heater
forcedly.
If
the
water
temperature
has
already
reached
the
setting
temperature,
then
it
wills
no
effect
to
press
the
button.
Also
the
heater
will
restore
to
automatic
state
after
the
water
temperature
reach
its
desire.
when
reach
the
setting
temperature,
the
heater
close
and
the
light
off.
NOTICE !
The
machine
would
give
an
alarm
if
the
water
tank's
sensor
finds
water
temperature
is
2
℃
or
less,
User
need
to
drain
all
inside
water
out
to
prevent
unit
damage
from
ice,
also
do
it
if
machine
not
be
used
a
long
time
in
winter
.
17

8 –Gas Flow Diagram
`
18

/
9 –Wiring Diagram
Without
Water
Tank
Electrical
Heater
R
E
D
S
C
M
C
B
L
A
C
K
C
1
Y
/
G
W
I
R
I
N
G
D
I
A
G
R
A
M
R
Y
/
G
W
H
I
T
E
(
B
L
U
E
)
XT1
B
L
U
E
F
M
YV2
B
L
U
E
YV1
B
L
U
E
B
L
U
E
CN
1
CN
2
T
2
0057
W
4
4
3
3
OUT3
4WV1
OUT4
4WV2
P
C
B
0UT5
0UT6
0UT7
CN
4
C
OM
P
R
ESS
O
R
T
E
M
PE
R
A
T
UR
E
A
M
B
I
E
N
T
T
E
M
PE
R
A
T
UR
E
W
A
T
E
R
T
E
M
PE
R
A
T
UR
E
A
CN
CN
3
C
O
PPE
R
SE
N
S
O
R
3
LED
Y
/
G
230V/5
0Hz
X
T
P
C
B
C
O
N
T
R
O
L
B
O
A
RD
C
M
C
O
M
P
R
ESS
O
R
C
1
C
O
M
P
R
ESS
O
R
C
APA
C
I
T
O
R
1
F
M
F
A
N
M
O
T
O
R
T
2
YV
1
CURR
E
N
T
I
NDUC
T
O
R
F
O
UR
W
AY VA
L
VE
1
X
T
1
YV
2
P
U
B
L
I
C
T
E
R
M
I
N
A
L
F
O
UR
W
AY VA
L
VE
2
C
2
F
A
N
M
O
T
O
R
C
APA
C
I
T
O
R
2
X
T
P
O
W
E
R
T
E
R
M
I
N
A
L
With
Water
Tank
Electrical
Heater
R
E
D
S
C
M
C
B
L
A
C
K
C
1
Y
/
G
W
I
R
I
N
G
D
I
A
G
R
A
M
R
Y
/
G
W
H
I
T
E
(
B
L
U
E
)
XT1
B
L
U
E
YV1
B
L
U
E
B
L
U
E
F
M
YV2
B
L
U
E
CN
1
CN
2
OUT3
4WV1
OUT4
4WV2
0UT5
0UT6
0UT7
C
OM
P
R
ESS
O
R
T
E
M
PE
R
A
T
UR
E
T
2
0057
W
P
C
B
CN
4
A
M
B
I
E
N
T
T
E
M
PE
R
A
T
UR
E
4
4
3
3
A
CN
W
A
T
E
R
T
E
M
PE
R
A
T
UR
E
CN
3
C
O
PPE
R
SE
N
S
O
R
W
H
I
T
E
3
/
Y
/
G
LED
230V/5
0Hz
B
L
A
C
K
B
L
ACK
X
T
E
L
E
C
T
R
I
C
A
L
H
EA
T
E
R
BL
UE
(W
HI
TE
)
P
C
B
C
O
N
T
R
O
L
B
O
A
RD
C
M
C
O
M
P
R
ESS
O
R
C
1
C
O
M
P
R
ESS
O
R
C
APA
C
I
T
O
R
1
F
M
F
A
N
M
O
T
O
R
CURR
E
N
T
X
T
T
E
R
M
I
N
A
L
YV
1
F
O
UR
W
AY
19

10 Problems / solutions :
The
difficulties
met
the
most
often
can
be
solved
by
reading
the
table
below.
If
nothing
corresponds
to
the
list,
or
if
the
solutions
applied
do
not
solve
the
problem,
refer
to
the
notice
or
contact
your
retailer.
Problem
Observation
Probable
cause
Explanation/Solution
The
heat
pump
does
not start
Screen
extinct
No
electric
food
Check
the
connection
with
the
catch or
/
and
the
interlocking
of
the
circuit breaker
at
the
head
of
line
The
heat
pump
does
not start
Screen
on
Voltage
to
low
Find
out
the
reason
and
repair
The
heat
pump
starts
and
stops
within
a
few minutes
Find
out
the
reason
and
repair
Compressor
failure
Refrigerant
circuit
is
damped
Four
way
valve
failure
Check
leakage,
charge
refrigerant
with
right
amount
Change
compressor
Find
the
damp
reason
and
make
some
changes
Change
The
temperature
of
the water
increases
very
slowly
The
heat
pump
works
Water
temperature
and
ambient temperature
too
low
Water
amount
used
continuously
too
large.
Water
is
running
under the
heat
pump
Water
comes
from
the
low
vat
The
black,
plastic
conduit
to evacuate
the
condensates
is not
connected
or
is
stopped
The
condensates
are
entailed
by
the
condensation
of
the
humid
air
on
the wings
of
the
evaporator.
It’s
quite natural.
Install
the
conduit
or
destop it.
Some
frost
appears
outside,
on
the
wings
of the
evaporator
The
thickness
of
the
frost
is
thin
Ambient
temperature
is
too low
The
frost
is
entailed
by
the
freezing
of
the
humid
air
on
the
wings
of
the
evaporator.
It’s
quite
natural
and
the heat
pump
is
going
to
defrost. Consider
the
wintering
of
the
heat pump.
The
thickness
of
the
frost
is thick
(the
blades
of
the
ventilator
may
rub
on
the
ice
much
more
thicker
inside)
The
deicing
probe
or
the thermic
circuit
breaker
does not
work
Stop
the
heat
pump
and
call
your retailer
The
heat
pump
works
but
the
temperature
of
the water
does
not
rise
(*)
The
pressure
of
the
refrigerant
shown
on
the
manometer
is very
low
Escape
of
the
refrigerant
Stop
the
heat
pump
and
call
your retailer
or
a
refrigeration
technician
The
pressure
of
the
manometer is
right
Breakdown
or
abnormal
wear of
the
compressor
The
heat
pump
emits noises
of
vibration
or sheet
The
sheets
of
the
casing
do
not
seem
to
be
shocked
The
screws
are
enlightened
Tighten
the
screws
of
the
carter
or
call
your
retailer
20
This manual suits for next models
3
Table of contents
Other OEM Heat Pump manuals
Popular Heat Pump manuals by other brands

Duratech
Duratech Heat Dura Pro manual

Sanyo
Sanyo ECO-i CHDX09053 datasheet

Vaillant
Vaillant geoTHERM exclusive installation instructions

Mitsubishi Electric
Mitsubishi Electric PUZ-WM AA Series installation manual

Dimplex
Dimplex SIH 9ME Installation and operating instructions

Goodman
Goodman M Series installation instructions