OEM IW-SYS3 User manual

IW-SYS3
In-Wall Audio System - AM / FM / CD / AUX / USB
Owner's Manual

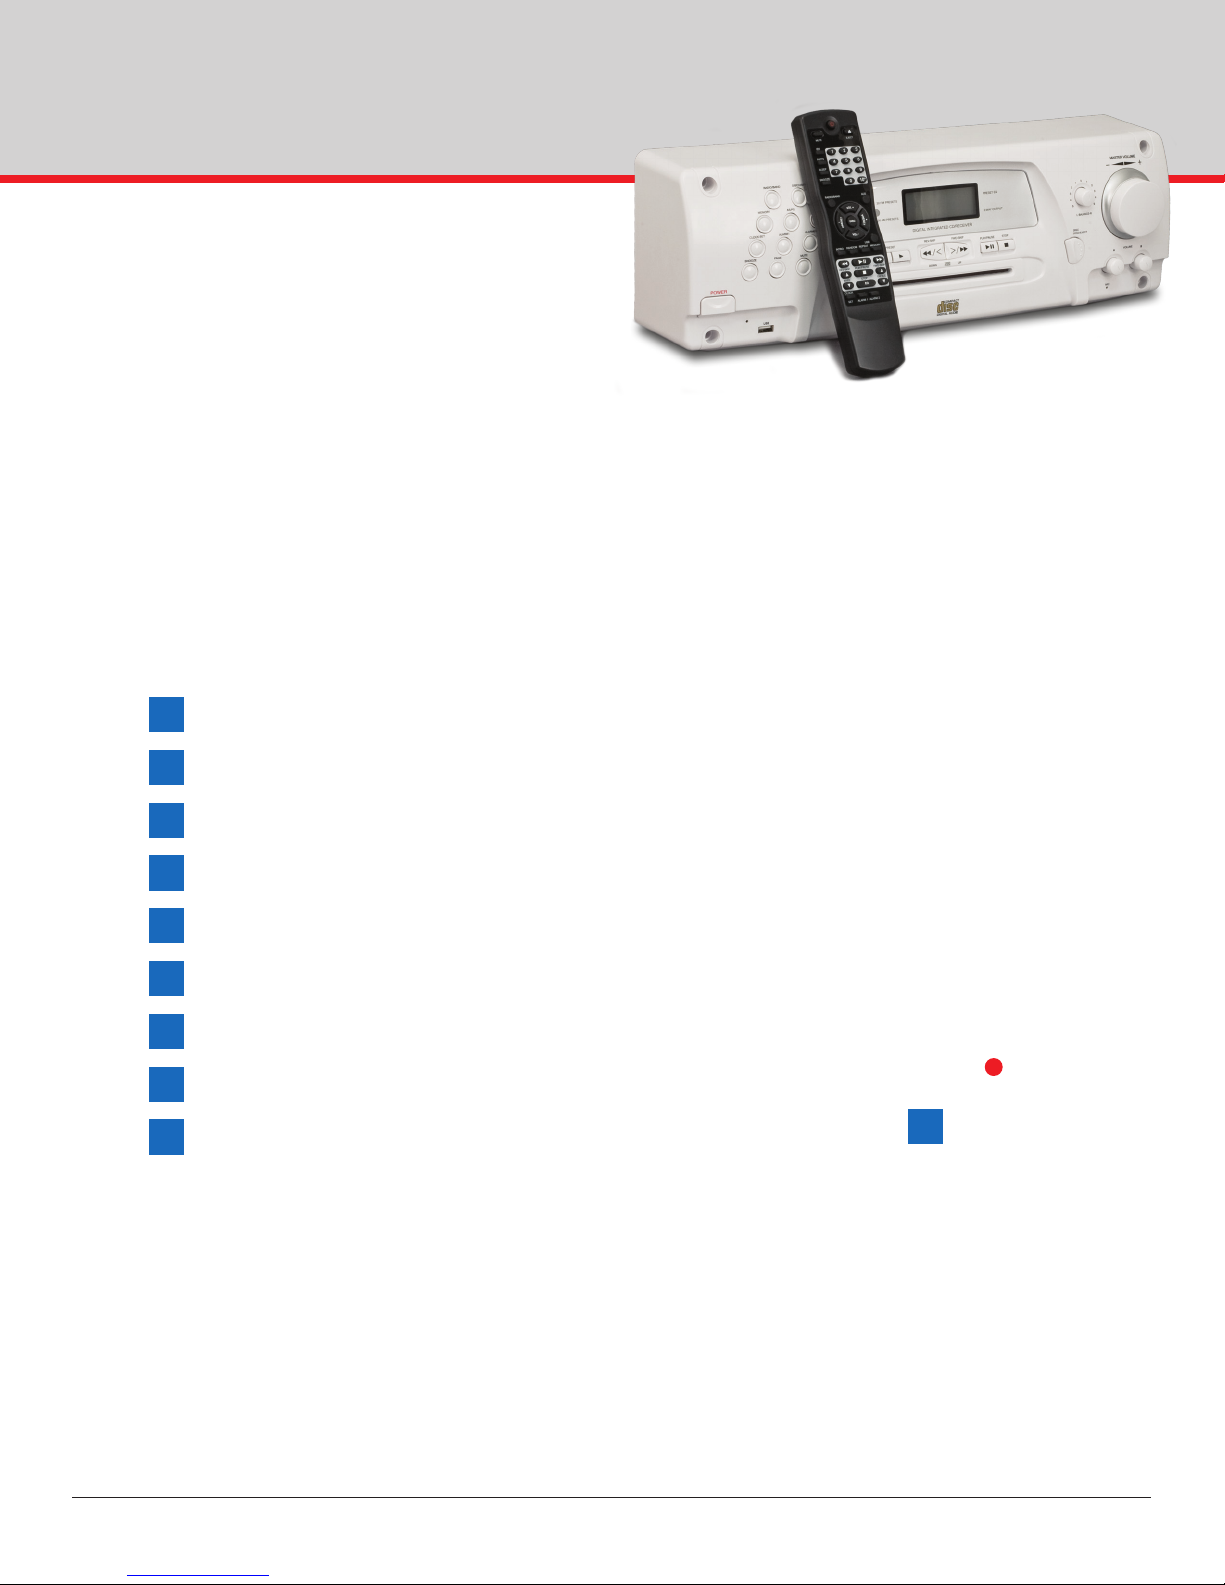
2IW-SYS3: In-Wall Audio System AM / FM / CD / AUX / USB
Rev. C
AM / FM / CD / AUX / USB
IMPORTANT SAFETY INSTRUCTIONS
»»Read these instructions. - All the safety and operating
instructions should be read before the appliance is
operated.
»»Retain Instructions - The safety and operating
instructions should be retained for future reference.
»»Heed all warnings - All warnings on the appliance and in
the operating instructions should be adhered to.
»»Follow all instructions - All operating and use instructions should be followed.
»»This is a permanently connected Class 1 apparatus - Installation of this apparatus should be carried out in
accordance with all applicable installation rules by qualied service personnel.
»»The rating plate is located on the back of unit, and the Caution Marking is located at the bottom of the enclosure.
»»Water and Moisture - Do not use this apparatus near water. The appliance should not be used near water, for
example, near a bathtub, washbowl, kitchen sink, laundry tub, in a wet basement or near a swimming pool and
the like. WARNING: To reduce the risk of re or electric shock, this apparatus should not be exposed to rain or
moisture, and objects lled with liquids, such as vases, should not be placed on this apparatus.
»»Mounting - The appliance should be mounted to a wall in accordance with the mounting dimensions.
»»Ventilation - Do not block any ventilation openings. Install in accordance with the manufacturer’s instructions.
The appliance should be situated so that its location or position does not interfere with its proper ventilation.
For example, the appliance should be not be situated on a bed, sofa, rug or similar surface that may block the
ventilation openings; or placed in a built-in installation, such as bookcase or cabinet that may impede the ow of
air through the ventilation
»»Heat - Do not install near any heat sources such as radiators, heat registers, stoves, or other apparatus
(including ampliers) that produce heat.
»»Power Sources - The appliance should be connected to a power supply only of the type described in the operating
instructions or as marked on the appliance.
»»Cleaning - The appliance should be cleaned with a slightly dampened cloth. Do not use harsh chemicals,
cleaning solvents, strong detergents, etc.
»»For Speaker Connections - 18 AWG (American Wire Gauge), Class 2 Cable, or larger, should be used.
The wire of preference is 16 AWG Stranded.
!
WARNING
The lightning ash with arrowhead symbol
within an equilateral triangle, is intended to
alert the user to the presence of uninsulated
“dangerous voltage’’ within the product’s
enclosure that may be of sufcient magnitude
to constitute a risk of electric shock to persons.
CAUTION
The exclamation point within an equilateral
triangle is intended to alert the user to
the presence of important operating and
maintenance (servicing) instructions in the
literature accompanying the product.
Important Safety Instructions
RISK OF ELECTRIC
SHOCK - DO NOT OPEN
CAUTION: TO REDUCE THE RISK OF
ELECTRIC SHOCK, DO NOT REMOVE
COVER (OR BACK). NO USER
SERVICEABLE PARTS INSIDE.
REFER SERVICING TO QUALIFIED
SERVICE PERSONNEL.
!
CAUTION

AM / FM / CD / AUX / USB
3
AM / FM / CD / AUX / USB IW-SYS3: In-Wall Audio System
AM / FM / CD / AUX / USB Rev. C
!
»»Outdoor Antenna Grounding - If an outside antenna is connected to the receiver, be sure the antenna system
is grounded so as to provide some protection against voltage surges and built up static charges. Section 810 of
the National Electrical Code. ANSI/NFPA No. 70-1984, provides information with respect to proper grounding
of the mast and supporting structure, grounding of the lead-in wire to an antenna discharge unit, connection to
grounding electrodes and requirements for the grounding electrode. (See Figure 1)
Notes
a. Use No. 10 AWG copper or No. 8 AWG aluminum or No. 17 AWG copperplate steel or bronze wire, or larger as
ground wires for both mast and lead-in.
b. Secure lead-in wire from antenna to antenna discharge unit and mast ground wire to house with stand-off
insulators, space from 4 feet (1.22 meters) to 6 feet (1.83 meters) apart
c. Mount antenna discharge unit as close as possible to where lead-in enters house.
An outside antenna system should not be located in the vicinity of overhead power lines or other electric light or
power circuits, or where it can fall into such power lines or circuits. When installing an outside antenna system,
extreme care should be taken to keep from touching such power lines or circuits as contact with them might be fatal.
»»Object and Liquid Entry - Care should be
taken so that objects do not fall and liquids
are not spilled into the enclosure through
openings.
»»Damage Requiring Service - The appliance
should be serviced by qualied service
personnel when:
a) The power supply cord or the plug has been
damaged; or
b) Objects have fallen, or liquid has been
spilled into the appliance; or
c) The appliance has been exposed to rain; or
d) The appliance has been dropped, or the
enclosure damaged.
“CAUTION - Use of controls or adjustments
or performance of procedures other than
specied herein may result in hazardous
radiation exposure”
Please record the Serial Number located on the rear of the unit in the space below:
Figure 1
Example of Antenna Grounding
According to the NEC
S/N:

4IW-SYS3: In-Wall Audio System AM / FM / CD / AUX / USB
Rev. C
AM / FM / CD / AUX / USB
IW-SYS3
In-Wall Audio System - AM / FM / CD / AUX / USB
IW-SYS3
This manual covers operating procedures,
general setup, and technical specications
for your IW-SYS3. We recommend that you
thoroughly read through the material contained
in this manual before connecting your in-wall
audio system. This will ensure that you have a
complete understanding of how to setup and
operate your IW-SYS3 properly for optimum
performance.
Take some time to familiarize yourself with
your IW-SYS3 system. Review the safety
precautions. Depending on your expertise and
local codes, some parts of the installation may
require a qualied person(s) to complete. Plan
accordingly!
When you see a red circled number
#
in the
manual this refers to a front or rear panel
feature, and a blue square X refers to an
operational instruction.
When the instructions say to press a button this
means a momentary press of the button. If it
is necessary to press a button for an extended
time then the manual will indicate this as
"Press and hold" or similar.
Getting Started
Getting Started
2 Important Safety Instructions
4 Getting Started
5 Overview / Product Features & Specications
6 What’s in the Box
6 What you will need
6 Supported / Recommended Accessories
7 Loading the Batteries in the Remote Control
7 Remote Control Range
8 Buttons & Basic Features
11 Navigation Functions
12 Reading the Display
14 Additional Buttons and Basic Features
16 Remote Control
17 A INTRO OPERATIONS
17 B RANDOM
17 C REPEAT
17 D PROGRAMMING / MEMORY / AS/PS
18 E CLOCK SET / DISPLAY
18 F USING THE ALARMS
19 G PRESET EQ SETTINGS
20 H NUMERIC KEYPAD
20 I SLEEP TIMER
21 Troubleshooting
22 Rear Connections - PRE AMP OUT, AUX IN
23 AM / FM Antennas
23 External Antenna Installation
24 Speaker Connections
26 Mounting Instructions
27 Mounting Dimensions
28 AC Power Connection
28 Black Button Wire Clamp
CONTENT

AM / FM / CD / AUX / USB
5
AM / FM / CD / AUX / USB IW-SYS3: In-Wall Audio System
AM / FM / CD / AUX / USB Rev. C
The IW-SYS3 is a dual zone audio entertainment system with a number of outstanding features including a Digital
Clock with Alarm & Snooze functions and a full function Remote Control. The unit plays CD’s as well as AM & FM radio
stations with 60 presets (30 AM, 30 FM). The auxiliary input provides connection of an MP3 player or other auxiliary
audio device. The new front USB port allows playback of audio les from a USB ash drive. The IW-SYS3 is designed to
be installed horizontally between 2x4 wall studs with 16" on-center spacing.
The IW-SYS3 is suitable for whole-house audio systems capable of driving up to 8 pair of 8 ohm loudspeakers.
Overview / Product Features & Specifications
Overview / Product Features & Specications
Features
»» Digital AM / FM tuner
»» CD Transport
»» Remote Control
»» Front USB port
»» Adjustable LCD Display w/LED backlight
»»ETL Listed
»»Remote Control (included)
»»AM / FM / CD / AUX / USB
»»Multi-Function Digital Display Window
»»Digital Clock
»»Alarm with Snooze Function
»»Timer / Sleep Function
»»Front Loading CD slot
»»Tuner Memory Presets (30 AM & 30 FM)
»»AM / FM Auto Seek
»»Independent Bass & Treble Controls
»»5 Pre-programmed EQ modes
»»Zone B Paging
»»Audio Muting
»»Intro Function
»»Programming to store the track in memory
»»ID3 MP3 Metadata Display
»»White Finish
»»New or Existing Construction
»»Unit Mounts in Standard 2" x 4" Stud Walls
»»Mounts directly to 16" On-Centers Studs
3 Year Limited Warranty
Connectivity
» USB port for playing MP3 / WMA les from USB ash drives
»AUX input (RCA Jacks)
»AM & FM Antenna inputs
»Pre-Amp Outputs for driving external Power Ampliers (RCA Jacks)
»Speaker Outputs capable of driving up to 8 pair of 8 ohm speakers
without impedance compensating devices (2 ohms min. per channel)
Specications
»» Input Power: 120V 60Hz AC, 45W
»» Main Speakers A:
8 ohm speaker, max 4 pair
16 ohm speaker, max 8 pair
»» Auxiliary Speakers B:
8 ohm speaker, max 4 pair
16 ohm speaker, max 8 pair
»»Audio Output Power:
Main Speakers A: 5 W + 5 W (max) @ 4 ohms, 3 W max @ 8 ohms
Auxiliary Speakers B: 5 W + 5 W (max) @ 4 ohms, 3 W max @ 8 ohms
»»Frequency Range:
AM 520 - 1710 KHz
FM 87.5 - 108 MHz
»»Frequency Response: 20 Hz - 20 KHz
»»S/N Ratio (A lter): 90 dB at 1 KHz 0db
Dimensions
» In-Wall Mounting Dimensions: 14-1/4" W x 5-1/4" H x 3-3/4" D
» Face Dimensions: 17-7/8" W x 6" H
» Face Relief: 4-5/8"

6IW-SYS3: In-Wall Audio System AM / FM / CD / AUX / USB
Rev. C
AM / FM / CD / AUX / USB
!
What’s in the Box
(1) IW-SYS3 In-Wall Audio System
(1) Remote Control, batteries not included
Please conrm that the following items are in the box:
(1) Owner’s Manual
(this document)
What's in the Box:
(1) AM Antenna
(1) FM Antenna w/ balun
Things you may need:
Drywall Saw #2 Phillips Head
Screw Driver
Double insulated
CL2 or 3 Speaker Wire
Supported / Recommended Accessories:
mainstation
The MS-D1 is compatible with Apple® 30-pin devices
and connects directly to the IW-SYS3 via AUX cable.
Also compatible with Apple® Lightning adapters.
The MS-B1 is a wireless Bluetooth® Receiver with
an Apple® 30-pin connector and converts the MS-D1
Docking Station into a wireless Bluetooth® Terminal.
IWM-2RGRG
For front access to the
AUX inputs connect the
In-Wall Jack Plate to the
back of the IW-SYS3.
The below products are available from OEM SYSTEMS COMPANY, INC.
What you will need Supported / Recommended
Accessories
(1) Black Button
Cable Connector
(4) Mounting
Screws
Power Drill
with 7/64"
(2.8mm) drill bit
(5) Screw Caps
Stud Finder Level
Wire Stripper
iPod, iPhone & iPad are registered trademarks of Apple Inc.
MS-B1
MS-D1
(2) 1.2V - 1.5V AAA
batteries (RO3, 24, UM 4)

AM / FM / CD / AUX / USB
7
AM / FM / CD / AUX / USB IW-SYS3: In-Wall Audio System
AM / FM / CD / AUX / USB Rev. C
1. Use only 1.2V to 1.5V AAA batteries. (RO3, 24, UM 4)
2. Open the rear lid and load the batteries as illustrated below.
3. Close the lid.
Loading the Batteries in the Remote Control
!
When inserting the batteries make sure not to damage the springs
on the battery’s terminals.
Do not use any batteries other than the ones specied. Also, do
not use a new battery together with an old one.
When loading the batteries into the remote control, set them in the
proper direction as indicated by the polarity marks ( and )
Do not heat batteries, disassemble them, or throw them into
ames or water.
Batteries may have different voltages, even if they are the same
size and shape. Do not use different types of batteries together.
To prevent leakage of battery uid, remove the batteries if you do
not plan to use the remote control for a long period of time
(3 months or more). If the uid should leak, clean it carefully from
the inside of the case, then insert new batteries. If a battery
should leak and the uid should get on your skin, wash your hands
thoroughly with water.
When disposing of used batteries, please comply with
governmental regulations or the disposal rules that apply in your
country / area.
WARNING - Do not use or store batteries in direct sunlight or other
excessively warm place, such as inside your car or near a heater.
This can cause damage to the batteries and reduce their life and
performance.
Battery CAUTIONS
Remote Control Range
The remote has a maximum range of
approximately 10 meters (33 feet) across an
angle of about +/- 30 degrees. The range will
diminish at wider angles and in the presence
of bright sunlight. The remote must have an
unobstructed visual path to the sensor for
proper operation.
In rare cases remote controls from other
equipment may interfere with each other.
Avoid using remotes for other equipment close
to the unit if they cause interference.
Replace the batteries when you notice a
decrease in the operating range of the remote.
- - For more information regarding the Remote
control refer to the Remote Control section of
this manual - -
Loading the Batteries in the Remote Control Remote Control Range

8IW-SYS3: In-Wall Audio System AM / FM / CD / AUX / USB
Rev. C
AM / FM / CD / AUX / USB
POWER
Feature / Button
Power: Switches power On and Off.
Press to turn on power. Press again to turn off power. Can also be used to stop alarm alert.
1
USB Audio Port: For playing MP3 & WMA les from USB ash drives.
Insert USB drive into USB socket. Select USB input by pressing Disc/USB button
13
once
or twice until the USB indicator shows on the display screen. The USB drive requires
approximately 10-15 seconds to initialize. Tracks will begin playing automatically beginning
at the rst track or the last track played depending on whether the same drive was previously
used. The USB reader responds to all the standard navigation controls. See the section on
Navigation Functions.
2
Buttons & Basic Features
1
3
4
5
6
7
8
9
10
11
12
13
14
SNOOZE
Snooze: Snoozes the sounding alarm for 10 minutes.
Pressing this button when Alarm 1 or 2 is sounding will silence the alert for 10 minutes.
2
3

AM / FM / CD / AUX / USB
9
AM / FM / CD / AUX / USB IW-SYS3: In-Wall Audio System
AM / FM / CD / AUX / USB Rev. C
Feature / Button
Buttons & Basic Features
4
5
6
7
8
9
PAGE
MUTE
CLOCK-SET
ALARM 1
ALARM 2
10
MEMORY
11
AS/PS
12
ID3
RADIO / BAND
ID3: Displays metadata information on MP3 and WMA les.
Pressing the ID3 button will display the Metadata information that is commonly associated with MP3 and
WMA tracks. The information may include song, album, and artist. Note: Metadata information is not
encoded on conventional audio CD's.
AS/PS: (Auto Store / Preview Scan) is used to automatically program radio stations and to preview
station presets.
To Automatically Program Radio Stations & To Preview Programed Radio Stations: - see item D
within this manual
RADIO/BAND: Selects the radio input and switches the radio between FM and AM bands.
Press the RADIO/BAND button to listen to the radio tuner. Pressing this button while listening to the
radio will switch the radio receiver between the FM and AM bands.
The radio can be tuned manually or automatically using the navigation buttons. The radio
presets can be changed using the preset buttons or using the numeric keypad on the remote.
For more information on selecting radio stations, see Navigation Functions
17
18
.
To store radio station presets see MEMORY
9
and AS/PS
10
.
MEMORY: Use to manually program radio presets and track playback order.
The Memory button is used to manually store memory presets for the radio. (See AS/PS for Automatic
Storage of radio stations.) The Memory button is also used to store the playback order of songs on the
CD and USB drives. To Program a Radio Preset & Program Playback Order of Audio Tracks: see item
D within this manual
Toggles Alarm2 mode on and off, silences Alarm2 alert, and is used to program Alarm2
- see item F within this manual
Toggles Alarm1 mode on and off, silences Alarm1 alert, and is used to program Alarm1
- see item F within this manual
CLOCK-SET: Use to set the Clock and to change the Display settings.
- see item E within this manual
MUTE: Mutes output to all speakers.
Press the MUTE button to mute the audio output to the speakers. Press the MUTE button again to
resume listening to the active input.
PAGE: Pages Zone B.
To page someone that is within the audible range of the Auxiliary Speakers B, Press and hold the PAGE
button
4
and speak into the microphone
26
. Your voice will be heard through the Auxiliary Speakers
(Speakers connected to output B). No output will be heard through the A speaker outputs while the
PAGE button is pressed.

10 IW-SYS3: In-Wall Audio System AM / FM / CD / AUX / USB
Rev. C
AM / FM / CD / AUX / USB
IR Remote Sensor: Infrared Remote Sensor
This is the receiver for the IR remote control. The remote has a maximum range of approximately 10
meters (33 feet) across an angle of about +/- 30 degrees. The range will diminish at wider angles and
in the presence of bright sunlight. The remote must have an unobstructed visual path to the sensor
for proper operation.
Buttons & Basic Features
Navigation Functions
DISC SLOT: CD, CD-R and CD-RW drive.
The CD player will accept audio CD's and CD-R & CD-RW discs with MP3, and WMA les.
Insert the disc label-side up until the disc stops about half-way into the slot. The disc will be
retracted into the drive automatically. The DISC input must be selected for disc playback.
The disc will automatically begin playing after initialization (10-20 seconds). See DISC/USB
13
and REV-SKIP FWD-SKIP
18
for more information on using the disc player and its
functions. The disc can be loaded and unloaded when another input is active.
15
16
Feature / Button
15
16
17
18
19
20
13
14
DISC/USB
AUX
DISC/USB: Selects the CD or USB input.
Press the DISC/USB button to listen to the Compact Disc. Press again to listen to the USB drive.
If either one of these inputs are active, pressing the button will switch to the other input.
AUX: Selects the Auxiliary input.
Press the AUX button to listen to the Auxiliary input that is located on the back of the system.

AM / FM / CD / AUX / USB
11
AM / FM / CD / AUX / USB IW-SYS3: In-Wall Audio System
AM / FM / CD / AUX / USB Rev. C
Navigation Functions
This section describes the use of the buttons used for Navigation of the Radio, CD, and USB drive.
18
REV-SKIP FWD-SKIP -- (DOWN TUNER | CLOCK UP)
Use to manually tune radio stations and skip and scan tracks on the CD and USB drives. Also
use to change clock and alarm settings.
Radio Tuning:
The radio can be tuned manually or automatically using the navigation buttons.
1. To manually step to a desired frequency press the left or right arrow to decrement or
increment the frequency.
2. To automatically scan to the next available station, press and hold the left or right arrow
for 1 second and the tuner will begin to scan for the next available station in the selected
direction.
Skip & Scan CD and USB Folders:
Press the REV-SKIP or FWD-SKIP arrows to decrement or increment tracks on the
active CD or USB drives.
Press and hold the REV-SKIP or FWD-SKIP arrows to review or cue the audio tracks.
Clock and Alarm Settings:
See items E and F
STOP: Use to stop playback of the CD and USB drives
Press the STOP button to stop the active drive. Press PLAY/PAUSE to start from the
beginning.
PLAY / PAUSE: Use to Play and Pause the audio tracks of the CD and USB drives
Press the when the drive is actively playing to pause the drive. Press again to resume
playback of the selected drive. Playback will resume where it was paused unless the input was
changed or the power was cycled.
19
17
PRESET: Use to change radio station presets and to change folders when playing the CD and
USB drives. Preset can also be used to change clock and alarm settings.
Radio Presets:
Press the arrows to decrement or increment the stored radio station presets.
See MEMORY
9
for information on storing the radio presets.
CD and USB Folders:
Press the arrows to decrement or increment the folders that may be present on the
active CD or USB drives. If folders are not present on the drive then pressing either button will
cause the drive to play from the beginning.
Clock and Alarm Settings:
See CLOCK-SET
6
and ALARM1
7
PRESET
REV- SKIP FWD- SKIP
DOWN UP
TUNER
CLOCK
PLAY/PAUSE
STOP
Navigation Functions

12 IW-SYS3: In-Wall Audio System AM / FM / CD / AUX / USB
Rev. C
AM / FM / CD / AUX / USB
Compact Disc: Both icons display when CD input is selected.
USB: Displays when the USB input is selected.
MP3 & WMA: Displays the le format playing from either the CD Drive or USB Port.
MUTE: Displays when the output to all speakers is muted.
5
PLAY PAUSE: Displays when audio track is playing, and displays when audio track is paused.
STEREO: Displays when the radio receives a stereo broadcast. (Not displayed if broadcast is monaural).
RADIO: Displays when the radio input is selected. MW displays when playing the AM band and
FM displays when playing the FM band. - See Radio Operations
12
CLOCK DISPLAY: Displays either clock time or alarm time - see item E
ALARM: Displays when either Alarm 1 or 2 is set along with the alarm type, Buzzer or Music.
- see item F
Frequency: KHz displays when playing the FM band. MHz displays when playing the AM band.
AUX1: Displays when auxillary input is selected. There is only one auxillary port on the IW-SYS3.
The Operation Display will show LINE IN.
Reading the Display
1
CLOCK DISPLAY
OPERATION DISPLAY
(Displays Active Operation)
Reading the Display
20

AM / FM / CD / AUX / USB
13
AM / FM / CD / AUX / USB IW-SYS3: In-Wall Audio System
AM / FM / CD / AUX / USB Rev. C
ID3: Displays when the ID3 button is pressed and the system is displaying ID3 Metadata information.
11
TRACK: Displays just above the track number when playing the CD or USB drives.
SLEEP: Displays when the Sleep Timer is active. - see item I
This function can only be activated from the remote.
INTRO: Displays when the system is in Intro Mode. - see item A
RANDOM: Displays when the CD or USB drives are in random playback mode.
MEMORY: Displays when the Disc or USB input is selected and the programmable playback function is
active. - see item D
The memory function becomes active when the memory button in pressed while the Disc or USB input is
selected.
REPEAT1: Displays when the system is set to repeat 1 audio track. - see item C
REPEAT: Displays when the system is set to repeat the entire volume of audio tracks. - see item C

14 IW-SYS3: In-Wall Audio System AM / FM / CD / AUX / USB
Rev. C
AM / FM / CD / AUX / USB
Feature / Button
Disc Load/Eject: Ejects and Loads Compact Discs.
Press to eject CD from slot. The disc should be removed from the slot after it is
ejected. Press again to reload the CD. If the CD is not removed from the slot after
ejection, the CD drive will attempt to reload the disc after 12 seconds.
21
Additional Buttons and Basic Features
DISC
LOAD/EJECT
21
22
23
24
26
25
Additional Buttons and Basic Features

AM / FM / CD / AUX / USB
15
AM / FM / CD / AUX / USB IW-SYS3: In-Wall Audio System
AM / FM / CD / AUX / USB Rev. C
MASTER VOLUME
L-BALANCE-R: Left and Right Balance Adjustment
Rotate to adjust the balance between the left and right speakers. It is common for
this control to be set to the center position. The center position is identiable by the
detent felt while rotating the control near the center. This control affects the outputs
of both the A and B stereo ampliers.
Additional Buttons and Basic Features
Control
23
Volume Control Knob A: Amplier A output level
Rotate to the desired position to set the maximum level of all the speakers connected
to the A outputs. It is common to set this control at or near its maximum position.
L-BALANCE-R
0
1 1
2 2
3 3
4 4
5 5
A
Volume Control Knob B: Amplier B output level
Rotate to the desired position to set the maximum level of all the speakers connected
to the B outputs. It is common to set this control at or near its maximum position.
B
24
–MASTER VOLUME+ Master Volume Control
Rotate clockwise or counter clockwise to increase or decrease the volume of all the speakers
connected to the system. The knob continuously rotates with 31 volume positions (0-30).
25
MIC: Microphone Sensor
Used in conjunction with the Page Button
4
to broadcast voice to Auxiliary Speakers B
35
36
.
26
MIC
22

16 IW-SYS3: In-Wall Audio System AM / FM / CD / AUX / USB
Rev. C
AM / FM / CD / AUX / USB
Remote Control
POWER: Toggles power On and Off.
1
DISC LOAD/EJECT: Ejects and
Loads Compact Discs.
21
Numeric Keypad
Selects Auxiliary Input.
14
Use VOL + to increase Master Volume
of all loudspeakers and use VOL - to
decrease the volume
25
Use Preset +, - buttons to step
through station presets.
- see Navigation Functions
17
Selects USB input
2
13
Treble control press the top +
button to increase treble; press the
bottom
-
button to decrease treble.
The range for this adjustment is ± 6.
PRESET EQ Pressing this button
steps through the preset Bass and
Treble settings. see item G for
PRESET EQ Settings
Remote Control Transmitter
16
ID3 Press to display metadata
information on MP3 and WMA
les.
11
Auto Store / Preview Scan (AS/PS)
is used to automatically program
radio stations and to preview station
presets.
10
Switches Alarm into Sleep Mode
SNOOZE: Quiets the sounding
alarm for 10 minutes.
3
Selects the radio input & switches
radio band between FM and AM.
12
Selects the CD input. Press
the DISC button to listen to the
Compact Disc.
13
15
Bass control press the top +
button to increase bass; press the
bottom
-
button to decrease bass.
The range for this adjustment is ± 6.
CLOCK SET / DISPLAY
6
- see item E
ALARMS
7
8
- see item F
Audio MUTE
5
Remote Control
REV-SKIP track
button - see
18
A B C D
PLAY/PAUSE
button -see
19
FWD-SKIP track
button - see
18
STOP button - see
19
D
I
F
H
9

AM / FM / CD / AUX / USB
17
AM / FM / CD / AUX / USB IW-SYS3: In-Wall Audio System
AM / FM / CD / AUX / USB Rev. C
Operations
INTRO OPERATIONS:
When active, “Intro” plays the rst 10 seconds of each audio track of the CD or USB drive.
1. When In CD or USB mode, press the INTRO button to start the intro scan mode.
2. Press the INTRO button again to release the intro scan mode.
RANDOM OPERATIONS
Random, also known as shufe play, mixes the playback order of audio tracks. When Random mode is active
the CD or USB drive will play continuously until stopped. It will play through all the tracks before repeating any
previously played tracks.
1. When In CD or USB mode, press the RANDOM button to set the random playing mode.
2. Press the RANDOM button again to release the random playing mode.
REPEAT
1. When REPEAT is pressed the rst time, the display will show and the CD or USB drive will play a single
audio track repeatedly until deactivated.
2. When Repeat is pressed a second time, the display will show and the CD or USB drive will now play the
entire volume of audio tracks repeatedly until stopped.
3. Press the REPEAT button again to cancel the repeat operation.
PROGRAMMING / MEMORY / AS/PS
To Program a Radio Preset:
1. Tune the radio to the desired frequency.
2. Press the MEMORY button
9
. The display will begin ashing a Preset number (1-30).
3. Select the desired Preset using the PRESET buttons. If no action is taken for 3 seconds the system will
exit the program mode.
4. Press the MEMORY button to store the Preset. The display will stop ashing and show the stored Preset.
5. Repeat for each desired Preset. The Preset value will increment automatically after storing a station.
To Program Playback Order of Audio Tracks:
1. Select the input that you wish to use, CD or USB. The drive will begin playing automatically after it has
initialized.
2. Press the STOP button after initialization.
3. Press the MEMORY button. The display will show P-01 001, indicating that the system is in Program mode.
The system will remain in Program mode until the PLAY button is pressed or another input is selected.
The P-01 is the program number and the 001 is the Track number.
4. Select a desired track using the navigation buttons. Press the MEMORY button to store the track.
The display will increment to P-02 indicating that it is waiting for the next Program number.
5. Continue adding tracks by selecting the track and pressing MEMORY.
6. Press PLAY to begin playback of the programmed tracks.
Note: The system will continue to repeat the programmed tracks until the input is changed or STOP is pressed.
The Programming will be lost once either is performed. It is not possible to add songs to the playback list once
playback begins.
A
B
C
D
INTRO OPERATIONS
RANDOM
REPEAT
PROGRAMMING / MEMORY / AS/PS

18 IW-SYS3: In-Wall Audio System AM / FM / CD / AUX / USB
Rev. C
AM / FM / CD / AUX / USB
Operations
F
To Automatically Program Radio Stations
1. Press and hold the AS/PS button
10
for 1 second to automatically program radio stations. If the FM band is selected
then the FM stations will be programmed. AM stations will be programmed if the AM band is selected. The unit will
program a maximum of 30 FM stations and 30 AM stations (60 total).
To Preview Programed Radio Stations:
1. Press AS/PS to Preview the 30 radio station presets. The Preset number will begin ashing and each preset will
play for 5 seconds. The Preview begins with Preset number 1 and will end at Preset number 1 unless AS/PS is
pressed again or the input is changed.
2. Press AS/PS again to stop Preview and to remain at the current station.
CLOCK SET / DISPLAY
1. Press and hold the CLOCK-SET button
6
for 1 second. The Hour
display will begin ashing and SET TIME will be displayed.
2. Use either set of navigation buttons or to set
the Hour.
(From the remote, the VOL+ and – will also work).
3. Press the CLOCK-SET button and the Minute display will begin
ashing. Set the Minute using the same navigation buttons.
4. Press the CLOCK-SET button again and SET 12H or 24H will be
displayed. Use the navigation buttons to set the clock to either
read in 12 hour or 24 hour mode. If you change the mode you may
need to reset the clock to the correct time.
5. Press the CLOCK-SET button again and LIGHT will be displayed.
Use the navigation buttons to adjust the brightness of the display.
There are 4 levels.
6. Press the CLOCK-SET button again and CONTRAST will be
displayed. Use the navigation buttons to adjust the contrast of the
display. There are 2 levels.
7. Press the CLOCK-SET button again and SET OK will be
momentarily displayed.
8. Note: You may enter the CLOCK-SET mode and skip to any
operation by continuing to press CLOCK-SET until you arrive at the
operation that you wish to change. Any skipped operation will be
unchanged.
USING THE ALARMS
The Alarms can be used in the same way as with any common
alarm clock. The programmed alarms will sound daily if the alarms
are in their active mode. The programmed alarm times will remain
unchanged unless they are reprogrammed or if the power fails. The
two alarms are independent and can be used together with each alarm
programmed for a different time. The alarms can be programmed to
have different alert sources, such as the Radio, Aux, Buzzer, CD, or
USB. The default alert is the Radio. The alert Buzzer sound for Alarm1
is different than Alarm2. Alarm2 has a higher frequency (pitch) beeper.
People with high frequency hearing loss may have a difcult time
hearing the Alarm2 Buzzer. The Buzzer (Beeper) alert sound is emitted
from all active speakers.
E
CLOCK SET
/ DISPLAY
USING THE ALARMS
D
cont.

AM / FM / CD / AUX / USB
19
AM / FM / CD / AUX / USB IW-SYS3: In-Wall Audio System
AM / FM / CD / AUX / USB Rev. C
Programming the alarm:
1. Press and hold the desired ALARM button (1 or 2) for 1 second. The Hour display will begin ashing and SET
TIME will be displayed.
2. Use either set of navigation buttons or to set the Hour value. (From the remote, the VOL+
and – will also work).
3. Press the ALARM button and the Minute display will begin ashing. Set the minute value using the same
navigation buttons.
4. Press the ALARM button again and SET RING will be displayed. Use the navigation buttons to set the Ring
source (Radio, Aux, Buzzer, CD, or USB). The Radio is the default input. Note: Ensure that you have an active
input, such as a CD in the CD player or no sound will be heard.
5. Press the ALARM button again and SET VOL will be displayed. Use the navigation buttons to adjust the volume
for the Alarm. 20 is the default volume level. Note: If you have other volume controls between the amplier and
the speakers then these volume controls should be set so that the alert can be heard at an appropriate volume.
6. Press the ALARM button again and SET OK will be displayed. The Alarm will be set and the active alarm indicator
(ALARM1 and/or ALARM2) will appear in the upper right corner of the display along with the alarm source, either
MUSIC or BUZZER.
Note: Ensure that Alarm1 or Alarm2 is displayed or the Alarm will not sound.
Toggling the Alarm between Active and Inactive mode:
1. Press the ALARM button to toggle the Alarms between their active or inactive states. When an Alarm is set
(toggled to its active mode), the active alarm indicator (ALARM1 and/or ALARM2) will appear in the upper
right corner of the display along with the alarm source, either MUSIC or BUZZER. The alarm time will also be
displayed for 6 seconds.
2. The Alarms can be toggled between their Active and Inactive modes without losing their programming.
3. If the power fails, the alarm and clock programming will be lost and they must be reprogrammed.
4. To review the programmed time and music source, simply toggle the Alarm from its inactive to active mode. The
display will show the alarm source and alarm time for 6 seconds.
Silencing the Alert:
Press the POWER button to silence the alert when the Alarm is sounding. Alternatively, pressing the ALARM button
of the alerting Alarm will also silence it.
PRESET EQ SETTINGS
Pressing this button steps through the preset Bass and Treble settings. The Bass and Treble controls may also be
adjusted manually using the + & – Bass and Treble controls on either side of the EQ button. The following chart
shows the pre-programmed EQ settings.
Bass Treble
Flat 0 0
Jazz +1 +1
Rock +3 +3
Class 0 +2
Pop +2 +2
G
PRESET EQ SETTINGS
F
cont.

20 IW-SYS3: In-Wall Audio System AM / FM / CD / AUX / USB
Rev. C
AM / FM / CD / AUX / USB
I
NUMERIC KEYPAD
The remote control of the IW-
SYS3 has a numeric keypad
that allows direct access to
radio stations and audio tracks.
1, 2, or 3 digit numbers can be
entered depending on the 10+
selection .
Pressing the 10+ button
changes the display
20
to show 1, 2, or 3 dashes. The number of
dashes displayed represents the number of digits that must be
entered on the Numeric Keypad.
When 1 dash is displayed then a single digit must be entered.
(Radio Station Presets 1 - 9 and Tracks 1 - 9 can be accessed.)
When 2 dashes are displayed then two digits must be entered.
(Radio Station Presets 01 - 30 and Tracks 01 - 99 can be accessed.)
When 3 dashes are displayed then three digits must be entered.
(Radio Station Presets 001 - 030 and Tracks 001 - 999 can be
accessed.)
Each press of the 10+ button will change the number of displayed
dashes. In most cases the 2-digit mode, (pressing the button until
two dashes are displayed), is the most useful because it allows for
access of single and double digit radio presets and audio tracks.
For example: If the system is in 2-dash mode then entering 05 on
the keypad will access either Radio Preset number 5 or Audio Track
5, depending on which input is actively playing. Similarly, pressing
15 on the keypad will access either Radio Preset 15 or Audio Track
15. If the system were in 3-digit mode then 005 or 015 would need
to be entered to access the same Preset or Track. If the system
were in 1-digit mode then Preset or Track 5 could be accessed but
not 15. It would be necessary to rst increment the 10+ selection
to access Preset or Track 15.
Note: The 10+ function will not need to be used often since the IW-
SYS3 will retain the last entry and remain in either 1, 2, or 3-digit
mode until the 10+ button is pressed again.
SLEEP TIMER
Use this function to activate (or deactivate) the Sleep Timer
function. When the Sleep Timer function is active the IW-SYS3 will turn itself off automatically after the time period
that is set. The available countdown times are 90, 80, 70, 60, 50, 40, 30, 20, and 10 minutes. This function is handy
when you want to listen to a program when falling asleep.
Activating the Sleep function:
To activate the Sleep Timer, press the Sleep button. When this button is pressed for the rst time, the sleep timer
will be activated and Sleep 90 will be displayed. will ash above the operation display indicating that you are
Numeric Keypad
NUMERIC KEYPAD
H
One dash allows you to enter one digit
Two dashes allows you to enter two digits
Three dashes allows you to enter three digits
SLEEP TIMER
Other manuals for IW-SYS3
3
Table of contents