7
Before using the ice maker, it is strongly recommended that you thoroughly
clean the whole machine.
1. Take out the ice basket.
2. Open the drain plug and dry the water in the water tank.
3. Wipe the water tank with diluted detergent, warm water, and a soft cloth.
4. The outside of the machine should be scrubbed with diluted detergent and
warm water.
5. Dry the inner liner with another piece of soft cloth.
6. Shut down the drain plug.
7. If the machine is not used for an extended amount of time, the water in the
tank should be poured out.
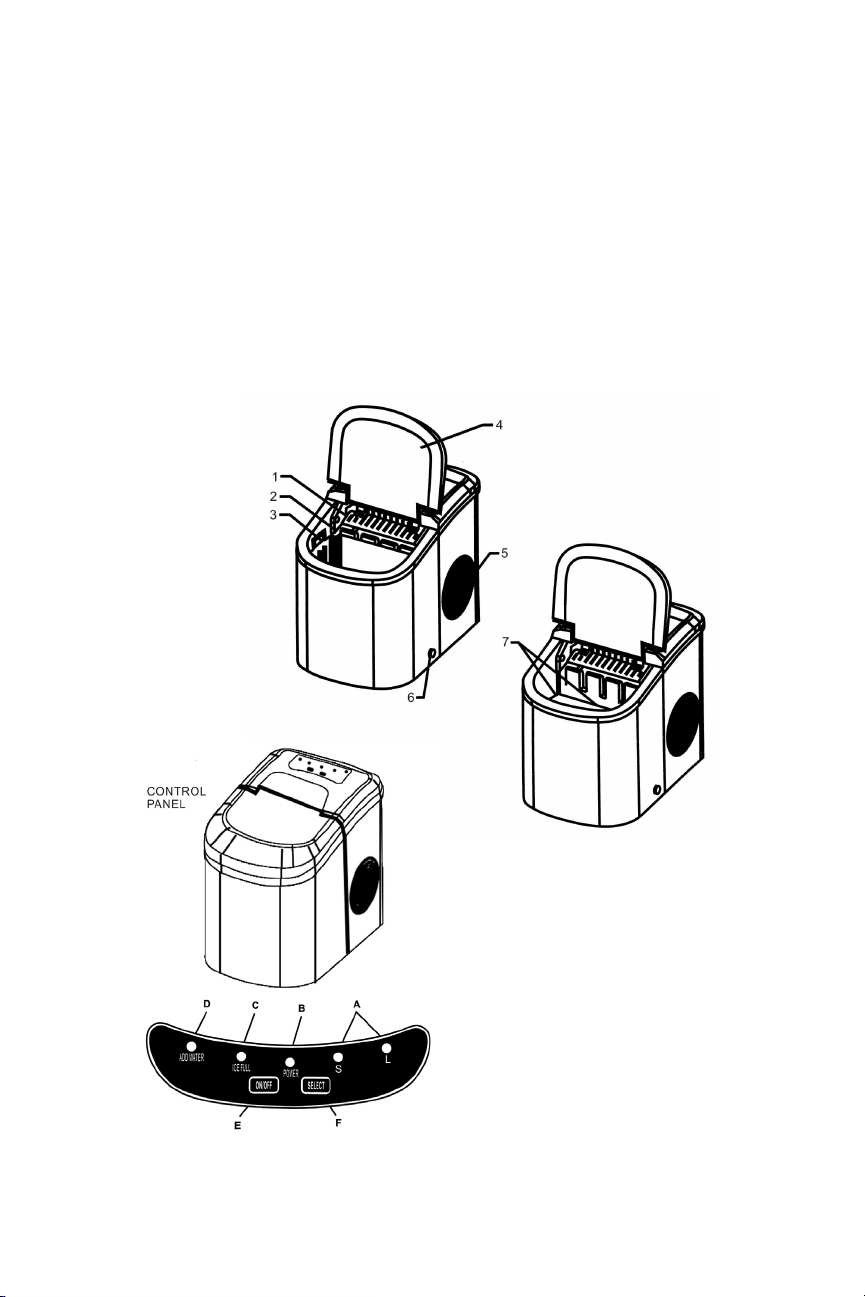
1. Press the “SELECT” key to select the size of the ice. If the room temperature
is lower than 59°F, it is recommended that you choose the small (S) ice to
prevent icing.
2. Open the upper cover, take out the ice basket, and add water to the water
tank. Keep the water level below the highest water level, then put back the
ice basket. Close the upper cover. It is recommended that the water level
should not exceed the bottom of the ice basket.
3. Press the “ON” button on the control panel to start the ice making.
4. Each ice cycle lasts 6 to 13 minutes depending on the size of the ice and
the temperature of the room. The size of the ice is also related to the water
temperature and the temperature of the room.
5. After the ice maker starts, the water level in the water tank should be
checked regularly. If the water pump does not come out of water, the ice
maker will automatically stop, and the “ADD WATER” indicator light will
indicate water shortage. Water should be added to the base, and the “ON”
select key should be pressed to start the ice making process start again.
6. Water should be changed every 24 hours to keep the ice as clean as
possible. If the ice maker is not used for a long time, drain the remaining
water.
7. Suggestion: Use drinking water for better tasting ice.
ICE MAKING MACHINE CLEANING
USING YOUR ICE MAKER