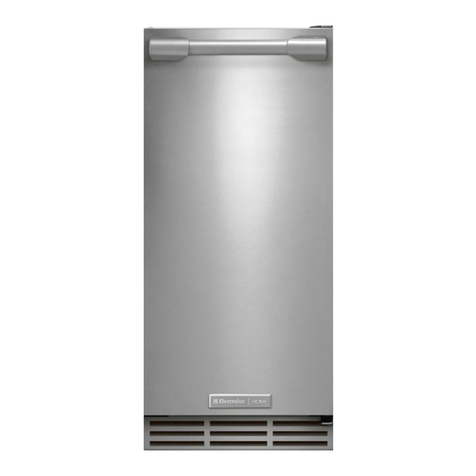
Nostalgia Electrics Coca-Cola CKICEBSC26CR Quick guide

All products are trademarks of Nostalgia Products LLC.
Worldwide design & utility patented or patents pending.
© 2023 Nostalgia Products LLC.
IGLOO® and the Igloo design are trademarks of Igloo Products Corp. All rights reserved.
www.nostalgiaproducts.com
(rev. 10/31/23 MD)
All products are trademarks of Nostalgia Products LLC.
Worldwide design & utility patented or patents pending.
© 2023 Nostalgia Products LLC.
www.nostalgiaproducts.com
(rev. 10/31/23 WL)

All products are trademarks of Nostalgia Products LLC.
Worldwide design & utility patented or patents pending.
© 2023 Nostalgia Products LLC.
www.nostalgiaproducts.com
(rev. 10/31/23 WL)
CKICEBSC26CR
Coca-Cola™ 26 Lb Ice Maker
Fabricador De Hielo Coca-Cola™ De 26 Libras
Machine À Glaçons Coca-Cola™ 26 Lb
Instructions and Recipes
Instrucciones y Recetas
Instructions et Recettes


ENGLISH
2
CONTENTS
SAFETY . . . . . . . . . . . . . . . . . . . . . . . . . . . . . . . . . . . . . . . . . 2
IMPORTANT SAFEGUARDS . . . . . . . . . . . . . . . . . . . . . . . . . . . . . 3
ADDITIONAL IMPORTANT SAFEGUARDS . . . . . . . . . . . . . . . . . . . . 3
INTRODUCTION . . . . . . . . . . . . . . . . . . . . . . . . . . . . . . . . . . . . 4
PARTS & ASSEMBLY . . . . . . . . . . . . . . . . . . . . . . . . . . . . . . . . . . 5
HOW TO OPERATE . . . . . . . . . . . . . . . . . . . . . . . . . . . . . . . . . . 6
HELPFUL TIPS . . . . . . . . . . . . . . . . . . . . . . . . . . . . . . . . . . . . . 7
CLEANING & MAINTENANCE . . . . . . . . . . . . . . . . . . . . . . . . . . . 7
RECIPES . . . . . . . . . . . . . . . . . . . . . . . . . . . . . . . . . . . . . . . . . 9
RETURNS & WARRANTY . . . . . . . . . . . . . . . . . . . . . . . . . . . . . . . 11
SAFETY
Appliance Specications:
110-120 Volts, 60 Hz
120 Watts, 2 Amps
Refrigerant R600a
THIS PRODUCT IS FOR USE IN 120V AC OUTLET ONLY.
Refer to www.nostalgiaproducts.com/user-manuals/ for the most updated manual.
Your safety and the safety of others is very important.
We have provided many important safety messages in this manual and
on your appliance. Always read and obey all safety messages.
This is the safety alert symbol.
This symbol alerts you to potential hazards that can
cause serious injury to you and others.
All safety messages will follow the safety alert symbol.
All safety messages will tell you what the potential hazard is, tell you how to reduce the
chance of injury, and tell you what can happen if the instructions are not followed.

ENGLISH
3
IMPORTANT SAFEGUARDS
A person who has not read and understood all operating and safety instructions
is not qualied to operate this appliance. All users of this appliance must read and
understand this Instruction Manual before operating or cleaning this appliance.
When using electrical appliances, basic safety precautions
should always be followed, including:
1. Read all instructions before operating this appliance.
2. DO NOT TOUCH the hot surfaces. Use handles or knobs.
3. This appliance is NOT A TOY.
4. Unsupervised young children and cognitively challenged
individuals should never operate this appliance.
5. Close supervision is necessary when any appliance is used by or near children.
6. To protect against electrical shock do not immerse cord, plug
or any part of this unit in water or other liquids.
7. Unplug from outlet when not in use, before removing parts and before cleaning.
Allow to cool before putting on or taking o any parts, and before cleaning.
8. DO NOT operate any appliance with a damaged cord or plug, or after the appliance
malfunctions, or if the appliance has been damaged in any manner. Return the
appliance to the nearest repair shop for examination, repair or adjustment.
9. The manufacturer does not recommend the use of accessory attachments other than
what is provided by the manufacturer. Use of attachments may cause injuries.
10. DO NOT use the appliance for other than its intended use.
11. DO NOT use outdoors. FOR HOUSEHOLD USE ONLY.
12. DO NOT place on or near a hot gas or electric burner, or in a heated oven.
13. DO NOT let cord hang over edge of table or counter, or touch hot surfaces.
14. NEVER leave unit unattended while in use or when plugged into an outlet.
15. Extreme caution must be used when moving an appliance containing hot food.
16. Always attach plug to appliance rst, then plug cord in the wall outlet. To
disconnect, turn any control to "o," then remove plug from wall outlet.
ADDITIONAL IMPORTANT SAFEGUARDS
Operating Safety Precautions
1. DO NOT touch the Evaporator while the unit is in use or during
the ice making process. This could cause severe burns.
2. DO NOT clean unit with ammable liquids. The fumes can create a re hazard or explosion.
3. Check Ice Hopper for presence of foreign objects prior to use.
4. DO NOT turn unit upside down while in use, or when lled with ice.
Instructions for the Electrical Cord and Plug
1. This appliance has a 3-prong plug. To reduce the risk of electrical
shock, this plug is intended to t into an outlet only one way.
2. A short power supply cord is provided to reduce the risk resulting
ENGLISH
4
from becoming entangled or tripping over a long cord.
3. If a long detachable power-supply cord or extension cord is used:
• Extension cords can be used if care is exercised in their use.
• The marked electrical rating of the cord or extension cord should
be at least as great as the electrical rating of the appliance.
• When using a longer cord or extension cord, make sure that
the cord does not drape over a countertop or tabletop where
it can be pulled on or tripped over unintentionally.
4. The manufacturer does not recommend using this machine in countries that do not support
120V AC even if a voltage adapter, transformer, or converter is in use.
SAVE THESE INSTRUCTIONS!
INTRODUCTION
Congratulations! You are now the proud owner of the SELFCLEANING ICE MAKER from
Igloo®! This stylish and portable ice maker allows you to make ice accessible virtually
anywhere. With its intuitive, easy-to-use design, you'll be making ice cubes soon after you
plug in your new appliance. Perfect for the kitchen, RVs, club houses, home bars, and more!
Features:
• Makes up to 26 lbs. of ice per day
• Produces 9 ice cubes every 7-15 minutes
• Water tank capacity: 1 quart
• Ice basket capacity: 2 pounds
• Multiple ice cube sizes: small and large
• Control panel with LED indicator lights
• Compact and elegant design
• Transparent lid for easy viewing
• Removable ice basket
• Refrigerant: R600a

ENGLISH
5
PARTS & ASSEMBLY
Before rst use, be sure to remove all interior and exterior packaging, and follow
the steps under CLEANING & MAINTENANCE to properly clean your unit.
CONTROL PANEL WITH LED INDICATOR LIGHTS
Clear Lid
Water Reservoir
Water Drain Plug
LED Control Panel
Ventilation
Add Water Indicator Light
Ice Full Indicator Light
POWER/CLEAN
Function Button
Large Ice Indicator Light
Small Ice Indicator Light

ENGLISH
6
HOW TO OPERATE
BEFORE FIRST USE
1. Follow the steps under CLEANING & MAINTENANCE before using this unit.
2. Place the unit on a at, level surface in a location that is protected from
direct sunlight and other sources of heat (i.e. stove, furnace, radiator). Ensure
there is at least four inches of empty space on all sides of the unit.
3. Allow one hour for the refrigerant uid to settle before plugging
the cord into an electrical outlet for the rst time.
USING YOUR ICE CUBE MAKER
1. Open the Clear Lid to remove the Ice Basket and pour water into the Water
Reservoir. Keep the water level below the MAX level mark. If water levels exceed
the MAX level mark, drain any excess water by removing the Water Drain Plug.
2. After plugging in the power cord, the Small Ice indicator light will
ash. Press the POWER/CLEAN button on the Control Panel.
3. The Large and Small Ice lights will ash alternately. Select the desired size of
the ice cubes by pressing the POWER/CLEAN button when your desired size
is lit. If the room temperature is lower than 60°F (16°C), it is recommended to
select the small-sized ice cubes in order to keep ice from sticking together.
4. Each ice-making cycle lasts 6 to 15 minutes, depending on the size of the
ice cube selected and the ambient temperature of the room. In extremely
hot temperatures, ice-making time may vary considerably.
5. While the ice maker is on, check the water level periodically. If the water pump is unable
to pump water, the unit will stop automatically and the Add Water light will illuminate.
6. If the water level is low, press the POWER button to turn the unit OFF, ll water up to
the MAX level mark and press the POWER button again to turn ON the unit again.
7. The unit automatically stops working when the Ice Basket
is full and the ICE FULL light will illuminate.
8. To ensure a reasonable hygiene level, change the water in the Water Reservoir
every 24 hours. If the unit isn’t in use, drain all water left in the Water Reservoir.
IMPORTANT NOTE: In the event that the power is disconnected during the ice making
cycle or that the LED lights on the Control Panel are blinking, press the POWER button
to stop the ice making cycle. Unplug the unit from the electrical outlet. Allow the
unit to sit for a few minutes to let it warm up and allow ice to fall from the evaporator
ngers. Empty the Water Tray and wait three minutes before restarting the unit.
DO NOT touch the Evaporator while the unit is in use or during the ice making
process. This could cause severe burns.

ENGLISH
7
HELPFUL TIPS
ADD WATER INDICATOR
If the Add Water Indicator comes on, try the following:
• Turn o the unit, add water, and restart the unit.
• There may be too much ice. Turn o the Ice Maker, remove some ice from the Ice Basket.
ICE CUBES STICK TOGETHER
• The ice cycle may be too long. Stop the Ice Maker, then restart it when the ice
cubes melt. Select the smaller sized ice cubes using the SELECT button.
• The water temperature in the Water Reservoir may be too low. Change the water in
the Water Reservoir. The room temperature should be set between 45˚ F - 90˚ F.
ICE MAKER NOT WORKING
If the ice-making cycle seems to be running properly,
but no ice is being made, try the following:
• The ambient temperature or water temperature in Water Reservoir may
be too high. The unit must be in an environment below 90˚ F. Try pouring
colder water (between 45˚ F - 90˚ F) into the Water Reservoir.
• If changing the water or allowing the unit to cool does not work, there may be a
leakage of the refrigerant uid, or a pipe in the cooling system may be blocked.
LED LIGHTS
• If the LED lights on the Control Panel are blinking, there may be a disruption in the
power source. Press the POWER button to stop the ice-making cycle. Let the ice maker
sit for several minutes to let it warm up and allow ice to fall from the evaporator
ngers. Empty the Water Tray and wait three minutes before restarting the unit.
CLEANING & MAINTENANCE
Your AUTOMATIC ICE MAKER is equipped with an automatic
cleaning function to help clean the interior of your unit, including
the water lines. Following these steps will help to maintain
the unit and add to longevity. It is recommended to
follow these cleaning steps on a monthly
basis to ensure optimal cleanliness.
1. Remove the Ice Basket, then drain any leftover water
by unplugging the Water Drain Plug on the bottom
of the unit. Replace the Water Drain Plug.
2. Prepare your cleaning solution.
Common cleaning solutions:
• Vinegar and water (ratio of 1:1)
• Lemon and water (ratio of 1:1)
• Bleach and water (ratio of 1 tsp. bleach : 2 qts. water)
• Commercial ice maker descaling and cleaning solution
3. Plug the unit into an electrical outlet.
4. Press and hold the Power/Clean button for 3 seconds to initiate auto cleaning mode.

ENGLISH
8
5. When the cleaning cycles have completed, drain the interior water by unplugging
the Water Drain Plug on the bottom of the unit. Replace the Water Drain Plug.
6. Clean the remainder of the interior and the exterior of the unit
using warm, soapy water and a non-abrasive towel.
7. Drain the interior of any remaining water by unplugging the Water Drain Plug on the
bottom of the unit, then dry with a non-abrasive towel. Replace the Water Drain Plug.
8. Before storing, keep the Clear Lid open and allow unit to dry completely for 24 hours.
Cleaning the Filter
1. Drain the water reservoir.
2. Remove and clean the lter screen located at the bottom of the reservoir.
3. Clean the area on the bottom of the reservoir where the lter screen
was located by using a kitchen sprayer or was cloth. This will help
remove any additional residue near the water hose/inlet.
Cleaning the Sensors
1. Locate the 2 sensors on the interior walls behind the ice basket.
2. Put a small amount of lemon juice or vinegar on a paper towel and
wipe o both sensors. This will remove any mineral deposits that may
be on the sensors, causing the“ice full”light to come on.

ENGLISH
9
RECIPES
Your AUTOMATIC ICE MAKER can be used to instantly make ice cubes to be for a variety
of beverages. Here are some delicious beverages that you can make at home.
MUDDY WATER
• 1 part cola
• 1 part orange juice
• Ice
Fill ¼ of each glass with ice made with
your AUTOMATIC ICE MAKER.
Pour orange juice until the glass is half full, or to taste.
Pour cola until glass is full.
Stir well.
ROY ROGERS
• 6-8 oz. cola
• ¼ oz. grenadine
• Maraschino cherries
• Ice
Fill glasses with ice from your AUTOMATIC ICE MAKER.
Add in Cola and grenadine.
Stir well.
Add maraschino cherry as garnish.
STRAWBERRY LEMONADE
• 8 large strawberries,
halved
• 1⁄cups white sugar
• 7 cups water
• 2 cups freshly
squeezed lemon juice
• Lemon slices
• Mint leaves
Place strawberries in a blender and top with 2 tablespoons
sugar. Pour 1 cup of water over sugared strawberries.
Blend until strawberry chunks transform into juice.
Combine strawberry juice, 6 cups water, 1 cup sugar and
lemon juice in a large pitcher. Stir until well blended.
Fill glasses with ice from your AUTOMATIC ICE MAKER.
Pour strawberry lemonade into glasses.
Garnish with a lemon slice and mint leaves, if desired.

ENGLISH
10
GINGER BEER MOJITO MOCKTAIL
• 6 oz. ginger beer
• 2 oz. fresh lime juice
• 10 mint leaves
• Fresh lime slices
• Ice
Muddle the mint and lime juice in your glass.
Fill glass ice from your AUTOMATIC ICE MAKER.
Add ginger beer to glass.
Stir thoroughly.
Garnish with additional mint leaves and fresh lime slice.
BLACKBERRY BASIL ICED TEA
• 6 cups water
• 4 bags black tea
• 12 oz. fresh
blackberries
• 8-12 basil leaves
• Liquid sweetener
to taste
Combine water, tea bags, blackberries and basil leaves
in a pitcher. Cover and refrigerate for 12-24 hours.
When ready, remove tea bags and add
liquid sweetener to taste.
Fill tall glass with ice from your AUTOMATIC ICE MAKER.
Add iced tea to glass until full.

ENGLISH
11
RETURNS & WARRANTY
SHOULD YOUR UNIT NOT WORK OR IF DAMAGED WHEN YOU FIRST TAKE IT OUT OF
THE BOX, PLEASE RETURN IT TO THE PLACE OF PURCHASE IMMEDIATELY.
SELF CLEANING ICE MAKER/ CKICEBSC26CR
Should you have any questions, please contact us via email or at the customer service number listed
below between the hours of 9:00 AM and 4:00 PM, Monday through Friday, Central Standard Time.
Distributed by:
Nostalgia Products LLC
1471 Partnership Dr.
Green Bay, WI 54304-5685
Customer Service
Phone: (833) 258-4210
Web: www.nostalgiaproducts.com
Customer Service Inquiry
To submit a Customer Service inquiry, go to www.nostalgiaproducts.com and ll
out the Customer Service Inquiry form and click the Submit button.
A representative will contact you as soon as possible.
Product Warranty Terms
Nostalgia Products LLC (the“Company”) hereby warrants that for a period of one (1) year from the
date of original purchase, this product will be free of defects in material and workmanship under
normal home use, provided that the product is operated and maintained in accordance with the
operating instructions. As the sole and exclusive remedy under this warranty, the Company will
at its discretion either repair or replace the product found to be defective, or issue a refund on the
product during the warranty period. This warranty is only available to the original retail purchaser of
the product from the date of initial retail purchase, and is only valid with the original sales receipt, as
proof of purchase date is required to obtain warranty benets. All warranty claims must be brought
to the attention of the Company within the warranty period and no later than 30 days of the failure
to perform. This warranty does not cover normal wear or damage caused by shipping, mishandling,
misuse, accident, alteration, improper replacement parts, or other than ordinary household use.
You may be required to return the product (with shipping prepaid by you) for inspection and
evaluation. Return shipping costs are not refundable. The Company is not responsible for returns
damaged or lost in transit. Unless otherwise specically permitted by the operating instructions, this
warranty applies to indoor household use only. In order to obtain service under this warranty, please
contact the Company at the telephone number listed above or by lling out the Customer Service
Inquiry Form located at www.nostalgiaproducts.com. Warranty valid only in USA and Canada.
This warranty is in lieu of all other warranties, expressed or implied, including warranties of
merchantability and tness for a particular purpose, which are hereby excluded to the extent
permitted by law. In no event shall the Company be liable for any indirect, incidental, consequential,
or special damages arising out of or in connection with this product or the use thereof. Some
states, provinces or jurisdictions do not permit the exclusion or limitation of incidental or
consequential damages, so the foregoing exclusion or limitation may not apply to you.
This warranty does not apply to re-manufactured merchandise.
Please read the operating instructions carefully. Failure to comply
with the operating instructions will void this warranty.
For more information, visit us online at www.nostalgiaproducts.com.
Like us on Facebook at www.facebook.com/NostalgiaElectrics.
Follow our boards on Pinterest at www.pinterest.com/nostalgiaelctrx.
Tweet along with us on Twitter at www.twitter.com/NostalgiaElctrx.

12
ESPAÑOL
12
SEGURIDAD
Especicaciones del electrodoméstico:
110-120 Volts, 60 Hz
120 Watts, 2 Amps
Refrigerante R600a
ESTE PRODUCTO SÓLO DEBE USARSE CON UN TOMACORRIENTE DE 120V AC.
Visite www.nostalgiaproducts.com/user-manuals/ para ver el manual más actualizado.
CONTENIDO
SEGURIDAD . . . . . . . . . . . . . . . . . . . . . . . . . . . . . . . . . . . . . .12
SALVAGUARDIAS IMPORTANTES. . . . . . . . . . . . . . . . . . . . . . . . . . 13
SALVAGUARDIAS IMPORTANTES ADICIONALES . . . . . . . . . . . . . . . .13
INTRODUCCIÓN . . . . . . . . . . . . . . . . . . . . . . . . . . . . . . . . . . . . 14
PIEZAS Y ENSAMBLE . . . . . . . . . . . . . . . . . . . . . . . . . . . . . . . . .15
CÓMO UTILIZAR . . . . . . . . . . . . . . . . . . . . . . . . . . . . . . . . . . . . 16
CONSEJOS ÚTILES . . . . . . . . . . . . . . . . . . . . . . . . . . . . . . . . . . . 17
LIMPIEZA Y MANTENIMIENTO . . . . . . . . . . . . . . . . . . . . . . . . . . .17
RECETAS . . . . . . . . . . . . . . . . . . . . . . . . . . . . . . . . . . . . . . . . . 18
DEVOLUCIONES Y GARANTÍA. . . . . . . . . . . . . . . . . . . . . . . . . . . . 21
Su seguridad y la de los demás son muy importantes.
Hemos proporcionado numerosos mensajes de seguridad importantes en este manual
y en su electrodoméstico. Siempre lea y obedezca todos los mensajes de seguridad.
Este es el símbolo de alerta de seguridad.
Este símbolo le avisa de los peligros potenciales que
pueden provocar serias lesiones a usted y a otros.
Todos los mensajes de seguridad estarán antecedidos por el símbolo de alerta.
Todos los mensajes de seguridad le dirán de qué peligro potencial se trata, cómo reducir
la posibilidad de lesiones y qué puede ocurrir si no se obedecen las instrucciones.

13
ESPAÑOL
13
SALVAGUARDIAS IMPORTANTES
Una persona que no haya leído y comprendido todas las instrucciones
de uso y seguridad no está calicada para utilizar este aparato. Todos
los usuarios de este dispositivo deben leer y comprender este Manual
de instrucciones antes de utilizar o limpiar este aparato.
Cuando utiliza aparatos eléctricos, siempre se deben seguir algunas
medidas básicas de seguridad que incluyen las siguientes:
1. Lea todas las instrucciones antes de utilizar este aparato.
2. NO TOQUE las supercies calientes. Use agarraderas o mangos.
3. Este aparato NO ES UN JUGUETE.
4. Los niños pequeños sin supervisión y las personas con limitación
cognitiva nunca deben utilizar este aparato.
5. Una supervisión estricta se requiere cuando un aparato se use por niños o cerca de ellos.
6. Como medida de protección contra el riesgo de descarga eléctrica, no sumerja el
cable, los enchufes ni ninguna otra parte de la unidad en agua ni en otros líquidos.
7. Desconéctelo del tomacorriente cuando no esté en uso, antes de
retirar piezas y antes de la limpieza. Déjelo enfriar antes de colocar
o retirar cualquiera de las piezas, y antes de la limpieza.
8. NO utilice ningún aparato con el cable o el enchufe dañados, ni si el aparato
tiene desperfectos o SI se ha dañado de cualquier manera. Devolver el
aparato al taller de reparación más cercano para su reparación o ajuste.
9. El fabricante no recomienda el uso de otros aditamentos o accesorios diferentes a los
proporcionados por el fabricante. El uso de accesorios puede provocar lesiones.
10. NO utilice el aparato para otros usos que no haya sido diseñado.
11. NO utilice el aparato al aire libre. SOLO PARA USO DOMÉSTICO.
12. NO lo coloque sobre o cerca de una hornilla eléctrica o gas caliente, o en un horno caliente.
13. NO permita que el cable cuelgue sobre el borde de la mesa o
del mostrador, ni que toque supercies calientes.
14. NUNCA deje la unidad desatendida mientras esté en uso o
cuando esté enchufada a una toma de corriente.
15. Debe ser extremadamente cuidadoso al mover cualquier aparato con comida caliente.
16. Siempre conecte primero el enchufe al aparato, luego enchufe el cable
a la toma de corriente. Para desconectar, mueva todos los controles
a“apagar” y luego retire el enchufe del tomacorriente.
SALVAGUARDIAS IMPORTANTES ADICIONALES
Precauciones de seguridad operativa
1. NO toque el evaporador mientras la unidad está en uso o durante el proceso
de producción de hielo. Esto podría causar quemaduras graves.
2. Revise el interior del elemento de calefacción que está debajo de la 2. NO limpie la unidad
con líquidos inamables. Los humos pueden crear un riesgo de incendio o explosión.
3. Antes del uso, revise la tolva de hielo para ver si tiene objetos extraños.
4. NO vire la unidad boca abajo mientras esté en uso, o cuando esté llena de hielo.

14
ESPAÑOL
14
Instrucciones para el cable eléctrico y el enchufe
1. El aparato tiene un 3 puntas enchufe. Se diseñó para reducir el riesgo de descarga
eléctrica, dado que entra en un tomacorriente solo en una posición.
2. Se provee un cable de alimentación corto para reducir el riesgo
resultantede enredarse o tropezar con un cable largo.
3. Si se utiliza un cable alargador o un cable de alimentación más largo:
• Unos cables de extensión se pueden utilizar si se tiene cuidado con su uso.
• Las características nominales del grupo de cables o del cable de
extensión deben ser al menos iguales a las del aparato.
• Cuando se utiliza un cable largo o cable de extensión, asegúrese de
que el cable no sobresalga de la encimera ni una mesa ya que se
puede halar o tropezarse con el cable involuntariamente.
4. El fabricante no recomienda el uso de esta máquina en países que no admiten 120V
CA incluso si se está usando un adaptador, transformador o convertidor de voltaje.
¡GUARDE ESTAS INSTRUCCIONES!
INTRODUCCIÓN
¡Felicitaciones! ¡Usted es ahora el orgulloso propietario de la MÁQUINA DE HIELO
PORTÁTIL ROSA de Igloo®! Esta máquina de hielo, elegante y portátil, le posibilita
disponer de hielo prácticamente en cualquier lugar. Gracias a su diseño intuitivo y fácil
de usar, estará haciendo cubitos de hielo poco después de conectar su aparato nuevo.
¡Ideal para la cocina, casas autoportantes, salones de clubes, bares del hogar y más!
Características:
• Prepara hasta 26 lb. de hielo por día
• Produce 9 cubos de hielo cada 7-15 minutos
• Capacidad del tanque de agua: 1 cuarto de galón
• Capacidad de la canasta de hielo: 2 libras
• Tamaños múltiples de cubos de hielo: pequeños y grandes
• Panel de control con luces indicadoras LED
• Diseño compacto y elegante
• Tapa transparente para una visión sencilla
• Canasta de hielo removible
• Incluye cuchara para hielo
• Refrigerante: R600a

15
ESPAÑOL
15
PIEZAS Y ENSAMBLAJE
Retire todos los embalajes interiores y exteriores. Siga todos los
pasos de LIMPIEZA Y MANTENIMIENTO antes de usar.
PANEL DE CONTROL CON LUCES INDICADORAS LED
tapa transparente
Reserva de agua
Tapón de drenaje
de agua
Panel de control LED
Ventilación
Agregar luz indicadora
de agua
Luz indicadora
de hielo lleno
Botón ENCENDIDO
/ LIMPIAR
Luz indicadora de
hielo pequeña
Luz indicadora de
hielo grande

16
ESPAÑOL
16
CÓMO FUNCIONA
ANTES DEL PRIMER USO
1. Siga todos los pasos de LIMPIEZA Y MANTENIMIENTO antes de usar.
2. Coloque la unidad sobre una supercie plana. Evite la luz directa del
sol y otras fuentes de calor. Asegúrese de que haya al menos cuatro
pulgadas de espacio vacío en todos los lados de la unidad.
3. Deje pasar una hora para que el líquido refrigerante se asiente antes de
enchufar el cable en una toma de corriente eléctrica por primera vez.
USO DE LA MÁQUINA AUTOMÁTICA PARA PREPARAR HIELO
1. Abra la tapa, retire la cesta de hielo y vierta agua en el depósito de agua.
Mantenga el nivel de agua por debajo de la marca de nivel.
2. Pulse el botón de corriente Encendido/Apagado en el Panel
de Control para iniciar el ciclo de hacer hielo.
3. Elija el tamaño deseado de los cubitos de hielo al pulsar el Botón ENCENDIDO /
LIMPIAR. Si la temperatura ambiente es inferior a 16°C (60 °F), se recomienda que elija
cubitos de hielo pequeños o medianos para evitar que se pegue junto el hielo.
4. El hielo ciclo de hacer hielo dura de 6 a 15 minutos, según el tamaño de la
selección del cubito de hielo y la temperatura ambiente. A temperaturas muy
calientes, el tiempo de hacer hielo puede variar considerablemente.
5. Mientras que la máquina de hielo esté encendida, verique el nivel de agua periódicamente.
Si la bomba de agua no puede inyectar agua, la MÁQUINA DE HIELO AUTOMÁTICA
se detendrá automáticamente, y la luz indicadora de Agregar agua se encenderá.
6. Pulse el botón de corriente Encendido/Apagado para apagar la unidad, llénela de agua
hasta la marca de nivel y pulse el botón de corriente de nuevo para encenderla otra vez.
7. La MÁQUINA DE HIELO AUTOMÁTICA dejará de funcionar automáticamente
cuando la cesta de hielo esté llena y se encienda la luz indicadora del hielo.
8. Cambie el agua en el depósito de agua cada 24 horas, a n de garantizar un nivel de
higiene razonable. Si la unidad no está en uso, drene toda el agua en el depósito.
NOTA IMPORTANTE: En caso de que desactive la corriente en la MÁQUINA DE HIELO
AUTOMÁTICA durante el ciclo de hacer hielo o cuando las luces LED en el Panel de
control estén destellando, pulse el botón de corriente Encendido/Apagado para
detener el ciclo de hacer hielo. Desconecte la unidad de la fuente de alimentación.
Deje que la MÁQUINA DE HIELO AUTOMÁTICA se asiente durante unos minutos
para que se caliente y permita que caiga el hielo de los dedos del evaporador. Vacíe
la bandeja de agua y espere tres minutos antes de volver a arrancar la unidad.
NO toque el evaporador mientras la unidad esté en uso o durante el proceso de
hacer hielo. Esto podría causar quemaduras graves.

17
ESPAÑOL
17
CONSEJOS ÚTILES
INDICADOR DE AGREGAR AGUA
Si el indicador de Agregar agua se enciende, intente lo siguiente:
• Apague la maquina de hielo, agregue agua y pulse el botón
de encendido nuevamente para reiniciar la unidad.
• Puede que haya mucho hielo. Apague la máquina de
hielo, retire algo de hielo de la cesta de hielo.
CUBITOS DE HIELO PEGADOS
• El hielo ciclo puede ser muy largo. Detenga la máquina de hielo
y reiníciela cuando se derritan los cubitos. Elija cubitos de hielo
de tamaño pequeño con el botón Tamaño del hielo.
• La temperatura del agua en el depósito de agua puede ser muy baja. Cambiar el
agua en el depósito de agua. La temperatura debe estar entre 45° F - 90° F.
LA MÁQUINA DE HIELO NO FUNCIONA
Si el ciclo de hacer hielo parece funcionar adecuadamente,
pero no hay hielo, intente lo siguiente:
• La temperatura ambiente o temperatura del agua en la reserva de agua puede
ser muy alta. La máquina de hielo debe estar en un ambiente inferior a 90° F.
Pruebe vertiendo agua fría (entre 45° F - 90° F) en el depósito de agua.
• Si cambiar el agua o dejar que se enfríe la máquina de hielo no
funciona, es posible que haya una fuga de uido refrigerante o un
tubo en el sistema de enfriamiento puede estar bloqueado. \
LUCES LED
• Si las luces LED en el Panel de control destellan, es posible que haya una interrupción
en la fuente de alimentación. Pulse el botón de corriente Encendido/Apagado para
detener el ciclo de hacer hielo. Deje que la máquina de hielo se asiente durante unos
minutos para que se caliente y permita que caiga el hielo de los dedos del evaporador.
Vacíe la bandeja de agua y espere tres minutos antes de volver a arrancar la unidad.

18
ESPAÑOL
18
LIMPIEZA Y MANTENIMIENTO
Su MÁQUINA AUTOMÁTICA PARA HACER HIELO está equipada
con una función de limpieza automática para ayudar a limpiar el
interior de su unidad, que incluye las líneas de agua. Seguir estos
pasos ayudará a mantener la unidad por un largo período.
1. Retire la cesta de hielo, drene después cualquier agua
restante quitando el tapónde drenaje de agua en el fondo
de la unidad. Vuelva a colocar el tapón de drenaje de agua.
2. Prepare su solución de limpieza.
Soluciones de limpieza comunes:
• Vinagre y agua (relación de 1:1)
• Limón y agua (relación de 1:1)
• Lejía y agua (relación de 1 cucharadita de lejía : 2 cuartos de agua)
• Solución comercial desincrustante y limpiadora para máquinas de hielo
3. Asegúrese de que la unidad está conectada y que la luz indicadora de Potencia
no está iluminada. Añada la solución limpiadora al depósito de agua.
4. Presione el botón SELECCIONAR hasta que se ilumine la luz indicadora de
LIMPIEZA. La unidad ciclará automáticamente la solución de limpieza 5 veces.
5. Cuando se hayan completado los ciclos de limpieza, drene el agua
interior quitando el tapón de drenaje de agua en el fondo de la
unidad. Vuelva a colocar el tapón de drenaje de agua.
6. Limpie el resto del interior y el exterior de la unidad con
agua jabonosa tibia y una toallita no abrasiva.
7. Drene de cualquier agua restante el interior quitando el tapón de drenaje de
agua en el fondo de la unidad. Vuelva a colocar el tapón de drenaje de agua.
8. Antes de guardar, mantenga abierta la tapa transparente y deje
secar completamente la unidad durante 24 horas.
Limpieza del ltro
1. Drene el depósito de agua.
2. Retire y limpie la pantalla del ltro ubicada en la parte inferior del depósito.
3. Limpie el área en la parte inferior del depósito donde estaba ubicada la malla
del ltro usando un rociador de cocina o un trapo. Esto ayudará a eliminar
cualquier residuo adicional cerca de la entrada/manguera de agua.
Limpieza de los sensores
1. Ubique los 2 sensores en las paredes interiores detrás de la canasta de hielo.
2. Ponga una pequeña cantidad de jugo de limón o vinagre en una toalla de papel
y limpie ambos sensores. Esto eliminará cualquier depósito mineral que pueda
haber en los sensores, lo que hará que se encienda la luz de "hielo lleno".
Table of contents
Languages:
Other Nostalgia Electrics Ice Maker manuals

Nostalgia Electrics
Nostalgia Electrics RSM702COKE Quick guide

Nostalgia Electrics
Nostalgia Electrics ICE SHOT DISPENSER User manual

Nostalgia Electrics
Nostalgia Electrics Nostalgia ICMWH Quick guide

Nostalgia Electrics
Nostalgia Electrics RSM850 Quick guide

Nostalgia Electrics
Nostalgia Electrics Igloo ICEBDS33SS Quick guide

Nostalgia Electrics
Nostalgia Electrics Coca-Cola RISM900COKE Quick guide