Olive SYMPHONY User manual

Userʼs Guide.
live better.
®
Olive Music center.

I
MPORTANT SAFETY INSTRUCTIONS
CAUTION: READ THIS USER MANUAL BEFORE OPERATING YOUR UNIT.
1. To assure the fi nest performance, please read this manual carefully.
Keep it in a safe place for future reference.
2. Your Olive music center is designed for recording and playing back
encoded digital audio signals and for the burning of audio CDs. Any
other usage is explicitly excluded.
3. Install this unit in a cool, dry and clean place – away from windows,
heat sources, sources of excessive vibration, dust, moisture and cold,
which could damage its components. Avoid sources of humming
(transformers, motors). To prevent fi re or electrical shock, do not ex-
pose the unit to rain or water.
4. Water and Moisture - Do not use this product near water - for
example near a bathtub, wash bowl, kitchen sink, or laundry tub; in
a wet basement; or near a swimming pool; and the like. Avoid
sudden temperature changes. Condensation water may be created
inside the device whilst moving it from a cold to a warm location or
using it in a moist room. The unit may no longer work properly.
Should the situation arise, remove CD, CD-R or CD-RW from the unit,
switch it off and wait at least an hour until the moisture evaporates.
Caution: This device is not equipped with a moisture sensor.
5. Do not place this product on an unstable cart, stand, tripod, bracket,
or table. The product may fall, causing serious injury to a child or
adult, and serious damage to the product. Use only with a
cart, stand, tripod, bracket or table recommended by the
manufacturer, or sold with the product. Any mounting of the
product should follow the manufacturerʼs instructions and should use
a mounting accessory recommended by the manufacturer.
6. For your own safety do not attempt to open the case of the Olive
music center, or disassemble it. You run the risk of electric shock and
voiding the limited warranty. No user-serviceable parts are inside.
Contact your dealer if something drops into the case.
7. Do not use force on switches, controls or connection wires. When
moving the unit, fi rst disconnect the power
plug and the wires
connected to other equipment. Never pull the wires themselves, only
the plugs.
8. Do not attempt to clean the unit with aerosol sprays, chemical
solvents, alcohol, or abrasives, or to remove dust with air pressure;
this might damage the fi nish or affect the performance. Use a clean,
soft and dry cloth. Unplug the product from the wall outlet before
cleaning.
9. Be sure to read the “HELP” section regarding common operating
errors before concluding that the unit is faulty.
10. Before plugging your unit into the AC main supply, make sure that
the voltage indicated at the back of the unit complies with the local
main voltage.
11. When planning not to use this unit for long periods of time (i.e.
vacation, etc.), disconnect the AC power plug from the wall outlet.
Doing so, always grab the plug, never the cable itself.
12. To prevent lightning damage, disconnect the AC power plug when
there is an electrical storm.
13. This unit is not to be disconnected from the AC power source if it is in
standby mode. Doing so might damage your Olive music center.
14. Never force a connector into a port. If the connector and port do
not join with reasonable ease, they probably donʼt match. Make
sure that the connector matches the port and that you have posi-
tioned the connector correctly in relation to the port.
15. Environmental notice: Batteries – even those containing no heavy
metal – may not be disposed of in household waste. Used batteries
must be disposed of properly in appropriate waste sites according
to local environmental regulations.
16. Heed Warnings - All warnings on the product and in the operating
instructions should be adhered to.
17. Attachments - Do not use attachments not recommended by the
product manufacturer as they may cause hazards.

18. Ventilation - Slots and openings in the cabinet are provided for
ventilation and to ensure reliable operation of the product and to
protect it
from overheating. Do not block any ventilation openings.
The openings should never be blocked by placing the product on a
bed, sofa, rug or other similar surface. This product should not be
placed in a built-in installation such as a bookcase or rack mount.
19. Grounding or Polarization - If this product is equipped with a
polarized alternating current line plug (a plug having one blade
wider than the other), it will fi t into the outlet only one way. This
is a safety feature. If you are unable to insert the plug fully into the
outlet, try reversing the plug. If the plug does not fi t into the
outlet, contact your electrician to replace your obsolete outlet. Do
not defeat the safety purpose of the polarized plug. If this product
is equipped with a three-wire grounding type plug, a plug having a
third (grounding) pin, it will only work in a grounding type power
outlet. This is a safety feature. If you are unable to insert the plug
into the outlet, contact your electrician to replace your obsolete out
let. Do not defeat the safety purpose of the grounding type plug.
20. Power Cord Protection - Power-supply cords should be protected
from being walked on or pinched particularly at plugs, convenience
receptacles, and the point where they exit from the product.
21. Overloading - Do not overload wall outlets, extension cords or
integral convenience receptacles as this can result in a risk of fi re or
electric shock.
22. Object and Liquid entry - Never push objects of any kind into this
product through openings as they may touch dangerous voltage
points or short-out parts that could result in a fi re or electric shock.
Never spill liquid of any kind on the product.
23. Damage Requiring Service - Refer all servicing to qualifi ed service
personnel. Servicing is required when the apparatus has been
damaged in any way, such as power-supply cord or plug is
damaged, liquid has been spilled or objects have fallen into the
apparatus, the apparatus has been exposed to rain or moisture,
does not operate normally, or has been dropped.
24. Replacement Parts - When replacement parts are required, be sure
the service technician has used replacement parts specifi ed by the
manufacturer or have the same characteristics as the original part.
Unauthorized substitutions may result in fi re, electric shock, or other
hazards.
25. Safety Check - Upon completion of any service or repairs to this
product, ask the service technician to perform safety checks to
determine that the product is in proper operating condition.
26. Heat - Do not install near any heat source such as radiators, heat
registers, stores, or other apparatus (including amplifi ers) that
produce heat.
The manufacturer of this device shall not be liable for damage or loss of data
including but not limited to music recorded to storage devices. It is the
customerʼs responsibility to maintain the original media and/or appropriate
backup copies within the specifi c rights of the mediaʼs copyright holder.
FCC APPROVAL
CAUTION: This product satisfi es FCC regulations when shielded cables and
connectors are used to connect the unit to other equipment. To prevent elec-
tromagnetic interference with electric appliances such as radios and televi-
sions, use shielded cables and connectors for connections.
FCC RADIATION EXPOSURE STATEMENT: This equipment complies with FCC
radiation exposure limits set forth for an uncontrolled environment. This equip-
ment should be installed and operated with minimum distance of 8 inch be-
tween the radiator and your body. This transmitter must not be co-located or
operating in conjunction with any other antenna or transmitter.
NOTE: This equipment has been tested and found to comply with the limits
for a Class B digital device, pursuant to Subpart J, Part 15 of the FCC rules.
These limits are designed to provide reasonable protection against harmful
interference in a residential installation.
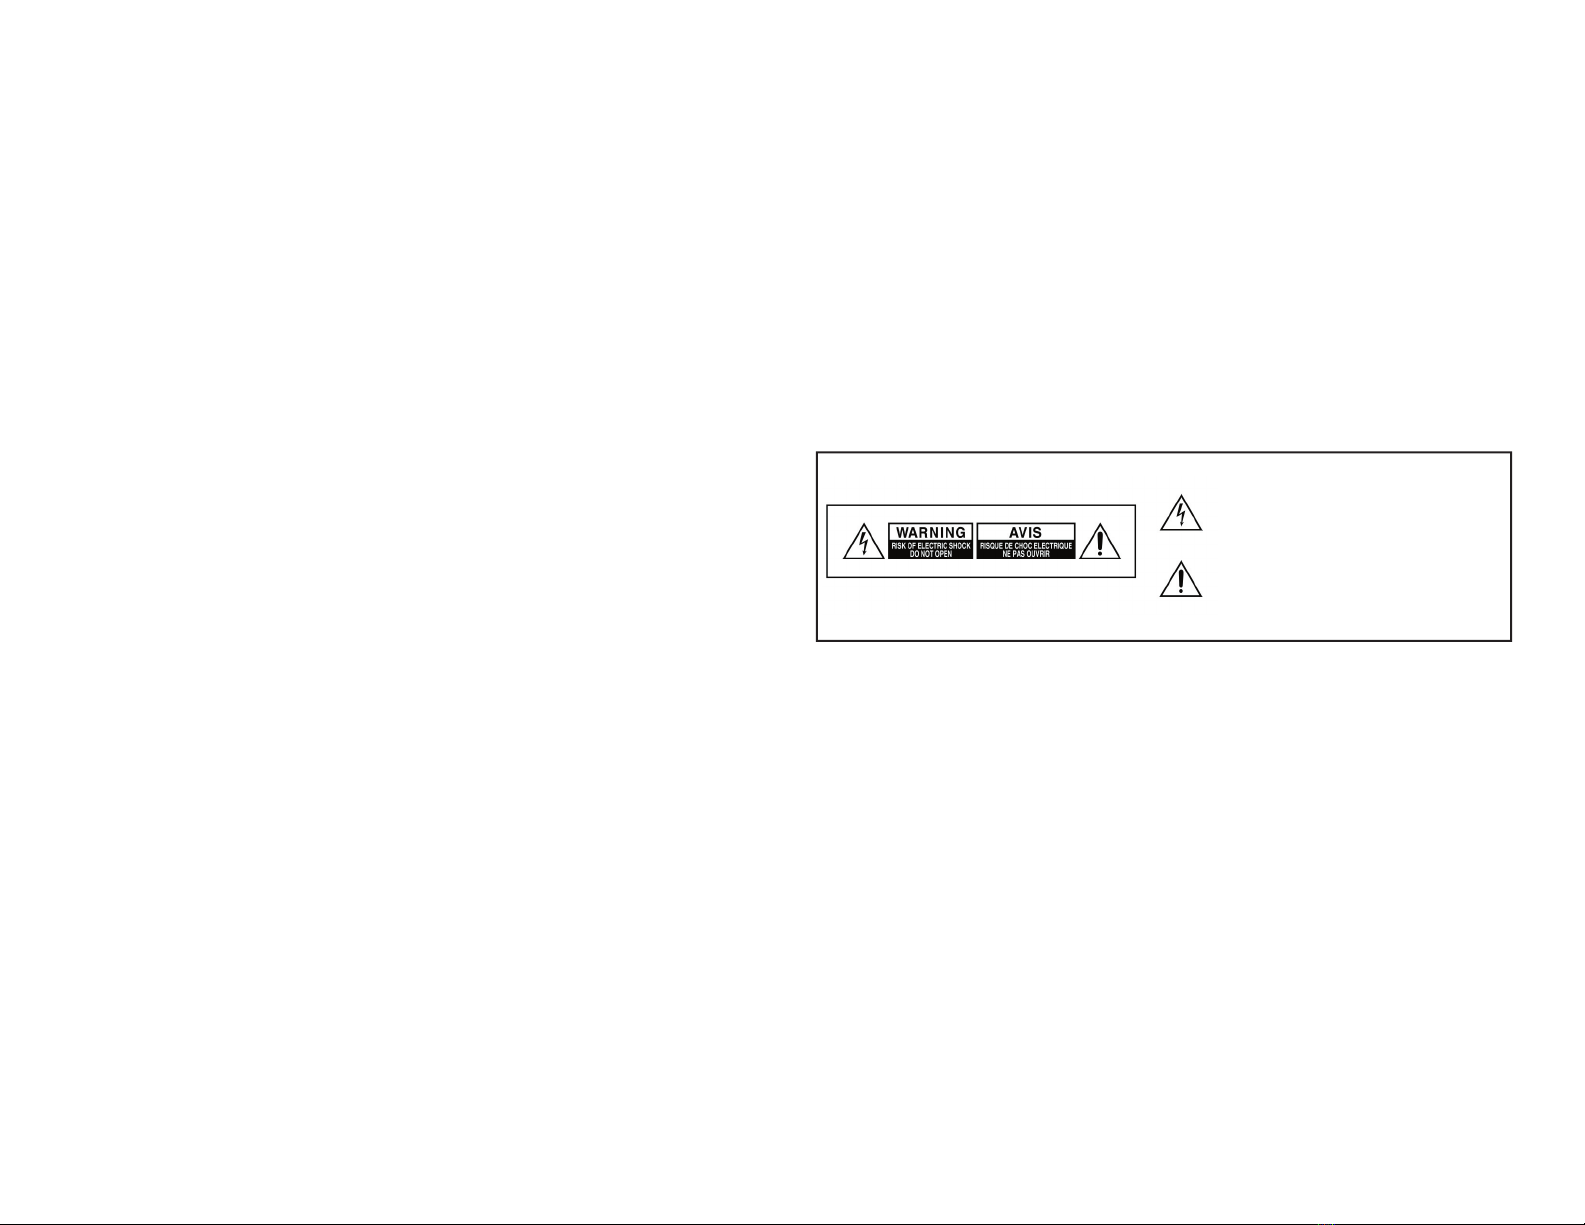
The lightning fl ash with arrowhead symbol, with
in an
equilateral triangle, is intended to alert the user to the
presence of uninsulated dangerous voltage within the
products enclosure th
a
t may be of suffi cient magnitude to
constitute a risk of e
lectric shock to persons.
T
he exclamati
on point within an equilateral triangle is
intended to alert the user to the presence of important
operating and mainte nance (servicing) instructions in
the literatur
e accompanying the appliance.

This equipment generates, uses, and can radiate radio frequency energy and,
if not installed and used in accordance with the instructions, may cause harm-
ful interference to radio communications. However, there is no guarantee
that interference will not occur in a particular installation. If this equipment
does cause harmful interference to radio or television reception, which can be
determined by turning the equipment off and on, the user is encouraged to try
to correct the interference by one or more of the following measures:
• Reorient or relocate the receiving antenna.
• Increase the separation between the equipment and receiver.
• Connect the equipment into an outlet on a circuit different from that to
which the receiver is connected.
• Consult the dealer or an experienced radio/TV technician for help.
STATEMENT REQUIRED BY 15.19 AND RSS210
Changes or modifi cations may cause this unit to fail to comply with Part 15 of
the FCC Rules and may void the userʼs authority to operate the equipment.
This device complies with Part 15 of the FCC Rules and with RSS-210 of Indus-
try Canada.
Operation is subject to the following two conditions:
•
this device my not cause harmful interference, and
•
this device must accept any interference received, including interference
that may cause undesired operation.
CAUTION
• Use of controls or adjustments or performance of procedures other than
those specifi ed herein may result in hazardous radiation exposure.
• The use of optical instruments with this product will increase eye hazard.
In formation to User Alteration or modifi cations carried out without ap-
propriate authorization may invalidate the userʼs right to operate the
equipment.
LASER SAFETY: This unit employs a LASER. Only a qualifi ed person should
remove the cover or service the device, due to possible eye injury.
“CAUTION - USE OF CONTROLS OR ADJUSTMENTS OR PERFORMANCE
OF PROCEDURE OTHER THAN THOSE SPECIFIED HEREIN MAY RESULT IN
HAZARDOUS RADIATION EXPOSURE.”
CD handling Precautions:
• Handle discs carefully so as not to damage or scratch the front side.
Always keep the disc surface clean.
• Do not use a disc with a special shape
• For best performance when recording from a CD try to maintain a
temperature of 95°F or less in the room where the Music Server is located.
MANUAL DISCLAIMERS
At the time of printing, the screen shot images in this manual matched the inter-
face screens. However, since the music server has the capability of download-
ing software updates and enhancements on a regular basis, the resulting
screen updates may no longer match the images in this manual. Check the
Olive website for more information on software updates.
COPYRIGHT NOTICE
This equipment must not be used for unauthorized duplication of CDs or any
other works protected by copyright. No license to infringe copyright is grant-
ed by the sale of this equipment. Recording and playback of some material
may require permission.
For further information refer to the following:
• Copyright Act 1956
• Dramatic and Musical Performers Act 1958
• Performers Protection Acts 1963, and 1972
• Any subsequent statutory enactments and orders.
TRADEMARKS & SERVICE MARKS
The Olive logo is a trademark of Olive Media Products, Inc. Other product
names mentioned herein are used for identifi cation purposes only and may be
trademarks of their respective companies.
UPnP enabled by TwonkyVision, www.twonkyvision.com
MPEG Layer-3 audio coding technology licensed from
Fraunhofer IIS and Thomson.
UPnP enabled by TwonkyVision, www.twonkyvision.com
Music recognition technology and related data are provided by FreeDB. For
more information visit www. freedb.org.

LPGL LIBRARY WRITTEN OFFER
This product contains Linux 2.4.26, that is made available under the GNU
GPL license version 2 (hereafter called “the Program”).
Olive Media Products, Inc. hereby offers to deliver or make available,
upon request, for a charge no more than the cost of physically performing
source distribution, a complete machine-readable copy of the correspond-
ing source code of the Program on a medium customarily used for software
interchange.
Please contact: Olive Media Products, Inc.
555 Howard Street
San Francisco, CA 94105
USA
This offer is valid for a period of three years after the date of purchase of this
product.
GPL PACKAGE WRITTEN OFFER
This product contains Linux 2.4.26, that is made available under the GNU
GPL license version 2 (hereafter called “the Program”).
Olive Media Products, Inc.
hereby offers to deliver or make available,
upon request, for a charge no more than the cost of physically performing
source distribution, a complete machine-readable copy of the correspond-
ing source code of the Program on a medium customarily used for software
interchange.
Please contact: Olive Media Products, Inc.
555 Howard Street
San Francisco, CA 94105
USA
This offer is valid for a period of three years after the date of purchase of this
product.
WARRANTY
Olive Media Products, Inc. (“Olive”) warrants this hardware product against
defects in materials and workmanship for a period of one (1) year from the
date of original retail purchase. If a defect exists, Olive will, at its option:
(1) Repair the product at no charge, using new or refurbished replacement
parts, or
(2) Exchange the product with a product that is new or which has been
manufactured from new or serviceable used parts and is at least
functionally equivalent to the original product.
A Replacement product assumes the remaining warranty of the original
product, or 90 days, whichever provides greater coverage. When a
product or part is exchanged, any replacement item becomes your property
and the replaced item becomes Oliveʼs property.
Exclusions and Limitations
Olive is not liable for any damage to or loss of any programs, data, or other
information stored on any media not covered by this warranty. Recovery
and reinstallation of system and application software and user data are not
covered under this Olive Limited Hardware Warranty. This warranty does
not apply: (a) to damage caused by accident, abuse, misuse, misapplica-
tion, or non-Olive products; (b) to damage caused by service (including
upgrades and expansions) performed by anyone who is not a Olive Autho-
rized Service Provider.
THIS WARRANTY AND REMEDIES SET FORTH ABOVE ARE EXCLUSIVE
AND IN LIEU OF ALL OTHER WARRANTIES, REMEDIES AND CONDI-
TIONS, WHETHER ORAL OR WRITTEN, EXPRESS OR IMPLIED. OLIVE
SPECIFICALLY DISCLAIMS ANY AND ALL IMPLIED WARRANTIES, INCLUD-
ING, WITHOUT LIMITATION,WARRANTIES OF MERCHANTABILITY AND
FITNESS FOR A PARTICULAR PURPOSE. IF OLIVE CANNOT LAWFULLY
DISCLAIM IMPLIED WARRANTIES UNDER THIS LIMITED WARRANTY, ALL
SUCH WARRANTIES, INCLUDING WARRANTIES OF MERCHANTABILITY
AND FITNESS FOR A PARTICULAR PURPOSE ARE LIMITED IN DURATION
TO THE DURATION OF THIS WARRANTY.

CONDITIONS, WHETHER ORAL OR WRITTEN, EXPRESS OR IMPLIED. OL-
IVE SPECIFICALLY DISCLAIMS ANY AND ALL IMPLIED WARRANTIES, IN-
CLUDING, WITHOUT LIMITATION,WARRANTIES OF MERCHANTABILITY
AND FITNESS FOR A PARTICULAR PURPOSE. IF OLIVE CANNOT LAWFULLY
DISCLAIM IMPLIED WARRANTIES UNDER THIS LIMITED WARRANTY, ALL
SUCH WARRANTIES, INCLUDING WARRANTIES OF MERCHANTABILITY
AND FITNESS FOR A PARTICULAR PURPOSE ARE LIMITED IN DURATION
TO THE DURATION OF THIS WARRANTY.
OLIVE IS NOT RESPONSIBLE FOR DIRECT, SPECIAL, INCIDENTAL OR
CON-
SEQUENTIAL DAMAGES RESULTING FROM ANY BREACH OF WARRANTY
OR CONDITION, OR UNDER ANY OTHER LEGAL THEORY, INCLUDING
BUT NOT LIMITED TO LOST PROFITS, DOWNTIME, GOODWILL, DAMAGE
TO OR REPLACEMENT OF EQUIPMENT AND PROPERTY, ANY COSTS
OF
RECOVERING, REPROGRAMMING, OR REPRODUCING ANY PROGRAM
OR DATA STORED IN OR USED WITH OLIVE PRODUCTS, AND ANY FAIL-
URE TO MAINTAIN THE CONFIDENTIALITY OF DATA STORED ON THE
PRODUCT. OLIVE
SPECIFICALLY DOES NOT REPRESENT THAT IT WILL BE
ABLE TO REPAIR ANY PRODUCT UNDER THIS WARRANTY OR MAKE A
PRODUCT EXCHANGE WITHOUT RISK TO OR LOSS OF PROGRAMS OR
DATA.
Some states and provinces do not allow the exclusion or limitation of
incidental or consequential damages or exclusions or limitation on the
duration of implied warranties or conditions, so the above limitations or
exclusions may not apply. This warranty gives you specifi c legal rights, and
you may also have other rights that vary by state or province.


USER MANUAL
Both the product describe
d in this user manual and the documentation
are
protected by copyright law. Copyright remains with the author. Software
and documentation may not be copied, reproduced, translated or distribut-
ed in any form, not even in part, without prior written consent by the copy-
right owner.
The authors decline any liability with regard to the software described
herein. They do not make any warranties for the correctness of the con
tents
of this documentation, nor are they liable for any direct or indirect damages
which may arise from the use of, or the inability to use, either the software
or the accompanying documentation, even if the possibility of such damages
m
ay have been brought to their attention.
The authors do not assume responsibility for any bugs or defects in the soft-
ware. This restriction of liability extends also to their distributors and retail-
ers.
Trademarks and registered trademarks are acknowledged. They remain the
exclusive property of their owners. Absence of such an identifi cation does
not constitute a breach of trademark protection.
1st edition Olive Media Products Inc.
©
September 2005 Olive 555 Howard Street
Email: [email protected] San Francisco, CA 94105
http://www.olive.us Tel.: +1 415.908.3870
Fax: +1 415.908.3932
SUPP
ORT
Should yo
u need some help with your music center, please contact Olive
Media Products
as follows:
Hotline: +1 415.908.3870 (Monday – Friday: 8am - 5pm, Pacifi c
Standard Time)

CONTENTS
1 INTRODUCTION
1.1 About this user manual 3
1.2 What is a music center? 3
1.3 First steps 3
1.3.1 Checking parts list and finding a place 3
1.3.2 Connecting 3
1.3.3 Getting started 3
1.3.4 Trying a music CD 4
1.4 The operating keys 4
1.4.1 On/Off (1) 4
1.4.2 CD slot (2) 4
1.4.3 Control buttons (3) to (6) 4
1.4.4 Record (7) 5
1.4.5 Eject CD (8) 5
1.4.6 Display (9) 5
1.4.7 Function keys (10) 5
1.4.8 Turn&Select wheel (11) 5
1.5 The remote control 6
1.5.1 Keypad (30) 6
1.5.2 Menu (31) 6
1.5.3 Mute (32) 6
1.5.4 Navigation (33) 6
1.5.5 Volume (34) 6
1.5.6 Brightness (35) 6
1.5.7 Additional function keys (36) 6
2 THE BASICS
2.1 Main menu 7
2.1.1 Audio CD 7
2.1.2 Artists 7
2.1.3 Albums 7
2.1.4 Songs 8
2.1.5 Genres 8
2.1.6 Playlists 8
2.1.7 Searchlists (Smart playlists) 8
2.1.8 Analog recording 9
2.1.9 Settings 9
2.1.10 Info 9
2.1.11 Music server 9
2.1.12 Internet Radio 9
2.1.13 Import 9
2.2 Playing a music CD 10
2.3 Importing a music CD 10
2.4 Playing songs 10
2.5 Copying a music CD 11
2.6 Burning a music CD 11
2.7 Header icons 11
3 ADVANCED FUNCTIONS
3.1 Playlists 12
3.1.1 Create a new playlist 12
3.1.2 Renaming or deleting an existing playlist 13
3.1.3 Playback of a playlist 13
3.2 Searchlists (Smart playlists) 13
3.2.1 Create a new searchlist 13
3.2.2 Edit an existing searchlist 15
3.2.3 Playback of a searchlist 15
3.3 Meta data 15
3.3.1 Editing meta data 15
3.4 Digitizing sounds of vinyl records and
analog music tapes 16
3.4.1 Connecting an input device 17
3.4.2 Creating a new recording 17
3.4.3 Adjusting the record level 17
3.4.4 Start the recording 17
3.4.5 Editing the recorded file 18
3.4.6 Importing the tracks 19
3.5 Internet Radio 20
3.5.1 Custom... 20
3.5.2 Top 100... 20
3.5.3 Predefined stations 20
3.5.4 Receiving a radio broadcast 21
3.6 Connecting an MP3 player 21
3.7 Backup your music collection 22
4 SETTINGS 23
4.1 Language 23
4.2 Date & Time 23
4.3 Play mode 23
4.3.1 Dynamics compression 24
4.4 Appearance 25
4.5 Import from CD 25
4.6 Analog recording 26
4.7 Burning 27
4.8 Network 27
4.9 Services 27
4.10 CD database 27
4.11 Device name 28
4.12 Factory settings 28
4.13 Recovery 28
5 NETWORKING
5.1 The center of your music 29
5.2 A member of your home network 30
5.3 Your music center and iTunes 30
5.4 Your music center and UPnP/AV
satellites 31
6 USING A WEB BROWSER FOR
MANAGING YOUR MUSIC CENTER
7 ADVANCED NETWORKING
7.1 Ports 34
7.2 Network modes 34
7.3 IP addressing 35
7.4 Network connection 35
7.5 Web Proxy 35

CONTENTS
7.6 WLAN 35
7.7 Copying music from a PC to your
music center 36
7.8 Copying music from your music
center to a PC 37
8 HELP!
8.1 “My music center is dead...” 37
8.2 Recovery CD 37
8.3 Software update 38
8.3.1 Software update via Internet 38
8.3.2 Software update using a CD 38
8.4 Useful key combinations 38
8.5 Overview of all menu options 39
8.6 Frequently Asked Questions 40
9 TECHNICAL DATA

1 INTRODUCTION
1.1 About this user manual
This manual applies for both music centers, the Symphony and the Musica.
Since the software of your music center is maintained and updated conti-
nously the software version of your device may differ from the one described
here. This may show in some minor differences in the wording of messages or
design of screens.
1.2 What is a music center?
Your music center stores all of your music library and enables you to find and
play single tracks, complete CDs or your own selections quick and easy. You
may use it as a CD player, you can import tracks from Audio CD and other
sources into it, and you are able to produce your own CD - obeying the Copy-
right Laws of your country - from its content. Additionally, your music server
can be connected to a computer network and may distribute its music to other
devices (satellites) based in various rooms.
The front panel of your music center provides you with a few buttons, a backlit
display and the easy-to-use Turn&Select wheel. The display shows the contents
of the music center and the menus for operating it. An additional remote con-
trol gives you the couch option and even your PC may be used for controlling
the music center.
1.3 First steps
1.3.1 Checking parts list and finding a place
Having unpacked your music center, itʼs a good idea to check now to see that
you have all the pieces. Besides the music center itself and this manual you
should find the following items:
• Power cord,
• Cinch audio cable,
• Optical Toslink audio cable (Musica only),
• Remote control and batteries,
• WLAN antenna,
• Recovery CD-ROM,
• Registration card.
Put the music center on secure, level surface within the reach of your Hi-fi
components.
1.3.2 Connecting
Connect the output from the music center“AUDIO OUT” (25) to the input jacks
of your stereo amplifier or Hi-ficomponent, matching the red plug to R (right)
and the black or white plug to L (left). Watch out for a secure seating of the
plugs to avoid noise.
If the music center should communicate with other devices wireless, screw the
WLAN antenna into the thread (23) at the back.
Connect deviceʼs AC power receptacle (20) with a power plug.
1.3.3 Getting started
Turn on your Hi-fisystem, your receiver, or your amplifier. Choose the appro-
priate audio input channel and turn the volume all the way down. Remove the
protective film from the music centerʼs display (6) and use the On/Off button
(1 ) at the front panel to turn it on.
The display gets lit and the music center needs about 40 seconds for the initial-
isation. When the music center logo appears on the display it is operational
and soon you are asked for chosing your preferred language:
3

Select function key 1 “English” to switch to the English language. Immediately
the display shows everything in English.
For changing the language later on, please refer to chapter 4 «Settings» on
page 23.
1.3.4 Trying a music CD
For a first test of your music center simply insert you favourite music CD into
the slot (2) at the front. If this CD is known already to the internal database its
title and artist are displayed on the screen:
Otherwise generic descriptions are displayed.
Just press the Play button (5 ) on the front. Your music center starts playing
the first track of the CD and shows the current song info on the display:
The buttons beneath the CD slot look and operate identical to buttons on CD
players or similar equipment. You can skip tracks forward and backward,
pause and restart the playing or stop it. The Eject button (8 ) to the right of
the CD slot (2) returns the CD to you.
1.4 The operating keys
Please see the drawing representing the music centerʼs front and remote con-
trol. The bracketed numbers refer to the numbers in these drawings.
1.4.1 On/Off (1)
This button switches the music center on or off. Switching off whilst shortly
pressing this button puts the music center in a sleep mode with minimal power
consumption. Coming back into operation then is just a matter of a few sec-
onds.
To switch off the music center completely keep this button pressed for about
3 seconds and release it when the display shows a closing “curtain”. Holding
the button for a longer time yields to an internal hardware reset.
Any time you unplug the music center from the power supply, it needs the
initialisation time of about 40 seconds to become operational again.
1.4.2 CD slot (2)
Insert the music CD printed side up until the mechanism catches it.
Have a look at the main menu of the display to make sure that there is no CD
already inserted in the slot. Otherwise your CDs and device could be dam-
aged.
1.4.3 Control buttons (3) to (6)
These buttons control the playing of songs of music CDs or the tracks stored
inside the music center. The Play/Pause button (5 ) starts a song and the
Stop button (4 ) ends it.
Additionally, the Play/Pause button (5) pauses the playback and allows to
continue at the same position.
resp.
4

The Previous Track (3 ) / Next Track (6 ) buttons skip a track of a CD or
a list in the given direction on every short push. Keep these buttons pressed
for fast forward or rewind within the track.
While playing a list of songs (artist, album, playlist, ...) you may choose any
other song and press the Previous Track (3 ) button. The current song will
be played to its end and then the newly chosen one is started. Pressing the
Play/Pause button (5 ) instead, it stops the current song and starts immedi-
ately the newly chosen.
Each button shows its activity with a pulsing white light.
1.4.4 Record (7)
The Record button (7) is used for different functions depending on the chosen
menu item. In all cases music is transferred from one place to another.
Menu: Audio CD or tracks - CD or tracks will be imported into the music
center.
Menu: Import - Audio files inside the “Import” folder will be imported into the
music center.
Menu: Artists/Albums/Songs/Lists - The songs of the artist, the album, or the
list will be burned on a CD-R.
Menu: Analogue Recording - Signals at the Audio In port are digitised and
will be imported into the music center.
1.4.5 Eject CD (8)
The playback of a CD is stopped and it is ejected. You can then remove it.
1.4.6 Display (9)
The display shows the current state of the music center and enables its usage
besides the buttons. It is divided into three parts: Header, main area, and the
current assignment of the function keys.
The header shows the name of your device, the current time, and by various
icons the current activities of the music center The main area shows the menu
options which are navigated by the Turn&Select wheel (11) or information on
the currently played, imported, or burned song. On the right the options of
the four function keys are displayed.
After five minutes of inactivity the screen saver is started. Touching the wheel
or a control key brings the display contents back.
1.4.7 Function keys (10)
Pressing a function key executes the displayed action. Not all keys are used
always. If the current situation has more than four options, function key 4
shows “More...” and enables you to toggle between the option sets.
1.4.8 Turn&Select wheel (11)
This genius gadget consists of two parts, the inner wheel and the outer ring.
They are independently turnable. The inner wheel moves the menu selection
up and down, and the outer ring chooses a menu option when turned right.
Turning the outer ring left, one menu level up is reached again. This descrip-
tion sounds a lot more complicated than really doing it! After a few minutes
you got used to this easy way of navigating through menus and will never
think about it again.
While songs are playing turning the inner wheel starts a fast forward or re-
wind like pressing the control keys 3 ( ) and 6 ( ) for long.
F4
5

If headphones are connected and the music center is playing music the inner
ring controls the volume of the headphones output.
1.5 The remote control
The remote control device is a second way to control the functions of the music
center. Its keys duplicates all the buttons on the front panel. Please refer to
the illustration page for details. The bracketed numbers refer to the numbers
in this drawing.
The On/Off switch (1), the control elements (3) to (8) and the function keys
(10) are identical to the same buttons on the front panel of the music center
(except fast forward and rewind). They are discussed earlier in this chapter.
1.5.1 Keypad (30)
You may address an individual track of a music CD or of a list contained on
the music center directly by its number. Use the numerical keypad to enter the
number.
The keypad can be used to enter textual information like meta data. It works
like the keypad of a mobile phone.
The keypad has this layout:
Key Edit:
1. character, also
after space
Edit:
2. character, also
after space
Browse:
Artists, albums,
songs
Browse:
Albums
0 0@_-*#[]()+= 0@_-*#[]()+= 0@_-*#[]()+= 0
1 1./,?ʼ:;&~! 1./,?ʼ:;&~! 1./,?ʼ:;&~! 1
2 ABCabc2 abcABC2 abc2 2
3 DEFdef3 defDEF3 def3 3
4 GHIghi4 ghiGHI4 ghi4 4
5 JKLjkl5 jklJKL5 jkl5 5
6 MNOmno6 mnoMNO6 mno6 6
7 PQRSpqrs7 pqrsPQRS7 pqrs7 7
8 TUVtuv8 tuvTUV8 tuv8 8
9 WXYZwxyz9 wxyzWXYZ9 wxyz9 9
1.5.2 Menu (31)
A shortcut to the main menu of the music center.
In edit mode this key toggles between upper case, lower case, and special
characters (umlauts).
1.5.3 Mute (32)
Toggles the volume of the output between zero and your preset value.
1.5.4 Navigation (33)
According to the function of the Turn&Select wheel you can navigate using
these keys through the menus of the music center. The centred “OK” key is
equivalent to function key 1, which almost everywhere confirms the chosen
action.
1.5.5 Volume (34)
Adjusts the level of the Audio Out port, which usually is connected to your
stereo components.
1.5.6 Brightness (35)
Adjusts the level of the background lighting of the keys.
1.5.7 Additional function keys (36)
These keys directly select main menu options. They are labelled accordingly to
the options. “Source” is temporarily unused. “Info” shows either the general
statistics or, while playing a song, its meta data.
6

2 THE BASICS
This chapter explains the basic functionality of your music center. Some details
are intentionally omitted to keep these sections simple. The next chapters go
more into detail.
2.1 Main menu
Besides the buttons on the front panel or the remote control the menu option
shown on the display are your main control of the music center. The main
menu gives you access to the various parts of the software. Function key 1, the
top one, mostly shows “Info” for the overall statistics of your music center as
well as its serial number, and function key 2 mostly shows “Help” for context-
sensitive help at your finger tips.
2.1.1 Audio CD
If a music CD is loaded into the CD slot, this menu option is at the top.
To the right of the CD you find the list of its tracks. The position of the cursor
in the menu structure defines the selection of songs played or imported. If the
title information of the music CD could not be found in the internal database
and if an Internet access is not available or enabled, generic descriptions are
displayed here:
2.1.2 Artists
This reveals an alphabetical list of all artists found on your music center.
Behind each artist you find the list of his/her albums and behind each album
its songs. These lists are filled by importing songs into the music center. “All...”
shows all songs of the chosen artist including songs which are not part of an
album.
The cursor defines the set of songs to be played or added to a list. Is the cur-
sor on the name of an artist and you press the Play/Pause button (5 ), all
albums and songs of this artist are played one after another. Is the cursor on
the name of an album and you press the same key, the songs of this album
are played only.
2.1.3 Albums
This reveals an alphabetical list of all albums found on your music center.
Behind each album you find its songs. These lists are filled by importing songs
into the music center. The cursor defines the set of songs to be played or
added to a list.
7

2.1.4 Songs
This reveals an alphabetical list of all songs found on your music center.
This list is filled by importing songs into the music center. The cursor defines the
set of songs to be played or added to a list.
2.1.5 Genres
This option provides a list of genres in which your songs, albums, or artists are
categorized.
Behind every genre you find the list of artists, albums, and songs assigned to
this genre. “All...” shows all songs of the chosen genre including songs which
are not part of an album.
Genres without assigned songs are not visible here. But you may chose from
all genres when assigning one to a song or an album. You may add your own
genre by just typing an appropriate text into the genre field of a song, album,
or artist.
2.1.6 Playlists
Using this option you can create your own selections of songs and group them
together. The right music for every mood can be collected here.
For detailled explanation about how to add a new playlist, please refer to
section 3.1 «Playlists» on page 12.
2.1.
7 Searchlists (Smart playlists)
You can create searchlists based on different selection criteria - so-called
smart playlists. These lists are dynamic as the content of a list depends on the
available set of songs on your music center. And changing attributes of songs,
albums, or artists will change the contents of these lists immediately.
For detailled explanations about how to add a new searchlist, please refer to
section 3.2 «Searchlists (Smart playlists)» on page 13.
8

2.1.8 Analog recording
Your music center can digitize and import sound from analogue sources, like
turntables, tape recorders, or cassette decks.
For detailled explanations about how to do such a recording, please refer to
section 3.4 «Digitising sounds of vinyl records and analog music tapes» on
page 16.
2.1.9 Settings
This menu option opens the area of setting and configuring the music center.
This starts with simple things like date and time or the name of the music center
and goes as far as advanced configuration of a wireless network. A separate
chapter deals with these topics (chapter 4 «Settings» on page 23).
2.1.10 Info
General statistic information about the music center.
The version number of the system software and the serial number can be ac-
cessed here. You need it for the registration of your music center.
You can see the available space, the number of stored songs, how many
artists and albums are collected, the date of the CD database, and other
statistical information.
If your music center is connected to the Internet you may update your system
software using function key 1. See section 8.3 «Software update» on page
38.
2.1.11 Music server
If the music center is integrated into a network, other networked music
centers and compatible music servers like iTunes on Mac OS or Windows are
listed here. Obviously their music collections must be published to be seen
here.
2.1.12 Internet Radio
If your music center is connected to the Internet you can receive Internet ra-
dio stations and play their broadcasting. This opens an additional source of
unlimited music.
2.1.13 Import
If the music center is integrated into a network, other computers can copy
music files to the import folder of your music center. This menu option gives
you the choice of importing some or all of them.
9

To import all available files and folders select function key 1 “Import” from
the main menu.
The import process does not do any encoding of the files. Your music files
have to be in a file format the music center is able to play, before you start to
import them. And there is no check on double entries by the music center.
Note: This menu option is visible only if the import folder contains data.
2.2 Playing a music CD
Insert the CD into the slot (2). If the meta data of the CD is available in the
internal database, title and artist are displayed automatically. Depending on
the settings and the availability these information can be searched for in the
Internet database.
Depending on the settings the CD starts playing automatically. Otherwise you
may choose a song and play it by pressing the Play/Pause button (5 ) button.
While the song is playing, artist, album title, and song title are displayed.
Long names are displayed alternating from the left to right. Again depending
on your settings, run time, total time, and remaining time, playlist, index of
the song in the playlist and total songs of the playlist or a spectogram can be
displayed.
The control buttons (3) - (6) give you the options to pause the playing, to stop
it, and to jump forwards or backwards. The Eject button (8) returns the CD
to you.
2.3 Importing a music CD
The recording of a CD happens in two steps: the music center first records the
music files on the hard disk without any compression or encoding; the second
step is the encoding of these files in the chosen format. After the music is
recorded, you can eject the CD and insert the next one. Please note that both
the music center and the record icons in the display header are still flashing.
This shows that the music center is still encoding the files of the first CD. Dur-
ing this operation, the handling of the music center may be not as quick and
smooth as usual.
After inserting a music CD its title is shown as the topmost entry of the main
menu. Press the Record button (7) or the function key 1 “Import” to import all
tracks of the CD on the music centerʼs hard disk. If you want to import only
selected tracks, select and mark these tracks before starting the import.
The progress of the import is shown on the display. It is possible to listen to
the songs while the importing takes place. Since the importing time is much
shorter than the playing time, listening and importing is not in sync.
CDs which are not recognized by the CD database are labelled by the music
center using the import date and time e.g. “Audio-CD 2005-01-01 10:12”.
If you want to import songs already stored on the music center, you are pre-
sented with a choice of overwriting or skipping it.
After the import you may have a look at the “Info” window to check the en-
coding format and the amount of space of your imported files.
Duplication of copy-protected audio CDs may infringe copyright and
digital rights laws of your country.
2.4 Playing songs
Use the menu options Artists, Albums, Songs, Genres, or Playlists to find the
song or the songs you want to play. Then press the Play button (5) and the
playback starts.
While the song is playing, artist, album title, and song title are displayed.
Long names are displayed alternating from the left to right.
10

resp.
If the Large Play View option is enabled, the display switches after the preset
time to this view. Now you may see the song title and artists right from your
couch.
The control buttons (3) - (6) give you the options to pause the playback, to
stop it, and to fast forward or rewind.
2.5 Copying a music CD
After inserting a music CD its title is shown as the topmost entry of the main
menu. Press the function key 2 “Copy” to copy all tracks of the CD onto a
second one.
Your music center reads all tracks off the music CD and then asks you to insert
a fresh CD-R into the CD slot (2). When a CD-R has been inserted, it begins
the burning.
Duplication of copy-protected audio CDs may infringe copyright and
digital rights laws of your country.
2.6 Burning a music CD
Choose an album or collect some songs into a playlist. Select the album or the
playlist and press the Record button (7). The music center adds up the length
of the songs and warns you if the total playing time exceeds the capacity of
a CD-R.
(7)
The music center asks you to insert a fresh CD-R into the CD slot (2). After
confirming with function key 1 “OK” the burn process starts. After an optional
verifying the newly burned CD is ejected.
2.7 Header icons
The header line of the display often shows little icons, flashing, animated, or
steadily. The following table shows the meaning of each one.
Steady The music center icon shows that the main menu is
referring to the music library located on the music
center.
Flashing The music center system is busy with a complex
operation, e.g. with encoding of music files.
Animated A music CD is currently played back.
Animated The music center is currently encoding music tracks,
e.g. from a music CD. This action is done at 3x speed.
The encoding of one hour of music takes about 20 to
30 minutes, whereas the import of the music tracks is
completed within 10 minutes using 10x speed.
Animated The music center is currently burning the chosen tracks
on a music CD.
Animated The music center is currently writing tracks to other
devices, for example on an MP3 player or to the music
center backup hard disk.
11

Animated The music center accesses the network, e.g. an iTunes
server.
Steady The iPod icon is shown in place of the music centerʼs
icon: an iPod is connected to the music center and has
been selected. The main menu is now referring to the
music library of the iPod.
Steady The iTunes icon is shown in place of the music centerʼs
icon: an iTunes server is connected to the music center
over the network and has been selected. The main
menu is now referring to the music library of the iTunes
server.
Animated A music track is currently played back, the output
volume is turned on.
Steady Mute is activated.
Steady Random mode is activated.
Steady Repeat mode is activated.
3 ADVANCED FUNCTIONS
This chapter discusses advanced options of the music center and shows their
benefits using step-by-step explanations.
3.1 Playlists
The music center maintains playlists for you. You create a list with a name of
your choice and assign songs, albums, or artists to this list. With a playlist, you
choose which songs to play and the order in which to play them.
You can create as many playlists as you want, include as many songs as you
want in each playlist, and rearrange the songs in each playlist until the order
is just right. You might have one playlist for exercising, one for a rainy Mon-
day, another that contains the music for dozing off in the night, and so on.
3.1.1 Create a new playlist
Adding a new playlist
Choose the main menu option Playlists.
Press function key 1 “New” and enter the name of your first playlist.
Use the inner wheel of the Turn&Select wheel (11) to select a character from
the alphabetic list at the bottom and choose it by turning the outer ring of the
Turn&Select wheel (11) shortly to the right. Create the complete title using this
technique. Function key 3 “Delete” and function key 4 “Insert” help correcting
typos. When finished press function key 1 “OK” and the new, empty playlist
is created.
Note: If you have a computer you can also create a playlist via the web
interface ( see page 32);
12
This manual suits for next models
1
Table of contents
Other Olive Stereo System manuals