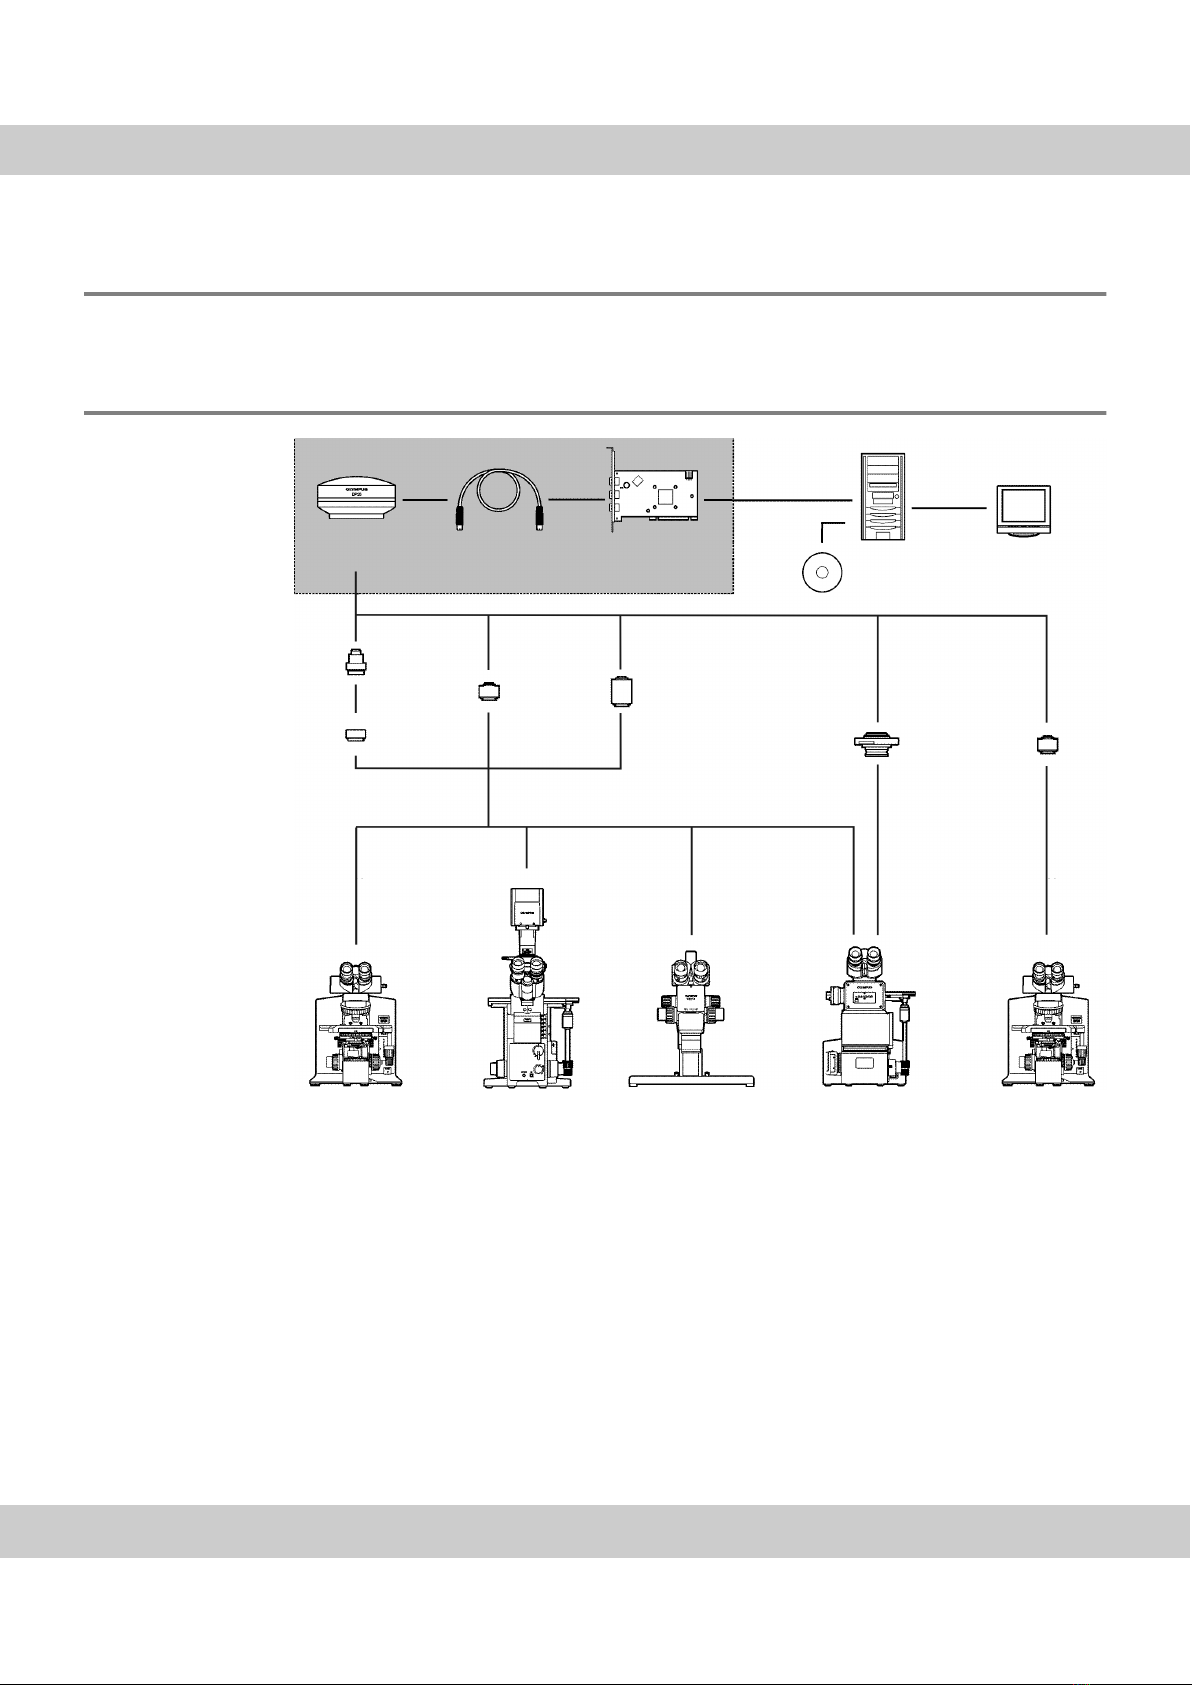
CCD color camera XC30
Any copyrights relating to this manual shall belong to Olympus Soft Imaging Solutions GmbH.
We at Olympus Soft Imaging Solutions GmbH have tried to make the information contained in
this manual as accurate and reliable as possible. Nevertheless, Olympus Soft Imaging
Solutions GmbH disclaims any warranty of any kind, whether expressed or implied, as to any
matter whatsoever relating to this manual, including without limitation the merchantability or
fitness for any particular purpose. Olympus Soft Imaging Solutions GmbH will from time to time
revise the software described in this manual and reserves the right to make such changes
without obligation to notify the purchaser. In no event shall Olympus Soft Imaging Solutions
GmbH be liable for any indirect, special, incidental, or consequential damages arising out of
purchase or use of this manual or the information contained herein.
No part of this document may be reproduced or transmitted in any form or by any means,
electronic or mechanical, for any purpose, without the prior written permission of
Olympus Soft Imaging Solutions GmbH.
Windows, Word, Excel and Access are trademarks of Microsoft Corporation which can be
registered in various countries. Adobe and Acrobat are trademarks of Adobe Systems
Incorporated which can be registered in various countries.
© Olympus Soft Imaging Solutions GmbH
All rights reserved
Printed in Germany
510_UMA_XC30_en_05__08-March-2016
Olympus Soft Imaging Solutions GmbH, Johann-Krane-Weg 39, D-48149 Münster,
Tel. (+49)251/79800-0, Fax.: (+49)251/79800-6060