manuals.online logo
Brands
  1. Home
  2. •
  3. Brands
  4. •
  5. One Forall
  6. •
  7. Universal Remote
  8. •
  9. One Forall Kameleon User manual

One Forall Kameleon User manual

8-Device
Universal Remote Control
URC-9960
User’s Guide
OFA Kameleon UG 5/8/03 3:22 PM Page 1
TABLE F C NTENTS
Introduction . . . . . . . . . . . . . . . . . . . . . . . . . . . . . . . . . . . . . . . 2
Installing Batteries . . . . . . . . . . . . . . . . . . . . . . . . . . . . . . . . . 3
How Kameleon™ Works. . . . . . . . . . . . . . . . . . . . . . . . . . . . . 3
Features And Function . . . . . . . . . . . . . . . . . . . . . . . . . . . . . . 4
Key C arts . . . . . . . . . . . . . . . . . . . . . . . . . . . . . . . . . . . . . . 4
Device Table . . . . . . . . . . . . . . . . . . . . . . . . . . . . . . . . . . . . . 7
Adjusting Brig tness . . . . . . . . . . . . . . . . . . . . . . . . . . . . . . . 8
Programming Device Control. . . . . . . . . . . . . . . . . . . . . . . . . 8
Programming A DVD/VCR Player Combo . . . . . . . . . . . . . . 10
Searc ing For Your Code. . . . . . . . . . . . . . . . . . . . . . . . . . . . 11
C ecking T e Codes . . . . . . . . . . . . . . . . . . . . . . . . . . . . . . . 11
Using T e Home T eater Mode . . . . . . . . . . . . . . . . . . . . . . 12
Control Organization. . . . . . . . . . . . . . . . . . . . . . . . . . . . . . 12
Programming T e Home T eater Mode . . . . . . . . . . . . . . . . 13
C anging Volume Lock . . . . . . . . . . . . . . . . . . . . . . . . . . . . . 14
Programming Volume Lock . . . . . . . . . . . . . . . . . . . . . . . . . 14
Programming Volume Unlock . . . . . . . . . . . . . . . . . . . . . . . 15
Using Macros . . . . . . . . . . . . . . . . . . . . . . . . . . . . . . . . . . . . . 16
Programming A Favorite C annel Macro . . . . . . . . . . . . . . . 16
Programming A Master Power Macro In
T e Home T eater Mode . . . . . . . . . . . . . . . . . . . . . . . . . . . 16
Clearing A Macro . . . . . . . . . . . . . . . . . . . . . . . . . . . . . . . . 17
Using Learning . . . . . . . . . . . . . . . . . . . . . . . . . . . . . . . . . . . 18
Learning Precautions . . . . . . . . . . . . . . . . . . . . . . . . . . . . . 18
Programming A Learning Key . . . . . . . . . . . . . . . . . . . . . . . 18
Deleting A Single Learned Key. . . . . . . . . . . . . . . . . . . . . . . 19
Deleting All Learned Keys In A Specific Mode . . . . . . . . . . . 19
Reassigning Device Keys . . . . . . . . . . . . . . . . . . . . . . . . . . . 20
Using Keymover . . . . . . . . . . . . . . . . . . . . . . . . . . . . . . . . . . . 20
Programming Keymover . . . . . . . . . . . . . . . . . . . . . . . . . . . 20
Restoring A Single Keymoved Key . . . . . . . . . . . . . . . . . . . . 21
Restoring All Keymoved Keys In A Single Mode . . . . . . . . . . 21
Using C annel Scan . . . . . . . . . . . . . . . . . . . . . . . . . . . . . . . 22
Programming Favorite C annel Scan . . . . . . . . . . . . . . . . . 22
Restoring Factory Default Settings . . . . . . . . . . . . . . . . . . . 23
Clearing All Custom Programming . . . . . . . . . . . . . . . . . . . 23
Manufacturer’s Codes. . . . . . . . . . . . . . . . . . . . . . . . . . . . . . 24
Setup Codes For Audio Amplifiers . . . . . . . . . . . . . . . . . . . . 24
Setup Codes For Audio Receivers . . . . . . . . . . . . . . . . . . . . 24
Setup Codes For Cable Boxes . . . . . . . . . . . . . . . . . . . . . . . 24
Setup Codes For CD Players . . . . . . . . . . . . . . . . . . . . . . . . 25
Setup Codes For DVD Players . . . . . . . . . . . . . . . . . . . . . . . 25
Setup Codes For DVD Player/VCR Combos . . . . . . . . . . . . . . 26
Setup Codes For Home Automation . . . . . . . . . . . . . . . . . . . 26
Setup Codes For PVRs. . . . . . . . . . . . . . . . . . . . . . . . . . . . . 26
Setup Codes For Satellite Receivers . . . . . . . . . . . . . . . . . . 26
Setup Codes For Satellite Receiver/PVR Combos . . . . . . . . . 26
Setup Codes For TVs . . . . . . . . . . . . . . . . . . . . . . . . . . . . . . 26
Setup Codes For TV/DVD Player Combos . . . . . . . . . . . . . . . 28
Setup Codes For TV/VCR Combos . . . . . . . . . . . . . . . . . . . . 28
Setup Codes For VCRs . . . . . . . . . . . . . . . . . . . . . . . . . . . . 28
Setup Codes For Video Accessories . . . . . . . . . . . . . . . . . . 30
About Upgrading . . . . . . . . . . . . . . . . . . . . . . . . . . . . . . . . . . 30
Upgrade Procedure . . . . . . . . . . . . . . . . . . . . . . . . . . . . . . . 30
Upgrade Exclusions . . . . . . . . . . . . . . . . . . . . . . . . . . . . . . 30
Troubles ooting . . . . . . . . . . . . . . . . . . . . . . . . . . . . . . . . . . 31
Device Mode Screens . . . . . . . . . . . . . . . . . . . . . . . . . . . . . . 32
Customer Support . . . . . . . . . . . . . . . . . . . . . . . . . . . . . . . . . 41
Instruction To T e User. . . . . . . . . . . . . . . . . . . . . . . . . . . . . 41
Limited Warranty . . . . . . . . . . . . . . . . . . . . . . . . . . . . . . . . . . 41
Battery Use And Safety. . . . . . . . . . . . . . . . . . . . . . . . . . . . . 42
Additional Information . . . . . . . . . . . . . . . . . . . . . . . . . . . . . 42
INTR DUCTI N
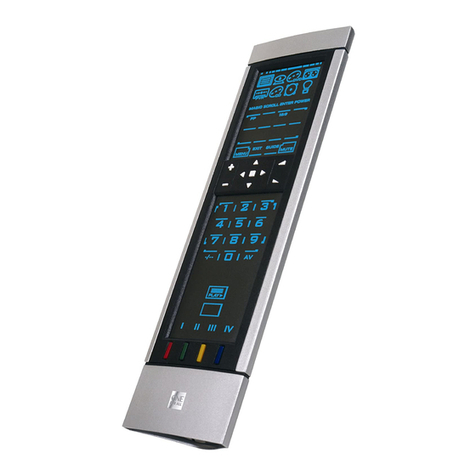
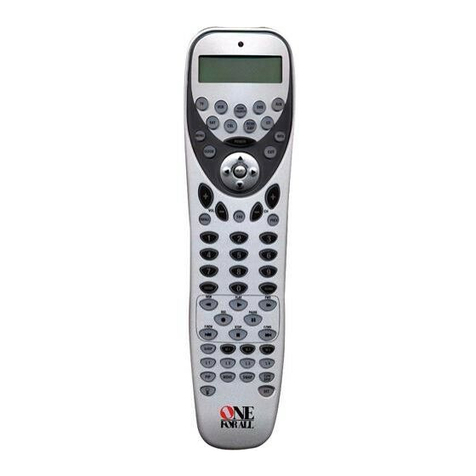
The OFA Kameleon™ 8-Device Remote (URC-9960)
is a revol tionary niversal remote control that
ses Universal Electronics’ Kameleon Technology.
Moreover,it allows yo to consolidate the cl tter of
all of yo r original remote controls into one easy-to-
se prod ct.Advanced feat res incl de:
•Kameleon Technology – dynamic men
screens that respond to device selection and
ill minate only active keys
•Home Theater Mode – a c stom mode that
gro ps the most-often- sed keys together
for operating convenience in one mode
•Macros – for instant activation of favorite
key seq ences
•Learning – to capt re niq e f nctions
from yo r devices’ original remote controls
•Key Mover – for copying keys from one
device to another, or to a different position
in the same mode
•Direct Code Setup – for easy device
programming with set p codes
•Innovative Code Search – allows set p of
yo r devices witho t looking p codes
•Favorite Channel Scan – for easy channel
s rfing of favorite channels
•Volume Lock – to assign vol me controls to
individ al devices or to one global device
•xtensive Code Library – largest and most
efficient gro p of IR remote control codes for
virt ally every c rrent brand and make
•Upgradeability – o r niq e telephone
pgrade system ens res yo r remote
control always has the latest set p codes
when adding new devices in the f t re
After installing fo r (4) new AAA alkaline
batteries (not incl ded, see next page), yo can
immediately se the nit to control a Motorola
Cable Box,a Toshiba DVD Player, a Philips Tivo
PVR (DVR),a Pioneer CD Player and A dio
Receiver, and a RCA TV,VCR, and Satellite Receiver.
To control other brands than the defa lt ones, see
Programming Device Control on page 8.
KAMELE N 8-DEVICE REM TE
2Table Of Contents/Introduction
OFA Kameleon UG 5/8/03 3:22 PM Page 2
INSTALLING BATTERIES
1. On the remote control’s back, p sh the tab
and lift off the battery cover.
2. Obtain fo r (4) new AAA alkaline batteries.
Match the + and – marks on the batteries to
the + and – marks in the battery case, then
insert the new batteries.
3. Press the battery cover back into place.The
tab sho ld click when the cover is locked.
4. If batteries are inserted correctly, the display
will t rn on and show all keys. If a key is
not pressed after 7 seconds, the display will
t rn off.
NOTE: The batteries will need replacement if one of
the following conditions occurs:
1. Pressing any key turns on all keys and icons.
2. The remote control no longer operates and the
display flashes on and off continously.
ee “Battery Use And afety” on page 42 for
additional information.
H W KAMELE N™W RKS
Kameleon™ allows wireless controllers to
dynamically change their appearance and
f nctionality, to match the home entertainment
environment. Moreover, this technology provides
nparalleled ease-of- se and s perior control by
delivering a niq ely int itive, graphical interface
that intelligently ill minates only the active keys.
The OFA Kameleon 8-Device Remote ses
Kameleon technology to provide the versatility
of an LCD remote control with the feel of a
traditional p sh b tton nit. The res lt is a
st nning, bright display with engaging anima-
tion and to ch-sensitive graphics for the ser.
The remote control incl des convenient Menu
Driven programming. The displays are divided
into two types of interactive screens: Device Menus
for normal remote control se, and Programming
Menus for feat re set p.Acting like it namesake,
Kameleon changes the Device Menu for the device
being selected. For example, selecting TV displays
a main men that contains channel selection,
vol me control,and a keypad. However, selecting a
DVD player still displays a men with those same
keys as the TV,b t now navigation keys and
transport controls are added for the DVD device.
Several devices have additional men s that can be
accessed sing SCR LL (see Device Menu creens,
starting on page 32). For example, TV has three
men s: a main men with keys for a general-
p rpose TV, a second men screen that adds
navigation keys and removes F RMAT,INPUT and
ENTER keys, and a third men screen that adds
INPUT,ENTER,and PIP keys. Depending on desired
feat res,a ser has the flexibility to se any men
screen that works best for the selected device.
NOTE:The AUX,CD,DVD,and PVR modes do not
have additional menu screens even though SCROLL
is displayed.
Animated key graphics also provided enhanced
operational feedback, so the ser can easily see
what mode is active and when the commands
are comm nicating with a device. The end res lt
of Kameleon technology is a simple, elegant, and
intelligent way of organizing a large n mber of
remote control keys for eight different devices in
a relatively small case.
USER’SGUIDE
Installing Batteries/How Kameleon Works 3
❶
❸
❷
OFA Kameleon UG 5/8/03 3:22 PM Page 3
FEATURES AND FUNCTI NS
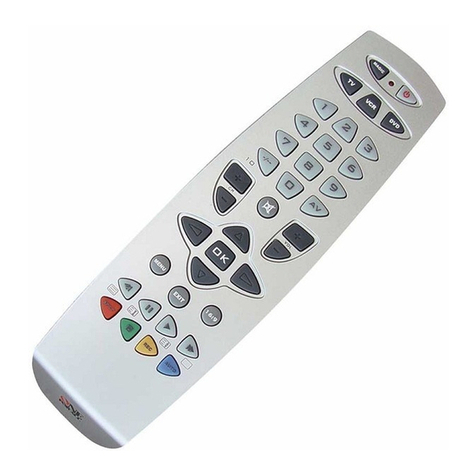
Use the ill stration below to locate feat res on the
OFA Kameleon 8-Device Remote (URC-9960) and
then refer to the Key Charts (starting on the right)
to learn how they f nction.
NOTE: The illustration shows all remote control keys. In
actual operation, only active keys used by the selected
device are displayed and non-active keys are hidden.
To find o t what type of devices can be controlled
by each device key after programming, see the
Device Table on page 7.
KEY CHARTS
When a key is pressed, the
IR Segments will animate.
O tgoing animation (see
arrows) indicates the remote
control is sending IR signals
to a selected device.
Incoming animation (see
arrows) indicates the
remote control is receiving
IR signals from a device
being learned (see Using
Learning on page 17).
Press a Device Key once
to select a desired home
entertainment device to
control (e.g., DVD).When
selected, the Device Key
will animate to indicate it
is c rrently active.Also see
the Device Table on page 7.
After programming, press
the Home Theater key once
to select the home theater
mode (see Using The Home
Theater Mode on page 12).
Press P WER once to t rn
on or off a selected device.
D ring programming,
the H ME key will appear.
Use it to exit the program
screen or to ret rn to the
last-selected device key
screen.
In the AUX,CBL/SAT,and
TV modes, se FAV to scan
thro gh all channels, or
after programming, to
scan thro gh 10 favorite
channels.
In the AUX,CBL/SAT,TV,
AUDI ,and VCR modes,
se SCR LL to view
additional key screens for
the selected device.
KAMELE N 8-DEVICE REM TE
4Features And Functions
OFA Kameleon UG 5/8/03 3:22 PM Page 4
Use V L ▲(or V L▼)
to raise (or lower) the
so nd vol me for the
selected device (also see
Changing Volume Lock on
page 14).
Press MUTE once to t rn
the so nd off or on.
In the AUX and CBL/SAT
modes, se PVR/V D to
access PVR/VOD programs
(if available on yo r cable
or satellite service).
In the AUDI mode, se
PRESET to access preset sta-
tions on yo r a dio device.
In the TV mode, se F RMAT
to change the aspect ratio or
zoom (if feat re is available
on yo r TV).
In the DVD or PVR mode,
press REPLAY once to
replay a DVD chapter or
a recorded program on
yo r PVR (or DVR).
In the CBL/SAT and AUX
modes, press SCR LL once
to display REPLAY and then
press REPLAY once to
replay a VOD program (if
available on yo r cable or
satellite service).
Use CH ▲(or CH ▼) to
select the next higher (or
lower) channel.
In all modes except CD,DVD,
and PVR,press LAST once to
recall the last channel.
In the PVR mode, se LAST
to select live or recorded
video.
In the CD or DVD modes,
press RAND to play random
tracks or chapters.
or
In the AUX and CBL/SAT
modes, se PAGE+ or
PAGE- to page p or down
thro gh channels in the
program g ide.
In the DVD mode, press
AUDI once to access DVD
a dio formats (if available).
In all modes except AUDI ,
se GUIDE to display yo r
selected device’s program
g ide or set p men .
In the AUDI mode, se
DSP to access DSP feat res
(if available) on yo r a dio
device.
Use INF to display the
c rrent channel and
program information.
In the AUX,CBL/SAT,CD,
DVD,and PVR modes, se
the Cursor Keys to move
the c rsor in the program
g ide and men screens.
Use K to choose options
from yo r selected device’s
men or g ide.
In the TV or VCR mode,
press SCR LL once to access
the Cursor and K Keys.
In the AUDI mode, press
SCR LL twice to access the
Cursor and K Keys.
In the AUDI mode, se the
Cursor Keys to move the
c rsor to select or test
s rro nd so nd channels
on yo r a dio device.Also
see V L keys (above left).
Use K to choose options
from yo r a dio device’s
men or g ide.
continued on next page...
USER’SGUIDE
Features And Functions 5
OFA Kameleon UG 5/8/03 3:22 PM Page 5
FEATURES AND FUNCTI NS
KEY CHARTS (C NTINUED)
Press MENU once to display
yo r selected device’s main
men .
Use EXIT to exit from yo r
selected device’s g ide or
men .
In the DVD or AUDI mode,
press SUBTITLE once to
display (or t rn off)
s btitles, if available on
yo r DVD or a dio device.
In all modes except AUDI ,
se the Number Keys
(1~ 9and 0) to directly
select channels (e.g.,009
or 031) or enter n mbers.
In the AUDI mode, se the
Number Keys to directly
select inp ts 1~ 9and 10.
To enter channels in the
AUDI mode, press SCR LL
three times to view channel
Number Keys (see above)
Use INPUT to change the
inp t so rce for a selected
device.
For certain brands in all
modes except CD and
AUDI ,press ENTER once
after entering n mbers (if
req ired on yo r original
remote control).
For CD or AUDI modes,
press SKIP once to skip to
the next track on yo r
a dio device.
After programming, press
Macro Key 1 ~ 4once to
r n a macro (see Using
Macros on page 16).
or
In the CD,DVD,AUDI ,and
VCR modes, se the
Transport Keys to control
the device’s transport.
In the PVR mode, se the
LIVE Transport Keys to
control PVR/DVR video.
In the CBL/SAT or AUX
mode, press SCR LL once
to display and se the LIVE
Transport Keys to control
VOD (Video On Demand)
if available on yo r
cable/satellite service.
In all modes except TV,
press ●twice to record a
program on yo r device
(if f nction is available).
In the TV mode,press PIP
once (or press SCR LL
twice) to display the
PIP Keys. Use them to
control the following
Pict re-In-Pict re feat res
(if available) on yo r TV:
Use PIP to switch the
Pict re-In-Pict re feat re
on or off.
Use SWAP to switch images
and so nd between the
main and window pict res.
Use SIZE to select a differ-
ent pict re window size.
Press FREEZE once to cap-
t re a frame of video in the
main pict re. Press it again
to res me normal viewing.
Use M VE to move the
window pict re to different
places in the main pict re.
Use SETUP to enable the
programming screen.
or
KAMELE N 8-DEVICE REM TE
6Features And Functions
OFA Kameleon UG 5/8/03 3:22 PM Page 6
In the program mode,
se the Program Keys to
personalize the remote
control as follows:
Use DEV SET to program
yo r device codes. See
Programming Device Control
on page 8.
Use SEARCH as an alternate
way to set p a device by
searching available codes.
See earching For Your Code
on page 11.
Use THEATER to create a
c stom mode with favorite
remote control keys from
different devices in yo r
home theater system.See
Using The Home Theater
Mode on page 12.
Use V L (Volume Lock)
to set vol me controls for
individ al or global device
se. See Changing Volume
Lock on page 14.
Use MACR to program a
series of commands on five
available macro keys. See
Using Macros on page 16.
Use (Brightness) to
adj st the brightness level of
the EL display. See Adjusting
Brightness on page 8.
Use IR LRN and IR DEL to
add and delete key f nctions
learned from yo r original
device remote controls. See
Using Learning on page 17.
Use M DE to reassign
an n sed device key to
control a second device. See
Reassigning Device Keys on
page 20.
Use THER to program
other f nctions. See the
Table of Contents on page 2
for sections on Checking
The Codes,Programming
Favorite Channel can,
Using Keymover,or
Upgrading.
DEVICE TABLE
NOTE: Please refer to the table below when performing
the instructions in “Programming Device Control”on
page 8.
After programming, the OFA Kameleon 8-Device
Remote will be able to control the following
types of devices:
USER’SGUIDE
Features And Functions 7
DEVICE KEY C NTR LS THESE DEVICES
Video Accessory or second
device (e.g., Cable Box, Satellite
Receiver, DVD Player, etc.) by
reassigning device keys (see
Reassigning Device Keys on
page 20)
Cable Box (Converter),
Satellite Receiver, or
Satellite/PVR Combo
CD Player or Home A tomation
Te l e v i s i o n
DVD Player, TV/DVD Player
Combo, or DVD/VCR Player
Combo
A dio Amplifier,A dio
Receiver, or Home-Theater
In-A-Box Device (listed nder
etup Codes For Audio Receivers
on page 24)
VCR or TV/VCR Combo
PVR (DVR)
OFA Kameleon UG 5/8/03 3:22 PM Page 7
ADJUSTING BRIGHTNESS
The OFA Kameleon 8-Device Remote has five
levels of brightness adj stment and is set to the
middle one at the factory. To increase or decrease
the brightness, perform the following steps:
1. Press and hold SETUP ntil the two bottom
IR segments flash twice. The Program Keys
will appear.
NOTE: If the display turns off because of inactivity,
you will need to start the programming sequence
again by repeating this step.
2. Press (Brightness) once.The Brightness
programming screen will appear:
• To increase brightness,press ▲one or
more times.
• To decrease brightness,press ▼one or
more times.
3. When the desired brightness is achieved, press
H ME twice to exit programming and ret rn
to the last-selected device men screen.
NOTE: Otherwise, to program other features, press
HOME only once to return to the Program Keys.
PR GRAMMING DEVICE C NTR L
The OFA Kameleon 8-Device Remote is preset at
the factory to operate the following devices:
• Motorola Cable Box ( sing the AUX key)
• Philips Tivo PVR (DVR)
• Pioneer CD Player and A dio Receiver
• RCA TV, VCR, and Satellite Receiver
• Toshiba DVD Player
To control devices other than the defa lt brands,
perform the following steps; otherwise skip
this section:
NOTE: To control a DVD Player/VCR Combo, perform
the instructions in “Programming DVD Player/VCR
Combo Control” on the page 10.
1. T rn on a desired device (e.g.,VCR or DVD
player) and, if applicable, insert media (e.g.,
cassette or disc).
NOTE: Please read steps 2 through 9 completely
before proceeding. Before starting step 2, review
the “Manufacturer’s Codes” (starting on page 24).
Brands are listed alphabetically in order of most
popular ones first. Highlight or write down the
devices and the codes you wish to program.
2. Press and hold SETUP ntil the two bottom
IR segments flash twice. The Program Keys
will appear as SETUP flashes repeatedly.
NOTE: If the display turns off due to inactivity,
the remote control will exit programming and
return to the last-selected device menu screen.
To start programming again, repeat this step.
NOTE: To stop programming at any time, press
HOME once to return to the Program Keys screen.
Press HOME once more to exit completely.
3. Press DEV SET once. The Device etup
programming screen will appear (as shown on
the next page):
KAMELE N 8-DEVICE REM TE
8Adjusting Brig tness/Programming Device Control
OFA Kameleon UG 5/8/03 3:22 PM Page 8
4. Press a device key once (i.e., AUX,CBL/SAT,
CD,TV,DVD,AUDI ,VCR,or PVR). The selected
device key will animate.
NOTE: Please refer to the Device Table on page 7
when choosing a device key for programming.
5. Use the Manufacturer’s Codes (starting on
page 24) to locate the type of device and
brand name and then se the Number Keys
to enter the first fo r-digit code for yo r
device.If performed correctly, the bottom two
IR segments will flash twice.
NOTE: If the bottom two IR segments displayed one
long flash instead,a mistake has occurred.Try
entering the same code again.
6. Aim the remote control at the device and
press P WER once. The device sho ld t rn
off. If it does not, repeat steps 5 and 6, trying
each code for yo r brand ntil yo find one
that works. If it still doesn’t work, try
earching For Your Code on page 11.
NOTE: If the device does not have a POWER key,
press the (Play) key.
7. If the code works, press K once.The two bot-
tom IR segments will display one long flash.
8. If desired,repeat steps 4 thro gh 7 for each
device yo want to control. If finished, press
H ME twice to exit programming and ret rn
to the last-selected device men screen.
9. For f t re reference, write down each
working device code in the following boxes:
AUX Code:
Device Type:_______________________
CBL/SAT Code:
Device Type:_______________________
CD Code:
Device Type:_______________________
DVD Code:
Device Type:_______________________
TV Code:
DVD Code:
Device Type:_______________________
AUDI Code:
Device Type:_______________________
VCR Code:
Device Type:_______________________
PVR Code:
USER’SGUIDE
Programming Device Control 9
OFA Kameleon UG 5/8/03 3:22 PM Page 9
PR GRAMMING DVD PLAYER/
VCR C MB C NTR L
1. T rn on the DVD Player/VCR Combo and
insert a DVD.
NOTE: Please read steps 2 through 10 completely
before proceeding. Before starting step 2, review
the “ etup Codes For DVD Player/VCR Combos” (on
page 26). Brands are listed alphabetically in order of
most popular ones first. Highlight or write down the
devices and the codes you wish to program.
2. Press and hold SETUP ntil the two bottom
IR segments flash twice. The Program Keys
will appear as SETUP flashes repeatedly.
3. Press DEV SET once. The Device etup
programming screen will appear:
4. Press DVD once. The key will animate.
5. Use the etup Codes For DVD Player/VCR
Combos (on page 26) to locate the brand
name and then se the Number Keys to enter
the first fo r-digit code for yo r device.
If performed correctly, the two bottom
IR segments will flash twice.
NOTE: If the two bottom IR segments displayed
one long flash instead, an error has occurred.
Try entering the same code again.
6. Aim the remote control at the device and press
P WER once. The device sho ld t rn off.
7. If the code works, press K once.The two bot-
tom IR segments will display one long flash.
8. (Optional) If yo ’ve located a set p code that
works, b t it also has a separate VCR code as
listed on page 26, yo ’ll also need to program it
into the remote control to access VCR controls
as follows:
a. Press VCR once.
b. Using the Number Keys,enter the fo r-
digit VCR code for yo r DVD Player/VCR
Combo. If performed correctly, the
two bottom IR segments will flash twice.
c. Press K once.The two bottom IR
segments will display one long flash.
NOTE: If a separate VCR setup code is not listed,
you can use the VCR key to program a separate VCR
device or another device (see “Reassigning Device
Keys” on page 20).
9. To exit programming,press H ME twice. The
display will ret rn to the last-selected device
men screen.
10. For f t re reference, write down the working
DVD Player/VCR Combo code in the below
boxes:
DVD Player/VCR Code:
VCR Code (if sed):
KAMELE N 8-DEVICE REM TE
10 Programming DVD Player/VCR Combo Control
OFA Kameleon UG 5/8/03 3:22 PM Page 10
SEARCHING F R Y UR C DE
If yo r device does not respond to the remote
control after trying all codes listed for yo r
brand, or if yo r brand is not listed at all, try
searching for yo r code.
NOTE: Before performing a code search for a CD or
DVD player or a VCR, turn on the device and insert
the required media.
For example, to search for a code for yo r TV:
1. Press and hold SETUP ntil the two bottom
IR segments flash twice. The Program Keys
will appear as SETUP flashes repeatedly.
2. Press SEARCH once. The earch Codes
programming screen will appear:
3. Press a device key once (e.g.,TV). The selected
device key will animate.The device’s Main
Menu screen will appear with the H ME key
still displayed.
4. Press P WER once to select it as the search
test f nction. The earch Programming screen
will appear again.
NOTE:With POWER as the search test function, a
“Power On” IR command will be sent to the device
each time a test code is sent.As a confirmation, the
IR segments will display an outgoing animation.
NOTE: If your device or its original remote control
does not have a Power key, select a different test
function in this step (e.g., CH+,VOL+,Play, etc).
5. Aim the remote control at the device (e.g., TV)
press ▲one or more times and stop when a
working code performs the test f nction
selected in step 4.If desired, se ▼ to try a
previo s code.
NOTE: In the search mode, the remote control will
send IR codes from its library to the selected device,
starting with the most popular code first.
6. To lock in the code,press K once. The two
bottom IR segments flash twice.
7. To search for codes of yo r other devices,
repeat steps 3 to 6, b t se the appropriate
device key and test f nction key for the device
yo are searching for.
8. To exit programming,press H ME twice. The
display will ret rn to the last-selected device
men screen.
CHECKING THE C DES
If yo have set p the remote control sing the
earching For Your Code proced re (on the left),
yo may need to find o t which fo r-digit code
is operating yo r eq ipment. For example, to
find o t which code is operating yo r TV:
1. Press and hold SETUP ntil the two bottom
IR segments flash twice. The Program Keys
will appear as SETUP flashes repeatedly.
continued on next page...
USER’SGUIDE
Searc ing For Your Code/C ecking T e Codes 11
OFA Kameleon UG 5/8/03 3:22 PM Page 11
CHECKING THE C DES (cont’d)
2. Press THER once.The Other programming
screen will appear:
3. Using the Number Keys,enter 9 9 0.The
bottom two IR segments will flash twice.
4. Press a desired device key once (i.e., AUX,
CBL/SAT,CD,TV,DVD,AUDI ,VCR,or PVR).
The selected device key will animate.
5. To view the code for the first digit, press 1
once. Co nt the n mber of times the two
bottom IR segments flash (e.g., three flashes
= 3) and write down the n mber in leftmost
box in the TV code boxes on page 9.
NOTE: If a code digit is “0”, the two bottom IR
segments will not flash.
6. Repeat step 5 three more times for remaining
digits. Use 2for the second digit, 3for the
third digit, and 4for the fo rth digit.Write
down the code digits in the remaining TV
code boxes on page 9.
NOTE: If you enter an invalid number (e.g., 7) or
key (e.g., Play), the two bottom IR segments will
display one long flash and return to the “Other”
programming screen. tart again with step 2 above.
7. To check for codes of other devices, repeat
steps 4 to 6, b t s bstit te the appropriate
device key for each device yo are checking.
Write down the device’s code digits in the
appropriate code boxes on page 9.
8. To exit programming,press H ME twice. The
display will ret rn to the last-selected device
men screen.
USING THE H ME THEATER M DE
The OFA Kameleon 8-Device Remote incl des a
c stom Home Theater mode. After the Home
Theater key is programmed, it will allow yo to
access fo r gro ps of remote control keys
witho t having to change device modes.
CNTR L RGANIZATI N
AB UT CNTR L GR UPS
For Home Theater programming,the remote
control’s keys are gro ped by type of control
into the following fo r control gro ps:
Video Playback Group: Transport Controls
(Rewind,Play,Fast
Forward,Stop,
Pause,Record,
Skip Forward,
Skip Back),and
LIVE TV
Volume Controls Group: V L+,V L-,and
MUTE
Channel Controls Group: CH+,CH-,INPUT,
Keypad (0 ~ 9),
FAV,ENTER,and LAST
Menu Controls Group: Cursor Controls
(Up,Down,Left,and
Right),K,PAGE+,
PAGE-,MENU,INF ,
GUIDE,and EXIT
AB UT DEVICE MDES
Moreover, the above Control Groups can be sed
in the following modes:
Video Playback Group: AUDI ,AUX,CBL/SAT,
CD,DVD,PVR,and
VCR
Volume Controls Group: AUDI ,AUX,CBL/SAT,
CD,DVD,PVR,TV,and
VCR
Channel Controls Group: AUX,CBL/SAT,DVD,
PVR,TV,and VCR
Menu Controls Group: AUDI ,AUX,CBL/SAT,
CD,DVD,PVR,TV,and
VCR
KAMELE N 8-DEVICE REM TE
12 C ecking T e Codes/Using T e Home T eater Mode
OFA Kameleon UG 5/8/03 3:22 PM Page 12
FACT RY DEFAULT SETTINGS
At the factory, the Control Groups are assigned
the following modes as defa lt settings:
Video Playback Group: DVD
Volume Controls Group: AUDI
Channel Controls Group: CBL/SAT
Menu Controls Group: CBL/SAT
If the defa lt settings fit yo r needs, yo can
skip programming this mode. Otherwise, per-
form the steps in the following section to assign
device modes to the Control Groups.
PR GRAMMING THE HME THEATER MDE
1. Press any device key once (i.e., AUX,CBL/SAT,
CD,TV,DVD,AUDI ,VCR,or PVR). The selected
device key will animate.
2. Press and hold SETUP ntil the two bottom
IR segments flash twice. The Program Keys
will appear as SETUP flashes repeatedly.
3. Press THEATER once. The Video Playback
programming screen will appear:
NOTE: If a device key is animated, it is assigned to
this function group. To continue programming the
Home Theater mode, you must select a device key,
even if it is the same one that is currently animated.
3. To assign a mode to the Video Playback gro p,
press a device key once (i.e., AUX,CBL/SAT,
CD,TV,DVD,AUDI ,VCR,or PVR). Then the
Volum e Cont rol s programming screen will appear:
NOTE: If a device key is animated, it is assigned to
this function group. To continue programming the
Home Theater mode, you must select a device key,
even if it is the same one that is currently animated.
4. To assign a mode to the Volum e Cont rol s gro p,
press a device key once. Then the Channel
Controls programming screen will appear:
NOTE: If a device key is animated, it is assigned to
this function group. To continue programming the
Home Theater mode, you must select a device key,
even if it is the same one that is currently animated.
continued on next page...
USER’SGUIDE
Using T e Home T eater Mode 13
OFA Kameleon UG 5/8/03 3:22 PM Page 13
USING THE H ME THEATER M DE
PR GRAMMING THE HME THEATER MDE
(C NTINUED)
5. To assign a mode to the Channel Controls
gro p,press a device key once.Then the Menu
Controls programming screen will appear:
NOTE: If a device key is animated, it is assigned to
this function group. To continue programming the
Home Theater mode, you must select a device key,
even if it is the same one that is currently animated.
6. To assign a mode to the Menu Controls gro p,
press a device key once. Since Home Theater
programming is now complete, the Program
Keys will appear again.
7. To exit programming,press H ME once. The
display will ret rn to the last-selected device
men screen.
CHANGING V LUME L CK
The OFA Kameleon 8-Device Remote is set at the
factory for independent vol me control of each
selected device.
However, yo may change the Vol me Lock
setting to Global Volume Lock so that a device’s
vol me will be locked to one mode (e.g., to
control TV vol me in all other modes).After
that, if desired, yo can perform Individual
Volum e Un lo c k on a selected device to set its
vol me control for independent operation.
LCKING VLUME CNTR L TNE MDE
(GL BAL VLUME LCK)
1. Press and hold SETUP ntil the two bottom
IR segments flash twice. The Program Keys
will appear as SETUP flashes repeatedly.
2. Press V L once. The Volu m e Lo ck
programming screen will appear:
3. Press a device key once (i.e., AUX,CBL/SAT,
CD,TV,DVD,AUDI ,VCR,or PVR) where yo
want the vol me controls locked to.The two
bottom IR segments will flash twice and the
Program Keys will appear again.
4. To exit programming,press H ME once. The
display will ret rn to the last-selected device
men screen.
5. Now, when yo press V L ▲,V L▼,or MUTE,
the selected device’s vol me will be con-
trolled, regardless of the mode selected.
KAMELE N 8-DEVICE REM TE
14 Using T e Home T eater Mode/C anging Volume Lock
OFA Kameleon UG 5/8/03 3:22 PM Page 14
UNL CKING VLUME CNTR L FR A SINGLE
DEVICE (INDIVIDUAL VLUME UNL CK)
1. Press and hold SETUP ntil the two bottom
IR segments flash twice. The Program Keys
will appear as SETUP flashes repeatedly.
2. Press V L once. The Volu m e Lo ck
programming screen will appear:
3. Press V L▼once.Then press a device key
once (i.e., AUX,CBL/SAT,CD,TV,DVD,AUDI ,
VCR,or PVR) where yo want the vol me
controls nlocked.The two bottom IR seg-
ments will flash twice and the Program Keys
will appear again.
NOTE: The programming mode is still active as
denoted by the flashing SETUP key. If desired, use the
other Program Keys to continue programming (see
Table of Contents on page 2 for related sections).
4. If desired,repeat steps 1 thro gh 3 (of this
section) for each device that yo want vol me
to be nlocked.
5. To exit programming,press H ME once. The
display will ret rn to the last-selected device
men screen.
6. Now, after yo select a device that has
vol me nlocked, pressing V L ▲,V L▼,or
MUTE will control the device’s vol me only in
its own mode.
UNL CKING ALL VLUME CNTR L
(REST RING DEFAULT SETTING)
1. Perform steps 1 and 2 of the previo s section.
2. Press V L ▲once. The two bottom IR seg-
ments will flash twice and the Program Keys
will appear again.
3. To exit programming,press H ME once. The
display will ret rn to the last-selected device
men screen.
4. Vol me will again be independently con-
trolled according to its defa lt states for all
programmed devices.
USER’SGUIDE
C anging Volume Lock 15
OFA Kameleon UG 5/8/03 3:22 PM Page 15
USING MACR S
The OFA Kameleon 8-Device Remote incl des
five Macro Keys,M1 thro gh M4 and P WER.
Each one can be set p to perform a repetitive,
time-cons ming operation with the press of a
single key.
NOTE: A macro programmed onto the POWER key can
only be accessed in the HOME THEATER mode. Pressing
it in any other mode will only send a “Power On/Off”
IR command to the selected device.
A macro can be sed to control a home theater
operation, to set a favorite channel, or for other
m ltiple f nctions yo wo ld like to control
with one key press. Moreover, each Macro Key
can hold p to 15 key presses total.
NOTE: Programming a new macro over an existing
one will erase the original macro.
PR GRAMMING A FAV RITE CHANNEL MACR
With so many channels available on yo r cable
or satellite system, yo can program a macro
that directly selects a favorite channel with one
key press.
For example, let’s ass me yo r favorite cable
programs are on channel 71. Use the following
instr ctions to program a macro for direct access
of this channel:
NOTE: The following example assumes all equipment
is turned off and that the TV is connected through the
Cable Box with TV tuning set to channel 3.
1. Press and hold SETUP ntil the two bottom
IR segments flash twice. The Program Keys
will appear as SETUP flashes repeatedly.
2. Press MACR once. The Macro programming
screen will appear (as shown above right):
3. Press an open Macro Key (e.g., M1,M2,M3,
or M4). The last-selected device men screen,
incl ding H ME,will be displayed.
4. Enter a desired macro seq ence of p to 15
key presses. For this example, press TV once,
followed by P WER once, and then enter 0 3
for the TV’s channel n mber. Next, press
CBL/SAT once, followed by P WER once,
and then enter 0 7 1 for the Cable Box’s
channel n mber.
NOTE: If there are more than 15 key presses in the
sequence, the bottom IR segments will display a
long flash denoting an error. The display will return
to the last-selected device menu screen. To program
the macro, start again with step 3.
5. To save the macro,press and hold SETUP ntil
the two bottom IR segments flash twice. The
Program Keys will appear again.
6. Exit programming by pressing H ME once.
The display will ret rn to the last-selected
device men screen.
7. Now, if yo aim the remote control at the
devices selected in step 4 and press the
programmed Macro Key once, the TV will
t rn on and t ne to channel 3. Then,the Cable
Box will t rn on,and t ne to channel 071.
PR GRAMMING A MASTER PWER MACR IN
THE HME THEATER MDE
A macro can be programmed onto the P WER
key to t rn on or off as many as seven Home
Theater devices.
NOTE: This following example assumes the Home
Theater system contains a atellite Receiver, a DVD
Player,an Audio Receiver,and a TV.
KAMELE N 8-DEVICE REM TE
16 Using Macros
OFA Kameleon UG 5/8/03 3:23 PM Page 16
1. Press and hold SETUP ntil the two bottom
IR segments flash twice. The Program Keys
will appear as SETUP flashes repeatedly.
2. Press MACR once. The Macro programming
screen will appear:
3. Press P WER once.The last-selected
device men screen, incl ding H ME,
will be displayed.
4. Enter the macro seq ence. For this example,
press CBL/SAT once, followed by P WER once.
Next, press DVD once, followed by P WER
once. Then press AUDI once, followed by
P WER once. Finally, press TV once, followed
by P WER once., and then the Home Theater
key once.
5. To save the power macro, press and hold
SETUP ntil the two bottom IR segments flash
twice. The Program Keys will appear again.
6. Exit programming by pressing H ME once.
The display will ret rn to the last-selected
device men screen.
7. To test the power macro,first make s re all
home theater devices selected in step 4 are
t rned on.Aim the remote control at the
devices and press the Home Theater key once,
followed by P WER once. The devices sho ld
t rn off in this order: Satellite Receiver, DVD
Player, A dio Receiver, and TV.
To t rn on the devices on again in the same
order as above,press P WER once.
CLEARING A MACR
1. Press and hold SETUP ntil the two bottom
IR segments flash twice. The Program Keys
will appear as SETUP flashes repeatedly.
2. Press MACR once. The Macro programming
screen will appear:
3. Select the Macro Key to be cleared and press
it once. The last-selected device men screen
will be displayed.
4. Press and hold SETUP until the two bottom IR
segments flash twice.The Program Keys will
appear again.
5. To exit programming,press H ME once. The
display will ret rn to the last-selected device
men screen.
USER’SGUIDE
Using Macros 17
OFA Kameleon UG 5/8/03 3:23 PM Page 17
USING LEARNING
The OFA Kameleon 8-Device Remote incl des a
Learning feat re so yo can add f nctions that
are niq e to yo r home entertainment devices
(e.g.,VCR Tracking Up or Down). However,
there are some considerations:
LEARNING PRECAUTI NS
• Yo r original remote controls m st be in
working order for learning to work properly.
• Learned keys are mode specific, so each one
can store a niq e f nction for each mode.
• Learned keys can be sed in macros (see
Using Macros on page 16).
• Do not se the following keys for learning:
Device Keys,M1~M4,SETUP,FAV,SCR LL,
PRESET,PVR V D,or Record (•) Key.
• Learning capacity is approximately 16 to 25
keys, depending on the code being learned.
• If both learned and keymoved f nctions
are assigned to the same key, the last
programmed f nction will be stored.
• A learned f nction cannot be sed as a
so rce for Keymover (see Using Keymover on
page 20).
• Certain device codes are not learnable
incl ding m lti-freq ency types, some high
freq ency ones, and other n s al formats.
• For optim m learning, avoid high levels of
ambient light s ch as nat ral s nlight or
energy-efficient fl orescent lights.
NOTE: Please have your original remote controls
handy before programming learning. Be sure to press
each teaching key within 5 seconds of the previous
entry. Otherwise, the OFA Kameleon 8-Device Remote
will exit the programming mode.
PR GRAMMING A LEARNING KEY
1. Press and hold SETUP ntil the two bottom
IR segments flash twice. The Program Keys
will appear (as shown above right) as SETUP
flashes repeatedly.
2. Press IR LRN once. The IR Learn
programming screen will appear:
3. Press a device key once (i.e., AUX,CBL/SAT,
CD,TV,DVD,AUDI ,VCR,or PVR) to assign a
mode for learning.The selected device men
screen,incl ding H ME,will be displayed.
4. Place the OFA Kameleon 8-Device Remote
head-to-head (abo t 2" apart) from yo r
original remote control.Also locate the key
(on yo r original remote control) that will
serve as the teaching f nction.
5. On the OFA Kameleon 8-Device Remote,
select and press a desired key where the
learned f nction will be stored.The IR
segments will display an incoming
animation,contin e for three revol tions,
and then the entire display will t rn off.
After the display is off, press and hold the
teaching key (on yo r original remote control)
ntil the display (on the OFA Kameleon
8-Device Remote) t rns on again.The two
bottom IR segments will flash twice when the
code is s ccessf lly capt red.
NOTE: If the two bottom IR segments display one long
flash, a learning error has occurred.Try repeating this
step again until a successful capture occurs.If the
2"
KAMELE N 8-DEVICE REM TE
18 Using Learning
OFA Kameleon UG 5/8/03 3:23 PM Page 18
function is still not captured, press HOME twice to exit
programming and review the “Learning Precautions”
on the previous page. If needed, also see
“Troubleshooting” on page 31.After review, start
programming again at step 1.
6. To learn other f nctions, repeat steps 3
thro gh 5 as desired.
7. To exit programming,press H ME twice. The
display will ret rn to the last-selected device
men screen.
DELETING A SINGLE LEARNED KEY
1. Press and hold SETUP ntil the two bottom
IR segments flash twice. The Program Keys
will appear as SETUP flashes repeatedly.
2. Press IR DEL once. The IR Delete
programming screen will appear:
3. Press a device key once (i.e., AUX,CBL/SAT,
CD,TV,DVD,AUDI ,VCR,or PVR) for the mode
where the learned key to be deleted resides.
The selected device men screen, incl ding
H ME,will be displayed.
4. Press the learned key to be deleted twice.
Upon deletion, the two bottom IR segments
will flash twice as confirmation.The Program
Keys will appear again.
5. If desired,repeat steps 2 thro gh 5 to delete
another learned key.
6. Exit programming by pressing H ME once.
The display will ret rn to the last-selected
device men screen.
DELETING ALL LEARNED KEYS INA
SPECIFIC MDE
1. Press and hold SETUP ntil the two bottom
IR segments flash twice. The Program Keys
will appear as SETUP flashes repeatedly.
2. Press IR DEL once. The IR Delete
programming screen will appear:
3. Press a device key once (i.e., AUX,CBL/SAT,CD,
TV,DVD,AUDI ,VCR,or PVR) for the mode
where the learned keys to be deleted reside.
The selected device men screen,incl ding
H ME,will be displayed.
4. Press the same device key (as in step 3) once.
Upon deletion, the two bottom IR segments
will flash twice as confirmation.The Program
Keys will appear again.
5. If desired,repeat steps 2 thro gh 5 to delete
other learned keys from another mode.
6. Exit programming by pressing H ME once.
The display will ret rn to the last-selected
device men screen.
USER’SGUIDE
Using Learning 19
OFA Kameleon UG 5/8/03 3:23 PM Page 19
REASSIGNING DEVICE KEYS
The OFA Kameleon 8-Device Remote can be set
to control a second device. For example, to con-
trol a TV, a cable box, and two DVD players, yo
can reassign the n sed AUX key to operate the
second DVD player as follows:
1. Press and hold SETUP ntil the two bottom
IR segments flash twice. The Program Keys
will appear as SETUP flashes repeatedly.
2. Press M DE once. The Mode Mover
programming screen will appear:
3. For the so rce mode, press a device key once
(i.e., AUX,CBL/SAT,CD,TV,DVD,AUDI ,VCR,
or PVR). For this example, press DVD once.
The selected device men screen, incl ding
H ME,will be displayed.
NOTE: Only one device can be assigned to an
unused device key at a time.
4. For the destination mode, press a device key
once (i.e., AUX,CBL/SAT,CD,TV,DVD,AUDI ,
VCR,or PVR). For this example, press AUX
once. Upon reassignment, the two bottom IR
segments will flash twice as confirmation.
The Program Keys will appear again.
5. For this example, the AUX key is now ready to
be set p to control yo r second DVD player.
See Programming Device Control on page 8.
If desired, repeat steps 2 to 5 to reassign
another device.
6. Exit programming by pressing H ME once.
The display will ret rn to the last-selected
device men screen.
USING KEYM VER
The OFA Kameleon 8-Device Remote incl des a
Keymover feat re that allows yo to map (or
copy) keys from one mode (i.e., so rce mode) to
another mode (i.e., destination mode).
NOTE: Do not use any of the Device Keys as a source
or destination key.
PR GRAMMING KEYM VER
For example, if yo r DVD player does not have
vol me control, yo can map those keys (i.e.,
V L▲,V L▼,and MUTE) from the TV mode to
DVD mode as follows:
1. Press and hold SETUP ntil the two bottom
IR segments flash twice. The Program Keys
will appear as SETUP flashes repeatedly.
2. Press THER once.The Other programming
screen will appear:
3. Using the Number Keys,enter 9 9 4.The two
bottom IR segments will flash twice.
4. For the so rce mode, press a desired device
key once (i.e., AUX,CBL/SAT,CD,TV,DVD,
AUDI ,VCR,or PVR). For this example, press
TV once. The selected so rce device men
screen,incl ding H ME,will be displayed.
KAMELE N 8-DEVICE REM TE
20 Reassigning Device Keys/Using Keymover
OFA Kameleon UG 5/8/03 3:23 PM Page 20

Other manuals for Kameleon

1

This manual suits for next models

1

Other One Forall Universal Remote manuals

One Forall URC-7781 User manual

One Forall

One Forall URC-7781 User manual

One Forall URC-7930 User manual

One Forall

One Forall URC-7930 User manual

One Forall Universal remote User manual

One Forall

One Forall Universal remote User manual

One Forall 6-DEVICE PVR User manual

One Forall

One Forall 6-DEVICE PVR User manual

One Forall URC-4063 EASY 4 User manual

One Forall

One Forall URC-4063 EASY 4 User manual

One Forall URC 7120 User manual

One Forall

One Forall URC 7120 User manual

One Forall 704917 User manual

One Forall

One Forall 704917 User manual

One Forall URC-7532 User manual

One Forall

One Forall URC-7532 User manual

One Forall URC-7556 User manual

One Forall

One Forall URC-7556 User manual

One Forall URC 1635 User manual

One Forall

One Forall URC 1635 User manual

One Forall A/V Producer URC 8800 User manual

One Forall

One Forall A/V Producer URC 8800 User manual

One Forall Easy 2 User manual

One Forall

One Forall Easy 2 User manual

One Forall iLifeTV User manual

One Forall

One Forall iLifeTV User manual

One Forall 3 Zapper User manual

One Forall

One Forall 3 Zapper User manual

One Forall Audio Zapper User manual

One Forall

One Forall Audio Zapper User manual

One Forall URC-8350 User manual

One Forall

One Forall URC-8350 User manual

One Forall URC-7540 User manual

One Forall

One Forall URC-7540 User manual

One Forall Zapper URC-6520 User manual

One Forall

One Forall Zapper URC-6520 User manual

One Forall Univeral Remote User manual

One Forall

One Forall Univeral Remote User manual

One Forall URC-6230 User manual

One Forall

One Forall URC-6230 User manual

One Forall Zapper URC-6512 User manual

One Forall

One Forall Zapper URC-6512 User manual

One Forall URC-7800 Cinema 7+ User manual

One Forall

One Forall URC-7800 Cinema 7+ User manual

One Forall URC-3740 User manual

One Forall

One Forall URC-3740 User manual

One Forall URC-7010 User manual

One Forall

One Forall URC-7010 User manual

Popular Universal Remote manuals by other brands

GE RM24927 instruction manual

GE

GE RM24927 instruction manual

Universal Remote Control omega MX-650 owner's manual

Universal Remote Control

Universal Remote Control omega MX-650 owner's manual

Logitech Harmony 900 quick start guide

Logitech

Logitech Harmony 900 quick start guide

GE 33712 instruction manual
GE

GE 33712 instruction manual

Philips Universal SBC RU 151 Brugsanvisning

Philips

Philips Universal SBC RU 151 Brugsanvisning

Leb Electronics SMARTY 868 instructions

Leb Electronics

Leb Electronics SMARTY 868 instructions

Savant SUR-0500 Quick reference guide

Savant

Savant SUR-0500 Quick reference guide

Bose Wave music system user guide

Bose

Bose Wave music system user guide

Onn 100020904 user manual

Onn

Onn 100020904 user manual

RCA RCR412B user guide

RCA

RCA RCR412B user guide

Contec Synergy V RT-U60C Programming and operating instructions

Contec

Contec Synergy V RT-U60C Programming and operating instructions

Philips ph750T owner's manual

Philips

Philips ph750T owner's manual

Radio Shack Plug 'n Power 61-2677C owner's manual

Radio Shack

Radio Shack Plug 'n Power 61-2677C owner's manual

Philips SRU5060 Instructions for use

Philips

Philips SRU5060 Instructions for use

Cisco AT3400 user guide

Cisco

Cisco AT3400 user guide

HEITECH HT 0018 operating instructions

HEITECH

HEITECH HT 0018 operating instructions

Chunghop RM-L988 operating instructions

Chunghop

Chunghop RM-L988 operating instructions

Bay Products BW-1220-US user manual

Bay Products

Bay Products BW-1220-US user manual

manuals.online logo
manuals.online logoBrands
  • About & Mission
  • Contact us
  • Privacy Policy
  • Terms and Conditions

Copyright 2025 Manuals.Online. All Rights Reserved.