Onida LEO40FC3D User manual

1
53 7
2 64 8
Picture
• PressMenu/ikeyonremotecontrolorMenubuttononControlPanelofLCD/LEDTVtodisplay
mainTVMenu.
• PressV- keyonyourremotecontrolofyourLCD/LEDTVtoselectPictureMenu.
• PressCH ( ) / CH ( )buttononyourremotecontroltotheselectfromfollowingoptions
1. Picture Mode
2. Brightness
3. Contrast
4. Color
5. Hue
6. Sharpness
7. Advanced
Afterselectingtherequiredoptionyoucanadjustitby
V+/V-keyseitherfromremotecontrolorcontrolpanel
oftheTV.
Features
YoucanaccesstheFeaturesavailableinyourLCD/LEDTVusingFeatureMenuonscreen.
• PressMenu/ikeyonremotecontrolorMenukeyonControlPanelofLCD/LEDTVtodisplay
mainTVMenu.
• PressCH onremotecontrolorCH+onControlPanelofLCD/LEDTVtoselectFeatures.
BelowarethefeatureswhichyoucanaccessintheFeatureMenu.
1. OSD Transparency
2. Wake Up Alarm
3. Sleep Timer
4. Blue Screen
5. Backlight (Optional)
6. Current Time
AfterselectingtherequiredoptionyoucanadjustitbyV+/V-keyseitherfromremotecontrolor
controlpaneloftheTV.
Advanced
AfterselectingtheAdvancedbypressingV+keyonyour
remotecontrolyoucanselectfollowingoptionsby
pressingCH ( )/CH ( )keys.
1. Noise Reduction
2. Fleshtone
3. Dynamic Contrast
4. Color Temp
Afterselectingtherequiredoption(1-4),pressV+/V-for
adjustmentasperyourliking.
PC 28/01/2014 11052284
2. TV Installation.
INSTRUCTION MANUAL
1. Quick Set-Up
Afterunpackingthecarton,pleasemakesurethefollowingaccessoriesarepresent.
Accessories*
• InstructionManual
• USBCable(Optional)
• Two1.5VAAABatteries
• RemoteControl
• WallMountBracket(Optional)
• Screws,WallMountSpacers,PlugConcrete,FoamPad(Asapplicable)
•Silica-GelBag(Optional)
•ComponentAudioINCable(Optional)
• AVOutCable(Optional)
•AvandComponentincable(Optional)
•StandBase(Optional)
•3DGlasses(Optional)0
Incaseyoundanyitemmissing,contactyourdealer.
*SubjecttochangeasperModel.
Note:0Markedaccessorynotavailableinnon3Dmodel
Installation Options:
•YoucaninstalltheTVonawallorplaceitonatable-likesurface.
•ToeliminateanyriskofinjuryfromtheTVfalling,itshouldbemounted/placedsecurely.
Wall Installation
DonotinstalltheTVonaweakwallsurface,likeplasteretc.
3. Remote Control3. Remote Control
Remote Control
TheremotecancontrolallthefunctionsofTV.Somefunctionscan
alsobeadjustedwiththeKeysonthecontrolpaneloftheTVSET.
Pleaseinstallthebatteriesbeforeyouusetheremote.
1. STANDBY ( ): ThiskeyisusedtoturntheLCD/LEDTVONfrom
standbymodeorputtheTVtostandbymode.
2. NUMBER KEY (0-9) : Thesekeyareusedtoselectchannelnumber
bydirectlypressingnumberkeys.
3. CH. MGR: TheusercanpressCH. MGRkeytoviewtheCH.Manager
menu.
4. MY VIEW : TheusercanpressMYVIEWkeytoviewthelistoffavorite
channelsinnon3Dmodels&forthe3DmodelsUsercanpressMYVIEW
togothe3Doption.
5. MUTE : TheusercanpressMUTEkeytomutethesoundofLCD/LEDTV,
whentheTVisalreadyinMUTE,theusercanun-mutetheTVby
pressingthiskey.
6. BROWSE BOX : TheusercanpressBROWSE BOXkeytobrowsethetuned
channelsinRFsource.
7. CH[Up]/CH[Down] : Theusercanselectthechannelinupward/
downwarddirection.Thiskeycanalsobeusedas / navigationinmenu.
8. V+/V-: Theusercanpressthesekeystoadjust(Increase/decrease)
thevolumelevel.Thiskeycanalsobeusedas / navigationmenu.
9. OK( ) : TheusercanpressOKkeytoconrmtheselectionwhile
doingmenusetting.
10. Back / : PressBack/ keytoexitfrommenuandsubmenudisplay.
WhentheUserMenuisnotdisplayed,PressingofBack / keyoncewill
swapbetweencurrentviewedchanneltopreviouslyviewchannel.
11. iPLAYON : PressiPLAYONkeytoenterintoUSB(iPLAYON)mode.
PressiPLAYONagaintocomeoutfromUSBmode.
12. MENU / i : DisplaythemainmenuonscreenwhenMenukeyispressed
onceandexitsfrommainmenuwhenMenukeyispressedagain.
13. SOURCE : Thiskeyisusedtodisplaythesourcemenuwhere
theusercanselectbetweenfollowinginputsources(TV,AV1,AV2,CMPT,
VGA,HDMI1&HDMI2)
14. S.MODE : Thiskeyenablesusertoselectdifferentsoundmodes
(Normal,Music,Flat&Movie).
15. SURR : Thiskeyenablestheusertoselectfromthefollowingsurround
options(ON/OFF)
16. P.SIZE : Thiskeyenablesusertochangethepicturesizeto16:9,
Zoom1,Zoom2,Autoand4:3.
17. P.MODE : Thiskeyenablestheusertoselectdifferentpicturemodes
(Normal,Vivid,Cinema,NewsandSports).
18. BASS+ : Notavailable/optional,PresstheBass+keytomakethe
WooferOn/Off.
Note : P-SIZEkeywillnotsupportnonTvstandardresolutioniniPLAYON
forVideos&Photos.
Remote Control
Multimedia Keys
Stop playback[ ]
1. PressSTOPkeytostoptherunningVideo/Audiocontentplaying
fromtheUSB.
Previous [ ]and Next [ ]
Duringplaying,press keytoskipbacktotheprevious
chapter,theneachpressofthekeywillskipachaptertillthestart
ofthedisc.
Eachpressof keyduringplayingwillskipthecurrentchapter
andplaythenextone.
Fast Forward [ ]and Fast Rewind [ ]
FFKEYS-FastForwardcontentswithspeedsof2x,4x,8x,16x
FRKEYS-FastRewindcontentswithspeedsof2x,4x,8x,16x
Pause Playback [ II ]
1. Press II keytopauseplayback(stillmode).Thesoundwillbe
mutedduringstillmode.
2. PressPAUSEtoresumenormalplayback.
Note:[II ] thiskeyworksasa“FREEZE”functioninothersources
excepttheUSBsource.
1.4 Basic Operations
ToviewtheTVanduseitsfeaturesyouhavetoturnthesetONasper
followingprocedure:
1.ConnecttheACpowercordofLCD/LED TVtoACoutlet.
2.Pressthe STANDBY KeyonremotecontrolorSTANDBY keyon
ControlPanelofLCD/LEDTVtoswitchthesetON.
Volume Adjustment
1. PresstheV+/V-keysonremotecontrolor
V+/V-keysonControlPanelofLCD/LED
TVtoadjustvolume.
2. IfyouwanttoswitchthesoundOFF,press
theMUTEKeyonremotecontrol.
3. Toun-mutetheLCD/LEDTV,pressMUTE
KeyonremotecontrolorV+/V-keystoturn
theVolumeON.
Programme Selection
1. PressCH ( ) / ( ) keyonremotecontrol
or / Key oncontrolpanelof
LCD/LED TVtobrowseprogrammesin
upwardordownwarddirection.Channel
numberisdisplayedontherightuppercorner
oftheLCD/LED TV. Channelstartsfrom01.
X MUTE
01
01
4. Key Controls
1. Menu:
Displaystheon-screenusermenu.PressMenukeyonControlPanelofthesettodisplay
theusermenuonLCD/LEDTVscreen.
2. CH+/CH- (Channel Up / Channel Down):
Itisusedtoselectaprogramormenuitem.UseCH+Keytochangeprogramtothenext
channelorCH-KeytochangeprogramtothepreviousChannel.WheninTVMENU,CH+
selects‘FEATURES’andCH-selects‘SETUP’.IntheonscreenmenuuseCH+/CH-Keys
tonavigateUP/DOWNsimilarto keysonremotecontroltoselectmenuitem.
WhentheLED/LCDTVisinStand-bymode,thenCH+/CH-keyisusedtoswitchitON.
3. V+/ V- (Volume Up / Volume Down):
Itisusedtoadjustthevolume/adjusttheMenuSettings,UseV+Keytoincreasethe
volumeandpressV-Keytodecreasethevolume.WheninTVMENU,V+selectsthe
‘SOUND’andV-selectsthe‘PICTURE’adjustment.Intheon-screenmenuuseV+/V-keys
asyouusethe keysonremotecontroltoadjustmenusetting.
4. Stand-by:
TurnstheLCD/LEDTVON/OFF.
5. Source (Optional):
Displaythesourceselectionmenuwheretheusercanselectthedesiredinputsource.
Note:
ForControlKeysreferCabinet Picturespage.
Setting Up TV MENU Program
Features
PresstheCH( )keyonremotecontrolor
CH+onFrontControlPanelofLCD/LEDTVto
selectFEATURESMenu.
Setup
PresstheCH( )keyonremotecontrolorCH-
keyonFrontControlPanelofLCD/LEDTVto
selectSETUPMenu.
Sound
PresstheV+( )keyonremotecontrolorV+
keyonFrontControlPanelofLCD/LEDTVto
selectSOUNDMenu.
Picture
PresstheV-( )keyonremotecontrolorV-
keyonFrontControlPanelofLCD/LEDTVto
selectPICTUREMenu.
Setup Picture
6. Setup
7. Features
Setup
• PressMenu/ikeyonremotecontroltodisplayTVMenu.
• PresstheCH keyonremoteorCH-keyoncontrolpaneltodisplaysetupmenu.
• PressCH / CH keysonremoteorCH+/CH-oncontrolpaneltoselectfromfollowingoptions.
1. Language 2. Source 3. Auto Tuning 4. Manual Adjust 5.Channel Manager
Language
TheusercanselecttheLanguageofhispreferencethroughthisoption.
• PressMenu/ikeyonremotecontrolorMenukeyonControlPanelofLCD/LED TVtodisplay
mainTVMenu.
Noise Reduction
Advanced
High
Off
On
Cool
Fleshtone
Dynamic Contrast
Color Temp
8. Picture
5. Setting Up TV MENU Program
Navigating Through Menu
TheTV MENUdisplayallowsusertoaccesstheFEATURES/SOUND/SETUP/PICTUREadjustments
areavailableinLCD/LED TV.
TonavigatethroughtheTV MENUpresstheMenukeyonremotecontrolorMenuKeyonControl
PanelofLCD/LED TVtodisplayTV MENU.
• PressCH keyonremotecontrolorCH- keyonControlPanelofLCD/LED TVtoselectSetup.
• PressCH / CH keyonremotecontrolorCH+ / CH- keyonControlPanelofLCD/LED TVto
selectLanguage.
• Press V+( ) / V- ( )keyonyourremotecontroloronControlPanelofLCD/LED TVtoselectthe
desirelanguagefromtheavailablelist.
• PresstheMenu/ikeyonceorBackkeyonremotecontrolorMenuKeyonControlPanelof
LCD/LED TVtoreturntothepreviousmenu.RepeatedlypressMenu/ikeyorBackkeyonremote
controlorMenuKeyonControlPanelofLCD/LED TVtoexitfromdisplay.
Auto Tuning
• ThisprocessallowstheusertosetallthechannelsoftheLocalCableNetwork.
• PressMenu/ikeyonremotecontrolorMenukeyonControlPanelofLCD/LED TVto
displaymainTVMenu
• PressCH keyonremotecontrolorCH-keyonControlPanelofLCD/LED TVtoselectsetup.
• PressCH / CH keyonremotecontrolorCH+/ CH-KeyonControlPanelofLCD/LED TVto
theselectAutoTuning.
• Press V+ keyonyourremotecontrolorV+ keyoncontrolpaneltoselectAutoTuningand
thenpressOKkeyonremoteorCH+keyoncontrolpaneltoconrmyourselection.
• WhenOKkeyispressedonAutoTuneconrmscreen,Autotuningscreenappearswhich
indicatestheRFfrequencytuningstatus.
• PressOKorMenu/ikeyonremotecontrolorMenukeyonControlPanelofLCD/LED TVto
stoptheautotuning.
Setting for Sound System
• SelecttheManualAdjustbypressingtheremoteCH / CH key.Selectthe“AudioSystem”
presstheV+/ V- keytoselectanappropriatesoundsystem:BG.DK.I(DefaultBG)
Note:Beforeauto/manuallytunningkeepsoundsystemBGforIndia.
9. Sound
Sound
• PressMenu/ikeyonremotecontrolorMenukeyonControlPanelofLCD/LEDTVtodisplaymain
TVMENU.
• PressV+keyonyourremotecontrolorcontrolpanelofLCD/LEDTVtoselecttheSoundMenu.
• PressCH/ CH keyonyourremotecontroltotheselectthefollowingoptions
Afterselectingtherequiredoption(1-5),pressV+/V-foradjustmentasperyourliking.
1. Sound Mode
2. Bass
3. Treble
4. Balance
5. Auto Volume
6. Equalizer
PressBack/MenukeyoncetoreturntothepreviousmenuandpresstheBack/Menu key
repeatedlytoexitfromthedisplay.
CAUTION

9 11 13 15
10 12 14 16
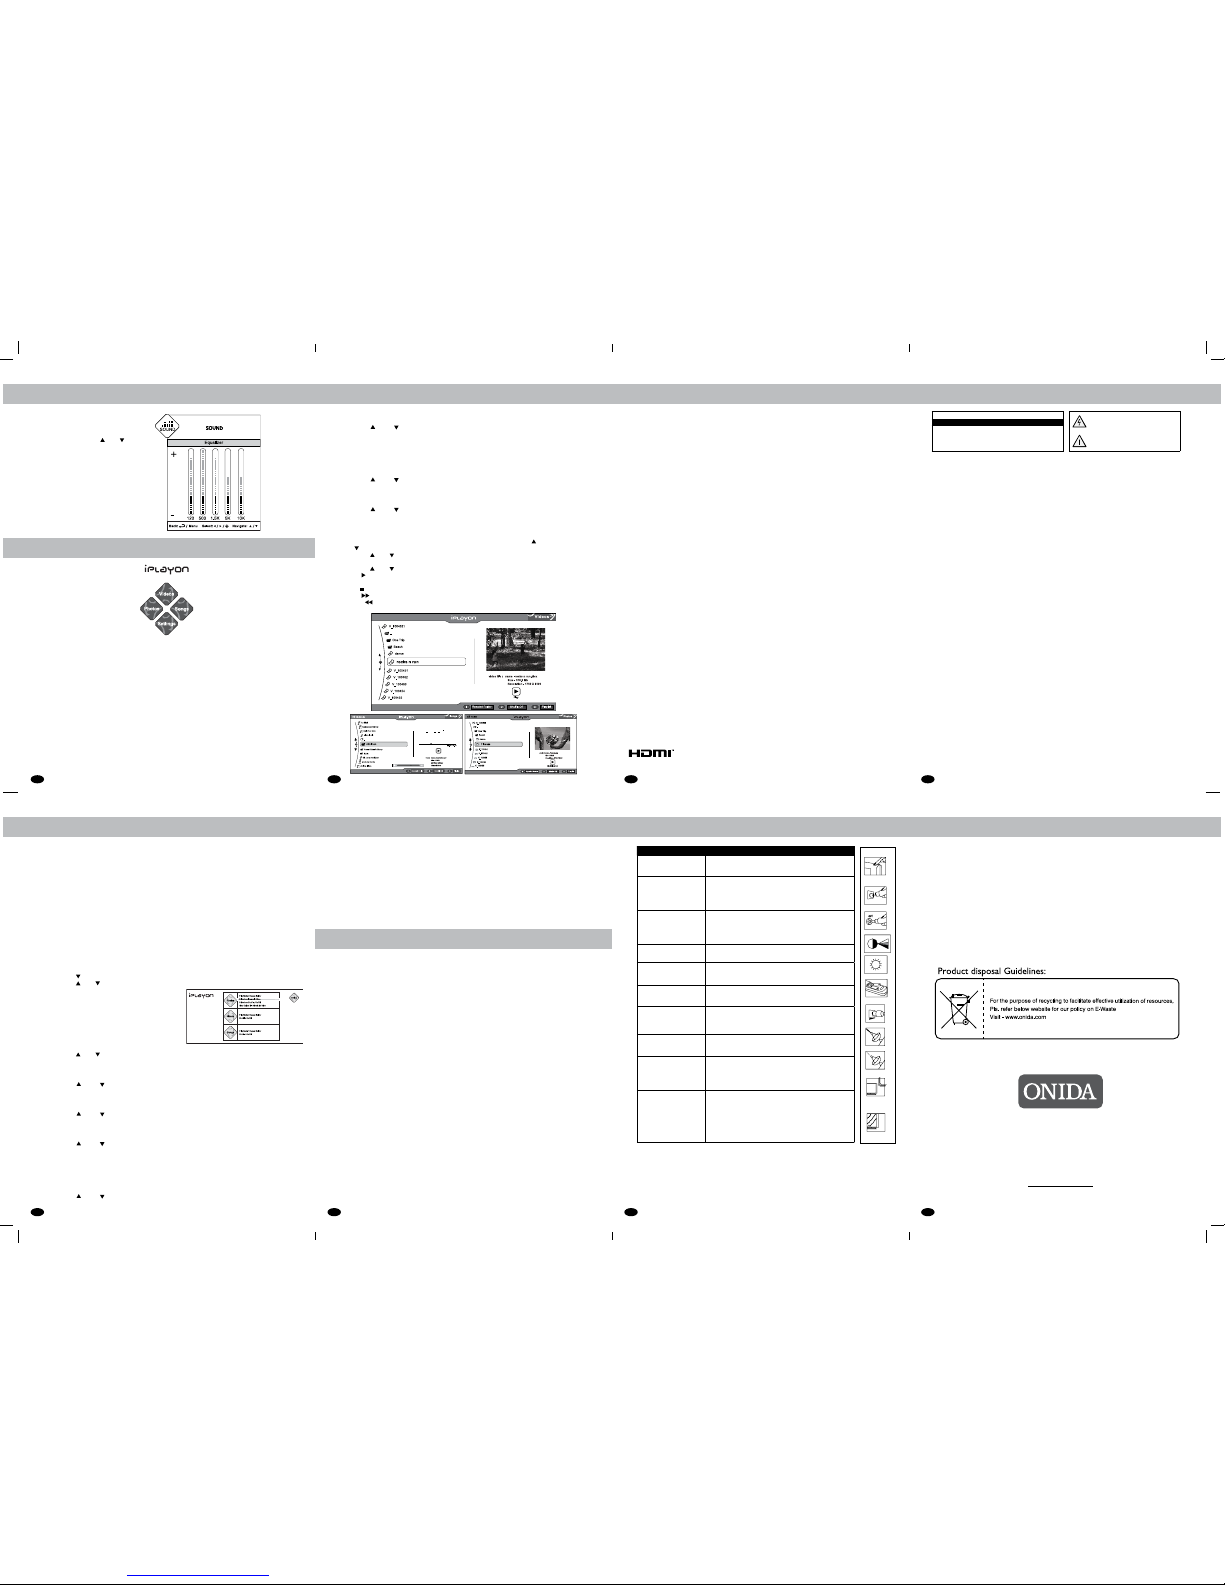
AfterselectingtheEqualizerbypressingV+/V-
youcanselecttherequiredfrequencyband,
andadjustitbyusingCH/ CH from
remotecontrolorcontrolpanelofTVasper
yourliking.
Equalizer Screen
10. iplayon
iplayon
TheONIDA LCD/LED TVgivesusertheexibilitytoconnectUSBdrivesandviewitscontents.
Thedesignismadesuchthattheusercanseephotos,viewvideosandplaysongs.Thedesign
takescareofsupportingmajorityofformatsforphotos,videosandsongs.
Onjustonekeyclick,theuserisabletoentertheiPLAYONMode.
USB Ports Selection (Optional)
1) IfUSBDeviceisconnectedtoUSB1portofLCD/LEDTV,thenLCD/LEDTVwilldetectand
display“MemoryDeviceConnected”andSymbol“USB1”willbeGREENcolour.Nowyoucanselect
Videos/Songs/Photos.
2) IfUSBDeviceisconnectedtoUSB2portofLCD/LEDTV,ThenyouhavetoPressNumericKey“2”
fromtheRemoteControl,toselecttheUSBDevice.AfterpressingNumericKey“2”StatusofUSB2will
become“MemoryDeviceConnected”and“USB2”SymbolbecomeGreen.Nowyoucanselect
Videos/Songs/Photos.
3) IfTwoUSBDeviceareconnectedtobothUSBportsofLCD/LEDTV,ThenbyDefaultLCD/LEDTVwill
displayUSB1“MemoryDeviceConnected”andSymbol“USB1”becomeGreen.Ifyouwanttoselect
USB2.ThenyouhavetopressNumericKey“2”fromtheRemoteControl.Now“USB2”Symbol
becomeGreen.NowyoucanselectVideos/Songs/Photos.IfyouwanttoselectUSB1.Thenyouhave
PressNumericKey“1”fromremotecontrol,thenstatusofUSB1willbecome“MemoryDevice
Connected”and“USB1”SymbolbecomeGreen.NowYoucanselectVideos/Songs/Photos.
iplayonSound
Settings
• Press iPLAYONkeyonremotecontroltodisplayiPLAYONmenu.
• PressCHkeytoselectSettings.
• PressCH/ CHkeytoselecttheoptionsinsettingsmenu.
• Pressbackkeytocomeoutofsettingmenu.
Photos
• PlayMode
• SlideInterval
• SlideShufe
• ViewOption
Play Mode
Thisistosethowphotosshouldbeplayedinsidefolder.
• PressCH/ CHkeytoselecttheplaymodeoptioninsettingsmenu.
• PressV+ / V- keytoselectplaymodes(RepeatFolder/RepeatFile/RepeatNone)
Slide Interval
Throughslideinterval,thetimegapbetweenimagesduringtheslideshowcanbeset.
• PressCH( ) / CH( ) keytoselecttheslideintervaloptioninsettingsmenu
• PressV+ / V- keytoselectinterval(Off,5seconds,10secondsand15seconds)
Slide Shufe
Thiswillchangethesequenceofphotosdisplay.
• PressCH( ) / CH( ) keytoselecttheslideshowshufeoptioninsettingsmenu.
• PressV+ / V- keytoselectshufe(On/Off)
View Option
Thistobeselectthetypeofview.
• PressCH( ) / CH( ) keytoselecttheviewoptioninthesettingsmenu.
• PressV+ / V- keytoselectfromthefollowingoption(Tileview/Listview).
Songs
1.PlayMode
2.Shufe
Play Mode
Thisistosethowsongsshouldbeplayedinsidethefolder.
• PressCH( ) / CH( ) keytoselectplaymodeoptioninsettingmenu.
• PressV+ / V- keytoselectplaymodes(RepeatFoder/RepeatFile/RepeatNone)
iplayon
14
13. Trouble Shooting
Problem CheckItem
Nopictureonscreenand
nosoundfromspeakers
• MakesurethattheTVsetisnotinthestandbymode
• TurnontheMAINPOWERbuttonoftheACoutlet
NoPictureinAVmode
• CheckthebrightnesssettingoftheTV.
• CheckCCFLlampofLCD/LEDpanelmayhave
malfunction.
• MakesureacablewithnoVIDEOinputssignalis
connectedtotheRF,AV.
Pictureisdisplayedbutno
soundfromspeakers
• Checkthevolumelevel.
• Makesuresoundisnotmuted.
• Makesuretheconnectorsoftheoptionalspeaker
systemaresecurelyinsertedinAVOUTandTV
Volumeisatmaximum.
Pictureistoolight • MakesureCOLORandCONTRASTsettingis
notsettoolow.
Pictureistoodark • Makesurebrightnesssettingisnotsettoolow.
• CheckCCFLlampofLCDpanelmayhavemalfunction.
Remotecontroldoesnot
work
• Changethebatterywiththenewbattery.
• Makesuretheinfraredtransmitterwindowisnot
receivingstronglightsuchaslightfromuorescentlamps.
Thepictureisnotsharp
Thepicturemoves
• Thereceptionmaybeweak.
• Thestateofbroadcastmayalsobebad
• Makesuretheantennaisfacingtherightdirection
• Makesuretheoutsideantennaisnotdisconnected
Thepictureisdoubledor
tripled
• Makesuretheantennaisfacingtherightdirection
• Theremaybereectedelectricwavesfrom
mountainsorbuildings.
Thepictureisspotted
• Theremaybeinterferencefromautomobiles,
trains,highvoltagelines,neonlightsetc.
• Theremaybeinterferencebetweentheantenna
cableandpowercable.Trypositioningthem
furtherapart.
Therearestripesonthe
screen
orcolorfade
• Istheunitreceivinginterferencefromotherdevices
• Transmissionantennasofradiobroadcasting
stationsandtransmissionantennasofamateur
radiosandcellularphonesmayalsocause
interference.
• Usetheunitasfarapartaspossiblefromdevices
thatmaycausepossibleinterference.
Note:IfLCD/LEDTVfailstooperatenormallyorifthereisanyothermalfunction,SwitchOFF
theTVfrommainsandSwitchONagain.
TheLCD/LEDpanelshaveveryhighresolutionpixels,morethantwomillions.Youmaysee
tinyblackand/orbrightpixels(Red,Blue,Green).Thisisnotanindicationofmalfunction
anddoesnotaffecttheperformanceandreliabilityoftheproduct.Thisphenomenonisnot
subjecttoexchangeorrefund.
iPLAYONenablestoviewphotos,listentoaudiolesandwatchvideossavedonUSBdevices.
• InsertaUSBdeviceinUSBjackonthesideoftheTV.
• PressiPLAYONkeytoenter iPLAYONmenu.
• IfnoUSBdeviceisconnectedtotheTV,amessage“NoDeviceConnected”isdisplay
withUSBicon.IfUSBisconnected“MemoryDeviceConnected”isdisplayed.
• Onlythefollowingleformatsaresupported.
Photos:JPEG,BMP,PNG
Songs:MPEG-1,MPEG-2(LayerI/II),MP3,AAC-LCandWMA.
Video:SupportsMPEG-1,MPEG-2,MPEG-4,DVD,RealMedia,
AVI,FLV,MKV,H264RMVB,MOVandMJPEG.Itwillsupportupto720p.
• ToexitiPLAYONmode,pressiPLAYONkeyfromiPLAYONmainmenuscreen.
*Note:
1.Otherthanaboveorconvertedformatmaynotbesupported.
2.CustomercanaccessonlyoneUSBatatime.
Shufe
Thiswillchangethesequenceofsongsplay.
• PressCH( ) / CH( ) keytoselecttheshufeoptioninsettingsmenu.
• PressV+ / V- keytoselectshufe(On/Off)
Videos
1.PlayMode
2.Shufe
Play Mode
Thisistosethowvideosshouldbeplayedinsidethefolder.
• PressCH( ) / CH( ) keytoselectplaymodeoptioninsettingmenu.
• PressV+ / V- keytoselectplaymodes(RepeatFoder/RepeatFile/RepeatNone)
Shufe
Thiswillchangethesequenceofvideosplay.
• PressCH( ) / CH( ) keytoselecttheshufeoptioninsettingsmenu.
• PressV+ / V- keytoselectshufe(On/Off)
Photos / Songs / Videos
• PressiPLAYONkeyonremotecontroltodisplay iPLAYONmenu.
• PressV - keytoselectPhotos / Press V+ keytoselectSongs.PressCH toselectVideos/Press
CH toselectsetting.
• PressCH / CH keytoselectthefolder
• PressOK keytoenterthefolderwhichwillshowphoto/music/videolesinsidethefolder.
• PressCH/ CH toselectNext/Previousfromphoto/music/videoles
• Press II onRemoteControlorOK keyoncontrolpaneltoplayorpausetheselected
photo/music/videoles.
• Press keytostoptheplayingphoto/music/videoles.
• Press I keytofastforwardthetrackby2x,4x,8xand16xspeed.(applicableformusic/videole)
• PressI keytofastrewindthetrackby2x,4x,8xand16xspeed.(applicableformusic/videole)
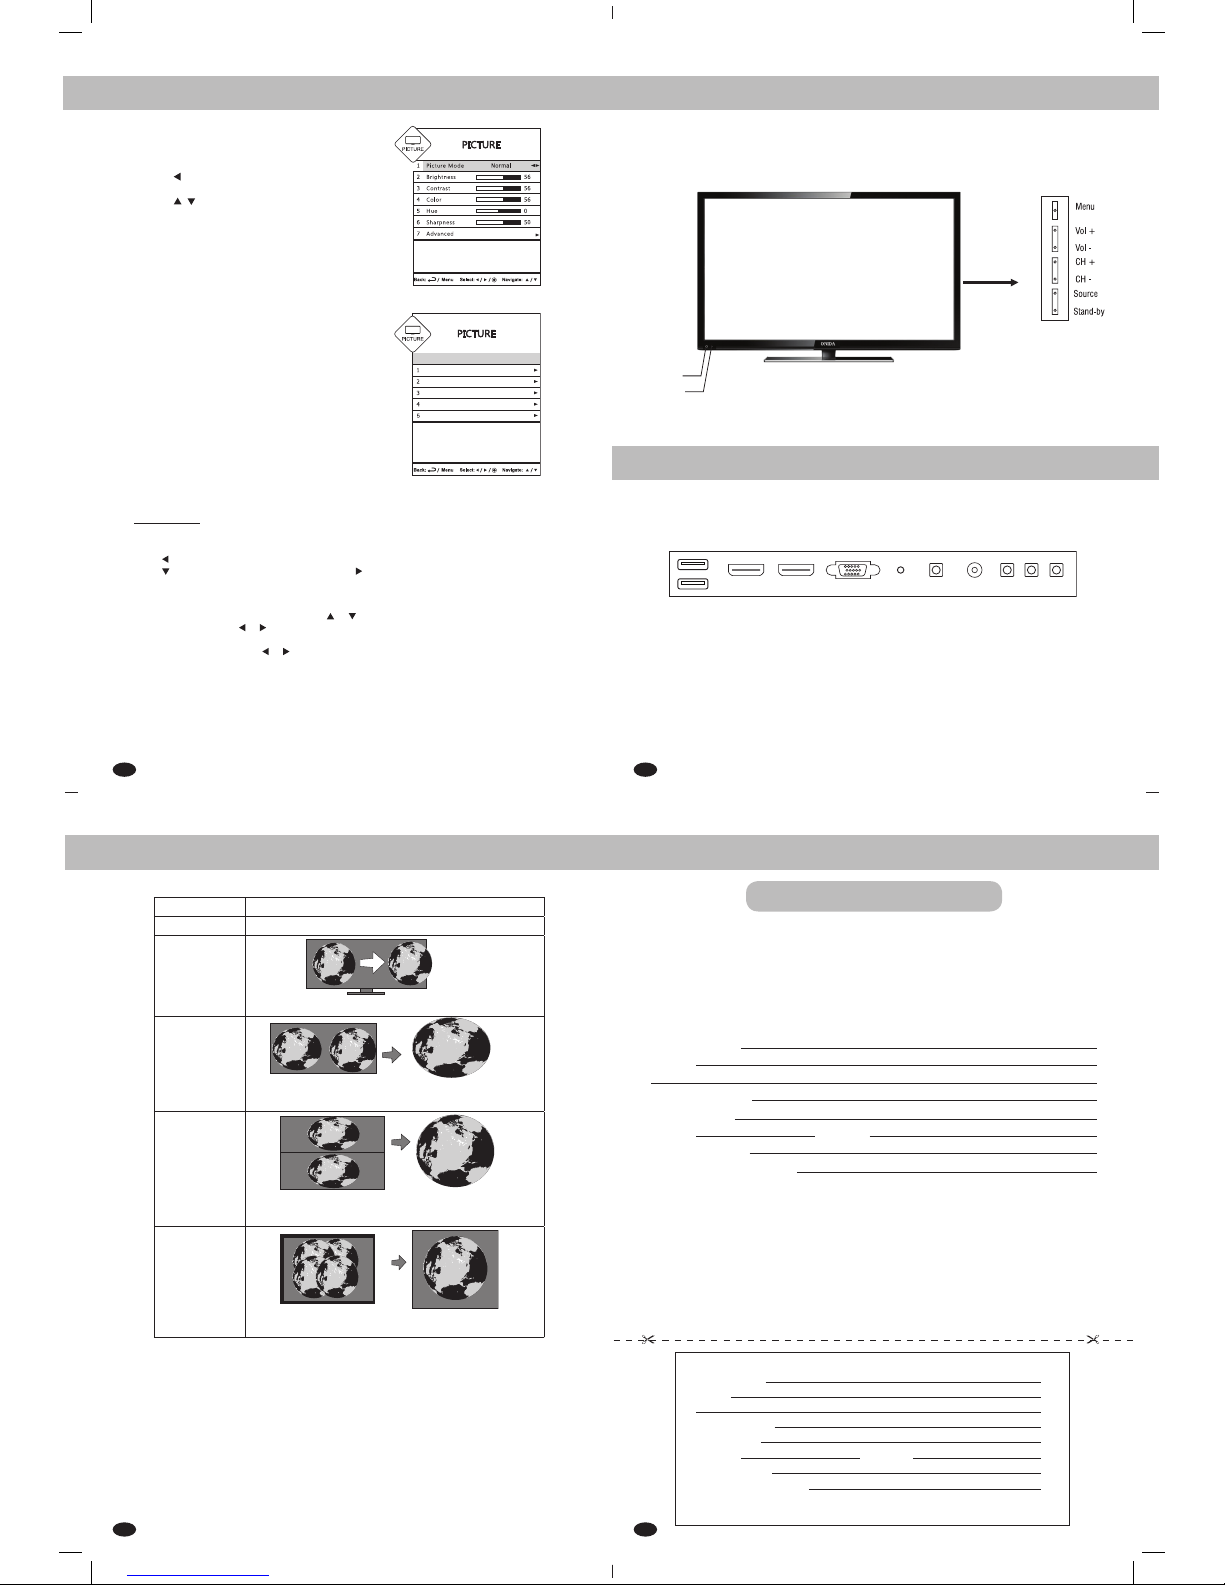
11. Quick Set-Up
Input / Output Connectivity
1. HDMI IN (High Denition Multimedia Interface IN):
TheLCD/LEDTVprovidesoneortwoHDMIInputPort.Theusercanconnecttothis
socketanydevicewhichhasHDMIoutput.
2. PC VGA IN (D-SUB) (Optional):
TheLCD/LEDTVprovidesonePCVGAInputPort.TheusercanconnectthePCto
theTVthrougha15-pinD-subconnector.Bydoingso,theLCD/LEDTVservesas
thescreenforthePC,whichcansupportresolutionupto720p.
3.PC Audio IN (Optional):
TheLCD/LEDTVprovidesonePCAudioInputPort.Connecttheaudiocablefrom
thePCtothePCaudioINoftheTVset.Bydoingso,theusercanlistentotheaudio
whichisplayedfromthePC.
4. Component (YPbPr/YCbCr) IN:
TheLCD/LEDTVprovidesoneComponent(YPbPr/YCbCr)InputPort.Connectthe
componentsocketsoftheDTVsettopboxorDVDplayertotheComponentINof
thesetalongwithaudioasshownonthesidepanel.
5. AV IN:
ThisLCD/LEDTVprovidesoneortwoAVInputsPorts.TheusercanconnecttheAudio
andVideoconnectors(Video,LeftandRight)ofDVD,Settopbox,etc.totheAV
inputports.
6. Antenna:
ThisLCD/LEDTVprovidesoneRFInputorAntennaInput.Theusercanconnectthe
localcabletothisAntennaInputPort.
7. USB:
TheLCD/LEDTVprovidesOneorTwoUSBInputPorts.
TheusercanconnecttheUSBtoplaysongs,videoandviewphotos.
8. AV Out (Optional):
ThisLCD/LEDTVprovidesoneAVoutPorts.
TheusercanconnectVideo,Audio(Video,Left&Right)outofTVtoexternalEquipment.
Note: 1)VideooutisavailableonlyforRF/AV.
2)ForQuickSet-upreferCabinetpicturepage.
Creating Playlist:
• List View: Tocreateplaylistinlistview,pressV+keywhenhighlightisonaparticularimagele.
Ayellowdotisseenonthelename.Thismeansthattheleisselectedtobeintheplaylist.
Theusercanselectmultiplelesinthisway.
• Tile View: TocreateplaylistinTileView,pressOKwhenthehighlightisonaparticularimage
lethumbnail.Aredtickmarkisseenonthele.Thismeansthattheleisselectedtobein
theplaylist.Theusercanselectmultiplelesinthisway.
• Theplaylistcreatedinlistviewwillremainthesameeveniftheuserswitchestotileview,
andviceversa.
• Toun-selecttheleinaplaylist,gototheleandpressV-keyorOKKey.Theyellowdot
ortheredtickmarkwillberemoved.Hencethelewillberemovedfromtheplaylist.
MIRC ELECTRONICS LTD.
Onida House, G-1, MIDC, Mahakali Caves Road, Andheri (East), Mumbai - 400093
MADE IN INDIA
www.onida.com IEmail: [email protected]
3988 9000
prex State Capital STD Code
14. Safety Precautions
Safety Precautions
HDMI-ThisTVincorporatesHigh-DenitionMultimediaInterfaceHDMITM
technology.TheHDMITMlogoandHigh-DenitionMultimediaInterfaceare
trademarksofHDMIlicensingLLC.
Warranty
Terms And Conditions Of The Warranty
• TheOnidaLCD/LEDTVsetisguaranteedagainstmanufacturingdefectsofparts&components
foraperiodofoneyearfromthedateofpurchase.
• Intheeventofanymanufacturingdefectduringthewarrentyperiod,thedefectivepartwillbe
replaced/repairedbytheCompanyfreeofcost.
• ThisWarrantyislimitedwithinmunicipallimits.
• Thiswarrantydoesnotextendtoanypartofthesetwhichhvasbeendamagedduetomisuse,
neglect,accidentorimproperinstallation,damagescausedbypetsoranyexternalagentssuch
aslightning,ooding,reetc.
• Furtherthiswarrantyshallceasetobeoperativeintheeventofthesethavingbeentempered
with,servicedorrepairedbyanyagencynotauthorisedbytheCompany.
• ThecompanydoesnotalsocoverlossordamageintransitwhethercarriedbytheCompany’s
transportorbythepurchaser.
• TheCompanywillnotbeliableforthedealer’sexpenses,ifany,chargedincarryingoutthe
termsofthiswarranty.
• TheCompanywillnotbeliableforanydelayinrectifyingtheset,intheeventofnon-availability
ofspares.
• TheCompanywillalsonotberesponsibleforlosses,directorindirect,arisingoutofthedelay,
ifany.
• Thiswarrantydoesnotcoverghostingorfadingeffect,inthepicture,causedbythesituationof
thepurchaser’sresidence,wherethesetislocated.
• Thiswarrantydoesnotextendtoaccessories(includingaerial),,ifany,suppliedwiththisset.
IntheeventthesetrequiresattentionattheCompany’sServiceStation,theCompanyshall
arrangedthetoandfrotransportationduringwarrantyperiod.
• Ifthepurchaserdesirestosendthissetforageneralcheckup/repairtotheServiceStation,
hewillhavetobearthetoandfrocost.
• Maximumcareistakentoensurethatthesetandaerialareshockproof.HowevertheCompany
willnotbeliableforanylossordamagecausetoproperty,fordeath&disabilitycausedto
humanlifeforanyreasonwhatsoever.
• ThiswarrantyisissuedsubjecttojurisdictionofcivilcourtsinMumbai.
Warranty Is Null And Void, If
• TheServiceCentercopyofwarrentycardisnotdispatchedwithin10daysofthedateofpurchase.
• TheTVsetisnotpurchasedfromtheauthorizeddealersoftheCompany.(Customersarerequestedtocheck
theDealer’sAuthorityCerticate).
Trade Mark Information
12. Warranty
• Theslotsandopeningsinthecabinetandinthebackorbottomareprovidedfornecessaryventilation.
Toensurereliableoperationofthisapparatus,andtoprotectitfromoverheating,theseslotsand
openingsmustneverbeblockedorcovered.
-Donotcovertheslotsandopeningswithaclothorothermaterials.
-Donotblocktheslotsandopeningsbyplacingthisapparatusonabed,sofa,rugorothersimilarsurface.
-Donotplacethisapparatusinaconnedspace,suchasabookcaseorbuiltincabinet,unlessproperventilationisprovided.
• Donotplacethisapparatusnearoroveraradiatororheatregister,orwhereitisexposedtodirectsunlight.
• Donotplaceavesselcontainingwater(Vasesetc.)onthisapparatus,asthiscanresultinariskofreorelectricshock.
• Donotexposethisapparatustorainorplaceitnearwater(nearabathtub,washbowl,kitchensnik,orlaundrytub,inawet
basement,ornearaswimmingpooletc.).Ifthisappartusaccidentallygetswet,unplugitandcontactanauthorizeddealer
immediately.
• Makesuretopulloutthepowercordfromtheoutletbeforecleaning.
• Thisapparatususebatteries.Inyourcommunity,theremightberegulationsthatrequireyoutodisposeofthesebatteries
properlytoprotecttheenvironment.Pleasecontactyourlocalauthoritiesfordisposalorrecyclinginformation.
• Donotoverloadwalloutlets,extensioncords,oradaptorsbeyondtheircapacity,sincethiscanresultinreorelectricshock.
• Power-supplycordsshouldberoutedsothattheyarenotlikelytobewalkedonorpinchedbyitemsplaceduponoragainst
them.Payparticularattentiontocordsattheplugend,whereconnectedtoadaptorsandatthepointwheretheyexitfrom
theapparatus.
• Toprotectthisapparatusfromalightningstorm,orwhenitisleftunattendedandunusedforlongperiodsoftime,unplug
itfromthewalloutletanddisconnecttheantennaorcablesystem.Thiswillpreventdamagetothesetduetolightningand
powerlinesurges.
• BeforeconnectingtheACpowercordtotheDCadaptoroutlet,makesurethevoltagedesignationoftheDCadaptor
correspondstothelocalelectricalsupply.(dependingonthemodel)
• Neverinsertanythingmetallicintotheopenpartsofthisappratus.Doingsomaycreateadangerofelectricshock.
• Toavoidelectricshock,nevertouchtheinsideofthisapparatus.Onlyaqualiedtechnicianshouldopenthisapparatus.
• Makesuretoplugthepowercordinunititisrmlyinserted.Pullontheplug,notthecordwhenremovingthepowercord
fromtheoutlet.Donottouchthepowercordwithwethands.
• Ifthisapparatusdoesnotoperatenormally-inparticular,ifthereareanyunusalsoundsorsmellcomingfromit-unplugit
immediatelyandcontactanauthorizeddealerorservicecentre.
• BesuretopullthepowerplugoutoftheoutletiftheTVistoremainunusedorifyouaretoleavethehouseforan
extendedperiodoftime(especiallywhenchildren,elderlyordisabledpeoplewillbeleftaloneinthehouse).
-Accumulateddustcancauseanelectricshock,anelectricleakage,orarebycausingthepower
cordtogeneratesparksandheat,orcausetheinsulationtodeteriorate.
• Besuretocontactanauthorizedservicecentre,wheninstallingyoursetinalocationwithheavydust,highorlow
tempratuers,highhumidity,chemicalsubstancesorwhereitwilloperatefor24hoursadaysuchasinanairport,atrain
station,etc.Failuretodosomaycauseseriousdamagetoyourset.
• Useonlyproperlygroundedplugandreceptacle.
-Animpropergroundmaycauseelectricshockorequipmentdamage.(ClassIEquipmentonly.)
• Toturnofftheapparatuscompletely,youmustpullthepowerplugoutofthewallsocket.Consequently,thepowerplug
shouldbereadilyaccessibleatalltime.
• Donotallowchildrentohangontotheproduct.
• Storetheaccessories(batteries,etc.)inalocationsafelyoutofthereachofchlidren.
• Donotinstalltheproductinanunstablelocationsuchasashakyself,aslantedoor,oralocationexposedtovibration.
• Topreventinjury,thisapparatusmustbesecurelyattachedtotheoor/wallinaccordancewiththeinstallationinstructions.
• Donotdroporimpartashocktotheproduct.Iftheproductisdamaged,disconnectthepowercordandcontacta
servicecenter.
• Tocleantheproduct,unplugthepowercordfromthepoweroutletandwipetheproductusingasoft,drycloth.Donotuse
anychemicalssuchaswax,benzene,alcohol,thinners,insecticeide,airfreshener,lubricantordetergent.Thismaydamage
theappearanceorerasetheprintingontheproduct.
• WARNING-Batteries(batterypackorbatteriesinstalled)shallnotbeexposedtoexcessiveheatsuchassunshine,
reorthelike.
CAUTION
RISKOFELECTRICSHOCK.DONOTOPEN
CAUTION: TO REDUCE THE RISK OF ELECTRIC
SHOCK.DONOTREMOVECOVER(ORBACK).THERE
ARE NO USER SERVICEABLE PARTSINSIDE. REFER
ALLSERVICINGTOQUALIFIEDPERSONNEL.
Thissymbolindicatesthathighvoltageis
presentinside.Itisdangeroustomakeany
kindofcontactwithanyinternalpartofthis
product.
Thissymbolindicatesthatimportantliterature
concerningoperationandmaintenancehas
beenincludedwiththisproduct.
• Donotexposetheapparatustodrippingorsplashing.
• Donotshotcircuit.disassemble,oroverheatthebatteries.
• Thereisadangerofexplosionityoureplacethebatterieswiththewrongtypeofbattery.Replaceonlywiththesameor
equivalenttype.
• TheMAINSplugoranappliancecouplerisusedasthedisconnectdevice,thedisconnectdeviceshallremainreadilyoperable.
(Whereanall-polemainsswitchisusedasthedisconnectdevice,theswitchshallremainreadilyoperable.)
• Avoidtouchingthescreenatalltimes,asthismayresultindamagetothescreen.
• Donotpush,ruborhitthescreensurfacewithyourngernailorasharpobject,asthismayresultinscratchesand
imagedistortions.
• WhenadjustingtheangleoftheTVset,moveitslowlysoastopreventtheTVsetfrommovingorslippingofffromitstablestand.
• WARNING-TOPREVENTTHESPREADOFFIREKEEPCANDLESOROTHEROPENFLAMESAWAY
FROMTHISPRODUCTATALLTIMES.

17 19
18 20
14. Picture
LED Cristal Series
PC 30/09/2013 11052286
Remote Sensor
Stand by
Power LED
Onida House ll, Mahal Industrial Estate, Nr Paper Box .Off. mahakali Caves Road,
Andheri (E),Mumbai - 400 093.
Customer’s Warranty Card
THIS WARRANTY STANDS NULL AND VOID IF THE SERVICE CENTRE COPY OF
WARRANTY CARD IS NO DISPATCHED WTHIN 10 DAY OF DATE OF PURCHASE
Service Station Copy
Customer Name
Address
Name of the Town
Dealer’s Name
Model No. Chassis No.
Date of purchase
Date of Expiry of Warranty
I accept the terms & conditions of the warranty Signature
Customer Name
Address
Name of the Town
Dealer’s Name
Model No. Chassis No.
Date of purchase
Date of Expiry of Warranty
I accept the terms & conditions of the warranty Signature
SERVICE CENTRE
Key
Controls
Picture
• PressMENU key on remote control or MENU key on
Control Panel of LED TV to display TV Menu.
• Press key on your remote control or Vol- on
Control panel to select Picture Menu.
• Press / key on remote control or CH+/- on
Control panel to select from following options
1. Picture Mode
2. Brightness
3. Contrast
4. Color
5. Hue
6. Sharpness
7. Advanced
3D Effect
1. Off
2. Frame Packing
3. Top Bottom
4. Side By Side
5. 2D to 3D
Cristal Series LED
Service Centre
PC VGA IN
HDMI 2
2 USB 1
HDMI 1 PC
AUDIO IN
CMPT-IN ANTENNA AV OUTAV 2 IN AV 1 IN
15. Picture
Warning:
1. If you watch the 3D content too closely or for a long period of time it may cause drowsiness,
headache. Take frequent breaks while watching 3D.
2. Children under the age of 5, Pregent lady, elder and those suffering from serious
physical conditions advised to avoid watching 3D.
3. When watching 3D contents you should be able to see full picture at your eye
level and maintain minimum distance of atleast twice the TV screen width.
Note: 3D Effect is not available in non 3D models.
16. Cabinet Pictures
17. Quick Set-Up
To select 3D:
3D can be selected either directly by ‘MY View’ key followed by OK key provided on the Remote
control or press “MENU” key on the remote
Press key on the remote to select ‘Picture’ menu
Press key to select ADVANCED and then press to select 3D Effect and press OK key
NOTE: Do not forget to wear proper 3D Glasses. 3D Effect is not enable when input source is not
connected. P.SIZE key on remote control does not work while viewing 3D.
3D SET UP : After entering 3D SET UP, use or keys to select one of the following settings.
1) 3D Effect : Press the or Keys followed by to OK select one of the following 3D Effects:
2) 3D to 2D : Select this mode if you want to view the 3D content in 2D mode.
3) Picture Correction : Press or Keys to select Left/Right or
Right/Left to adjust the image for the left and right eye to better visibility.
Note: The last 3 setting of 3D Setup are not enable when 3D Effect is OFF.
“Frame packing” effect is unable is only in HDMI source.
“Side By Side” and “Top-Bottom” effects are enable only in USB videos & HDMI source.
3D effect is disable in Photos and Songs of USB source.
For viewing 3D content use HDMI or USB source only. In other sources like, AV,CMPT, RF & VGA
the 3D content display will not be good but for normal TV signals 2D to 3D conversion possible.
3D Effect Description
Off Display contents in original format
2D to 3D
Side by Side
Top & Bottom
Frame
Packing
Select this mode when two frame are
separated by some space.
Change a 2D content to 3D
If the source content is in Side by Side mode,
then select this mode to view proper image,
If the source content is in Top & Bottom mode,
then select this mode to view proper image,
Noise Reduction
Advanced
High
Off
On
Cool
Fleshtone
Dynamic Contrast
Color Temp
3D Effect

21
22 24
23
18. Quick Set-Up Quick Set-Up
Parameters
LEO40FC3D
Television System PAL, SECAM,
Television
Programme
VLF : 2-4
VHF : 5-12
UHF : 21-69
Cable :
S1 - S41,
X, YXZ, Z+1, Z+2
LED Panel 38.5 Wide
LED Panel
Panel
Resolution
FHD
1920 x 1080
Power
Consumption Max In Watts 83
External Antenna
Impedance 75Ω
Audio Output 10W + 10W
Input/Output
Connectivity
AV IN
RF IN
CMPT IN
HDMI IN
USB
AV OUT
VGA IN
PC AUDIO IN
2
1
1
2
2
1
1
1
3D Features YES
AC Power Input 100~240 V
AC,50/60Hz
Cabinet 39”
Cristal
Net Weight In Kgs 10.6
Dimensions
(L x W x D)
with Stand
In mm 887X215X592.2
*Allrightsreservedfortechnicalmodications
Notes:Asapolicyofcontinuousdevelopment,thefeatures,specicationsaresubjecttochangewithoutpriornotice.
SERVICE CENTRE NUMBER
Sr.No STATE TELEPHONE REMARK
1 Andhra Pradesh 040 - 39889000
2 Arunachal Pradesh 033 - 39889000 STD Code of Kolkatta
3 Assam 033 - 39889000 STD Code of Kolkatta
4 Bihar 1800 - 30099000
5 Chhattisgarh 0731 - 3988900
6 Delhi 011 - 39889000
7 Goa 022 - 39889000
8 Gujarat 079 - 39889000
9 Haryana 0172 - 3988900
10 Himachal Pradesh 0172 - 3988900 STD Code of Chandigarh
11 Jammu and Kashmir 0172 - 3988900 STD Code of Chandigarh
12 Jharkhand 1800 - 30099000
13 Karnataka 080 - 39889000
14 Kerala 0484 - 3988900
15 Madhya Pradesh 0731 - 3988900
16 Maharashtra 022-39889000
17 Manipur 033 - 39889000 STD Code of Kolkatta
18 Meghalaya 033 - 39889000 STD Code of Kolkatta
19 Mizoram 033 - 39889000 STD Code of Kolkatta
20 Nagaland 033 - 39889000 STD Code of Kolkatta
21 Orissa 1800 - 30099000
22 Punjab 0172 - 3988900
23 Rajasthan 0141 - 3988900
24 Sikkim 033 - 39889000 STD Code of Kolkatta
25 Tamil Nadu 044-39889000
26 Tripura 033 - 39889000 STD Code of Kolkatta
27 Uttar Pradesh 0522 - 3988900
28 Uttarakhand 0522 - 3988900 STD Code of Lucknow
29 West Bengal 033 - 39889000
Business Reply Card
SERVICE CENTRE
Input / Output Connectivity
1. HDMIIN(HighDenitionMultimediaInterfaceIN):
The LCD/LED TV provides one or two HDMI Input Port. The user can connect to this
socket any device which has HDMI output.
2. PCVGAIN(D-SUB)(Optional):
The LCD/LED TV provides one PC VGA Input Port. The user can connect the PC to
the TV through a 15-pin D-sub connector. By doing so, the LCD/LED TV serves as
the screen for the PC, which can support resolution upto 720p.
3. PC Audio IN (Optional):
The LCD/LED TV provides one PC Audio Input Port. Connect the audio cable from
the PC to the PC audio IN of the TV set. By doing so, the user can listen to the audio
which is played from the PC.
4. Component(YPbPr/YCbCr) IN:
The LCD/LED TV provides one Component (YPbPr / YCbCr) Input Port. Connect the
component sockets of the DTV set top box or DVD player to the Component IN of
the set along with audio as shown on the side panel.
5. ComponentAudioIN(Optional):
The LCD/LED TV provides one Component Audio Input Port, Connect Left and Right
cable with given Component audio cable from the DVD, Set top box, etc.
6. AV IN:
This LCD/LED TV provides one or two AV Inputs Ports. The user can connect the Audio
and Video connectors (Video, Left and Right) of DVD, Set top box, etc. to the AV
input ports.
7. Antenna:
This LCD/LED TV provides one RF Input or Antenna Input. The user can connect the
local cable to this Antenna Input Port.
8. USB:
The LCD/LED TV provides One or Two USB Input Ports.
The user can connect the USB to play songs, video and view photos.
9.AVOut(Optional):
This LCD/LED TV provides one AV out Ports.
The user can connect Video,Audio (Video, Left & Right) out of TV to external Equipment.
Note: Video out is available only for RF/AV source
Product Specifications
LED STAND ASSEMBLING
Wall Mount
FOR TV ON THE WALL
Prepare your TV’s backside by material provided in the accessory box, as below :-
1. Fix wall mount bracket on backside of TV using two or four screw.
2. Stick black color spacer on backside of TV as shown below.
ForWallmountingbracketxed
with 4 nos screw (M6 x 25)
ForStandbasexingwith3nos
self tapping screw (4 x 20)
Stick black color spacer 2 nos
This manual suits for next models
1
Table of contents
Other Onida TV manuals