Onn RT-4507 User manual

0 n nTM/MC
USER MANUAL
GUIDE DE
L'UTILISATEUR
Dual Alarm Clock
Radio with USB Charging
Radio-reveil a deux alarmes
avec chargement USB
RT-4507

A
CAUTION
RISK OF ELECTRIC SHOCK
DO NOT OPEN
CAUTION:
TO REDUCE THE RISK OF ELECTRIC SHOCK, DO NOT REMOVE COVER (OR BACK).
NO USER-SERVICEABLE PARTS INSIDE. REFER SERVICING TO QUALIFIED SERVICE PERSONNEL.
DANGEROUS VOLTAGE:
The lightning flash with arrowhead symbol, within an equilateral triangle is intended to alert the
user to the presence of uninsulated dangerous voltage within the product's enclosure that may be of sufficient
magnitude to constitute a risk of electric shock to persons.
A
ATTENTION:
The exclamation point within an equilateral triangle is intended to alert the user to the presence
of important operating and maintenance (servicing) instructions in the literature accompanying the appliance.
FCC WARNING:
This equipment may generate or use radio frequency energy. Changes or modifications to this equipment may cause
harmful interference unless the modifications are expressly approved in the instruction manual. The user could lose the authority to
operate this equipment if an unauthorized change or modification is made.

NOTE:
This equipment has been tested and found to comply with the limits for a Class B digital device, pursuant to Part 15 of the FCC Rules. These limits
are designed to provide reasonable protection against harmful interference in a residential installation. This equipment generates, uses and can radiate
radio frequency energy and, if not installed and used in accordance with the instructions, may cause harmful interference to radio communications.
However, there is no guarantee that interference will not occur in a particular installation. If this equipment does cause harmful interference to radio Or
television reception, which can be determined by turning the equipment off and on, the user is encouraged to try to correct the interference by one or
more of the following measures:
•
Reorient or relocate the receiving antenna.
•
Increase the separation between the equipment and receiver.
•
Connect the equipment into an outlet on a circuit different from that to which the receiver is connected.
•
Consult the dealer or an experienced radio/TV technician for help.
Compliance information:
This device complies with Part 15 of the FCC Rules. Operation is subject to the following two conditions: (1) this device may
not cause harmful interference, and (2) this device must accept any interference received, including interference that may cause undesired operation.
WARNING: TO PREVENT FIRE OR SHOCK HAZARD, DO NOT EXPOSE THIS UNIT TO RAIN OR MOISTURE.
SURGE PROTECTORS:
It is recommended to use a surge protector for AC connection. Lightning and power
surges ARE NOT covered under warranty for this product.
This Class B digital apparatus complies with Canadian ICES-003.

a.
Do not expose this unit or the AC/DC adaptor to dripping or splashing water. Keep liquid-filled objects, such as vases, away from this
unit and AC/DC adaptor.
b.
To ensure that this unit is completely disconnected, unplug it from the wall.
c.
Ensure that the AC/DC adaptor is easily accessible.
d.
Please note the information printed underneath the unit.
e.
Batteries should not be exposed to excessive heat such as direct sunshine, fire, etc.
f.
Do not impede the ventilation of this unit by covering the ventilation openings with items such as newspapers, table-cloths,
curtains, etc.
g.
Keep open flames, such as lighted candles, away from this unit.
h.
Do not place this unit in closed bookcases, racks, or other spaces without proper ventilation.
i.
Use only the same or equivalent type batteries as there is a danger of explosion if the incorrect batteries are used or they are
installed incorrectly.
j.
Dispose of batteries properly according to environmental regulations.

1.
Read these Instructions.
2.
Keep these Instructions.
3.
Heed all Warnings.
4.
Follow all instructions.
5, Do not use this apparatus near water.
6.
Clean only with a dry cloth.
7.
Do not block any ventilation openings. Install in accordance with the manufacturer's instructions.
8.
Do not install near any heat sources such as radiators, hear registers, stoves, or other apparatus (including amplifiers)that produce heat.
9.
Do not defeat the safety purpose of the polarized or grounding - type plug. A polarized plug has two blades with one wider than the other. A grounding
type plug has two blades and a third grounding prong. The wide blade or the third prong are provided for your safety. When the provided plug does not
fit into your outlet, consult an electrician for replacement of the obsolete outlet.
10.
Protect the power cord from being walked on or pinched particularly at plugs, convenience receptacles.
11.
Only use attachments/accessories specified by the manufacturer.
12.
Use only with a cart, stand, tripod, bracket, or table speified by the manufacturer,
or sold with the apparatus. When a cart is used, use caution when moving the
cart/apparatus combination to avoid injury from tip-over.
13.
Unplug this apparatus during lightning storms or when unused for long periods of time.
14.
Refer all servicing to qualified service personnel. Servicing is required when the apparatus has been damaged in any way, such as power-supply cord or
plug is damaged, liquid has been spilled or objects have fallen into the apparatus, the apparatus has been exposed to rain or moisture, does not operate
normally, or has been dropped.

15.
Power Sources - This product should be connected to a power supply only of the type described in these operating instructions,
or as marked on the unit.
16.
Water and Moisture - This product should be kept away from direct contact with liquids. The apparatus shall not be exposed to dripping or splashing
and that no objects filled with liquids, such as vases, shall be placed on the apparatus.
17.
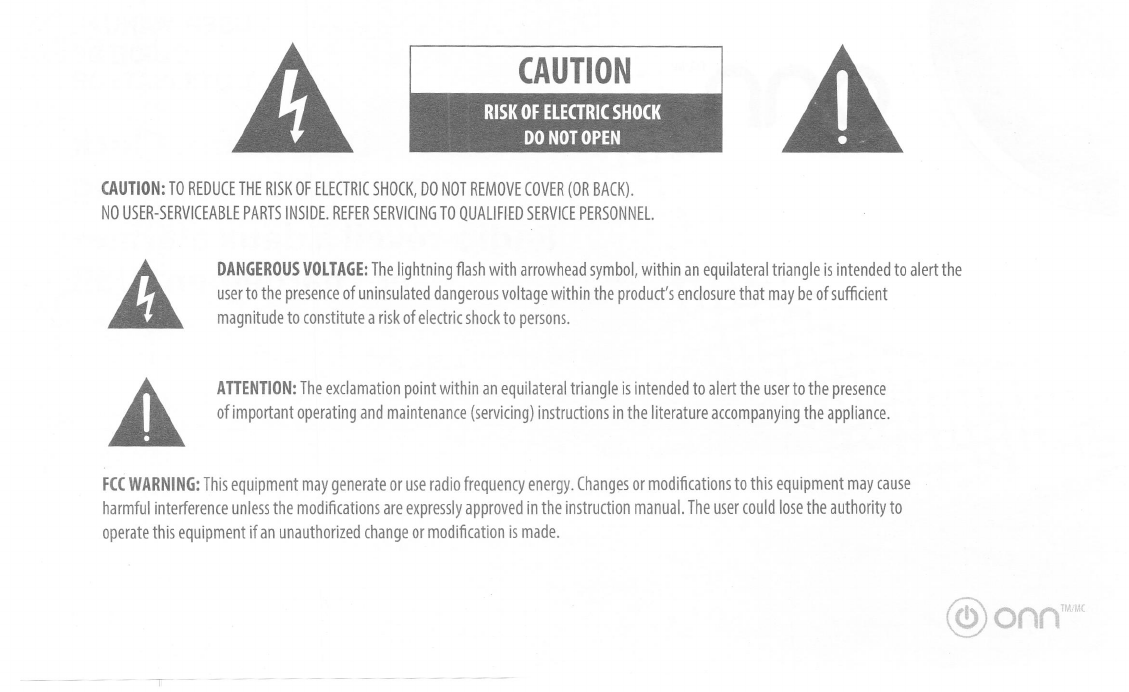
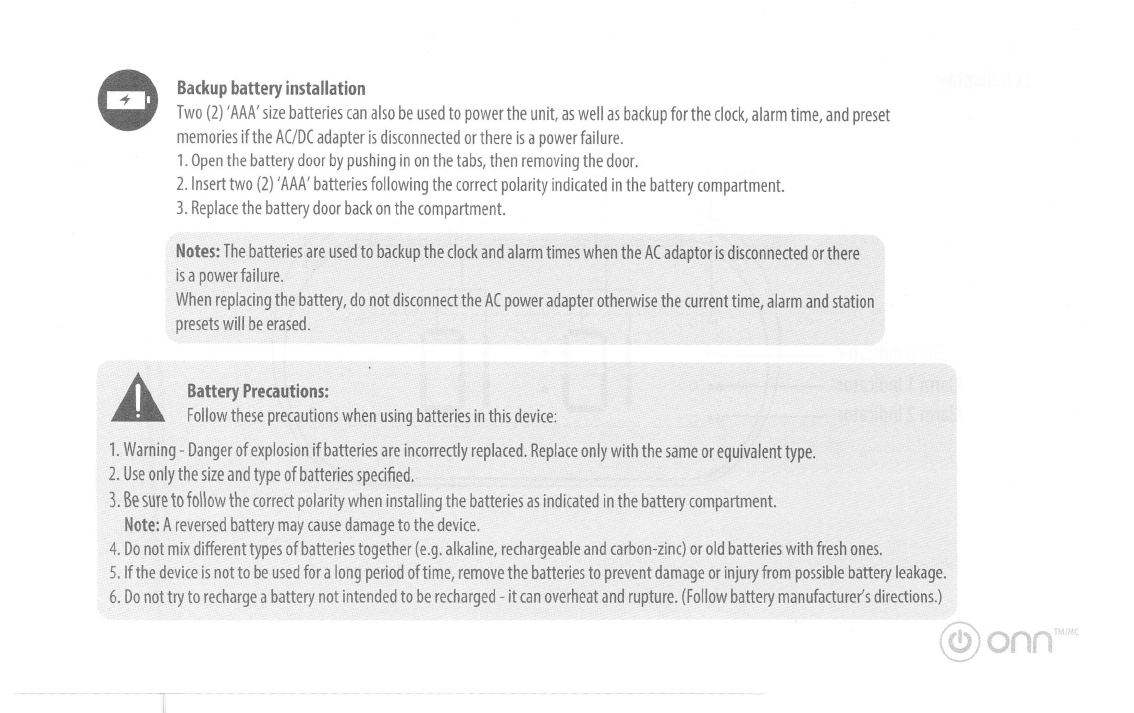
CAUTION-Danger of explosion if battery is incorrectly replaced. Replace only with the same or equivalent type.
Batteries (a battery pack or an installed battery) shall not be exposed to excessive heat such as sunshine, fire etc.
18.
Where the mains plug or an appliance coupler is used as the disconnect device, the disconnect device shall remain readily operable.
19.
Do not install this equipment in a conned or "boxed-in" space such as a bookcase or similar unit, and maintain good ventilation conditions.
The ventilation should not be impeded by covering the ventilation openings with items such as newspaper, tablecloths, curtains, etc.
20.
This apparatus is for professional use only.
21.
When moving or not using the appliance, secure the power cord (e.g. wrap it with a cable tie) .Be careful not to damage the power cord. Before using it
again, make sure the power cord has not been damaged. If the power cord has been damaged at all, bring the unit or cord to a qualified service
technician for repair or replacement as specified by the manufacturer.
22.
WARNING: Please refer to any important information (e.g. electrical, safety, etc.) printed on the exterior bottom enclosure or rear panel before
installing or operating the product.
23.
WARNING: Do not ingest the battery, Chemical Burn Hazard (The remote control supplied with) this product contains a coin/button cell battery. If the
coin/button cell battery is swallowed, it can cause severe internal burns in just 2 hours and can lead to death. Keep new and used batteries away from
children. If the battery compartment does not close securely, stop using the product and keep it away from children. If you think batteries might have
been swallowed or placed inside any part of the body, seek immediate medical attention.

0
°
)
AC outlet
AC/DC adapter plug
O
Inside the Box
RT-4507 Sleep and Sound alarm clock radio, AC power adapter and user guide.
AC power source
Insert the small end of the AC adaptor into the DC In Jack (located on the rear of the unit).
Connect the other end to a wall outlet providing 100-240V AC, 50/60 Hz.
The output of the provided AC/DC Adaptor is DC 5V 2.5A.
Notes:
Disconnect both ends of the power cord when not in use.
Use only the supplied AC adaptor with the following specs:
AC In - 100-240V AC, 50/60Hz/DC Out— 5V 2.5A
CD
Adjusting the volume
Press the VOL + or VOL — button repeatedly to increase or decrease the volume to a safe listening level.

10
11
12
13
Location of Controls
1.
POWER Button
2.
RADIO (AM/FM) Button
3.
TUNE- Button
4.
TUNE+ Button
5.
SNOOZE/SLEEP/DIMMER Button
6.
VOL-/ALARM 1
7.
VOL+/ALARM 2
8.
TIME SET/PRESET Button
9.
MEM/BUZZER Button
10.
USB Charging port
11.
USB Charging port
12.
DC IN jack
13.
Battery Compartment Door

PM Indicator Hour Digits
Minute Digits
Sleep Indicator
Alarm 1 Indicator
Alarm 2 Indicator
LCD display

Backup battery installation
Two (2) 'AAA' size batteries can also be used to power the unit, as well as backup for the clock, alarm time, and preset
memories if the AC/DC adapter is disconnected or there is a power failure.
1.
Open the battery door by pushing in on the tabs, then removing the door.
2.
Insert two (2) 'AAA' batteries following the correct polarity indicated in the battery compartment.
3.
Replace the battery door back on the compartment.
Notes:
The batteries are used to backup the clock and alarm times when the AC adaptor is disconnected or there
is a power failure.
When replacing the battery, do not disconnect the AC power adapter otherwise the current time, alarm and station
presets will be erased.
A
Battery Precautions:
Follow these precautions when using batteries in this device:
1.
Warning - Danger of explosion if batteries are incorrectly replaced. Replace only with the same or equivalent type.
2.
Use only the size and type of batteries specified,
3.
Be age to follow the correct polarity when installing the batteries as indicated in the battery compartment.
Note: A reversed battery may cause damage to the device.
4.
Do not mix different types of batteries together (e.g. alkaline, rechargeable and carbon-zinc) or old batteries with fresh ones.
5.
If the device is not to be used for a long period of time, remove the batteries to prevent damage or injury from possible battery leakage.
6.
Do not try to recharge a battery not intended to be recharged - it can overheat and rupture. (Follow battery manufacturer's directions.)

Setting the clock
1.
Plug in the AC power adapter. The hour digits will blink on the display.
2.
Press TUNE-/TUNE+ repeatedly to set the correct hour, then press TIME SET PRESET to confirm the setting. The minutes digits will blink.
3.
Press TUNE-/TUNE+ repeatedly to set the correct minutes, then press TIME SET PRESET to confirm the setting.
Notes:
1.
When you set the clock to a time afternoon, the PM indicator Ii9hts. 12:00 PM=NOON time.
2.
To reset or set the time, turn off radio mode, press and hold TIME SET PRESET.
The hour digits will blink on the display and then refer to Clock Setting 2, and 3, above.
Setting the alarm
1.
Press VOL-/AL1 or VOL+/AL2 , and the All or AL2 indicator will light up. Press and hold VOL-/AL1 (or VOL+/AL2).
The hour digits will blink on the display.
2.
Press TUNE-/TUNE + repeatedly to set the correct hour, then press VOL-/AL1 (or VOL+/AL2) to confirm the setting.
The minutes digits will blink.
3.
Press TUNE-/TUNE+repeatedly to set the correct minutes, then press VOL-/AL1 (or VOL+/AL2) to confirm the setting.
4.
Press TUNE-/TUNE+to select the alarm sound source (either buzzer or radio).
The alarm mode name will be shown on the display (Buzzer=bu or Radio=rAd). Press VOL-/AL1 (or VOL+/AL2)
to confirm. If you select radio, tune to the station you want and set the volume.
5.
Press TUNE-/TUNE+to set the volume of the alarm. The alarm will turn on at the time you have set and will turn off
automatically after 59 minutes.
6.
Repeat these steps to set the alarm to a different time.
7.
After the alarm clock loud ,press BUZZER button can cancel the alarm

Notes:
1.
Your clock radio must be in standby mode (radio off) to set the alarm.
2.
Your clock radio can be set to activate twice a day by setting different times in ALARM 1 and ALARM 2.
3.
In standby mode (radio off), press and hold VOL-/AL1 (or VOL+/AL2) to reset the alarm time.
4.
If AL1/2 set to the same time, only ALARM1 will alarm on.
5.
In standby mode (radio off), press VOL-/AL1 (or VOL+/AL2) once to display alarm time, and press again to cancel.
Snooze
1.
Press Snooze/Sleep/Dimmer to mute the alarm for nine minutes. The alarm can be muted as many times as you want within
59 minutes of the preset alarm time.
2.
Press any button except Snooze/Sleep/Dimmer to turn the alarm off for 24 hours.
Setting the sleep timer
While listening to the radio, you can select the time interval in minutes before the unit turns off automatically.
Press Sleep to select among 90 MIN, 60 MIN, 45 MIN, 30 MIN, 15 MIN and off.
Note:
Sleep is automatically deactivated when the unit is turned off.
Adjusting the dimmer
Press Dimmer repeatedly to adjust the display brightness: High =Low.

Listening to the radio
1.
Press POWER to turn on the unit.
2.
Press AM/FM to select a band (AM or FM).
3.
FPress TUNE-/TUNE+ to tune in to a station.
4.
Press VOL-/VOL+ to adjust the volume.
Setting radio presets
1.
Press TUNE-/TUNE+ to tune your clock radio to the station you want to save.
2.
Press and hold MEM, The preset number blinks.
3.
Press TUNE-/TUNE+ repeatedly to select the preset number you want.
4.
Press MEM again to store the station as a preset. The preset number stops blinking.
5.
Repeat steps 1 through 4 to save additional stations as presets.
Note:
There are 10 preset locations for FM and AM band.

Using Presets
Press TIME SET PRESET repeatedly to select the preset station you want.
To Improve Radio Reception
Rotate the unit horizontally until orientation with best reception is found.
USB device charging
The RT-4507 features dual USB charging ports on the back of the back of the unit which are designed to charge most USB compatible devices.
Plug in a USB cable (sold separately) into the RT-4507 USB port then connect your device to begin charging.
Each USB port charging current can't be more than 1A.
FAQ for USB charging
0: Why is the USB port not charging my devices?
A: Make sure that the USB plug is firmly connected into both ports of the RT-4507 and your USB compatible
device and that the RT-4507 is plugged in to a power source as the USB charging ports will not operate
from the backup batteries.
Q: Why will my Nook/netbook device not charge when I connect it to the USB charger?
A: Even though it my be USB compatible, some devices, including the Nook and some larger tablets or
netbooks require a higher output to charge them than the 5V/1.0A USB port on the RT-4507. Please check
your device manufacturer's charging specifications as you may be required to only use the charger
supplier with your device at time of purchase.

Specifications
General:
Power Source
DC 5V/2.5A
AC Power Supply
100-240V-50/60Hz 0.4A
Battery Backup
2x1.5V AAA size batteries
Speaker
8 ohm
Output Power
0.5 W
Radio section:
Frequency Range (FM)
87.5 -108 MHz
(AM)
520-1710KHz
Specifications are subject to change without notice.


on
nTM/MC
USER MANUAL
GUIDE DE
L'UTILISATEUR
Radio-reveil a deux alarmes
avec chargement USB
Dual Alarm Clock
Radio with USB Charging
RT-4507

A
AVIS
RISQUE D'ELECTROCUTION
NE PAS OUVRIR
AVERTISSEMENT :
AFIN DE REDUIRE LE RISQUE D'ELECTROCUTION, NE PAS ENLEVER LE COUVERCLE (OU LE DOS).
NE CONTIENT AUCUNE PIECE REPARABLE PAR L'UTILISATEUR. FAITES APPEL A UN TECHNICIEN QUALIFIE POUR TOUTE REPARATION.
TENSION ELECTRIQUE DANGEREUSE :
Le symbole de l'éclair et d'une tete de fleche a l'interieur d'un triangle
equilateral signale a I'utilisateur la presence d'une «tension dangereuse » non isolee a l'interieur de l'appareil
pouvant etre d'une magnitude suffisante pour provoquer une electrocution.
A
AVERTISSEMENT :
Le point d'exclamation a l'interieur d'un triangle equilateral signale a I'utilisateur la presence
de consignee importantes concernant le fonctionnement et l'entretien (reparation) de l'appareil, incluses dans la
documentation accompagnant l'appareil.
MISE EN GARDE DE LA FCC:
Cet equipement genere ou utilise de l'energie radioelectrique. Tout changement ou modification non
expressement approuve par ce manuel d'instructions peut causer des interferences nuisibles. L'utilisateur pourrait perdre son droit
d'utilisation de I'equipement si ces changements ou modifications sont effectues.

REMARQUE :
Cet equipement a ete teste et declare conforme aux limitations pour appareils numeriques de classe B selon la section 15 des reglements
de la FCC. Ces limitations sont destinees a assurer une protection raisonnable contre les interferences nuisibles clans une installation residentielle. Cet
equipement genere, utilise et peut emettre de l'energie radioelectrique et, s'il n'est pas installe et utilise conformement aux presentes instructions, it
peut causer des interferences nuisibles aux communications radio. Toutefois, rien ne garantit ('absence d'interferences dans une installation particuliere.
Si cet appareil cause des interferences
nuisibles a la reception des signaux de radio ou de television, ce qui peut etre detecte en allumant et en
eteignant
('appareil, on encourage l'utilisateur d'essayer de corriger ces interferences par l'un des moyens suivants :
•
Reorientez ou deplacez l'antenne de reception.
•
Augmentez la distance separant requipement et le recepteur.
•
Branchez requipement sur une prise se trouvant sur un circuit different de celui sur lequel le recepteur est branche.
•
Consultez le detaillant ou un technicien radio/television pour obtenir de l'aide.
Declaration de conformite :
Cet appareil est conforme a la section 15 des reglements de la FCC Le fonctionnement est soumis aux deux conditions
suivantes : (1) cet appareil ne doit pas causer d'interferences nuisibles et (2) cet appareil dolt accepter toute interference revue, y compris celles pouvant
entrainer un fonctionnement indesirable.
MISE EN GARDE : POUR NITER TOUT RISQUE D'INCENDIE OU D'ELECTROCUTION, NE PAS EXPOSER CET APPAREIL
A
LA PLUIE OU
A
L'HUMIDITE.
LIMITEURS DE SURTENSION :
L'utilisation d'un limiteur de surtension est recommandee pour la connexion CA. La foudre et les surtensions electriques
NE SONT PAS COUVERTES par la garantie offerte sur cet apparel!.
Cet appareil numerique de classe B est conforme a la norme canadienne ICES-003.

a.
N'exposez pas cet appareil ou l'adaptateur CA / CC a des gouttelettes ou a des eclaboussures d'eau. Gardez les objets remplis de liquide, tels que des
vases, loin de cet appareil et de l'adaptateur CA / CC.
b.
Pour vous assurer que cet appareil est completement deconnecte, debranchez-le du mur.
c.
Assurez-vous que l'adaptateur CA / CC est facilement accessible.
d.
Prenez connaissance des informations imprimees sous l'appareil.
e.
Les piles ne doivent pas etre exposees a une chaleur excessive, comme les rayons directs du soleil, le feu, etc.
f.
N'obstruez pas ('aeration de cet appareil en couvrant les ouvertures d'aeration avec des articles tels que des journaux, nappes, rideaux, etc.
g.
Gardez les Hammes nues, teller que des bougies allumees, loin de cet appareil.
h.
Ne placez pas cet appareil dans des bibliotheques, étagères ou autres espaces fermes sans ventilation adequate.
i.
N'utilisez que des piles du meme type ou de type equivalent, car it existe un risque d'explosion si les piles utilisees sont incorrectes ou si elles sont mal
installees.
j.
Eliminez correctement les piles conformement aux reglementations environnementales.
Table of contents
Languages:
Other Onn Clock Radio manuals