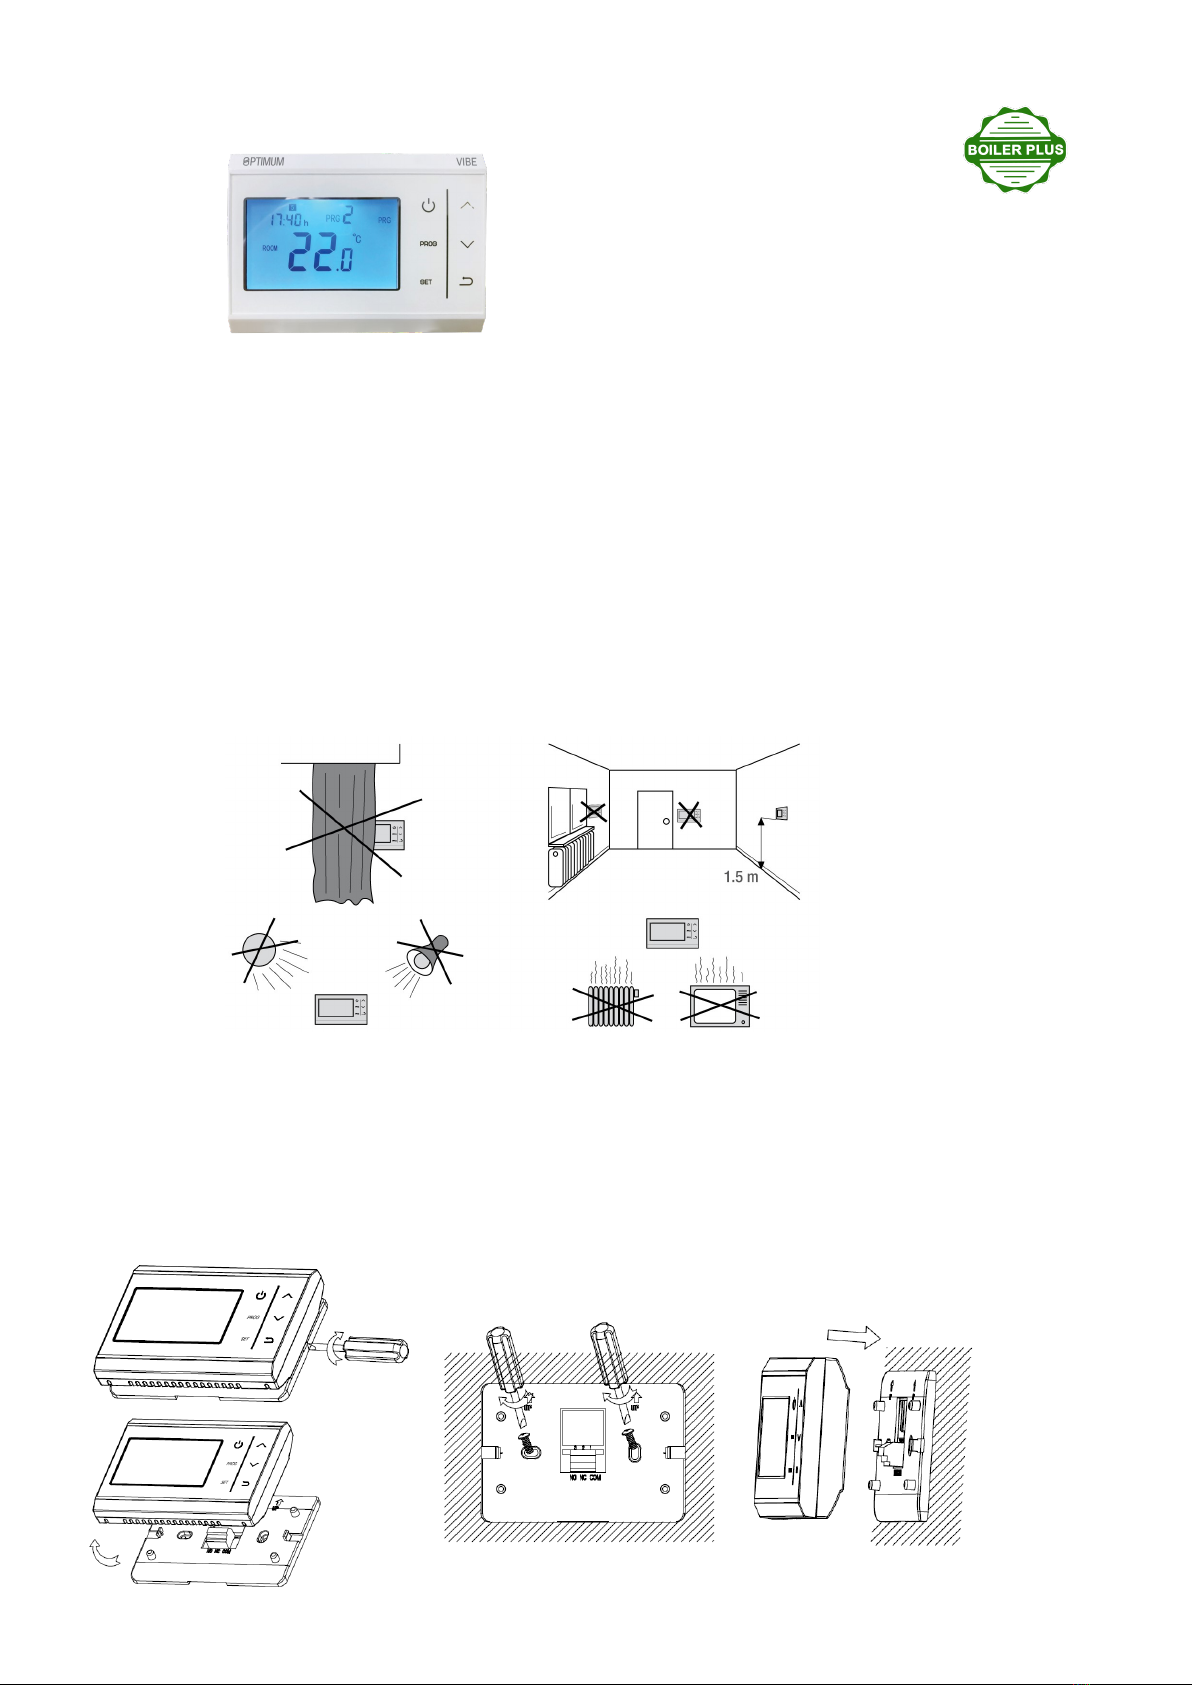
Thermostat - installaon
Having completed the backplate wall-xing and wiring, place 2 x AAA alkaline baeries in the baery compartment
at the back of the transmier; ensure correct polarity. Now clip the thermostat onto the backplate: align the upper
two holes on the back of the thermostat with the pillars on the backplate, and pivot downwards, applying light
pressure unl the housing clicks into place. Switch on the power. If you remove the thermostat from the back-
plate you must switch o the power supply rst.
Set the me and day: Aer inserng baeries, the transmier will jump to me-seng mode, or during normal
operaon, touch SET for ve seconds, change the minutes with the up or down arrow, touch SET, change the
hours, touch SET, change the day, touch SET. Then touch the ON/OFF icon to put in run mode. Full set-up can be
completed later.
Note that - if you hold the thermostat for longer than a few seconds, it will start to detect your body temperature,
rather than the ambient room temperature. This will aect the calculaon of demand / no demand for heat. Re-
place the transmier onto the back-plate so that it will again start to detect the ambient room temperature.
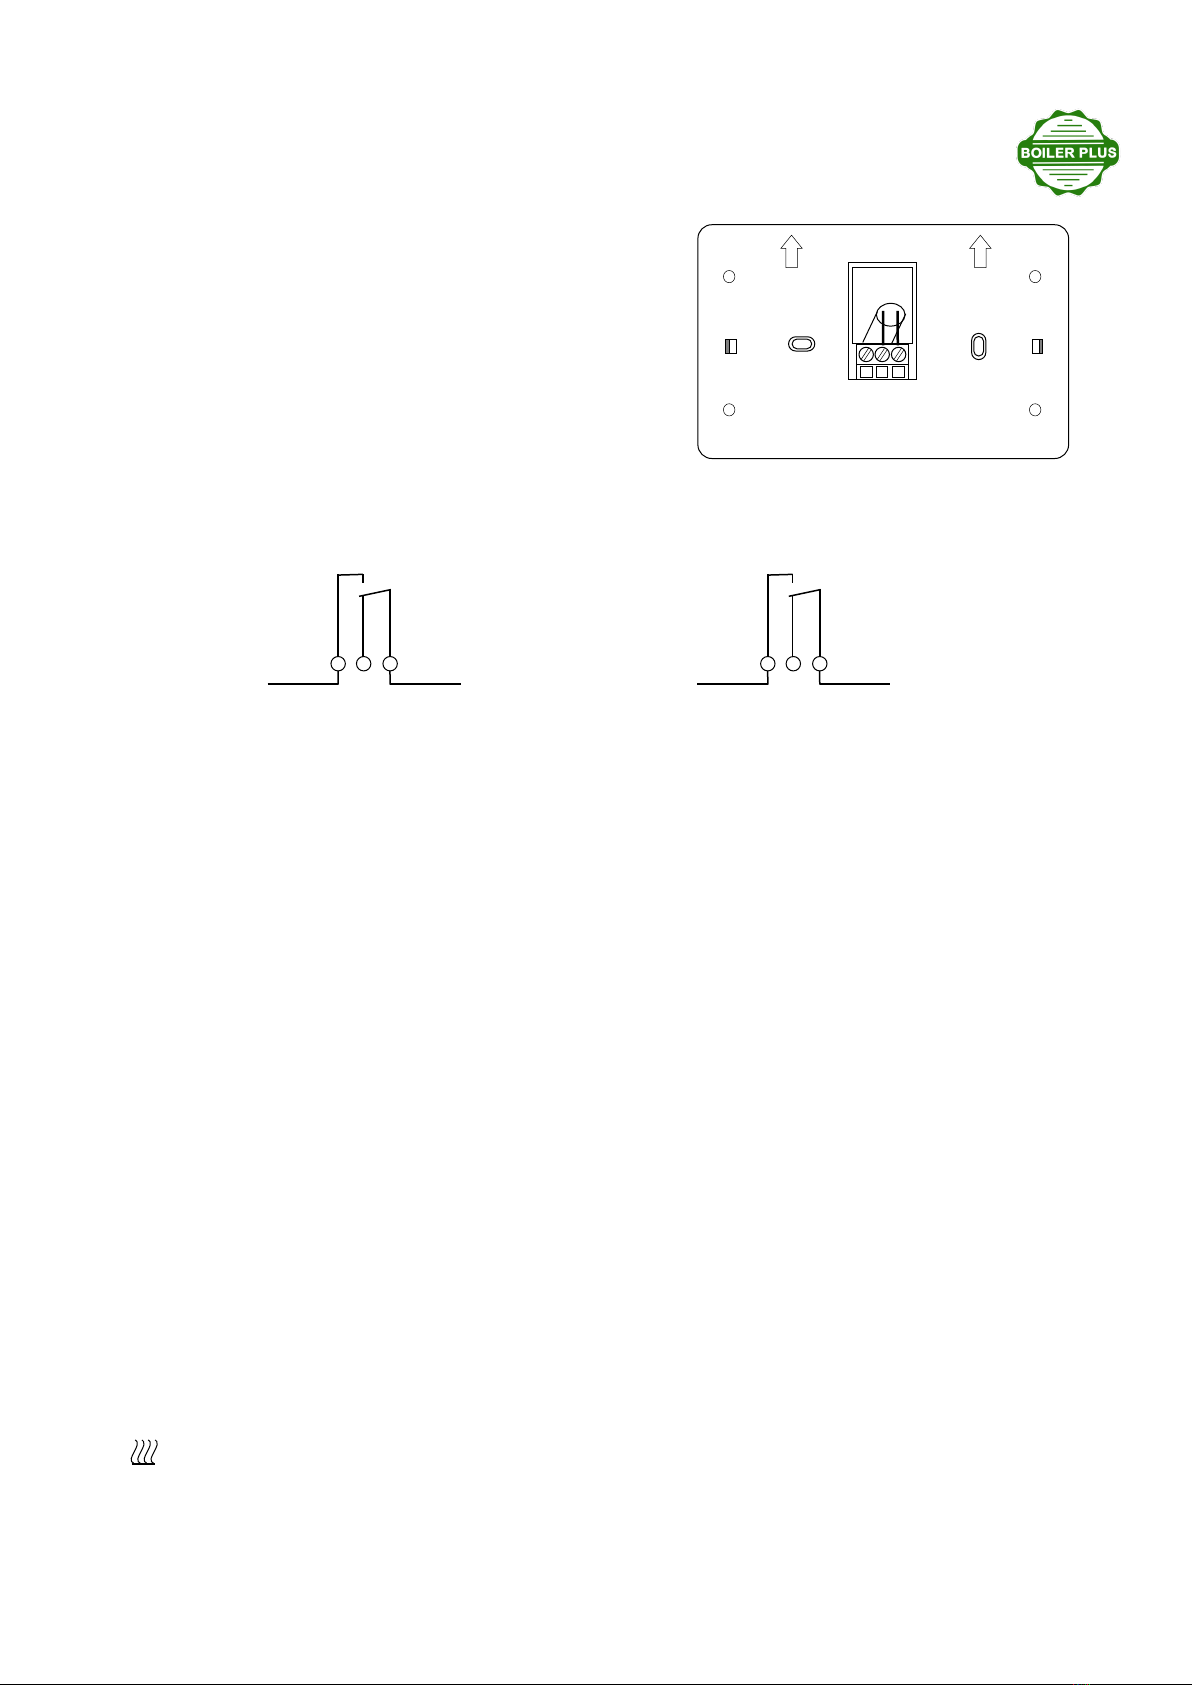
Thermostat / backplate - installaon (cont’d)
The thermostat is intended for wall-mounng in a clean,
dry environment. It is a class II control, with an ambient
temperature rang from 0 to 500C. It has 60mm wall-xing
centres compable with standard paress boxes. A back-
plate channel is provided for surface-run wiring.
The thermostat controls a volt-free changeover switch and
will control the heang appliance via a two-wire connec-
on. The terminals are marked N O (normally open), N C
(normally closed), and COM (common). Normal heang
appliance connecons will be live feed & return (mains or
low voltage) to the two terminals marked COM and N O.
Wiring for volt-free switching:
Connect the volt-free boiler connecons
(Switch wire 1 / Switch wire 2) to COM & NO
(common and normally open)
Do not connect anything to terminal N C
Wiring for mains switching:
Connect 230V AC Live feed to COM
Connect the 230V AC switched live to N O
Do not connect anything to terminal N C
The VIBE HWSTAT thermostat is a baery powered double-insulated Class II control. Do not connect any neutral or
earth wire. Use a separate insulated single screw terminal block to provide earth connuity if required. Use an
otherwise empty insulated single screw terminal block to ‘park’ a neutral wire if required.
Complete the seng up procedure.
touch the UP arrow to raise the SET temperature above the measured ROOM temperature. Within 2 or 3 seconds
the demand symbol (see le) should appear in the display. There is an audible click as the switching relay oper-
ates. The heang appliance should now be running.
Before connecng the thermostat to the boiler, make sure that you have followed the boiler external thermo-
stat connecon instrucons. A mains connecon to a volt-free terminal could damage the boiler circuitry.
COMNCNO
SW1 SW2
COMN CN O
230V boiler live 230V live feed
UP
NO NC COM