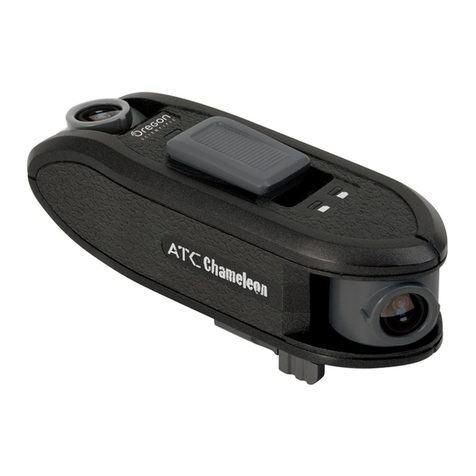
Oregon Scientific ATCChameleon User manual

User Manual


ATCChameleon – 3
Contents
Package Contents � � � � � � � � � � � � � � � � � � � � � � � � � � � � � � � � � � � � � � � � � � � � � � � � � � � � � � � � � � � � �4
Technical Specications � � � � � � � � � � � � � � � � � � � � � � � � � � � � � � � � � � � � � � � � � � � � � � � � � � � � � � � �5
Computer System Requirements � � � � � � � � � � � � � � � � � � � � � � � � � � � � � � � � � � � � � � � � � � � � � � � � �6
Operating Elements
Main Unit � � � � � � � � � � � � � � � � � � � � � � � � � � � � � � � � � � � � � � � � � � � � � � � � � � � � � � � � � � � � � � � � � � �7
Battery Charging � � � � � � � � � � � � � � � � � � � � � � � � � � � � � � � � � � � � � � � � � � � � � � � � � � � � � � � � � � � � �8
MicroSD Card Insertion � � � � � � � � � � � � � � � � � � � � � � � � � � � � � � � � � � � � � � � � � � � � � � � � � � � � � � � �9
Date and Time Setting � � � � � � � � � � � � � � � � � � � � � � � � � � � � � � � � � � � � � � � � � � � � � � � � � � � � � � � �10
Camera Operation
Video recording � � � � � � � � � � � � � � � � � � � � � � � � � � � � � � � � � � � � � � � � � � � � � � � � � � � � � � � � � � � � � 11
Battery and MicroSD card memory capacity status checking � � � � � � � � � � � � � � � � � � � � � � � � � �12
Video screen selection � � � � � � � � � � � � � � � � � � � � � � � � � � � � � � � � � � � � � � � � � � � � � � � � � � � � � � � �13
Import video
Connecting to a computer with Windows operation system� � � � � � � � � � � � � � � � � � � � � � � � � �14
Connecting to a Mac � � � � � � � � � � � � � � � � � � � � � � � � � � � � � � � � � � � � � � � � � � � � � � � � � � � � � � �14
Computer Software � � � � � � � � � � � � � � � � � � � � � � � � � � � � � � � � � � � � � � � � � � � � � � � � � � � � � � � �15
Mounting
Tripod mount � � � � � � � � � � � � � � � � � � � � � � � � � � � � � � � � � � � � � � � � � � � � � � � � � � � � � � � � � � � � � � �16
Vented helmet mount � � � � � � � � � � � � � � � � � � � � � � � � � � � � � � � � � � � � � � � � � � � � � � � � � � � � � � � � �17
Precautions
Camera � � � � � � � � � � � � � � � � � � � � � � � � � � � � � � � � � � � � � � � � � � � � � � � � � � � � � � � � � � � � � � � � � � �18
Waterproof � � � � � � � � � � � � � � � � � � � � � � � � � � � � � � � � � � � � � � � � � � � � � � � � � � � � � � � � � � � � � � � � �19
FCC Compliance Statement � � � � � � � � � � � � � � � � � � � � � � � � � � � � � � � � � � � � � � � � � � � � � � � � � � � �20
Information for Users� � � � � � � � � � � � � � � � � � � � � � � � � � � � � � � � � � � � � � � � � � � � � � � � � � � � � � � � � �21
Disclaimer � � � � � � � � � � � � � � � � � � � � � � � � � � � � � � � � � � � � � � � � � � � � � � � � � � � � � � � � � � � � � � � 22-23
ATCChameleon – 4
Quick Start Guide
Package Contents
Thank you for purchasing the ATCChameleon Dual lens Action Camera, this package should
contain the:
1� Main Camera Unit
2� Base mount
3� Vented mount
4� Tripod mount
5� USB cable
6� Quick Start Guide
1�
4�
2�
5�
3�
6�

ATCChameleon – 5
Technical Specications
Sensor resolution 2M pixels CMOS (both front and rear lens)
Memory card Supports Micro SD/SDHC Class 4 card or above and compatible
up to 32GB (not included)
Movie storage Horizontal split mode -- 960x720P pixels each view, 30fps
(combined video = 1920x720P)
Vertical split mode – 1280x720P pixels each view, 30fps
(combined video = 1280x1440P)
Focusing range 2m~innity
Movie images MP4
USB Interface USB 2�0
Rechargeable battery (built-
in) capacity
1050mAh
Dimensions 114�5mm(L) x 40mm(W) x 48mm(H)
Waterproof standard IPX4
Operating systems for PC
software
WinXP / Vista / 7 or Apple Mac OS X 10�7 or above

ATCChameleon – 6
Minimum System Requirements
• Window Environment: 3�0 Ghz Intel Pentium D (dual-core) or faster running Window XP (Service
Pack 2 or later), Windows Vista, Windows7
• Mac Environment: Intel-based Mac running Mac OS X 10�7 Lion or later
• 2GB RAM
• 1GB or greater video card
• 1280x960 resolution video support (32bit)
Computer System Requirements

ATCChameleon – 7
Operating Elements - Main Unit
7.
8.
9.
2.
3.
5.
4.
6.
6.
10.
off on
11.
1.
1� Slide Switch (off -- on)
2� MEMORY indicator
3� BATTERY indicator
4� MicroSD card slot
5� Micro USB socket
6� 180° adjustable lens
7� ON / OFF indicator
8� STATUS button
9� Video Screen switch
10�Microphone and speaker
11�Quick Release bracket

ATCChameleon – 8
Operating Elements - Battery Charging
ATCChameleon has a built-in lithium polymer rechargeable battery, you can recharge the battery
via USB�
1� Switch off the Slide switch�
2� Connect the camera to a USB port with the supplied USB cable� When charging starts, the
BATTERY indicator will turn red�
3� When charging is nished, the BATTERY indicator turns off.
4� Remove the camera from the USB port�
Note
• Please fully charge the battery before rst use.
• Battery shall not be exposed to excessive heat such as sunshine, re or the like.
• CAUTION: Danger of explosion if battery is incorrectly replaced�
Replace only with the same or equivalent type�

ATCChameleon – 9
Operating Elements - MicroSD card Insertion
1� Open the side hatch�
2� Insert the MicroSD card until it clicks in place� Ensure the MicroSD card terminals are facing
down�
3� To remove the MicroSD card, push the card until it clicks then pull the card out�
Note
• Always insert or remove the MicroSD card when the the camera is off�
• MicroSD cards with Class 6 or above are recommended to use for the best performance
during recording�
• Supports up to 32GB MicroSD cards�

ATCChameleon – 10
Operating Elements - Date & Time Setting
1� Download and install the ATCChameleon PC software from http://atc.oregonscientic.com
2� Run the PC software on the PC�
3� Connect the camera to the USB port of the PC with the supplied USB cable� Then switch on
the Slide switch�
4� Click the button on the PC software� Press SET button to send the PC local time and local
main frequency setting to the camera�
5� Unplug the camera from the USB port to complete the synchronization�
Note on mains frequency
• Input the correct local mains frequency� The shutter frequency will match the local mains
frequency to reduce banding and flicker effect while recording under certain types of
lighting, such as uorescent or mercury vapour lamp.
• If you are uncertain about the local mains frequency, test both 50Hz and 60Hz and choose
the one that produces the best results�

ATCChameleon – 11
Yellow
REC
Red
1� Switch on the Slide switch�
2� The camera is under the stand by mode while ON / OFF indicator turns yellow�
3� Recording starts in a moment when the ON / OFF indicator turns red�
4� To stop recording, switch off the Slide switch�
5� Shut down the camera�
Operation - Video recording

ATCChameleon – 12
1
2
3
4
Operation - Battery and MicroSD card memory capacity status checking
1� Open the side door�
2� Press the STATUS button to check the current battery and MicroSD card memory status�
3� The ON / OFF indicator turns yellow�
4� The battery and memory indicator turn on for indicating the status�
5� The camera will be turned off automatically�

ATCChameleon – 13
1
2
Operation - Video screen selection
1� Open the side door
2� Select the vertical or horizontal format of video screen by sliding the video slide switch
Note
• The video will be stored in the selected video format�
• The video screen format can not be changed in PC software after recording�

ATCChameleon – 14
Operation - Import video
Connecting to a computer with Windows operation system
Connect the camera to a computer with the provided USB cable�
Switch on the Slide switch� The computer will recognize the camera as a “removable disk”�
Open the “DCIM” folder of the removable disk�
Double click on a le to open it.
Connecting to a Mac
Connect the camera to a Macintosh with the provided USB cable and then turn on the camera�
The Macintosh will recognize the camera automatically as an external hard drive
Please note that in order to remove completely the deleted les from the MicroSD card, empty the
trash before ejecting the camera�

ATCChameleon – 15
00:00:00/00:00:00
ATC_0001
00:00:00/00:00:00
ATC_0001
00:00:00/00:00:00
ATC_0001
Computer software
Click the button to select the video le or drag the le into the software window.
File name
Drag le into the
software window to
play video
Swap
Picture in picture
Single Video Display
Double Video Display
Full Screen
ResizeInfoSetting
Open le
Play /
Volume /
Pause
Mute
00:00:00/00:00:00
ATC_0001
00:00:00/00:00:00
ATC_0001

ATCChameleon – 16
Mounting - Tripod Mount
Tripod Mounting
Slide the quick release bracket to the tripod mount�

Bedienungsanleitung


ATCChameleon – 3
4
5
6
7
8
9
10
11
12
13
14
14
15
16
17
18
19
20
21
Inhaltsverzeichnis
Lieferumfang. . . . . . . . . . . . . . . . . . . . . . . . . . . . . . . . . . . . . . . . . . . . . . . . . . . . . . . . . . . . . . . . .
Technische Details . . . . . . . . . . . . . . . . . . . . . . . . . . . . . . . . . . . . . . . . . . . . . . . . . . . . . . . . . . .
Computer Systemanforderungen . . . . . . . . . . . . . . . . . . . . . . . . . . . . . . . . . . . . . . . . . . . . . . .
Operative Elemente
Hauptgerät . . . . . . . . . . . . . . . . . . . . . . . . . . . . . . . . . . . . . . . . . . . . . . . . . . . . . . . . . . . . . . . . .
Batterie laden . . . . . . . . . . . . . . . . . . . . . . . . . . . . . . . . . . . . . . . . . . . . . . . . . . . . . . . . . . . . . . .
MicroSD Karte einführen . . . . . . . . . . . . . . . . . . . . . . . . . . . . . . . . . . . . . . . . . . . . . . . . . . . . . .
Datum und Uhrzeit einstellen . . . . . . . . . . . . . . . . . . . . . . . . . . . . . . . . . . . . . . . . . . . . . . . . . .
Kamerabedienung
Videoaufnahmen . . . . . . . . . . . . . . . . . . . . . . . . . . . . . . . . . . . . . . . . . . . . . . . . . . . . . . . . . . . .
Speicherkapazitätstatus von Batterie und MicroSD Karte überprüfen . . . . . . . . . . . . . . . . . . . .
Videobildschirmauswahl. . . . . . . . . . . . . . . . . . . . . . . . . . . . . . . . . . . . . . . . . . . . . . . . . . . . . . .
Videos importieren
An einem Computer mit Windows-Betriebssystem anschließen . . . . . . . . . . . . . . . . . . . . . .
An einen Mac anschließen . . . . . . . . . . . . . . . . . . . . . . . . . . . . . . . . . . . . . . . . . . . . . . . . . .
Computer Software . . . . . . . . . . . . . . . . . . . . . . . . . . . . . . . . . . . . . . . . . . . . . . . . . . . . . . . .
Halterungen
Stativhalterung . . . . . . . . . . . . . . . . . . . . . . . . . . . . . . . . . . . . . . . . . . . . . . . . . . . . . . . . . . . . . .
Helmhalterung . . . . . . . . . . . . . . . . . . . . . . . . . . . . . . . . . . . . . . . . . . . . . . . . . . . . . . . . . . . . . .
Vorsichtsmaßnahmen
Kamera. . . . . . . . . . . . . . . . . . . . . . . . . . . . . . . . . . . . . . . . . . . . . . . . . . . . . . . . . . . . . . . . . . . .
Wasserfestigkeit . . . . . . . . . . . . . . . . . . . . . . . . . . . . . . . . . . . . . . . . . . . . . . . . . . . . . . . . . . . . .
Informationen für Anwender . . . . . . . . . . . . . . . . . . . . . . . . . . . . . . . . . . . . . . . . . . . . . . . . . . . .
Haftungsausschlusserklärung . . . . . . . . . . . . . . . . . . . . . . . . . . . . . . . . . . . . . . . . . . . . . . . . . .

ATCChameleon – 4
Quick Start Guide
Lieferumfang
Vielen Dank, dass Sie die ATCChameleon Dual Lens Action Kamera erworben haben. Im
Lieferumfang sollte Folgendes vorhanden sein:
1. Kamera Hauptgerät
2. Sockelhalterung
3. Helmhalterung
4. Stativhalterung
5. USB-Kabel
6. Schnellstart-Anleitung
1.
4.
2.
5.
3.
6.
Other manuals for ATCChameleon
1
Table of contents
Other Oregon Scientific Action Camera manuals

Oregon Scientific
Oregon Scientific ATCChameleon User manual

Oregon Scientific
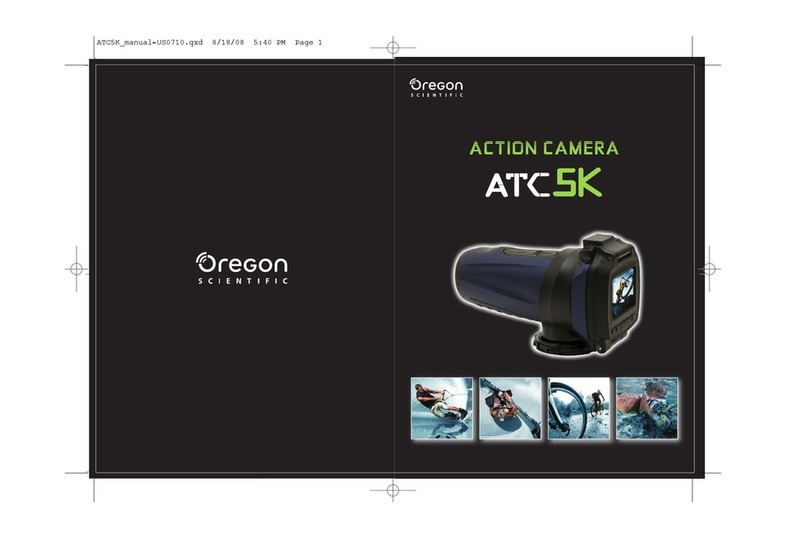
Oregon Scientific ATC5K User manual

Oregon Scientific
Oregon Scientific ATC Mini User manual

Oregon Scientific
Oregon Scientific ATC-2K User manual

Oregon Scientific
Oregon Scientific ATC Mini User manual

Oregon Scientific
Oregon Scientific ATC-2K User manual

Oregon Scientific
Oregon Scientific ATC3K User manual