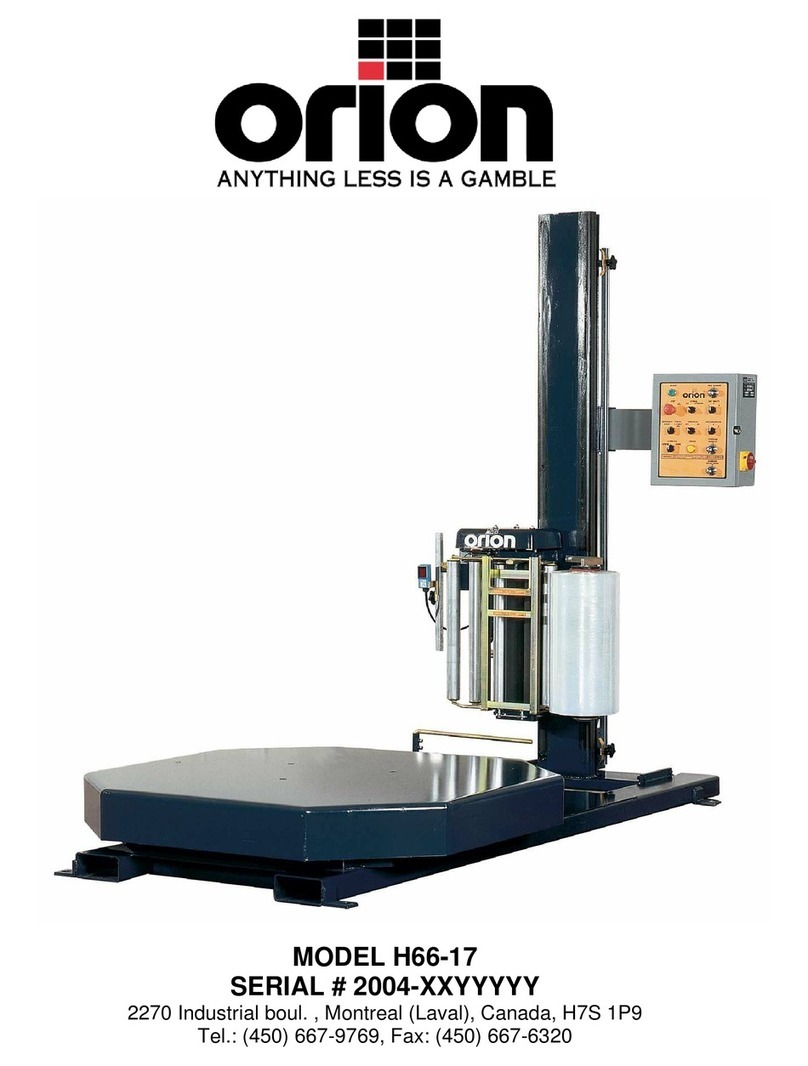
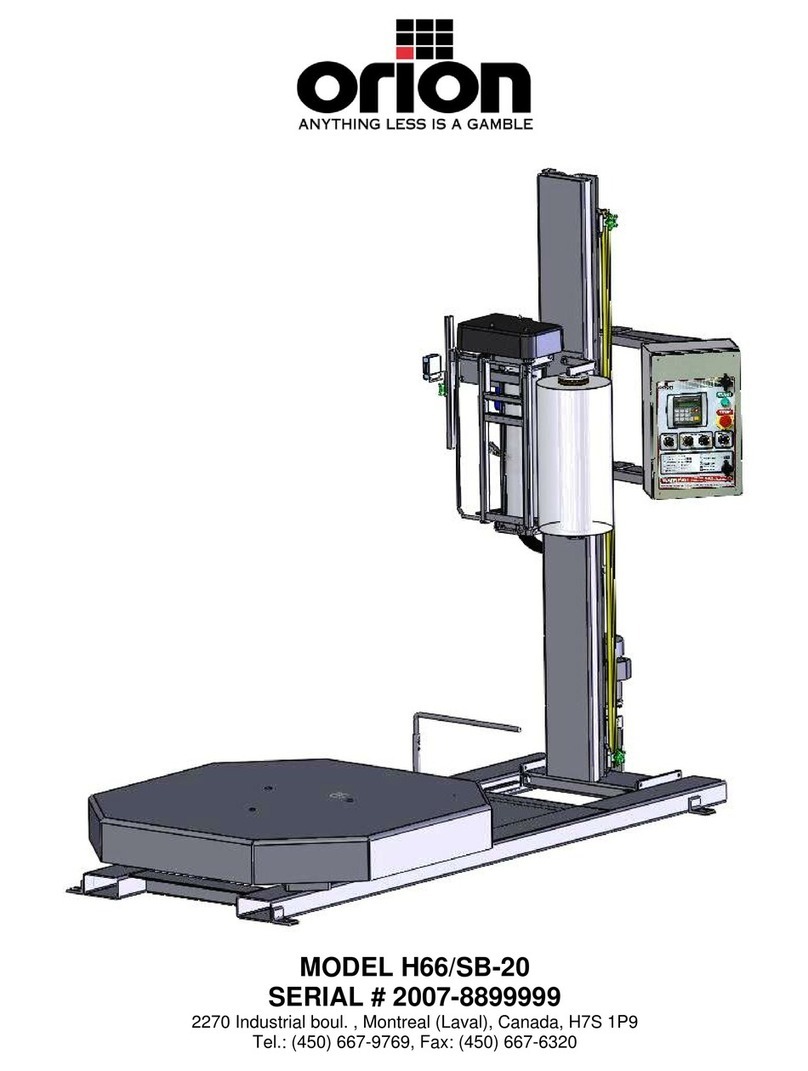
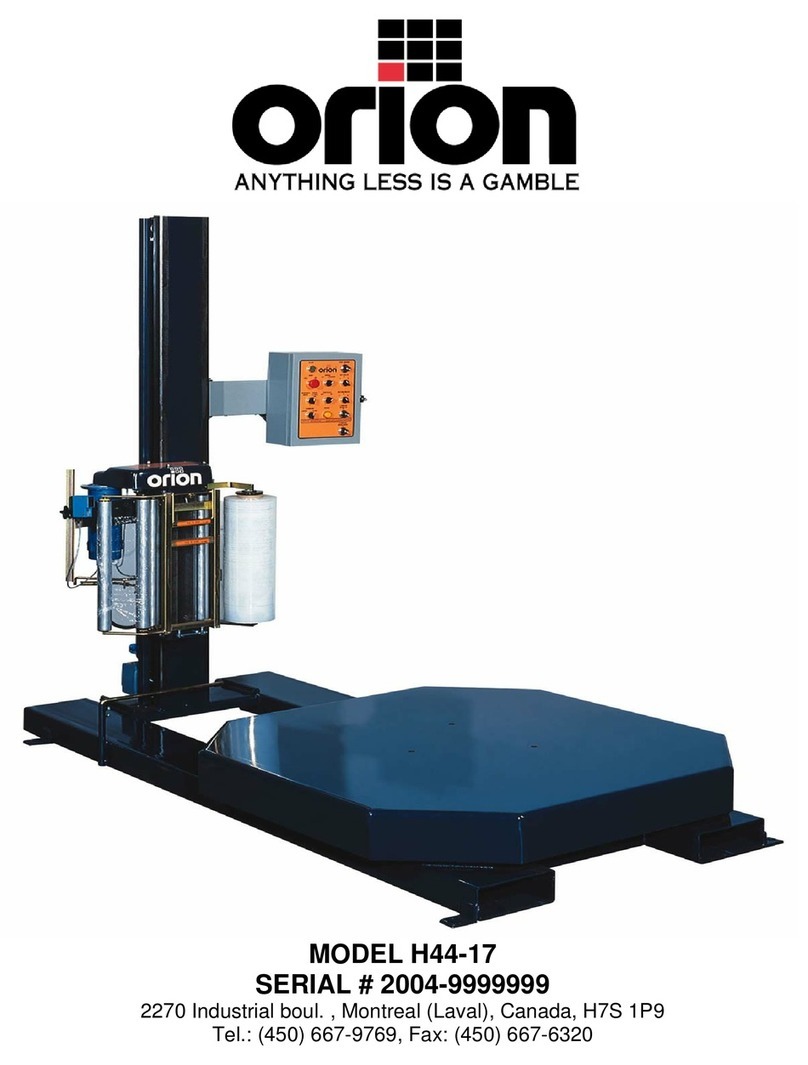
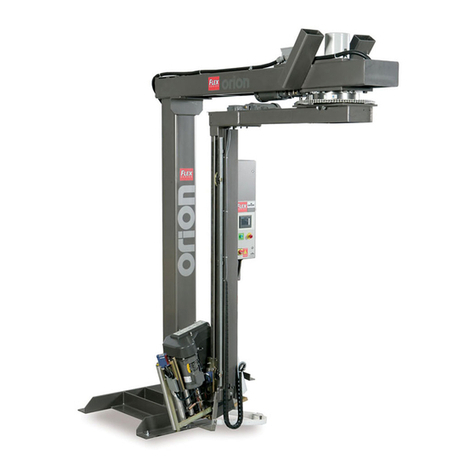
Orion FLEX Series User manual

AG360 Flex
STRETCHWRAPPER
MANUAL
Model
AG 360 RoboWrapper
Revision Date - June 28, 2017
Machine Manual
Revision 1.1
4750 County Road 13 NE
Alexandria, MN 56308
Phone: (901) 888-4170
Toll Free: (800) 333-6556
FAX: (901) 365-1071

© 2017 Pro Mach. All Rights Reserved.
Section 106 of the 1976 Copyright Act forbids any party other than the author (Pro Mach) to: Reproduce owned work
in copies or phonorecords, to prepare derivative works based upon the work; to distribute copies or phonorecords of
the work to the public by sale or other transfer of ownership, by rental or lease. Copyright protection subsists from the
time the work is created in fixed form. The copyright in the work of authorship immediately becomes the property of
the author who created the work (Pro Mach.) Only the author or those deriving their rights through the author can right-
fully claim copyright.
Liability Waiver
The information in this manual is subject to change without notice and does not represent a commitment on the part
of Pro Mach and assumes no responsibility for any errors that may appear in this manual. In no event will Pro Mach
or its employees, partners, contracted workers/ companies or any association who participates in the writing of this
manual be liable for technical or editorial omissions made herein; nor for direct, indirect, special, incidental, or conse-
quential damages resulting from the use or defect of this manual.

Orion Machine Manual
Revision 1.1 AG 360 RoboWrapper
28 June 2017 Table of Contents
Page I
Table of Contents
Chapter 1: Introduction and Safety
Introduction. . . . . . . . . . . . . . . . . . . . . . . . . . . . . . . . . . . . . . . . . . . . . . . . . . . . . . . . . . . . 1-1
About this Manual . . . . . . . . . . . . . . . . . . . . . . . . . . . . . . . . . . . . . . . . . . . . . . . . . . 1-1
Copyright Notice . . . . . . . . . . . . . . . . . . . . . . . . . . . . . . . . . . . . . . . . . . . . . . . . . . . 1-2
Flex Series Warranty . . . . . . . . . . . . . . . . . . . . . . . . . . . . . . . . . . . . . . . . . . . . . . . . 1-2
Safety. . . . . . . . . . . . . . . . . . . . . . . . . . . . . . . . . . . . . . . . . . . . . . . . . . . . . . . . . . . . . . . . . 1-3
System Safety Recommendations. . . . . . . . . . . . . . . . . . . . . . . . . . . . . . . . . . . . . . 1-3
Operation Safety . . . . . . . . . . . . . . . . . . . . . . . . . . . . . . . . . . . . . . . . . . . . . . . . . . . 1-4
Maintenance Safety. . . . . . . . . . . . . . . . . . . . . . . . . . . . . . . . . . . . . . . . . . . . . . . . . 1-4
Hazard Messages . . . . . . . . . . . . . . . . . . . . . . . . . . . . . . . . . . . . . . . . . . . . . . . . . . 1-5
Lockout and Tagout Recommendations . . . . . . . . . . . . . . . . . . . . . . . . . . . . . . . . . 1-6
Electrical System . . . . . . . . . . . . . . . . . . . . . . . . . . . . . . . . . . . . . . . . . . . . . 1-6
Installation and First Time Power Up . . . . . . . . . . . . . . . . . . . . . . . . . . . . . . . . . . . . . . . 1-7
Inspection . . . . . . . . . . . . . . . . . . . . . . . . . . . . . . . . . . . . . . . . . . . . . . . . . . . . . . . . 1-7
Unloading. . . . . . . . . . . . . . . . . . . . . . . . . . . . . . . . . . . . . . . . . . . . . . . . . . . . . . . . . 1-7
Machine Installation . . . . . . . . . . . . . . . . . . . . . . . . . . . . . . . . . . . . . . . . . . . . . . . . . . . . . 1-8
Assembly Procedure . . . . . . . . . . . . . . . . . . . . . . . . . . . . . . . . . . . . . . . . . . . . . . . . 1-8
Pallet Guide Arm and Sensing Arm Wheel . . . . . . . . . . . . . . . . . . . . . . . . . . . . . . 1-12
Operating Parameters . . . . . . . . . . . . . . . . . . . . . . . . . . . . . . . . . . . . . . . . . . . . . . 1-13
Checks Prior to Running . . . . . . . . . . . . . . . . . . . . . . . . . . . . . . . . . . . . . . . . . . . . 1-13
Chapter 2: System Description
Machine Specifications . . . . . . . . . . . . . . . . . . . . . . . . . . . . . . . . . . . . . . . . . . . . . . . . . . 2-1
Machine Layout Drawings . . . . . . . . . . . . . . . . . . . . . . . . . . . . . . . . . . . . . . . . . . . . . . . . 2-2
Machine Dimensions . . . . . . . . . . . . . . . . . . . . . . . . . . . . . . . . . . . . . . . . . . . . . . . . 2-2
Machine Component Identification . . . . . . . . . . . . . . . . . . . . . . . . . . . . . . . . . . . . . 2-3

Machine Manual Orion
AG 360 RoboWrapper Revision 1.1
Table of Contents 28 June 2017
Page II
Chapter 3: System Operation
Operating Procedures . . . . . . . . . . . . . . . . . . . . . . . . . . . . . . . . . . . . . . . . . . . . . . . . . . . 3-1
Charging the AG 360. . . . . . . . . . . . . . . . . . . . . . . . . . . . . . . . . . . . . . . . . . . . . . . . 3-1
How to Start and Shut Down Your Wrapping System . . . . . . . . . . . . . . . . . . . . . . . 3-2
On/ Off Key Switch . . . . . . . . . . . . . . . . . . . . . . . . . . . . . . . . . . . . . . . . . . . . 3-2
START AND EMERGENCY STOP SWITCHES. . . . . . . . . . . . . . . . . . . . . . 3-2
Transporting the AG 360 . . . . . . . . . . . . . . . . . . . . . . . . . . . . . . . . . . . . . . . . . . . . . 3-3
When Battery Power Is Present:. . . . . . . . . . . . . . . . . . . . . . . . . . . . . . . . . . 3-3
When Battery Power is Not Present or Safety Switch Active:. . . . . . . . . . . . 3-3
Steering Spring Tension Release . . . . . . . . . . . . . . . . . . . . . . . . . . . . . . . . . . . . . . 3-4
Aligning the AG 360 with the Pallet . . . . . . . . . . . . . . . . . . . . . . . . . . . . . . . . . . . . . 3-5
Loading The Film. . . . . . . . . . . . . . . . . . . . . . . . . . . . . . . . . . . . . . . . . . . . . . . . . . . 3-6
Carriage Prestretch Adjustment. . . . . . . . . . . . . . . . . . . . . . . . . . . . . . . . . . . . . . . . 3-8
Universal Go-To Buttons . . . . . . . . . . . . . . . . . . . . . . . . . . . . . . . . . . . . . . . . . . . . . . . . 3-10
Run Screens . . . . . . . . . . . . . . . . . . . . . . . . . . . . . . . . . . . . . . . . . . . . . . . . . . . . . . . . . .3-11
Run Screen . . . . . . . . . . . . . . . . . . . . . . . . . . . . . . . . . . . . . . . . . . . . . . . . . . . . . . 3-11
Recipe Screens. . . . . . . . . . . . . . . . . . . . . . . . . . . . . . . . . . . . . . . . . . . . . . . . . . . . . . . . 3-13
Recipe Screen . . . . . . . . . . . . . . . . . . . . . . . . . . . . . . . . . . . . . . . . . . . . . . . . . . . . 3-13
Recipe Select Screen . . . . . . . . . . . . . . . . . . . . . . . . . . . . . . . . . . . . . . . . . . . . . . 3-15
User Setting Screens . . . . . . . . . . . . . . . . . . . . . . . . . . . . . . . . . . . . . . . . . . . . . . . . . . . 3-16
Wrap Settings Screen . . . . . . . . . . . . . . . . . . . . . . . . . . . . . . . . . . . . . . . . . . . . . . 3-16
Menu Screens . . . . . . . . . . . . . . . . . . . . . . . . . . . . . . . . . . . . . . . . . . . . . . . . . . . . . . . . . 3-18
Menu Screen . . . . . . . . . . . . . . . . . . . . . . . . . . . . . . . . . . . . . . . . . . . . . . . . . . . . . 3-18
Jogging Screen . . . . . . . . . . . . . . . . . . . . . . . . . . . . . . . . . . . . . . . . . . . . . . . . . . . 3-19
Production Data Screen. . . . . . . . . . . . . . . . . . . . . . . . . . . . . . . . . . . . . . . . . . . . . 3-20
Tension Sensor Calibration Screen. . . . . . . . . . . . . . . . . . . . . . . . . . . . . . . . . . . . 3-21
Diagnostics Screen . . . . . . . . . . . . . . . . . . . . . . . . . . . . . . . . . . . . . . . . . . . . . . . . 3-22
The Inputs Status Screen . . . . . . . . . . . . . . . . . . . . . . . . . . . . . . . . . . . . . . . . . . . 3-23
The Manual Screen . . . . . . . . . . . . . . . . . . . . . . . . . . . . . . . . . . . . . . . . . . . . . . . . 3-24
Fault History Screen . . . . . . . . . . . . . . . . . . . . . . . . . . . . . . . . . . . . . . . . . . . . . . . 3-25
HMI Setup . . . . . . . . . . . . . . . . . . . . . . . . . . . . . . . . . . . . . . . . . . . . . . . . . . . . . . . 3-26
Battery Settings Screen. . . . . . . . . . . . . . . . . . . . . . . . . . . . . . . . . . . . . . . . . . . . . 3-27
Machine Settings Screens . . . . . . . . . . . . . . . . . . . . . . . . . . . . . . . . . . . . . . . . . . . . . . . 3-28
Machine Settings Screen. . . . . . . . . . . . . . . . . . . . . . . . . . . . . . . . . . . . . . . . . . . . 3-28
Chapter 4: Troubleshooting
Component Inspections. . . . . . . . . . . . . . . . . . . . . . . . . . . . . . . . . . . . . . . . . . . . . . . . . . 4-1
Battery Connections . . . . . . . . . . . . . . . . . . . . . . . . . . . . . . . . . . . . . . . . . . . . . . . . 4-1
Main Breaker Electrical Disconnect/ Hard Reset. . . . . . . . . . . . . . . . . . . . . . . . . . . 4-2
Side Panel Interlock Switch . . . . . . . . . . . . . . . . . . . . . . . . . . . . . . . . . . . . . . . . . . . 4-3
Handle Proximity Switch . . . . . . . . . . . . . . . . . . . . . . . . . . . . . . . . . . . . . . . . . . . . . 4-3
Carriage Obstacle Detect Limit Switch . . . . . . . . . . . . . . . . . . . . . . . . . . . . . . . . . . 4-4
Film Carriage Door Switch. . . . . . . . . . . . . . . . . . . . . . . . . . . . . . . . . . . . . . . . . . . . 4-4
Safety Bumper. . . . . . . . . . . . . . . . . . . . . . . . . . . . . . . . . . . . . . . . . . . . . . . . . . . . . 4-5
Transmission Engage/ Disengage. . . . . . . . . . . . . . . . . . . . . . . . . . . . . . . . . . . . . . 4-5
Orion Machine Manual
Revision 1.1 AG 360 RoboWrapper
28 June 2017 Table of Contents
Page III
Alarm Message Chart. . . . . . . . . . . . . . . . . . . . . . . . . . . . . . . . . . . . . . . . . . . . . . . . . . . . 4-6
Chapter 5: Maintenance
Maintenance Recommendations. . . . . . . . . . . . . . . . . . . . . . . . . . . . . . . . . . . . . . . . . . . 5-1
Opening Control Panels and Covers . . . . . . . . . . . . . . . . . . . . . . . . . . . . . . . . . . . . 5-1
Left Side Enclosure. . . . . . . . . . . . . . . . . . . . . . . . . . . . . . . . . . . . . . . . . . . . 5-2
Right Side Enclosure . . . . . . . . . . . . . . . . . . . . . . . . . . . . . . . . . . . . . . . . . . 5-2
Charging and Indicator Connectors on Door . . . . . . . . . . . . . . . . . . . . . . . . 5-3
HMI Back Panel . . . . . . . . . . . . . . . . . . . . . . . . . . . . . . . . . . . . . . . . . . . . . . 5-3
Carriage Lift Chain Adjustment . . . . . . . . . . . . . . . . . . . . . . . . . . . . . . . . . . . . . . . . 5-4
Chain Maintenance . . . . . . . . . . . . . . . . . . . . . . . . . . . . . . . . . . . . . . . . . . . . . . . . . 5-4
Tower Raceways Maintenance . . . . . . . . . . . . . . . . . . . . . . . . . . . . . . . . . . . . . . . . 5-4
Cleaning The Stretch Rollers. . . . . . . . . . . . . . . . . . . . . . . . . . . . . . . . . . . . . . . . . . 5-5
Steering Handle Tension Adjustment . . . . . . . . . . . . . . . . . . . . . . . . . . . . . . . . . . . 5-6
Bumper Tension Adjustment . . . . . . . . . . . . . . . . . . . . . . . . . . . . . . . . . . . . . . . . . . 5-6
Chapter 6: Electrical Prints and Mechanical Drawings
Electrical Prints . . . . . . . . . . . . . . . . . . . . . . . . . . . . . . . . . . . . . . . . . . . . . . . . . . . . . . . . 6-1
Mechanical Drawings . . . . . . . . . . . . . . . . . . . . . . . . . . . . . . . . . . . . . . . . . . . . . . . . . . . . 6-2

Machine Manual Orion
AG 360 RoboWrapper Revision 1.1
Table of Contents 28 June 2017
Page IV

Orion Machine Manual
Revision 1.1 AG 360 RoboWrapper
28 June 2017 List of Figures
Page I
List of Figures
Chapter 1: Introduction and Safety
Fork Tube Access Locations . . . . . . . . . . . . . . . . . . . . . . . . . . . . . . . . . . . . . . . . . . 1-7
Securing the Lifting Eye Bolt . . . . . . . . . . . . . . . . . . . . . . . . . . . . . . . . . . . . . . . . . . 1-8
Remove Tower Horizontal Bracket . . . . . . . . . . . . . . . . . . . . . . . . . . . . . . . . . . . . . 1-8
Bolting on the Tower . . . . . . . . . . . . . . . . . . . . . . . . . . . . . . . . . . . . . . . . . . . . . . . . 1-9
Connecting the Battery Cable . . . . . . . . . . . . . . . . . . . . . . . . . . . . . . . . . . . . . . . . . 1-9
Connecting the Battery Cable . . . . . . . . . . . . . . . . . . . . . . . . . . . . . . . . . . . . . . . . 1-10
Installing the Tension Spring . . . . . . . . . . . . . . . . . . . . . . . . . . . . . . . . . . . . . . . . . 1-10
Connecting the Battery Charger . . . . . . . . . . . . . . . . . . . . . . . . . . . . . . . . . . . . . . 1-11
Pallet Guide Arm and Wheel . . . . . . . . . . . . . . . . . . . . . . . . . . . . . . . . . . . . . . . . . 1-12
AG 360 Path of 52” . . . . . . . . . . . . . . . . . . . . . . . . . . . . . . . . . . . . . . . . . . . . . . . . 1-13
Chapter 2: System Description
Machine Layout Drawing . . . . . . . . . . . . . . . . . . . . . . . . . . . . . . . . . . . . . . . . . . . . . 2-2
Machine Layout Drawing . . . . . . . . . . . . . . . . . . . . . . . . . . . . . . . . . . . . . . . . . . . . . 2-3
Chapter 3: System Operation
Charging Port. . . . . . . . . . . . . . . . . . . . . . . . . . . . . . . . . . . . . . . . . . . . . . . . . . . . . . 3-1
The Operator Panel . . . . . . . . . . . . . . . . . . . . . . . . . . . . . . . . . . . . . . . . . . . . . . . . . 3-2
Forward and Reverse Transport Buttons. . . . . . . . . . . . . . . . . . . . . . . . . . . . . . . . . 3-3
Transmission Engage/ Disengage. . . . . . . . . . . . . . . . . . . . . . . . . . . . . . . . . . . . . . 3-3
Spring Tension Release . . . . . . . . . . . . . . . . . . . . . . . . . . . . . . . . . . . . . . . . . . . . . 3-4
Adjusting the Pallet Guide . . . . . . . . . . . . . . . . . . . . . . . . . . . . . . . . . . . . . . . . . . . . 3-5
Aligning the AG 360 With a Pallet Instructions . . . . . . . . . . . . . . . . . . . . . . . . . . . . 3-5
Door Latch . . . . . . . . . . . . . . . . . . . . . . . . . . . . . . . . . . . . . . . . . . . . . . . . . . . . . . . . 3-6
Loading the Film . . . . . . . . . . . . . . . . . . . . . . . . . . . . . . . . . . . . . . . . . . . . . . . . . . . 3-6
Film Cling Diagram . . . . . . . . . . . . . . . . . . . . . . . . . . . . . . . . . . . . . . . . . . . . . . . . . 3-7
Removing the Pre-Stretch Cover. . . . . . . . . . . . . . . . . . . . . . . . . . . . . . . . . . . . . . . 3-8
High and Low Ratio Adjustment . . . . . . . . . . . . . . . . . . . . . . . . . . . . . . . . . . . . . . . 3-8
Safety Line on Safety Lock . . . . . . . . . . . . . . . . . . . . . . . . . . . . . . . . . . . . . . . . . . . 3-9
Pre-Stretch Ratio Indicator Light . . . . . . . . . . . . . . . . . . . . . . . . . . . . . . . . . . . . . . . 3-9
The Run Screen. . . . . . . . . . . . . . . . . . . . . . . . . . . . . . . . . . . . . . . . . . . . . . . . . . . 3-11
The Recipe Screen . . . . . . . . . . . . . . . . . . . . . . . . . . . . . . . . . . . . . . . . . . . . . . . . 3-13
The Recipe Screen . . . . . . . . . . . . . . . . . . . . . . . . . . . . . . . . . . . . . . . . . . . . . . . . 3-15
The Wrap Settings Screen. . . . . . . . . . . . . . . . . . . . . . . . . . . . . . . . . . . . . . . . . . . 3-16
The Menu Screen . . . . . . . . . . . . . . . . . . . . . . . . . . . . . . . . . . . . . . . . . . . . . . . . . 3-18
The Jogging Screen. . . . . . . . . . . . . . . . . . . . . . . . . . . . . . . . . . . . . . . . . . . . . . . . 3-19
The Production Data Screen . . . . . . . . . . . . . . . . . . . . . . . . . . . . . . . . . . . . . . . . . 3-20
The Tension Sensor Calibration Screen . . . . . . . . . . . . . . . . . . . . . . . . . . . . . . . . 3-21
The Diagnostics Screen. . . . . . . . . . . . . . . . . . . . . . . . . . . . . . . . . . . . . . . . . . . . . 3-22
The Inputs Screen . . . . . . . . . . . . . . . . . . . . . . . . . . . . . . . . . . . . . . . . . . . . . . . . . 3-23

Machine Manual Orion
AG 360 RoboWrapper Revision 1.1
List of Figures 28 June 2017
Page II
The Manual Screen . . . . . . . . . . . . . . . . . . . . . . . . . . . . . . . . . . . . . . . . . . . . . . . . 3-24
The Fault History Screen . . . . . . . . . . . . . . . . . . . . . . . . . . . . . . . . . . . . . . . . . . . . 3-25
The HMI Setup Screen . . . . . . . . . . . . . . . . . . . . . . . . . . . . . . . . . . . . . . . . . . . . . 3-26
The Battery Settings Screen . . . . . . . . . . . . . . . . . . . . . . . . . . . . . . . . . . . . . . . . . 3-27
The Machine Settings Screen . . . . . . . . . . . . . . . . . . . . . . . . . . . . . . . . . . . . . . . . 3-28
Chapter 4: Troubleshooting
Right Side Battery Connections. . . . . . . . . . . . . . . . . . . . . . . . . . . . . . . . . . . . . . . . 4-1
Left Side Battery Connections . . . . . . . . . . . . . . . . . . . . . . . . . . . . . . . . . . . . . . . . . 4-1
Opening the Panel . . . . . . . . . . . . . . . . . . . . . . . . . . . . . . . . . . . . . . . . . . . . . . . . . . 4-2
Main Disconnect . . . . . . . . . . . . . . . . . . . . . . . . . . . . . . . . . . . . . . . . . . . . . . . . . . . 4-2
Side Panel Interlock Switch . . . . . . . . . . . . . . . . . . . . . . . . . . . . . . . . . . . . . . . . . . . 4-3
Front Handle Proximity Switch. . . . . . . . . . . . . . . . . . . . . . . . . . . . . . . . . . . . . . . . . 4-3
Obstacle Detect Limit Switch . . . . . . . . . . . . . . . . . . . . . . . . . . . . . . . . . . . . . . . . . . 4-4
Film Carriage Door Switch. . . . . . . . . . . . . . . . . . . . . . . . . . . . . . . . . . . . . . . . . . . . 4-4
Safety Bumper. . . . . . . . . . . . . . . . . . . . . . . . . . . . . . . . . . . . . . . . . . . . . . . . . . . . . 4-5

Transmission Engage/ Disengage Lever. . . . . . . . . . . . . . . . . . . . . . . . . . . . . . . . . 4-5
Chapter 5: Maintenance
Battery Cover Handles. . . . . . . . . . . . . . . . . . . . . . . . . . . . . . . . . . . . . . . . . . . . . . . 5-1
Opening the Panel . . . . . . . . . . . . . . . . . . . . . . . . . . . . . . . . . . . . . . . . . . . . . . . . . . 5-1
Left Side Electrical Enclosure . . . . . . . . . . . . . . . . . . . . . . . . . . . . . . . . . . . . . . . . . 5-2
Right Side Electrical Enclosure . . . . . . . . . . . . . . . . . . . . . . . . . . . . . . . . . . . . . . . . 5-2
Charging Connector and Indicator Connections . . . . . . . . . . . . . . . . . . . . . . . . . . . 5-3
Back of HMI . . . . . . . . . . . . . . . . . . . . . . . . . . . . . . . . . . . . . . . . . . . . . . . . . . . . . . . 5-3
Carriage Lift Chain Adjustment . . . . . . . . . . . . . . . . . . . . . . . . . . . . . . . . . . . . . . . . 5-4
Steering Handle Tension Adjustment . . . . . . . . . . . . . . . . . . . . . . . . . . . . . . . . . . . 5-6
Bumper Tension Adjustment . . . . . . . . . . . . . . . . . . . . . . . . . . . . . . . . . . . . . . . . . . 5-6
Chapter 6: Electrical Prints and Mechanical Drawings

Orion Machine Manual
Revision 1.1 AG 360 RoboWrapper
28 June 2017 Introduction and Safety Contents
Page I
Introduction and Safety Contents
Introduction. . . . . . . . . . . . . . . . . . . . . . . . . . . . . . . . . . . . . . . . . . . . . . . . . . . . . . . . . . . . 1-1
About this Manual . . . . . . . . . . . . . . . . . . . . . . . . . . . . . . . . . . . . . . . . . . . . . . . . . . 1-1
Copyright Notice . . . . . . . . . . . . . . . . . . . . . . . . . . . . . . . . . . . . . . . . . . . . . . . . . . . 1-2
Flex Series Warranty . . . . . . . . . . . . . . . . . . . . . . . . . . . . . . . . . . . . . . . . . . . . . . . . 1-2
Safety. . . . . . . . . . . . . . . . . . . . . . . . . . . . . . . . . . . . . . . . . . . . . . . . . . . . . . . . . . . . . . . . . 1-3
System Safety Recommendations. . . . . . . . . . . . . . . . . . . . . . . . . . . . . . . . . . . . . . 1-3
Operation Safety . . . . . . . . . . . . . . . . . . . . . . . . . . . . . . . . . . . . . . . . . . . . . . . . . . . 1-4
Maintenance Safety. . . . . . . . . . . . . . . . . . . . . . . . . . . . . . . . . . . . . . . . . . . . . . . . . 1-4
Hazard Messages . . . . . . . . . . . . . . . . . . . . . . . . . . . . . . . . . . . . . . . . . . . . . . . . . . 1-5
Lockout and Tagout Recommendations . . . . . . . . . . . . . . . . . . . . . . . . . . . . . . . . . 1-6
Installation and First Time Power Up . . . . . . . . . . . . . . . . . . . . . . . . . . . . . . . . . . . . . . . 1-7
Inspection . . . . . . . . . . . . . . . . . . . . . . . . . . . . . . . . . . . . . . . . . . . . . . . . . . . . . . . . 1-7
Unloading. . . . . . . . . . . . . . . . . . . . . . . . . . . . . . . . . . . . . . . . . . . . . . . . . . . . . . . . . 1-7
Machine Installation . . . . . . . . . . . . . . . . . . . . . . . . . . . . . . . . . . . . . . . . . . . . . . . . . . . . . 1-8
Assembly Procedure . . . . . . . . . . . . . . . . . . . . . . . . . . . . . . . . . . . . . . . . . . . . . . . . 1-8
Pallet Guide Arm and Sensing Arm Wheel . . . . . . . . . . . . . . . . . . . . . . . . . . . . . . 1-12
Operating Parameters . . . . . . . . . . . . . . . . . . . . . . . . . . . . . . . . . . . . . . . . . . . . . . 1-13
Checks Prior to Running . . . . . . . . . . . . . . . . . . . . . . . . . . . . . . . . . . . . . . . . . . . . 1-13

Machine Manual Orion
AG 360 RoboWrapper Revision 1.1
Introduction and Safety Contents 28 June 2017
Page II

1.
Page 1-1
Orion Machine Manual
Revision 1.1 AG 360 RoboWrapper
28 June 2017 Introduction and Safety
Introduction and Safety
Introduction
Thank you for choosing Orion stretch-wrapping equipment. It is a wise choice, which will
benefit your company now and in the future.
Orion uses a unique combination of functional, rugged steel structure and sophisticated
control systems to offer equipment high in durability and low in maintenance require-
ments. Our advance control systems mean that Orion equipment can be operated safely
and efficiently without the need for special operator expertise.
Please read this manual carefully and keep it handy. Following these simple operating
instructions will insure the safe and efficient performance of this machine while simple
maintenance procedures will guarantee a long and productive life of the equipment.
This manual covers standard features of the machine. Certain options may not be fully
covered due to their unique application. Every effort has been made to ensure document
accuracy however, Orion Packaging retains the right to change specifications without
notice.
In order to acquire more information about custom made features of your machine and to
provide quicker service, the following information is required when making an inquiry:
1. Model AG 360 RoboWrapper
2. Serial Number (See sticker on electrical cabinet)
3. Built in Alexandria Minnesota, USA
About this Manual
Orion is committed to helping you maximize the productivity of your system. This manual
is specifically designed for your AG 360 RoboWrapper, to assist you in the operation and
maintenance of your new equipment. Please take the time to familiarize yourself with the
contents of this manual.
• Section 1 is the Introduction and Safety section. This section discusses safety, lock
out/ tag out, hazard messages, and installation information.
• Section 2 is the System Description section. This section discusses machine specifica-
tions. A Machine Layout Drawing is found at the end of this section.
• Section 3 is the System Operation section. This section describes the operational pro-
cedures, operator control panels, and the Human Machine Interface.
• Section 4 is the Troubleshooting section. Troubleshooting inspections illustrations and
a troubleshooting chart are found in this section.
• Section 5 is the Maintenance section. Maintenance illustrations and inspections are
found in this section. You will also find required maintenance procedures.

Machine Manual Orion
AG 360 RoboWrapper Revision 1.1
Introduction and Safety 28 June 2017
Page 1-2
Copyright Notice
© 2017 Pro Mach
Section 106 of the 1976 Copyright Act forbids any party other than the author (Pro Mach) to: Reproduce
owned work in copies or phonorecords, to prepare derivative works based upon the work; to distribute
copies or phonorecords of the work to the public by sale or other transfer of ownership, by rental or lease.
Copyright protection subsists from the time the work is created in fixed form. The copyright in the work
of authorship immediately becomes the property of the author who created the work (Pro Mach.) Only
the author or those deriving their rights through the author can rightfully claim copyright.
Flex Series Warranty
AG360 BY ORION WARRANTY EFFECTIVE SEPTEMBER 2016
For the AG360 by Orion stretch wrapper, Orion provides a 1-year (one year) warranty from delivery
date of its products to be free from defects in materials and workmanship as described below. This war-
ranty assumes that normal service will be performed by the user.
All Parts, Mechanical and Electrical Components, and Structural Components on the AG360 by Orion
are warranted to be free from defects in material and workmanship for a period of one (1) years. During
the warranty period Orion will, at its option, either repair or replace any failed component.
The polyurethane pre-stretch rollers on the AG360 by Orion models carry a one (1) year warranty and
are guaranteed to be free from defects in material and workmanship. Rollers are not warranted against
physical damage, corrosion, abuse, or negligence. Wear parts such as e.g. belts, fuses, light bulbs, circuit
breakers, brakes, motor brushes, slip ring brushes, etc. are excluded from this warranty.
DAMAGE IN TRANSPORT
Damage in transport is the responsibility of the carrier and is not covered under our warranty.
FREIGHT CHARGES
There will be no freight charges for warranty parts that are ordered for shipment via UPS regular
ground service from Orion. Any other method of shipment, (UPS red/blue, Federal Express, common
carrier, etc.) will be at the expense of the customer/distributor.
PARTS RETURN POLICY
For most components valued at under $300 list price, Orion does not require that the defective compo-
nent be returned. All defective components valued at $300 or more list price must be returned to Orion
in Alexandria, MN. It is at Orion's sole discretion as to whether any given component must be returned,
regardless of its value, for the purpose of determination of warranty status and the nature of the defect.
Furthermore, confirmation that the part does not need to be returned must be provided by Orion at the
time of order placement.
IMPORTANT EXCLUSIONS
Except as stated herein, orion makes no other warranty, expressed or implied and in no event shall be
liable for incidental or consequential damages. Orion makes no warranty as to fitness of equipment for
particular purpose. Orion neither assumes nor authorizes anyone else to assume for it, any other obliga-
tion or liability relating to its equipment. This warranty does not apply to damage to equipment which,
in the judgment of orion, has been subject to incorrect voltage supply, normal wear and tear, to misuse,
neglect, or has been repaired or altered by unauthorized personnel. Defective parts must be returned to
orion, freight prepaid, within 14 days of shipment of the replacement part, except for components valued
at under $300 list price under the conditions stated above. Defective parts must be returned in their orig-
inal state along with a fully completed orion warranty parts return form. Defective parts that have been
disassembled, damaged during removal, or otherwise tampered with, will not be covered under warran-
ty, unless otherwise stated in writing. Orion's sole obligation under this warranty will be to provide re-
pairs to components or replacement parts, f.o.b. Orion's point of shipment except as stated above. All
aspects of the above stated warranty and procedures related to ordering parts under warranty will be
upheld with no exceptions.
Orion recommends that the purchase of an Orion Production Assurance Kit be considered to maximize
system uptime. See your Orion distributor for details.

Orion Machine Manual
Revision 1.1 AG 360 RoboWrapper
28 June 2017 Introduction and Safety
Page 1-3
Safety
Orion's stretch wrappers should be operated with caution and common sense as any other
industrial equipment. To prevent injury and/or electrical shocks, careful operation of the
machine and awareness of its many automatic functions is required. All electrical power
and compressed air must be disconnected prior to all inspection, maintenance or repair
work. At Orion, we are committed to building quality packaging and material handling
equipment. To achieve this, our machines must be efficient, easy to maintain, and safe to
operate. Before attempting to operate the equipment, become familiar with the safety rec-
ommendations and operational components of your AG 360 RoboWrapper. You should
also become familiar with the technical information pertaining to components used within
the system, including their operating and safety features. This information is located in the
Vendor Data Manual and in other literature supplied with the equipment. To maximize
machine safety and efficiency you must operate the machine correctly and comply with
the safety features described. Stay alert and remember: Safety is the responsibility of
everyone who operates or services your BEC system.
System Safety Recommendations
Safeguarding personnel that operate and/or maintain automated equipment is the primary
consideration. Because it is very dangerous to enter the operating space of the AG 360
RoboWrapper during operation, adequate safeguards must be in place and safety precau-
tions must be observed. The following general precautions are recommended for all per-
sonnel who perform system operation or maintenance.
• Do lockout-tagout procedures whenever you do maintenance and repair work.
• All personnel who repair, maintain, or operate the equipment need to know the loca-
tion of all EMERGENCY STOP buttons.
• Do not operate the equipment with any of the safety guards removed.
• Do not wear neckties, loose clothing, or long loose-hanging hair around any equip-
ment.
• Observe and follow the DANGER, WARNING, and CAUTION messages throughout
this manual, in vendor manuals, and displayed on the equipment.
• Personnel should attend all available safety and operational training courses.
• Personnel should know and follow the recommended safety procedures whenever
they must enter the packaging systems motion area.
• Personnel should not enter the working path of the machine while control power is
"ON".
• Personnel should not power up the system if someone is in the working path of the
machine.
• The system should be powered down when not in use.
• Personnel should pay special attention to all the posted warnings and cautions located
on any devices. Observe all safety and/or precautionary steps and procedures when
working with the system.
• Personnel should keep the system clean to make it easier to spot hazards.

Machine Manual Orion
AG 360 RoboWrapper Revision 1.1
Introduction and Safety 28 June 2017
Page 1-4
Operation Safety
The following safety precautions are recommended for all personnel who will operate this
AG 360 RoboWrapper.
• Operators should immediately report unsafe working conditions to a supervisor.
• The operator should understand the function of the entire system including all external
devices and equipment that interact with the system.
• Before starting operation, the operator should understand the complete task that the
system is designed to accomplish.
• The operator should know the location and functional status of all devices (switches,
sensors, control signals) that can cause the system to move.
• The operator should know where each EMERGENCY STOP button is located for
both main and external control devices. Do not hesitate to use them in an emergency.
• The operator should make sure all safety devices are functioning and periodically
checked for proper operation.
• The operator should ensure that all personnel are outside the system before starting
operation.
• The operator should never cross in front of the machine while in operation.
Maintenance Safety
The following safety precautions are recommended for all personnel who are responsible
for the maintenance or service this AG 360 RoboWrapper.
• Personnel should ensure that all safety devices are functioning and periodically
checked for proper operation before performing maintenance.
• Before performing any maintenance, service, or inspection inside the AG 360
RoboWrapper, the power source should be turned off and locked out.
• Maintenance should be performed on the system with the power OFF. Lockout and tag
out procedures should be followed to protect personnel from injury and to indicate the
equipment is being serviced.
• Personnel should pay careful attention to all devices that may be powered or capable
of motion, such as conveyors and pneumatic devices.
• Use only specified replacement parts. Never use non-specific fuses that have not been
specified. Potential fire and/or damage may result.
• Before restarting the system, ensure personnel are not in path of the system and that
the system and external devices are operating properly.

Orion Machine Manual
Revision 1.1 AG 360 RoboWrapper
28 June 2017 Introduction and Safety
Page 1-5
Hazard Messages
Notations appear on pages of this manual to alert the reader to important messages regard-
ing a significant hazard for personnel or equipment. These messages convey three levels
of risk as defined below. Failure to observe these instructions can result in death, serious
injury, damaged equipment, or loss of product or production.
DANGER Denotes the possibility of serious injury or death to personnel.
WARNING Denotes the possibility of potential injury or damage to equipment.
CAUTION Denotes the possibility of damage to product or an interruption of produc-
tion.

Machine Manual Orion
AG 360 RoboWrapper Revision 1.1
Introduction and Safety 28 June 2017
Page 1-6
Lockout and Tagout Recommendations
Electrical System
(See OSHA 1910.147 & OSHA 1910.333 (b)(2) for exception to procedures)
To avoid hazards of electrical shock or other personal injuries, the main power disconnect
for the system and any other separate sources of power for the system shall be locked out
& tagged as a safety precaution during entry and maintenance to the system.
To accomplish this, set the Main Power Disconnect operating handle to the "OFF" position
and install a personal locking device through the padlock hole on the operating handle.
Attach a Danger tag to the handle containing a statement prohibiting unauthorized opera-
tion of the disconnect and removal of the tag signed by the individual responsible for lock-
ing out the system. If several personnel are performing maintenance, each individual shall
install a lockout device and tag.
A qualified person shall verify that the equipment is de-energized by:
1. Operating controls to verify equipment cannot be restarted.
2. Using test equipment to test circuits and electrical parts that will be exposed to person-
nel.
Stored electric energy that might endanger personnel shall be released by discharging the
circuits. Check appropriate equipment manuals on exact procedures.
To re-energize equipment, a qualified person shall conduct tests and visual inspections, as
necessary, to verify that all tools, electrical jumpers, shorts, grounds, and other such
devices have been removed, so that equipment can be safely energized. Personnel exposed
to the hazards associated with re-energizing equipment shall be warned to stay clear of
equipment. Each lock and tag shall be removed by the person who applied it or under their
direct supervision. A visual determination that all personnel are clear of the equipment
shall be accomplished before the operating handle on each Main Power Disconnect is
placed to the "ON'' position.

Orion Machine Manual
Revision 1.1 AG 360 RoboWrapper
28 June 2017 Introduction and Safety
Page 1-7
Installation and First Time Power Up
Inspection
1. Remove all packing and supporting additions - these may include the blocks under the
carriage and the restraining bar over the table.
Note: When removing the packing materials covering the machine, care
must be taken not to cut any of the electrical wires and/ or polyure-
thane covering on the film carriage rollers.
2. Perform a visual inspection of the electrical and mechanical parts for loosened joints
and / or broken connections. Any suspected shipping damage must be reported imme-
diately to the freight carrier. Any transport damage cannot be claimed to Orion Pack-
aging Inc.
3. Check around the tower to ensure that there is no crippling of the movable parts i.e.
casters, center axle or drive assembly.
4. Verify the following:
• Check wires and conduits for crushed sections or loose fittings.
• Verify the film carriage to be sure that it is correctly aligned with the tower
• Verify the tension on the lift belt.
• Verify all the dials and knobs on the control panel for smooth action.
Unloading
This machine can be easily unloaded and transported by a forklift with a minimum capac-
ity of 2500 lbs. This is also useful if the battery power is ever completely depleted.
1. Carefully insert the forks into the lifting tubes to the maximum possible depth. Forklift
access is located on the side of the machine. Look for the forklift tube access stickers
shown below.
2. Lift the machine only to the necessary height to move it with no bouncing or friction
on the floor.
Figure 1 - 1
Fork Tube Access
Locations

Machine Manual Orion
AG 360 RoboWrapper Revision 1.1
Introduction and Safety 28 June 2017
Page 1-8
Machine Installation
• After the visual inspection has been completed, the electrical power shall be con-
nected as specified on the diagrams supplied with the machine for charging.
• Make sure the machine is operating on a hard and level surface.
Assembly Procedure
1. Secure the ring "A" above carriage with a chain for lift up purpose.
2. Remove two side's marked fixed bar "B"
3. Lift up the tower with a lifting strap attached to the eye bolt.
Figure 1 - 2
Securing the Lifting
Eye Bolt
A
Figure 1 - 3
Remove Tower
Horizontal Bracket

Orion Machine Manual
Revision 1.1 AG 360 RoboWrapper
28 June 2017 Introduction and Safety
Page 1-9
4. Fix and tighten the tower by three M8 bolts.
CAUTION Use Loctite to secure the screws.
5. Open the machine cover and check the battery connections..
Figure 1 - 4
Bolting on the Tower
Figure 1 - 5
Connecting the
Battery Cable

Machine Manual Orion
AG 360 RoboWrapper Revision 1.1
Introduction and Safety 28 June 2017
Page 1-10
6. Check the battery cable connection.
7. Move the steering arm towards right side, and install the tension spring.
Figure 1 - 6
Connecting the
Battery Cable
Figure 1 - 7
Installing the Tension
Spring
This manual suits for next models
2
Table of contents
Other Orion Stretch Wrapping System manuals