Osotto TP-42 Operator's manual

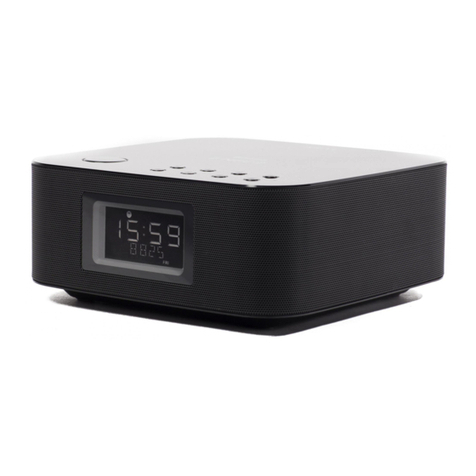
Timeport Bluetooth Clock Speaker
Mo
Model TP-42
Mo
User Instruction Manual
Mo

Thank you for purchasing this Osotto product. We trust that you will be pleased with the
quality and design of your new Timeport. Please read this user manual carefully and keep it
for future reference.
Inside the carton you will find:
1 x Timeport TP-42 Bluetooth Speaker with built-in rechargeable battery
1 x Charging Cable
1 x Audio cable
1 x Instruction Manual
Please charge your Timeport fully before you use it by connecting to a standard 5v USB
charger (Max 2.1A). The unit is fully charged when the light goes out.
1. Long press to enter Bluetooth mode. Short press to select input mode.
2. Previous song or FM program. Press 3 seconds to decrease volume.
3. Play and Pause key. Long press to choose input sources, including Bluetooth, FM radio,
TF card.
4. Next song or FM program. Press 3 seconds to increase volume.
5. Reduce key for setting clock or alarm.
6. Menu key for setting clock or alarm.
7. Increase key for setting clock or alarm.
8. Brightness adjustment. Short press to adjust, press and hold to turn off the display.
Top P an el F un ct ions
T
Unpacking Your Timeport & Getting Started
Please dispose of all packaging responsibly. The cardboard carton should be recycled. Inner
packaging is widely recyclable – please check with your local provider.

1. ON and OFF power switch
2. AUX in jack
3. DC in jack (Standard 5v micro USB, Max 2.1A)
4. LED indicator: red indicates charging. Charge is complete when lamp goes out.
5. TF card slot
6. USB charging port; use to charge your phone or other smart device with DC5V power.
Bluetooth mode
1. Bluetooth version: Bluetooth 4.2, supports HSP, HFD, A2DP, AVRCP, English prompt tone.
Bluetooth pairing name: OSOTTO.
2. Slide the power switch (1) to the “ON” position for power on. The clock icon, battery icon,
and alarm clock icon will light up.
3. Long press the “ ” button to enter the Bluetooth mode. Long press “ ” again to exit the
Bluetooth mode.
4. When in Bluetooth Pairing mode, the the display icon will flash until a connection is
established. On the device to be paired, search for pairing name “OSOTTO”. When
connected, Timeport will confirm, and the icon will gently pulse. Once paired, Timeport will
automatically connect the Bluetooth device in future, if no other device is already
connected.
TF Mode
1. Turn on the speaker and insert TF card, it will automatically enter into TF mode.
2. The TF icon pulses slowly when playing music.
3. Remove TF card and Timeport will automatically switch to Bluetooth mode.
Line in
1. Insert the AUX cable to the line in mode and the AUX icon will light up without flashing.
2. Pull out the AUX cable, and Timeport will automatically return to Bluetooth mode.
FM mode
1. Long press to enter FM mode. Timeport has a built-in antenna, and an AUX cable or
USB cable can also be used as an external antenna to improve reception.
2. Short press to search channels. The display icon will be flashing while searching.
3. After Timeport has searched for channels, short press / to move between
channels. Long press / to increase or decrease the volume.
Charging
1. Connect the USB cable for charging with a USB charger or power source rated at 5V.
2. The red indicator lamp is lit while charging and will go out when fully charged.
When the battery level is lower than 15%, the icon will be flashing. If the battery is very low,
Rear Panel

the speaker will prompt you with an indication voice message before shutting down. The clock
function will still be available. Press any key for 3 seconds to display the current time.
The clock will retain the right time when the battery is exhausted, and when you recharge
Timeport, the correct time will be displayed, unless it has been left uncharged for an extended
period.
Turn on the speaker. You will hear a voice message, then the display will sleep. Press
to wake up and show the time on the display. If you want to use the Bluetooth
function, just press to enter into Bluetooth mode.
1. When time is being displayed, long press “M” till the hour flashes to enter time setup. Short
press “M” to enter the hour and minute setting options, and use the “+/-“ buttons to adjust the
time.
2. Select 12 hour or 24 hour setting by using the “+/-“ keys to switch between “AM” or “PM”
or the icon. Short press “M” to confirm the current setting and automatically move to the
next setting option. To finish setup, long press ”M” until no icon is flashing.
1. Short press M to select “Alarm clock 1” mode.
2. Long press M to set alarm clock 1. The hour will flash, and you can use + /- to adjust. Short
press M when the hour is set, and the minute will flash. After setting the minute, short press
M to move onto the next options to select alarm music, alarm clock circulation, and alarm
ON/OFF (see below). Finally, long press M until no icons are flashing to exit the setting mode.
3. Alarm clock 2 setting is same as Alarm clock 1.
There are seven options for the alarm sound. There are five built in tones. Option 6 plays the
first song in the TF card, and option 7 plays the FM radio, using the last selected radio
program. Press +/- to switch between the options, then short press “M” to set.
1. The alarm is ON when the icon is lit
2. If the icon is not lit, the alarm is OFF. Use the +/- key to toggle between on and off.
A Circulation icon is used to select a repeating alarm (every day alarm). While the alarm clock
Setting the Time
Alarm clock
Alarm music
Alarm ON and OFF
Every-day alarm, or once only alarm option
Get started

1 icon is flashing, press +/- to choose circulating or not.
The “ ” icon will be displayed when the alarm will sound every day.
No “ ” icon means alarm will sound only one day.
When the alarm sounds, press any key to stop the alarm. If you don’t press any key, Timeport
will enter snooze mode, and the alarm will sound again after 5 minutes. The alarm will repeat
like this 3 times if you do not turn it off by pressing any key. After three cycles, the alarm will
stop.
1. Please reduce the volume to minimum before connecting to audio sources to prevent surge
damage to the speakers.
2. Keep Timeport dry and avoid exposure to damp or humid environments.
3. Please do not open the back cover of Timeport as this will invalidate the warranty.
4. Turn off the power switch and unplug charger when not in use for longer periods.
Speaker 1pc
Audio cable 1pc
User manual 1pc
USB cable 1pc
Rechargeable battery 1pc (fixed in speaker)
Inside Package
Inside Package
Tower speaker 1pc
Audio cable 2pcs
Remote control 1pcs
User manual 1pc
Inside Package
Tower speaker 1pc
Audio cable 2pcs
Remote control 1pcs
User manual 1pc
Inside Package
Tower speaker 1pc
Audio cable 2pcs
Remote control 1pcs
User manual 1pc
Responsible End of Life Disposal
Inside Package
Tower speaker 1pc
Audio cable 2pcs
Remote control 1pcs
User manual 1pc
Inside Package
Tower speaker 1pc
Audio cable 2pcs
Remote control 1pcs
User manual 1pc
Inside Package
Tower speaker 1pc
Caution
Snooze function
Do not dispose in normal household waste. The unit contains a Lithium battery that should be
removed before disposal by a competent person and disposed of in accordance with local
regulations.

Button overview
AUDIO buttons
Bluetooth
Long press for
speaker on/off,
short press to
select input
modes
Short press for
previous track,
long press for
volume down
Short press for
play/pause/
answer/ hang
up, long press
for switching
input mode/
reject call.
Double click for
redialing.
Short press for
next track, long
press for volume
up
TF CARD
Long press for
speaker on/off
Short press for
previous track,
long press for
volume down
Short press for
play/ pause.
Long press to
switch input
mode.
Short press for
next song, long
press for volume
up
AUX Line in
Long press for
speaker on/off
Short press for
previous track,
long press for
volume down
Short press for
mute status,
long press for
switching input
mode.
Long press for
volume up.
FM
Long press for
speaker on/off
Short press for
previous track,
long press for
volume down
Short press for
searching
channels, long
press for
switching input
mode
Short press for
next channel,
long press for
volume up
Clock buttons
Clock
Short press for
reducing
Short press for
confirming or
entering next
Short press for
increasing
Short press for
dimming. Long
press for closing

setting. Long press
for confirming
completely or
exiting
showing
Alarm 1
Short press for
reducing
Short press for
confirming or
entering next
setting. Long press
for confirming
completely or
exiting
Short press for
increasing
Short press for
dimming. Long
press for closing
showing
Alarm 2
Short press for
reducing
Short press for
confirming or
entering next
setting. Long press
for confirming
completely or
exiting
Short press for
increasing
Short press for
dimming. Long
press for closing
showing
Table of contents
Other Osotto Speakers manuals


