Outdoor Cameras Australia Swift ENDURO User manual


32
Contents
1.0 Quick Start Guide ....................................................................................................- 3 -
1.1 What’s in the Box ......................................................................................................................................- 3 -
1.2 Let’s Get Started ........................................................................................................................................- 3 -
1.3 How to Setup the Enduro ..........................................................................................................................- 4 -
1.4 Camera Settings ........................................................................................................................................- 6 -
2.0 Enduro Layout ........................................................................................................- 7 -
2.1 Figure 1: FrontView...................................................................................................................................- 7 -
2.2 Figure 2: BottomView ...............................................................................................................................- 8 -
2.3 Figure 3: Internal, Side and Back View.......................................................................................................- 9 -
3.0 Full Enduro Set Up Guide.......................................................................................- 10 -
3.1 Introduction ............................................................................................................................................- 10 -
3.2 Important Notes ......................................................................................................................................- 10 -
3.3 Power Supply ..........................................................................................................................................- 11 -
3.4 SD Card Selection ....................................................................................................................................- 12 -
3.5 USB Connection .......................................................................................................................................- 13 -
3.6 Key Features ............................................................................................................................................- 13 -
4.0 Enduro Operations ................................................................................................- 14 -
4.1 Video/Photo Playback .............................................................................................................................- 14 -
4.2 Delete ..................................................................................................................................................... - 14 -
4.3 Format of SD Card ...................................................................................................................................- 14 -
4.4 Auto Power O ........................................................................................................................................- 14 -
4.5 Operation Menu ...................................................................................................................................... - 14 -
5.0 Trail Camera App (3G Only) ...................................................................................- 22 -
6.0 Specications........................................................................................................- 26 -
7.0 Trouble Shooting...................................................................................................- 27 -
8.0 Warranty...............................................................................................................- 29 -

54
1.0 Quick Start Guide
Congratulations! You are now the proud owner of a Swift Enduro Camera from Outdoor Cameras Australia.We want to
ensure you capture the exact images and videos you need, while also enjoying using your camera.
To help you do this, we oer the best support we can. If you are having any diculties with your camera, or nd
yourself struggling with the manual, please call us from 9am-5pm Monday to Friday. We are here to help! Our website
also features some great set-up videos that are very easy to follow.
The rst few pages of this manual give you a Quick Start Guide as an introduction to the Swift Enduro. However, for
more detailed and important camera instructions, please see Part 3.
1.1 What’s in the Box
• Camera
• Instruction manual
• USB cable
• Mounting strap
• Antenna (3G Model Only)
1.2 Let’s Get Started
Your camera will be good to go in just three simple steps:
a. Insert the batteries
Open the camera housing (with the latch on the right hand side) and insert the batteries in accordance with the
+ and - marked in the battery case.
Note: 12AA alkaline, rechargeable Ni-MH, or lithium batteries are recommended. For better performance, please
select the correct battery type you are using in the“Battery Type”section (you can do this later)
b. Insert the SD card
Note: SD cards sized from 8-32GB are recommended. Do not use cards that are larger or smaller than this (they
may work for a small number of images but then stop and deplete the camera of battery life quite quickly). Please
insert the SD card in the same direction/position as marked on the camera above the SD card slot. It will go in
smoothly and easily and click into position. If it is not going in easily, do not force it as the SD card slot can be
permanently damaged if the card is forced inside.Try turning the card around.
c. Mount the Antenna & Insert SIM card (for 3G Model Only)
When you attach the antenna screw it on rmly but be careful not to over tighten it.
The SIM card must be the standard SIM size. These are the largest of the 3 SIM cards. Be careful not to insert sim
cards that are too small (they can fall into the SIM slot and then be irretrievable). Insert the SIM into the slot in
the same direction as directed on the camera above the slot. It will click into place. Ensure you have activated your
SIM card and that it has credit on it.
1.3 How to Setup the Enduro
Now it’s time to congure your Swift Enduro camera for your unique situation.
1. Power on the Camera
Switch the Power switch to ON; The camera is now functional and ready to work upon movement (the screen will
not light up upon“ON”). You will not hear or see it activating and taking images. You can mount it to start taking
images now but it will be in default settings. Please refer to page3 below for default settings in red letters. The
following steps will take you through changing the settings to your preferences.
2. Congure Camera Settings
Switch the Power switch to SETUP. The screen will light up with the Enduro logo briey and then you will be able
to see what the camera can see. Press the MENU button. You will enter the menu to view & change settings. Press
the arrow buttons (located around the OK button) for navigation and OK button to conrm settings.
Note: Switch the camera to ON to enable the camera to activate after you have changed your preferred settings.
The screen will turn o and the light on the front of the camera will ash for a few seconds. The camera is now
active (even though it may seem like nothing is happening).
SIM is the correct sized SIM card.
Menu
Button
Arrow
Button
OK
Button
Power
Switch

76
3. Connect the Camera to a Network (3G Model Only)
The 3G model has a signal“Searching”process when you switch the power switch to SETUP.
If it comes up with a signal bar and no other pop-ups, it means the network is auto-matched and no manual setup
is needed. Go to the 3G Menu tab and complete the“Send To”section by entering phones/emails that you want
the camera to send images to. You will be able to receive photos upon motion triggers.
If it comes with a pop-up“SIM Auto Match failed…”, please go to“SIM Auto Match”under“3G”, select“Manual”,
and ll in local operator APN details in“Manual Setup”, the camera will connect to their network to send photos.
Note: This camera can send photos to 2 phones and 2 emails. It’s set to send photos to phones via MMS, and to
emails via SMTP (data). If you would prefer other options of sending, you can set this up in the 3G menu (this is
covered in more detail later in this manual).
1.4 Camera Settings (Default Settings in Red Letters)
Cam
Cam ID
OFF/ON
Cam Mode
Photo/Pic + Video
PIC + Video/ Video ON
Video Length
05~60 Secs
IR LEDs
All/Part
Image Size
5MP/8MP/12MP
Night Mode
Balanced/Min. Blur/Max Range
Multi-shot
1P/2/3/4/5P
Video Size
1080P/720P/D1
Other
Language
English...
Date/Time
Month : Date : Year : Hour : Min : Sec
Time Stamp
OFF/ON
Battery Type
Alkaline/NI-MH
Frequency
50Hz/60Hz
SD Cycle
OFF/ON
Reset
Yes /No
Password
OFF/ON (6 digits)
About
Ver: /IMEI: /MCU:
PIR
Sensitivity
High/Middle/Low
Delay
OFF/ON
Time Lapse
OFF/ON
Timer
OFF/ON
3G
3G Switch
ON/OFF
SIM Auto Match
Auto/Manual
Manual Setup
MMS/3G
MMS
ON/OFF
SMTP
Default/Manual/OFF
FTP
ON/OFF
SMTP/FTP Pic Size
640*480/1920*1440
Max Num/Day
Unlimited/1~99
SMS Ctrl
By Trigger/All the Time
Daily Report
OFF/ON
Send To
Phone/Email
SIM PIN
ON

98
2.0 Enduro Layout
Take a few moments to familiarise yourself with the camera controls and displays.
2.1 Figure 1: Front View
2.2 Figure 2: BottomView
DC in
SIM Card golden part faces front housing side.
SD Card Slot
MENU Button LCD Screen
Power Switch
(ON/OFF/SETUP Test Mode)
Navigation Buttons/
OK Buttons Battery Bay
Battery Bay
USB port
28 IR LEDs
Indicator
Light
Light
Sensor
Antenna
(3G model only)
PIR Sensor
Lens
30 IR LEDs
58 IR LEDS
in Total
(day/night)

1110
2.3 Figure 3: Internal, Side and BackView 3.0 Full Enduro Set Up Guide
3.1 Introduction
Thank you for purchasing the Swift Enduro Camera. Now it’s time to capture those images or videos you need from
your camera. Just remember, if you are having any diculties with your camera, or nd yourself struggling with the
manual, please call us from 9am-5pm Monday to Friday. We are here to help! Our website also features some great
set-up videos that are very easy to follow.
The Quick Start Guide at the beginning of this manual is designed to introduce how the Swift Enduro works. The
following section will give you more details about the cameras operation.
3.2 Important Notes
1. Insert the SD card correctly – do not force it in. The camera must be OFF when SD card is inserted.
2. Please use high-quality AA batteries to prevent battery cells from suering leaked acid corrosion. You will also
get better night images.
3. If using a 240V adapter ensure it has the correct output voltage and current (9-12V 2A).
4. In Test mode, the camera will automatically power o in 3 mins if there is no keypad touching. If it is in the Menu
though it won’t power o automatically.
5. Do not frequently insert or pull out the SD card, batteries or plug when the camera is on.
6. Do not have any oating objects, such as leaves, and grass in the motion detection zone of cameras, to avoid the
camera taking unnecessary images.
7. Do not keep the camera next to hot objects, air conditioner exhaust vents, hot water systems, and lights, etc. to
avoid the camera taking unnecessary images.
8. The Date/Time settings can be saved in camera for 12 hours with no batteries in the camera if the camera has been
powered for at least 1 hour previous.
DC in
SIM Card golden part faces front housing side.
SD Card Slot
MENU Button LCD Screen
Power Switch
(ON/OFF/SETUP Test Mode)
Navigation Buttons/
OK Buttons Battery Bay
Battery Bay
USB port

1312
3.3 Power Supply
a. Batteries
Always ensure you use a quality brand of battery. These cameras can sit in some very high temperatures and the
batteries can get quite hot. Poor quality batteries cannot handle the heat as well and are much more likely to leak
in your camera. In addition, good quality batteries give a much brighter image or video at night.
There is a big dierence between brands (sometimes up to 100 times the number of images). We recommend
the following brands:
Alkaline batteries – Duracell or Energizer
NiMh rechargeable – Fujitsu or Eneloop
Lithium - Energizer
The Enduro runs on 6 or 12 AA size batteries (9-12V power supply). It can work with high quality alkaline, high-
quality NiMH rechargeable batteries, and lithium batteries. For the best night images, we suggest using NiMih
rechargeable or lithium batteries. Please also choose the correct battery type you’re using in the menu option
“Battery Type”.
Batteries should be inserted with correct electrode position as marked on the housing. Upside down batteries
electrodes may cause device malfunction. Also, we strongly recommend changing the batteries when power icon
on camera screen or photo stamp is empty.
Note: Please don’t mix batteries types (eg alkaline and Nimh)! Dierent batteries types used in the
camera may cause permanent damage which also voids the warranty!
The table below shows the approximate number of photos or videos the camera can take with 12AA alkaline
batteries. Even better performance can be achieved with rechargeable NiMH batteries or lithium batteries.
Test Condition: LCD screen o. Mode:“Power On”_PIR motion detection on; 3G O
12AA Alkaline Batteries
Photos shot per day Working time Video clips shot per day Working time
IR LEDs On
Max.Range 100 pics 81 days
10secs video clips 10 clips 75 days
Balanced 100 pics 76 days
Min. Blur 100 pics 70 days
IR LEDs O
Photo 100 pics 113 days 10secs video clips 10 clips 228 days
b. Solar Panel
This camera can be used with the Swift Solar Panel. The solar panel does not charge the batteries in the camera
but has its own built in battery that the panel keeps charged. Batteries can still be used in the camera at the same
time, but they will only be used by the camera if the solar panel power ceases (they are a backup). Most people
use no batteries in the camera when using the solar power option as they are not required. Because the Swift Solar
Panel has a built in battery it still has power for night images and video.
c. Power Adaptor
This camera can also be powered by an external 240V to 12V/ 2A DC adapter. If you are sourcing your own power
adapter then please ensure that it is to the correct specications or you can permanently damage your camera.
3.4 SD Card Selection
SD cards sized from 8-32GB are recommended. Do not use cards that are larger or smaller than this (they may work
for a small number of images but then stop and deplete the camera of battery life quite quickly). Please insert the SD
card in the same direction/position as marked on the camera above the SD card slot. It will go in smoothly and easily
and click into position. If it is not going in easily then do not force it as it may be the wrong way around (the SD card
slot can be permanently damaged if it is forced in).
A memory card is required to operate the camera.When the camera is“ON”and no memory card is inserted, the screen
displays“No card”. Before inserting or removing the memory card, the camera must be turned“OFF”. Failing to do so
may cause loss of or damage the pictures/ videos already recorded on the memory card. When the SD card is full, the
viewing screen shows“Memory Full”.
The chart (top right) will show you the approximate capacity of dierent size SD cards. Please check to see which size
card can best t your needs.
8 GB 16 GB 32 GB
Photo (pictures)
5MP 7492 15307 30936
8 MP 4798 9794 19795
12 MP 3371 6887 13919
Video (hours)
640x480 00:46:57 01:35:56 03:13:52
HD 00:33:53 01:09:14 02:19:56
FHD 00:17:48 00:36:20 01:13:21
SD
Size
Capacity

1514
3.5 USB Connection
The camera can be connected to your computer via the USB connection – only use the cable supplied with the camera.
Leave the camera on OFF and connect it.The camera screen then displays“MSDC”. You can then download the images
o your camera to your computer. You can also delete images from your camera. An easy way to delete the images, is
to simply remove the SD card from your camera and put it in your computer.
If you press “Menu” once, “MSDC” turns to “PC Cam”, the camera now can be used as a PC camera; press “Menu”
again, and the camera exits PC camera mode.
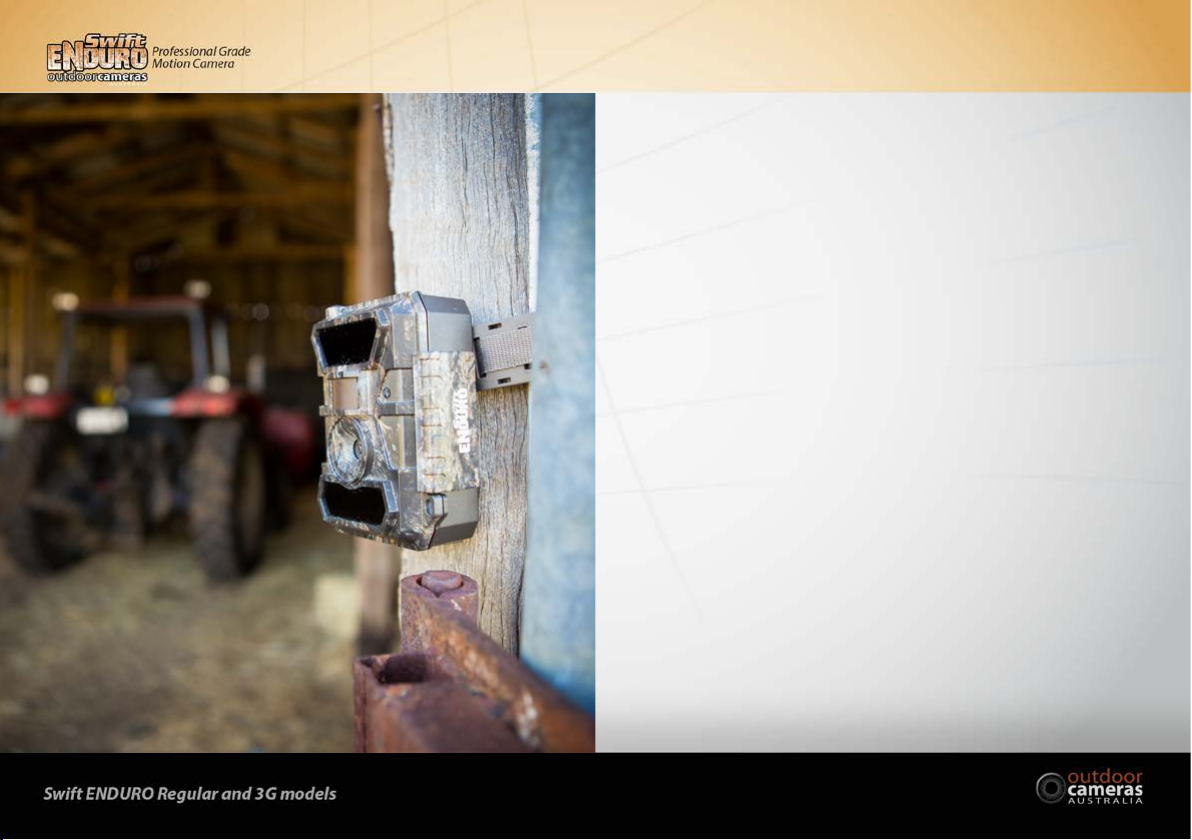
3.6 Key Features
1. 0.35 seconds triggerspeed;
2. 12MP/1080P@30FPS;
3. Programmable 5/8/12 Megapixel high-quality resolution;
4. 58pcs invisible IR LEDs, oer20metres (65feet)realnightvisiondistance;
5. Crystalclearday&nightphoto/videoquality;
6. 1photoburstpersecond to get full moving track of object;
7. Support multiple functions: adjustable PIR sensitivity, Multi-shot (1~5 photos per trigger), programmable
delay between motions, Time Lapse, Timer, stamp of (camera ID, date/time, temperature, moon phase) on every
singlephoto;
8. Available operation temperature: -25°C to 60°C;
9. Built-in 2.0”TFT colour screen;
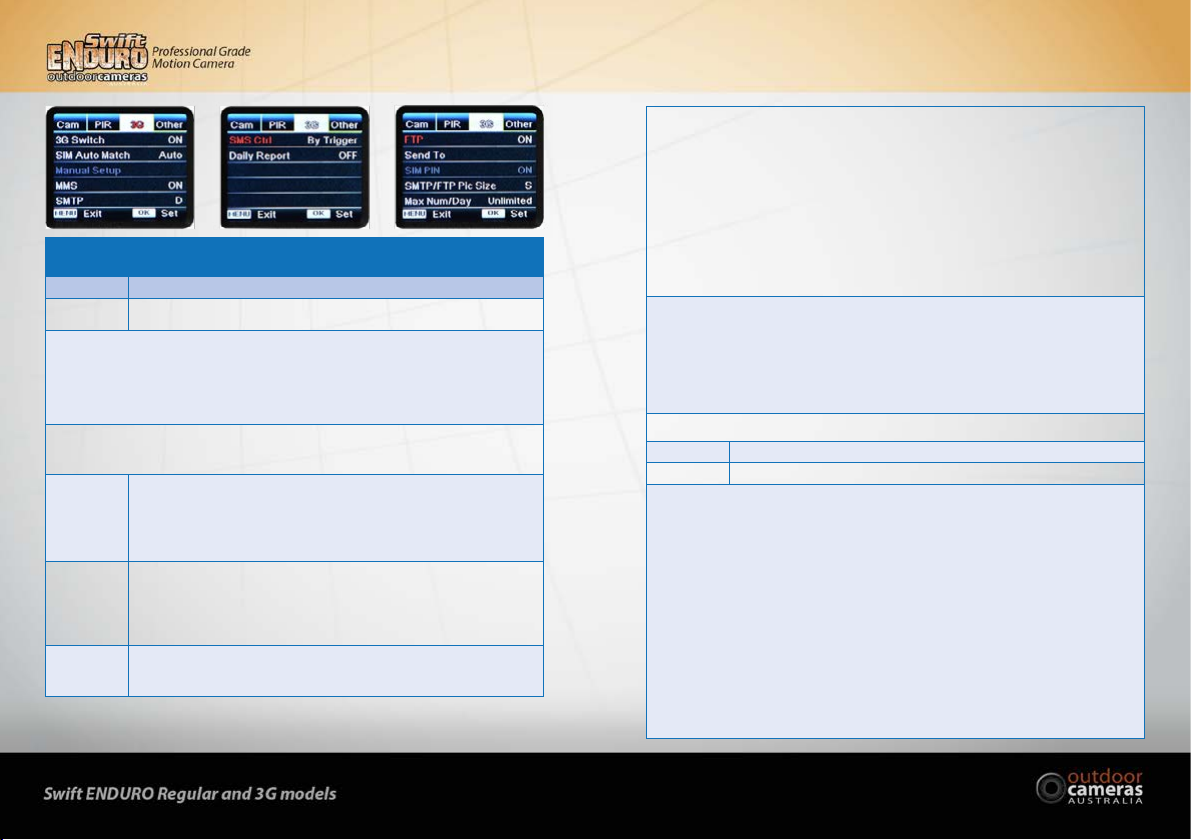
3G Model
10. Camera can transmit photos via email, MMS or FTP.
11. SMS communication with camera remotely;
12. Optional image size (640*480 and 1920*1440) Email/FTP photos;
13. APP available in IOS & Android APP store
4.0 Camera Operations
4.1 Video/Photo Playback
Turn “Power Switch” to “SETUP” position to enter test mode, press arrow button “” to enter Playback;
press“”and“”for selection,“OK”to play photo/video.
1. Press button“” again to exit.
2. In Playback Mode, press“Menu”button to delete les, or format SD card; press “Menu”again to exit.
4.2 Delete
In Playback Mode (see 4.1 above), press the “Menu”button to delete les, or format SD card. Press“OK”to choose
Delete, then press“” and “”for selection of “ONE” (deletes one image) or “ALL” (deletes all images), then
“Yes ”to conrm, or“No” to exit to previous page.
4.3 Format of SD Card
In Playback Mode (see 4.1 above), press the “Menu”button then “”for selection of “Format”, and then select
“Yes ”to format. Press“” and“”for selection,“Ye s ”to conrm,“No”to exit to previous page.
4.4 Auto Power O
In Test mode, the camera will automatically power o in 3 minutes if there is no keypad touching (unless it is in the
Menu screen). This will atten the batteries if it is accidentally left on in this mode. Please manually turn it “OFF”
and“ON”if you want to do further changing of the settings.
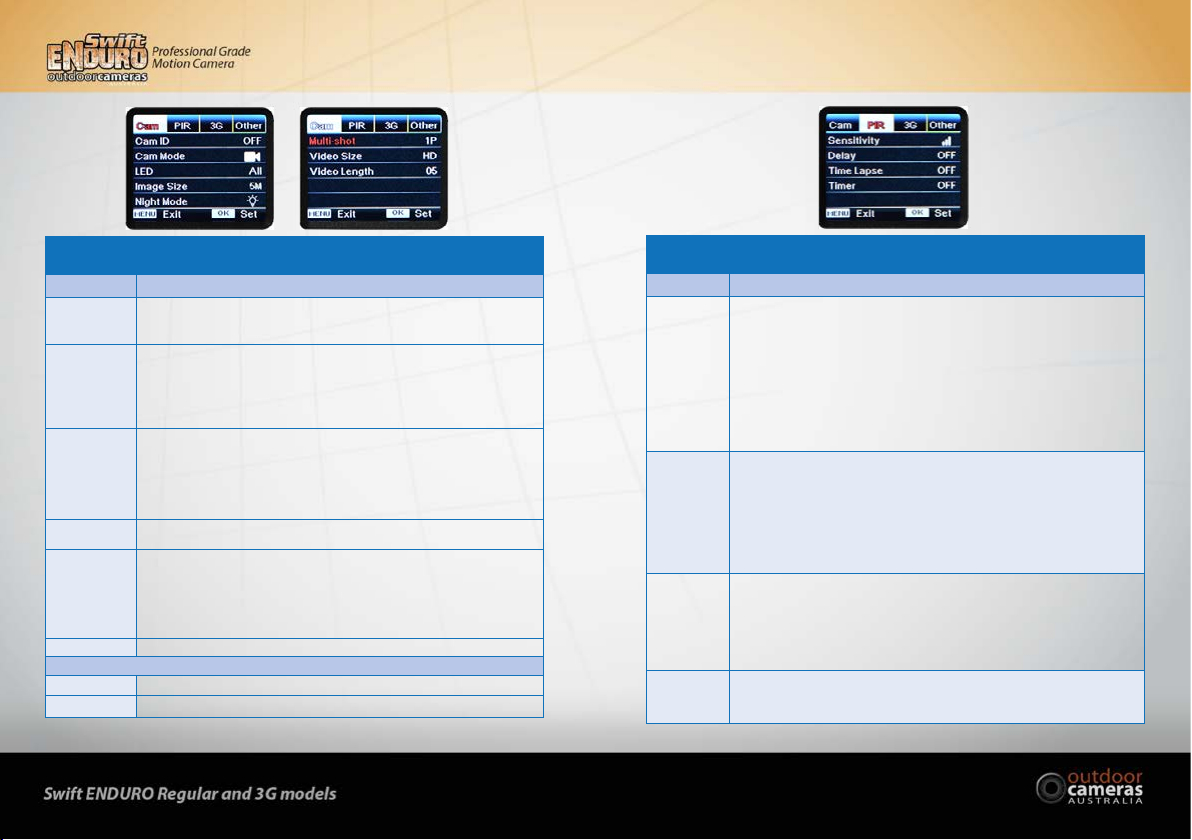
4.5 Operation Menu
Turn the Power switch to“Set Up”and you are then inTest mode (you can see what the camera is seeing). Press the
“Menu”button once to enter the camera settings menu. To navigate through the settings press “”, “ ”, “ ”, or
“”, and press“Ok”for selection,“Menu”to exit to previous page, and “Menu”to switch alpha/ digits/ symbols.
Note: For some settings, the user needs to press “Menu” to save & exit the conguration after pressing
“OK”to conrm (Cam ID, Delay, Time Lapse, Timer, Password).

1716
The “Cam”Tab
Settings Programmable Options
Cam ID Select “ON”, press “OK”, to set 4 digits/ letters for each camera. This function can help the user to identify
what photos are from what camera.
Cam Mode
Photo, PIC+VIDEO, Video
1. Photo: camera shoots photos only based upon the selected Multi-shot & Image Size;
2. PIC+VIDEO: camera shoots photo(s) rst, then video upon the same trigger event.
3. Video: camera shoots videos only based on selectedVideo Length/Size
IR LEDs
All/Part
All: all 58pcs IR LEDs will work at night; (this is good when you want the night images/video to be as
bright as possible)
Part: Bottom 30pcs IR LEDs will be turned o (this function might be used when you are capturing close
up footage - within 2 metres.
Image Size 5MP (2560*1920), 8MP (3264*2448), 12MP (4032*3024) We recommend using it in 5MP mode.
Night Mode
1. Min. Blur: Short exposure time (1/30 sec) to minimise motion blur for better image quality;
shortened IR ash range. This is our preferred Night mode although it does use slightly more power.
2. Max. Range: Longer exposure time (1/8 sec) to extend IR ash range for better night vision; lower
image quality.
3. Balanced: combination of above 2 options;
Multi-shot Programmable 1~5 photos per trigger
Video On
Video Size 1280*720, 640*480, 1920*1080
Video length 5~59 Secs
PIR
Settings Programmable Options
Sensitivity
High, Middle, Low
Higher sensitivity is: 1) more sensitive to movements by smaller subjects; 2) longer detection distance;
3) easier for sensor to detect dierence between body heat and outdoor temperature; 4) easier to trigger
camera to record.
In high temperature environments, the body heat of subjects and the environments temperature is hard for
the camera to distinguish between. In this situation we suggest setting it to High. Also be aware that in
areas of heavy vegetation the heat can make the vegetation set the camera o if it is moving around within
the cameras eld of view. This is more likely to occur in the heat of the day between 10:00 am and 2:00 pm.
Delay
Select “ON”, press“OK”, to set a time interval that you desire between photos/videos upon motion.This option
is used to prevent the camera taking too many photos or videos in some situations eg stock water trough.
Rarely used in a security situation though.
Example: Camera will wait 1 minute between photo/video recordings with motion if pre-set time interval
is 00:01:00
Congurable delay time: 00:00:05~23:59:59
Note: Please don’t turn ON Time Lapse and Delay simultaneously!
Time Lapse
Select “ON”, press “OK”, to set the interval; camera will shoot pics or video clips automatically upon the
interval user set.
Congurable interval: 00:00:05~23:59:59. Please note the PIR sensor of camera will be turned o when the
camera is in Time Lapse mode. The camera cannot record movement andTime Lapse images simultaneously.
Note: Please don’t turn ON Time Lapse and Delay simultaneously!
Timer
Select “ON”, press “OK”, to set the beginning time and end time (hour/minute); The camera will then only
work during the time period set.
i.e.: 15:00 – 18:00; camera only works during 15:00 – 18:00

1918
The “3G”Tab (3G model only)
Settings Programmable Options
3G Switch 3G function can be turned ON and OFF.
SIM Auto Match
1) Camera will automatically enter MMS & 3G settings when the SIM card is inserted;
2) If “SIM Automatch failed, please enter setup manually” pops up on screen, please switch “SIM Auto Match”to “Manual” mode,
then enter MMS & 3G settings in“Manual Setup”;
Manual Setup
(Please enter settings below manually in“Manual” mode if your carrier can’t be automatically matched by the camera).
MMS Setup
Please contact your carrier for URL/ APN/ IP/ Port (Username & Password if required); and enter these
manually.
1. With MMS settings added, the camera can send photos to preset phones/email. If the MMS settings are
incorrect, then phones/ email accounts will not be able to receive photos from camera.
2. Emails can be received from camera via SMTP only when SMTP is ON.
3G Setup
Enter your local carriers 3G APN, and corresponding Username and Password.
Note: Only with 3G settings added, can SMTP and FTP functions work.
Note: it’s not a must to enter Username and Password of APN. But some carriers may require this password
access to enable GPRS function. For details, please contact your local operator.
MMS ON/OFF - You can choose to allow pics to be sent to your phone number via MMS by switch ON/ OFF MMS
function here.
SMTP Setup
Camera comes with default SMTP settings.You only need to enter the receiving email address in“Send to”. If you’d prefer to use your
own SMTP server then you can do so by using the following instructions
1) Enter your mailbox server IP; i.e.: Hotmail IP: smtp.live.com; Gmail IP: smtp.gmail.com;
2) Enter your mailbox port; Port of most mailbox is 25; please enter your mailbox corresponding port.
3) Enter your mailbox password access.
Note:
1. SMTP only sends photos to preset emails. If the entered SMTP information is wrong, then you will not be able to receive photos
from the camera via email.
2. MMS stops sending photos to email when SMTP is set to work.
FTP Setup
1) Enter your FTP server IP;
i.e.: FTP Server IP: ftp://dianwan2008.gicp.net/ Enter: dianwan2008.gicp.net Gmail IP: smtp.gmail.com;
2) Enter your FTP server port; The port of most FTP server is 21; please enter your FTP server corresponding port.
3) Enter your FTP server password access. Note: FTP only uploads photos to a preset FTP account; if FTP information is incorrect
then FTP account will not be able to receive photos from the camera.
Send To
Phone Enter recipients’phone numbers (1~2)
Email Enter recipients’email accounts(1~2)
SIM PIN
You can ignore the description below if your SIM has been activated already. (“Pls input PIN-Code”will not pop up after the signal
search if your SIM is activated.)
1) Camera will check if inserted SIM card is activated during signal search in“Test”mode;
2) If SIM is not activated,“Pls input PIN-Code”will pop up on screen after signal search;
3) The “SIM PIN”will become editable in the“3G”page of the Menu
4) Enter the PIN code in“SIM PIN”; camera will auto power o. Camera will activate SIM card automatically during signal search
when you restart the camera after you enter the PIN code.
Note:
1)“Pls input PIN-Code”will pop up again if wrong PIN code is entered;
2) Please re-try your PIN code if you see“Pls input PIN-Code”after signal search;
3) SIM is normally limited to 3 attempts; it’ll be locked if PIN code is entered incorrectly 3 times so we suggest you double check
your PIN code before you try again.
4) As a last resort insert your SIM card into your phone to unlock it by using its PUK code.

2120
SMTP/FTP Picture Size
Pictures sent via SMTP and FTP are optional in size as either 640*480, or 1920*1440. The small size images are approx. 30-40KB
and the large are about 300-400KB. Full sized images are still stored on the SD card.
Note:
1) camera will only send photos to preset phone numbers via MMS;
2) camera will only send photos to preset email(s) via MMS if SMTP is not congured;
3) camera will only send photos to preset email accounts via SMTP (GPRS) if SMTP is set.
Max Num/Day
Default: unlimited;
Optional: 1~99
i.e.: User chooses 50, then the cameras will only send 50 pics every day. All the other images will only be stored on the SD card.
SMS Ctrl
1) By Trigger: (Best for AA battery power)
The camera will only be able to change & save settings sent to it remotely (via App) when the camera is triggered to shoot
photos/videos. The camera (and GPRS module) sits dormant until it is triggered by movement or the next scheduled time lapse
image.When it wakes up it downloads any messages previously sent and then processes them. If the camera has been turned
o remotely it automatically checks every hour for a message to turn back on.
2) All the Time: (Only use when power adapter is connected as this option will consume 25 times the amount of
battery power.)
Camera GPRS module is on stand-by all the time; so the camera settings can be changed and saved whenever you send the
remote SMS setting commands.
Daily Report
1) OFF;
2) ON; Choose ON to set up the time when you want the camera to send you the Daily Report;
Contents of the Daily Report: Device IMEI Number, CSQ (Signal Strength): 0~31, Camera ID, Temperature, Date &Time, Battery
Life, SD Card Info, Total Pics Taken by Cam, Pics Sent by Cam
The “Other” Tab
Settings Programmable Options
Language English…
Date/Time Month : date : year; hour : minute : second
Note: Please adjust camera date/time to ensure some functions work as expected.
Stamp Imprints of programmed camera ID, moon phase, temperature, date, and time on photo
Battery Type Alkaline/ NI-MH
Adjust to your battery type. If you are using Lithium batteries select NiMH.
Frequency 50HZ, 60HZ; improper setting may cause camera screen icker. This is rarely required to be changed.
SD Cycle When ON the camera will save images over the top of old images when the SD card is full. If set to OFF
the camera will stop taking images when the SD card is full.
Reset Select “Yes”to reset camera back to factory default settings.
Password
Select “ON”, press“OK”, to enable password protection for your camera. The camera supports passwords
up to 6 digits/letters long. When you start your camera you will be required to enter this. If you forget
this password you will have to send it back to us to have this xed.
About Firmware version in camera (Version: / IMEI: / MCU:)

2322
1.0 Trail Camera APP
There is an App called TrailCamera which is available for free on both
iPhone and Android. Download the App.
1. Hit the plus sign in the top right to add your camera.
2. Name your camera in theTop box eg Front Gate.
3. In the second box put the phone number of the sim card you have
put into your camera (phone number of the camera), then hit Add.

2524
8. Hit the Send button. Depending on whether your phone is Android
or iPhone the phone will react dierently. iPhones bring up the
standard“Messages”App which allows you to then send the message
in that App, while Androids bring up send message conrmation
screens to which you just hit Conrm.
9. When your camera next triggers you should then get a conrmation
message back from the camera to say it has received your message –
“SMS commands executed successfully!” Note – The camera will not
receive your message instantly because it is dormant. See page 20
SMS Ctrl of this manual for more information.
10. This allows you to send a message to the camera to get an instant
image back. This will only work when the camera is in“All theTime”
mode. See p20 SMS Ctrl for more information.
5. Hit the General Setting button
4. Select your camera.
6. This takes you into the camera settings screen where you can enter all
the camera settings. Make sure you have the cameras phone number
in the top right (Camera Sim Number) and the image destination
phone number (your phone number) in the MMS section (if you are
wanting to send by MMS).
7. Make sure all these setting are how you want them before proceeding
to the next step as these setting will replace the settings already in
the camera.

2726
5.0 Specifications
Image Sensor 5 Mega Pixels Colour CMOS
Eective Pixels 2560x1920
Day/Night Mode Yes
IR range 20m
IR Setting Top: 28 LEDs, Foot: 30LEDs
Memory SD Card (4MB – 32 GB)
Operating keys 7
Lens FOV=52°; Auto IR-Cut-Remove (at night)
LCD Screen 2”TFT, RGB, 262k
PIR distance 20m (65feet)
PIR Angle Regular lens model: 52°
Picture size 5MP/8MP/12MP =2560x1920/3264x2448/4000x3000
Picture Format JPEG
Video resolution FHD (1920x1080), HD (1280x720), VGA(640x480)
Video Format AVI
Video Length 5-59sec. programmable
Shooting Numbers 1-5
Trigger Time 0.35s
Trigger Interval 4s-7s
Camera + Video Yes
Device Serial No. Yes
Time Lapse Yes
SD Card cycle ON/OFF
Operation Power Battery: 9V; DC: 12V
Battery Type 12AA
External DC 12V
Stand-by Current 0.135mA
Stand-by Time 5~8 months (6×AA~12×AA)
Auto Power O In Test mode, camera will automatically power o in 3 mins if there is no keypad touching.
Interface USB/SD Card/DC Port
Mounting Strap; Tripod
Operating Temperature -25°C to 60°C
Storage temperature -30 °C to 70°C
Operation Humidity 5%-90%
Waterproof spec IP66
Dimensions 148.25*117.37*78.25 mm
Weight 367g
Certication CE FCC RoHs
Specications are subject to change without prior notice.

2928
6.0 Trouble Shooting
6.1 Photos Do Not Capture Subject of Interest
1. Check the “Sensor Level” (PIR sensitivity) parameter setting. For warm environmental conditions, set the Sensor
Level to“High”and for cold weather use, set the sensor to“Low”.
2. Try to set your camera up in an area where there is less environmental heat (hot air vents, higher o the ground in
summer to get less of the ground’s heat) in the camera’s eld of view.
3. In some cases, setting up the camera near water will make the camera take images with no subject in them. Try
to aim the camera over ground.
4. Try to set the camera up on stable and immovable objects, i.e.: large trees. Any movement in the tree can set the
camera o. Also vegetation moving around in front of the camera can set the camera o in the heat of the day.
5. At night, the motion detector may detect beyond the range of the IR illumination. Reduce the distance by
adjusting the PIR sensor sensitivity.
6. The rising sun or sunset can trigger the cameras PIR sensor. The camera should be reoriented if this is causing a
problem.
7. If a person/animal moves quickly, it may move out of the camera’s eld of view before the photo is taken. Move
the camera further back or redirect the camera. Setting up the camera at a 30 degree angle to the movement
can also help this.
8. Ensure that the motion sensor is not inadvertently covered.
9. Ensure your camera is targeted well capturing the target moving across the middle of the image frame for
bestresults.
6.2 Camera Stops Taking Images or Won’tTake Images
1. Please make sure that the SD card is not full. If the card is full, the camera will stop taking images. You can turn on
Cycle Recording to avoid this. Check the SD card does not have les on it from another device as this can sometimes
prevent the camera from being able to store images onto the card.
2. Check the batteries to make sure that there is enough power. Poor batteries can sometimes allow the camera to
take day time images but not night images. Sometimes it may also take a couple of minutes for the camera to read
the battery level correctly. It is always a good idea to try another set of new batteries.
3. Make sure that the camera power switch is in the“On”position and not in the“O”or“Test”modes.
4. When the 3G function is on, there will be around a 1 minute interval for the camera to send out a photo before the
camera takes the next photo. If you turn o the GPRS, the camera can shoot photos continuously.
5. Try formatting the SD card with the camera. Also ensure the SD card is 8GB to 32GB in size. No smaller or larger. It
is also a good idea to sometimes try another SD card.
6.3 Night Vision Flash Range Doesn’t Meet Expectations
1. Please check to make sure that the batteries are fully charged or of a high quality brand. Cheap battery brands
usually result in poor ash range.
2. “Max Range”oers better IR ash range. Given IR ash range values are based on Max Range setting.
3. High-quality 1.5V NiMH rechargeable AA batteries can also oer much better IR ash range. Alkaline batteries
cannot deliver enough amperage to power the illuminator consistently at night.
6.4 Sent Images are not being received (3G Model)
1. Check your sim card has credit.
2. If you are sending MMS messages ensure that the sim card is not a data card as data cards cannot send MMS. Data
cards can send email (SMTP).
3. Check that the camera is picking up mobile reception in the main screen. It will bring up the bars in the top left of
the screen. This information will still be displayed even if the sim card has no credit. If the camera is not picking
up any bars or only 1 or 2 it might be having trouble with reception. Try and test the camera in an area with good
reception. Larger aerials are available if reception with the supplied aerial is not enough.
4. Ensure that the correct phone network has been selected and that the correct number for the recipient’s phone has
been entered. Numbers are to be entered starting with“04”.
5. This model only works on the Telstra network and not the Optus network.

3130
7.0 Warranty
We are very happy to oer our customers a two year warranty on the Swift Enduro camera.
Our products are warranted against defects in materials and workmanship for a period of two years from the date of
original purchase. If a defect exists, we will:
1. either repair the product at no charge using new or refurbished parts;
2. or exchange the product with a functionally equivalent product that is new or refurbished.
This warranty excludes damage resulting from abuse, accident, modications or other causes that are not defects in
materials and workmanship, or by someone other than our authorised technicians. This warranty only covers failures
due to defects in materials or workmanship under normal usage. The warranty does not cover damage to the camera
from battery leaks, or insect damage.
To obtain warranty service, please call us to determine the nature of the problem before returning the product for
repair or exchang.
Notes
_________________________________________
_________________________________________
_________________________________________
_________________________________________
_________________________________________
_________________________________________

32
Table of contents