Outdoor GreatRoom Company SONOMA12-R Specification sheet

Sonoma 12 Pergola
outdoorrooms.com
Manual and Installation Instructions
Please read these instructions before removing parts from crate.

Introduction
Thank you for your purchase from The Outdoor GreatRoom Company. This pergola has been engineered and manufactured in the USA.
This user manual will help make the installation and setup of your new pergola fast and easy. Outdoor GreatRoom company recommends
visiting with your local authority for building codes, restrictions, or requirements for this product. Please read the manual through before
starting the project.
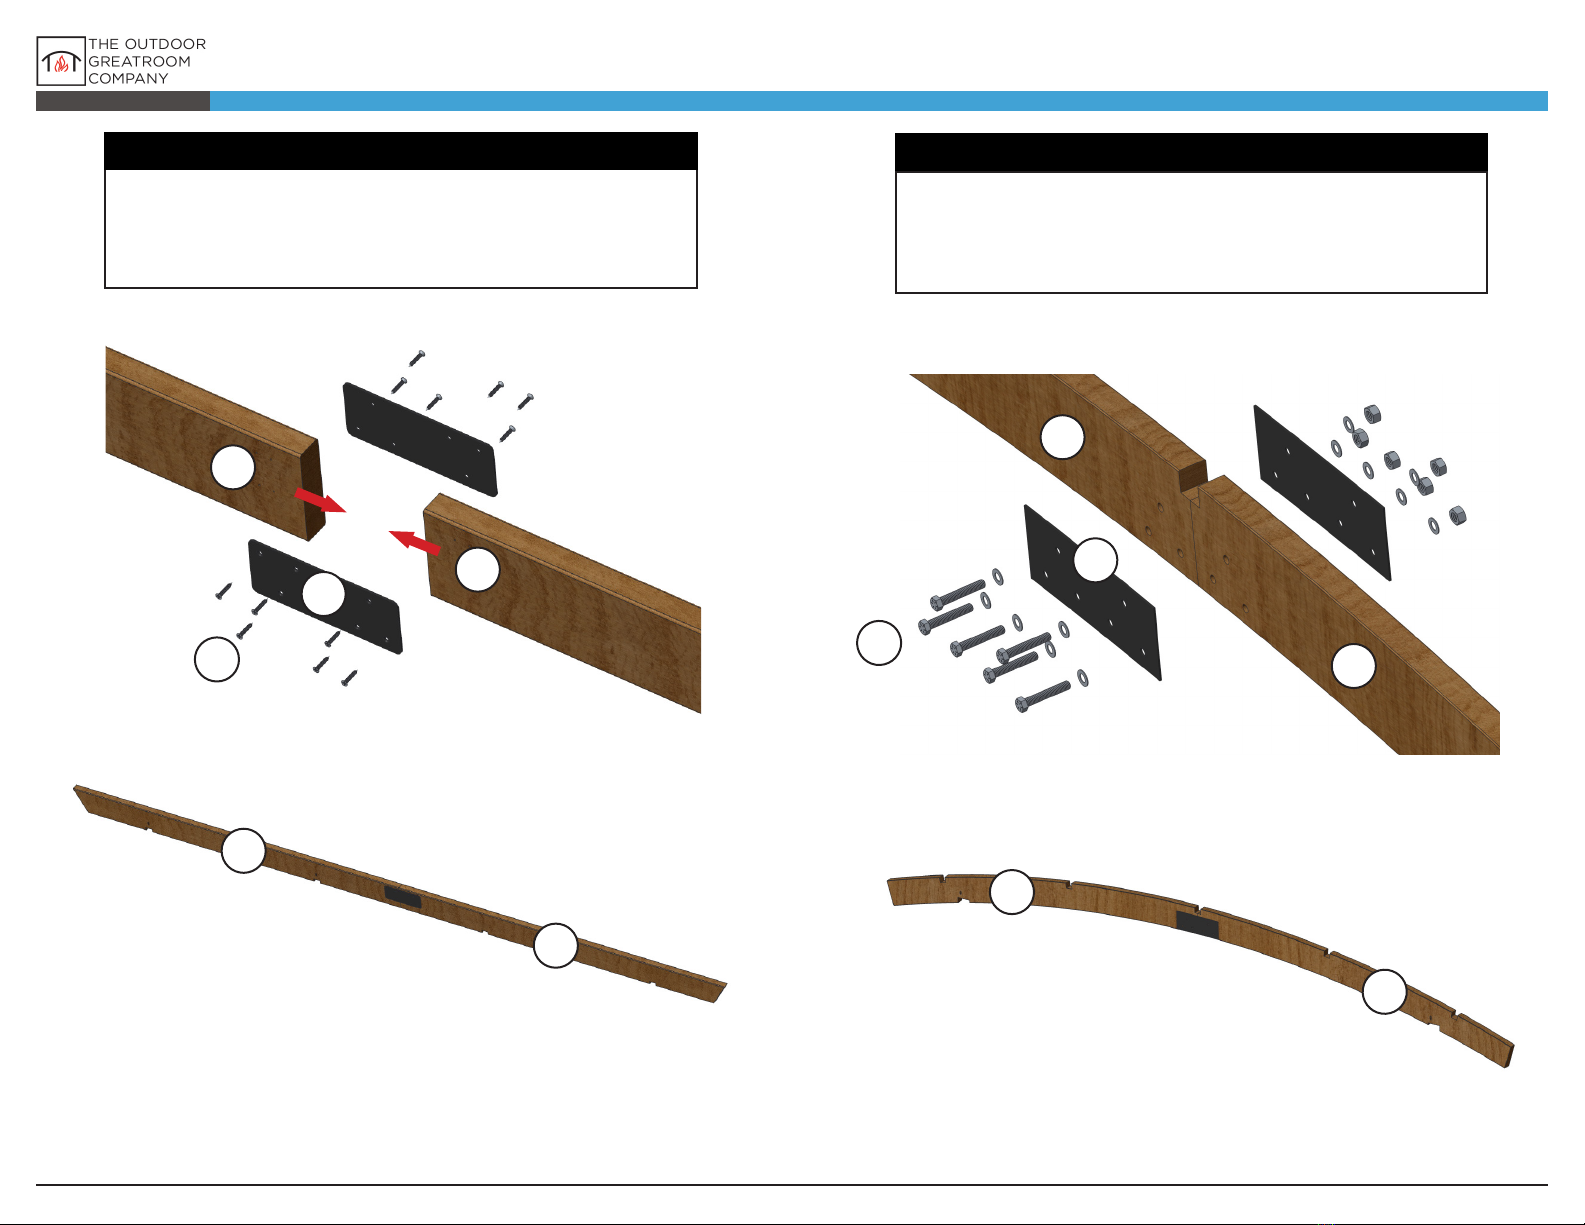
This pergola is made of premium grade kiln dried Douglas Fir. Douglas Fir, if maintained properly, will last a very long time, similar to life
of both Cedar and Redwood. All nished pieces have been stained via submersion to ensure even penetration. It is recommended that
the pergola receive a clear, oil-based stain yearly to maintain the color, minimize warping and prevent rotting. Every few years a colored oil
based stain should be used to keep the original color.
IMPORTANT
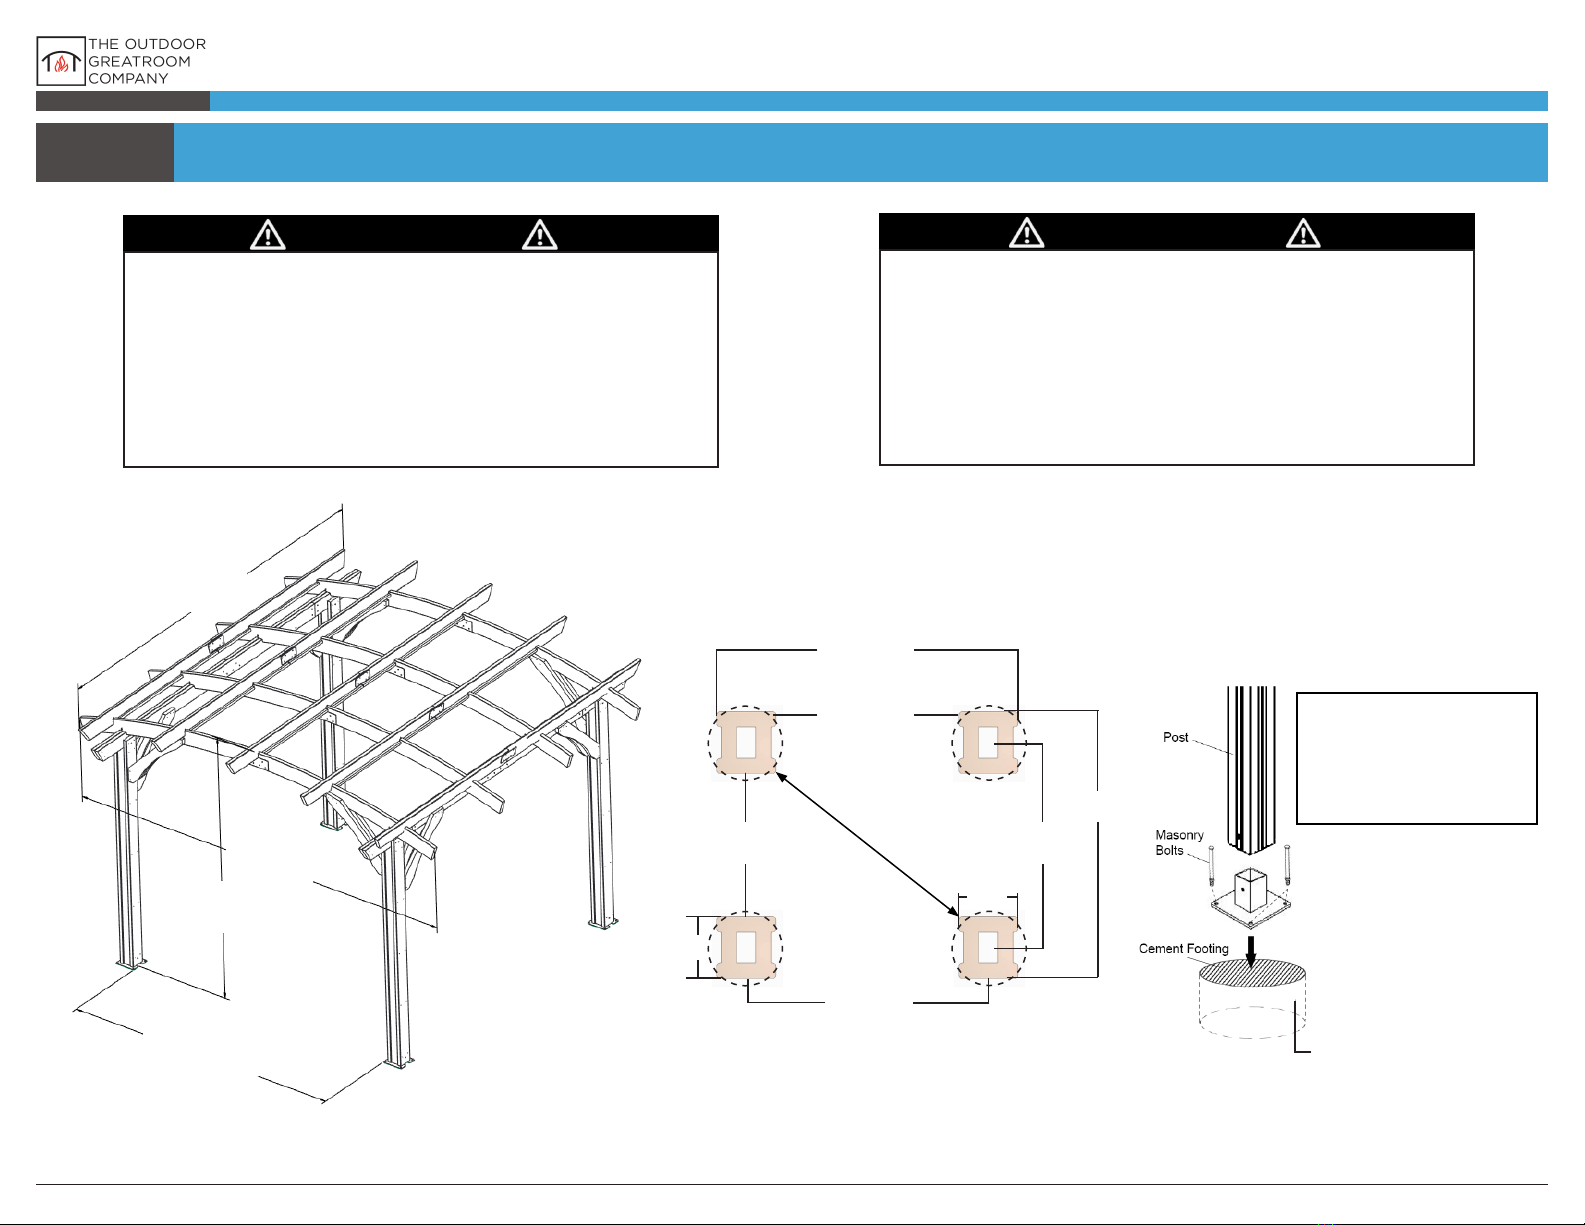
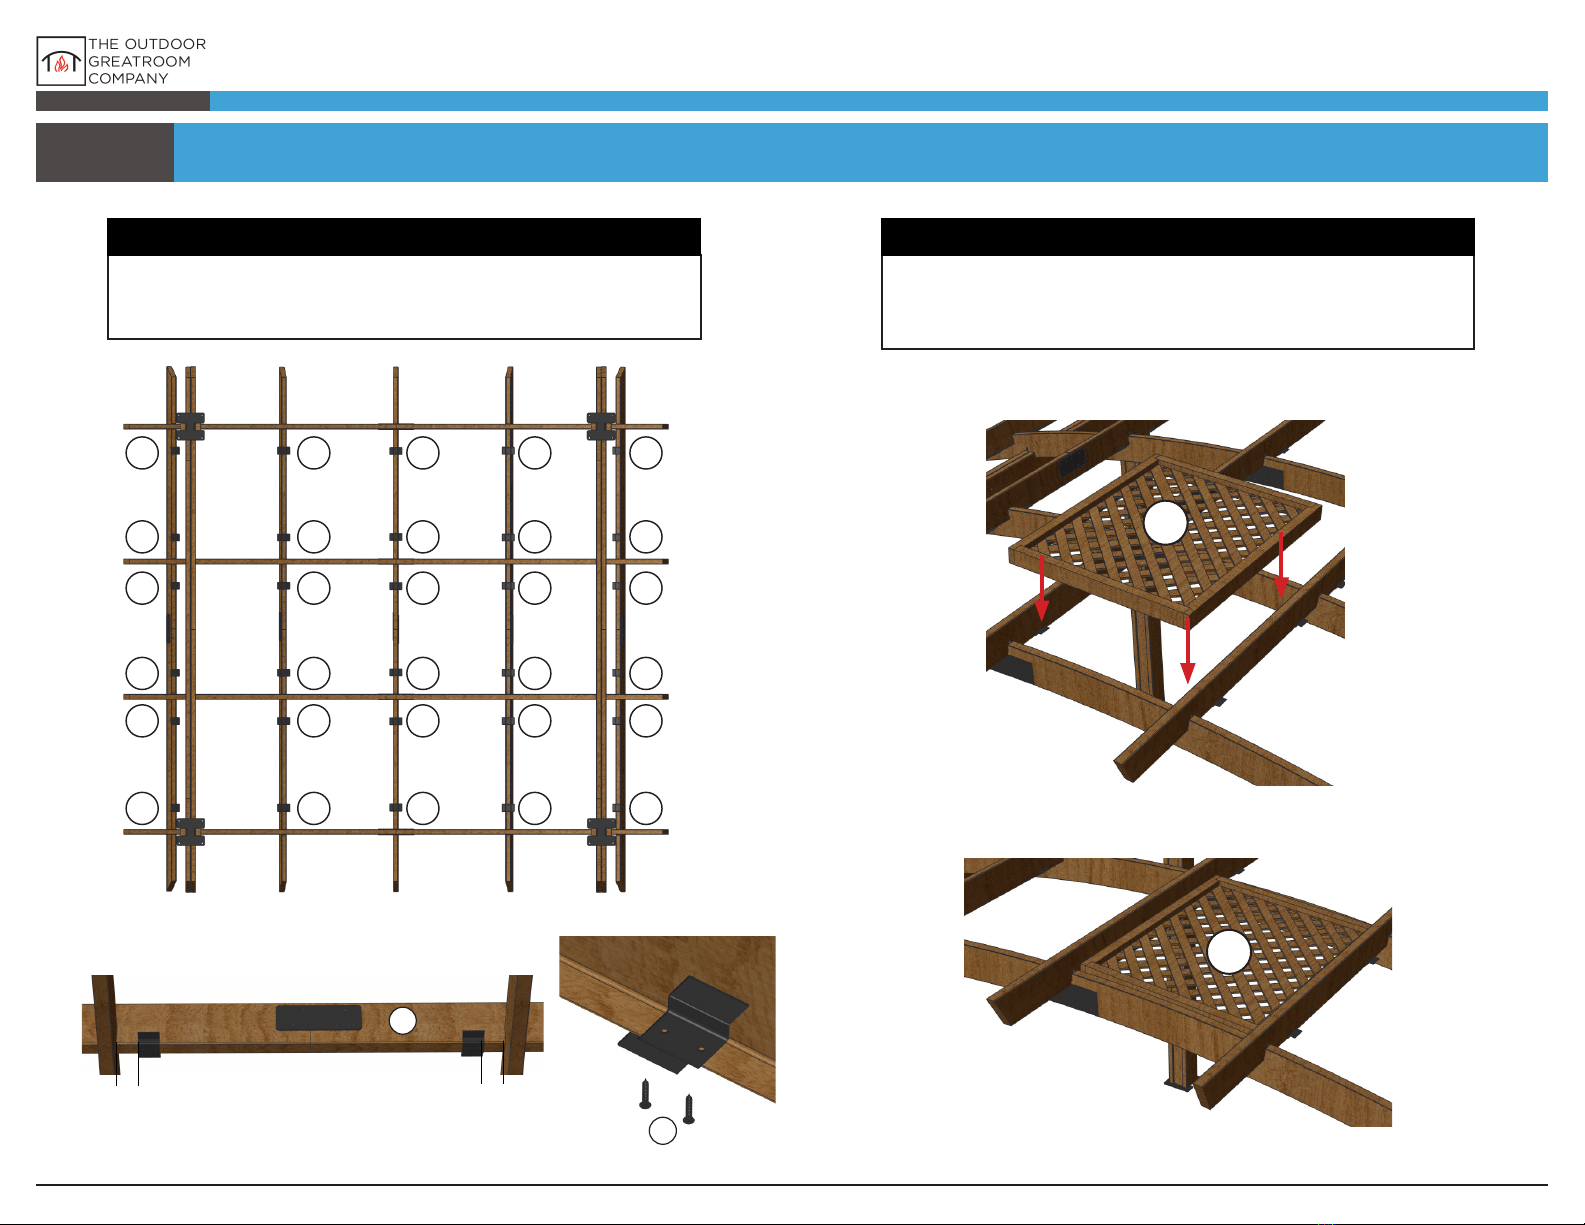
• Anchoring Required-Contact your local authority for details.
• Read instructions prior to assembly.
• Assistance is required and we recommend at least 2 people
for installation.
• Contact place of purchase with any further questions.
outdoorrooms.com90224 REV F 01-08-19 1
ATTENTION
•Cored or Cordless Drill
• Measuring Tape
• Level
• Metric Socket Set
• Step Ladder
• Rubber Mallet
• Hammer Drill*
• Concrete Drill Bits*
• Concrete Anchors*
• Construction Grade Adhesive
(such as PL 400)
*Only required for anchoring to concrete surfaces.
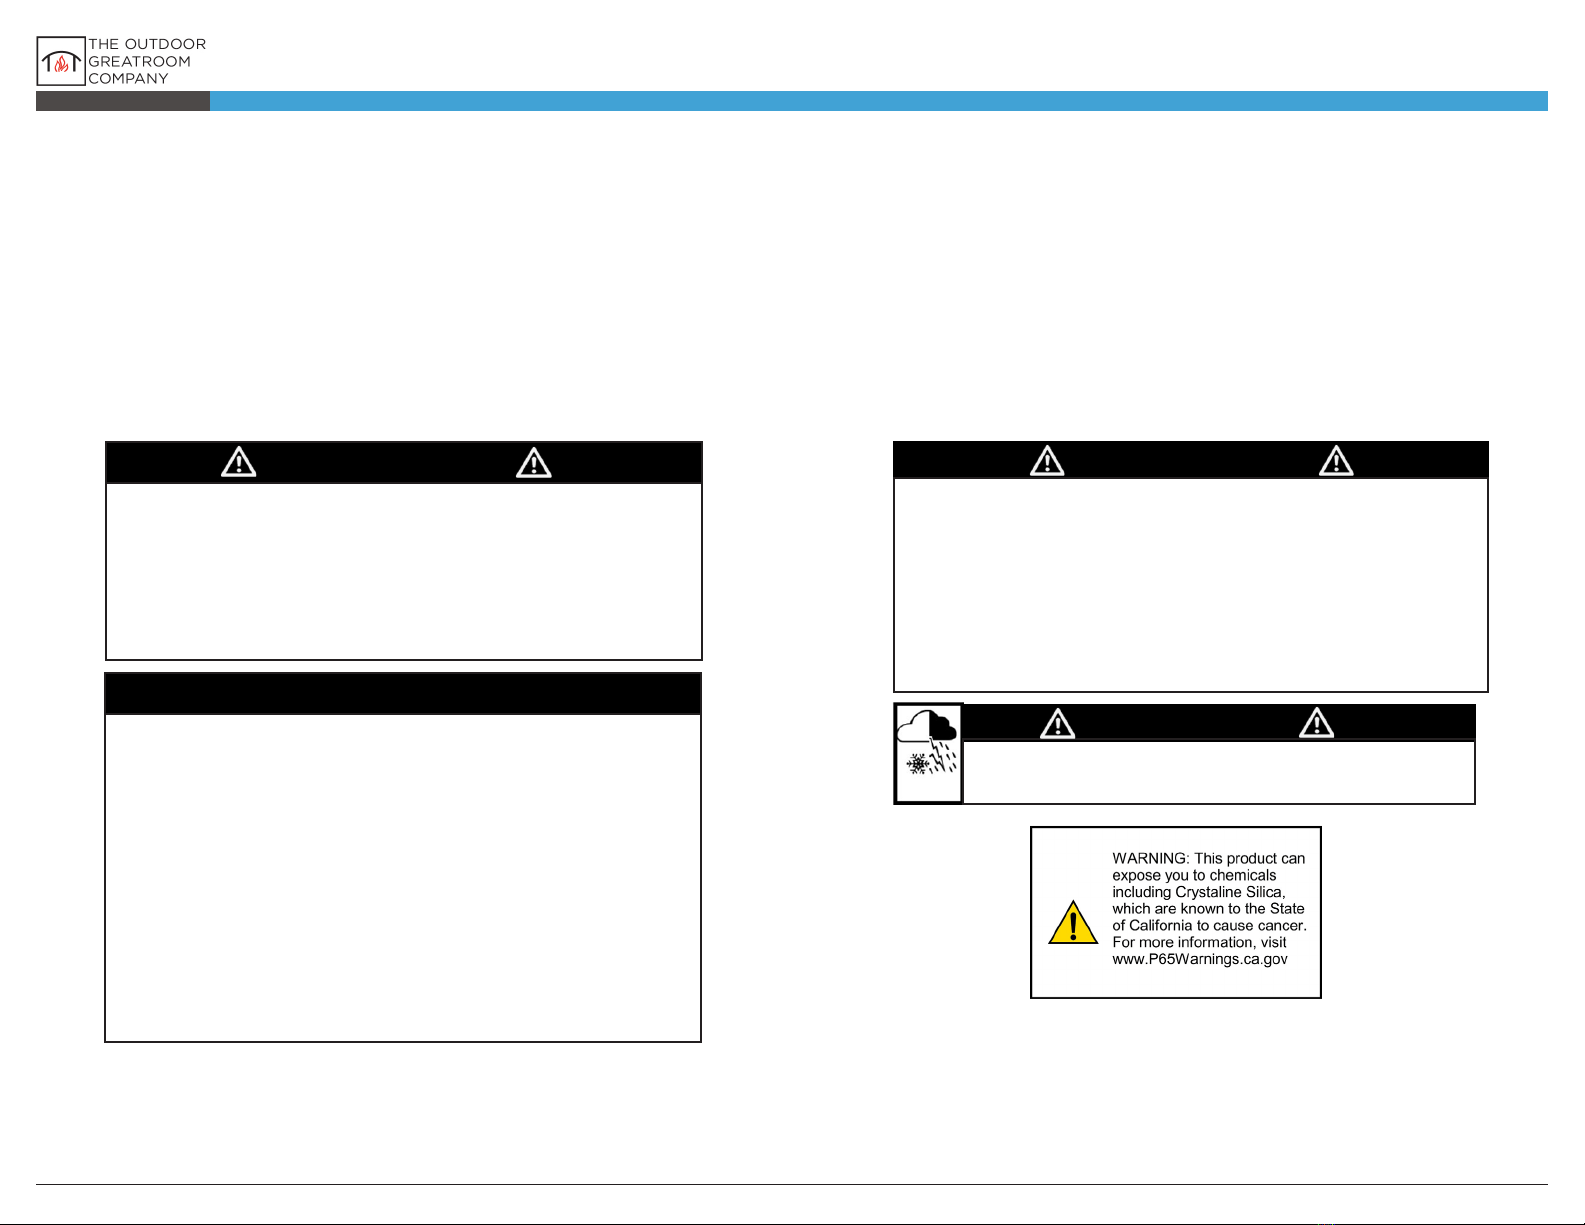
Douglas Fir Lumber may have surface splits. This occurs
while the lumber dries and seasons. This characteristic is
also known as “checking” in the lumber industry. These
can be upwards of 1/8” running inches to feet in length.
These characteristics do not aect the structural
strength and integrity of the product nor does it aect
or void the warranty.
WARNING
Extreme weather including heat, cold, rain, snow and high humidity
aect all wood products. Taking proper care of your pergola is essential
to ensure long-lasting performance and beauty.
REQUIRED TOOLS

outdoorrooms.com90224 REV F 01-08-19 2
DHEADER BEAM X4
EHEADER BEAM X4
FHEADER BEAM X2
GCANOPY BEAM X10
JARCH BEAM X8
W SONOMA 12 LATTICE
(OPTIONAL)
INCLUDED PARTS (WOOD)
1a.
ACOLUMN X4
BTALL CORBEL POST BRACE X4
CSHORT CORBEL POST BRACE X4

L- ARCH MENDING PLATE X8
K- RECTANGULAR MENDING PLATE X10
M- FOOT X4
O- M10 X 160 HEX BOLT (with nut and washers)
P- M10 X 90 HEX BOLT (with nut and washers)
N- M10 X 55 HEX BOLT (with nut and washers)
INCLUDED PARTS (METAL HARDWARE)
1b.
outdoorrooms.com90224 REV F 01-08-19 3
U- END PURLIN BRACKET X12
T - PURLIN BRACKET X18
R- 3” WOOD SCREW
Q - 1.25” WOOD SCREW
V- END PURLIN BRACKET X60
OPTIONAL HARDWARE KIT
*Parts included in lattice package*
S- 2” WOOD SCREW

outdoorrooms.com90224 REV F 01-08-19 4
Bolt steel footplate to each of four supplied posts
“A” as shown. Use hardware “M” and “O”
O
M
Apply construction adhesive to boards on one
side and bolt beams together as shown using
bolts “P” with a nut and washer. Bolt heads
should be on the side comprise of beams “E”
(Do not use bolts in holes marked with an X
below.) Repeat for opposite side ledger beam.
Insert 2” wood screws “S” into pre-drilled holes
near ends of beams “D” once bolts are in place
and tightened.
PERGOLA ASSEMBLY
2.
STEP 1 STEP 2
X
X
D
F
D
E
A
E

STEP 3 STEP 4
With arch beams “J” laying at on ground, bolt
together (4X) using supplied hardware bolts “N”,
and mending plates “L”
outdoorrooms.com90224 REV F 01-08-19 5
Attach rectangualr mending plate “K” to canopy
beams as shown below. Attach beams “G” together
(5X).
J
J
G
G
K
S
J
J
G
G
N
L

22.00
outdoorrooms.com90224 REV F 01-08-19 6
Attach short corbels “C” with hardware
screws “R” (upper screws should be installed
from both sides of ledger beam).
STEP 5
Lay columns on level surface. Bolt ledger beams
assembled in step 2 to column “A” with beams
“E” facing upward. Hardware “O” is used.
Repeat step 5 for remaining posts.
In the remaining steps, a rubber mallet may be useful in tting beams together properly.
ATTENTION
Insert 2 screws “R”
into each side column.
Ensure colums are
squared with ledger
beam before fastening.
Repeat for all columns.
STEP 6
R
R
E
O
With the assistance of another person, stand
the assembled columns upright. One person is
recommended per coulmn to help brace before
continuing on to further steps.
ATTENTION

R
outdoorrooms.com90224 REV F 01-08-19 7
STEP 7 STEP 8
Carefully position posts in nal location. Check
for square. Install canopy beam assemblies with
screw “R” at intersections with arch beams. The
use of a level or similar tool is highly suggested.
R
Once header beams are installed and bolts are
tightened, end arch beam sections can be in-
stalled between them and secured in place with
hardware screws “R”. Position
components with bolt heads visable from the
outside of the pergola.
After end arched beams are installed, tall
corbel post braces “B” can be attached as
shown below with hardware screws “R” (upper
3 screws are installed from both sides of
corbel). Once corbels are in place, install
remaining arched beams with screws “R”.
R
GG
16.00
R
GGG

ATTENTION
Recommended 12-18” diameter footing
(12” minimum).
Check local codes for depth minimums.
Footing typically is 24” minimum depth.
42” for extreme cold climates.
Do not do nal tightening of all bolts until
unit is fully assembled, level and square.
After pergola is IN POSITION, SQUARED
UP, and LEVELED, anchor posts with
masonary bolts through steel footplates.
ATTENTION
Depth of masonary
footing varies by
local code & conditions
107”+/-1” 114”+/-1”
5.25”
Center to Center
Dimension
114”+/-1”
5.50”
Suggested for installation
on lawns. For other
surfaces, appropriate
mounting methods should
be used.
DIMENSIONAL AND POST LOCATION INFORMATION
3.
14” Overhang
outdoorrooms.com90224 REV F 01-08-19 8
Inside Diagonal
154” +/-1”
Inside Dimension
109”+/-1”
MAX WIDTH
151.50
MAX HEIGHT
112.00
INSIDE DIMENSION
109.00
MAX LENGTH
146.00
Outside Dimension
120”+/-1”
118”+/-1”

outdoorrooms.com90224 REV F 01-08-19 9
LATTICE INSTALLATION (OPTIONAL)
4.
2in. 2in.
Position brackets 2in. from ends.
STEP 3
T
T
T
T
T
T
T
T
T
T
T
T
T
T
T
T
T
T
U
U
U
U
U
U
U
U
U
U
U
U
Mount brackets “T” and “U” to “G” as shown
below using (2X) “V” screws.
STEP 1
Carefully lower lattice “W” into opening.
Make sure lattice is placed securely on
each bracket.
V
W
W
G

Your new Sonoma 12 pergola is warranted against structural defects for a period of three (3) years from the date of purchase. This does not apply to damage caused by
excessive loads such as snow or use of roof as storage. Your Sonoma pergola is warranted against defects in nish and other defects not related to structure for a period
of one (1) year from the date of purchase. All metal hardware must be sprayed with a clear lacquer sealer once your pergola is assembled to prevent rust and corrosion.
The Outdoor GreatRoom Company extends the following warranty for Outdoor GreatRoom outdoor products used in the United States of America or Canada. Dealers
and employees of The Outdoor GreatRoom Company have no authority to make any warranty or authorize any remedies in addition to or inconsistent with the terms
of this warranty. This warranty gives you specic legal rights. You may also have other rights that vary from state to state.
The Outdoor GreatRoom Company warrants that this Outdoor GreatRoom Outdoor Product (the “Product”) will be free from defects in material and workmanship for
a period of one (1) year for nish and other non-structural defects and three (3) years from its date of purchase structurally. This warranty is subject to the conditions,
exclusions and limitations described below.
This warranty applies only to the original owner of the Product and is non-transferable. The Outdoor GreatRoom Company obligation under this warranty does not
extend to damages resulting from (1) assembly, operation or maintenance of the Product not in accordance with the Installation/Assembly Instructions, Operating
Instruc tions and the Listing Agency Identication Label furnished with the Product; (2) installation or use which does not comply with local building codes and or-
dinances; (3) shipping, improper handling, improper operation, abuse, misuse, accident or unworkmanlike repairs; (4) Installation or use of components not supplied
with the Product or any other components not expressly authorized and approved in writing by The Outdoor GreatRoom Company; and/or (5) modication of the
Product not expressly authorized and approved in writing by The Outdoor GreatRoom Company. Any of the circumstances described in the previous sentence voids
this warranty. This warranty is void if the Product or any component has been removed, repaired, or replaced before The Outdoor GreatRoom Company has been
aorded a reasonable opportunity to inspect the Product.
This warranty is limited to the replacement or repair of defective components or workmanship and The Outdoor GreatRoom Company may fully discharge its obliga-
tions under this warranty by repairing or replacing, at its discretion, the defective components. The Outdoor GreatRoom Company will provide replacement parts at
no charge and will pay reasonable and necessary labor and freight costs related to replacing or repairing defective components under this warranty. The maximum
amount recoverable under this warranty is limited to the purchase price of the Product and, if The Outdoor GreatRoom Company is unable to provide replacement
or repair in an expedient and cost-eective manner, The Outdoor GreatRoom Company may discharge all obligations under this warranty by refunding the purchase
price of the Product.
EXCEPT TO THE EXTENT PROVIDED BY LAW, THE OUTDOOR GREATROOM COMPANY MAKES NO EXPRESS WARRANTIES OTHER THAN THE WARRANTY EX-
PRESSED HEREIN. THE DURATION OF ANY IMPLIED WARRANTY IS LIMITED TO THE DURATION OF THE WARRANTY SPECIFIED ABOVE. IN NO EVENT SHALL THE
OUTDOOR GREATROOM COMPANY BE LIABLE FOR ANY INCIDENTAL OR CONSEQUENTIAL DAMAGES CAUSED BY DEFECTS IN THE PRODUCT. Some states do
not allow limitations on how long an implied warranty lasts, or do not allow exclusion or limitation of incidental or consequential damages, so these limitations may
not apply to you.
To obtain service under this warranty, you must:
Send written notice of the claimed condition to: The Outdoor GreatRoom Company, 14400 Southcross Dr. W. Burnsville, MN 55306.
Arm that you are the original owner of the Product.
Provide The Outdoor GreatRoom Company reasonable opportunity to investigate the claim, including reasonable opportunity to inspect the Product prior
to any repair or replacement work and before the Product or any component of the Product has been removed.
Obtain The Outdoor GreatRoom Company’s consent to any warranty work before the work is done.
outdoorrooms.com90224 REV F 01-08-19 10
SONOMA PERGOLA WARRANTY INFORMATION
5.
This manual suits for next models
1
Table of contents
Other Outdoor GreatRoom Company Patio Furniture manuals