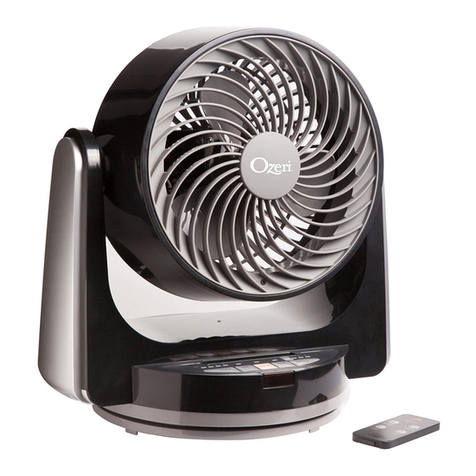
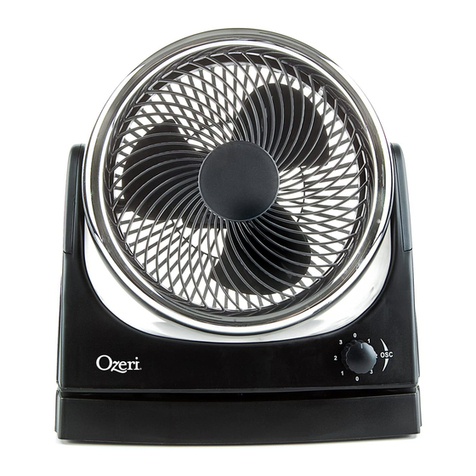
Ozeri Brezza 360 Guide

Oscillating Table Fan
with Orbital Motion Technology
Model No: OZF8
INSTRUCTION MANUAL
AND WARRANTY
Copyright 2020, Ozeri
360
Brezza

Important Safety Instructions
Thank you for purchasing the Ozeri Brezza 360 Table Fan. This product
has passed extensive quality assurance tests for residential use. Every
care has been taken to ensure that it reaches you in perfect condition.
WARNING:When using electric appliances, basic safety
electric shock and personal injury, including (but not limited to)
the following:
Use this fan only as described in this manual.
Check the voltage indicated on the rating plate. This fan is designed
for a 120V-60Hz electric supply. Make certain the power source
conforms to these electric requirements. Make sure the room where
this fan will be used has a working smoke detector.
2
READ AND SAVE THESE INSTRUCTIONS:
Do not use an electrical extension cord with this fan. Do not plug the
fan into a power strip. The use of such devices may create electric and/
foreign objects through the front case.
This product is not a toy. Do not allow children to tamper with the fan.
Be careful not to allow hair, curtains, tablecloth, clothes or other
nearby objects block the airways of the fan or to enter the openings of
the fan. This can cause damage and/or injuries.
Do not use this or any fan if the cord is found to be or becomes
damaged. Periodically check the electric cable of thisfan. If the electric
cable is damaged, it must be replaced by the manufacturer, its after-
Do not use this fan if it falls and/or becomes damaged in any way. If
the fan becomes damaged, it must be replaced by the manufacturer,
danger.
WARNING: Do not use this fan outside, or in any commercial, industrial
or agricultural setting. This fanisonly for residential use. Do not use this
fan with any solid state speed control devices.
Do not use this fan in a damp area such asbathroom.
Do not use this fan on a window, ledge, oron any unstable platform.
The fan should only be used standing on its base. Never lay the fanon
its side.

Do not use this fan next to a window or anywhere where exposure to
rain or moisture is possible. This may create an electrical hazard.
Do not place the electrical cord under any objects, such as carpets,
throw rugs or runners. Do notplace electrical cord in areas of foot
The fan must always be unplugged when not in use. Before
Do not operate the fan in an area where gasoline, paint supplies or any
Do not try to repair ordisassemble this fan. Doing so will void the
warranty and may result in damage and/or personal injury.There
are no end-user serviceable parts.
This fan is not suitable for use in agricultural facilities and hazardous
locations. This fan does not meet the requirements of NEC Article 547-
7 and 500 (2002).
Keep this fan and all electrical appliances outof reach of children at
all times.
3
THIS FAN HAS A POLARIZED PLUG (ONE BLADE IS WIDER THAN THE
OTHER). TO REDUCE THE RISK OF ELECTRICAL SHOCK, THIS PLUG IS
INTENDED TO FIT IN A POLARIZED OUTLET ONLY ONE WAY. MATCH
THE WIDE BLADE OF PLUG TO THE WIDE SLOT OF THE OUTLET. FULLY
INSERT. IF THE PLUG DOES NOT FIT FULLY IN THE OUTLET, REVERSE THE
PLUG. IF IT STILL DOES NOT FIT, CONTACT A QUALIFIED ELECTRICIAN.
DO NOT ATTEMPT TO BYPASS THIS SAFETY FEATURE.
NOTE: THIS FAN IS EQUIPPED WITH A FUSE. ALWAYS UNPLUG
THE FAN BEFORE REPLACING FUSES. IF THIS FAN LOSES POWER
AND YOU SUSPECT THE FUSE IN THE PLUG HAS BLOWN, UNPLUG
THE FAN, THEN SLIDE THE FUSE DOOR FOUND ON THE SIDE
OF THE PLUG TO THE OPEN POSITION. SLIDE THE FUSE DOOR
OUTWARD UNTIL THE BLOWN FUSE IS FULLY VISIBLE. REMOVE
THE BLOWN FUSE AND SNAP THE REPLACEMENT FUSE INTO
PLACE. FULLY CLOSE THE FUSE DOOR. ONLY REPLACE WITH A
FUSE RATED AT 2.5 AMPS, 125 VOLTS.

Overview of your Fan:
1. Fan Blade
2. Front Grille Cover
3. Control Knob
4. Handle
5. Fan Base
Fan S
Model #:…………………………………………….………….OZF8
Rated Voltage:…………………………………………...120V/60Hz
Wattage:………………………………………………………..36W
Net Weight…………………………………………………. 3.64 lbs
Operating Instructions::
1. Please ensure the fan is
OFF (in the 0 position)
and placed on a dry level
surface.
2. Plug the power cord into a polarized 120 volt AC wall outlet.
3. Turn the knob on the front of the fan to the right for Oscillation Mode
(360 degree motion) or to the left for Non-Oscillation Mode.
4. The following are the air speeds for both Oscillation and Non-
Oscillation Modes:
b. 1 = Low
5. To turn the fan OFF, move the knob back to the OFF (0 position).
1
2
3
4
5
4
c. 2 = Medium
d. 3 = High
O
S
C
I
L
L
A
T
I
O
N
WARNING: DO NOT ATTEMPT TO FORCE OR IMPEDE THE
FAN’S OSCILLATION. DOING SO WILL DAMAGE THE FAN AND
VOID THE WARRANTY.

Moderating Temperatures:
The Ozeri Air Circulator can help distribute cooler air from ornear your
air conditioner, and warmer air from or near your heater, by creating a
energy usage.
To circulate cool air, position the fan near an openwindow exposed to
cooler outside temperatures, or to an air conditioning unit. Since hot air
rises, direct the cool air from the fan by pointing it up to force the cooler
air into circulation.
5
Manually Setting the Vertical Angle:
1. With the fan completely o, gently rotate the fan’s top housing across
its arc to the desired angle. Then turn on the fan in non-oscillating
mode by selecting level 1, 2 or 3 on the left side of the control knob.
The fan will remain at this angle.
2. Never attempt to adjust the oscillation while the fan is engaged.
Doing so will damage the fan and void the warranty.
3. To return the fan to its straight or ush position, with the fan com-
pletely o, gently rotate the fan's top housing until it is centered and
aligned with its base.
360

6
WARNING: DO NOT HANG OR MOUNT THIS FAN.
Cleaning:
1. Always disconnect the cord from the electrical outlet before cleaning
your fan.
2. Dust may be removed by using a vacuum cleaner along the back of
the fan where the plastic grille covers the air intake, and along the
3. Wipe the exterior surfaces of the fan occasionally with adamp cloth
(not dripping wet) and dry thoroughly with a soft dry cloth before
operating the fan.
4. Do not use harsh cleaners or materials to clean this unit, doing so will
cause damage.
For non-directional airow or to maximize the distribution of airow into
a wide space, select your desired OSCILLATION speed to activate the
Brezza's 360 degree function. The 360 degree motion will deliver the
greatest distribution of airow and provide thorough mixing to a given
space, thereby helping bring the room to a more desirable equilibrium
temperature.
Cooling in SUMMER
Dierent methods to maximize air circulation.

WARNING: DO NOT ALLOW WATER TO RUN INTO THE
INTERIOR OF THE FAN ASTHIS COULD CREATE A FIRE OR
ELECTRIC SHOCK HAZARD.
Removal of Front Grille for Cleaning:
7
Ensure the fan is unplugged.
Remove the front grille by turning it counter-clockwise away from its
frame (Figure 1).
Use a vacuum to clean. Wipe the fan blades and the grille with a
damp rag. DO NOT IMMERSE IN WATER AND NEVER ALLOW WATER
TO DRIP INTO THE MOTOR HOUSING. DO NOT USE CHEMICALS LIKE
PAINT THINNER OR GASOLINE TO CLEAN THE FAN OR BLADES
(Figure 2, Figure 3).
To reassemble, carefully realign grille with the frame and turn
clockwise (Figure 4).
To store the fan, clean it carefully as instructed. Place the fan in the
original packaging for storage or cover it to protect it from dust.
Store in a cool dry place.
front cover vacuum
cleaner
Front net
cover
FIGURE 1 FIGURE 2
FIGURE 3 FIGURE 4

WARRANTY INFORMATION
THIS WARRANTY DOES NOT APPLY TO THE FOLLOWING
Ozeri Customer Service:
Phone: 1-877-299-1296
Email: [email protected]
Your product is warranted to the original owner for 1 year from the date
of purchase against defects in material and workmanship under normal
use and service. Should your product prove defective within 1 year from
the date of purchase, return the defective part or unit, freight prepaid
along with your receipt and an explanation of the claim to Ozeri. Please
pack your product carefully to avoid damage in transit. Under this
warranty, Ozeri will repair or replace any parts found to be defective
due to manufacturer’s defect. This warranty extends only to personal
use and does not extend to any product that has been used for
commercial use, rental use, or use which is not intended. There are no
warranties other than that expressly set forth herein. This warranty is
not transferable. Ozeri is not responsible in any way for damages, losses
or inconveniences caused by equipment failure due to user negligence,
abuse, or use not in accordance with the user guide or any additional
safety, use, or warnings included in the product materials. Further, Ozeri
is not liable for incidental or consequential damages of any nature
resulting from the use of this product and any liability shall not exceed
the purchase price of the product.
This Warranty gives you specic legal rights. You may also have other
rights which vary from state to state.
- Damage due to accident, misuse, abuse, alterations or vandalism.
- Improper or inadequate maintenance.
- Damage in return transit.
- Unsupervised use by children under 18 years of age.
(Ozeri® and its subsidiaries assume no liability for damage caused by the use of the product
other than for its intended use or as instructed above and in the User Manual.)

Ventilador de mesa oscilante
con tecnología Orbital Motion
Modelo N.º: OZF8
Copyright 2020, Ozeri
360
Brezza
MANUAL DE
INSTRUCCIONES
Y GARANTÍA

2
Instrucciones de seguridad importantes
Gracias por comprar el ventilador de mesa Ozeri Brezza 360. Este producto ha
pasado extensas pruebas de control de calidad para su uso residencial. Se han
tomado todas las precauciones para garantizar que llegue a usted en perfectas
condiciones.
ADVERTENCIA: Al utilizar aparatos eléctricos, deben seguirse las
precauciones de seguridad básicas para reducir el riesgo de
incendio, descarga eléctrica y lesiones físicas, entre las que se
incluyen (pero no se limitan a) las siguientes:
LEA Y GUARDE ESTAS INSTRUCCIONES:
Use este ventilador solo como se describe en este manual.
Compruebe la tensión indicada en la placa de características. Este
ventilador está diseñado para un suministro eléctrico de 120V-60 Hz.
Asegúrese de que la fuente de alimentación cumple con estos requisitos
eléctricos. Verifique que la habitación donde se utilizará este ventilador
tenga un detector de humo que funcione.
No utilice un cable de extensión eléctrica con este ventilador. No enchufe
el ventilador en una barra de alimentación. El uso de dichos dispositivos
puede crear riesgos eléctricos o de incendio.
No fuerce los dedos a través de la carcasa frontal. No permita que ningún
objeto ajeno atraviese la carcasa frontal.
Este producto no es un juguete. No permita que niños manipulen el
ventilador.
Asegúrese de que el pelo, las cortinas, los manteles, la ropa y otros objetos
cercanos no obstruyan el flujo de aire del ventilador ni entren en sus
aberturas. Esto puede causar daños o lesiones.
No use este o ningún ventilador si el cable se encuentra dañado. Revise
periódicamente el cable de alimentación de este ventilador. Si el cable de
alimentación está dañado, debe ser sustituido por el fabricante, su servicio
postventa o por una persona cualificada para evitar daños.
No use este ventilador si se cae o se daña por alguna razón. Si el ventilador
se daña, debe ser sustituido por el fabricante, su servicio postventa o por
una persona cualificada para evitar daños.
ADVERTENCIA: No utilice este ventilador en el exterior, o en ningún
entorno comercial, industrial o agrícola. Este ventilador es exclusivamente
para uso residencial. No utilice este ventilador con ningún dispositivo de
control de velocidad de estado sólido.
No utilice este ventilador en un área húmeda como el baño.
No utilice este ventilador en una ventana, repisa o en una plataforma
inestable. El ventilador deberá utilizarse únicamente de pie sobre su base.
Nunca coloque el ventilador de lado.

3
No use este ventilador cerca de una ventana o en cualquier lugar donde
sea posible la exposición a lluvia o humedad. Esto puede crear un riesgo
eléctrico.
No coloque el cable de alimentación debajo de ningún objeto, como
alfombras, alfombrillas o correderas. No coloque el cable de alimentación
en zonas de tránsito peatonal donde haya riesgo de tropiezo.
Desenchufe el ventilador siempre que no se utilice. Antes de desenchufar
el ventilador, primero asegúrese de que se ha apagado.
No haga funcionar el ventilador en un área donde se utilice o almacene
gasolina, suministros de pintura o cualquier líquido inflamable o productos
químicos explosivos.
No intente reparar o desmontar este ventilador. Esto anularía la
garantía y podría resultar en daños o lesiones personales. No hay
piezas que puedan ser reparadas por el usuario final.
Este ventilador no es adecuado para su uso en instalaciones agrícolas y
lugares considerados de riesgo. Este ventilador no cumple con los requisitos
de los artículos 547- 7 y 500 del NEC (2002).
Mantenga este ventilador y todos los aparatos eléctricos fuera del alcance
de los niños en todo momento.
ESTE VENTILADOR TIENE UN ENCHUFE POLARIZADO (UNA CLAVIJA ES
MÁS ANCHA QUE LA OTRA). PARA REDUCIR EL RIESGO DE DESCARGAS
ELÉCTRICAS, ESTE ENCHUFE ESTÁ DISEÑADO PARA ENCAJAR DE UNA
ÚNICA MANERA EN UNA TOMA DE CORRIENTE POLARIZADA. LA CLAVIJA
ANCHA DEL ENCHUFE DEBE COINCIDIR CON LA RANURA ANCHA DE LA
TOMA DE CORRIENTE. INSERTAR COMPLETAMENTE. SI EL ENCHUFE NO
ENCAJA COMPLETAMENTE EN LA TOMA DE CORRIENTE, INVIERTA EL
ENCHUFE. SI AÚN ASÍ NO ENCAJA, PÓNGASE EN CONTACTO CON UN
ELECTRICISTA CUALIFICADO. NO INTENTE PASAR POR ALTO ESTA
CARACTERÍSTICA DE SEGURIDAD.
NOTA: ESTE VENTILADOR ESTÁ EQUIPADO CON UN FUSIBLE. SIEMPRE
DESCONECTE EL VENTILADOR ANTES DE CAMBIAR LOS FUSIBLES.
SI ESTE VENTILADOR PIERDE POTENCIA Y SOSPECHA QUE EL FUSIBLE
DEL ENCHUFE SE HA FUNDIDO, DESENCHUFE EL VENTILADOR, Y
LUEGO DESLICE LA TAPA DEL FUSIBLE QUE SE ENCUENTRA EN EL
LADO DEL ENCHUFE A LA POSICIÓN ABIERTA. DESLICE LA TAPA DEL
FUSIBLE HACIA AFUERA HASTA QUE EL FUSIBLE FUNDIDO QUEDE
COMPLETAMENTE VISIBLE. RETIRE EL FUSIBLE FUNDIDO Y COLOQUE
EL FUSIBLE DE REPUESTO EN SU LUGAR. CIERRE POR COMPLETO LA
TAPA DE FUSIBLES. SOLO REEMPLAZAR CON UN FUSIBLE DE 2.5
AMPERIOS, 125 VOLTIOS.
Fig. 1 Fig. 2 Fig. 3

Vista general de su ventilador:
1. Aspa del ventilador
2. Cubierta de rejilla frontal
3. Perilla de control
4. Manija
5. Base del ventilador
1
2
3
4
5
4
APAGADO
APAGADO
ADVERTENCIA: NO INTENTEN FORZAR O IMPEDIR LA OSCILACIÓN
DEL VENTILADOR. ESTO DAÑARÍA EL VENTILADOR Y ANULARÍA LA
GARANTÍA.
Especificaciones del ventilador:
Modelo N.º:............................................................................................................OZF8
Tensión nominal:....................................................................................120 V/60 Hz
Potencia:................................................................................................................. 36 W
Peso neto........................................................................................................... 3.64 lbs
Flujo de aire en la configuración baja (1): ................................................ 11 fps
Flujo de aire en la configuración media (2): ............................................ 15 fps
Flujo de aire en la configuración alta (3):.................................................. 19 fps
Instrucciones de uso:
1. Asegúrese de que el ventilador
esté APAGADO (en la posición 0)
y colocado en una superficie seca
y nivelada.
2. Enchufe el cable de alimentación en una toma de pared polarizada de
120 voltios CA.
3. Gire la perilla de la parte frontal del ventilador hacia la derecha para el
modo de Oscilación (movimiento de 360 grados) o hacia la izquierda
para el modo de No oscilación.
4. A continuación se indican las velocidades del aire para los modos de
Oscilación y No oscilación:
a. 0 = Apagado c. 2 = Medio
b. 1 = Bajo d. 3 = Alto
5. Para APAGAR el ventilador, mueva el mando de nuevo a la posición
APAGADO (0).

Regulación de la temperatura:
5
Ajuste manual del ángulo vertical:
1. Con el ventilador completamente apagado, gire suavemente la carcasa
superior del ventilador a través de su arco hasta el ángulo deseado. Luego
encienda el ventilador en el modo no oscilante seleccionando el nivel 1, 2
o 3 en el lado izquierdo de la perilla de control. El ventilador permanecerá
en este ángulo.
2. Nunca intente ajustar la oscilación mientras el ventilador esté conectado.
Esto dañaría el ventilador y anularía la garantía.
3. Para volver a colocar el ventilador en su posición recta o a ras, con el
ventilador completamente apagado, gire suavemente la carcasa superior
del ventilador hasta que esté centrado y alineado con su base.
360
El Circulador de Aire Ozeri puede ayudar a distribuir aire más frío desde o
cerca de su aire acondicionado, y aire más caliente desde o cerca de su
calefactor, creando un remolino de flujo de aire. Con el tiempo, esto puede
ayudar a regular las temperaturas y aumentar la eficiencia de enfriamiento o
calentamiento, reduciendo así el uso de energía.
Para hacer circular el aire frío, coloque el ventilador cerca de una ventana
abierta expuesta a temperaturas exteriores más bajas, o a una unidad de aire
acondicionado. Como el aire caliente sube, dirija el aire frío del ventilador
apuntándolo hacia arriba para forzar el aire más frío a que circule.

6
Limpieza:
1. Desconecte siempre el cable de la toma de corriente antes de limpiar el
ventilador.
2. El polvo puede eliminarse utilizando una aspiradora en la parte posterior
del ventilador, donde la rejilla de plástico cubre la entrada de aire, y a lo
largo de la cubierta de rejilla frontal. También puede utilizarse un
limpiador de tuberías o un plumero flexible.
3. Limpie las superficies exteriores del ventilador ocasionalmente con un
paño húmedo (que no gotee) y séquelas bien con un paño suave y seco
antes de usar el ventilador.
4. No utilice limpiadores o materiales agresivos para limpiar esta unidad, de
lo contrario podría dañar el aparato.
Para flujo de aire no direccional o para maximizar la distribución del flujo de
aire en un espacio amplio, seleccione la velocidad de OSCILACIÓN deseada
para activar la función de 360 grados del Brezza. El movimiento de 360 grados
entregará la mayor distribución del flujo de aire y proporcionará una mezcla
completa a un espacio dado, lo que ayudará a que la habitación tenga una
temperatura ambiente equilibrada más deseable.
Enfriamiento en VERANO
Diferentes métodos para maximizar la circulación del aire.
ADVERTENCIA: NO CUELGUE O MONTE ESTE VENTILADOR.

ADVERTENCIA: NO PERMITA QUE INGRESE AGUA HACIA
EL INTERIOR DEL VENTILADOR, YA QUE ESTO PODRÍA
OCASIONAR UN PELIGRO DE INCENDIO O DE DESCARGA
ELÉCTRICA.
7
Asegúrese de que el ventilador esté desenchufado.
Retire la rejilla frontal girándola en sentido contrario a las agujas del reloj,
alejándola de su marco (Figura 1).
Utilice una aspiradora para limpiar. Limpie las aspas del ventilador y la
rejilla con un trapo húmedo. NO SUMERJA EN AGUA Y NO PERMITA QUE
GOTEE AGUA EN LA CARCASA DEL MOTOR. NO UTILICE QUÍMICOS COMO
DILUYENTE DE PINTURA O GASOLINA PARA LIMPIAR EL VENTILADOR O
LAS ASPAS (Figura 2, Figura 3).
Para volver a montarla, vuelva a alinear cuidadosamente la rejilla con el
marco y gire en el sentido de las agujas del reloj (Figura 4).
Para guardar el ventilador, límpielo con cuidado según las instrucciones.
Coloque el ventilador en el embalaje original para su almacenamiento o
cúbralo para protegerlo del polvo. Almacénelo en un lugar fresco y seco.
cubierta
frontal
aspiradora
Cubierta
de rejilla
frontal
FIGURA 1 FIGURA 2
FIGURA 3 FIGURA 4
Retiro de la rejilla frontal para su limpieza:

Este producto tiene una garantía de 1 año para el propietario original, a
partir de la fecha de compra, ante defectos del material y utilización en
condiciones de uso y servicio normales. Si su producto resultare
defectuoso en el plazo de un año a partir de la fecha de compra,
devuelva la pieza o unidad defectuosa, con el envío prepagado, junto
con una explicación del reclamo a Ozeri. Empaque su producto con
cuidado para evitar daños en el transporte. En virtud de esta garantía,
Ozeri reparará o reemplazará cualquier producto que resulte defectuoso
debido a una falla de fabricación. Esta garantía se extiende únicamente
al uso personal y no se extiende a ningún producto que haya sido utilizado
para uso comercial, uso de alquiler o uso no previsto. No hay más
garantías que las establecidas expresamente en el presente documento.
Esta garantía no es transferible. Ozeri no se hace responsable en modo
alguno de los daños, pérdidas o inconvenientes causados por fallos en
el equipo debido a la negligencia del usuario, abuso o uso no conforme
con la Guía del usuario o cualquier seguridad adicional, o por no seguir
las advertencias incluidas en los materiales del producto. Además, Ozeri
no se hace responsable de los daños incidentales o consecuentes de
cualquier naturaleza que resulten del uso de este producto y cualquier
responsabilidad no superará el precio de compra del producto.
Esta garantía le otorga derechos legales específicos. También puede
tener otros derechos que varían de un estado a otro.
ESTA GARANTÍA NO SE APLICA A LO SIGUIENTE:
- Daños por accidente, mal uso, abuso, alteraciones o vandalismo.
- Mantenimiento inapropiado o inadecuado.
- Daños en tránsito por devolución.
- Uso no supervisado por parte de niños menores de 18 años.
Servicio de atención al cliente de Ozeri:
Teléfono: 1-877-299-1296
(Ozeri® y sus filiales no asumen ninguna responsabilidad por los daños causados por el uso
del producto que no sea el previsto o el indicado anteriormente y en el manual de usuario).
INFORMACIÓN DE LA GARANTÍA
This manual suits for next models
1
Table of contents
Languages:
Other Ozeri Fan manuals
Popular Fan manuals by other brands

Wolf
Wolf CRL Series Installation and maintenance instructions

NuTone
NuTone QTXEN110H instructions

Akai
Akai FS40-U3B instruction manual

Air Creatve
Air Creatve Classic Line 925 installation guide

Rinnai
Rinnai ENERGYSAVER RHFE-308FTR installation manual

Ruck Ventilatoren
Ruck Ventilatoren EMIX Series Assembly instruction

Ryobi
Ryobi P3300 Operator's manual

Scarlett
Scarlett SC-377 instruction manual

Westinghouse
Westinghouse WSFHVMF12CH instruction manual

Vents
Vents VK Series user manual

Larson Electronics
Larson Electronics IND-HVAC-DTW-UVC-R1-SS Series Instruction guide

Home Decorators Collection
Home Decorators Collection BETHEL 52-BETL Use and care guide