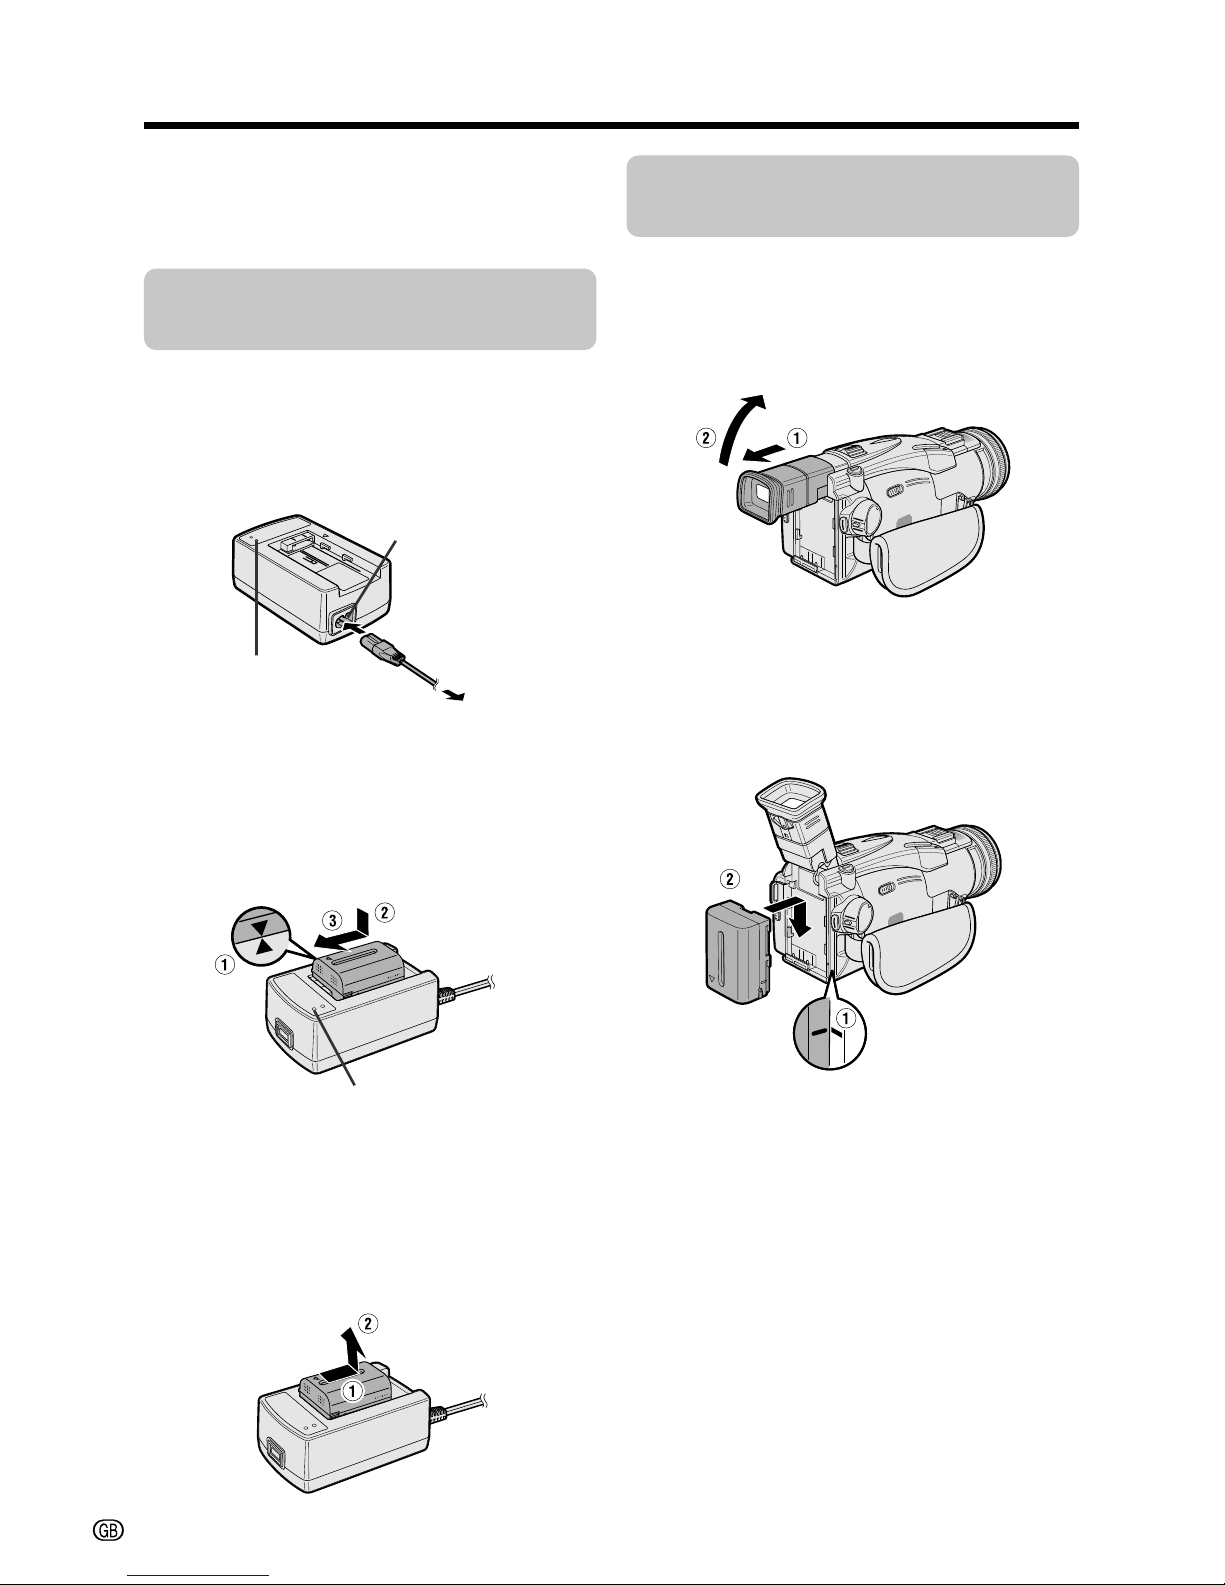
vi
DV Technology
Digital video (DV) is a revolutionary technology
that enables recording and playback of high
quality images with the use of special digital
features previously unavailable with conven-
tional analog formats.
DV and conventional video cassette
tapes
There are two kinds of DV-format video
cassette tapes: the Mini DV cassette and the
larger DV cassette used for extended playback
and recording. This camcorder only operates
with Mini DV cassettes. DV cassettes cannot
be used. Be sure to use Mini DV cassettes with
the imark.
This product incorporates copyright
protection technology that is protected by
method claims of certain U.S. patents and
other intellectual property rights owned by
Macrovision Corporation and other rights
owners. Use of this copyright protection
technology must be authorized by
Macrovision Corporation, and is intended
for home and other limited viewing uses
only unless otherwise authorized by
Macrovision Corporation. Reverse engineer-
ing or disassembly is prohibited.
Mini DV cassette DV cassette
8 mm cassette VHS cassette Beta cassette
Note:
• This camcorder reproduces the highest picture
quality when used with an ME tape. It is
recommended you use an ME tape for high-
quality recording and playback.
8 mm, VHS, and Beta cassettes cannot be
used for playback or recording with this
camcorder.
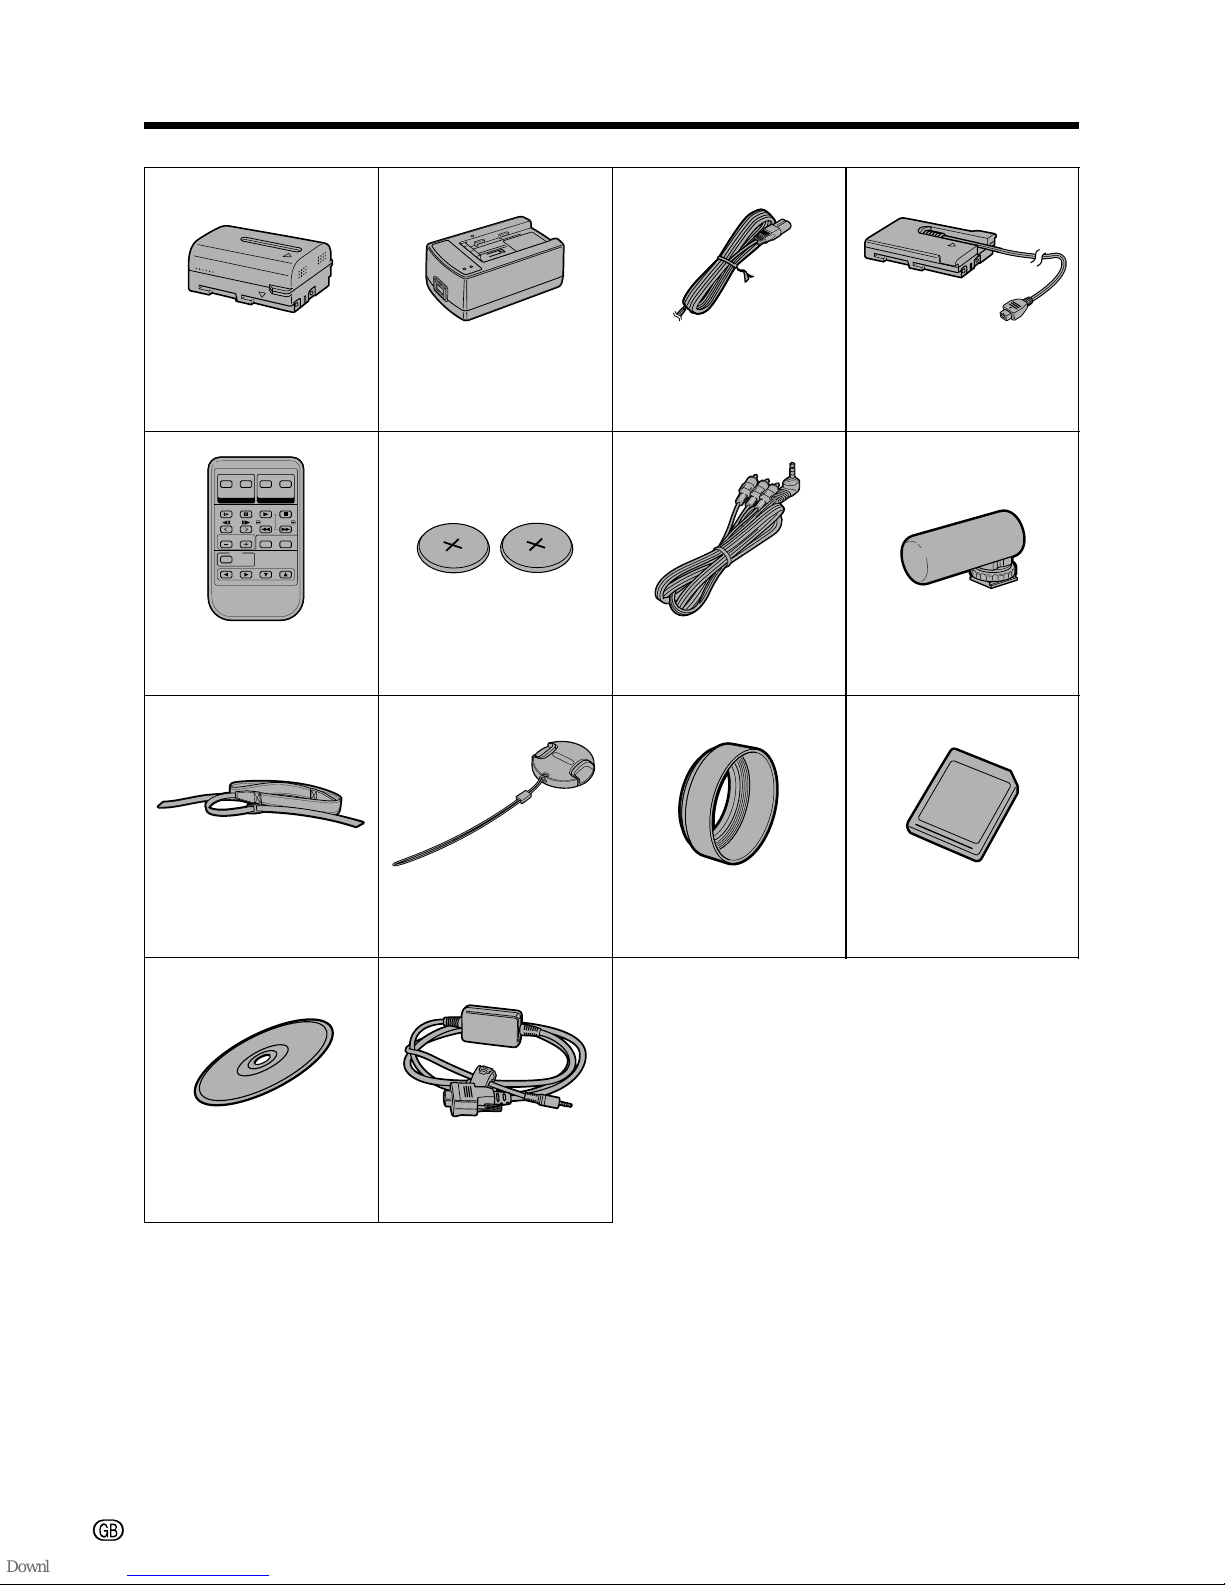
SD Memory Card and
MultiMediaCard
SD Memory card and MultiMediaCard are
compact recording media just 32 mm long and
24 mm wide which support the needs of the
digital network society where music, images,
games and various other provider services are
offered.
• You can use an SD Memory Card (supplied)
and a MultiMediaCard (commercially
available) for storing still images with this
camcorder, not a SmartMedia\card or
Memory Stick\media.
• An SD Memory Card is superior to a
MultiMediaCard in terms of copyright
protection functions and high speed transfer.
• The SD Memory Card is compatible with
MultiMediaCard, and data stored on
MultiMediaCard can be used with the SD
Memory Card.
Note:
• This camcorder is verified to work with the
following card types and capacities.
CSD Memory Card: 128 MB or less
CMultiMediaCard: 64 MB or less
Memory Stick\media
SD Memory Card MultiMediaCard
SmartMedia\card
About Your Camcorder