manuals.online logo
Brands
  1. Home
  2. •
  3. Brands
  4. •
  5. Panasonic
  6. •
  7. Camcorder
  8. •
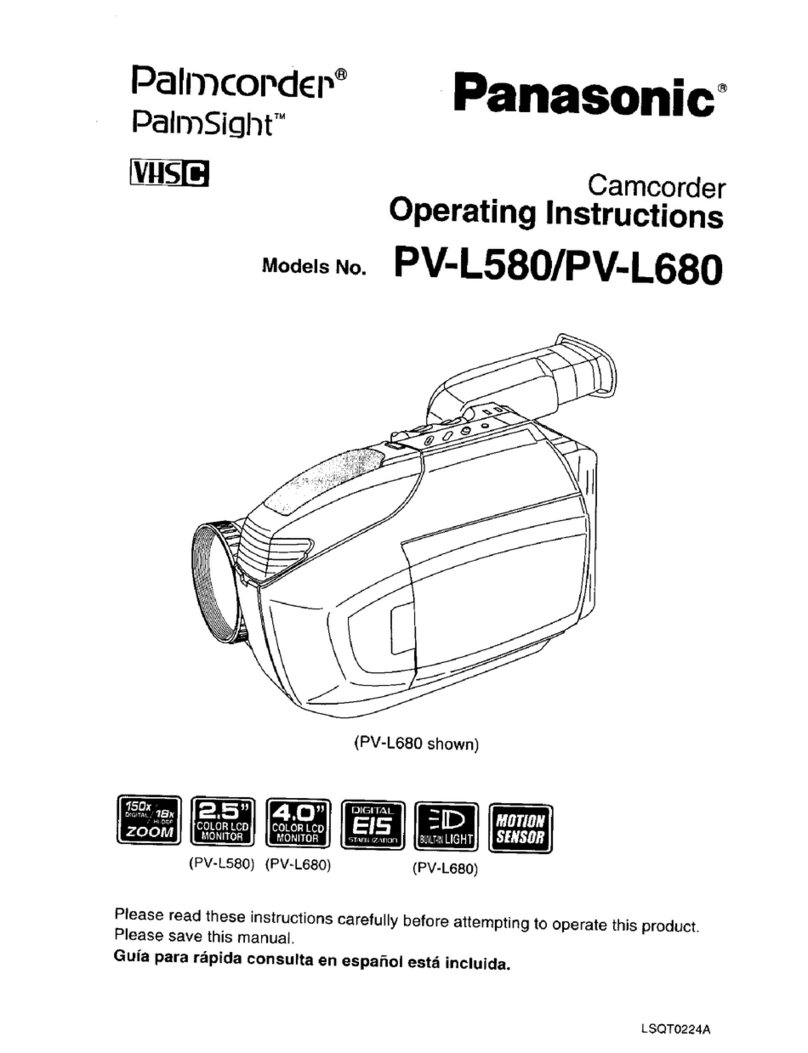
  9. Panasonic Palmcoder PV-L757 User manual

Panasonic Palmcoder PV-L757 User manual

ORDER No.MKW9703M312
B15 (U.S.A.)
B4 (CANADA, PUERTO RICO)
ServiceManual
Compact VHS Camcorder
Panasonic'
PalmcordcP'! l
PV-L657
Consists of PV-L657D /PV-A17
PV-L757
Consists of PV-L757D /PV-A17
Models : PV-L657D
PV-L757D
Model : PV-A17
MODEL
ITEM SPECIFICATION 1 2
Power Source : Compact VHS Camcorder : DC 6V (_) O
Consumption : Compact VHS Camcorder : 6V I)(3 10W (Max. 13W)
V'KleORecording Head : 4 rotary heads plus flying erase head. helical scanning system
System Signal - to- Noise Ratio : SP : more than 43dB, SLP : More than 41dB
Hodzontal Resolution (Color /Monochrome) Recording :more than 300 lines, (_) (_
Playback : more than 230 lines
Audio Head : Normal Mono : 1 stationary head
MIC Input Level (M3 type) -70dB (_)
Frequency Responoe : Normal Mono : SP : 100Hz -8kHz, SLP : 100Hz -5kHz
Signal -to -Noise Ratio : SP : more than 42dB, SLP : more than 40dB
iVideo Signal EIA Standard (525 lines, 60 fields) NTSC color signal (_ O
SP : 1 - 5 /16 i.p.s. (33.35mm /sec), SLP : 7 /16 i.p.s. (11.125mm /sec)
Record /Playback "13me:SP : Max. 40min, SLP :Max. 120rain, with TC-40 Tape (_) (_)
Tape Speed FF Time : Less than 8min. 14sec. (TC-4O Tape)
REW Time : Less than 8min. 19sec. (TC-40 Tape)
Tape Format Tape width O.5inch (12.7mm) high density tape _
1. PV-L657D (Compact VHS Camcorder) Designs and Specifications are subject to change without notice.
2. PV-L757D (Compact VHS Camcorder) (Please see reverse side.)
Panasonico ©1997 Matsushita Kotobuki Electronics Industries LTD.
All rights reserved. Unauthorized copying and distribution
is aviolation of law.
k.,e,mu_ Irh, r_,e,xi_n_=
Tally
TAPE
EJECT
WARNING:
• Do not leave the Pslmcorder with the EVF
aimed directly at the sun as this may cause
damage to the internal parts of the EVF.
"(55
• When your Pelmcorder is aimed at excessively
bright objects, or bright lights, a vertical bar
may appear in the picture. This is a normal
charactedstic of the CCD pick-up device. Try
to avoid this when possible.
Before you begin...
•Connect the Pslmcorder to s power eoume.
•Insert s cassette with record tab.
Set the POWER switch to CAMERA.
The built-in Lens Cover opens.
EVF
PAUSE1
Record/Pause
mode.
With the Vlewfincler Eye Cup
against your eye, adjust the Vision
Adjustment Control to your eye-
sight.
SIIcle the TAPE SPEED Selector
to SP or SLP.
Press RECORD/PAUSE to start
recording.
The Tally Lamp and REC Indicatorare
titdudngrecording.
IRECORD
Press the RECORD/PAUSE again to
the recording.
Set the Power switch to OFF after
recording isfinished.
• To remove the cassette
In Record/Pause mode, slide the TAPE EJECT
switch.
I! _/ni,,Uih a Ji[||| 7inn illmla
|
The LCD (Uquid Crystal Display) monitor
can be used while recording.
OFF
max.
PHONE (earphone) j min.
Before you begin...
• Connect the Palmcorder to a power source.
Press the LCD-OPEN button to unlock
the LCD monitor.
Swing the LCD monitor fully open
and adjust the angle.
• Rotating the LCD monitor while it is
only partially open may block the
cassette door and cause damage to
the Palmcorder body. p
LCD AUTO ON [_
•Set the LCD-POWER switch to
AUTO ON. The LCD monitor will then m
turn on/off according to the (_t
Palmcorder's POWER switch setting. (")
•When the LCD monitor is turned ON,
the Viewfinder automatically turns =[3
OFF. _l
•If the LCD monitor is rotated 180 ° to B
face the same direction as the lens/ O
subject, the Viewfinder turns back on Z
allowing both you and the subject to
monitor the recording. 0
LCD POWER OFF "!1
• Set the LCD-POWER switch to OFF 0
to have Vlewflnder on only.
• When the LCD monitor is completely 0
closed, It will shut off automatically to Z
save power even if the LCD-POWER "1
switch is left on. ;:0
, When the LCD monitor tums off, the O
_Viewfinder turns on automatically, p
Start recording. O)
Note:
•Using the LCD monitorreduces battery
operatingtime.
•Youcannot monitorthe sound from the speaker
duringrecording.Connect the earphone (M3
type, notsupplied) to PHONE (earphone)jack
and adjustthe volumeofthe earphone using
the VOLUME control.
•Closethe LCD monitorcompletely when not in
use.
.=
(n
i
3
r_m_._worillak,-l...m,A_
m,.'_...Bml_l .m_A Wtt_ru..._,
Whenever the PalmcorderisleftIn RECORD/PAUSE mode for 5 minutes,It willautomati-
callyswitchto Stand-by mode to conserveenergy. Activatingthe Stand-by Quick
Release featureallows you to release the Stand-bymode and resume recordingby
simplypressingthe RECORD/PAUSE button.If thisfeature is notactivated, itIs neces-
saryto tumthe PalmcorderOFF and backon to CAMERA to start recordingagain. The
defaultsettingfromthe factoryisset to theIZIf|l_[,'_r_Jlmode.
Before you begin...
• Conne,:t the Palmoorder to apower source.
• InNrt I csesettl with record tab.
Continue holding down the UP • .h|,,m,.m_,..lwDrlH_mm_
button before and after turning the
POWER ewitch to CAMERA untilthe
STAND-BY RELEASE menu screen is
displayed.
Prssa UP •or DOWN •to select
mrm:Jormammm.
DISPLAY
_TqdkvJ:
B[o]]_l£_Iq IkvJ:1
RECORD/PAUSE
: PtJl&_ VI& IIY
: IRJIH _SR.AY KI!
You can resume recordingfrom Stand-
by mode by pressingthe RECORD/
PAUSE button.
You must setthe POWER switchto
OFF, and then to CAMERA torelease
the Stand-by mode.
Press DISPLAY to set your selection
and exitthisscreen.
If you stoprecordingbut planto resume within24 hours,use the EditStandby featureto
make a smoothtransitionbetween scenes. 1Press RECORD/PAUSE whllo
recording.
Set the POWER swit©h to OFF and
leave the cassette in the Palmcorder.
When ready to resume recording,set
the POWER switch to CAMERA and
press RECORD/PAUSE.
Note:
• If it is going to be longer than 24 hours before
you resume recording, you will need to use the
POWER Switch manual Easy Edit feature described below.
For propercontinuitywhen tapin_lfromthe Stop mode, or after changingthe Battery
Pack.
,("--L ISet the POWER switch to VCR.
2(_ Press REWIND/SEARCH to go
back a few seconds on the tape.
0Press PLAY toreview the picture
on the Vlewfinder.
(_ Press STILL at the locationyou
wishto continueyour recording.
Set the POWER switch to CAMERA.
Press RECORD/PAUSE to continue
recording.
WU/'/IR/ff/V_
FAST
UP •
DOWN •Ifbwlt_1.n ._nlmuac.,
To rapidly locate ascene
Press FAST FORWARD/SEARCH or
REWIND/SEARCH forrapid visualsearch.
Pressagain, or press PLAY to resume
normalspeed.
View aStill Picture
Press STILL tofreeze the picture.
Press again toresumenormalplayback.
Note:
• During se•mh playback, horizont•l noisebars
willappear and there will be no •udio.
•To protectthe tape •nd the video heads, your
P•lmcorder's operating modes will rev•rt as
follows:
STILL _STAND-BY •ft•r 5 minutes.
STANDBY "-_ POWER OFF •fter 5 minutes
when using•Battery Pack.
•When the tape reaches itsend during pl•yb•ck,
or fast forward, it will rewind automatically.
Before you begin...
• Connect the P•lmcorder to •power source.
• Insert a recorded cassette.
Set the POWER switch to VCR.
2(_ Press the REWIND/SEARCH
button to rewind the tape.
_) Press PLAY to start playback.
OPress STOP to stop playback.
Auto Play
When the POWER switch ts set to VCR,
playback will automatically begin if the
record tab has been removed on the
cassette.
Search Speed
Standard Play (SP) Search is about 3 times the
norm•l speed, •nd Super Long Play (SLP)
Search is•bout 9 times the norm•l speed.
Auto Tracking
Continuously analyzes the signal of each
recording for optimum picture quality.
Manual Tracking
To minimize the noise in some recordings,
manual tracking may be necessary.
For Noise in Playback mode:
Press UP •or DOWN •until picture
clears.
Press DISPLAY to return to Auto Tracking.
For Noise in Still mode:
Press UP •or DOWN •until picture
clears.
V-Lock Control (Reduces jitter in Still
mode.)
Press DISPLAY and UP •or DOWN •
until picture is stable.
You can also usethe LCD monitorto
playbackyour recording.
AUTO ON
OFF
Speaker
PHONE (earphone)
Jack
180°
VOLUME
Before you begin,..
•Connect the Palm:order to •power source.
•Insert •roco_lod ram.
•Setthe POWER Iwltoh to VCR.
Press the LCD-OPEN button to unlock
the LCD monitorand swingopen.
2Set the LCD-POWER switch to AUTO
ON. The LCD monitorwillthen tum on/
offaccording tothe Palmcorder's
POWER switchsetting.
• Whenthe LCD monitoristurned ON,
theViewfinderautomatically turns
OFF.
• When notin use, closethe LCD
monitor.(Faces inward)
Playback the tape.
* Adjustthevolumeof the speakeror
earphone(if connected) usingthe
VOLUME control.
Set the LCD-POWER switch to OFF to
have Viewfinderon onlywhen viewingis
finished.
•When the LCD monitoriscompletely
closed,itwillshutoffautomatically to
save powereven ifthe LCD-POWER
switchislefton.
•Whenthe LCD monitor turnsoff,the
Viewfindertums onautomatically.
Note:
•Usingthe LCD monitorreduces battery
operatingtime.
• If you connectthe earphone (M3 type, not
supplied)to PHONE (earphone)jack, the sound
fromthe speakerwill be muted.
_LIEIavlxc[Ii_ FIB:fEIBM rJli_ r_EIAV_
rl, lilFUEI,LLVmZL'iU_.Li_iUlUEnE, L
Your Palmcordermay be connectedto a
TV to playback tapes or to view what you
are recording.
CTV with AUDIONIDEO IN Jacks.
To Audio In
Audio/Vide(
Cable
(Supplied)
To AudloNideo Out
-'rv without AUDIONIDEO IN Jacks.
To Audio/
Video Out
RF Adaptor
(optional) VHF Antenna
CH 3/4 Switch 300 ohm-7S ohm
transformer
(not supplied)
or F Connector
•UHF Ante
vc rv
Selector Jr Back of TV
C,bl, _ J I L
(not supplied) I_ I
To VHF Antenna _J_F_el___l
Terminal
g
Before you begin...
• Connect the Palmcorder to apower source.
Set the POWER switch to VCR for
tape playback.
Or, set to CAMERA to view what your
Palmcorder is recording.
Turn the TV ON and set It to LINE
INPUT.
Check your TV operating instructions.
Note:
If your TV has no VIDEO or AUDIO IN jacks,
select CH 3 or4 on your TV to match the
CH 3/4 switchsettingon the OPTIONAL
PV-RF16 RF Adaptor. Set the VCR/I"V
selector on the RF Adaptor to VCR for
playback.
Stert playback or begin • recording.
If you have connected the
Palmcorder to your TV using the
PV-RF16 RF Adaptor and want to
watch TV only:
Set the POWER switch to OFF onthe
Palmcorder,
Then, set the VCR/'rv Selector on the RF
Adaptor to TV.
Now, turn the TV ON and select a
channel.
"CAW System Installer
This reminder isprovidedto call the CATV
system installer'sattention to Article 820-40
of the NEC in USA (and to the Canadian
Electrical Code inCanada) that provides
guidelines for proper grounding and, in
particular,specifiesthat the cable ground
shallbe connected to the groundingsystem
of the building,as close to the point of cable
entry as practical.
I XnE:.* MLII_i HEdk.._,."--EII'--
Load Detector
Remove the Battery Compartment lid
and Insert the AA size battery.
•Make sure polaritiesam aligned properly.
•When tape loading and unloading time
becomes longer thannormal, battery replace-
mentis necessary.
Turn the Tape Wheel on the
Fcassette In the direction of the
arrow totake up any alack.
Slide the RELEASE button in the
direction of the arrow to open the
PlayPak door.
Insert the _cassette with the
window facing up and to the left.
Then, snap the lid shut.
* Besure the cassette reel area under the
PtayPak is free to tum while loading.
* Allowthe Load Detector to fully retract
before usingthe PlayPak in yourstandard
VHS VCR.
Slide the RELEASE button and walt
for the lid to open.
Hold the PlayPek securely in one
hand. Using your finger, reach through
the hole in the bottom of the PlayPak
Adaptor and push the tape out the top.
rW_l_ L_r_rru Lm
Built*in Twin Capsule
2-Way Microphone System
Built-in Auto
Built-in Lena Cover
Opens automatically when
the Power Switch is set to
CAMERA. Tally Lamp
POWER Lamp
Lightswhen the Power Switch
isset to VCR or CAMERA.
CLOCK SET UP • Button
REWIND/SEARCH Button
PLAY Button
Button
FAST FORWARD/
SEARCH Button
Strap Attachment
Rings
DC IN J
Connector
BATrERY RELEASE
Button Selector
Audio/Video Output Connector
(This connector for use with
supplied AudloNideo cable only.)
STOP Button
Hand Strap
RECORD/PAUSE Button
with REC Lamp
DOWN •Button
(Tracking Control)
MANUALFOCUS
Wheel
POWER Switch
[jl_TmJ|l'_lu
LCD.OPEN button
Volume Control
Earphone Jack (Monaural)
Connecttheearphone (M3 type,not
tothe earphonejack for
monitoringthe soundduringplaybackor
recording.
LCD-POWER Switch
Built-In Speaker
LCD (Liquid CryMal
Display) Monitor
PUSH TO CLOSE
Button
[lffff/_IL_r/'/I
Vision Adjustment
Control
Tripod Mounting Hole
Clock Battery Tray m n'tz'q,mrns
COLOR TINT
G
*Tint Control
Adjusts the tint for natural
fleshtones.
*Color Control
Adjuststhe color intensity.
Bdght Control
Adjuststhe brightness
ofthe picture.
*Note: These controls have been set at
the factory. ItIs notnecessarytoadjust
these controlsunder normal
clmumstances.But, shouldit become
necessary, be carefulto make the
adjustmentwith a small,slender
screwdriverso as notto damage the
miniature control.
DIGITAL ZOOM Button SECURITY MODE Button
MODE SEL Button HIGH SPEED
POWER ZOOM Switch TITLE Button SHUTrER Button
LIGHT Switch
(EVF)
BACKLIGHT Button
FADE Button
EIS Button
COLOR Button
Button
(Auto Tracking)
TAPE EJECT Switch
NEG/POS Button
*Note: Thiscontrol hasbeen setat the
factory.It is not necessaryto adjustthis
controlunder normalcircumstances.But,
should it become necessary, be careful
to makethe adjustmentwith s small,
*Bright Control slenderscrewdriverso as nottodamage
Adjustthe brightnessof the miniaturecontrol.
the picture. EYEPIECE RELEASE button
CHARGE Lamp
POWER Lamp
VCR DC OUT Battery Charging
Connector Compartment
BATFERY REFRESH
Button
AC Power Cord
CAUTION:
This unitwilloperate on 110/120/
220/240V ACoAnAC plugadaptor
may be requiredfor voltagesother
than 120V AC. Please contact
eithera local orforeign electrical
partsdistributorforassistancein
selectingan aitemata AC plug.
We recommendusingthe
accessorypowerplugadaptor
(VJSS0070) in an area whichhas
specialAC outlets.

This manual suits for next models

1

Other Panasonic Camcorder manuals

Panasonic HC-V720P Installation and service instructions

Panasonic

Panasonic HC-V720P Installation and service instructions

Panasonic NV-VX57A User manual

Panasonic

Panasonic NV-VX57A User manual

Panasonic AGDVC20P - 3 CCD DV CAMCORDER User manual

Panasonic

Panasonic AGDVC20P - 3 CCD DV CAMCORDER User manual

Panasonic NV-DS99EN User manual

Panasonic

Panasonic NV-DS99EN User manual

Panasonic Palmcoder Multicam PV-GS400 User manual

Panasonic

Panasonic Palmcoder Multicam PV-GS400 User manual

Panasonic PV-DV103-K User manual

Panasonic

Panasonic PV-DV103-K User manual

Panasonic NV-VZ14PN User manual

Panasonic

Panasonic NV-VZ14PN User manual

Panasonic HC-V720 Technical specifications

Panasonic

Panasonic HC-V720 Technical specifications

Panasonic NV-MX1B User manual

Panasonic

Panasonic NV-MX1B User manual

Panasonic SDR-H80P User manual

Panasonic

Panasonic SDR-H80P User manual

Panasonic HDC-HS900K User manual

Panasonic

Panasonic HDC-HS900K User manual

Panasonic AJ-D400 User manual

Panasonic

Panasonic AJ-D400 User manual

Panasonic HC-V550 User manual

Panasonic

Panasonic HC-V550 User manual

Panasonic AG-DVC60P User manual

Panasonic

Panasonic AG-DVC60P User manual

Panasonic AGHPX255 User manual

Panasonic

Panasonic AGHPX255 User manual

Panasonic SDR-S26P User manual

Panasonic

Panasonic SDR-S26P User manual

Panasonic AG-HPX300 User manual

Panasonic

Panasonic AG-HPX300 User manual

Panasonic HC-V550P User manual

Panasonic

Panasonic HC-V550P User manual

Panasonic HC-V550 User manual

Panasonic

Panasonic HC-V550 User manual

Panasonic Palmcorder MultiCam PV-DV852 User manual

Panasonic

Panasonic Palmcorder MultiCam PV-DV852 User manual

Panasonic PV-DV52 User manual

Panasonic

Panasonic PV-DV52 User manual

Panasonic AG-HVX200PJ User manual

Panasonic

Panasonic AG-HVX200PJ User manual

Panasonic HC-X1000PP User manual

Panasonic

Panasonic HC-X1000PP User manual

Panasonic Palmcorder PV-L50 User manual

Panasonic

Panasonic Palmcorder PV-L50 User manual

Popular Camcorder manuals by other brands

LG LV300N-B Color Video Camera

LG

LG LV300N-B Color Video Camera

Sony PJ50V operating guide

Sony

Sony PJ50V operating guide

Sony XDCAM PMW-160 Service manual

Sony

Sony XDCAM PMW-160 Service manual

Sony CCX-Z77 operating instructions

Sony

Sony CCX-Z77 operating instructions

Coby SNAPP CAM4000 instruction manual

Coby

Coby SNAPP CAM4000 instruction manual

JVC GRD72US - MiniDV Digital Camcorder Software Installation and USB Connection Guide

JVC

JVC GRD72US - MiniDV Digital Camcorder Software Installation and USB Connection Guide

Canon ETT 555 Basic use

Canon

Canon ETT 555 Basic use

Teknofun 811142 user manual

Teknofun

Teknofun 811142 user manual

Sony HANDYCAM DCR-TRV330 operating instructions

Sony

Sony HANDYCAM DCR-TRV330 operating instructions

JVC GZMC200 - Everio 2MP 4GB Microdrive... user guide

JVC

JVC GZMC200 - Everio 2MP 4GB Microdrive... user guide

Hitachi VME-573LA - Camcorder instruction manual

Hitachi

Hitachi VME-573LA - Camcorder instruction manual

Sony CCD-TRV15 operating instructions

Sony

Sony CCD-TRV15 operating instructions

JVC GR-AX660 instructions

JVC

JVC GR-AX660 instructions

Sony HDR-CX110 - High Definition Flash Memory Handycam... Guia de operaciones

Sony

Sony HDR-CX110 - High Definition Flash Memory Handycam... Guia de operaciones

Hitachi VM-7380E Service manual

Hitachi

Hitachi VM-7380E Service manual

Sony PMW-500 Features

Sony

Sony PMW-500 Features

Sony HVR-V1U operating guide

Sony

Sony HVR-V1U operating guide

Everet EVP220N user manual

Everet

Everet EVP220N user manual

manuals.online logo
manuals.online logoBrands
  • About & Mission
  • Contact us
  • Privacy Policy
  • Terms and Conditions

Copyright 2025 Manuals.Online. All Rights Reserved.