manuals.online logo
Brands
  1. Home
  2. •
  3. Brands
  4. •
  5. Panasonic
  6. •
  7. CD Player
  8. •
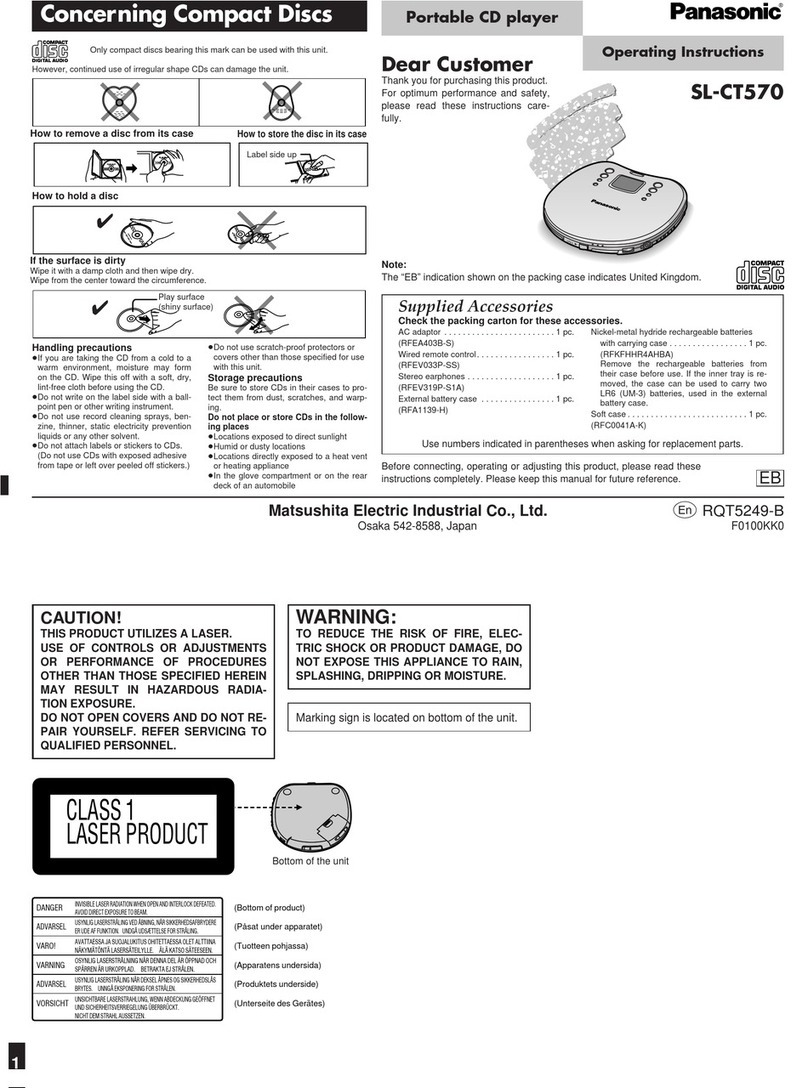
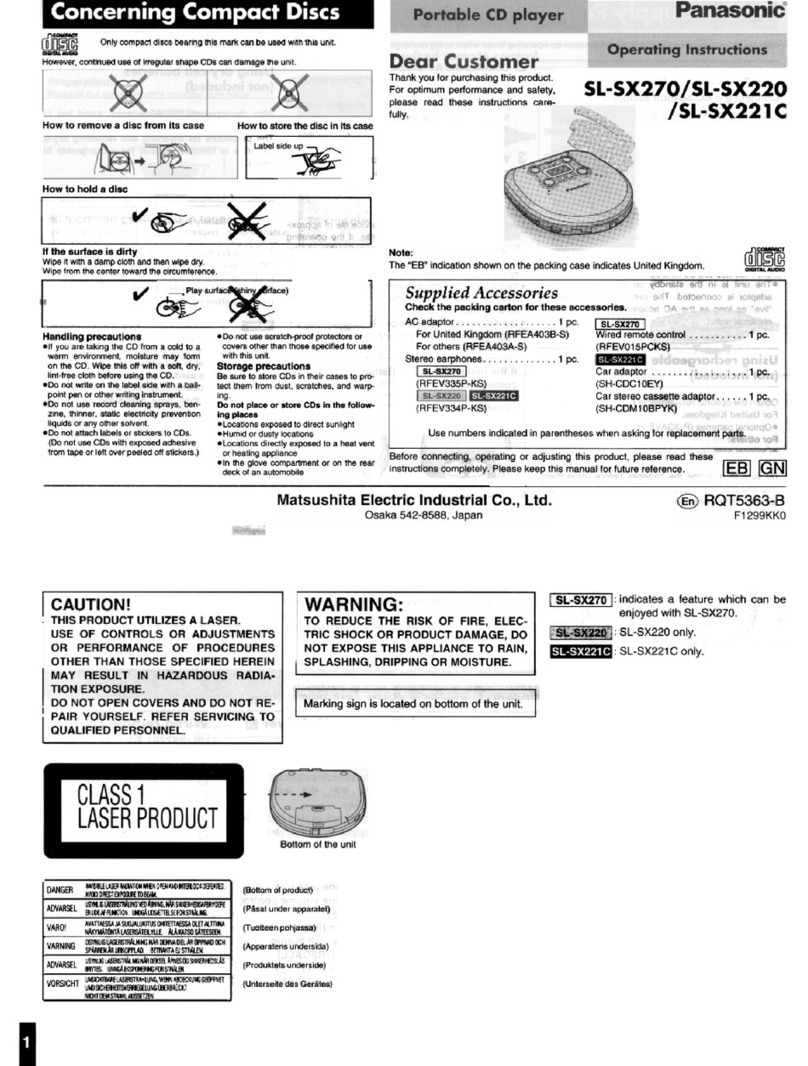
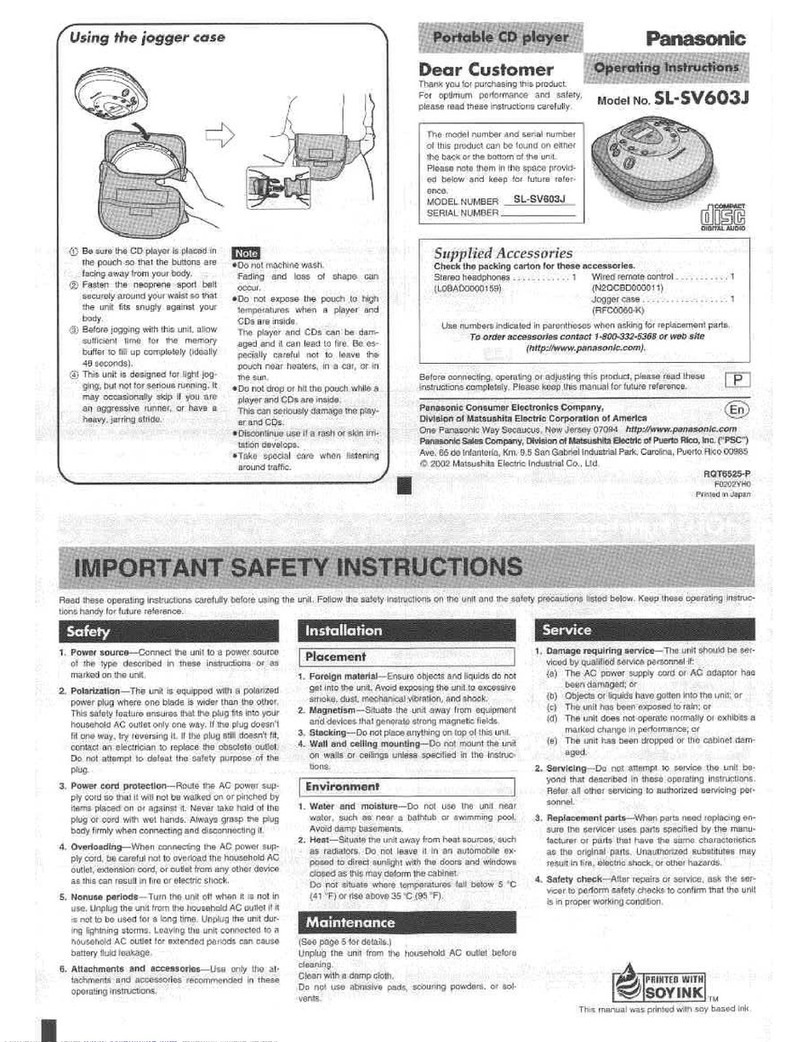
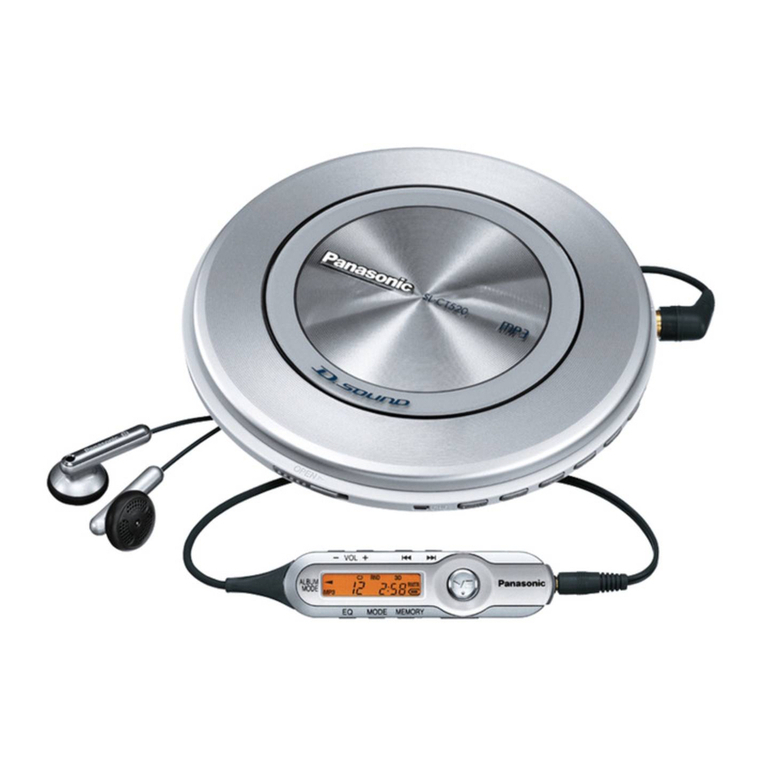
  9. Panasonic RXES25 - RADIO CASSETTE W/CD User manual

Panasonic RXES25 - RADIO CASSETTE W/CD User manual

Panasonic °
.... '_-k -JO _Js f
Portable Stereo CD System
Operating Instructions
ModetNo.RX-ES25
RX-ES20
DIGITAL AUO|O
,_Befo_-econnecting, operating or ad usting this product, please read these
irt_t;'ilt,ti_ne ,'ompletely. Please keep this manual for future reference.
[_ [_ RQT5183-1P
uear cuslomer
m
Thank you for purchasing this product.
For optimum performance and safety, please read these instructions
carefully.
The model number and serial number of this product can be
found on either the back or the bottom of the unit.
Please note them in the space provided below and keep for
future reference•
MODELNUMBER
SERIALNUMBER
User memo:
DATE OF PURCHASE
DEALER NAME
DEALER ADDRESS
TELEPHONENUMRER
Supplied Accessories
CAUTION!
THIS PRODUCT UTILIZES A LASER.
USE OF CONTROLS OR ADJUSTMENTS OR PERFORM-
ANCE OF PROCEDURES OTHER THAN THOSE SPECI-
FIED HEREIN MAY RESULT IN HAZARDOUS RADIATION
EXPOSURE.
DO NOT OPEN COVERS AND DO NOT REPAIR
YOURSELF. REFER SERVICING TO QUALIFIED
PERSONNEL.
CAUTION:
TO PREVENT ELECTRIC SHOCK MATCH
WIDE BLADE OF PLUG TO WIDE SLOT,
FULLY INSERT.
WARNING:
TO REDUCE THE RISK OF FIRE, ELECTRIC
SHOCK OR PRODUCT DAMAGE, DO NOT
EXPOSE THIS APPLIANCE TO RAIN,
SPLASHING, DRIPPING OR MOISTURE.
Please check and identify the supplied accessories.
Use numbers indicated in parentheses when
asking for replacement parts.
(Only for U.S.A.)
To order accessories contact 1-800-332-5368 or
web site (http://www.panasonic.com).
[] AC power cord (polarized) .................................................... tpc.
(RJA0065-A)
The included AC power supply cord is for use with this unit only.
Do not use it with other equipment.
[] Remote control transmitter (EUR648251) ............................ 1pc.
Table of Contents Precautions
Supplied Accessories .............................................. 2
Precautions ............................................................... 3
Use of Batteries ........................................................ 5
Power Sources ......................................................... 6
Memory Batteries ..................................................... 6
Location of Controls ................................................ 7
The Remote Control ................................................. 8
Setting the Clock ...................................................... 9
Using Headphones ................................................... 9
im-mm ,j
The Radio ................................................................ 10
Normal toning ................................................................ 10
Using auto scan ............................................................. 10
Preset tuning .................................................................. 11
CDs .......................................................................... 12
Other modes of play ...................................................... 13
Cassettes ................................................................ 15
Tips on Recording .................................................. 15
Recording CDs ....................................................... 16
Normalrecording ........................................................... 16
ALL-REC........................................................................ 17
1-REC ............................................................................ 18
Recording the Radio .............................................. 18
Sound Quality ......................................................... 19
3-D sound with the Sound Virtualizer ................... 19
The Play and Record Timer ................................... 20
The Sleep Timer ...................................................... 21
The Timer Fader ...................................................... 21
Maintenance ........................................................... 21
Troubleshooting ..................................................... 22
Product Service ...................................................... 23
Specifications .......................................... Back cover
THE FOLLOWING APPLIES ONLY IN THE U.S.A.:
CAUTION:
This equipment has been tested and found to comply with
the limits for a Class B digital device, pursuant to Par'( 15 of
the FCC Rules.
These limits are designed to provide reasonable protection
against harmful interference in a residential installation. This
equipment generates, uses and can radiate radio frequency
energy and, if not installed and used in accordance with the
instructions, may cause harmful interference to radio
communications. However, there is no guarantee that inter-
ference will not occur in a particular installation. If this equip-
ment does cause harmful intederence to radio or television
reception, which can be determined by turning the equ{p-
ment off and on, the user is encouraged to try to correct the
interference by one of the following measures:
•Reorient or relocate the receiving antenna.
elncrease the separation between the equipment and re-
ceiver.
eConnect the equipment into an outlet on a circuit different
from that to which the receiver is connected.
eConsult the dealer or an experienced radio/TV technician
for help.
Any unauthorized changes or modifications to this equip-
ment would void the user's authority to operate this device.
This device complies with Part 15 of the FCC Rules. Opera-
tion is subject to the following two conditions: (1) This device
may not cause harmful interference, and (2) this device must
accept any interference received, including interference that
may cause undesired operation.
The following mark and symbols are located on the bottom of
the unit.
CAUTION
CAUTION: TO REDUCETHE RISK OF ELECTRIC
SHOCK, DO NOT REMOVE SCREWS.
NO USER-SERVICEABLE PARTS
INSIDE.
REFER SERVICING TO QUALIFIED
SERVICE PERSONNEL.
The lightning flash with arrowhead symbol, within
,_ an equilateral triangle, is intended to alert the user
• _1_ to the presence of uninsulated "dangerous voltage"
_, within the product's enclosure that may be of suffi-
i,_l, cient magnitude to constitute a risk of electric shock
to persons.
,_The exclamation point within an equilateral triangle
is intended to alert the user to the presence of
important operating and maintenance (servicing)
instructions in the literature accompanying the ap-
pliance.
II
ul
18
Ib
et
I)
m
Before using this unit please read these operating instructions care-
fully• Take special care to follow the warnings indicated on the unit
itself as well as the safety suggestions listed below.
Afterwards keep them handy for future reference.
1. Power Source--The unit should be connected to power supply
only of the type described in the operating instructions or as
marked on the unit.
2. Polarization--If the unit is equipped with a polarized AC power
plug (a plug having one blade wider than the other), that plug
will fit into the AC outlet only one way. This is a safety feature. If
you are unable to insert the plug tully into the outlet, try revers-
ing the plug. If the plug should still fail to fit, contact your eleCtri-
clan to replace your obsolete outleL Do not defeat the safety
purpose of the polarized plug.
3. Power Cord Protection--AC power supply cords should be
routed so that they are not likely to be walked on or pinched by
items placed upon or against them• Never take hold of the plug
or cord if your hand is wet, and always grasp the plug body
when connecting or disconnecting it.
4. Nonuse Periods--When the unit is not used, turn the power
off. When left unused for a long period of time, the unit should
be unplugged from the household AC outlet•
Placement ]
1. Ventilation--The unit should be situated so that its location or
position does not interfere with its proper ventilation. Allow
10 cm (4") clearance from the rear of the unit.
2. Foreign Material--Care should be taken so that objects do not
fatt into and liquids are not spirted into the unit. Do not subject
this unit to excessive smoke, dust, mechanical vibration, or
shock.
3. Magnetism--The unit should be situated away from equipment
or devices that generate strong magnetic fields.
4. Stacking--Do not place heavy objects, other than system com-
ponents, on top of the unit.
5. Surta_e--Piace the unit on aflat, level surface.
6. Carts and Stands--The unit should be used only with acart or
stand that is recommended by the manufacturer. A
The unit and cart combination should be moved
with care. Quick stops, excessive force, and un-
even surfaces may cause the unit end cart com-
bination to overturn.
7. Wall or Ceiling Mounting--The unit should not be mounted to
a wall or ceiling, unless specified in this operating instructions.
Clean the cabinet, panel and controls with a soft cloth lightly moist-
ened with mild detergent solution•
Do not use any type of abra_ve pad, scouring powder or solvent
such as alcohol or benzine.
Environment
1. Water and Moisture--Do not use this unit near water--for ex-
ample, near a bathtub, washbowl, swimming pool, or the like.
Damp basements should a_sobe avoided.
2. Condensation--Moisture may form on the lens in the following
conditions...
eimmediately after aheater has been turned on.
ein a steamy or very humid room•
ewhen the unit is suddenly moved from a cold environment to a
wanTi one.
If moisture forms inside this unit, it may not operate propedy. To
correct this problem, turn on the power and wait about one hour
for the moisture to evaporate.
3, Heat--The unit should be situated away from heat sources
such as radiators and the _ike. It also should not be placed in
temperatures less than 5°C (41°F) or greater than 35°C (95°F).
1. Damage Requiring Service--The unit should be serviced by
qualified service personnel wdee:
(a) The AC power supply cord or the plug has been damaged; or
(b) Objects have fallen or liquid has been spilled into the unit; or
(c) The unit has been exposed to rain; or
(d) The unit does not appear to operate normally or exhibits a
marked change in performance; or
(e) The unit has been dropped, or the enclosure damaged.
2. Servicing--The user should not attempt to service the unit be-
yond that described in the operating instructions. All other
servicing should be referred to an autbedzed service personnel.
For the address of an authorized servicenter:
In the U.S.A. 1.800-211-7262 or web site
(http://www.panasonic.com)
In Canada 905-624-5505 or web site
(www.panasonic.ca)
@
Selecting fine audio equipment such as the unit you've just pur-
chased is only the start of your musical enjoyment. Now it's time to
consider how you can maximize the fun and excitement your equip-
ment offers. This manufacturer and the Electronic Industdes Asso-
ciation's Consumer Electronics Group want you to get the most out
of your equipment by playing it at asafe level. One that lets the
sound come through loud and clear without annoying bladng or dis-
todion--and, most importantly, without affecting your sensitive
hearing.
We recommend you to avoid prolonged exposure to excessive
noise.
Sound can be deceiving. Over time your hearing "comfod level"
adapts to higher volumes of sound. So what sounds "normal" can
actually be loud and harmful to your headng.
Guard against this by setting your equipment at a safe level
BEFORE your headng adapts.
To establish a safe level:
•Start your volume control at a low setting.
•Slowly increase the sound until you can hear it comfortably and
clearly, and without distortion.
Once you have established a comfortable sound level:
•Set the dial and leave it there.
Taking aminute to do this now will help to prevent headog damage
or loss in the future. After all, we want you listening for a lifetime.
• if this unit is not used for a long period of time or is used
only from an AC power source, remove all the batteries to
prevent potential damage due to possible battery leakage.
• Align the poles (+ and -) propedy when inserting the batteries.
• Do not mix old and new baffedes or different types of battedes.
• Do not recharge ordinary dry cell battedes.
• Do not heat or disassemble the batteries. Do not allow them to
contact flame or water.
• Do not keep together with metallic objects such as necklaces.
• Do not use rechargeable type batteries.
• Do not use batteries if the covering has been peeled off.
Mishandling of batteries can damage other items, cause damage to
the unit, and may cause a fire through short-circuiting or electrolyte
leakage.
If electrolyte leaks from the batteries, consult your dealer.
Wash thoroughly with water if electrolyte comes in contact with any
part of your body.
|
q}
==
u_
m
_p Household AC outlet
(AC 12_ 60Hz)
o_w_;rcor!nduded)
(R20/LR20, O, UM-1) .__
1 2 4 3 J_--_ Inner row
0oterrow
Power Sources
Connect the AC power cord.
Conserving power
The unit consumes 3.1W for RX-ES25 and 2.1W for RX-ES20
even when it is turned off with [_)]. To save power when
the unit is not to be used for a long time, unplug it from the house-
ho_d AC outlet. Remember to reset the radio stations and any other
memory items before using the unit again if you haven't inserted
memory batteries.
Disconnect the AC power cord from the unit to operate on battery
power•
The remote control cannot turn the unit on when batteries are used.
[] Removing the batteries I
Open the battery cover, insert a finger into the hole in the bottom of
the unit and push out.
I I
"_J" flashes on the display when the batteries are running down.
Then, the unit turns itself off and displays "U0f".
Replace all the batteries with new ones.
m
Memory batteries retain memory (clock/timer/CD/radio settings)
during power supply interruption.
These batteries do not power the unit.
Replacing the batteries ]
•The memory battebes last about one year.
• Connect the unit to AC power before replacing the batteries.
• Extend the memory battery life by always pressing [_'_8t_WA]
to turn the unit off before disconnecting the unit from the AC
power source or replacing the power batteries.
[] Removing the batteries I
Lift the negative end of the number 4 battery to remove batteries.
®® ® ® ®
Number Designation Reference Page
(_ Standby/on switch (F_Uff_)
Pressto switchtheunitfrom ontostandbymodeorviceversa.In
standby mode,theunitisstillconsumingasmallamount ofpower
(_ Preset equalizer button (PRESET EQ) ..................... 19
(_ Play timer/record timer button
(_)PLAY/REC) ............................................................. 20
(_ Clock/timer button (CLOCK/rIMER) .................... 9, 20
Volume control buttons (+,-VOLUME) ....... 10, 12, 15
_) Display panel
Time adjust/preset channel select/CD track select dial
(TIMEJPRESETTUNE --CD SKIP -) ........ 9, 11, 12, 20
(_ Remote control signal sensor (SENSOR) ................. 8
(_ Speaker
These speakers do not have magnetic shielding. Do not place
them near televisions, personal computers or other devices
easily influenced by magnetism.
Number Designation Reference Page
Band button (TUNER BAND) .............................. 10, 11
CD play/pause button (_/11CD) ................................ 12
(_ CD recording mode button (CD REC MODE) .... 17, 18
CD program/clear, tuner preset button
(-MEMORY - CLEAR) .......................................... 11, 14
CD tray
_) Tuning/CD search buttons
(REW/-/<1<1, IH_/+ IFF) .............................. 10,12
CD mode select/stop button (11TAPFJCD) ........ 12, 13
(_ Preset channel select/CD track select dial
(TIME/PRESET TUNE _CD SKIP _)................. 11, 12
CD tray open/close button (--_CD) ........................... 12
Number Designation Reference Page
Deck eject button (& DECK) ..................................... 15
Record/record pause button (e/ll) .............. 16, 17, 18
Cassette play button (1_ TAPE) ................................ 15
Tape mode select/stop button (11TAPE/CD) ..... 15, 16
_:_ Deck
Rewind/fast-forward buttons
(REW/-/<1<1, IHD._/+/FF) .................................... 15
Q
•, • i
O
tit
e_
".3
O-
@@-
@-
O
f
f
0--®
45 6 _10
7 8 9 0
-@@
of© & -®®
VOLUME
R6, AA, UM-3
SENSOR
30°30°
Transmissioo
window
Number Designation Reference Page
(_ Sleep timer button (SLEEP) ....................................... 21
Numbered buttons .......................................... 11, 13, 14
FM modeJBP button (FM MODE/BP) ................... 10, 18
Tape counter reset button (C-RESET) ....................... 15
Sound virtualizer button (S.VIRTUALIZER) .............. 19
Auto scan button (AUTO SCAN) ................................ 10
Timer fader button (TIMER FADER) .......................... 21
Display select button (DISPLAY) ........................... 9, 15
Repeat button (REPEAT) ............................................ 13
Random play button (RANDOM) ............................... 13
Tuning/rewind/fast-forward buttons
(REW/-, +/FF) ........................................................ 10, 15
Preset tuning/preset scan/CD skip/search buttons
(_141 Iv, ^1_) ................................................. 11,12
When the unit is supplied with AC power, buttons O, O, O, _),
(_, (_, _), _) and_ function in the same way as the controls on the
main unit.To save power, the unit cannot be turned on from the re-
mote control when batteries are used.
Insert so the poles (+ and -) match those in the remote control.
Remove if the remote control is not going to be used for a long
period of time. Store in a cool, dark place.
Replace if the unit does not respond to the remote control even
when held close to the front panel.
Aim at the sensor, avoiding obstacles, at a maximum range of 7 meters
directly in front of the unit.
•Keep the transmission window and the unit's sensor free from dust.
• Operation can be affected by strong light sources, such as direct
sunlight, and the glass doors on cabinets.
Do not
• put heavy objects on the remote control.
•take the remote control apart.
•spill liquids onto the remote control
This is a twelve hour clock.
The example shows how to set the clock to 1:30 p.m.
I_ll Press [P'_'_F_W_] to turn the unit on.
]Press [CLOCK/TIMER] to select clock.
Each time you press me outton:
Clock --> iON _PLAY -_--> _@PLAY OFF"
E'orl0ioa,dispo.. coFp:
]Within 10seconds
Turn [TIME/PRESET TUNE --CD SKIP--] to set
the time.
L_I Press [CLOCK/TIMER] to start the clock.
The original disptay isrestored shorl_yafler.
When batteries are used
The unitcannotbeturned on withthe remote control.
[] Displaying the clock I
Remote control only
Press [DISPLAY].
Reduce volume before connection.
Plug type: 3.5mm (Ve") stereo
'Avoid listening for prolonged periods of time to prevent hearing dam-
age.
I}
pHONES
Preparation: (when using batteries) Press [_ ].
@
]Press [TUNER BAND] to select "FM" or "AM".
(Uni'_comes onwhen using ACpower.)
Each time you press the button:
AM _ FM
]Press [ P,EW/-/_II_I] or [I|H)'-/+/FF ] to select a sta-
tion.
"_" is displayed during FM stereo broadcasts.
]Press [+, - VOLUME] to adjust the volume.
Remote control only
You can search for a station by listening to all tuned-in stations for 8
seconds each.
]Press [TUNER] to select "FM" or "AM".
F_ Press [AuTo SCAN].
Auto scanstarts.
]Press [AUTO SCAN] when you find the desired
station.
Auto scan ends when it reaches the original frequency again,
To stop during the process, press [AUTO SCAN].
[] If noise is excessive in FM I
Remote control only
Press [FM MODE/BP] to display "_".
Monaural sound is selected (" leak1"goes off) and noise reduces when
reception is weak.
Press [FM MODE/BP] again to cancel the mode.
Auto-tuning
Press and hold [REW /-/_ or _ /+/FF] until the frequency
starts changing rapidly.
The frequency stops when it finds a station, (interference may also
cause it to stop. Start auto-tuning again if this occurs,)
To stop auto-tuning
Press [REW l-141_l] or [l_l_ l+lFF].
[] To improve reception
FM: Change the length and direction of the antenna•
AM: Change the facing of the unit.
•AM reception is briefly interrupted if [A DECK] is pressed.
•To improve reception when using lhe unit in abuilding or vehicle,
use it near a window.
To receive FM broadcasts allocated in 0.1MHz
M_
First press [TUNER BAND] to select "AM". Now, press and hold
[TUNER BAND], The display changes in a few seconds to show the
current lowest FM frequency. Continue to hold down the button,
The minimum frequency changes and the step is changed at the
same time. Changing the step erases all preset stations.
R_De_lt tb_ _hc3v_' fn _h_n¢3_ th_ _f_n h_Pk
Preparation: (when using bafteries) Press [_ ].
Tuning is simpler if you preset stations.
You can preset 12 FM and 12 AM stations.
[] Presetting radio stafions 1
Preparation: Tune to the station you want to preset. (._ page 10)
]Press [-MEMORY-CLEAR].
.._.: Preset channel
Indicates preset scan
channel (1 to 12).
TOenter channel 10, 11 or 12
Press [>_10],then the two digits.
If" _" goes off during presetting, return to step g.
I Selecting channels
Preparation: Press [TUNER BAND] to select "FM" or "AM".
[] Turn [TIME/PRESET TUNE _CD SKIP--] to select
the channel.
On the remote control
Press the numbered button(s) to select the channel (1 to 12).
To select channel 10, 11 or 12, press [_>10],then the two digits.
_U_ng preset scan ]
You can searchforastationby listeningto all preset channels for 8
secondseach.
Remote control only
Preparation: Press [TUNER] to select "FM" or "AM".
]Press and hold [P<I_I/v] or [^/1=,.1_1] until "PS"
appears on the display.
Preset scan stads.
]Press [_I<I/V] or [^/IH_I] when you find the
desired channel.
Preset scan ends after searching through each preset channel once•
To stop during the process, press [_F<I /V] or [^ /IH_ ].
,,,.I
Cancelling a preset channel
e.g. If channel 3is not needed
(_ Select channel 3.
_) Press [eMEMORY -- CLEAR].
_) While =_" is flashing
Turn [TIME/PRESET TUNE - CD SKIP -] to display "- -".
Press [eMEMORY -- CLEAR].
Now, when you perform preset scan or turn [TIME/PRESET TUNE
- CD SKIP -] to select apreset channel, channel 3 is skipped.
• To select the cancelled channel, press the remote control's num-
bered buttons.
• You can press 1_-<41/V] or [^/1_1_] on the remote control for
turning of [TIME/PRESET TUNE--CD SKIP -] described
above.
7(_) _ [] While" _"is flashing
"-- Turn [TIME/PRESET TUNE --CD SKIP _] to select
B_ _/____\ a channel and press [*MEMORY -CLEAR].onthe remote control
_- Press the numbered button(s) to enter the station into a
Label
Elapsed time of track tn play
Track number in pla_
DIGITALAUDIO
]Press [_ACD] to open the tray.
(Theunitcomeson.)
Load a CD and press [_ CO] to close the tray•
]Press [1_/11COl to start play.
Playsto the and of the CDand stops.
]Press [+, -VOLUME] to adjust the volume.
To stop play
Press[11TAPF_JCD].
One touch play (When using AC power)
When aCD is loaded, press [1_/11CO].
The unit comes on and play starts,
TO pause play
Press [1_/11COl during play.
Press again to resume play•
TO skip tracks
Turn ['rIME/PRESET TUNE _CD SKIP _] clockwise (forward) or
counter-clockwise (backward)•
On the remote control
Press [_ /V] (backward) or [A /I_ ] (forward).
Searching through tracks
Press and hold [REW/- /<1<1] (backward) or [1_ /+/FF] (forward)
during play.
On the remote control
Press and hold [_/k/J (backward) or [A /1_] (forward) during
play.
Separate this unit from radios and televisions if it causes interference.
]CD selection I
ChooseCOs with thismark: (_)
Do not
•use irregularly shaped COs ((_)).
• use CDs with labels and stickers that are coming off or with
adhesive exuding from under labels and stickers. ((_)
•attach scratch-proof covers orany other kind of accessory.
•write anything on the CO.
•clean CDs with liquids. (Wipe with a soft, dry cloth.)
•use COs printed wRh labe( printers available on the market.
/,
Numbered buttons
•E]I
f
fB
0 Qoo
CS_ CSS_
4 5 6 ->11
C_ C_ C9 _
7890
Preparation: Press [m] to switch to CD mode.
Remote control only
Direct access play
• _1 Startsplayfrom a selectedtrack
I_EAT :
-- QSelect the track with the numbered buttons.
For two-digit tracks, press [_>10],then the two digits•
,a.o
-- _.._ Repeat play
P_ayso frockor all tracksrepeatedly II
-Press [REPEAT] before or during play to select a mode. ,_'
&Each time you press the button:
12 3 °_
I1-{_] :One-track repeat
0 0 0 '--0 _'= t'_-l'-q ! ,,d
. s 6 ?_ ::-'l ulL' $
0 0 0 0 t.L_L_LL_L____L ............ (_ :AII-trackrepeat
7 8 9 0
(No display) : Cancel
Press [CD] to start play if in the stop mode.
To repeat selected tracks
_) Start program play (.=) page 14).
(_ Press [REPEAT] to select "[_ ".
ILlRANDOM
5 1
B ..........................
CD
_!!_,_,_ • ,_,_ ,_i_,_ ,,,_, _,_,_i_,_ _i_ !_i_i_"I _'_i _ -
To cancel
Press[REPEAT] until"1- (_" and" _" are cleared.
The modeis alsocanceflediltheCD trayisopened,
Random play
Plays the tracks once each in random order
]Press [RANDOM] during CD stop mode.
]Press [CD] to start play.
To cancel
Press [RANDOM] to clear _".
If cancelled during play, play continues to the end of the CD.
The mode is also cancelled if the CD tray is opened.
• Random play cannot beusedtogetherwith 1-track repeat and pro-
gram play.
• You cannot select tracks with the numbered buttons.
•You cannot skip to tracks already played.
•Search can be done within the track in play only.
,," Track number Play time
d:3 '-/:35
®4r ,
Programmed track Play sequence
<I<IN A/IH_ c_
,11 i i
Ed In ffB:B6 "
°@
CD _-_- J Cf r'-i,l-i i
'- ®0
w _J _t L_'JJ I
Program play
Selectup to36 tracksto play in the orderyouchoose.
On the main unit
Preparation: Press [i TAPEJCD] to switch to CD mode•
g Turn [TIME/PRESET TUNE --CD SKIP--] to select
the track.
]Press [.MEMORY-CLEAR].
Repeat steps [] and [] to program other tracks.
]Press [1_/I I CD] to start play.
On the remote control
Preparation: Press [i] to switch to CD mode.
]Press [PGM/°CLEAR].
"_" appea_ on the display.
Enter the track number with the numbered but-
tons.
For tracks numbered 10 and over, Dress [>10] then the two
digits
Reoeat this step mprogram other tracks
]Press [CD] to start play.
The program remains intact even fplay is stopped or the unit is
t_rned oft. "Cd-P" agpears w_en D_ay_s s_opped to indicate the con-
tents are in the memory
To cancel
Press and hold [=MEMORY -- CLEAR] (remote control: [PGM/
"= CLEAR]) in the stop mode until "CLEAR" is disp_ayod.
The mode is also cancelled if the CD tray is oDened.
"FULL" is displayed
If 36 tracks have already been programmed.
"- --:-- --" is displayed
If the total play time of the program exceeds 100 minutes.
You can still program and play tracks
[] "1"o check the program contents (white "Cd-P" is dis-
played)
Turn [TIME/PRESET TUNE _-CD SKIP _].
On the remote control
Press 1t_t<1/V] or [A /1_=.t].
/
i_, _! "! i_ J_
El
Side to be played back facing up
Insert the cassette with the exposed tape facing you.
I °o!
®<--
Ptf t ._',"It,_,
® • @
©• o
Cassettes _; " _
]Press [_ DECK] to open the deck.
(The unitcomeson.)
Load a cassette and close the deck by hand•
]Press [1_ TAPE] to start play.
]Press [+,-VOLUME] to adjust the volume.
To stop play
Press[11TAPE/CD].
One touch play (When using AC power)
When a cassette is loaded, press [1_ TAPE].
The unit comes on and play starts.
Fast-forward and rewind
Press [REW/- /<1<1] (rewind) or _/+/FF] (fast-forward)
On the remote control
Press [REW /-] (rewind) or [+ /FF] (fast-forward).
Selection of tapes
Use normal position tapes to play correctly.
High position and metal position tapes can be played, but the unitwill
not be able to do full justice to the characteristics of these tapes.
I Cassette tape care I
•Tapes exceeding 100 minutes are thin and can break or get caught
in the mechanism.
• Tape slack can get caught up in the mechanism and should be
taken up before the tape is played.
•Endless tapes can get caught up in the deck's moving parts if used
incorrectly•
Use household AC power or new batteries when recording to avoid
poor recordings caused by the batteries running down.
Televisions can cause intederence to recordings made on this unit
if the two are too close to each other.
Selection of tapes for recording
Use normal position tapes.
High position and metal position tapes can be used, but the unit will
not be able to record or erase them correctly.
Volume and sound quality in recording
•Recording level is set automatically.
•Recording are unaffected by changes to sound quality.
]display tape counter recording /
]
To tile while
Remote control only
Press [DISPLAY].
Each time you press the button in the CD or radio mode:
_>(_) Present state --* _) Present time --_ (_ Tape counter
/ /
To reset the tape counter
Press [C-RESET].
The counter resets to =000".
II
II
O
=€
IEI To protect tapes against further recording
Side A_ "_@
Tab for side "B" Tab for side "A"
Tor -,ecord Adphee
Normal positiontape sive
Insert the cassette with the exposed tape facing you.
_- Erasure prevention I
The illustration shows how to remove the tabs to prevent recording.
To record on the tape again, cover as shown.
[] Erasing re(:ord;ngs !
(_ Insert the cassette with the side to be erased facing up.
(_) Press [I TAPF_/CD] to switch to TAPE mode.
(_) Press [l/ll].
Recording CDs
Preparations:
•Insert a CD (,_ page 12).
• Wind on the leader tape.
]Press [_ DECK] to open the deck.
Load a cassette with the side for recording facing up and close
the deck by hand.
]Press [IITAPE/CD] to switch to CD mode.
Each time you pressthe button:
TAPE e->Cd
]Press [e/ll] to start recording.
CD prayand recording startat the sametime.
The cassette stops when the CD finishes.
To stop recording
Press [11TAPE/CD].
[] To pause recording
Press [e/ll].
Press again to resume recording.
To continue recording from another CD on the same cas-
sette
Press[A CD] andreplacetheCD.
(_ Press [e/ll].
To record selected tracks
_) Do step ill, then program the tracks (,_ page 14).
(_ Press [O/11].
To skip unwanted tracks
(_ Press [1/11] to pause recording (the CD also pauses)•
(_ Turn [TIMFJPRESETTUNE --CD SKIP --] so the next track you
want to record is displayed.
Press [1111] to resume recording.
: _" • )_ • _ 3 ¸•
Records the whole CD or selected tracks. When the tape finishes
before CD, recording and CD pauses for you to resume recording on
the opposite side.
Preparation: Insert a CO (,_ page 12).
]Press [BTAPE/CD] to switch to CD mode.
]Press [CD REC MODE] to display"ALL-REC".
Each time youpressthe button:
ALL-REC --* 1-REC --* OFF
+ I
The display shows the tape length needed.
=C .... " indicates the tape needed exceeds 100 minutes.
You can still record, but some tracks may notbe recorded if the
tape isn't long enough.
]Load a cassette with the side for recording facing
up.
]Press [Q/Ill to start recording.
The unit rewinds the tape, records 10 seconds of silence, and
then starts recording.
To stop recording
Press[NITAPE/CD].The CD alsostops.
If a track is interrupted at the end of the side facing up
Recording and CD pauses.
To record the track aaain on the OOOOSiteside
1. Press [_ DECK], flip the cassette, and insert it.
2. Press [t/11].
The unit records !0 seconds of silence, and resumes recording
from the beginning of the cut-off track.
To record selected tracks
(_) Program tracks (_ page 14).
(_) DO steps [] to L_1.
You cannot use ALL-REC with random play and repeat play (,_. page
13).
m
Records a selected track from the CD and stops.
Preparations:
Insert a CD (,=l. page 12) and a cassette (-1, page 15).
Wind the tape on to where you want to start recording.
]Press [IITAPE/CD] to switch to CD mode.
]Press [CD REC MODE] to display"l-REC'.
Each time you press the button:
ALL-F_EC--> 1-REC "--* OFF
+I
]Turn ['TIME/PRESETTUNE _- CD SKIP _] to select
the track you want to record.
]Press [o/11] to start recording,
CD playand recording start at the sametime.
To stop recording
Press[MTAPE/CD]. The CD alsostops.
To continue recording from another CD
1. Press [_ CD] and replace the CD.
2. Do steps [] to L_I!
To record a track in play
(_ Press [CD REC MODE] to display "I-REC".
@Press [@111].
Recording starts from the beginning of the track and stops when the
track finishes.
Recording and CD will stop when the tape reaches its end, even it the
track has not finished.
"L 5
• _i _ • _:_¢IIR_D _• _•_ _D _m___ • _!_ .u_.• • • • _ _
Preparations:
• To record from the beginning of the tape:
Wind on the leader tape.
•To record from pert way through the tape:
Wind lhe tape on to where you want to start recording.
]Load s cassette with the side for recording facing
up.
]Tune to the station (,,_ page 10).
]Press [@/11]to start recording.
FMM0[_YBP
Q
To stop recording
Press[11TAPP-/CD].
To pause recording
Press ]O/11].
Press again to resume recording.
[] Reducing noise when recording AM (Best Proof func-
tion)
Remote control only
Press [FM MODF.JBP] while recording•
Each time you press the button:
bP1 _-_bP2
Choose the setting with the least noise.
C
t,
•i_¸¸_,{jii:i:••••1"o'__ •_i
You can choose one of four types of sound quality.
(_)XBS: Adds punch to rock
_) Clear: Cladfies higher sounds
©Soft: For background music
(_ Vocal: Adds gloss to vocals
Press [PRESET EQ] to select a setting.
Each time you press the button:
F© XBS --) _) Clear_ © Soft--_© Vocal _1
EQ-OFF (cancelled) _- J
Changes to sound quality do not affect recordings.
_! 3-D sound with the Sound Virtualizer
Remote control only
You can create a three-dimensional sound field when listening to
stereo sound.
Press [S.VIRTUALIZER].
Pressagaintocancel.
•This feature does not affect recordings.
•The actual effect depends on the source played. II
I
I
! |e_l The Play and Record Timer
€)
ROT5183
i:
IFOR PLAY TIMER I
[- I.'3h,f i ._._-r J_
|_%,/J,, _+_/_ _C"LIL+
l-{ G____%__x_.....
FOR RECORDTtMER I
/_\ t--.II_d t 3.1--t Fi
>_/_,t,, %'odr_:.uu
...... /I\
El ,iA
\, I /,
\ t /
-_-_.- t-t_
,-alL,
\ I /
f i t t'-_Lt
I. tl "-, I /Q
t.w f-i
,Ju
\. /\ I I
j,7_, -O.-t _--L1 ,._ -- ._.-t t7--
/ '-1-1'-'/,-,t c.-,,,
__I I \ _"_°_l I -_
B% ...................
[ tDa I_Jt i-i -I-
i.....................I...................._I
" "_ ..................
You can set the timer to come on at a certain time to wake you up
(play timer) or to record a radio station (record timer).
Preparations:
Turn the unit on and set the clock. (,,,_page 9)
•For play timer, prepare the music source (tape/CD/radio) for lis-
tening, and set the volume.
•For record timer, check the cassette's erasure prevention tab (=,i_
page 16: [] ) and load the cassette with the side for recording facing
up. Tune to the radiostation (,,_ page 10 to t 1), and set the volume.
¢
[] Setting the start and finish times
Press [CLOCK/TIMER] to select the desired timer
function.
Each time you press the button:
_oCIOck _ _ON _PLAY I___>2_)PLAY OFF "
riginal display <-- ;_REC O;F! 4--_ON _REC! <_. I
ON _)PLAY: to set the play timer
ON _)REC: to set the record timer
Proceed to step [] before these indicators stop flashing
(about 10 seconds).
B(_ Turn [TIME/PRESET TUNE --CD SKIP --] to set
the start time.
(_ Press [CLOCK/rIMER].
B_ Turn [TIME/PRESET TUNE --CD SKIP _] to set
the finish time.
(_) Press [CLOCK/TIMER].
The start and finishtimes are now set.
Turning the timer on 3
[] Press [_)PLAY/REC] to display the timer indicator.
Each time you press the button:
(_PLAY --> ®REC --> no display (off)_
//
_)PLAY: to turn the play timer on
_REC: to turn the record timer on
(The indicator doesn't appear if the start and finish times
haven't been set.)
"E" appears if the clock hasn't been set.
]Press [l_'_lmf_] to turn the unit off.
The unit must be off for timer to operate.
The record timer comes on about 30 seconds earlier than the
set time.
To cancel the timer
Press [_)PLAY/REC] when the unit is on to clear the timer indica-
tors from the display,
(The timer comes on at the set time everyday if the timer is on.)
To check the settings (when unit is off)
Press [CLOCK/TIMER].
The settings are shown in the following order:
Start time, Finish time --*Music source--->Volume _* Original display
To change the settings (when unit is on)
To chartge the times
DO steps ill, [], lkl, and ILt.
To change the source or volume
1. Press [_)PLAWREC] to clear the timer indicator.
2. Make changes to the sou¢ce or volume.
3. Do steps [] to 15]1.
You can enjoy your desired source after you have set the timer.
Turn the unit off before the timer's start time.
The play and record timers cannot be used together.

Other manuals for RXES25 - RADIO CASSETTE W/CD

3

This manual suits for next models

1

Other Panasonic CD Player manuals

Panasonic RX-ES29EE User manual

Panasonic

Panasonic RX-ES29EE User manual

Panasonic SL-SW950 User manual

Panasonic

Panasonic SL-SW950 User manual

Panasonic WJDR200 - DIGITAL VIDEO RECORD User manual

Panasonic

Panasonic WJDR200 - DIGITAL VIDEO RECORD User manual

Panasonic DVD-PS3 User manual

Panasonic

Panasonic DVD-PS3 User manual

Panasonic CQ-C7300W User manual

Panasonic

Panasonic CQ-C7300W User manual

Panasonic SL-SX280 User manual

Panasonic

Panasonic SL-SX280 User manual

Panasonic SL-SX469V User manual

Panasonic

Panasonic SL-SX469V User manual

Panasonic SL-SV550 User manual

Panasonic

Panasonic SL-SV550 User manual

Panasonic DMP-BDT370 Technical specifications

Panasonic

Panasonic DMP-BDT370 Technical specifications

Panasonic CQ-C5400 User manual

Panasonic

Panasonic CQ-C5400 User manual

Panasonic LX-900 User manual

Panasonic

Panasonic LX-900 User manual

Panasonic DVD-S54S User manual

Panasonic

Panasonic DVD-S54S User manual

Panasonic DVD-LS83E User manual

Panasonic

Panasonic DVD-LS83E User manual

Panasonic RX-ES29GC User manual

Panasonic

Panasonic RX-ES29GC User manual

Panasonic SLCT580 - PORT. CD PLAYER User manual

Panasonic

Panasonic SLCT580 - PORT. CD PLAYER User manual

Panasonic SL-S261C User manual

Panasonic

Panasonic SL-S261C User manual

Panasonic SL-SV600J User manual

Panasonic

Panasonic SL-SV600J User manual

Panasonic WJDR200 - DIGITAL VIDEO RECORD User manual

Panasonic

Panasonic WJDR200 - DIGITAL VIDEO RECORD User manual

Panasonic SL-SW404 User manual

Panasonic

Panasonic SL-SW404 User manual

Panasonic SL-SX340 User manual

Panasonic

Panasonic SL-SX340 User manual

Panasonic CQDF202U - AUTO RADIO/CD DECK User manual

Panasonic

Panasonic CQDF202U - AUTO RADIO/CD DECK User manual

Panasonic SL-SX450 User manual

Panasonic

Panasonic SL-SX450 User manual

Panasonic SL-SX240 User manual

Panasonic

Panasonic SL-SX240 User manual

Panasonic SL-CT810 User manual

Panasonic

Panasonic SL-CT810 User manual

Popular CD Player manuals by other brands

Pioneer PD-M407 operating instructions

Pioneer

Pioneer PD-M407 operating instructions

Nakamichi MB-4s Service manual

Nakamichi

Nakamichi MB-4s Service manual

Sony Walkman 2-896-703-72 (2) operating instructions

Sony

Sony Walkman 2-896-703-72 (2) operating instructions

Tascam CD-160 owner's manual

Tascam

Tascam CD-160 owner's manual

Onkyo DX-C909 Service manual

Onkyo

Onkyo DX-C909 Service manual

Pyle Pro pdcdtp500 instruction manual

Pyle Pro

Pyle Pro pdcdtp500 instruction manual

Kenwood DP-M109 instruction manual

Kenwood

Kenwood DP-M109 instruction manual

Denver Electronics TC-22 instruction manual

Denver Electronics

Denver Electronics TC-22 instruction manual

auna multimedia POCKET ROCKER manual

auna multimedia

auna multimedia POCKET ROCKER manual

Kenwood DPC-X537-D Service manual

Kenwood

Kenwood DPC-X537-D Service manual

Roksan Audio Caspian M2 user manual

Roksan Audio

Roksan Audio Caspian M2 user manual

Emerson HD2850 owner's manual

Emerson

Emerson HD2850 owner's manual

Pioneer LaserDisc CLD-D760 operating instructions

Pioneer

Pioneer LaserDisc CLD-D760 operating instructions

Clatronic CDP 601 Instruction manual & guarantee

Clatronic

Clatronic CDP 601 Instruction manual & guarantee

Philips Expanium AZ-2558 Operation user's manual

Philips

Philips Expanium AZ-2558 Operation user's manual

Tascam CD-A700 Technical documentation

Tascam

Tascam CD-A700 Technical documentation

Philips AZ302/55 user manual

Philips

Philips AZ302/55 user manual

Victrola V50-250 instruction manual

Victrola

Victrola V50-250 instruction manual

manuals.online logo
manuals.online logoBrands
  • About & Mission
  • Contact us
  • Privacy Policy
  • Terms and Conditions

Copyright 2025 Manuals.Online. All Rights Reserved.