manuals.online logo
Brands
  1. Home
  2. •
  3. Brands
  4. •
  5. Panasonic
  6. •
  7. Cordless Telephone
  8. •
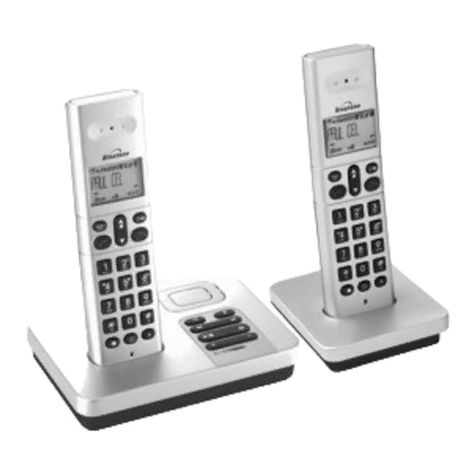
  9. Panasonic KX-TCD400HGB User manual

Panasonic KX-TCD400HGB User manual

ORDERNO. KM40306101C2
Telephone Equipment
KX-TCD400HGB / KX-TCD400HGC / KX-A140EXB / KX-
A140EXC
Digital Cordless Phone
Black Version
Dark Blue Version
(for Hungary)
SPECIFICATIONS
2003 PanasonicCommunications Co., Ltd. All rights reserved.
1
Unauthorized copying and distribution isaviolation of law.
1. ABOUT LEAD FREE SOLDER (PbF: Pb free)
Note:
Inthe information below, Pb, the symbol forleadinthe periodic table of elements, will referto
standardsolderorsolderthat contains lead.
We will use PbF solderwhendiscussing the leadfree solderusedinourmanufacturing process
whichis made fromTin(Sn), Silver(Ag), and Copper(Cu).
This model, and others like it, manufacturedusing leadfree solderwill have PbF stampedon
the PCB. Forservice and repairwork we suggest using the same type of solderalthough, with
some precautions, standardPbsoldercanalsobe used.
Caution
-PbF solder has amelting point that is50°F ~70°F (30°C~ 40°C)
higher than Pb solder. Please use asoldering iron with
temperature control and adjust itto 700°F ± 20°F (370°C± 10°C). In
case of using high temperature soldering iron, please be careful
not to heat too long.
-PbF solder will tend to splash ifitisheated much higher than its
melting point, approximately1100°F (600°C).
-Ifyou must use Pb solder on aPCB manufactured using PbF
solder, remove as much of the original PbF solder as possibleand
be sure that anyremaining ismelted prior to applying the Pb
solder.
-When applying PbF solder to doublelayered boards, please check
the component side for excess which mayflow onto the opposite
side (See the figure below).
2
1.1. Suggested PbF Solder
There are several types of PbF solderavailable commercially. While this product is
manufacturedusing Tin, Silver, and Copper
(Sn+Ag+Cu), you canalsouse Tinand Copper(Sn+Cu) orTin, Zinc, and Bismuth(Sn+Zn+Bi).
Please check the manufac
turer’s specific instructions forthe melting points of theirproducts and anyprecautions for
using theirproduct withother
materials.
The following leadfree (PbF) solderwire sizes are recommendedforservice of this product:
0.3mm, 0.6mm and 1.0mm.
1.2. How to recognize that Pb Free solder isused
1.2.1. Base Unit PCB
(Component View)
(FlowSolderSide View)
Note:
The location of the “PbF“ mark is subject tochange without notice.
1.2.2. Handset PCB
3
(Component View)
(FlowSolderSide View)
Note:
The location of the “PbF“ mark is subject tochange without notice.
2. FOR SERVICE TECHNICIANS
ICs and LSIs are vulnerable tostatic electricity.
Whenrepairing, the following precautions will helpprevent recurring malfunctions.
1. Cover the plasticparts boxes with aluminum foil.
2. Ground the soldering irons.
3. Use aconductive mat on the worktable.
4. Donot touch ICor LSI pins with bare fingers.
3. CAUTION
Dangerof explosion if batteryis incorrectlyreplaced. Replace onlywiththe same orequivalent
type recommendencedbythe manufacturer.
Dispose of usedbatteries according tothe manufacture’s Instructions.
4. BATTERY
4.1. BatteryInstallation
Please ensure the batteries are insertedas shown. part shouldbe insertedfirst.
Close the coveras indicatedbythe arrow.
-When you replace the batteries, part shouldbe removed first.
4
4.2. BatteryCharge
At the time of shipment, the batteries are not charged. To charge, place the handset on the base
unit.
Please charge the batteries forabout 7 hours before initial use. During charging, the battery
icon is as shownbelow.
The handset whichpoweris off will be turnedon automaticallywhenit is placedon the base
unit.
Innormal use, the handset and the base unit shouldbe poweredon at all times.
Note forService:
The batterystrengthmaynot be indicatedcorrectlyif the batteryis disconnectedand connected
again, evenafterit is fullycharged.
Inthat case, byrecharging the batteryas mentionedabove, you will get a correct indication of
the batterystrength.
4.3. BatteryLife
-Batterylife isdependent on use and conditions but ingeneral
when using fullycharged Ni-MHbatteries (700 mAh):
Talktime: 10hrs approx.
Standbytime: 120hrs approx.
-When using Ni-Cdbatteries (250 mAh):
Talktime: 4hrs approx.
Standbytime: 40hrs approx.
(Times indicated are for peak performance)
-The batteries reach peak performance after several full charge/
discharge cycles.
5
-The batteries cannot be overcharged unless theyare repeatedly
removed and replaced.
-Ifbatterylife isshortened then please check that batteryand
charge terminalsare clean.
-For maximum batterylife, itisrecommended that the handset is
not recharged until batteryicon flashes .
4.4. Replacing the Batteries
If the icon flashes aftera fewtelephone calls evenwhenthe handset batteries have
beenfullycharged, 2 batteries must be replaced.
Charge newbatteries forapproximately7 hours before initial use.
(The telephone line cordmust not be connectedtothe telephone socket at this time).
Whenreplacing the batteries, ensure that the correct batterytype is selected.
-To exitthe operation, press anytime.
-When Ni-Cdbatteies are fitted with the
setting in , icon will disappear and stop
charging even ifthe handset ison the cradle.
-Donot use non-rechargeablebatteries. Ifnon-rechargeable
batteries are fitted and start charging, itmaycause the leakage of
the batteryelectrolyte.
Please use onlyPanasonic P03P(Ni-MH) orP03H(Ni-Cd) batteries.
5. LOCATION OF CONTROLS
6
5.1. Base Unit
5.2. Handset
6. SETTINGS
6.1. Connection
Plug inthe AC adaptorand the telephone line cordinorder1, 2, 3, 4.
7
The AC adaptormust remainconnectedat all times (It is normal forthe adaptortofeel warm
during use).
-Never install telephone wiring during alightning storm.
6.2. SymbolsUsed inThisService Manual
6.3. PINCode
6.3.1. Base Unit
8
-To exitthe operation, press anytime.
ForService Hint:
*: If the current 4-digit PIN is forgotten, press and you will
be able toenternewPIN.
6.3.2. Handset
-To exitthe operation, press anytime.
ForService Hint:
*: If the current 4-digit PIN is forgotten, press and you will
be able toenternewPIN.
9
6.3.3. Reset Base Unit PIN toDefault (0000) -When ThereisNO Handset
Registered-
6.3.3.1. Symptom
There is no waytoreset base PIN whenthere is no handset registeredtothe base.
6.3.3.2. Thinkable Situation
-Customer mayask to reset base PINbecause theyforget it.
-Customer maybring onlyabase unitfor repairand there isno
handset registered to the base.
6.3.3.3. Remedy
<Preparation>
Referto JIGs and PC ().
<Connection>
1. Solder apinor lead wire to GND, SDA, and SCLKon base PCB.
2. Plug inAC adaptor to the base.
3. Turn on the power to the JIG (9V).
4. Then connect the cableto each pins using clip.
As forthe connection betweenJIG and PCB, see belowphotos.
<PC setting and howtoreset base PIN todefault (0000)>
1. Refer to PC Setting ().
2. Next, execute <initbspin.bat> bytyping "initbspin". The PC
displaywill be shownas below.
3. After that, turn off DC power supply(9V) to the jig, unplug AC
adaptor, and remove pins on PCB.
Then close the cabinet. The base pinreturns to the default(0000)
and you can register ahandset to the base using the base PIN
(0000).
6.4. Reset
6.4.1. Base Unit
10
-To exitthe operation, press anytime.
-*1: The factorypreset is0000.
Base Unit Initial Settings
Function Initial Setting Remarks (selectable
options)
FlashTiming 100 msec 600/100 msec
Pause Timing 3 seconds 3 seconds/5 seconds
4-Digit Base Unit PIN 0000 -
Dialling Mode Tone Tone/Pulse
6.4.2. Handset
You canreset all of the handset settings totheirinitial settings.
-To exitthe operation, press anytime.
-*1: The factorypreset is0000.
Handset Initial Settings
11
Function Initial Setting Remarks (selectable
options)
Time Alarm Mode OFF OFF/ON
Alarm Time Clear OFF/Once/Daily
Handset RingerVolume 6 -
Handset External RingerPattern 1 20 patterns
Handset Alarm Tone Pattern 1 20 patterns
KeyTone ON ON/OFF
Range Warning Alarm OFF OFF/ON
BatteryLowAlarm ON ON/OFF
Talk Mode Display Lengthof the Call Talk Time/Phone No.
DisplayLanguage Hungarian 10 languages
Call BAR OFF OFF/ON
Direct Call Mode OFF OFF/ON
Direct Call Number Clear Upto24 digits
4-Digit Handset PIN 0000 -
AutoTalk OFF OFF/ON
Redial Memory All Clear -
Handset ReceiverVolume Medium Low/Medium/High
6.5. KeyLock
You canlock the handset dialling buttons. Onlyincoming calls are acceptedwhile the keylock
is on. The keylock is cancelledif the handset is turnedoff.
Whenthe keylock is on, emergencycalls cannot be made until keylock is cancelled.
- isdisplayed (Refer to Handset Display ()) and all dialling buttons
are locked.
6.6. Recall Feature
RECALL is usedtoaccess special telephone services. Contact yourNetwork providerfor
details. If yourunit is connectedtoa PBX, pressing RECALL allows you toaccess some
features of yourhost PBX suchas transferring anextension call.
12
6.7. Dialling Pause for PBXline/long distance service users
A dialling pause is usedwhena pause inthe dialling of the phone numberis necessaryusing a
PBX oraccessing a long distance service.
Forexample, when9 (line access number) is dialledfollowedbya pause toaccess anoutside
line through a PBX:
-Entering apause prevents misdialling when you redial or dial a
stored number.
-Pressing REDIALonce creates one pause. To extend the pause
requirement time, press REDIALaccordingly.
*1 is displayed(Referto Handset Display ()) on the LCD.
6.8. Call BAR On/Off (Call Prohibition On/Off)
You cannot make anydialling if call BAR is on.
-To exitthe operation, press anytime.
-*1: The factorypreset is0000.
-*2: If isselected, isdisplayed (Refer to Handset
13
Display ()).
6.9. Selecting the DisplayLanguage
-To exitthe operation, press anytime.
-*1 You can select one of 10 languages. Ifyou set alanguage you
cannot read, reset the handset to its initial settings.
Press MENU DOWNRIGHTUPRIGHT4-digitHandset
PINUPOK
All handset setting will be reset to theirinitial settings, however,
the Phonebook data will be saved.
6.10. Select Dialling Mode (Tone/Pulse)
You canchange the dialling mode totone orpulse depending upon yournetwork service. If you
have a touchtone service, select tone. If you have rotaryorpulse service, select pulse.
-To exitthe operation, press anytime.
-*1: The factorypreset is0000.
6.11. Select Flash Timing
14
You canchange the duration of the flashtiming depending on the requirements of yournetwork
providerorPBX.
-To exitthe operation, press anytime.
-*1: The factorypreset is0000.
ForService Hint: Referto Flash Time setting ()
6.12. Summaryof ProgrammableFunctions
You canselect and execute the following functions bypressing direct command as follows
without programming.
These operations needtobe done withthe Handset nearthe base unit.
Press . Press or until the arrowpoints to
, thenpress .
is displayed.*1
*1 If anykeyis not pressedover60 seconds, the displaywill returnto“Setting Base”.
15
*2 Referto PIN Code () formore details.
7. DISPLAY
7.1. Handset Display
7.2. Before Requesting Help(Troubleshooting)
If you experience anyproblems withthe normal use of yourapparatus, you shouldunplug it
fromthe telephone outlet and connect a knownworking telephone inits place.
If the knownworking telephone still has problems, thenplease contact the customerservice
department of yourNetwork provider.
If it operates correctly, thenthe problemis likelytobe a fault inyourapparatus.
Inthis case, contact yoursupplierforadvice. YourNetwork providermaycharge you if they
attend a service call that is not due toapparatus suppliedbythem.
Turnthe powerOFF thenON (Handset) / Disconnect thenconnect the AC adaptor(Base Unit).
16
Cross Reference:
Power On/Off ()
Call BAR On/Off (Call Prohibition On/Off) ()
Key Lock ()
8. OPERATIONS
8.1. Power On/Off
*1 When button is released, the displaychanges tothe standbymode.
*2 The displaygoes blank.
8.2. Making aCall
17
*1 If you needcorrection, press CLEAR. Digit is clearedtothe left, thenenternumbers.
8.3. Answering aCall
-Each ringer will start ringing with lower volume then gradually
increase the volume when receiving acall.
*1 You canalsoanswera call bypressing anydialling button, HOLD, , or .
8.4. Setting the Clock/Date
Aftera mains powerfailure the clock needs tobe reset. Ensure that icon is not flashing.
-To exitthe operation, press anytime.
*1 Forexample, toset 7:15, enter0715.
*2 Forexample, toset the 16thof February, 2003, enter160203.
8.5. Phonebook
You canstore up to20 callerinformation inthe phonebook.
18
8.5.1. Storing aCallerInformation
-To exitthe operation, press anytime.
*1 If you needcorrection, press RIGHTorLEFT tomove cursorthencleara characterby
pressing CLEAR, and/orentercharacters. Characters are clearedoraddedtothe left of the
flashing character. To entercharacters, see CharacterSelection below.
*2 To continue storing anothercallerinformation, repeat the steps from3.
19
-To exitthe operation, press anytime.
*1 If there is no itemstoredinthe phonebook, the displayshows .
*2 Digits are clearedtothe left of the flashing digit.
*3 Digits are addedtothe left of the flashing digit. If you needtoclearoradd more thanone
digit, repeat the steps from5.
*4 Characters are addedtothe left of the flashing character. If you needtoclearoradd more
thanone character, repeat the steps from8.
*5 To continue clearing anothercallerinformation, repeat the steps from2.
8.5.2. Storing the Phone Numberintothe Phonebook When Pre-dialling
20

This manual suits for next models

3

Other Panasonic Cordless Telephone manuals

Panasonic KX-WT115 User manual

Panasonic

Panasonic KX-WT115 User manual

Panasonic 545X03001 User manual

Panasonic

Panasonic 545X03001 User manual

Panasonic KX-TC1703B User manual

Panasonic

Panasonic KX-TC1703B User manual

Panasonic KX-T3610 User manual

Panasonic

Panasonic KX-T3610 User manual

Panasonic KX-TG8102 User manual

Panasonic

Panasonic KX-TG8102 User manual

Panasonic KX-TU301FX User manual

Panasonic

Panasonic KX-TU301FX User manual

Panasonic KX-TGP500 User manual

Panasonic

Panasonic KX-TGP500 User manual

Panasonic KX-TGA830AZ User manual

Panasonic

Panasonic KX-TGA830AZ User manual

Panasonic KX-TGA401C User manual

Panasonic

Panasonic KX-TGA401C User manual

Panasonic KX-TGA910EX User manual

Panasonic

Panasonic KX-TGA910EX User manual

Panasonic S-ICX User manual

Panasonic

Panasonic S-ICX User manual

Panasonic KXTG7431 - EXPAND CORDLESS ANS SYS User manual

Panasonic

Panasonic KXTG7431 - EXPAND CORDLESS ANS SYS User manual

Panasonic KX-TG674SK User manual

Panasonic

Panasonic KX-TG674SK User manual

Panasonic KX-TG7170FX User manual

Panasonic

Panasonic KX-TG7170FX User manual

Panasonic KX-TG2620 User manual

Panasonic

Panasonic KX-TG2620 User manual

Panasonic KX-TG6511 User manual

Panasonic

Panasonic KX-TG6511 User manual

Panasonic KX-TG1100HK User manual

Panasonic

Panasonic KX-TG1100HK User manual

Panasonic KX-TC2000NZB User manual

Panasonic

Panasonic KX-TC2000NZB User manual

Panasonic KX-TG6811E User manual

Panasonic

Panasonic KX-TG6811E User manual

Panasonic KX-TG2560 User manual

Panasonic

Panasonic KX-TG2560 User manual

Panasonic KX-TC903W User manual

Panasonic

Panasonic KX-TC903W User manual

Panasonic KX-TCD212E User manual

Panasonic

Panasonic KX-TCD212E User manual

Panasonic KX-TCD440AL User manual

Panasonic

Panasonic KX-TCD440AL User manual

Panasonic KX-TCD505HKM User manual

Panasonic

Panasonic KX-TCD505HKM User manual

Popular Cordless Telephone manuals by other brands

BT CALLER DISPLAY 1000 Quick setup and user guide

BT

BT CALLER DISPLAY 1000 Quick setup and user guide

Thuraya SG-2520 user guide

Thuraya

Thuraya SG-2520 user guide

Motorola L701BT user guide

Motorola

Motorola L701BT user guide

Uniden Modro 20 owner's manual

Uniden

Uniden Modro 20 owner's manual

Codan 8525B Series Handbook

Codan

Codan 8525B Series Handbook

UCOM COCOON 8002 user guide

UCOM

UCOM COCOON 8002 user guide

BT FREESTYLE 2010 user guide

BT

BT FREESTYLE 2010 user guide

Radio Shack ET-521 owner's manual

Radio Shack

Radio Shack ET-521 owner's manual

AUDIOLINE DECT 5500B+ operating instructions

AUDIOLINE

AUDIOLINE DECT 5500B+ operating instructions

Topcom Butler 4012 Quick installation guide

Topcom

Topcom Butler 4012 Quick installation guide

AT&T DECT AT3211-2 quick start guide

AT&T

AT&T DECT AT3211-2 quick start guide

Olympia OL3020 owner's manual

Olympia

Olympia OL3020 owner's manual

Sitex ultima Operation manual

Sitex

Sitex ultima Operation manual

Aastra CORDLESS PHONE Installation planning

Aastra

Aastra CORDLESS PHONE Installation planning

V-tech DS662V-1F user manual

V-tech

V-tech DS662V-1F user manual

V-tech CS6328-2 user manual

V-tech

V-tech CS6328-2 user manual

Cortelco Colleague Owner's instruction manual

Cortelco

Cortelco Colleague Owner's instruction manual

Uniden DX14560 DX14561 owner's manual

Uniden

Uniden DX14560 DX14561 owner's manual

manuals.online logo
manuals.online logoBrands
  • About & Mission
  • Contact us
  • Privacy Policy
  • Terms and Conditions

Copyright 2025 Manuals.Online. All Rights Reserved.