manuals.online logo
Brands
  1. Home
  2. •
  3. Brands
  4. •
  5. Panasonic
  6. •
  7. Microwave Oven
  8. •
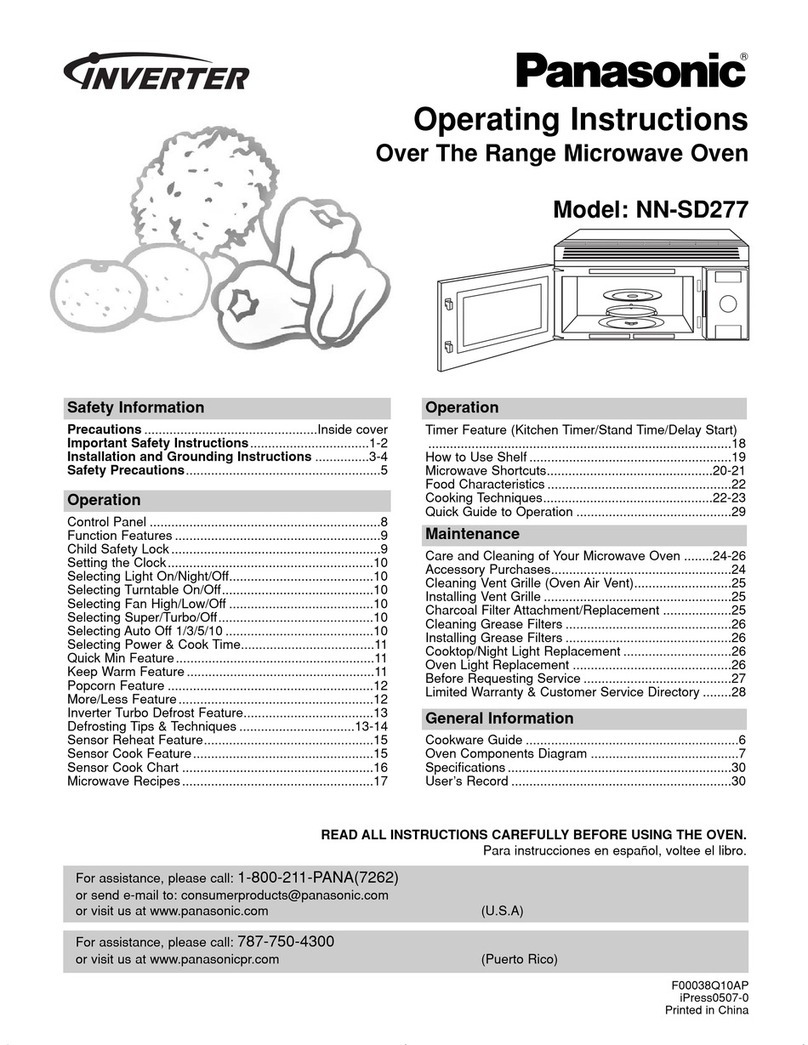
  9. Panasonic NN-S562 User manual

Panasonic NN-S562 User manual

Panasonic
Operating
Instructions
Microwave
Oven
Modeis
NN-S562
NN-S592
TAs
dial
COnMUNS
Gately
instucions,
Operating
Imsiructians
and
Maintenance
al
the
avert
&
Completely
Ans
G6
G08ar
Este
DPeGUCTO.
ite
asta
rst
er
Su
iolabadad
ES
ianadl
dé
instuedanies
en
ashanol
pwede
ser
enconirada
en
ie
paginas
f2-29
(Spanish
Operating
Ingtructions
can
bo
founed
on
pagers
22-4)
Fer
assistance.
please
call
:1-800-211-PANA[/262)
nd
e-mail
io
‘[email protected]
OF
ViSH
WB-al
wWiWw.panasonic.cam
For
as
Or
VISIE
ii
Before
sparing
(his
ave,
please
read
(hese
instiuctian
(U.S.A)
sistance,
please
call
1
787-750-4300
Sal
www.panasonicorncom
(Puerte
Ries)
Thank
you
for
purchasing
a
Panasonic
Microwave
Oven.
PRECAUTIONS
TO
AVOID
POSSIBLE
EXPOSURE
TO
EXCESSIVE
MICROWAVE
ENERGY
(a)
Do
not
attempt
to
operate
this
oven
with
the
door
open
since
open-door
operation
can
result
in
harmful
exposure
to
microwave
energy.
It
is
important
not
to
defeat
or
tamper
with
the
safety
interlocks.
Under
nor-
mal
conditions
oven
will
not
operate
with
door
open.
(b)
Do
not
place
any
object
between
the
oven
front
face
and
the
door
or
allow
soil
or
cleaner
residue
to
accumulate
on
sealing
surfaces.
(c)
Do
not
operate
the
oven
if
it
is
damaged.
It
is
particularly
important
that
the
oven
door
close
properly
and
that
there
is
no
damage
to
the:
(1)
door
(bent),
(2)
hinges
and
latches
(broken
or
loosened),
(3}
door
seals
and
sealing
surfaces.
(d)
The
oven
shouid
not
be
adjusted
or
repaired
by
anyone
except
properly
qualified
service
personnel.
Technical
Specifications
pT
sans
Power
Source
120
V
60
Hz
Power
Consumption:
11.5
Amps,
1,320
W
Output:*
1,300
W
Outside
Dimensions
11
7/s"
x
20
9/8"
x
15
7/a"
(H
x
Wx
D):
(301
x
518
x
404
mm)
Oven
Cavity
Dimensions
8’/e"
x
143/4"
x
15
3/16”
(H
x
W
x
D):
(225
x
375
x
386
mm)
Operating
Frequency:
2,450
MHz
Uncrated
Weight:
Approx.
23
ibs.
(10.5
kg)
“IEC
705-88
Test
procedure
Specifications
subject
to
change
without
notice.
The
serial
number
of
this
product
may
be
found
on
the
back
side
of
the
oven.
You
Model
No.
should
note
the
model
number
and
the
serial
number
of
this
oven
in
the
space
Serial
No.
provided
and
retain
this
book
as
a
per-
manent
record
of
your
purchase
for
future
reference.
Date
of
Purchase
©
Copyrighted
by
Matsushita
Electric
Industrial
Co.,
Ltd.
2002.
CONTENTS
Before
Operating
PCC
BUNT
cic
cosines
cdescccadsns
dateccectn
cece
eatesentiza
nel
cadasshigiopaoesnmecsiies
sssediea
twats
Inside
Front
Cover
Important
Safety
Instructions
...........
eck
cece
tence
tees
ceeees
acess
aeeneaeee
reece pease
enaaeenes
2-3
Installation
and
ore
WTRSSEEUCTOONS
oasis
ie
Sides
sed
heaescgarcsodcicensassnscnebenbyunmctangestnscenpacsnind
Safety
Precautions...
viandickeleses
taneous
Cookware
and
Utensil
Guide
.
Feature
Diagram......
Control
Pane!
........
eee
NNO
OD
Operation
Let's
Start
to
Use
Your
OVEN
..........
eee
escecseeseeeeassneaenseees
8
Clock
Setting...
saga
Ghanancauot
ead
caeeccnedilebavcan
daxetesseuncatmacdaesoxtavenespenbeaabasa
cman
bine
@uameer
winnie
To
Use
Child
Safty
Lock...
Piece
hin
tee
ea
ttatiascutie
WA
ela
t
actisth
tascam
ac
ovaraeleanenaage
To
Use
More/Less
Pad...
eoteestlsta
te
ecea
ch
Wace
Stack
ts
tracl
aah
eectralets
ae
acueoe
shai
Cie
necadantcatten
dace
Be
©
ts
ah
ace)
coo
010
Bl
a>
>
eee
nr
are
rie
ee
Bor
SPT
eae
END
EEN
SRE
REMI
MU
TT
RCTT
TTT
eT
TTT
9
WISE:
BaCORe
PA
isis
cs
cdeiicss
apne
bua
tacetie
oneal
cctunded
lesan
cantndusenteecectenstacciteateateat.
donstecauhen
San
Jikan
10
To
Reheat
using
Power
&
Time
Settinng.............-.--.ccccssssscsssscrccarrescrssscneesensesensssenvesssssnene
8
.
Sensor
Reheat
:.é2632:
sececcsizes
lcci
Test
iws
eh
od
ete
ceo
es
Ree
iccas
dalaeeiees
12
To
Defrost
using
Power
&
Time
Setting
.........ccce
cs
ccceeereeeeree
renee
ceneesennessnnereneeecnaetenacenne
8
Inverter
Turbo
Detrost.........cccccssseccssserecseeseesessseeeseceeeseseneeeenccaae
1°17
To
Cook
using
PO
WON
Se
TU
STII
see
sheic
cakes
scence
dat
Gash
ca
sich
ncetiatd
dct
woh
aainaeaae
Sensor
Cook...
We
Yd
hued
totes
ran
ateynaadeddtebaasiauis
aatiabiatcopetinstinadys
METS
Quick
Min
Function...
igs
uShip
tested
tcencuss
patenardeaasece
saves
ape
Timer
Setting
cade
Timer
/
Stand
Time
/
Delay
Stat
nnn
Microwave
Shortcuts...
la
ts
Seiad
Sain
alsaea
lube
st
acts
ae
Caiaaavecusapaasaup
istnoiaintessteaed
cerensueetaean
le
Food"
Gh
aracinneliceasincss
me
ncce
waa
nope
ena
nae
aalennalomsadaee
ele
Cookirigy
TeChrigues
sii
ivscf
catcsst
ecko
sce
cata
sock
isdasabbadsanttaacegesansssareaausaeuioanenake
_AT-
18
Quick
Guide
to
Gey
ellos
cerieie
ernest
ne
Cover
Maintenance
TECHNICAL
SpeciiCal
ORs
cz
5:5.
essa
datasets
esccesscees
ects
catades
cca
tahesnacnatndihe
Inside
Front
Cover
Care
Of
VOUS
MICTOWAVE
OVEN
osc,
inccceetsasssscecivonresstcasenseisacersisnsuccsdnacriuacrvodnesatetsgenttesoke<etosks
19
To
Order
Accessories,
Books,
te
ccc.
cacissccicccieusssasecesdcnsredsd
dennosensteccegdabadanceeevecsduseceandedaandener
19
Baiore
REQUeSting:
SGPViGe
2.
ccsc.cccon5.c5
eo
ia
Secs
tien
iv
cugenncedagataesen
cc
chzcacaciecreusancscataeceenweste
asides
20
Limited
Warranty
&
Customer
Services
Directory...........:ccscceecceceeccesereeseseseseeaseenesteesaeenesaes
21
Manual
de
instrucciones
apie
males
metenon)
Precauciénes...
Este
<vewtice
eniseaarts
Cesena
taut
tay
Ses
ualerectetepilec
aasiunte
Sgedacneatewcet
22
Instrucciones
de
‘Seguridad...
Ora
utcetere
Ae
fa
eal
nas
ee
oto
one
ae
23
Instrucciones
para
Conexién
:
a
|
TDN
SIA
PI
tah
eet
eT
Instrucciones
de
InstalaciOn.................ec
cess
csecseeetteeeenscensscesee
cesses
sesessneausnaeeenseeseaneree
ne
Sug
eremectas
WSS
isc
ssa
as
escksctan
Boschusnstasteeetenctcmdacss
eicbnabacabadaeatesee
siaetee
seep
iacae
haigesoncteeD
Panel
de
Control
..
deca
wibcsntieg
ht
sehaabhs
fuali:uoeaade
tabeasiaUatad
vast
dawiddfunsedacgoyssediubssianazetacressasoalhaee
Procedimientos
de
Operacion
.
eddie
cansnhieetvctuagsd
i
oeedaty
atecce
casts
san
talie
nado
eseeneanaspiahbensaaeee
27-28
Gili
Rapicla:
6
Operaciann
cece
cis
ooss
ee
chai
oca
cscs
ttaee
ested
aan
ceased
239
For
assistance,
PLEASE
CALL
1-800-211-PANA
(7262)
IMPORTANT
SAFETY
INSTRUCTIONS
Your
microwave
oven
is
a
cooking
device
and
you
should
use
as
much
care
as
you
use
with
a
stove
or
any
other
cooking
device.
When
using
this
electric
appliance,
basic
safety
precautions
should
be
followed,
including
the
fotlowing:
WA
R N
[
N
G_n
reduce
the
risk
of
burns,
electric
shock,
fire,
injury
to
persons,
or
exposure
to
excessive
microwave
energy:
1.
2.
10.
11.
.
Keep
cord
away
from
heated
surfaces.
13.
Read
all
instructions
before
using
the
appliance.
Read
and
follow
the
specific
“PRECAU-
TIONS
TO
AVOID
POSSIBLE
EXPO-
SURE
TO
EXCESSIVE
MICROWAVE
ENERGY,”
found
on
the
inside
front
cover.
.
This
appliance
must
be
grounded.
Connect
only
to
properly
grounded
outlet.
See
“GROUNDING
INSTRUCTIONS”
found
on
page
4.
.
Install
or
locate
this
appliance
only
in
accordance
with
the
installation
instruc-
tions
found
on
page
4.
.
Do
not
cover
or
block
any
openings
on
this
appliance.
.
Do
not
store
or
use
this
appliance
out-
doors.
Do
not
use
this
product
near
water—for
example,
near
a
kitchen
sink,
in
a
wet
basement,
or
near
a
swimming
pool,
and
the
like.
.
Use
this
appliance
only
for
its
intended
use
as
descnbed
in
this
manual.
DO
NOT
use
corrosive
chemicals,
vapors,
or
non-food
products
in
this
appliance.
This
type
of
oven
is
specifically
designed
to
heat,
or
cook.
It
is
not
designed
for
industrial
or
lab-
oratory
use.
The
use
of
corrosive
chemi-
cals
in
heating
or
cleaning
wil!
damage
the
aga
and
may
result
in
radiation
leaks
.
When
cleaning
surfaces
of
door
and
oven
that
come
bi
gol
on
closing
the
door,
use
only
mild,
non-abrasive
soaps
or
detergents
applied
with
a
sponge
or
soft
cloth.
.
Do
not
allow
children
to
use
this
appliance,
unless
closely
supervised
by
an
adult.
Do
not
operate
this
appliance
if
it
has
a
damaged
cord
or
plug,
if
it
is
not
working
properly,
or
if it
has
been
damaged
or
dropped.
Do
not
immerse
cord
or
plug
in
water.
Do
not
let
cord
hang
over
edge
of
a
table
or
counter.
14.
15.
This
appliance
should
be
serviced
only
by
qualified
service
personnel.
Contact
the
nearest
authorized
servicenter
for
exami-
nation,
repair
or
adjustment.
Some
products
such
as
whole
eggs,
nar-
row
neck
bottles
and
sealed
containers—
for
example,
closed
glass
jars—may
explode
and
should
not
be
heated
in
this
oven.
16.
To
reduce
the
risk
of
fire
in
the
oven
cavity:
(a)
Do
not
overcook
food.
Carefully
attend
appliance
if
paper,
plastic,
or
other
com-
bustible
materials
are
placed
inside
the
oven
to
facilitate
cooking.
(b)
Remove
wire
twist-ties
from
paper
or
plastic
bags
before
placing
bag
in
oven.
(c)
lf
materials
inside
the
oven
should
ignite,
keep
oven
door
closed,
turn
oven
off,
and
disconnect
the
power
cord,
or
shut
off
power
at
the
fuse
or
circuit
breaker
panel.
(d)
Do
not
use
the
cavity
for
storage
purpos-
es.
Do
not
leave
paper
products,
cooking
utensils,
or
food
in
the
cavity
when
not
in
use.
17.
Liquids,
such
as
water,
coffee,
or
tea
are
able
to
be
overheated
beyond
the
boiling
point
without
appearing
to
be
boiling
due
to
surface
tension
of
the
liquid.
Visible
bub-
bling
or
boiling
when
the
container
is
removed
from
the
microwave
oven
is
not
always
present.
THIS
COULD
RESULT
IN
VERY
HOT
LIQUIDS
SUDDENLY
BOIL-
ING
OVER
WHEN
A
SPOON
OR
OTHER
UTENSIL
IS
INSERTED
INTO
THE
LIQ-
UID.
To
reduce
the
risk
of
injury
to
per-
sons:
(a)
Do
not
overheat
the
liquid.
(b}
Stir
the
liquid
both
before
and
halfway
through
heating
it.
(c)
Do
not
use
straight-sided
containers
with
narrow
necks
(d)
After
heating,
allow
the
container
to
stand
in
the
microwave
oven
for
a
short
time
before
removing
the
container.
(e)
Use
extreme
care
when
inserting
a
spoon
or
other
utensil
into
the
container.
SAVE
THESE
INSTRUCTIONS
For
proper
use
of
your
oven
read
remaining
safety
cautions
and
operating
instructions.
IMPORTANT
SAFETY
INSTRUCTIONS
General
Use
1.
.
DO
NOT
operate
DO
NOT
tamper
with
or
make
any
adjustments
or
repairs
to
door,
Control
Panel
hous-
ing,
safety
interlock
switches
or
any
other
part
of
the
oven.
DO
NOT
remove
outer
panel
from
oven.
Repairs
must
only
be
done
by
a
qualified
service
person.
the
oven
empty.
The
microwave
energy
will
reflect
continuously
throughout
the
oven
causing
overheat-
ing,
if
food
or
water
is
not
present
to
absorb
energy.
This
could
damage
the
oven
and
result
in
the
risk
of
a
fire.
.
DO
NOT
dry
clothes,
newspapers
or
other
materials
in
oven,
or
use
news-
papers
or
paper
bags
for
cooking.
Fire
could
result.
.
DO
NOT
use
recycled
paper
products
unless
the
paper
product
is
labeled
as
safe
for
microwave
oven
use.
Recycled
paper
products
may
contain
impurities
which
may
cause
sparks,
and
result
in
fires
when
used.
.
DO
NOT
hit
or
strike
Contro!
Panel.
Damage
to
controls
may
occur.
Fire
could
result.
.
POT
HOLDERS
should
always
be
used
when
removing
items
from
the
oven.
Heat
is
transferred
from
the
HOT
food
to
the
cooking
container
and
from
the
cooking
container
to
the
Glass
Tray.
The
Glass
Tray
can
be
very
HOT
after
removing
the
cooking
container
from
the
oven.
.
DO
NOT
store
flammabie
materials
next
to,
on
top
of,
or
in
the
oven.
These
could
be
fire
hazards.
Glass
Tray
1.
2
DO
NOT
operate
the
oven
without
Roller
Ring
and
Glass
Tray
in
place.
DO
NOT
operate
the
oven
without
the
Glass
Tray
fully
engaged
on
the
drive
hub.
Improper
cooking
or
damage
to
the
oven
could
result.
Verify
that
the
Glass
Tray
is
properly
engaged
and
rotating
by
observing
its
rotation
when
you
press
Start.
.
Only
use
the
Glass
Tray
specifically
designed
for
this
oven.
Do
not
substi-
tute
any
other
glass
tray.
.
If
the
Glass
Tray
is
hot,
allow
to
cool
before
cleaning
or
placing
in
water.
.
DO
NOT
cook
directly
on
the
Glass
Tray.
Always
place
food
in
a
microwave-safe
dish,
or
on
a
rack
set
-in
a
microwave-safe
dish.
.
{f
food
or
utensil
on the
Glass
Tray
touches
oven
walls,
causing
the
tray
to
stop
moving,
the
tray
will
automatically
rotate
in
the
opposite
direction.
This
is
normal.
7.
Glass
Tray
can
turn
in
either
direction.
Roller
Ring
1,
2.
3.
Roller
Ring
and
oven
floor
should
be
cleaned
frequently
to
prevent
exces-
sive
noise.
Roller
Ring
must
always
be
used
for
cooking
along
with
Glass
Tray.
Always
replace
Roller
Ring
and
Glass
Tray
in
their
proper
positions.
INSTALLATION
AND
GROUNDING
INSTRUCTIONS
Examine
Your
Oven
Unpack
oven,
remove
ail
packing
material
and
examine
the
oven
for
any
damages
such
as
dents,
broken
door
latches
or
cracks
in
the
door.
Notify
dealer
immediate-
ly
if
oven
is
damaged.
DO
NOT
install
if
oven
is
damaged.
Placement
of
Oven
1.
Oven
must
be
placed
on
a
flat,
stable
surface.
For
proper
operation,
the
oven
must
have
sufficient
air
flow.
Allow
3-
inches
(7.6
cm)
of
space
on
both
sides
of
the
oven
and
1-inch
(2.5
cm)
of
space
of
space
on
top
of
oven.
a.
DO
NOT
block
air
vents.
If
they
are
blocked
during
operation,
the
oven
may
be
overheated
and
damaged.
When
using
any
cloth
over
the
oven,
the
air
intake
and
exhaust
should
not
be
blocked.
Also
should
allow
space
on
back
and
both
sides
of
oven
properly.
b.
DO
NOT
place
oven
near
a
hot,
damp
surface
such
as
a
gas
or
electric
range,
or
dishwasher.
c.
DO
NOT
operate
oven
when
room
humidity
is
too
high.
2.
This
oven
was
manufactured
for
household
use
only.
Grounding
instructions
This
appliance
must
be
grounded.
In
the
event
of
an
electrical
short
circuit,
ground-
ing
reduces
the
risk
of
electric
shock
by
providing
an
escape
wire
for
the
electric
current.
This
appliance
is
equipped
with
a
cord
having
a
grounding
wire
with
a
grounding
plug.
The
plug
must
be
plugged
into
an
outlet
that
is
properly
installed
and
grounded.
WA
R
N
[
N
G_
improper
use
of
the
grounding
plug
can
result
in
a
risk
of
electric
shock.
Consult
a
qualified
electrician
or
service
person
if
the
grounding
instructions
are
not
completely
understood,
or
if
doubt
exists
as
to
whether
the
appliance
is
properly
grounded.
If
it
is
necessary
to
use
an
extension
cord,
use
only
a
three
wire
extension
cord
that
has
a
three
blade
grounding
plug,
and
a
three
slot
receptacle
that
will
accept
the
plug
on
the
appliance.
The
marked
rating
of
the
extension
cord
should
be
equal
to
or
greater
than
the
elec-
trical
rating
of
the
appliance.
Power
Supply
.
1.
A
short
power-supply
cord
is
provided
to
.
reduce
the
risks
resulting
from
becoming
entangle
in
or
tripping
over
a
longer
cord.
:
2.
Longer
cord
sets
or
extension
cords
are
available
and
may
be
used
if
care
is
exercised
in
their
use.
3.
If
a
long
cord
or
extension
cord
is
used,
(1}
the
marked
electrical
rating
of
the
cord
set
or
extension
cord
should
be
at
least
as
great
as
the
electrical
rating
of
the
appliance,
(2)
the
extension
cord
must
be
a
grounding-type
3-wire
cord,
and
(3)
the
longer
cord
should
be
arranged
so
that
it
will
not
drape
over
the
counter
top
or
tabletop
where
it
can
be
pulled
on
by
children
or
tripped
over
accidentally.
Wiring
Requirements
1.
The
oven
must
be
operated
on
a
SEPA-
RATE
CIRCUIT.
No
other
appliance
should
share
the
circuit
with
the
microwave
oven.
/f
it
does,
the
branch
circuit
fuse
may
biow,
the
circuit
breaker
may
trip,
or
the
food
may
cook
slower
than
the
times
recommended
in
this
manual.
2.
The
VOLTAGE
used
must
be
the
same
as
specified
on
this
microwave
oven
(120
V,
60
Hz).
Using
a
higher
voltage
is
dangerous
and
may
result
in
a
fire
or
another
incident
causing
oven
damage.
Using
a
lower
voltage
will
cause
slow
cooking.
Panasonic
is
NOT
responsible
for
any
damages
resulting
from
the
use
of
the
oven
with
any
voltage
other
than
specified.
3.
The
oven
must
be
Plugged
into
at
least
a
20
AMP,
120
VOLT,
60
Hz
GROUNDED
OUTLET.
Where
a
standard
two-pron
outlet
is
encountered,
it
is
the
persona
responsibility
and
obligation
of
the
con-
ee
to
nee
it
eae
with
a
properly
ground-
ed
three-prong
Sutlet.
OE
TV
/
Radio
Interference
1.
Operation
of
the
microwave
oven
may
cause
interference
to
your
radio,
TV
or
similar
equipment.
2.
When
there
is
interference,
it
may
be
reduced
or
eliminated
by
taking
the
follow-
ing
measures:
a.
Clean
door
and
sealing
surfaces
of
the
oven.
(See
Care
of
Your
Microwave
Oven)
b.
Place
the
radio,
TV,
etc.
away
from
the
microwave
oven
as
far
as
possible.
c.
Use
a
properly
installed
antenna
to
obtain
stronger
signa!
reception.
Safety
Precautions
Follow
These
Safety
Precautions
When
Cooking
in
Your
Oven
IMPORTANT
Proper
cooking
depends
upon
the
power,
the
time
set
and
quantity
of
food.
If
you
use
a
smaller
portion
than
recommended
and
cook
at
the
time
for
the
recommended
por-
tion,
fire
could
result.
1)
HOME
CANNING
/
DRYING
FOODS
/
SMALL
QUANTITIES
OF
FOODS
«
Do
not
use
your
oven
for
home
canning,
your
oven
cannot
maintain
the
food
at
the
proper
canning
temperature.
Improperly
canned
food
may
spoil
and
be
dangerous
to
consume.
*
Do
not
dry
meats,
herbs,
fruits
or
vegetables
in
your
oven.
Small
quantities
of
food
or
foods
with
low
moisture
content
can
dry
out,
scorch
or
catch
on
fire
if
overheated.
2)
POPCORN
Popcorn
may
be
popped
in
a
microwave
oven
corn
popper.
Microwave
popcorn
which
pops
in
its
own
package
is
also
available.
Follow
pcorn
manufacturers’
directions
and
use
a
rand
suitable
for
the
wattage
of
your
microwave
oven.
CAUTION:
When
using
pre-packaged
microwave
popcorn,
follow
recommended
pace
instructions.
Check
package
weight
before
using
the
Popcorn
pad
(see
Popcorn
Pad
section).
Set
the
oven
for
the
weight
of
the
popcorn
package.
lf
these
instructions
are
not
followed,
the
popcorn
may
not
pop
adequately
or
may
ignite
and
cause
a
fire.
Never
leave
oven
unattended
when
popping
popcorn.
Allow
the
popcorn
bag
to
cool
before
opening,
eineye
open
the
bag
away
from
your
face
and
body
to
prevent
steam
burns.
3)
DEEP
FAT
FRYING
*
Do
not
attempt
to
deep
fat
fry
in
your
microwave
oven.
Cooking
oils
may
burst
into
flames
and
may
cause
damage
to
the
oven
and
perhaps
result
in
burns.
Microwave
uten-
sils
may
not
be
able
to
withstand
the
tempera-
ture
of
the
hot
oil,
and
could
shatter
or
melt.
4)
FOODS
WITH
NONPOROUS
SKINS
+»
Potatoes,
apes
egg
yolks,
whole
eggs,
whole
squash
and
sausages
are
examples
of
foods
with
nonporous
skins.
These
types
of
foods
must
be
pierced
before
microwave
cooking
to
prevent
their
bursting.
«
Use
fresh
potatoes
for
baking
and
cook
until
just
done.
sa
recommended
weights
for
pro-
grammed
cooking.
Overcooking
causes
dehy-
dration
and
may
result
in
a
fire.
5)
GLASS
TRAY
/
COOKING
UTENSILS
/
FOIL
+«
Cooking
utensils
get
hot
tart
Rebabieitries
Heat
is
transferred
from
the
HOT
food
to
the
container
and
the
Glass
Tray.
Use
potholders
when
removing
utensils
from
the
oven
or
when
removing
lids
or
plastic
wrap
covers
from
cooking
utensils,
to
avoid
burns.
+
The
Glass
Tray
will
get
hot
during
cooking.
It
should
be
allowed
to
cool
before
handling
or
before
paper
products,
such
as
paper
plates
or
microwave
popcorn
bags,
are
placed
in
the
oven
for
microwave
cooking.
«
When
using
foil,
skewers,
warming
rack
or
utensils
made
of
metal
in
the
oven,
allow
at
least
1-inch
(2.5
cm)
of
space
between
metal
material
and
interior
oven
walls.
{f
arcing
occurs
(sparking),
remove
metal
material
(skewers
etc.}
and/or
transfer
to
a
non-metallic
container.
+
Dishes
with
metallic
trim
should
not
be
used,
as
arcing
may
occur.
«
If
an
entree
is
heated
in
a
foil
tray,
maintain
at
least
1-inch
(2.5
cm)
spacing
from
the
oven
walls.
6)
PAPER
TOWELS
/
CLOTHS
+
DO
NOT
use
a
ed
towels
or
cloths
which
contain
a
synthetic
fiber
woven
into
them.
The
synthetic
fiber
may
cause
the
towel
to
ignite.
se
paper
eee
supervision.
7)
Shs
NING
DISHES
/
OVEN
COOKING
«
Browning
dishes
or
grills
are
designed
for
microwave
oo
only.
Always
follow
instruc-
tions
provided
by
the
manufacturer.
DO
NOT
prenieat
browning
dish
more
than
6
minutes.
«
If
an
oven
cooking
bag
is
used
for
microwave
cooking,
prepare
according
to
package
direc-
tions.
DO
NOT
use
a
wire
twist-tie
to
close
bag,
instead
use
plastic
ties,
cotton
string
or
a
simp
cut
from
the
open
end
of
the
bag.
8)
THERMOMETERS
-
DO
NOT
use
a
conventional!
meat
thermome-
ter
in
your
oven.
Arcing
may
occur.
Microwave-safe
thermometers
are
available
for
both
meat
and
candy.
9)
BABY
FORMULA
/
FOOD
«
DO
NOT
heat
baby
formula
or
food
in
the
microwave
oven.
The
glass
jar
or
surface
of
the
food
may
appear
warm
while
the
interior
can
be
so
hot
as
to
burn
the
infant's
mouth
and
ee
LY
aeal
TING
PASTRY
PRODUCTS
«
When
reheating
pastry
products,
check
tem-
eratures
of
any
fillings
before
eating.
Some
oods have
fillings
which
heat
faster
and
can
be
extremely
hot,
while
the
surface
remains
warm
to
the
touch
cs
ay
Donuts).
11)
GENERAL
OVEN
USAGE
GUIDELINES
»
DO
NOT
use
the
oven
for
any
reason
other
than
the
preparation
of
food.
«
DO
NOT
leave
oven
unattended
while
in
use.
Cookware
and
Utensil
Guide
ITEM
MICROWAVE
COMMENTS
Yes
for
Small
strips
of
foil
can
be
molded
around
thin
parts
of
Aluminum
Foil
eee
ng
meat
or
poultry
to
prevent
overcooking.
Arcing
can
occur
only
if
foil
is
too
close
to
oven
wall
or
if
too
much
foil
is
used.
Browning
dishes
are
designed
for
microwave
cooking
ony:
Check
browning
dish
information
for
instructions
heating
chart.
Do
not
preheat
for
more
than
6
minutes.
Brown
paper
bags
|}
No
|
May
cause
a
fire
in
the
oven.
Dinnerware
Check
manuitacturers’
use
and
care
directions
for
use
in
Labeled
microwave
heating.
Some
dinnerware
hd
state
on
the
“Microwave-Safe”
back
of
the
dish,
“Oven-Microwave
Safe”.
Other
Dinnerware
Use
CONTAINER
TEST
below.
Disposable
polyester
Some
frozen
foods
are
packaged
in
these
dishes.
Can
be
Paperboard
Dishes
purchased
in
grocery
stores.
Fast
Food
Carton
with
Metal
Handle
—
Metal
handle
may
cause
arcing,
Frozen
Dinner
Tray
Frozen
dinners
may
be
heated
in
foil
tray,
if
tray
is
less
than
Metal
%.-in.{2
cm)
high.
Place
foil
tray
in
center
of
oven.
Leave
at
least
1-in.
(2.5
cm)
space
between
foil
tray
and
oven
walls.
Microwave-safe
Heat
only
1
foil
tra
‘a
the
oven
at
a
time.
For
containers
more
than
*.-inch
(2
cm)
deep,remove
food
and
place
in
a
similar
size
microwave-safe
container.
Glass
Jars
Yes,
Remove
lid.
Heat
food
unt
just
warm,
not
HOT.
Most
glass
use
caution
|
jars
are
not
heat
resistant
O
oO
not
use
for
cooking.
Glassware
Heat
Resistant
Oven
Yi
Ideal
for
microwave
cooking
and
browning.
Glassware
&
Ceramics
es
(See
CONTAINER
TEST
below)
Metal
Bakeware
1
No
__|
Notrecommended
for
use
in
microwave
ovens.
Metal
Twist-Ties
May
cause
arcing
which
could
cause
a
fire
in
the
oven.
Follow
manufacturers’
directions.
Close
bag
with
the
nylon
tie
provided,
a
strip
cut
from
the
end
of
the
Dag,
or
a
piece
of
cotton
string.
Do
not
close
with
metal
twist-tie.
Make
six
Y-in.
(1.
cm
slits
near
the
closure.
ee
et
|
Paper
Towels
&
Napkins|
Yes
|
Use
to
warm
rolls
and
sandwiches
by
microwave.
Use
as
a
cover
to
prevent
spattering.
Safe
for
use
in
Plastic
Microwave-Safe
Yes
Cookware
Reheat
&
Storage
Yes,
|
use
caution
Browning
Dish
Yes
Oven
Cooking
Bag
Should
be
labeled,
"Suitable
for
Microwave
Heating.”
Check
manufacuters’
directions
for
recommended
uses.
Some
microwave-safe
plastic
dishes
are
not
suitable
for
cooking
foods
with
nia
fat
or
sugar
content.
The
heat
from
hot
food
may
cause
the
plastic
to
warp.
Melamine
This
material
absorbs
microwave
energy.
Dishes
get
HOT!
Yes,
Plastic
foam
will
melt
if
foods
reach
a
high
temperature.
Use
Plastic
Foam
Cups
to
bring
foods
to
a
low
serving
temperature.
Use
to
cover
food
during
cooking
to
retain
moisture
and
Plastic
Wrap
Yes
porett
spattering.
Should
be
labeled
“Suitable
for
icrowave
Heating”.
Check
package
directions.
Use
only
for
short
term
reheating
and
to
bring
Shaw:
Were
W000
a
food
to
a
low
serving
temperature.
Thermometers
Microwave-safe,
only
Use
only
microwave-safe
meat
and
candy
thermometers.
Not
suitable
for
use
in
microwave
oven,
will
cause
sparks
Conventional
and
get
hot.
Use
as
a
cover
to
prevent
spattering
and
to
retain
moisture.
CONTAINER
TEST
TO
TEST
A
CONTAINER
FOR
SAFE
MICROWAVE
OVEN
USE:
Fill
a
1-
cup
glass
measure
with
water
and
place
it
in
the
microwave
oven
along
with
the
container
to
be
tested;
heat
one
(1)
minute
at
P10
(HIGH).
If
the
container
is
microwave
oven-safe
(transparent
to
microwave
energy),
the
container
should
remain
comfortably
cool
and
the
water
should
be
hot.
If
the
container
is
hot,
it
has
absorbed
some
microwave
energy
and
should
NOT
be
used.
This
test
cannot
be
used
for
plastic
containers.
6
Feature
Diagram
(a)
External
Air
Vents
(b)
Internal
Air
Vents
G
Door
Safety
Lock
System
(d)
Exhaust
Air
Vents
(e)
Contro!
Pane!
G)
Identification
Plate
(g)
Glass
Tray
(h)
Roller
Ring
Heat/Vapor
Barrier
Film
(do
not
remove)
(j)
Menu
Labet
(k)
Cover
(do
not
remove)
Oven
Light:
Oven
Light
turns
on
only
while
cooking
and
will
not
turn
on
when
oven
door
is
opened.
Control
Panel
(1)
Display
Window
(2)
Sensor
Reheat
Pad
(=
page
12)
2
(3)
inverter
Turbo
Defrost
Pad
SOUR
;
(page
10)
(4)
Popcorn
Pad
(<page
9)
(1)
(5)
Power
Level
Pad
(page
8)
{6)
Number
Pads
(7)
Sensor
Cook
Pads
(page
12)
(8)
Timer
Pad
(<page
15)
(9)
Clock
Pad
(pages
8)
5
(10)
Quick
Min
Pad
(<page
10)
(2)
(141)
Bacon
Pad
(page
10)
(12)
More/Less
Pad
(page
9,
12)
(3)
(13)
Start
Pad
One
tap
allows
oven
to
begin
function-
ing.
If
door
is
opened
or
Stop/Reset
Pad
is
pressed
once
during
oven
oper-
ation,
Start
Pad
must
be
pressed
again
to
restart
oven.
(14)
Stop/Reset
Pad
(7)
Before
cooking:
One
tap
clears
your
instruction.
NZ
8/9
During
cooking:
One
tap
temporarily
=
stops
the
cooking
process.
Another
tap
mi
Clock|
(=a
cancels
ail
your
instructions
and
time
of
(8-10)
4
day
or
colon
appears
on
the
Display
Window.
Beep
Sound:
When
a
pad
is
pressed
correctly,
a
beep
will
be
heard.
If
a
pad
is
I
Dest
and
no
beep
is
heard,
(42)
the
unit
did
not
or
cannot
accept
the
instruc-
tion.
The
oven
wil!
beep
twice
between
pro-
grammed
stages.
At
the
end
of
any
com-
plete
program,
the
oven
will
beep
5
times.
Let's
Start
to
Use
Your
Oven!
Power
&
Time
Setting
1.
Plug
into
a
properly
grounded
electrical
outlet.
7S
The
oven
automatically
displays
weights
in
imperial
(oz/b).
Display
Window
88:89);
2.
If
you
wish
to
use
metric
(g/kg):
‘
he
Press
Start
to
convert
to
metric.
ay
Verify
your
selection
%,
on
the
Display
Window.
3.
G0
Colon
appears
on
Display
fae
Press
Window.
Now,
enjoy
cooking
with
your
Panasonic
microwave.
Clock
Setting
The
oven
will
operate
without
setting
the
clock.
Example:
To
set
11:25
a.m.
or
p.m.
"
fs
Clock
»
Press
once.
»Colon
flashes.
+
Enter
time
of
day
using
the
number
pads.
»Time
appears
on
the
Display
Window,
colon
continues
flashing.
-
Press.
»Colon
stops
flashing;
time
of
day
is
entered.
NOTES:
1.To
reset
the
clock,
pet
steps
1-
3.
2.The
clock
will
retain
the
time
of
day
as
long
as
the
oven
is
plugged
in
and
electricity
is
supplied.
3.Clock
is
a
12
hour
display.
4.Oven
will
not
operate
while
colon
is
flashing.
This
feature
allows
you
to
manually
set
the
power
and
time
for
microwave
cooking.
Example:
To
cook
at
P
6
(MEDIUM)
Power
for
1
minute
30
seconds
1.
-
Select
Power
Level.
Power
Level
(according
to
the
a
chart
below)
Press
5
times.
-
Set
Cooking
Time
using
number
pads.
-
Press.
»
Cooking
will
start.
The
time
on
the
Display
Window
will
count
down.
once
P10
(HIGH)
twice
P9
3
times
P8
4
times
P
7
(MEDIUM-HIGH)
5
times
P
6
(MEDIUM)
6
times
P5
7
times
P
4
8
times
|
P
3
(MEDIUM-LOW)/DEFROST
9
times
P2
10
times
NOTES:
1.For
more
than
one
stage
cooking,
repeat
Steps
1
and
2
for
each
stage
of
cooking
before
pressing
Start
Pad.
The
maximum
number
of
stages
for
cooking
is
5
stages.
2.When
selecting
P10
(HIGH)
power
for
the
first
stage,
you
may
begin
at
step
2.
3.
Two
beeps
will
sound
between
each
stage
of
programming.
Five
beeps
will
sound
at
the
end
of
the
enrire
sequence.
4.When
selecting
P10
(HIGH)
power,
the
maximum
programmable
time
is
30
minutes.
For
other
power
levels,
the
maximum
time
is
99
minutes
and
99
seconds.
5.For
reheating,
use
P10
(HIGH)
for
liquids,
P7
(MEDIUM-HIGH)
for
most
foods
and
Pé
(MEDIUM)
for
dense
foods.
6.For
defrosting,
use
P3
(MEDIUM-LOW).
P
1
(LOW)
To
Use
Child
Safety
Lock
This
feature
prevents
the
electronic
operation
of
the
oven
until
cancelled.
It
does
not
lock
the
door.
To
Set:
Press
3
times.
-
“Child”
appears
on
the
Display
Window.
>"Child"
continues
to
be
displayed
until
Child
Lock
is
can-
celled.
Keypads
may
be
pressed
but the
microwave
will
not
start.
To
Cancel:
Stop/Reset
Press
3
times.
-
The
Display
Window
will
return
to
colon
or
time
of
day
when
Child
Lock
has
been
cancelled.
To
Use
More/Less
Pad
For
Popcorn:
When
using
Popcorn
pad,
maybe
the
weight
is
not
the
same
as
offered.
By
using
the
More/Less
pad,
the
programs
can
be
adjusted
to
cook
food
for
a
longer
or
shorter
time
or
a
heavier
or
lighter
weight.
1
tap
=
More
Cooking
2
taps
=
More*
Cooking
3
taps
=
Less
Cooking
4
taps
=
Less”
Cooking
5
taps
=
original
setting
For
Sensor
Reheat/Cook:
Preferences
for
food
doneness
vary
with
each
individual.
After
having
used
the
Sensor
Cook
feature
a
few
times,
you
may
decide
you
would
prefer
your
food
cooked
to
a
different
doneness.
1
tap
=
More
Cooking
2
taps
=
Less
Cooking
3
taps
=
original
setting
Press
More/Less
pad
before
pressing
Start.
To
Use
Popcorn
Pad
Example:
To
heat
1.75
oz.
of
Popcorn
-
Set
the
desired
weight
of
prepackaged
microwave
popcorn,
-
Press
Start
Pad.
»
After
several
seconds,
cooking
time
appears
on
the
Display
Window
and
begins
to
count
down.
NOTES
ON
POPCORN
PAD:
1.
Use
prepackaged
room
temperature
microwave
popcorn.
Read
manufacturers’
instructions.
2.
Place
bag
in
oven
according
to
manufac-
turers’
directions.
3.
Pop
only
one
bag
at
a
time.
4.
After
popping,
allow
the
contents
of
the
bag
to
cool
for
a
few
minutes
before
opening.
Open
bag
carefully
away
from
face
and
body
because
popcorn
and
steam
are
extremely
hot.
5.
Do
not
reheat
unpopped
kernels
or
reuse
ag.
6.
NEVER
leave
oven
unattended
when
popping
popcorn.
Stop
the
oven
when
popping
slows
to
2
to
3
seconds
between
pops.
Overcooking
may
cause
scorching.
7.
With
the
many
varieties
of
microwave
popcorn
available
in
the
market
place,
it
may
be
necessary
for
you
to
move
the
popcorn
container
to
the
outer
edge
of
the
*
gm
tray
to
obtain
the
best
cooking
results.
REMARK:
When
popping
multiple
bags
one
right
after
the
other,
the
cooking
times
may
vary
slightly.
This
does
not
affect
the
pop-
corn
results.
To
Use
Bacon
Pad
1.
-
Set
the
desired
num-
ber
of
slices.
4
slices
(3.2
-
4
02.}
(90
-
110
g)
6
slices
(4.8
-
5.8
02.)
(135
-
165
g)
10
slices
(8.1
-
9.5
02.)
(230
-
270
g)}
14
slices
4
times
(11.6
-
13
02.)
(330
-
370
g)
*
Press
Start
Pad.
»
Cooking
time
appears
on
the
Display
Window
-
and
begins
to
count
’
down.
NOTES
ON
BACON
PAD:
1.
For
best
results,
place
bacon
on
ridged
(Bacon)
dish.
This
keeps
it
away
from
the
grease
and
helps
it
to
crisp.
2.
To
absorb
grease
spatters,
cover
with
paper
towels.
3.
If
bacon
is
not
cooked
to
your
liking,
contin-
ue
to
heat
by
manually
adding
more
time.
This
feature
allows
you
to
set
and/or
add
cooking
times
easily
in
multiples
of
one
minute.
To
Set
Cooking
Time:
«
Set
cooking
time
(up
to
10)
Power
Level
is
P10.
-
Press
Start
Pad.
»
Cooking
begins
and
Bacon
istice}
Press
once.
Display
Window
counts
down.
At
the
end
of
cook-
ing,
5
beeps
sound
and
colon
or
time
of
day
appears.
NOTE:
1.You
can
use
other
power
levels.
Select
desired
power
level
before
setting
cooking
time.
2.After
setting
the
time
by
Quick
Min
Pad,
you
cannot
use
Number
Pads,
and
vice
versa.
3.Press
Quick
Min
Pad
to
add
more
time
dur-
ing
cooking.
To
verify
the
additional
cooking
time,
check
the
Display
Window.
10
inverter
Turbo
Defrost
This
feature
allows
you
to
defrost
meat,
poultry
and
seafood
simply
by
entering
the
weight.
Example:
To
defrost
1.5
pounds
of
meat.
Place
food
on
microwave
safe
roasting
rack
in
an
appropriately
sized
dish.
*
Press.
"def"
appears
briefly
on
the
Display
Window.
+
Enter
weight
of
the
food
using
the
number
pads.
*
Press.
»Defrosting
will
start.
The
time
on
the
Display
Window
will
count
down.Halfway
through
defrosting,
beep
sounds.
Turn
over,
rearrange
foods,
remove
defrost
areas
or
shield
with
aluminum
foil.
cee
directions
"DURING
DEFROSTING"”
in
page
11.)
Conversion
Chart:
Follow
the
chart
to
convert
ounces
or
hun-
dredths
of
a
pound
into
tenths
of
a
pound.
To
use
Auto
Defrost,
program
the
weight
of
the
food
in
Ibs.
(1.0)
and
tenths
of
a
lb.
(0.1).
Ifa
piece
of
meat
weighs
1.95
Ibs.
or
1
Ib.
14
02z.,
program
1.9
Ibs.
Hundredths
Tenths
of
of
=
nome
a
Pound
oOo
Q
OONMDOPOh
+
2909999900¢%
Defrosting
Tips
&
Techniques
Before
Freezing:
1,
Freeze
meats,
poultry,
and
fish
in
packages
with
only
1
or
2
layers
of
food.
Place
wax
paper
between
layers.
2.
Package
in
heavy-duty
plastic
wraps,
bags
(labeled
“For
Freezer”)
or
freezer
paper.
3.
Remove
as
much
air
as
possible,
i.e.
create
a
vacuum.
4.
Seal
securely,
date,
and
label.
To
Defrost:
1.
Remove
wrapper.
This
he!ps
moisture
to
evaporate.
Juices
from
food
can
get
hot
and
cook
the
food.
2.
Set
food
on
microwave
safe
roasting
rack
in
an
appropriately
sized
dish.
3.
Place
roasts
fat-side
down.
Place
whole
poultry
breast-side
down.
4.
Drain
liquids
during
defrosting.
5.
Turn
over
(invert)
items
during
defrosting.
6.
Shield
edges
and
ends
if
needed.
(See
Cooking
Techniques).
7.
Select
power
and
minimum
time
so
that
items
wiil
be
under-defrosted.
After
Defrosting:
1.
Large
items
may
be
icy
in
the
center.
Defresting
will
complete
during
STANDING
TIME.
2.
Let
stand,
covered
with
plastic
wrap,
in
the
refrigerator
for
time
shown
in
the
chart
below.
3.
See
chart
below
for
standing
time
and
rinsing
directions.
4.
Items
which
have
been
layered
should
be
rinsed
separately
or
have
a
longer
stand
time.
DEFROST
TIME
at
P3
DURING
DEFROSTING
AFTER
DEFROSTING
Fish
and
Seafood
fup
to
3
Ibs.
(1.4
kg)]
Crabmeat
Fish
Steaks
Fish
Fillets
Sea
Scallops
Whole
fish
Meat
Ground
Meat
Roasts
[22-4
Ibs,
(1.1-1.8
kg)
Chops/Steak
Ribs/T-bone
Stew
Meat
Liver
(thin
sliced)
Bacon
(sliced)
Poultry
Chicken,
Whole
Cutlets
Pieces
Cornish
Hens
Turkey
Breast
[5-6
Ibs.
(2.3-2.7
kg)}]
(minJ\b.}
Stand
Time
Rinse
Break
apart/Rearrange
Turn
over
Turn
over/Rearrange/Shield
ends
Break
apart/Remove
defrosted
pieces
Turn
over
Turn
over/Remove
defrosted
portion/
Turn
over/Shield
ends
and
defrosted
surface
Turn
over/Rearrange/Shield
ends
and
defrosted
surface
Turn
over/Rearrange/Shield
ends
and
defrosted
surface
Break
apart/Rearrange/
Remove
defrosted
pieces
Drain
liquid/Turn
over/
Separate
pieces
Turn
over
Turn
over/Shield
Break
apart/Turn
over/
Remove
detrosted
Pieces
Turn
over/Shield
Turn
over/Shield
11
This
sensor
feature
allows
you
to
reheat
any
quantity
of
food
with
only
one
touch.
The
oven
does
it
all
for
you.
Example:
To
reheat
2
cups
of
soup
~_
ie
Sensor
2.
(see
page
9.)
Optional
-
Press.
3.
»
Cooking
starts.
After
heat/steam
is
detected
by
the
Genius,
2
beeps
sound.
The
remaining
cooking
time
appears
on
the
Display
Window
and
begins
to
count
down.
At
the
end
of
cooking,
five
beeps
sound.
NOTES:
Casseroles
-
Add
3
to
4
tablespoons
of
aul
cover
with
lid
or
plastic
wrap.
Stir
when
time
appears
on
the
Display
Window.
Canned
foods
-
Empty
contents
into
casserole
dish
or
serving
bowl:
cover
dish
with
lid
or
plastic
wrap.
After
reheating,
release
plastic
wrap
and
stand.
Plate
of
food
-
Arrange
food
on
plate;
top
with
butter,
gravy,
etc..
After
reheating,
release
plastic
wrap
and
stand.
Follow
the
recommendations
for
Sensor
Cooking,
in
addition
to
the
following:
DO
NOT:
1.
Reheat
bread
and
pastry
products.
Use
manual
power
and
time
for
these
foods.
2,
Reheat
raw
or
uncooked
food.
3.
Use
if
oven
cavity
is
warm.
4.
Use
for
beverages.
5.
Use
for
frozen
foods.
Sensor
Cook
-
Breakfast
Lunch
Snack
Side
Dish
Dinner
This
sensor
feature
allows
you
to
cook
any
quantity
of
food
with
only
one
touch.
The
oven
does
it
all
for
you.
Example:
To
cook
a
10
oz.
Frozen
Entrée.
»
Press
until
the
desired
number
of
category
appears
on
the
Display
Window.
tunch
f4-3}
Press
twice.
2
Optional
After
heat/steam
ts
detected
by
the
Genius,
2
beeps
sound.
The
remaining
cooking
time
appears
on
the
Display
Window
and
begins
to
count
down.
At
the
end
of
cooking,
five
beeps
sound.
(see
page
9.)
-
Press.
»
Cooking
starts.
For
the
best
results
with
the
GENIUS,
follow
these
recommendations.
BEFORE
Reheating/Cooking
1.
The
room
temperature
are
|
the
oven
should
be
below
95°
F
(35°
C).
2.
Food
weight
should
exceed
4
oz.
(110
g).
3.
Glass
Tray
and
outside
of
container
should
be
dry.
4.
Cover
food
loosely
with
lid,
or
with
vent-
ed
plastic
wrap.
5.
All
foods
should
be
taken
from
their
nor-
mal
storage
place.
12
DURING
Reheating/Cooking:
DO
NOT
open
the
oven
door
until
2
beeps
sound
and
time
appears
on
the
Display
Window.
Doing
so
will
cause
inaccurate
cooking
since
the
steam
from
food
is
no
longer
contained
within
the
oven
cavity.
Once
the
timer
begins
to
count
down,
the
oven
door
may
be
opened
to
stir,
turn,
shield,
rearrange,
mix
or
add
foods.
AFTER
Reheating/Cooking:
All
foods
should
have
a
covered
stand
time.
Sensor
Cook
Chart
|
Pad
|
Recipe
_|[ServingWeight
HINTS
Breakfast
|
1.
Oatmeal
Y2,1cup_
|
Place
inside
a
microwave-safe
serving
bowl
with
no
cover.
Follow
manufacturers’
directions
for
preparation
of
quick
oatmeal.
2.
Breakfast
8
maximum
|
Follow
manufacturers’
directions
for
Sausage
preparation
of
pre-cooked
breakfast
sausage.
Place
in
a
radial
pattern.
aes
2,
4
eggs
Follow
Basic
Omelet
recipe
on
page
14.
Lunch
1-2cups
|
Pour
soup
into
a
microwave-safe
serving
bowl.
Cover
loosely
with
lid
or
vented
plastic
wrap.
5.
Frozen
8
-
32
oz
Follow
manufacturers’
directions
for
Entrées
preparation
of
8
and
10
oz.
sizes.
For
larger
sized
entrées,
where
the
directions
state
for
the
entire
film
cover
to
be
removed,
do
not
vent
or
remove
film
cover
to
ensure
the
sensor
will
detect
accurately
for
complete
cooking.
Be
careful
when
removing
the
film
cover
after
cooking.
Remove
them
away
from
you
to
avoid
steam
burns.
If
additional
time
is
needed,
continue
to
cook
manually.
6.
Frozen
Pizza|
4,
8
oz.
Follow
manufacturers’
directions
for
(single)
preparation.
7.
Hot
Dog
4
maximum
|
Make
3
slits
on
each
Hot
Dog.
Place
Hot
Dog
on
paper
plate
or
microwave-safe
dish
leaving
space
between
each.
Times
may
vary
by
size
and
manufacturer.
Ye
-
1/2
cups
|
Place
rice
with
hot
water
in
a
microwave-safe
casserole
dish.
Cover
loosely
with
lid
or
vented
before
serving.
10.
Fresh
Ye
-
1
Ib.
All
pieces
should
be
the
same
size.
Vegetables
Add
a
small
amount
of
water
and
cover
loosely
with
lid
or
vented
plastic
wrap.
12.
Ground
1-2
|b.
Break
apart
in
glass
bowl
or
colander.
Meat
{16
-
32
oz.)
|
Cover
with
vented
plastic
wrap.
Juices
should
be
clear.
Drain.
Ya-
1
Ib.
Arrange
in
a
single
layer.
Cover
with
vented
plastic
wrap.
casserole
dish.
Cover
loosely
with
lid
or
plastic
wrap.
Drain.
8.
Potatoes
4
maximum
|
Pierce
at
least
6
times
on
top
of
the
potato
(6-8
oz.
each)
|
with
a
fork.
Place
potatoes
on
a
microwave-
safe
dish.
Do
not
cover.
Let
stand
5
minutes
to
complete
cooking.
plastic
wrap.
Let
stand
5
to
10
minutes
Dinner
.|
11.
Chicken
Yo
-
2
Ib.
Place
skin-side
up.
Cover
with
vented
Pieces
plastic
wrap.
Let
stand
5
minutes
before
serving.
After
2
beeps,
stir.
Re-cover
and
press
Start.
14.
Pasta
+
2-80z.
Place
pasta
with
hot
water
in
a
microwave-safe
15.
Casserole
|
oS
Prepare
according
to
recipes
on
page
14.
13
Sensor
Cook
Recipe
OMELET
Basic
Omelet
1
tablespoon
butter
or
margarine
2
eggs
2
tablespoons
milk
salt
and
ground
black
pepper,
if
desired
Heat
butter
in
a
9-inch
pie
plate,
30
seconds
at
P10,
or
until
melted,
turn
the
plate
to
coat
the
bottom
with
butter.
Meanwhile,
combine
the
remainin
ingredients
in
a
separate
bowl
an
together;
pour
into
the
pie
plate.
Cook,
covered
with
vented
plastic
wrap,
on
OMELET.
Let
stand
2
minutes.
With
a
spatu-
ra,
loosen
the
edges
of
the
omelet
from
the
plate;
fold into
thirds
to
serve.
beat
Yield:
1
serving
Approx.
Cooking
Time:
4
minutes
NOTE:
Double
ingredients
for
a
4
egg
Omelet.
CASSEROLE
Shepherd's
Pie
1
pound
lean
ground
beef
%e
cup
frozen
peas,
thawed
Ys
Cup
chopped
onion
1
tablespoon
gravy
powder
Ye
teaspoon
curry
powder
Ya
teaspoon
salt
Ya
teaspoon
ground
black
pepper
2
cups
mashed
potatoes
in
a
2-Qt.
casserole
dish,
crumble
the
beef
and
cook
for
5-7
minutes
at
P6,
until
the
meat
is
cooked;
stirring
twice.
Add
the
remaining
ingredients,
except
the
potatoes.
Stir
well
and
spread
the
potatoes
evenly
on
the
top.
Cover
with
a
lid
and
cook
on
CASSEROLE.
Yield:
4
servings
Approx.
Cooking
Time:
17
minutes
Macaroni
and
Cheese
“a
Cup
butter
2
tablespoons
chopped
onion
1
clove
minced
garlic
Ys
cup
all
purpose
flour
1
teaspoon
dry
mustard
1
teaspoon
salt
Ys
teaspoon
ground
black
pepper
2
cups
milk
2
cups
grated
chedder
cheese
8
02.("/2
Ib
dry
weight)
macaroni,
cooked
and
drained
vs
cup
bread
crumbs
1
teaspoon
paprika
In
a
2-Qt.
casserole,
melt
the
butter
for
40
seconds
at
P10.
Add
onion
and
garlic
and
cook
for
1
minute
at
P10.
Stir
in
flour,
mus-
tard,
salt
and
pepper
then,
gradually
add
the
milk.
Cook
for
3-4
minutes
at
P10,
stirring
once.
Continue
cooking
for
3-4
minutes
at
P10
or
until
the
sauce
thickens.
Stir
in
the
cheddar
cheese.
Stir
the
sauce
into
the
mac-
aroni,
in
a
3-Qt.
casserole.
Top
with
bread
crumbs
and
paprika.
Cover
with
vented
plas-
tic
wrap.
Cook
on
CASSEROLE.
Yield:
6
servings
Approx.
Cooking
Time:
17
minutes
Beef
and
Macaroni
Casserole
1
pound
lean
ground
beef
1
small
chopped
onion
Ye
green
bell
pepper,
chopped
1
cup
chopped
celery
2
cans
(15
0z.)
tomato
sauce
cups
water
1
cup
uncooked
elbow
macaroni
1
teaspoon
parsley
Y2
teaspoon
salt
Ya
teaspoon
pps
black
pepper
Y2
Cup
grated
cheddar
cheese
Crumble
the
ground
beef
in
a
3-Qt.
casserole.
Cook
for
5
-
7
minutes
at
P6
or
until
the
meat
is
cooked;
stirring
twice.
Add
onion,
peppers
and
celery.
Cook
for
3-4
minutes
at
P10.
Add
the
remaining
ingre-
dients,
except
cheese.
Cover
with
vented
plastic
wrap.
Cook
on
CASSEROLE.
Sprinkle
with
cheese.
Cover
and
let
stand
5
minutes.
Yield:
4-6
servings
Approx.
Cooking
Time:
17
minutes
Tuna
Casserole
1
can
(6
02.)
drained
and
flaked
tuna
4
cups
cooked
and
drained
noodles
1
can
(10*/«
oz.)
condensed
cream
of
mushroom
soup
1
can
(4
02.)
mushroom
pieces
and
steams,
drained
1
package
(16
0z.}
frozen
peas,
defrosted
Ys
cup
milk
1
cup
crushed
potato
chips
Ye
Cup
grated
cheddar
cheese
In
a
3-Qt.
casserole,
combine
tuna,
noodles,
soup,
mushrooms,
peas
and
milk;
mix
well.
Cover
with
vented
plastic
wrap.
Cook
on
CASSEROLE.
Top
with
potato
chips
and
cheese.
Yield:
4-6
servings
Approx.
Cooking
Time:
17
minutes
14
Timer
Setting
This
feature
allows
you
to
program
a
To
Set
Delay
Start:
Standing
Time
after
cooking
is
completed
and
to
program
the
oven
as
a
kitchen
timer
Example:
To
start
cooking
5
minutes
and/or
to
program
a
delay
start.
=i
{3
a
at
P6-MEDI-
Power).
Pampa
i
samt
nee
Use
as
a
Kitchen
Timer:
(sa
=e
To
count
5
minutes
+
Enter
desired
amount
of
delayed
time
using
number
pads.
ip
to
99
minutes
an
99
seconds)
Sal
weer
-
Enter
the
desired
cooking
program
-
Set
desired
amount
of
time
usin
ng
number
pads.
up
to
99
minutes
and
9
seconds).
5
times
(see
page
8
for
direc-
y
tions).
[o]
[2]
art
+
Press.
To
Set
Stand
Time:
>
Delayed
time
will
count
down.
Then
cooking
will
start.
»
Press.
»Time
will
count
down
without
oven
operating.
Example:
To
stand
for
5
mins.
after
eee
te
Eg
mins.
at
P6-
MEDI
Power)
NOTES:
-
Enter
the
desired
1.
When
each
stage
finishes,
a
two-
rote
cooking
program
beep
signal
sounds.
At
the
end
of
the
(see
page
8
for
program,
the
oven
will
beep
five
5
times
directions).
times.
2.
If
oven
door
is
ops
ened
during
Stand
Time
or
Kitchen
Timer,
the
time
on
[o]
ue
screen
will
continue
to
count
own.
3.
Stand
and
Delay
time
cannot
be
pro-
grammed
before
any
Auto
Control
Function.
This
is
to
prevent
the
start-
-
Set
desired
amount
ing
temperature
of
food
from
rising
of
Stand
Time
using
before
defrosting
or
cooking
begins.
A
number
pads.
to
change
in
starting
temperature
could
99
minutes
and
99
cause
inaccurate
results.
seconds}
-
Press.
»
Cooking
will
start.
After
cooking,
stand
time
will
count
down
without
oven
operating.
15
Microwave
Shortcuts
TIME
To
separate
Bacon,
30
sec.
Remove
wrapper
and
place
in
microwave
1
pound
(450
g)
safe
dish. After
heating,
use
a
plastic
Spatula
to
separate
slices.
To
soften
Brown
Sugar
20
-
30sec.
{|
Place
brown
sugar
in
microwave-safe
dish
with
a
slice
of
bread.
Cover
with
plastic
wrap.
P6
1
cup
(250
mL)
12
-2
Remove
wrapper
and
place
butter
in
a
To
melt
Butter,
1
stick,
/«
pound
(110
g)
microwave-safe
dish
covered
with
plastic
wrap.
Remove
wrapper
and
place
butter
in
a
microwave-safe
dish.
To
soften
Butter,
1
stick,
'/«
pound
(110
g)
To
melt
Chocolate,
1
square,
1
02.
(28
g)}
To
meit
Chocolate,
Pt0
(HIGH)
Remove
wrapper
and
place
chocolate
in
a
microwave-safe
dish.
Stir
before
adding
more
time.
(Stir
until
completely
melted.)
Note:
Chocolate
holds
its
shape
Ye
cup
(125
mL)
chips
even
when
softened.
To
toast
Coconut,
1
Place
in
a
microwave-safe
dish.
Ve
cup
(125
mL)
Stir
every
30
seconds.
To
soften
Cream
Cheese,
|P3
(MED-LOW)
1-2
Remove
wrapper
and
place
ina
8
oz.
(250
g)
microwave-safe
bowl.
To
brown
Ground
Beef,
4-5
Crumble
into
a
microwave-safe
colander
1
pound
(450
g)
set
into
another
dish.
Stir
twice.
Drain
grease.
To
steam
Hand
Towels
-
4
20
-
30
sec.
|
Soak
in
water,
then
wring
out
excess.
Place
on
a
microwave-safe
dish.
Heat.
Present
immediately.
To
soften
tce
Cream,
P3
(MED-LOW)
1-12
Check
often
to
prevent
melting.
Y2
gallon
(2 L)
Cup
of
liquid
boiling
water,
broth,
etc.
1
cup,
8
oz.
(250
mL)
2
cups,
16
oz.
(500
mL}
to
heat
mitk
1
cup,
8
oz.
(250
mL)
2
cups,
16
oz.
(500
mL)
To
roast
Nuts,
P10
(HIGH)
Heated
liquids
can
erupt
if
not
stirred.
Do
not
heat
liquids
in
microwave
oven
without
stirring
before
and
after
heating.
P10
(HIGH)
Spread
nuts
into
a
9-inch
(230
mm)
1/2
cups
(375
mL)
microwave-safe
pie
plate.
Stir
occasionally.
To
toast
Sesame
Seeds,
nr
in
a
small
microwave-safe
bowl.
Ye
cup
(50
mL}
cael
twice.
To
skin
Tomatoes
hiaeaa
(HIGH)
30
sec.
Place
tomato
into
a
microwave-safe
bow!
{one
at
a
time)
containing
boiling
water.
Rinse
and
peel.
Repeat
for
each
tomato.
To
remove
Cooking
Odor
=
Combine
1
to
1'/2
cups
(250
-
375
mL)
water
with the
juice
and
peel
of
one
lemon
in
a
small
microwave-safe
bowl.
After
heating,
wipe
interior
of
oven
with
a
cloth.
Food
Characteristics
Cooking
Techniques
Piercing
Bone
and
Fat
Both
bone
and
fat
affect
cooking.
Bones
may
cause
irregular
cooking.
Meat
next
to
the
tips
of
bones
may
overcook
while
meat
positioned
under
a
large
bone,
such
as
a
ham
bone,
may
be
undercooked.
Large
amounts
of
fat
absorb
microwave
energy
and
the
meat
next
to
these
areas
may
overcook.
Density
Porous,
airy
foods
such
as
breads,
cakes
or
rolls
take
less
time
to
cook
than
heavy,
dense
foods
such
as
potatoes
and
roasts.
When
reheating
donuts
or
other
foods
with
different
centers
be
very
careful.
Certain
foods
have
centers
made
with
sugar,
water,
or
fat
and
these
centers
attract
microwaves
(For
example,
jelly
donuts).
When
a
jelly
donut
is
heated,
the
jelly
can
become
extremely
hot
while
the
exterior
remains
warm
to
the
touch.
This
could
result
in
a
burn
if
the
food
is
not
allowed
to
cool
properly
in
the
center.
Quantity
Two
potatoes
take
longer
to
cook
than
one
pota-
to.
As
the
quantity
of
the
food
increases
so
does
the
cooking
time.
When
cooking
small
amounts
of
food
such
as
one
or
two
potatoes,
do
not
leave
oven
unattended.
The
moisture
content
in
the
food
may
decrease
and
a
fire
could
result.
Shape
Uniform
sizes
heat
more
evenly.
The
thin
end
of
a
drumstick
will
cook
more
quickly
than
the
meaty
end.
To
compensate
for
irregular
shapes,
place
thin
parts
toward
the
cenier
of
the
dish
and
thick
pieces
toward
the
edge.
Size
Thin
pieces
cook
more
quickly
than
thick
pieces.
Starting
Temperature
Foods
that
are
room
temperature
take
less
time
to
cook
than
if
they
are
chilled,
refrigerated,
or
frozen.
Foods
with
skins
or
membranes
must
be
pierced,
.
scored
or
have
a
strip
of
skin
peeled
before
cook-
ing
to
allow
steam
to
escape.
Pierce
whole
egg
yolks
and
whites,
clams,
oysters,
chicken
livers,
whole
potatoes
and
whole
vegetables.
Whole
apples
or
new
potatoes
should
have
a
1-inch
strip
of
skin
peeled
before
cooking.
Score
sausages
and
frankfurters.
Browning
Foods
will
not
have
the
same
brown
appearance
as
conventionally
cocked
foods
or
those foods
which
are
cooked
utilizing
a
browning
feature.
Meats
and
poultry
may
be
coated
with
browning
sauce,
Worcestershire
sauce,
barbecue
sauce
or
shake-on
browning
sauce.
To
use,
combine
browning
sauce
with
melted
butter
or
margarine;
brush
on
before
cooking.
For
quick
breads
or
muffins,
brown
sugar
can
be
used
in
the
recipe
in
place
of
granulated
sugar,
or
the
surface
can
be
sprinkled
with
dark
spices
before
baking.
Cooking
Techniques
Spacing
:
~.
8
Ps
fae
ee
~~
Individual
foods,
such
as
baked
potatoes,
cup-
cakes
and
appetizers,
will
cook
more
evenly
if
placed
in
the
oven
equal
distances
apart.
When
possible,
arrange
foods
in
a
circular
pattern.
Covering
As
with
conventional
cooking,
moisture
evapo-
rates
during
microwave
cooking.
Casserole
lids
or
plastic
wrap
are
used
for
a
tighter
seal.
When
using
plastic
wrap,
vent
the
plastic
wrap
by
fold-
ing
back
part
of
the
plastic
wrap
from
the
edge
of
the
dish
to
allow
steam
to
escape.
Loosen
or
remove
plastic
wrap
as
recipe
directs
for
stand
time.
When
removing
plastic
wrap
covers,
as
well
as
any
glass
lids,
be
careful
to
remove
them
away
from
you
to
avoid
steam
burns.
Various
degrees
of
moisture
retention
are
also
obtained
by
using
wax
paper
or
paper
towels.
However,
unless
specified,
a
recipe
is
cooked
covered.
18
Shielding
Thin
areas
of
meat
and
poultry
cook
more
quickly
than
meaty
portions.
To
prevent
overcooking,
these
thin
areas
can
be
shielded
with
strips
of
aluminum
foil.
Wooden
toothpicks
may
be
used
to
hold
the
foil
in
place.
Timing
A
range
in
cooking
time
is
given
in
each
recipe.
The
time
range
compensates
for
the
uncontrol-
lable
differences
in
food
shapes,
starting
temper-
ature,
and
regional
preferences.
Always
cook
food
for
the
minimum
cooking
time
given
in
a
recipe
and
check
for
doneness.
If
the
food
is
undercooked,
continue
cooking.
it
is
easier
to
add
time
to
an
undercooked
product.
Once
the
food
is
overcooked,
nothing
can
be
done.
Stirring
Stirring
is
usually
necessary
during
microwave
cooking.
We
have
noted
when
stirring
is
helpfut,
using
the
words
once,
twice,
frequently,
or
occa-
sionally
to
describe
the
amount
of
stirring
neces-
sary.
Always
bring
the
cooked
outside
edges
toward
the
center
and
the
less
cooked
center
por-
tions
toward
the
outside
of
the
dish.
Rearranging
Rearrange
small
items
such
as
chicken
pieces,
shrimp,
hamburger
patties,
or
pork
chops.
Rearrange
pieces
from
the
edge
to
the
center
and
pieces
from
the
center
to
the
edge
of
the
dish.
Turning
It
is
not
possible
to
stir
some
foods
to
redistribute
the
heat.
At
times,
microwave
energy
will
concen-
trate
in
one
area
of
a
food.
To
help
insure
even
cooking,
these
foods
need
to
be
turned.
Turn
over
large
foods,
such
as
roasts
or
turkeys,
halfway through
cooking.
Stand
Time
Most
foods
will
continue
to
cook
by
conduction
after
the
microwave
oven
is
turned
off.
In
meat
cookery,
the
internal
temperature
will
rise
5°F
to
15°F
(3°C
to
8°C),
if
allowed
to
stand,
tented
with
foil,
for
10
to
15
minutes.
Casseroles
and
vegetables
need
a
shorter
amount
of
standing
time,
but
this
standing
time
is
necessary
to
allow
foods
to
complete
cooking
to
the
center
without
overcooking
on
the
edges.
Test
for
Doneness
The
same
tests
for
doneness
used
in
convention-
al
cooking
may
be
used
for
microwave
cooking.
Meat
is
done
when
fork-tender
or
splits
at
fibers.
Chicken
is
done
when
juices
are
clear
yellow
and
drumstick
moves
freely.
Fish
is
done
when
it
flakes
and
is
opaque.
Cake
is
done
when
a
tooth-
pick
or
cake
tester
is
inserted
and
comes
out
clean.
Candy
is
done
when
it
reaches
the
proper
temperature
for
each
stage
of
crystallization.

Other manuals for NN-S562

2

This manual suits for next models

1

Other Panasonic Microwave Oven manuals

Panasonic NN-S423 User manual

Panasonic

Panasonic NN-S423 User manual

Panasonic NN-E20JWM User manual

Panasonic

Panasonic NN-E20JWM User manual

Panasonic NNSN960S User manual

Panasonic

Panasonic NNSN960S User manual

Panasonic Genius NN-SD697S User manual

Panasonic

Panasonic Genius NN-SD697S User manual

Panasonic NN-SD377S User manual

Panasonic

Panasonic NN-SD377S User manual

Panasonic NN-V653WF User manual

Panasonic

Panasonic NN-V653WF User manual

Panasonic INVERTER NN-S760 User manual

Panasonic

Panasonic INVERTER NN-S760 User manual

Panasonic NN-SA631B User manual

Panasonic

Panasonic NN-SA631B User manual

Panasonic TK712SSQP User manual

Panasonic

Panasonic TK712SSQP User manual

Panasonic NE-1878 User manual

Panasonic

Panasonic NE-1878 User manual

Panasonic NN-ST651M User manual

Panasonic

Panasonic NN-ST651M User manual

Panasonic Sonic Steamer NE-3280 User manual

Panasonic

Panasonic Sonic Steamer NE-3280 User manual

Panasonic NN-SN668B User manual

Panasonic

Panasonic NN-SN668B User manual

Panasonic NN-SD65LS User manual

Panasonic

Panasonic NN-SD65LS User manual

Panasonic NN-CD767 User manual

Panasonic

Panasonic NN-CD767 User manual

Panasonic NN-CD997S User manual

Panasonic

Panasonic NN-CD997S User manual

Panasonic Over The Range Microwave Oven User manual

Panasonic

Panasonic Over The Range Microwave Oven User manual

Panasonic NE-1856 User manual

Panasonic

Panasonic NE-1856 User manual

Panasonic Inverter NN-SD797 User manual

Panasonic

Panasonic Inverter NN-SD797 User manual

Panasonic NN-CD87KS User manual

Panasonic

Panasonic NN-CD87KS User manual

Panasonic NN-C784MF User manual

Panasonic

Panasonic NN-C784MF User manual

Panasonic Inverter NN-CD757W Product guide

Panasonic

Panasonic Inverter NN-CD757W Product guide

Panasonic NNS740 - MICROWAVE User manual

Panasonic

Panasonic NNS740 - MICROWAVE User manual

Panasonic NN-CS894B User manual

Panasonic

Panasonic NN-CS894B User manual

Popular Microwave Oven manuals by other brands

Samsung MG700W owner's manual

Samsung

Samsung MG700W owner's manual

Midea EM031EZN-P00A Service manual

Midea

Midea EM031EZN-P00A Service manual

Samsung DE7711 Installation and owner's manual

Samsung

Samsung DE7711 Installation and owner's manual

Gorenje MO20E2BH manual

Gorenje

Gorenje MO20E2BH manual

Zanussi ZKG44500X user manual

Zanussi

Zanussi ZKG44500X user manual

LG MS-2042W Service manual

LG

LG MS-2042W Service manual

Amana LD510D owner's manual

Amana

Amana LD510D owner's manual

Daewoo KQG-6L6B5S Operating instructions & cook book

Daewoo

Daewoo KQG-6L6B5S Operating instructions & cook book

Turboair TMW-1100M user manual

Turboair

Turboair TMW-1100M user manual

Viking VMOR205SS use and care manual

Viking

Viking VMOR205SS use and care manual

Zelmer 29Z024 user manual

Zelmer

Zelmer 29Z024 user manual

Korona 58060 instruction manual

Korona

Korona 58060 instruction manual

DeDietrich DMG2508B manual

DeDietrich

DeDietrich DMG2508B manual

Fisher & Paykel OM25BLCX1 user guide

Fisher & Paykel

Fisher & Paykel OM25BLCX1 user guide

Kenmore 87100 Service manual

Kenmore

Kenmore 87100 Service manual

Whirlpool W11108505B User instructions

Whirlpool

Whirlpool W11108505B User instructions

Sunbeam Products Oster OGWX1401S user manual

Sunbeam Products

Sunbeam Products Oster OGWX1401S user manual

Stirling D90N30ASLR-T4-H instruction manual

Stirling

Stirling D90N30ASLR-T4-H instruction manual

manuals.online logo
manuals.online logoBrands
  • About & Mission
  • Contact us
  • Privacy Policy
  • Terms and Conditions

Copyright 2025 Manuals.Online. All Rights Reserved.