manuals.online logo
Brands
  1. Home
  2. •
  3. Brands
  4. •
  5. Panasonic
  6. •
  7. TV
  8. •
  9. Panasonic TX-21AD2 User manual

Panasonic TX-21AD2 User manual

SM - 96004
Service ManualService Manual
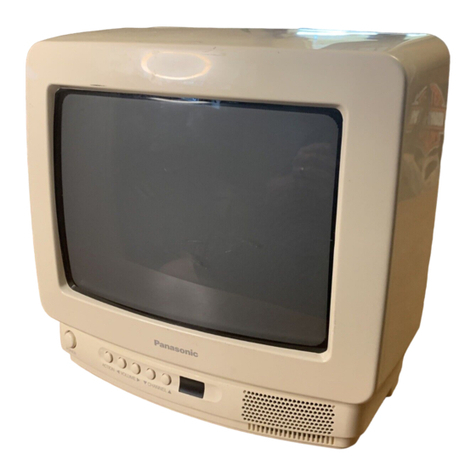
Colour Television
TX-21AD2
EURO-2 Chassis
Specifications
Power Source : 220-240V AC 50Hz
Power Consumption : 80W
Aerial Impedance : 75Wunbalanced, Coaxial Type
Receiving System : PAL I, PAL 60,
Receiving Channels : UHF E21 - E69
Intermediate Frequency :
Video 39.5 MHz
Sound 33.5 MHz
Colour 35.07 MHz
Video / Audio
Terminals :
AUDIO MONITOR OUT Audio(RCA x 2) 500mV rms,1kW
AV1 IN Video (21 pin ) 1V p-p 75W
Audio (21 pin ) 500mV rms,10kW
RGB (21 pin )
AV1 OUT Video (21 pin ) 1V p-p 75W
Audio (21 pin ) 500mVrms, 1kW
AV2 IN Video (21 pin ) 1V p-p 75W
Audio (21 pin ) 500mV rms,10 kW
S-Video IN Y : 1V p-p 75W
(21 pin ) C : 0.3V p-p 75W
AV2 OUT Video (21 pin ) 1V p-p 75W
Audio (21 pin ) 500mVrms, 1kW
AV3 IN Audio (RCA x 2)500mV rms,10kW
Video (RCA x 1)1V p-p 75W
High Voltage : 27kV _1kV at zero beam current
Picture Tube : 51 cmV measured diagonally.
Audio Output :
Internal Speaker 2 x 20W (Music Power)
8WImpedance
Headphones 8 WImpedance
Accessories supplied : Remote Control
UM3 Battery
T.V. Stand
Dimensions : Height : 465mm
Width : 558mm
Depth : 495mm
Net Weight 23kg
Specifications are subject to change without notice.
Weight and dimensions shown are approximate.
NOTE : This service manual should be used in conjunction
with the EURO 2 technical guide.
Panasonic Panasonic CS (UK)
WILLOUGHBY ROAD,
BRACKNELL
BERKS,
RG12 8FT.
All manuals and user guides at all-guides.com
all-guides.com
Contents
Safety Precautions 2
Location of Controls 3
Chassis Service Position 4
Service Mode 5
Self Check 6
Adjustment Procedure 6
Alignment Settings 7
Waveform Pattern Table 8
Block Diagrams 9
P.C.B. Views 12
Schematic Diagrams 14
Parts Location 17
Replacement Parts List 18
Safety Precautions
General Guide Lines
1. It is advisable to insert an isolation transformer in the AC supply
before servicing a hot chassis.
2. When servicing, observe the original lead dress in the high
voltage circuits. If a short circuit is found, replace all parts which
have been overheated or damaged by the short circuit.
3. After servicing, see that all the protective devices such as
insulation barriers, insulation papers, shields and isolation R-C
combinations are correctly installed.
4. When the receiver is not being used for a long period of time,
unplug the power cord from the AC outlet.
5. Potentials as high as 28kV are present when this receiver is in
operation. Operation of the receiver without the rear cover
involves the danger of a shock hazard from the receiver power
supply. Servicing should not be attempted by anyone who is not
familiar with the precautions necessary when working on high
voltage equipment. Always discharge the anode of the picture to
the chassis before handling the tube.
6. After servicing make the following leakage current checks to
prevent the customer from being exposed to shock hazards.
Leakage Current Cold Check
1. Unplug the AC cord and connect a jumper between the two
prongs of the plug.
2. Turn on the receiver's power switch.
3. Measure the resistance value with an ohmmeter, between the
jumpered AC plug and each exposed metallic cabinet part on the
receiver, such as screw heads, aerials , connectors, control
shafts etc. When the exposed metallic part has a return path to
the chassis the reading should be between 4M ohm and 20M
ohm. When the exposed metal does not have a return path to
the chassis the reading must be infinite.
Leakage Current Hot Check
1. Plug the AC cord directly into the AC outlet. Do not use an
isolation transformer for this check.
2. Connect a 2k ohm 10W resistor in series with an exposed
metallic part on the receiver and an earth such as a water pipe.
3. Use an AC voltmeter with high impedance to measure the
potential across the resistor.
4. Check each exposed Metallic part and check the voltage at each
point.
5. Reverse the AC plug at the outlet andrepeat each of the above
measurements.
6. The potential at any point should not exceed 1.4Vrms. In case a
measurement is outside the limits specified, there is a possibility
of a shock hazard, and the receiver should be repaired and
rechecked before it is returned to the customer.
X-Radiation Warning
1. The potential sources of X-Radiation in TV sets are the high
voltage section and the picture tube.
2. When using a picture tube test jig for service ensure that the jig
is capable of handling 28kV without causingX-Radiation.
NOTE : It is important to use an accurate periodically calibrated high
voltage meter
1. Set the brightness to minimum.
2. Measure the high voltage. The meter should indicate 27kV _1kV
at zero beam current if the meter indication is out of tolerance,
immediate service and correction is required to prevent the
possibility of premature component failure.
3. To prevent an X-Radiation possibility, it is essential to use the
specified tube.
HOT CHECK CIRCUIT
2Kohm10W
A.C.Voltmeter
WaterPipe
(Earth)
ToInstrument's
exposed
metallicparts
Fig.1
All manuals and user guides at all-guides.com
Location Of Controls
Service Hints
How to remove the rear cover
i. Remove the 5 fixing screws (A) as shown in Fig.3/Fig.4.
Fig.2
FOCUS
SCREEN
Fig.3.
SCREWS(A)
SCREW
Fig.4
All manuals and user guides at all-guides.com
TX-21AD2
4
How to move the chassis into the Service position
NOTE: To place the chassis into the advised service position the T.V. must be on the T.V. stand provided with the set.
1. To place the chassis into service position hold and lift the rear of the E-PCB chassis and gently pull the chassis toward you as shown in Fig.5.
B-PCB service position.
i. Release the respective wiring clips and rotate the chassis horizontally through 90_anti-clockwise, then lift the front of the chassis as shown in
Fig.6.
ii. Insert the beadclamper located in the bottom left hand corner of the cabinet (Fig.8.) into the chassis frame shown in Fig.9.
iii. After servicing ensure all wiring is returned to its original position before returning the receiver to the customer.
E-PCB service position.
i. Release the respective wiring clips and rotate the chassis horizontally through 180_ anti-clockwise, the lift the FBT side of the chassis as shown
in Fig.7.
ii. Insert the beadclamper located in the bottom left hand corner of the cabinet (Fig.8.) into the chassis frame shown in Fig.9
iii. After servicing ensure all wiring is returned to its original position before returning the receiver to the customer.
.
FRAME
Fig.5
Fig.6. Fig.7.
BEAD
CLAMPER
CABINET
Fig.8.
CHASSIS BEAD
CLAMPER
INSERT
Fig.9.
T.V. STAND T.V. STAND
B - PCB
E - PCB
B - PCB
E - PCB
MAINS
SWITCH
All manuals and user guides at all-guides.com
TX-21AD2
5
Service Mode
The remote control is used for entering and storing adjustments, with the exception of cut-off adjustments which must always be done prior to service
adjustment. Perform adjustments in accordance with screen display. The display on the screen also specifies the CCU variants as well as the approx.
setting values. The adjustment sequence for the service mode is indicated below.
1. Set the Bass to maximum position, set the Treble to minimum
position, press the F button followed by the Volume down on the
customer controls at the front of the TV and at the same time
press the Reveal button on the remote control, this will place the
TV into the Service Mode.
2. Press the RED / GREEN buttons to step down / up through the
functions.
3. Press the YELLOW / BLUE buttons to alter the function values.
4. Press the STORE button on the preset panel after each
adjustment has been made to store the required values.
5. To exit the Service Mode press the Normalisation button.
NOTE: This TV also has the option of using a Memory Pack which enables you to copy thepreset TV channels and analogue levels into the Memory
Pack and then upload them onto another EURO-2 TV set.
Using the Memory Pack
TV to Memory Pack process
1. Plug the memory pack into the lower of the two 21 pin terminals
at the back of the TV and switch the TV on. If the TV has only
one 21 pin connector then this will be able to accept the memory
pack.
2. Go into the Service Mode as explained above. The screen will
show:- 3. Press the blue button on
the remote control. The
screen will show:-
4. Press the STORE button
on the TV. The screen will
show:-
5. All the tuning information stored inside the TV will now be
transferred to the Memory Pack. This process will take 2-3
minutes to complete and when finished the screen will show:-
Memory Pack to TV Process
1. Plug the memory pack into the lower of the two 21 pin terminals
at the back of the TV and switch the TV on. If the TV has only
one 21 pin connector then this will be able to accept the memory
pack.
2. Go into the Service Mode as explained above. The screen will
show:- 3. Press the STORE button
on the TV. The screen will
show:-
4. All the tuning information stored inside the Memory Pack will
now be transferred to the TV. This process will take 2-3 minutes
to complete and when finished the screen will show:-
OK!
5. The tuning information from the Memory Pack has now been
copied into the TV
6. To exit from the Service Mode switch off the TV.
7. The process has now been completed and the Memory Pack
can now be removed.
Errors
If an error occurs while using the Memory Pack the TV will detect this and the screen will show:-
Program
Error!
If this happens then switch off the TV and repeat the process that was being used. If the errors continue to occur then check the connectors between
the TV and the memory pack and check the 9V battery inside the memory pack.
External>>TV
Program
Program
TV>>External
Storing
OK!
External>>TV
Program
Loading
All manuals and user guides at all-guides.com
TX-21AD2
6
SELF CHECK
Self check is used to automatically check the Bus lines and Hexadecimal code of the TV set.
To enter the Self Check mode press Function down button, on thePreset Panel, at the same time pressing the Status button, on the Remote Control,
and the screen will show:-
Adjustment Procedure
Item/Preparation Adjustments
+B SET-UP
1. Receive a window pattern
2. Set the controls:
Brightness minimum
Contrast minimum
Volume minimum
1. Set the +B voltage up as follows:
AdjustR811 so thatB2 shows 130V +/- 1V
2. Confirm the following voltages.
B1 200 +/- 10V B6 12 +/- 0.5V
B3 27 +/- 1V B7 5+0.1/-0.25V
B4 41.0 +/- 1V B8 5+/- 0.25V
B5 15.5 +/- 1V U33 31 +/- 1V
RF AGC
1. Receive a test pattern.
2. Connect an oscilloscope between the tuner
RF AGC and ground.
3. Set the oscilloscope gain range to 1V/div.
1. Check that the noise becomes large when the RF AGC VR
R126 is turnedcounterclockwise. After the check turn it clockwise.
2. Gradually turn the RF AGC VR anti-clockwise, and set the
RF AGC VR to the point where the RF AGC voltage is just falling to a
point where this voltage drops by 0.2V from the maximum value.
CUT OFF
1. Receive a window pattern.
2. Degauss the tube externally.
3. Set the TV into Service Mode 1.
4. SelectCutoff DC mode.
1. Confirm then value is 128 and select Ug2 mode noting colour with
largest value
2. Turn the screen VR until a colour reaches 20~30.
3. Connect an oscilloscope to the cathode with the biggest value
colour.
4. SelectCutoff DC mode and adjustCutoff pulse to 159V +/- 5V.
5. Disconnect the oscilloscope and adjust the screen to whichever colour
reaches70 +/- 30 first.
1
2
3
4
5
6
7
8
9
10
11
12
13
14
15
16
17
18
19
20
21
22
23
24
ok
ok
ok
ok
ok
ok
ok
ok
ok
ok
ok
ok
ok
ok
ok
ok
ok
ok
Tuner
VIF
EEPROM
SoundAV
switch1
VideoAV
switch1
DolbySub
DolbyIC
forL/R
DolbyIC
forC/R
Hex codes
If the CCU ports have been checked and found to be incorrect then "--" will appear in place of "OK".
VDP
TPU
MSP
PSMODE
P. TA1
P. TA2
P. TA3
P. TA0
PSDA
P
SCL1
PSCL3
PSCL4
PSBLED
POFF
PDEFL
PRAM
ok
ok
- -
- -
- -
06
CE
34
94
85
- -
All manuals and user guides at all-guides.com
all-guides.com
TX-21AD2
7
Alignment Settings (The figures used below are nominal and used for representative purposes only)
Alignment Function TX-21AD2 Settings / Special features
1. Vertical amplitude V-AMP
063 Optimum setting
2. Vertical symmetry V-SYM
002 Optimum setting
3. Vertical linearity V-LIN
-020 Optimum setting
4. Vert.D.C. Vert. D.C.
000 No Adjustment
5. V-Pos. V. Pos
005 Optimum setting
6. Horizontal amplitude H-AMP
-044 Optimum setting
7. Horizontal position H-POS
542 Optimum setting
8. Text Position TEXT POSITION
049 Optimum setting
9. EW-amplitude E-W AMP 1
-059 Optimum setting
10. EW-amplitude E-W AMP 2
044 Optimum setting
11. Trapezium-comp TRAPEZ 1
000 Optimum setting
12. Trapezium- comp TRAPEZ 2
-009 Optimum setting
13. Colour VCO Colour VCO
006 Press either Blue or Yellow buttons to effect
automatic adjustment
14. Cut-off DC Cut-off DC
050 No Adjustment
15. Ug2 Test Ug 2 Test
094 044 020
SelectCutoff DC in Service Modemode and
confirm the value is 128. SelectUg 2 Test noting
colour with largest value, adjust on FBT until a
colour reaches 20 ~ 30. Connect an
oscilloscope to the cathode of the biggest value
colour, selectCutoff DC mode and adjust get
Cutoff pulse voltage to 159_5V. Disconnect the
oscilloscope and adjust the screen to whichever
colour reaches 70_30 first.
16. Cutoff Cutoff
057 064 056 Press the GREEN button to step through the
settings. Adjust for optimum.
17. White White
200 255 246 Press the GREEN button to step through the
settings. Adjust for optimum.
All manuals and user guides at all-guides.com
TX-21AD2
8
PIN 42
I601
10u
PIN 6 E8
50u sec/div
PIN 5 E8
10u
PIN 3 E8
10u
PIN 18
5u sec/div
PIN 44
10u
PIN 4 E8
10u
PIN 6
5m sec/div
PIN 34
5m sec/div
BASE
20u sec/div
PIN 7
5m sec/div
BASE Q503
20u sec/div
PIN 6
5m sec/div
PIN 5
5m sec/div
GREEN DRIVE
100v
RED DRIVE
80v
PIN 8
IC701
64u sec/div
COLLECTOR
64u sec/div
PIN 3
IC801
5u sec/div
PIN 7
2u sec/div
(Chroma)
WAVEFORM PATTERN TABLE
PIN 1
5m sec/div
EMITTER Q352
EMITTER
Q351
BLUE DRIVE
120v
EMITTER Q353
All manuals and user guides at all-guides.com
TX-21AD2
9
VIDEO BLOCK
TUNER X103
FILTER IC102
VIDEO
Q3006
BUFFER
Q3001
BUFFER
J
K
3
1
0
2
AV3
5
6
21
10 Q103
BUFFER
1
16
5
19
15
20
10
8
11
C
V/Y
64
63
61
39
38
37
36
35
34
33
32
31
30
29
28
27
26
17
2
3
16
5
6
7
8
12
11
10
13
14
15
3
16
15
14
12
9
6
7
8
20
D
WE
RAS
CAS
A0
A1
A2
A3
A4
A5
A6
A7
A8
A9
42
31
4
3
12
13
19
20
21
32
Y
/R
P0
P1
C1
C0
Y0
Y1
Y2
MSY
13
44
14 Q3005
BUFFER
Q3004
BUFFER
IC3502
TELETEX
IC601
VIDEO
Q307
BUFFER
Q302
AMP Q301
AMP
Q308
BUFFER
Q304
AMP
Q303
AMP
Q309
BUFFER
Q306
AMP
Q305
AMP
R
G
B
55
57
59
Q351
OUTPUT AMP
Q352
OUTPUT
Q353
OUTPUT
IC3001
AV
19
20
R
G
B
11
15
V/Y
C
V/Y
17
V/Y
25
AGC
TUNER
VIDEO IN
H OUT
V
V
V
IC3501
MEMORY
IC351
RGB AMPS
1
2
3
9
8
7
4
A10
J
K
3
1
0
1
AV1
J
K
3
0
0
1
AV2
27
All manuals and user guides at all-guides.com
TX-21AD2
10
TUNER X103
FILTER Q102
BUFFER Q101
AMP
IC102
SIF/VIF/DEMODULATOR
Q202
AMP Q201
BUFFER
58 Q2102
BUFFER
Q2101
BUFFER
I251
AUDIO OUTPUT
AMP
28
29
6
3
1
1
13
8
22
IC2101
AUDIO
PROCESSOR
SIF
52
53
36
37
W
1
2
1
1
AV3
6
2
3
1
W
1
2
2
1
AV2
6
2
3
1
46
47
Q2308
MUTE
L
R
L
R
L
R
L
R
L
R
R
L
SIF
IN
AV2 IN
AV2 OUT
AV3 IN
R
L
R
L
LR
Q2310
BUFFER
25 26
Q2309
BUFFER
J
K
2
3
0
1
4
Q2301
AMP
Q2302
AMP
Q2306
MUTE
Q2305
MUTE
L
R
Q251
MUTE Q252
MUTE
Q1208
MUTE
LEFT AUDIO
MUTE SIGNAL
Q2307
MUTE
50
49
34
33
6
2
3
1
W
1
2
2
1
AV1
L
R
L
R
AV1 IN
AV1 OUT
Q2306
MUTE
Q2305
MUTE
AV2 OUT
R
L
D3018 D3019
45
AUDIO BLOCK
RIGHT AUDIO
IF SIGNAL
All manuals and user guides at all-guides.com
TX-21AD2
11
IC3502
TELETEX
IC3501
TEXT
MEMORY
IC1205
RESET
IC1201
MICROPROCESSOR
CONTROL
IC1202
EEPROM
MEMORY
IC1203
EAROM
PROGRAMME
MEMORY
IC601
VIDEO
IC2101
SOUND PROCESSOR
IC2301
8V REG
IC3001
AV
SWITCHING
IC1206
5V
IC102
IF PROCESSOR
IC851
12V
IC801
PSU
CONTROL
IC103
12V REG
I466
AUDIO OUTPUT
IC451
VERTICAL
TUNER
T1201
D1204
Q851
Y
PCB
Q503
DRIVER
Q551
LINE
OUTPUT
FBT
D554
150V
200V
27V
5V
15V
5VSB
29V
CLOCK 4
DATA
CLOCK
8V
12V
IC701
HORIZ OUTPUT
27V
T801
D855
D851
D852
D853
27V
D854
12V
5V
5V
5V RESET
29V
5VSB
POWER SUPPLY AND CONTROL BLOCK
All manuals and user guides at all-guides.com
all-guides.com
TX-21AD2
12
CONDUCTOR VIEWS
TP’S TRANS
TPY1 C2 Q351 C2
TPY2 C3 Q352 C2
TPY3 C2 Q353 C2
TPY4 B2
TPY5 B2 IC’S
TPY6 A3 IC351 B3
Y BOARD TNP117069
All manuals and user guides at all-guides.com
TX-21AD2
14
E-BOARD TNP197091
All manuals and user guides at all-guides.com
TX-21AD2
14
B BOARD TNP117064 SCHEMATIC DIAGRAM FOR MODELS
TX-21AD2
(EURO-2S CHASSIS)
Notes
i. RESISTOR
All resistors are carbon ¼W resistor, unless marked.
Unit of resistance is OHM (W) (K=1,000, M=1,000,000).
ii. CAPACITOR
All capacitors are ceramic 50V capacitors, unless marked, the unit of capacitance ismF unless otherwise stated.
iii. COIL
Unit of inductance ismH, unless otherwise stated.
iv. TEST POINT
TestPointPosition
v. EARTHSYMBOL
ChassisEarth(cold)
LineEarth(Hot)
vi. VOLTAGE MEASUREMENT
Voltage is measured by a DC voltmeter.
Measurement conditions are as follows:
Power source AC 220-240V, 50Hz
Receiving Signal Colour Bar signal (RF)
All customer controls Maximum position
v
IndicatestheVideosignalpath
IndicatestheAudiosignalpath
IndicatestheVertical/Horizontalsignalpath
viii. This schematic diagram is the latest at the time of printing and is subject to change without notice.
Precautions
a. Do not touch the hot part, or the hot and cold parts at the same time, as you are liable to a shock hazard.
b. Do not short-circuit the hot and cold circuits as electrical components may be damaged.
c. Do not connect an instrument, such as an oscilloscope, to the hot and cold circuits simultaneously, as this may ca use fuse failure. Connect the earth of
the instruments to the earth connection of the circuit being measured.
d. Make sure to disconnect the power plug before removing the chassis.
Remarks
i.
The Power Circuit contains a circuit area which uses a separate power supply to isolate the earth connection. The circuit is defined by HOT and COLD
indications in the schematic diagram. All circuits, except the Power Circuit, are COLD.
IMPORTANT SAFETY NOTICE
Components identified by mark have special characteristics
important for safety. When replacing any of these components,
use only manufacturer's specified parts.
All manuals and user guides at all-guides.com
TX-21AD2
14
B BOARD TNP117064 SCHEMATIC DIAGRAM FOR MODELS
TX-21AD2
(EURO-2S CHASSIS)
Notes
i. RESISTOR
All resistors are carbon ¼W resistor, unless marked.
Unit of resistance is OHM (W) (K=1,000, M=1,000,000).
ii. CAPACITOR
All capacitors are ceramic 50V capacitors, unless marked, the unit of capacitance ismF unless otherwise stated.
iii. COIL
Unit of inductance ismH, unless otherwise stated.
iv. TEST POINT
TestPointPosition
v. EARTHSYMBOL
ChassisEarth(cold)
LineEarth(Hot)
vi. VOLTAGE MEASUREMENT
Voltage is measured by a DC voltmeter.
Measurement conditions are as follows:
Power source AC 220-240V, 50Hz
Receiving Signal Colour Bar signal (RF)
All customer controls Maximum position
v
IndicatestheVideosignalpath
IndicatestheAudiosignalpath
IndicatestheVertical/Horizontalsignalpath
viii. This schematic diagram is the latest at the time of printing and is subject to change without notice.
Precautions
a. Do not touch the hot part, or the hot and cold parts at the same time, as you are liable to a shock hazard.
b. Do not short-circuit the hot and cold circuits as electrical components may be damaged.
c. Do not connect an instrument, such as an oscilloscope, to the hot and cold circuits simultaneously, as this may ca use fuse failure. Connect the earth of
the instruments to the earth connection of the circuit being measured.
d. Make sure to disconnect the power plug before removing the chassis.
Remarks
i. The Power Circuit contains a circuit area which uses a separate power supply to isolate the earth connection. The circuit is defined by HOT and COLD
indications in the schematic diagram. All circuits, except the Power Circuit, are COLD.
IMPORTANT SAFETY NOTICE
Components identified by mark have special characteristics
important for safety. When replacing any of these components,
use only manufacturer's specified parts.
All manuals and user guides at all-guides.com
all-guides.com
All manuals and user guides at all-guides.com
NOTE :
The numbers on the exploded view below refer to the
miscellaneous section of the Replacement Parts List.
PARTS LOCATION
3
1
4
97
11
13
12
18
14
All manuals and user guides at all-guides.com
MISCELLANEOUS COMPONENTS
1) EUR51920 REMOTE CONTROL
2) UR51EC780 BATTERY COVER (REMOTE)
3) TKY8E090 CABINET
4) A51EAL155X01 CRT
6) TLK8E05117 DEGUASS COIL
7) TKU8E00240 BACK COVER
8) TBM8E1506 PRESET LABEL
9) TNP117069AC Y P.C.B.
10) TNP117064AA B P.C.B
11) TNP197091AY E P.C.B
12) TMX8E013 CHASSIS FRAME
13) EAG1218A2 SPEAKER
14) TKP8E1139 SPEAKER NET
15) TBM153022 PANASONIC BADGE
16) TBX8E030 POWER BUTTON
17) TKP8E1138AD2 DOOR LID
18) TSX8E0017 POWER CORD
TBM8E1535 PRESET LABEL
TEK6935 LID SWITCH
TKP8E1140 LED TUBE
TMW8E022 LED HOLDER
TPC8E4525 OUTER CARTON
TPD8E562 CUSHION
F9-4-220 RELAY
TQB8E2082 INST BOOK
TS2800 TV STAND
UM-3DEP-2P BATTERY
H1202 832AG11D-ESL I.C. SOCKET
MOE6 TES4537 SPRING
MOE10 TES4537 SPRING
TNR001 ENV87880G3 TUNER
CAPACITORS
C001 ECUV1H103ZFX S.M. CAP 50V 10nF
C002 ECA1HMR33GB ELECT 50V 0.33mF
C003 ECUV1H104ZFX S.M. CAP 50V 100nF
C004 ECA1CM221GB ELECT 16V 220pF
C006 ECA1CM101GB ELECT 16V 100pF
C007 ECUV1H104ZFX S.M. CAP 50V 100nF
C009 ECUV1H104ZFX S.M. CAP 50V 100nF
C109 ECUV1H390JPX S.M. CAP 50V 39pF
C110 ECUV1H102KBX S.M. CAP 50V 1nF
C111 ECUV1H683ZFX S.M. CAP 50V 68nF
C112 ECUV1H150JCX S.M. CAP 50V 15pF
C113 ECA1CM100GB ELECT 16V 10pF
C114 ECUV1H270JPX S.M. CAP 50V 27pF
C115 ECUV1H103ZFX S.M. CAP 50V 10nF
C116 ECA1CM101GB ELECT 16V 100pF
C117 ECUV1H103ZFX S.M. CAP 50V 10nF
C118 ECUV1H103ZFX S.M. CAP 50V 10nF
C119 ECA1HMR47GB ELECT 50V 0.47mF
C120 ECUV1H102KBX S.M. CAP 50V 1nF
C121 ECUV1H103ZFX S.M. CAP 50V 10nF
C122 ECUV1H151JX S.M. CAP 50V 150pF
C123 ECUV1H102KBX S.M. CAP 50V 1nF
C124 ECA1CM470GB ELECT 16V 47mF
C125 ECUV1H103ZFX S.M. CAP 50V 10nF
C127 ECA1CM470GB ELECT 16V 47mF
C128 ECUV1H103ZFX S.M. CAP 50V 10nF
C130 ECA1HMR47GB ELECT 50V 0.47mF
C131 ECA1HM2R2GB ELECT 50V2.2mF
C132 ECUV1H331KBX S.M. CAP 50V 330pF
C133 ECUV1H102KBX S.M. CAP 50V 1nF
C134 ECUV1H103ZFX S.M. CAP 50V 10nF
C135 ECUV1H103ZFX S.M. CAP 50V 10nF
C136 ECA1CM100GB ELECT 16V 10pF
C137 ECA1EM101GB ELECT 25V 1mF
C138 ECUV1H103ZFX S.M. CAP 50V 10nF
C140 ECA1HM010GB ELECT 50V 1pF
C141 ECUV1H102KBX S.M. CAP 50V 1nF
C144 ECUV1H090DCX S.M. CAP 50V 90pF
C145 ECA1CM470GB ELECT 16V 47mF
C201 ECUV1H070DCX S.M. CAP 50V 7pF
C202 ECUV1H070DCX S.M. CAP 50V 7pF
C203 ECUV1H470JX S.M. CAP 50V 47pF
C204 ECUV1H560JCX S.M.CAP 50V 56pF
C205 ECUV1H100DCX S.M. CAP 50V 10pF
C207 ECUV1H220JCX S.M. CAP 50V 22pF
C209 ECUV1H103ZFX S.M. CAP 50V 10nF
C210 ECUV1H103ZFX S.M. CAP 50V 10nF
C211 ECUV1H103ZFX S.M. CAP 50V 10nF
C251 ECEA1EU101 ELECT 25V 100mF
C252 ECUV1H103KBX S.M. CAP 50V 10nF
C253 ECEA1HU4R7 ELECT 50V 4.7mF
C254 ECQM1H334J FILM 50V 330nF
C255 ECEA1EGE101 ELECT 25V 100mF
C256 ECUV1H103KBX S.M. CAP 50V 10nF
C257 ECEA1HU4R7 ELECT 50V 4.7mF
C258 ECEA1EU101 ELECT 25V 100mF
C259 ECQM1H334J FILM 50V 330nF
C260 ECEA1VU102 ELECT 35V 1000mF
C261 ECEA1VU102 ELECT 35V 1000mF
C262 222236516184 FILM 160V 180nF
C263 ECEA1HU010 ELECT 50V 1mF
C264 ECEA1HGE222 ELECT 50V 2200mF
C265 222236516184 FILM 160V 180nF
C266 ECEA1HU010 ELECT 50V 1mF
C267 ECUV1H104ZFX S.M. CAP 50V 100nF
C268 ECUV1H104ZFX S.M. CAP 50V 100nF
C269 ECEA1CU100 ELECT 16V 10mF
C271 ECUV1H561KBX S.M. CAP 50V 560pF
C301 ECEA1CU470 ELECT 16V 47mF
C302 ECUV1H104ZFX S.M. CAP 50V 100nF
C303 ECUV1H104ZFX S.M. CAP 50V 100nF
C310 ECUV1H104ZFX S.M. CAP 50V 100nF
C354 ECQM2104KZ FILM 250V 100nF
C355 ECUV1H222JCX S.M. CAP 50V 2.2nF
C356 ECUV1H222JCX S.M. CAP 50V 2.2nF
C357 ECUV1H222JCX S.M. CAP 50V 2.2nF
C358 ECQM1H224J FILM 50V 220nF
C360 ECKC3D152J CERAMIC 2KV 1.5nF
C361 ECEA1HUR47 ELECT 50V 0.47mF
C451 ECUV1H102JX S.M. CAP 50V 1nF
C452 ECUV1H473ZFX S.M. CAP 50V 47nF
C453 ECUV1H472KBX S.M. CAP 50V 4.7nF
C454 ECUV1H104ZFX S.M. CAP 50V 100nF
C455 ECEA1VU222 ELECT 35V 2200mF
C456 ECEA1HGE221 ELECT 50V 220mF
C457 ECUV1H103KBX S.M. CAP 50V 10nF
C458 ECQM1H154J FILM 50V 150nF
C459 ECQM1H154J FILM 50V 150nF
REPLACEMENT PARTS
Important Safety Notice
Components identified by mark have special characteristics important for safety.
When replacing any of these components, use only manufacturer's specified parts.
All manuals and user guides at all-guides.com

Other manuals for TX-21AD2

1

Other Panasonic TV manuals

Panasonic TCL42E50X User manual

Panasonic

Panasonic TCL42E50X User manual

Panasonic TX-32C300E User manual

Panasonic

Panasonic TX-32C300E User manual

Panasonic TX-L42FT60B User manual

Panasonic

Panasonic TX-L42FT60B User manual

Panasonic TX-29P800R-IRAN User manual

Panasonic

Panasonic TX-29P800R-IRAN User manual

Panasonic TX-28ZDP2C Operating manual

Panasonic

Panasonic TX-28ZDP2C Operating manual

Panasonic TX-28LDM4F User manual

Panasonic

Panasonic TX-28LDM4F User manual

Panasonic CT-G3387L User manual

Panasonic

Panasonic CT-G3387L User manual

Panasonic TX-29EG20RU-IRAN User manual

Panasonic

Panasonic TX-29EG20RU-IRAN User manual

Panasonic PVSS2710 - TV/HDR COMBO User manual

Panasonic

Panasonic PVSS2710 - TV/HDR COMBO User manual

Panasonic CT-27SF34 User manual

Panasonic

Panasonic CT-27SF34 User manual

Panasonic Viera TH-42PZ85EA User manual

Panasonic

Panasonic Viera TH-42PZ85EA User manual

Panasonic TX-26LX52L User manual

Panasonic

Panasonic TX-26LX52L User manual

Panasonic TCL42ET5X User manual

Panasonic

Panasonic TCL42ET5X User manual

Panasonic CT-27G24 User manual

Panasonic

Panasonic CT-27G24 User manual

Panasonic TX-W32D3F/P User manual

Panasonic

Panasonic TX-W32D3F/P User manual

Panasonic TX-21AD3F User manual

Panasonic

Panasonic TX-21AD3F User manual

Panasonic TC-51PM10Z User manual

Panasonic

Panasonic TC-51PM10Z User manual

Panasonic CT-20G7DF-1 User manual

Panasonic

Panasonic CT-20G7DF-1 User manual

Panasonic TX-28G1 User manual

Panasonic

Panasonic TX-28G1 User manual

Panasonic TH-L32X20A User manual

Panasonic

Panasonic TH-L32X20A User manual

Panasonic TX-65CW324 User manual

Panasonic

Panasonic TX-65CW324 User manual

Panasonic UT5O series Assembly instructions

Panasonic

Panasonic UT5O series Assembly instructions

Panasonic TX-29P180T User manual

Panasonic

Panasonic TX-29P180T User manual

Panasonic TX-40CXW704 Assembly instructions

Panasonic

Panasonic TX-40CXW704 Assembly instructions

Popular TV manuals by other brands

Kogan KALED423DXZA user manual

Kogan

Kogan KALED423DXZA user manual

Kogan KALED32DVDWA user manual

Kogan

Kogan KALED32DVDWA user manual

Toshiba 32W3753DB operating instructions

Toshiba

Toshiba 32W3753DB operating instructions

Princess 68CT8 owner's manual

Princess

Princess 68CT8 owner's manual

AWA MSDV1636-O3 Service manual

AWA

AWA MSDV1636-O3 Service manual

BBK LT1516D Service manual

BBK

BBK LT1516D Service manual

Evervue BN185 Operation manual

Evervue

Evervue BN185 Operation manual

Philips 32TA2800/55 Service manual

Philips

Philips 32TA2800/55 Service manual

Haier HTAF29C user manual

Haier

Haier HTAF29C user manual

Sanyo CE27LD4-B instruction manual

Sanyo

Sanyo CE27LD4-B instruction manual

Mitsubishi CK-3526R Service manual

Mitsubishi

Mitsubishi CK-3526R Service manual

Westinghouse CW50T9XW user manual

Westinghouse

Westinghouse CW50T9XW user manual

Sharp cx68n5 Operation manual

Sharp

Sharp cx68n5 Operation manual

Samsung UN40C6500VFXZA troubleshooting manual

Samsung

Samsung UN40C6500VFXZA troubleshooting manual

JVC PD-42WX84SJ Service manual

JVC

JVC PD-42WX84SJ Service manual

Philips Magnavox TS2768 owner's manual

Philips

Philips Magnavox TS2768 owner's manual

Magnavox MT1331B3 owner's manual

Magnavox

Magnavox MT1331B3 owner's manual

Sony KV-34HS420N operating instructions

Sony

Sony KV-34HS420N operating instructions

manuals.online logo
manuals.online logoBrands
  • About & Mission
  • Contact us
  • Privacy Policy
  • Terms and Conditions

Copyright 2025 Manuals.Online. All Rights Reserved.