Panda-Audio Future Impact v3 User manual

Box contents:
● A Future Impact v3 pedal;
● A Quick-Start Guide.
Items required but not included:
● A 9V stabilized, 100mA, center-negative, Roland-Boss-type power supply.
● A MIDI interface and two MIDI cables for use with a PC (Windows 7 and above) or
MAC (OS X 10.6 (Snow Leopard) and above). (Minimum screen resolution -
1280x900.)
2

EU Directives on the Protection of the Environment
RoHS This product is compliant with the EU Directive 2002/95/EG for the Restriction of
the use of Certain Hazardous Substances in Electrical and Electronic Equipment. No lead
(Pb) cadmium (Cd), mercury (Hg), hexavalent chromium (Cr + 6), PBB or PBDE is
intentionally added to this device. Any traces of impurities of these substances contained
in the parts are below the RoHS specified threshold levels.
REACh This product is compliant with the European Union Directive EC1907/206 and
contains none or less than 0.1% of the chemicals listed as hazardous chemicals in the
REACh regulation.
WEEE As with the disposal of all old electrical and electronic equipment, this product is
not to be treated as regular household waste. Instead it should be handed over at the
applicable collection point for the recycling of electrical and electronic equipment.
This product complies with the European Union Council Directives and Standards
relating to electromagnetic compatibility EMC Directive (2006/95/EC) and the Low Voltage
Directive (2004/108/EC). EMC compliance test report: EMC – 130930/1
Operation is subject to the following two conditions:
1) This device may not cause harmful interference, and;
2) This device must accept any interference received, including interference that may
cause undesired operation.
Panda-Audio Ltd.
Széchenyi u. 8
2040 Budaörs
HUNGARY
Tel.: +36-23-441-071
Email: [email protected]
Warranty
If your Future Impact v3 breaks or malfunctions as a result of any defective electronic parts
or due to a design fault of ours, we will repair or replace it during the warranty period, which
is two years from the date of original purchase.
WARNING: never operate the BANK button by foot. It must be operated by hand only.
Damage to the BANK button will not be covered by the warranty.
3

Introduction
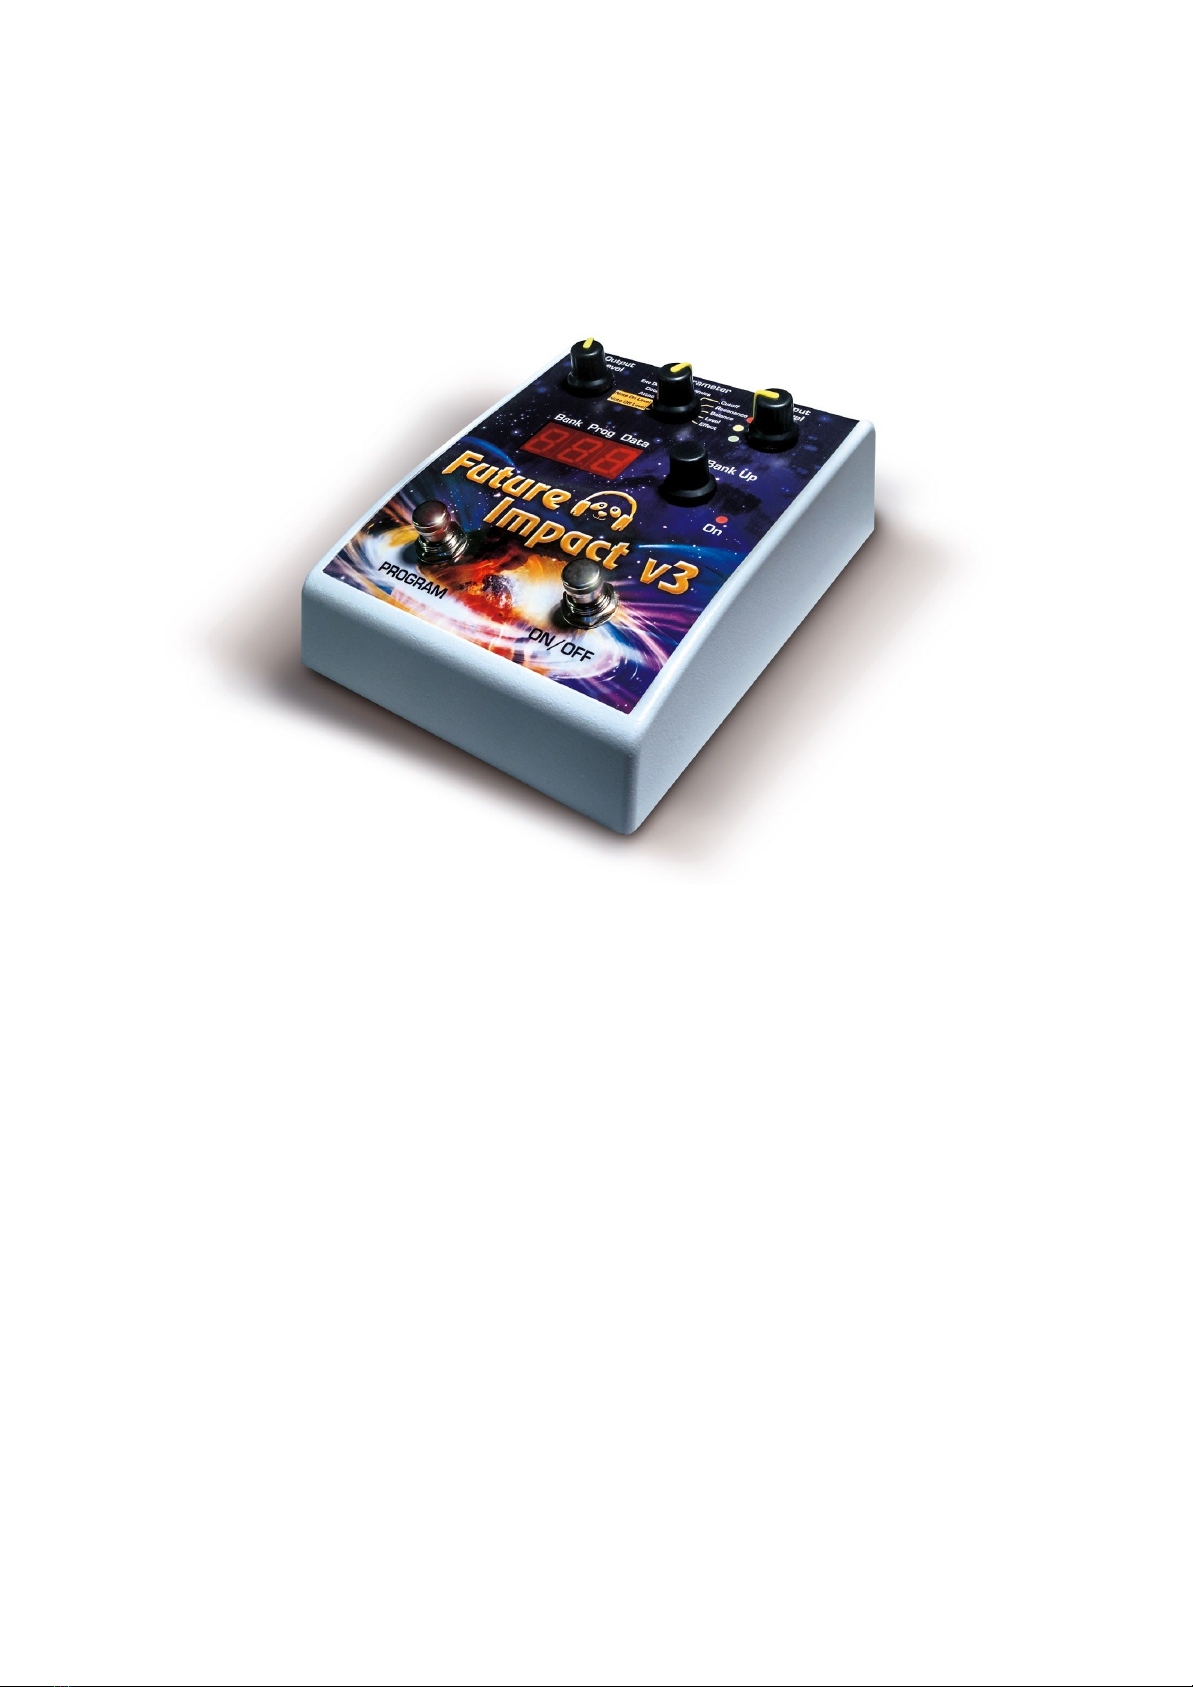
Thank you for purchasing arguably the most revolutionary synthesizer effects pedal there is:
the Future Impact v3.
The Future Impact v3 harnesses all the power and versatility of some of the best (and
best-loved) keyboard synthesizers and squeezes it into a small and portable stomp-box
pedal format, making those wonderfully-inspiring and sometimes other-worldly sounds
available to all instrumentalists.
You now have in your hands the means to create and play classic synthesizer sounds like
those heard on recordings by Herbie Hancock, George Duke, Stevie Wonder, Vince Clarke,
Joe Zawinul, Chick Corea, Jan Hammer, Keith Emerson and countless others.
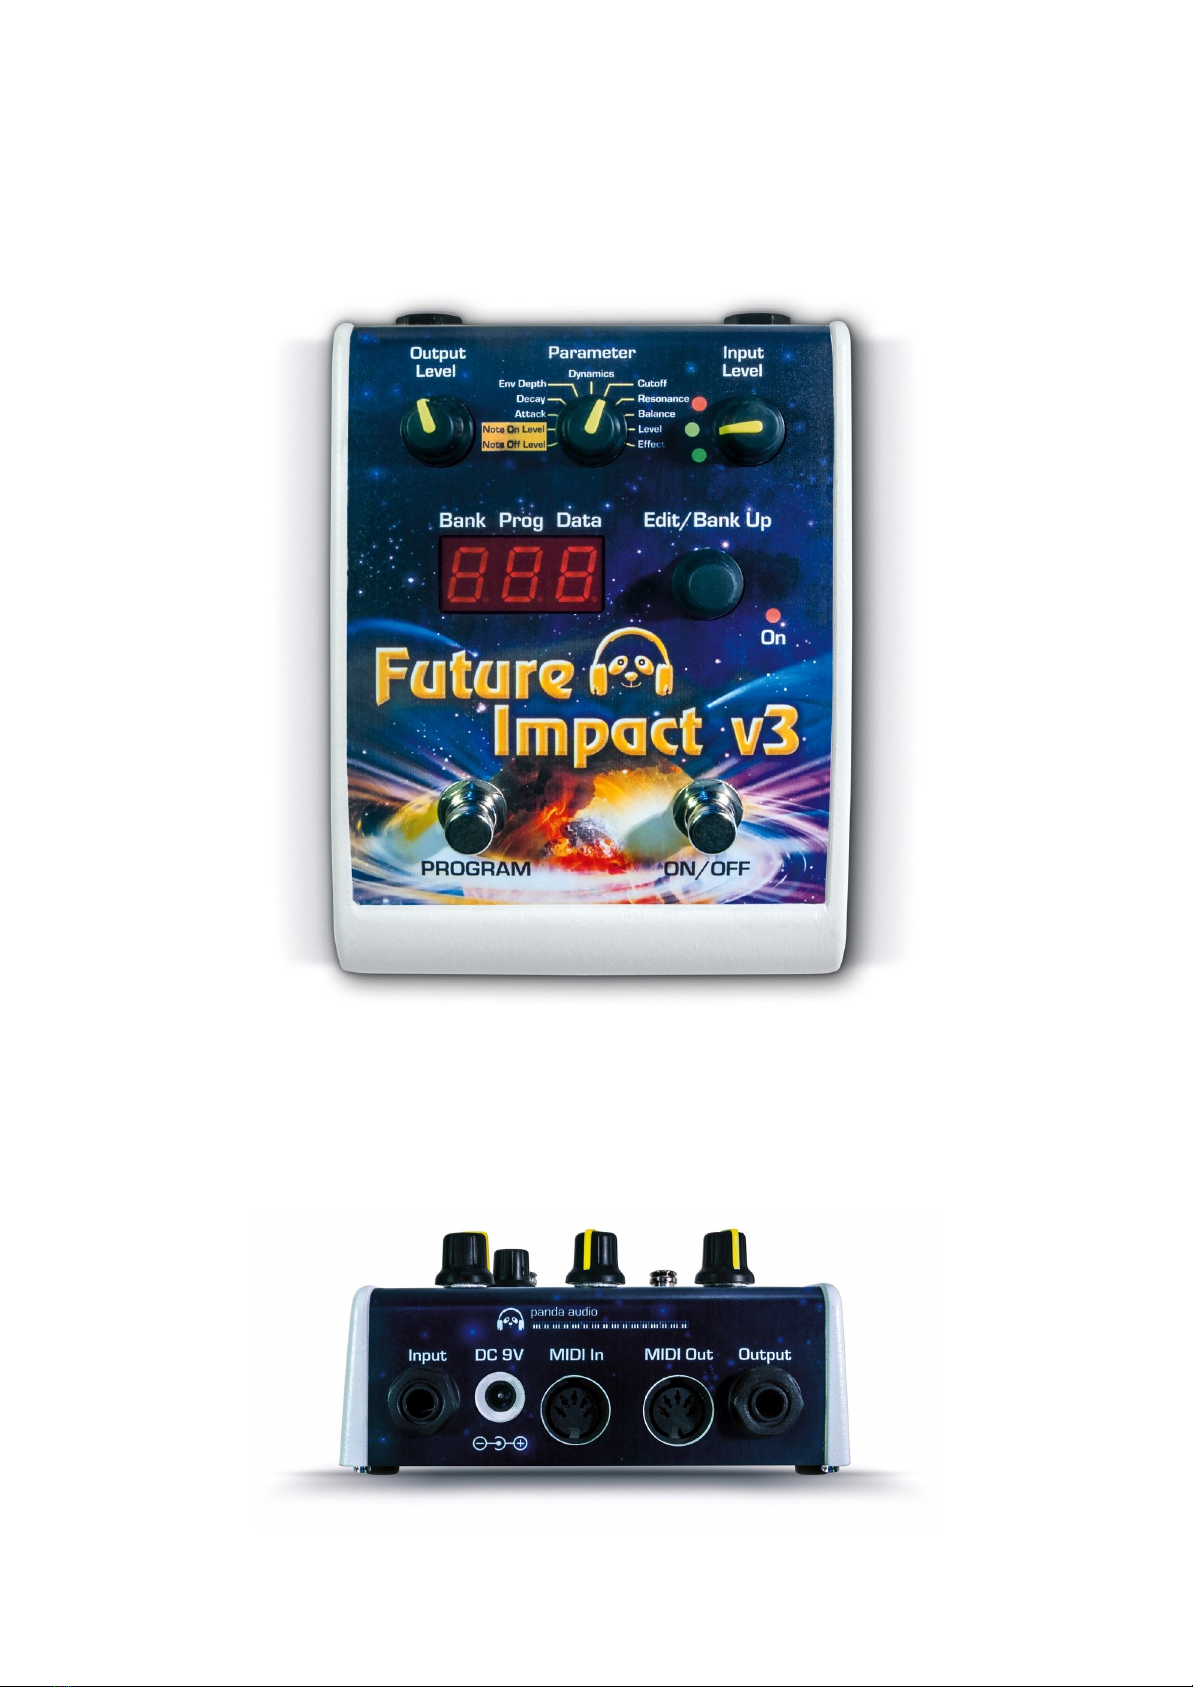
The Future Impact v3 (FI) is an incredibly versatile pedal and the range of sounds it is
capable of producing is quite staggering. In addition to producing synthesizer sounds such
as basses, leads and pads, it can function as an octaver, chorus, flanger, phaser, distortion,
envelope filter, traditional wah-wah, tremolo, reverb, etc. and even has a built-in tuner. As
such, it can potentially replace a whole pedalboard of dedicated single-effect pedals. It has
relay-switched true bypass so your input signal is unaffected when the pedal is off.
The FI is monophonic, that is, it can only respond to input of one note at a time. It can
be set
up to produce 4-note chords and pad sounds but won’t respond to chordal input. It was
originally designed for use with bass guitar, but in version 3 the pitch range has been
extended so that it can now also be used with higher-pitched instruments such as guitar,
clarinet, trumpet, etc. In several places in this manual the input instrument is referred to as
“bass/guitar” as these are the most typically-used instruments, however, please remember
that any
pitched instrument that can be played monophonically can be used. Additionally the
FI can be used as a monophonic synthesizer expander by connecting a keyboard, wind
controller, computer or any other MIDI source to the MIDI input port.
There are 99 onboard sounds but via the included Editor software, you have access to many
more, either by downloading and transferring them to the pedal or by creating them yourself.
In its original incarnation, the FI was already a powerfully expressive instrument. With the
addition of the new features of version 3.00, its enhanced capabilities make it unparalleled in
the field of synthesizer effects pedals.
In the box, under your FI, you will find a Quick-Start Guide. It explains how to use the FI with
a bass guitar and will allow you to dive right in to playing the pedal with the minimum of fuss.
The information contained in the separate Quick-Start Guide also appears below in this
manual, along with the Detailed Manual, which contains a complete description of how to
use all the features of the pedal and the accompanying Editor software.
4

Main Features
● 99 editable onboard sounds; many more available via the included Editor software;
● Super-fast and accurate pitch tracking over the full range of 6-string bass or guitar;
● 4 VCOs each with saw, square (with variable pulse width) and triangle waveforms;
● 3 effects - Chorus, EQ and Overdrive;
● Resonant filter with Lowpass, Highpass, Bandpass and Notch modes;
● 12dB/oct and 24dB/oct filter slopes;
● 2nd, parallel Bandpass filter;
● Individual envelopes for VCA, VCF and Noise source;
● Global LFO for VCOs and VCF;
● Expression pedal control of LFO depth, filter cutoff and volume via MIDI;
● Synth triggered either by an instrument’s audio signal or via MIDI;
● A 3-voice harmonizer, 2 voices with variable transposition;
● High-quality distortion for the harmonizer voices and dry input signal;
● Built-in tuner;
● Powered by a standard 9V, center-negative supply;
● Low current draw of only 100mA;
● Large 3-digit display - current sound’s location number is visible at all times;
● All 99 sounds accessible directly from the pedal - no external equipment required;
● Rugged and road-worthy metal housing;
● Full-size MIDI IN and OUT ports;
● Relay-switched true bypass.
New features for version 3.00
● Full ADSR envelopes, giving a hugely expanded sound palette;
● Ability to use all 3 effects simultaneously and configure their order;
● Improved tracking;
● 10 new LFOs - including saw, square, triangle and sample-and-hold types;
● Extended input and oscillator ranges - instruments of all pitches can now be used;
● 4 Flexi Controllers - adds powerful real-time, user-controllable modulation capability
which vastly increases expressive potential;
● Envelopes and LFOs freely assignable via Flexi Controllers;
● Extended pitch bend range of 24 semitones in either direction;
● Portamento legato settings now completely independent of gate/trigger mode;
● Detune Mode - chosen notes can be detuned by 50 cents, giving access to
non-western scales;
● Split Mode - only the synth signal is sent to the audio output so the input instrument
signal can be split using a Y-cable or splitter box prior to the audio input socket;
● Synth and EWI Mode - audio input signal can be decoupled from the synth triggering
circuit to allow independent triggering by MIDI whilst still playing your bass/guitar;
● Ability to back up programs directly from the pedal to a computer;
● An exciting new factory default soundset created by experienced sound designers.
5

Table of Contents
Introduction
Main Features
New features for version 3.00
Table of Contents
Top Panel Controls and Display
Connections
Quick-Start Guide
Setting up the Future Impact v3
Operating the Future Impact v3
Tuner
Editing the Sounds
Description of the Parameters
Configuring the Future Impact v3
Detailed Manual
Editing the Configuration Parameters
The Future Impact v3 Editor
Installing the Editor
The File Menu
Firmware Update
The View Menu
On-screen Keyboard
Parameters
VCO Block
Foldover Distortion
Distortion Block
Envelopes Block
Envelope mode behavior
VCF Block
VCF INPUT
Attack/Release Distortion
FILTER
LFO Block
MIDI Block
Main Mixer Block
6

Effects Block
Effect 1: Overdrive
Effect 2: Equalizer
Effect 3: Chorus
Adjusting effects on the FI with the PARAMETER and EDIT dials
Flexi Controllers
More on Flexi Range Control
Special Flexi-only Modulation Sources
Pulse Width Settings
Some ideas for uses of Flexi Controllers
MIDI Controllers as Flexi Controller Sources and Range Controls
Block Adjust Mode
Building your first sound
MIDI Implementation
Specifications
Appendix
Algorithm Block Diagrams
The Editor Panel
Flexi Control Sources
Flexi transformation curves
Flexi Range Controls
Compatible MIDI interfaces
FI as a replacement for standard single-effect pedals
FI as envelope filter
FI as chorus
FI as flange
FI as phaser
FI as tremolo
FI as vibrato
FI as reverb
FI as octaver
FI as pedal wah
Warranty and Return Policy
FAQs
7

Top Panel Controls and Display
Connections
8

Quick-Start Guide
The Future Impact v3 will let you play amazing and authentic synth lines from your bass,
guitar or keyboard. You can choose from 99 onboard sounds that you can quickly shape to
your taste. By using the pedal in conjunction with the included Editor software, you can
branch out further and download many more free sounds created by experienced sound
designers and other enthusiasts in the music community. You can also learn to build and
share your own sounds, unlocking your creative potential and opening the door to
inspirational music-making.
This Quick-Start guide will show you how to set up and use the FI with your bass, including
the use of the built-in tuner. The guide will also explain what the main sound-sculpting
parameters are and how to adjust them easily on the pedal.
If you want to delve deeper into the process of transferring new sounds to your pedal or
creating your own then you will need to consult the Detailed Manual, though you may find
some of the information you are looking for in the FAQ section at the very end of this
manual.
Setting up the Future Impact v3
Connect your bass/guitar to the INPUT jack. Connect the OUTPUT to an amplifier. Use a
Roland/Boss compatible 9V, minimum 100mA stabilized, center-negative power supply. You
must use a power supply which matches the mains voltage and connector requirements of
your country. A power supply is not included with the FI.
Connect the FI to the proper supply to power it on. First, it will display the software version
for one second, then it will display the instrument mode for one more second. It is very
important to set the correct instrument mode for your instrument. (See the section below
entitled Configuring the Future Impact v3 for details of how to set the instrument mode.)
The default instrument mode is for bass guitar, displayed as “bSS”.
See Editing the Configuration Parameters further below for a full explanation of the
Instrument Modes.
Press the ON/OFF footswitch (right) to turn the FI on. The ON LED will light up. Adjust the
INPUT LEVEL dial so that the red LED lights up briefly only when your bass is played at its
loudest. Adjust the OUTPUT LEVEL dial to your needs.
Note: Due to the true bypass function of the FI, the level display will only work when the
effect is ON.
9

Operating the Future Impact v3
The FI has 99 sounds (programs) distributed across 10 banks: bank 0 has 9 sounds, all
other banks have 10. You can step up through the banks by pressing
the EDIT/BANK UP
dial. Furthermore, if you press and hold this dial and turn it, you can quickly move up or
down to any bank.
Sounds are selected with the PROGRAM footswitch. A single press will move up by one
program, a double press will move down by one. If you press and hold this footswitch, the
number will scroll up, first slowly, then faster. If you hold this footswitch after a double press,
the number will scroll down in the same manner. In this Program-Selection Mode, known as
DIRECT Mode, moving up and down through the program numbers will seamlessly step over
the bank borders so that you can access any of the 99 programs using just the one
footswitch.
Note: The FI is based on the detection of the bass/guitar’s pitch. To function correctly, it
requires monophonic notes that are played cleanly. If you play chords, power chords, use
slapping or tapping techniques, or try to use it outside of the pitch range of the selected
instrument then unpredictable results will occur.
Tuner
The FI includes a very high-quality, fast-response tuner that uses the advanced pitch
detection technology of the FI. To activate the tuner, press and hold the ON/OFF switch for
one second. The tuner can be activated from both the ON and OFF states and in either case
the audio output will be completely muted. In the display, the first digit shows the note name
and the second digit shows (an approximation of) the # sign. The third digit shows the
fine-tune value using one or more of the three horizontal lines as follows:
Upper line only
Sharp by > 10 cents
Upper and middle lines
Sharp by > 3 cents
Middle line only
In tune (within ±3 cents)
Lower and middle lines
Flat by > 3 cents
Lower line only
Flat by > 10 cents
To exit tuner mode, press ON/OFF briefly and the FI will return to the ON state.
10

Note: While in tuner mode, the display will be blank if there is no input signal.
The tuner is calibrated to the Tune Base value. This can be adjusted in the range of
428Hz...440Hz...452Hz. See the Editing the Configuration Parameters section for
instructions on how to set Tune Base.
Editing the Sounds
If you have found a sound that you want to modify for your music, the PARAMETER dial
allows you to select and edit 11 different parameters. Two of these parameters are GLOBAL,
thus common to all programs; the other 9 are editable on a per-program basis. All
parameters have a default value of 5. You can deviate up to 4 steps away from the default
setting (either downwards to 1 or upwards to 9) by turning the EDIT dial. Editing a parameter
causes an immediate audible change to the sound and the decimal point starts blinking.
Press the EDIT button to save the changes. Any unsaved changes will be lost when
switching to a new program, pressing the ON/OFF footswitch or powering off the pedal.
Note: Saving changes to a program using the EDIT button will cause that program to
be the one that is loaded upon next powering on the FI.
Description of the Parameters
NOTE OFF LEVEL (global): Sets the volume threshold of the input signal below which the
synth stops sounding. A lower value allows you to sustain notes longer. A higher value
allows better articulation of staccato notes.
NOTE ON LEVEL (global): Sets the volume threshold of the input signal above which the
synth begins sounding. If low-volume notes do not trigger the synth then decrease the value.
If multiple triggering occurs then increase the value.
ATTACK: Sets the length of the attack stage of the filter AD/ADSR envelope. Higher values
make the filter take longer to open after a note is played.
DECAY: Sets the length of the decay stage of the filter AD/ADSR envelope. Higher values
make the filter take longer to close again after it has opened.
ENVELOPE DEPTH: Sets how much the filter opens in response to the filter AD/ADSR
envelope.
DYNAMICS: Sets how much the filter opens in response to playing dynamics.
CUTOFF: Sets the cutoff frequency of the filter. Lower values yield a darker sound; higher
values yield a brighter sound.
11

RESONANCE: Boosts the frequencies around the filter cutoff frequency. Lower values give
a flat, wide peak; higher values give a narrow, sharp peak.
BALANCE: Sets the balance between the bass/guitar sound and the synth sound. A setting
of 9 mutes the dry bass/guitar sound entirely.
LEVEL: Sets the overall output level of the sound.
EFFECTS: Sets the amount of chorus, overdrive or tilt-EQ applied to the sound. For full
details on how the effects are influenced by this parameter see the Effects Block section of
this manual.
Configuring the Future Impact v3
This is done via a boot menu. Only the two most immediately important parameters of this
menu are shown here; the complete list is shown in the Detailed Manual.
The default configuration of the FI is for bass.
To enter the boot menu, press and hold the PROGRAM (left) footswitch while powering on
the pedal. Turn the PARAMETER dial to “Note Off Level” to see the name of a parameter
and turn it clockwise to any other position to see that parameter’s value. The value is
adjusted using the EDIT dial. Step through the parameters by pressing the left footswitch
again. When editing is complete, turn the FI off and on again.
The aforementioned two parameters of the boot menu are given below:
●RESET ALL (“rS”)
Value: 0, 1. (Default on reset is 0.)
Change to 1 to reset all sound parameters to default (5) upon power-on. The default
program loaded at power-on will be reset to 1.
● INSTRUMENT MODE (“InS”)
Value: bSS (Bass), SPL (Split), Gtr (Guitar), Snt (Synth), EUI (EWI). (Default on reset
is bSS.)
Choose the option for your instrument. If using an instrument not listed above then
choose either Bass or Guitar, whichever one best fits the pitch range of your
instrument. For a full explanation of each instrument mode, please see the Detailed
Manual.
End of Quick-Start Guide
12

Detailed Manual
The first section of this part of the manual will explain the complete list of configuration
parameters located in the boot menu. The second section, which forms the bulk of the
manual, will show you everything you need to know about the Editor. This begins by showing
you how to download and install the software, connect the FI to your computer and update
the pedal’s firmware. It then goes on to explain how to load, save, transfer and rearrange
programs. The final part takes you through all of the controls and functions of the Editor in
detail.
Editing the Configuration Parameters
As already mentioned, the Future Impact v3 has 99 onboard programs whose many
parameters can be fully edited with the Editor software. As you may recall from the Editing
the Sounds section of the Quick-Start manual, each program has a smaller subset of those
parameters, which can be coarsely edited directly on the FI itself using the EDIT dial. In
addition, there are the two Global Parameters, NOTE OFF LEVEL and NOTE ON LEVEL,
which can likewise be edited with the EDIT dial.
The FI also has 7 Configuration Parameters that are common for all Programs; these can be
edited on the FI via a boot menu. Two of these parameters (Reset All and Instrument Mode)
were already discussed in the Quick-Start Guide, but for the sake of completeness, they are
repeated here in the complete list.
To enter the boot menu, press and hold the PROGRAM (left) footswitch while powering on
the pedal. Turn the PARAMETER dial to “Note Off Level” to see the name of a parameter
and turn it clockwise to any other position to see that parameter’s value. The value is
adjusted using the EDIT dial. Step through the parameters by pressing the left footswitch
again. When editing is complete, turn the FI off and on again.
The parameters of the boot menu are given below:
●RESET ALL (“rS”)
Value: 0, 1. (Default on reset is 0.)
Change to 1 to reset all sound parameters to default (5) upon power-on. The default
program loaded at power-on will be reset to 1.
● DIRECT/LEGACY PROGRAM-SELECTION MODE (“PrG”)
Value: 0 (DIRECT), 1 (LEGACY). (Default on reset is 0.)
DIRECT Mode is the default setting for selecting a sound. Sounds can be selected
with the PROGRAM footswitch. A single press will move up by one program, a
double press will move down by one. If you press and hold this footswitch, the
number will scroll up, first slowly, then faster. If you hold this footswitch after a double
13

press, the number will scroll down in the same manner. In this program mode,
incrementing and decrementing the program number will seamlessly step over the
bank borders so that you can access any of the 99 programs using just the one
footswitch.
LEGACY Mode is included in the FI for historical compatibility reasons. In this
program mode, sounds are selected from within a bank
by pressing the PROGRAM
footswitch. Pressing it will move up by one program and the LEDs will start to blink
but the sound will not change yet. Press the ON/OFF footswitch to activate the
selected sound. A quick double-press of the PROGRAM switch will move down by
one program. (Scrolling works the same as it does in DIRECT Mode.)
We highly recommend using DIRECT mode as it is much more practical than
LEGACY mode.
● GLOBAL MIDI CHANNEL (“GLb”)
Value: All, 1, 2, 3, 4, 5, 6, 7, 8, 9, 10, 11, 12, 13, 14, 15, 16. (Default on reset is All.)
“All” is global OMNI mode. 1…16 sets the global receive channel corresponding to
the number chosen. If OMNI mode is selected then the MIDI output channel for
Program Change that is sent out will be channel 1.
● VCF CONTROL RANGE (“vCF”)
Value: 1 (+/-1 octave), 2 (+/-2 octaves), 4 (+/-4 octaves). (Default on reset is 1.)
Sets the Voltage Controlled Filter (VCF) control adjustment range used when the
VCF frequency is controlled by MIDI CC11 or CC74, or when it is adjusted on the FI
via the PARAMETER and EDIT dials. The center point of the range corresponds to
the program’s preset cutoff value (as set by the VCF FRQ slider in the Editor).
● TUNE BASE (“tBS”)
Value: 428-452. (Default on reset is 440.)
This is the tune base value for the synthesizer when it is used through MIDI IN as an
expander. Using the FI with a bass guitar is not affected by this parameter, as the
tuning of the synthesizer is locked to the tuning of the bass guitar in this case. When
you move the parameter selector from its leftmost position, the display then shows
the tune base value; this can be adjusted with the EDIT dial. The adjustment range is
from 428 Hz (ca. -50 cents) to 452 Hz (ca. +50 cents). This adjustment will also set
the base of the TUNER.
Important: If you update your FI’s firmware to 3.00 from an older version then the
tune base will not be at 440 and so the tuner will show “incorrect” pitch values. You
must reset the tune base. You can do this by performing a RESET ALL. Alternatively,
if you do not want to lose any program settings made with the PARAMETER and
14

EDIT dials, you can manually set the tune base to 440 (or any other desired value).
● INSTRUMENT MODE (“InS”)
Value: bSS (Bass), SPL (Split), Gtr (Guitar), Snt (Synth), EUI (EWI). (Default on reset
is bSS.)
○ Bass Mode: The pitch tracking is optimized and limited for the pitch range of
the bass guitar. The entire range of a 24-fret, 6-string bass is covered.
○ Split Mode: A variation of Bass mode, designed for using the FI on stage with
two separate amplifiers (one for bass/guitar, one for synth), or for using in the
studio where having separate bass/guitar and synth channels may be
1
desired. In this mode you must split the signal prior to the FI’s input with a
splitter box or a Y cable for the two destinations.
Everything works as in Bass mode, but with the following differences:
■ The direct audio signal portion of all programs is muted so that only
the synth signal is sent to the FI’s audio output;
■ The ON/OFF footswitch will not switch to true bypass when turned
off, instead the output remains connected to the digital circuitry and
all signals are muted.
○Guitar Mode: The pitch tracking is optimized and limited for the pitch
range of the 6 string guitar.
○Synth Mode and EWI Mode: Most features of these two modes are the
same.
The audio input is separated from the pitch control and triggering so that an
audio signal can be routed to the VCF and effects without affecting the synth
sounds;
Unlike in Bass/Split/Guitar modes, the FI will power on in the ON state;
The Tuner feature has no use. Instead, a long press of the right-hand switch
puts the FI into Detune Mode, which can be used to set up the FI to play in
non-western tunings.
Once Detune Mode is activated, the following will occur:
■ Any previous detuning applied to notes of the chromatic scale will be
reset;
1 Strictly speaking in this case by “synth” we mean the contents of the VCF output, that is, any signal
routed through the filter.
15

■ Any notes that are now played via MIDI will be set to transpose down
by 50 cents upon exiting Detune Mode.
Pressing the ON/OFF switch again will exit Detune Mode and the altered
(detuned) scale can now be played.
Note that the detuned scale will not be stored in flash memory, but must
instead be initialized “on the fly” anytime you want to use it. This is not
important for SYNTH (though it does not hurt) but it is useful for EWI.
The difference between Synth and EWI Modes is only in the initialization of
MIDI CC values. For completeness here are the initialization values in all
Instrument Modes:
MIDI CC
1
2
5
7
11
65
74
Bass/Split/Guitar
127
127
127
127
64
127
64
Mode
Synth
0
127
127
127
64
127
64
EWI
127
127
0
127
64
127
64
Note: These MIDI CCs will be initialized to their default values on startup, on every
program change and whenever the editor changes a Flexi source.
●MIDI THRU (“trU”)
Value: 0, 1 (Default on reset is 0.)
If set to 0 then MIDI information presented to MIDI IN will not
be passed to MIDI
OUT.
If set to 1 then all information presented to MIDI IN will
be passed to MIDI OUT.
16

The Future Impact v3 Editor
The FI v3 Editor is the place where all the magic happens. It can best be thought of as the
control room of the pedal. If you want to move beyond the 99 onboard sounds and fully
immerse yourself in the fascinating world of subtractive synthesis then this where to do that.
The editor can be used to audition programs and edit them to your taste or to create your
own sounds from scratch and save them to your computer. It can also be used to transfer
programs between your computer and the FI.
If you simply want to audition new sounds created by others and load them onto your pedal,
or change the order of your pedal’s sounds, then read the section on the File Menu below
and/or the FAQ section at the end. These are also the two places to look if you need to
update the firmware in your FI.
If you want to edit sounds or create your own then study the various blocks of the
Parameters section. There is a lot of information there so you may need to keep referring
back to it until you have a firm grasp. The sections are laid out clearly, logically and with
examples where necessary, so this should hopefully help you to digest the information more
easily.
17

The FI is a very complex device with over 100 fully-adjustable parameters per sound. These
are mostly adjusted using sliders but there a few pushbuttons too. In order to get an
overview we recommend you first familiarize yourself with the panel layout in the image
above (or the one found here at the end of the manual) and investigate the block diagrams
of the FI algorithms in the Appendix. On the first page of the Appendix, you will find a
diagram of the whole device (minus the effects). Note however that the oscillators appear
here just as a rough outline; the detailed diagram of the oscillators is on the second page.
The third page shows how the effects block is inserted into the structure of the FI.
The FI has two basic sound sources: The harmonizer/bass guitar block and the synthesizer
block. The synthesizer is driven by the information derived from the bass/guitar sound. The
bass/guitar must be played using clean, monophonic lines. The whole range of 24-fret, 6
string bass and guitar is supported. Slapping, tapping or chordal playing does not provide
accurate pitch information and can result in notes of unintended pitch being triggered on the
synthesizer. The sounds of the FI can be created from the synthesizer sound, the
harmonizer/bass guitar sound, or a mixture of the two.
This all might seem quite daunting or confusing at first but don’t worry, the following sections
of the manual will explain what all the controls do and teach you what you need to know in
order to start editing sounds deeply or building your own.
Installing the Editor
Go to http://pandamidi.com/support and download the latest Distribution Package. The
package contains the latest firmware file and editor software along with a folder containing
the 99 factory default programs. Copy the editor software package into any directory on your
computer, connect your MIDI interface to the computer and double-click FIEditor.exe (PC)
or FIEditor.app (macOS).
(For Mac users: The first time you launch the editor, macOS will inform you that you are
about to launch an app downloaded from the internet. If you see a warning message saying
that the app is not from the App Store and you cannot run it, it is because you have set your
Mac to only allow apps from the App Store. If that is the case then in the Finder, Control-click
the FIEditor.app, choose Open from the menu, and in the dialog that appears, click Open.
Enter your admin name and password when prompted. The FIEditor.app will now be saved
as an exception to your security settings and you can open it in the future by double-clicking
it.)
In the MIDI>Preferences pull-down menu at the top of the Editor screen, select the MIDI IN
and MIDI OUT ports you want to use. The three options are listed and explained further
below.
18

If you want to be able to write programs to the FI then
you need two MIDI connections between the FI and
your computer:
1. MIDI OUT of the interface → MIDI IN of the FI;
2. MIDI OUT of the FI → MIDI IN of the interface.
If you just want to audition, edit and create sounds
and save them to your computer (without writing them
to the FI) then only connection 1 is needed.
The MIDI IN and OUT ports are as follows:
●Output Device selects which device the Editor uses to send
MIDI information to
the
FI.
●Input Device selects which device the Editor uses to receive
MIDI information from
the FI.
●Keyboard Input Device is a second MIDI IN to the Editor. If you want to design a
sound using a keyboard instead of the bass/guitar, connect the MIDI OUT of the
keyboard to the computer via this second MIDI IN and the computer will perform a
through function to the FI for the keyboard signals.
Important: do not connect the FI’s MIDI OUT to the computer’s MIDI IN via Keyboard Input
Device; the FI’s MIDI OUT should only ever be connected to the computer’s MIDI IN using
FI Input Device. This is because from version 1.22 of the FI there is a MIDI through function
implemented in the software. Since Keyboard Input Device also implements a MIDI
through, connecting the FI MIDI OUT to the computer via this input would cause an infinite
MIDI loop.
The File Menu
The options in the FILE pull-down menu are explained below.
19

●Select Directory: Specifies the location that the editor uses for loading and saving
program files.
●Load Program from File to Editor: Loads a program from your computer into the FI
editor.
The program file format of FI 3.0 is much more advanced than that of previous
versions. The FI v3 editor can load program files that were created with an earlier
editor, but will convert these to the new format when saving.
●Save Program from Editor to File: Saves an edited program to your computer.
You can save a program to your computer using any name up to 32 characters in
length, but in order to write a program to the FI, the name must
begin with a two-digit
prefix between 01 and 99. This prefix determines the slot on the FI to which the
program will be written.
●Write Program from File to FI: Opens the selected directory and allows you to
select one sound program and write it to the FI.
Remember, the program must have a two-digit number at the beginning of its name.
If it does not, first Load the program into the editor and then Save it with a two-digit
prefix added to its name.
Note: Whilst the Write Program from File to FI command appears to work even if
you only have one cable connecting the computer to the FI, the editor will not receive
confirmation of the writing action and an error message will appear; both
cables must
be used.
●Write All Programs from Files to FI: Writes all programs from your selected
directory to the FI in a single run.
When you use this option you must have a bi-directional connection between the FI
and the computer, otherwise an error will occur after writing the first program.
If the directory contains two or more files that have the same two-digit prefix then the
editor will generate an error message and the write process will not be possible until
you have removed the duplicates.
If the directory contains gaps, i.e. if
any of the two-digit prefixes
between 01 and 99 are not included
in program file names, then the
editor will present you with two
options:
20
Other manuals for Future Impact v3
1
Table of contents