Paradigm surflink User manual
REMOTE MICROPHONE
OPERATIONS MANUAL


Table of Contents
Introduction 4
Basic Use 6
Controls Overview 8
Operation 10
Low Battery and Recharging 10
Power On/Off Slider 12
Syncing 13
Built-In Microphones 15
LED 16
How to Wear 17
Streaming Audio 18
Interoperability with Other Accessories 18
Troubleshooting 20
Regulatory Notices 22

Introduction
The SurfLink Remote Microphone is designed to
stream remote microphone audio directly to your
900MHz wireless hearing instruments. When worn
by a distant speaker in noisy environments, SurfLink
Remote Microphone functions as an assistive listening
device.
Streaming – Audio or sound transmitted from
SurfLink Remote Microphone to your 900MHz wireless
hearing instruments.
Package Contents
• SurfLink Remote Microphone
• USB-to-MicroUSB Recharging Cable
• Operations Manual
Optional Accessories
• Wall Power Adaptor
• Car Charger Adaptor
• Lanyard
4
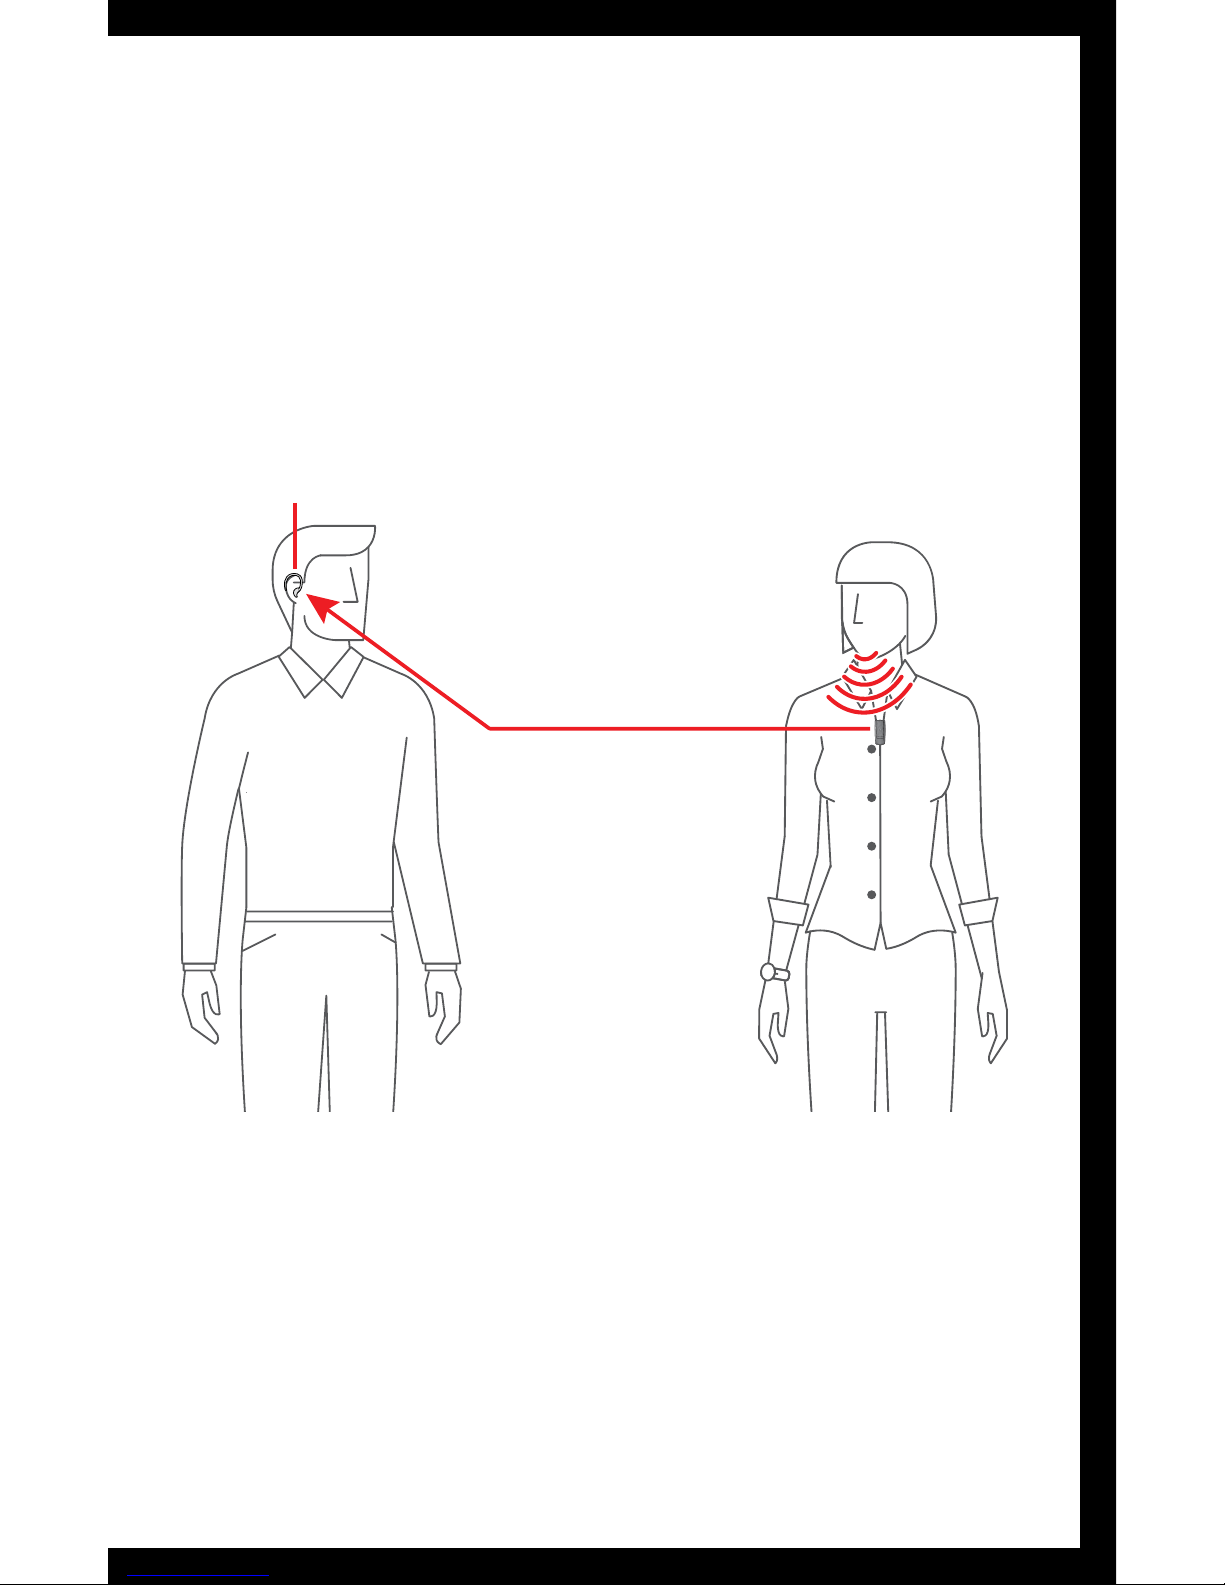
Typical Setup
5
Hearing Intrument Speaker

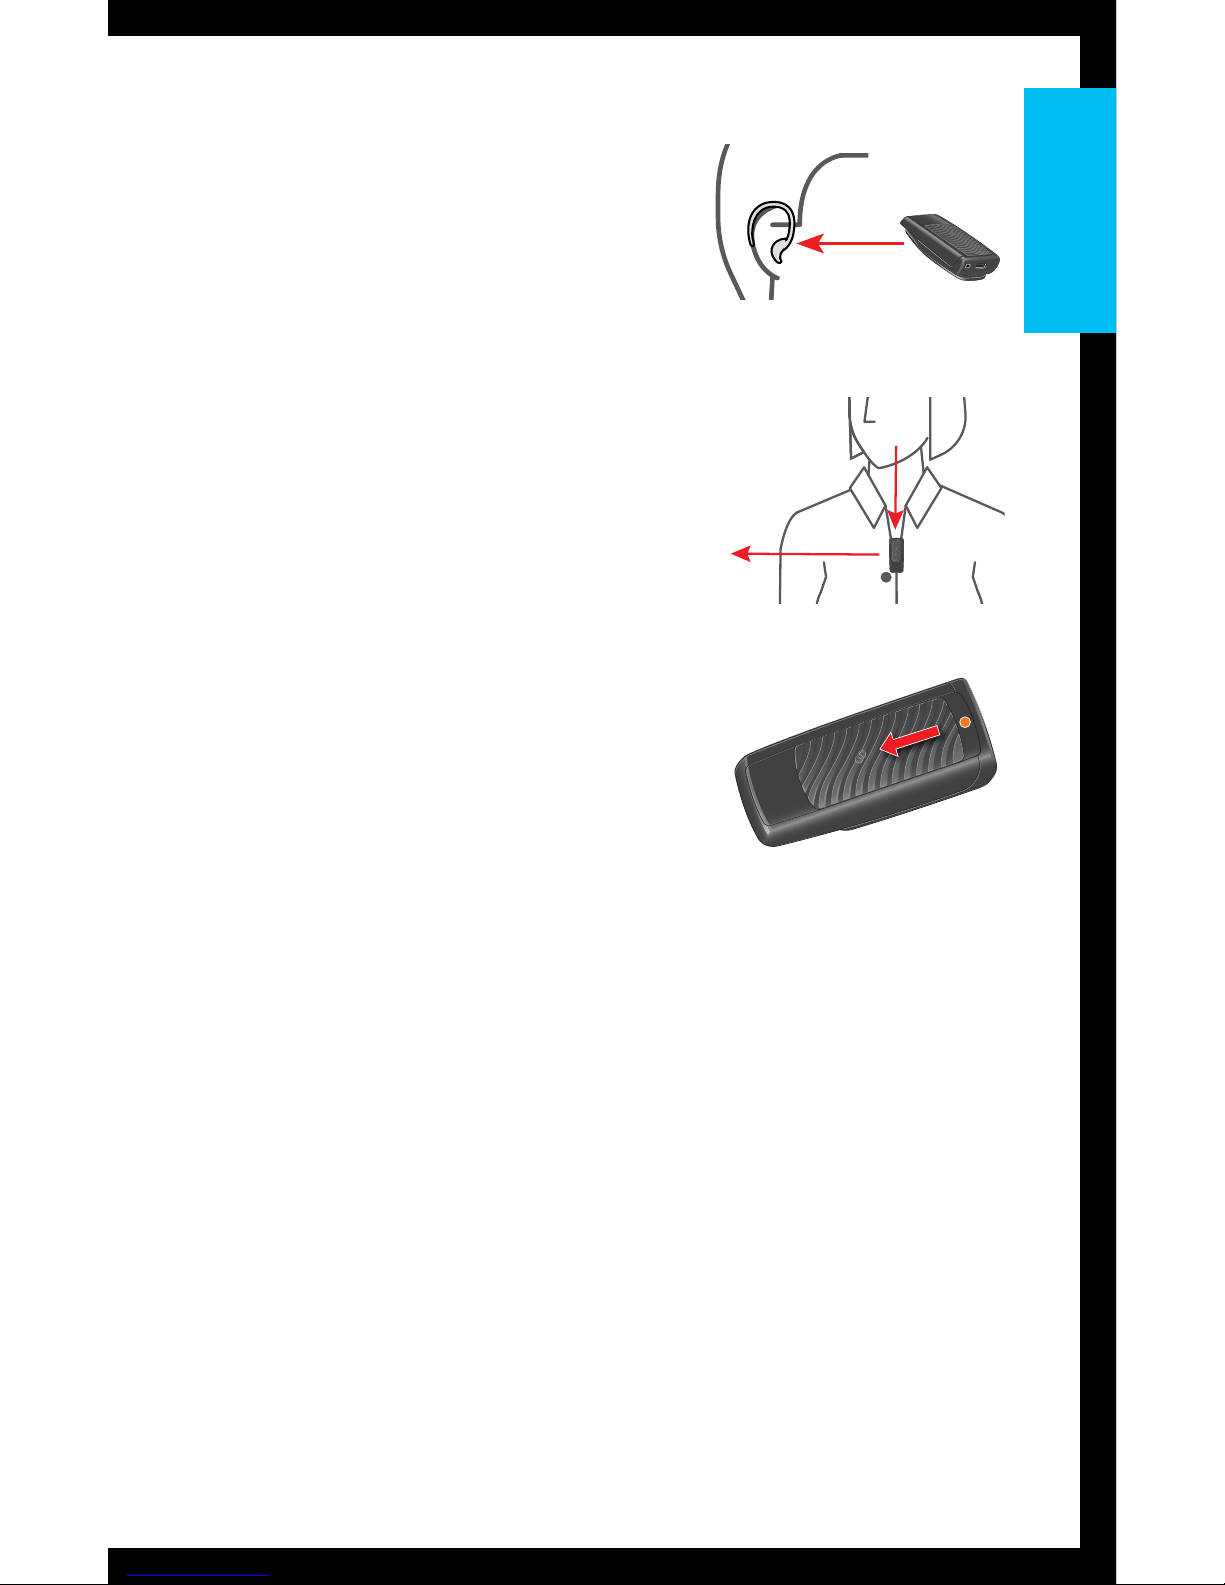
Basic Use
To quickly start using SurfLink
Remote Microphone:
1. Power on SurfLink Remote
Microphone. Green LED
appears for 2 seconds.
2. Press “Sync” icon on
slider button for 5 seconds
until LED starts rapidly
blinking blue.
3. Open one hearing instrument
battery door, insert battery,
and close battery door.
Green LED blinks to confirm
successful sync.
If you only have one hearing
instrument, wait 20 seconds
until red LED blinks.
If you have two hearing
instruments, open second
hearing instrument battery
door, insert battery, and
close battery door. Green
LED blinks to confirm
successful sync.
66
Basic Use
4. Each hearing instrument
should automatically start
streaming audio. Blue
LED slowly blinks when
audio streaming is active.
5. Have a speaker attach
SurfLink Remote Microphone
to their clothing within 8”
(20cm) of their mouth.
6. To stop streaming, turn off
SurfLink Remote Microphone.
77
Basic Use
2
4
1
6
3
5
88
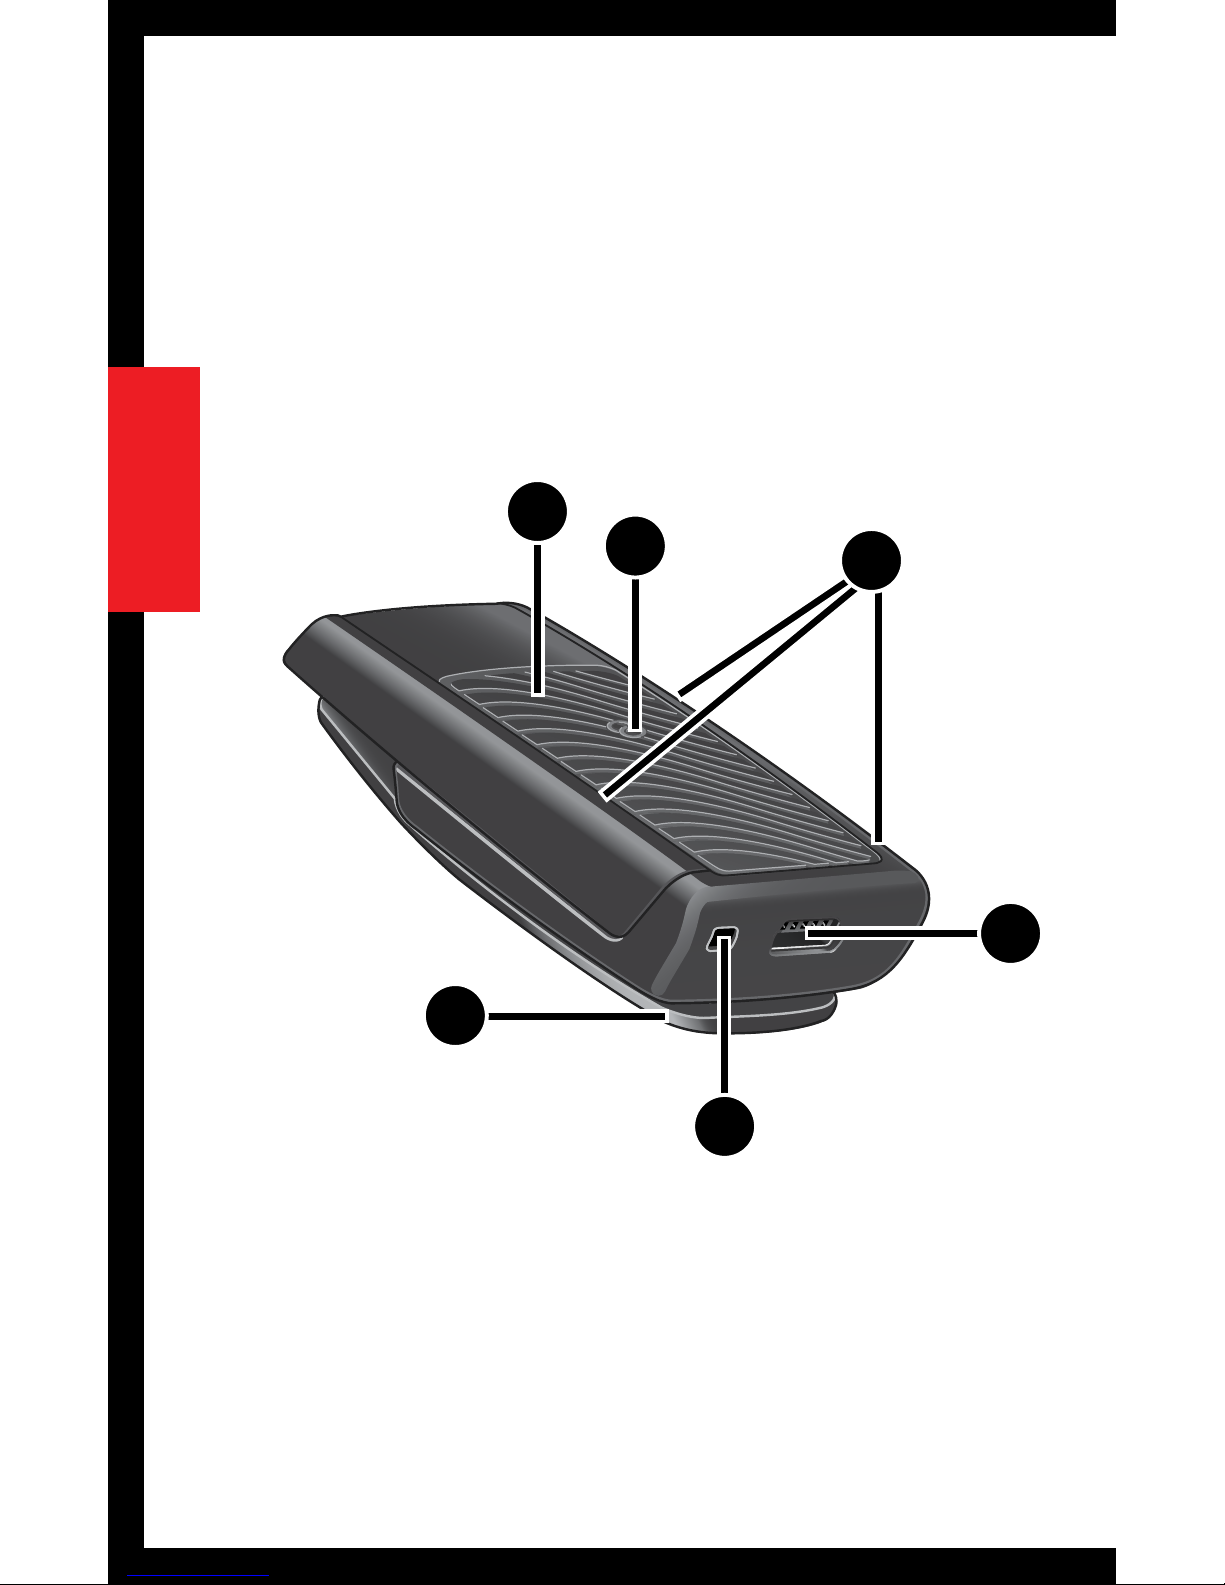
Controls Overview

Controls Overview
1. MicroUSB Jack for Recharging
Recharging via Battery-Charging Cable.
2. Power On/Off Slider
• Moving the slider towards the microUSB jack
powers on SurfLink Remote Microphone.
• Moving the slider away from the microUSB
jack powers off SurfLink Remote Microphone.
3. Syncing
Establishes the relationship between SurfLink
Remote Microphone and hearing instruments.
4. Built-In Microphones
Pick up sound and transmits to hearing
instruments.
5. LED Indicator
Identifies the current state of SurfLink
Remote Microphone.
6. Clip
Affixes SurfLink Remote Microphone to clothing.
99
Controls Overview

Operation
Low Battery and Recharging
If SurfLink Remote Microphone is on and enters
a low battery condition, the LED slowly blinks
red and provides an audible indicator tone to a
hearing instrument. The indicator tone is distinctly
different from the low battery indicator for a hearing
instrument, so there is no confusion as to which is
experiencing a low battery condition. Once SurfLink
Remote Microphone enters a low battery condition,
the indicator tone will occur about every 5 minutes
until SurfLink Remote Microphone automatically shuts
down, or until a recharging power source is applied.
When SurfLink Remote Microphone is properly
connected to a power source, the LED turns green
for 2 seconds and recharging automatically begins.
While SurfLink Remote Microphone is off, the LED
slowly blinks green during recharging and changes
to solid green when fully charged. While SurfLink
Remote Microphone is on, the LED prioritizes
streaming by slowly blinking blue (even when the
battery is fully charged).
1010
Operation
Other manuals for surflink
2
Table of contents


