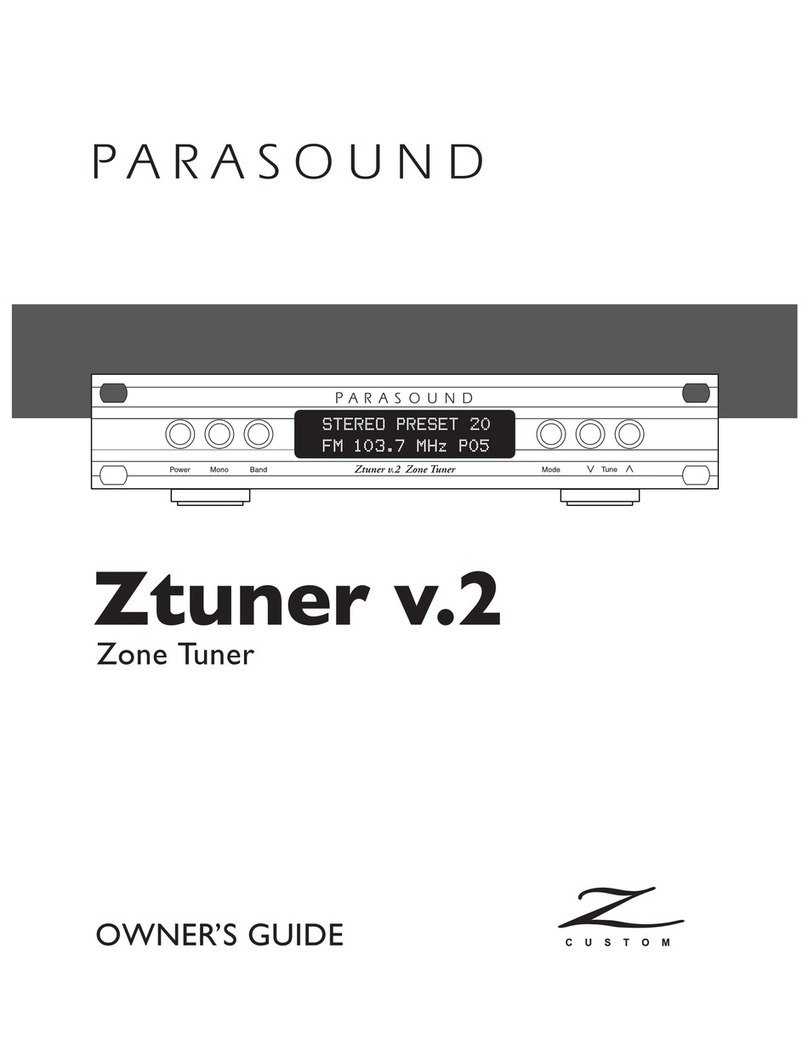
Parasound Ztuner User manual

Owner’s Guide
Ztuner Zone Tuner
Power Mono Band Mode Tune
Ztuner Zone Tuner
PARASOUND
Ztuner

TABLE OF CONTENTS
Important Safety Instructions ....................................3
Introduction ................................................4
AC Voltage Switch............................................5
Installing and Ventilation Requirements ..............................5
Rack Mounting ..............................................5
Rear Panel Connections and Controls ................................6
Front Panel Display and Controls ..................................9
Remote Control Handset........................................11
Maintenance ..............................................13
Typical Problems and Remedies ..................................14
If You Require Assistance ......................................15
Repairs: Return Authorization and Shipping............................15
Warranty Repair ............................................15
Specifications..............................................16

IMPORTANT SAFETY INSTRUCTIONS 3
The lightning flash with the arrowhead symbol within an equilateral triangle is intended to alert the user
to the presence of “dangerous voltage” inside the product that may constitute a risk of electric shock.
The exclamation point within an equilateral triangle is intended to alert the user to the presence of
important operating and maintenance instructions in the literature accompanying the product.
TO REDUCE THE RISK OF ELECTRIC SHOCK, DO NOT REMOVE COVER. NO USER-SERVICEABLE
PARTS INSIDE. REFER SERVICING TO QUALIFIED SERVICE PERSONNEL
1. Read Instructions — Read all the safety and operating instructions before operating this product.
2. Retain Instructions — Retain safety and operating instructions for future reference.
3. Heed Warnings — Adhere to all warnings on the product and in the operating instructions.
4. Follow Instructions — Follow all operating and use instructions.
5. Cleaning — Unplug this product from the wall outlet before cleaning. Use a damp cloth for cleaning.
Clean the outside of the product only.
6. Attachments — Do not use attachments that are not recommended by the product manufacturer;
they may be hazardous.
7. Water and Moisture — Do not use this product near water.
8. Accessories — Do not place this product on an unstable cart or stand. The product may fall, causing
bodily injury and damage to the product. A product and cart combination should be moved with care.
Quick stops, excessive force, and uneven surfaces may cause the product and cart to overturn.
9. Ventilation — Slots and openings in the cabinet are provided for ventilation to ensure reliable opera-
tion of the product and to protect it from overheating. These openings must not be blocked or
covered. This product should not be placed in a built-in installation such as a bookcase or rack unless
proper ventilation is provided.
10. Power Sources — Operate this product only from the type of power source indicated on the label.
If you are not sure of the type of power supply to your home, consult your dealer or local power
company. This product is equipped with a three-prong grounding plug. This plug will only fit into a
grounding power outlet. If you are unable to insert the plug into the outlet, contact your electrician
to replace your obsolete outlet. Do not defeat the safety purpose of the grounding plug.
11. Power Cord Protection — Power supply cords should be routed so that they are not likely to be
walked on or pinched by items placed upon or against them.
12. Lightning — Unplug the unit from the wall outlet for added protection during a lightning storm
and when it is left unattended and unused for long periods of time. This will prevent damage to the
product due to lightning and power line surges.
13. Overloading — Do not overload wall outlets or extension cords. This can result in a fire or electric shock.
14. Inserting Objects into Unit — Never push objects of any kind into this product through any openings;
they may touch dangerous voltage points or short out parts that could result in fire or electric shock.
15. Servicing — Do not attempt to repair or service this product yourself. Opening or removing covers may
expose you to dangerous voltage and other hazards. Refer all servicing to qualified service personnel.
16. Damage Requiring Service — Unplug this product from the wall outlet and refer servicing to quali-
fied service personnel under the following conditions: a) If the power-supply cord or plug is damaged.
b) If liquid has been spilled into the product. c) If the product has been exposed to rain or water. d) If
the product does not operate normally by following the operating instructions. e) If the product has
been dropped or damaged in any way. f) If the product exhibits a distinct change in performance.
17. Replacement Parts — When replacement parts are required, be sure the service technician has used
replacement parts specified by the manufacturer. Unauthorized substitutions may result in fire, electric
shock, and other hazards.
19. Safety Check — Upon completion of any service or repairs to this product, ask the service technician
to perform safety checks to determine that the product is in proper operating condition.
20. Wall or Ceiling Mounting — Mount the product to a wall or ceiling only as recommended.
21. Heat — The product should be situated away from heat sources such as radiators, heat registers,
stoves, and other products (including amplifiers) that produce heat.
www.parasound.com

INTRODUCTION
4
Thank You for Choosing Parasound
Congratulations on your purchase of this precision component and thank you for your selection
of Parasound. Please take a few moments to review this manual so you may enjoy all the
benefits of your new Ztuner’s unique features and capabilities.
Unpacking
Carefully unpack your Ztuner and these accessories:
•Detachable AC power cord
•Remote handset
•2 AAA batteries
•Black trigger wire with a 2.5 mm sub-mini plug at each end.
•2.5 mm to 3.5 mm adapter plug
•FM antenna, flexible dual wire “folded dipole”
•FM antenna 300 Ωto 75 Ω“balun” transformer/connector
•AM antenna, single wire
Please inspect the unit now and contact your Parasound Dealer promptly if you see evidence
of shipping damage. Save the carton and packing inserts in case you move or in the event you
need to ship your amplifier for repair. Before you proceed, locate the serial number on the rear
panel or underside of the unit and record it here for future reference:
Serial #: __________________________________________________________________________
Date of Purchase:__________________________________________________________________
Parasound Dealer: ________________________________________________________________
Phone Number: __________________________________________________________________

AC VOLTAGE, INSTALLATION, AND RACK MOUNTING 5
115v - 230v AC Voltage Selector Switch
This switch is found on the chassis bottom. Make sure the 115/230V switch is set for the cor-
rect AC line (mains) voltage before you connect the Ztuner’s power cord and before you install
it. The unit may be seriously damaged if this switch is set incorrectly.
Installation and Ventilation Requirements
Install your Ztuner away from heat sources such as heating ducts, radiators, or other heat-producing
components. Always position the Ztuner horizontally.
Observe the following ventilation guidelines when installing the Ztuner in an equipment rack
or any other enclosed space:
You should never install the Ztuner in an unventilated equipment cabinet or compartment because
hot air will not exhaust adequately to prevent overheating. Air won’t often circulate adequately in a
cabinet or enclosure whose front and back sides are open; pockets of intense heat can still develop
around any heat-producing equipment.Therefore, a ventilation fan is highly recommended. Allow
a few inches of empty space on each side and above the unit and try to avoid crowding or stacking
the Ztuner tightly between other components. A ventilation fan is also recommended where other
heat-producing equipment must be mounted close to the Ztuner.
Do not place the unit on carpeting or any other material that could obstruct air flow into the ven-
tilation holes in its chassis bottom.
Rack Mounting
The Ztuner occupies only half the width of a single rack space in a standard 19" equipment rack.
For rack mounting, you can fasten it to another Parasound Z series model by using the Parasound
SBS (Side-by-Side) mounting kit. You can also mount a single Ztuner in the rack with the accessory
Zblank panel. The SBS includes four rack mount bolts plus four pairs of plastic “shoulder washers.”
The washers are important because they insulate the Ztuner front panel (and chassis) from the
metal equipment rack and from the four mounting bolts. Locate these washers on both sides of
the front panel before the mounting bolts are screwed into the rack rail.
Power Mono Band Mode Tune
Ztuner Zone Tuner
230
AC Voltage Selector Switch.
Shown set for 230v.
Ztuner SBS Behind Panels Zblank panel

REAR PANEL CONNECTIONS AND CONTROLS
6
Connection Precautions
Disconnect the AC cord before and while making or changing any input, trigger, or speaker
connections. Make sure there is no strain or tension on any connections that could cause
them to pull loose.
Antenna Connections
The Ztuner cannot receive any FM or AM stations without separate antennas for each band.
Adequate reception and sound quality depend on antennas suitable for your location.
FM Indoor Wire Antenna
A standard FM “folded dipole” T-shaped flexible wire antenna is included with your Ztuner.
It should be adequate for most urban and suburban locations where there aren’t surrounding
tall buildings and/or hills.
Connect the 300 Ω(ohms) antenna wire’s two spade connectors to the screw terminals on the
small 300 Ωto 75 Ωbalun adapter. First loosen each screw and insert a spade lug under each
of the lock washers. Tighten the screws to hold the wires securely.
Push the balun’s plug carefully onto the round antenna receptacle marked FM 75 Ω.
You should be prepared to adjust the position of the wire
antenna to optimize reception. Clear reception of certain
stations may require a different antenna orientation, espe-
cially if there are tall buildings and/or hills nearby.
Outdoor Antenna
For best reception with the least background noise, we
recommend the use of a high-quality outdoor FM antenna.
Use round 75 Ωcoaxial cable from the antenna with an “F”
connector (not included) which you plug into the Ztuner’s 75 ΩFM antenna receptacle. If you use
flat 300 Ωtwin lead antenna wire, use the balun adapter as described above.
Cable Transmission
Most cable companies transmit FM stations as well as TV. Check with your local cable company
about the availability of FM stations. The quality of FM radio varies widely among cable operators.
Your Ztuner connects the same way as a second television: Use a TV-FM signal splitter (not includ-
ed) with the incoming cable connection and connect one wire from the output of the splitter to
connect your television and the wire from the other output to the Ztuner FM connector.
Powered FM Antennas
A small powered indoor antenna is sometimes useful when it’s impractical to install an outdoor
roof-top antenna or where FM transmission is not available via cable or a community TV/FM
antenna. However, powered antennas can occasionally add noise and distortion. In many cases,
you will receive clearer signals with the supplied dipole wire antenna.
AM Antenna
A single wire is supplied as an AM antenna. Connect it to the AM antenna terminal and position
it for best AM reception.
Audio Out Jacks
Connect standard audio cables from the L and R Out jacks to the Tuner input on your preamplifi-
er or system controller. You may connect the Ztuner to any line-level input, even if the input isn’t
labeled “tuner.”
Attach to Ztuner 75 Ω
Antenna terminal
Attaches to
Antenna Wires

REAR PANEL CONNECTIONS AND CONTROLS continued
Ext (External) Remote Control
Input Jack
Your Ztuner accepts the infrared signal of any popular infrared repeater system to facilitate
remote control operation from another room or when your tuner is installed within a closed
cabinet. This connector is a 1⁄8" (3.5 mm) two conductor mini jack; its center conductor (plug tip)
is +, its outer conductor (plug sleeve) is - .
Note: this input does not require an amplified IR connecting block.
Loop Jack
A Loop out jack is provided as a convenience so you may pass along or “daisy-chain” the incoming
IR repeater signal to another remote-controlled component.
Automatic Turn On Options
For convenience the Ztuner can be triggered to turn on automatically when a suitable voltage
is applied to its 12V In (input) jack. When automatic turn on is selected the Ztuner front panel
Power button is disabled so that on/off is determined solely by the triggering preamp or controller.
Man (Manual) Auto Switch
Man Position
When the Man Auto switch is in its Man (manual) position, the auto turn on function is disabled
and the Ztuner must be turned on and off manually with the Power button on its front panel.
Auto position
When the Man Auto switch is set to its Auto position, the Ztuner is turned on and off with an
external +9 V to + 12 V voltage from your controller or preamplifier. When the external voltage
ceases the Ztuner will turn off immediately. The Auto switch position disables the front panel
Power button.
12V In Connection
The Ztuner 12V input uses a 2.5 mm sub-mini jack. To trigger the Ztuner, plug one end of the
provided cord into this jack and the other end into the source component’s trigger output. Some
components may use a 3.5 mm trigger output jack, so we have also included a 3.5 mm jack -
2.5 mm plug adapter.
If the control component’s trigger output is a + and - terminal, you can cut the 2.5 mm plug off
one end of the included trigger wire and attach the bare wires to these terminals. The lead with
the white stripe on it corresponds to the plug’s tip and the unmarked lead corresponds to the
sleeve of the plug.
Note: If the trigger voltage source is DC, the trigger plug tip must be + (positive) and its sleeve
- (negative). The Ztuner trigger current draw is a negligible 15 mA.
AC Voltage Selector On Bottom
Out
L
R
Out
In Out
Ztuner ZoneTuner
Parasound Products, Inc.
San Francisco, CA USA Design Certified to Comply With
F.C.C. Rules, Part 15, Subpart C. AVIS: RISQUE DE CHOC ELECTRIQUE-NE PAS OUVRIR.
Auto On
Man Auto
Zone
1 2 3 4
Region
US EU
115V
/230V
60Hz
/50Hz
20W
0.5A
Fuse
Only
12VTrigger
RS-232 ControlExt Remote
GND
FM 75ΩAM
In Loop
7

REAR PANEL CONNECTIONS AND CONTROLS continued
12V Trigger Loop Jack
The 12V Trigger Loop jack lets you “daisy-chain” the incoming trigger voltage to an additional
Ztuner or other component.
Note: The total load on your preamp or controller’s trigger output is the sum of the current
drawn by the trigger circuits of each of the components you’ve linked together.
RS-232 Control Jack
This is a DB9 serial port which accepts commands from your system controller and feeds back
status to be displayed. The following can be controlled and displayed:
- Power on
- Station preset number
- Tuned station frequency
- Tuning mode, preset-seek-manual
- FM or AM band
- Stereo, mono, enforced mono
- The Zone number of the incoming control signal
RS-232 codes for the Ztuner are available at our website, www.parasound.com.
Region Switch
Set this switch for the region where you live. Tuning increments in the USA position (North
America) are 200 kHz for FM and 10 kHz for AM. Tuning increments in the EU position (Europe,
UK, Scandinavia) are 50 kHz for FM and 9 kHz for AM.
Zone 1 2 3 4 Switch
You can select different remote command codes to control up to four Ztuners independently
with the same wireless remote control system. Set the Zone switch to the number 1-4 that cor-
responds to the zone you programmed with the remote control handset (see Remote Control).
When you turn on the Ztuner after you move the Zone switch the display will briefly flash ZONE
CHANGE with the zone number you just selected.
Notes:
- The factory settings for the Zone switch and remote handset are 1.
- The Zone switch should only be changed when the Ztuner is turned off.
AC Line Cord
The AC cord supplied with your Ztuner should be connected directly to an un-switched AC wall
outlet or power strip that is always “live.” Connect the AC cord only after you have connected
the antenna wires and audio cables.
AC Voltage Selector On Bo
In Out
With
C. AVIS: RISQUE DE CHOC ELECTRIQUE-NE PAS OUVRIR.
Auto On
Man Auto
Zone
1 2 3 4
Region
US EU 12VTrigger
RS-232 ControlExt Remote
In Loop
8

FRONT PANEL DISPLAY AND CONTROLS
The Ztuner displays the following information:
• AC will appear faintly whenever the Ztuner is plugged into a live AC outlet, even if the unit
is not turned on.
• The selected broadcast frequency such as 102.1 MHz for FM or 810 kHz for AM.
• The selected FM or AM band selected frequency range, MHz for FM, kHz for AM
• A station that was preset between 01 and 30. If the frequency selected was not already
entered as a preset station, this indicator will not light.
• MEMORY illuminates while the memory bank is open. You can store a new preset station
at this time.
• Stereo-Mono indicator for FM.
• MONO-E to show enforced mono operation.
• Zone settings of the Ztuner and the remote handset.
Power Button
Press this button once to turn on and press it again to turn off.
What will be displayed: After turn on the display first shows PARASOUND Ztuner.
Note: If you changed the Zone or Region setting since the Ztuner was last turned on, or if its
AC power was interrupted, it will next display ZONE CHANGE with the new zone number 1-4. If
you changed the Region setting since the Ztuner was last used, it will next display REGION
CHANGE and the new US or EU setting.
The display will then show the following information. For example:
MAX30 or MAX 8 indicate the maximum number of presets you have made available with the
P 8/30 key on the remote control handset. This feature enables you to restrict the total number
of preset stations you tune to only the first eight presets so you can find your favorite stations
more quickly when tuning the presets.
PRESET means the Preset Tuning mode is selected so that if you turn the knob it will select the
previous or next preset station. For your convenience the Preset Tuning mode is automatically
selected whenever the Ztuner is turned on. This is because we expect that you will most often
listen to preset stations.
FM 95.3MHz P04 (MAX30 selected) or P4 (MAX 8 selected) shows you are tuned to an FM
station at 95.3MHz and it was already memorized as Preset 4. It will be the same station that
was tuned when you last used your Ztuner.
Note: The Power button will not operate when the Auto On switch on the Ztuner rear panel is
set to Auto.
Band Button
Press this button to toggle between FM and AM frequency bands.
MAX30 PRESET
FM 95.3 MHz P04
MAX 8 PRESET
FM 95.3 MHz P4
or
Power Mono Band Mode Tune
Ztuner Zone Tuner
PARASOUND
Ztuner
9

FRONT PANEL DISPLAY AND CONTROLS continued
10
A typical display might be:
MAN TUNE means the Manual Tuning mode is selected so that if you turn the knob it will
select the previous or next AM broadcast frequency.
Mono Button
The Ztuner will display STEREO for an FM stereo station with a signal strength of at least 30uµ.
If the station is broadcasting mono or it is a stereo station with a signal strength below 30uµ
the MONO is displayed. AM stations are mono only.
If you press the Mono button once it will enforce mono output even for FM stations that are
broadcasting stereo. When you have enforced, or fixed, mono output, the display will show
MONO-E in place of STEREO or MONO. Press the Mono button again to restore automatic
FM stereo-mono reception.
Note: Mono reduces background noise and the “spitting” sound you often hear when you’re
trying to listen to a weak FM station or an FM station that is subject to multipath distortion.
Enforcing full-time mono is also useful when the Ztuner is used for a zone, such as a hallway
or bathroom, in which one or more mono speakers are installed.
Tune Knob
Turn the Tune knob to find stations. The tuning mode is controlled by the adjacent Mode button.
Mode Button
The Tune Mode button controls the three functions of the Tune knob.
Preset Tune
Whenever PRESET appears, the Tune knob selects only preset stations.
Note: This will select among 30 or only 8 possible preset stations according to how you
pressed the P 8/30 key on the remote control handset.
Whenever PRESET appears the tune knob selects preset stations.
Auto Tune
After you press the Mode button once AUTO TUNE will be displayed. Turn the Tune knob clockwise
one step to find the next station. Turn it counter-clockwise one click to find the previous station.
Notes:
- You can stop auto tune at any time by pressing any button or by turning the Tune knob one
click in the opposite direction that the unit is tuning.
- The preset number will appear if you tune to a station that was already preset.
Manual Tune
After you press the Mode button a second time MAN TUNE will be displayed. Turn the Tune
knob to select the next or previous broadcast frequency, even if there is no station actually
broadcasting there. Manual tune is useful when you are trying to tune a weak station that
might be passed over in auto tune or deliberately “de-tune” a station whose reception is
compromised by a stronger signal from a station at an adjacent broadcast frequency.
Note: A preset number will appear when you tune to a station that is already preset.
MAX30 PRESET
FM 95.3 MHz P04
MAX 8 PRESET
FM 95.3 MHz P4
or
MONO MAN TUNE
AM 810kHz

REMOTE CONTROL HANDSET
The remote control has a range of approximately 20 - 25 feet (6 - 7.5 meters). Use only AAA
alkaline batteries in the handset and insert them according to the + and - polarity markings in
the battery compartment.
Zone Code
You can select different remote command codes to control up to four Ztuners independently
with the same wireless remote control system. Program the remote handset to the number
1-4 that corresponds to the Zone switch number on the Ztuner.
Notes:
- The remote handset will not operate the Ztuner unless its zone code number matches the
Ztuner Zone selector switch setting. The purpose of separate zone codes is to enable as many
as four Ztuners to operate independently in the same installation.
- The factory settings for the remote handset and the unit’s Zone switch are 1.
Setting the Zone Code
To set the remote zone code, press both the Zone key and the key 1-4 which corresponds to
the setting of the Ztuner Zone switch. These keys must be pressed simultaneously for about
1.5 seconds.
When the same zone code is programmed in the Ztuner and the remote handset the display
will look like this example for a few seconds.
ZONE 1 refers to the Ztuner zone setting and R Zone 1 refers to the remote handset program-
ming. In this example, both are set to Zone 1 and the remote will control the unit.
However, if the Ztuner and the remote handset are set up with different zone codes the display
will display the mis-match for a few seconds.
In this example the Ztuner Zone switch is set to Zone 3 and the remote handset is programmed
for Zone 1. The remote is unable to control the unit.
On and Off Keys
These have the same function as the Power button on the front panel.
Press On to turn the Ztuner on. The display will illuminate.
Press Off to turn the Ztuner off. The display will flash OFF as the unit turns off.
These separate keys enable programming unambiguous “hard” on and off commands into a
system controller or to create a macro sequence for a learning type remote control.
Note: These keys will not function when the rear panel Auto On switch is set to Auto.
ZONE 3 R ZONE 1
FM 103. MHz P23
ZONE 1 R ZONE 1
FM 103. MHz P23
11

REMOTE CONTROL HANDSET continued
12
Tune < and > Keys
These keys have the same function as the Tune knob on the front panel.
Press the < key to go to the previous preset or station.
Press the > key to advance to the next preset or station.
Mode Key
The Mode key has the same function as the Mode button on the front panel. It selects the tuning
function of the Tune < and > keys.
We expect you will most often use the preset tune mode where PRESET is displayed.
Press the Mode key once and the < and > keys are for auto tuning seek down or up. The display
shows AUTO TUNE.
Press the Mode key again and the < and > keys are for manual tuning down or up. The display
shows MAN TUNE.
Press the Mode key a third time to restore the preset tuning mode.
The display shows PRESET.
Band Key
The Band key has the same function as the Band button on the front panel. It selects FM and
AM bands.
Mono Key
The Mono key has the same function as the Mono button on the front panel Press the Mono
key once to enforce mono output for stations which are broadcasting stereo signals. When you
press the Mono key to manually select mono output, the display will show MONO-E. E stands
for Enforced. Press the Mono key again to restore automatic stereo-mono operation.
Mem (Memory) Key
The Ztuner can store up to 30 station presets. The first preset number is 01 (1 with MAX 8) and
the last preset number is 30 (MAX 30).
To store a preset station into memory:
1. Tune to the station you want to store in memory.
2. Press the Mem key; MEMORY will appear in the front panel display and the empty space
next to the P will flash. These indicate that the memory bank is open and you may enter a
new station into memory.
3. Press numbered keys to select the desired preset number such as key 3 for Preset station
number 3, or press key 1 and then key 5 for Preset station number 15. After you have selected
the preset number, MEMORY is replaced by PRESET 30 (or 8) and the new preset number
replaces the flashing space.
Note: After you press the Mem key you’ll have about 5 seconds to press the first numbered
key. If you don’t press any number keys in this time, no new preset station will be entered.
STEREO MEMORY
FM 99. MHz P

REMOTE CONTROL HANDSET continued
Note: When MAX30 is displayed, press the 0 key before selecting
keys 1,2 or 3. Otherwise the Ztuner will wait approximately four sec-
onds with the adjacent digit flashing to see if you’re going to press
another number key to select a 2 digit preset number.
Preset 8/30 Key
This key enables you to restrict the total number of preset stations
you tune to only the first eight presets so you can find your favorite
stations more quickly when tuning the presets. When you push the
P 8/30 key the display will show either MAX30 or MAX 8.
Note: To take advantage of this convenience, make sure your
favorite station presets are 1-8.
Preset-Direct Keys 0 through 9
The numbered keys perform three functions.
Preset Station Selection
Press the numbered keys for direct access to each stored preset station.
Presets 1-9 are displayed as P 01, P 02, P 03, and so on (MAX 30).
Presets 1-9 are displayed as P 1, P 2, P 3, and so on (MAX 8)
To select station presets 10-30, press the tens place key first. For
example, to select preset 23, first press key 2, then press key 3. This
key works in conjunction with the Mem (Memory) key.
Note: When MAX30 is displayed, press the 0 key before selecting
keys 1,2 or 3. Otherwise the Ztuner will wait approximately four sec-
onds with the adjacent digit flashing to see if you’re going to press
another key to select a 2 digit preset number.
Direct Frequency Tuning
The numbered keys can select the broadcast frequency of the station you wish to receive.
First press the Direct key, then the numbered keys corresponding to the station.
In USA: to receive FM 103.7, press Direct, 1, 0, 3, 7, 0.
In Europe, to receive 103.75 press the Direct key, then press keys 1, 0, 3, 7, 5.
Note: If you enter an incomplete frequency, such as 1, 0, 3, 7 which is missing the final 0 or 5,
there will be a short pause while the Ztuner fills in the missing number and finds the station.
MaintainingYour Ztuner
Your Parasound Ztuner requires no periodic maintenance; it will thrive on your frequent use and
enjoyment. It has no user-serviceable parts inside. To avoid the risk of electric shock, do not
remove its top cover. The exterior can be cleaned with a soft cloth moistened only with a few
drops of water or glass cleaner.
13
Band
Presets - Direct Entry
Tune
Mono
ModeDirect
Mem P 8/30Zone
1 2 3
4 5 6
7 8 9
0
Ztuner Zone Tuner
On Off

TYPICAL PROBLEMS AND REMEDIES
No sound
- Check that AC is live.
- Check the plugs for audio cables are secure at both ends.
- Make sure the control preamp/receiver is switched to the correct input.
- Is the unit on? Check the setting of the Man On switch.
Poor FM Reception
- Poorly located antenna. Try repositioning the antenna or installing an outdoor antenna.
- An indoor antenna is inadequate. Building shields signals. Try cable company FM service.
- Bad connection at antenna. Check antenna connections.
- STEREO indication is not steady, switches back and forth to MONO. Station is too weak
to receive in stereo. Press Mono button to enforce mono.
Poor AM Reception
AM stations are more susceptible to interference from home appliances and electrical storms.
- Inadequate antenna. Use a longer wire. Try repositioning it in different directions.
- Static Interference from light dimmers or home appliances. Could be poorly grounded AC
house wiring. Call electrician.
- Static interference from certain weather conditions or nearby electric bus line. No remedy is likely.
Remote does not operate
- Zone code setting does not match the tuner. Change zone number.
- Weak or dead batteries in remote. Replace batteries and recycle old ones.
- IR Interference. Insure that the front panel IR receiver is not obscured or exposed to direct
sunlight or a plasma TV screen.
14

IF YOU REQUIRE ASSISTANCE – REPAIRS
Call your Parasound dealer first. If the dealer can’t help you with your problem we encourage
you to call Parasound’s Technical Service Department, toll-free at 1-866-770-8324, Monday -
Friday, 7am - 5pm Pacific time. We can suggest other diagnostic tests you can easily perform.
If we determine that your Ztuner should be returned to Parasound or an Authorized Parasound
Warranty Center for inspection and possible servicing, we will provide the location of a warranty
center near you or shipping instructions for the unit’s return to Parasound.
Before You Return Any Unit to Parasound for Service
Before you send your unit to Parasound, you will need to obtain a specific Return Authorization
(RA) number and shipping instructions from Parasound’s Technical Department. The RA number
must be clearly marked on the outer carton. Use the original factory packing materials and
arrange adequate insurance to cover its value. You must include a copy of your purchase receipt,
since this document establishes the validity of this unit’s warranty. Warranty repairs are only
performed by Parasound or Parasound Authorized warranty centers when your purchase receipt
is from a Parasound Authorized Dealer or Parasound Authorized Reseller.
Units Will Be Refused by Parasound Under the Following Conditions
1. Unit was sent without the Parasound-assigned RA number marked on the carton.
2. Unit was sent in an unsuitable shipping carton, likely to have been damaged in transit.
3. Unit has inadequate packing, unit likely to have been damaged in transit.
4. Unit was shipped collect for shipping charges. We do not accept collect shipments.
5. Unit was shipped via the US Postal Service.
6. Unit was sent to an address other than the address instructed by our Technical Department.
Note: The shipping address is not the same as Parasound’s office address.
Warranty Repair
Read your accompanying Parasound Limited Warranty carefully to understand the applicable rights
and limitations. This section provides instructions for obtaining repairs, both for units covered
under the Parasound Limited Warranty and for units or situations which are outside the Warranty.
Unit is not eligible for repair under the terms of the Parasound warranty if:
1. Unit was not purchased from a Parasound Authorized Dealer or Parasound Authorized Reseller.
2. Unit’s serial number was removed, modified, or defaced.
3. Unit shows evidence of abuse and/or misuse.
4. Unit was modified in any way.
5. A prior repair was attempted by an unauthorized repair station.
15

SPECIFICATIONS
Tuning Range
FM: 87.5 MHz to 108 MHz
AM: 520 kHz to 1610 kHz
FM Sensitivity
Mono IHF 10.8 dBf
Stereo IHF 36.9 dBf for 50 dB of quieting
AM Sensitivity
IHF 10 uV/m
Signal to Noise Ratio
74 dB Stereo; 65 dBf IHF-weighted
FM Stereo Separation
50 dB @ 1 kHz
40 dB @ 10 kHz
FM Selectivity
80 dB alternate channel
AM Selectivity
30 dB
FM Frequency Response
30 Hz to 15 kHz +/- 1 dB
AM Frequency Response
20 Hz to 4.5 kHz +/- 2 dB
Total Harmonic Distortion
FM Mono < 0.08 %
FM Stereo < 0.18 %
Total Harmonic Distortion
AM < 0.5 %
Capture Ratio
1.5 dB
AM Suppression
60 dB
AC Power Consumption
20 watts
12V Trigger Current Requirement
15 mA
Dimensions
91⁄2"Wide
10" Deep with connectors
2" High with feet, 13⁄4" panel only
241 x 254 x 50mm, 44.1mm panel only
Net and Shipping Weight
4 lbs., 1.83 kg; 6.7 lbs., 3.1 kg
Rack Mount Accessories
May be Purchased Separately
SBS: Bracket and bolts to attach two
Z series units side-by-side in a standard
19" equipment rack.
Zblank: 91⁄2"x 13⁄4" blank panel, required to
mount a single Z series unit; Zblank kit
includes one SBS.
16
Parasound Products, Inc. 950 Battery Street, San Francisco, CA 94111
Customer Service 415-397-7100 / Technical Dept. 415-675-7272 / Fax 415-397-0144
www.parasound.com
Rev 0.91 © Parasound Products, Inc. 2004
Other manuals for Ztuner
1
Table of contents
Other Parasound Tuner manuals