PARKIT360 Force User manual

Parkit360 Force
Owner’s Manual
V2.6.2
Parkit360 Force Owner’s Manual 2
Introduction
We know you’re busy, and need to get that trailer moved. Now. So with that in mind,
we’ve kept these instructions as brief as possible, but they are important, so please take
a moment and check them out.
We want to make sure that you enjoy years of safe and trouble-free operation with your
arkit360 Force.
www.parkit360.ca

Parkit360 Force Owner’s Manual 3
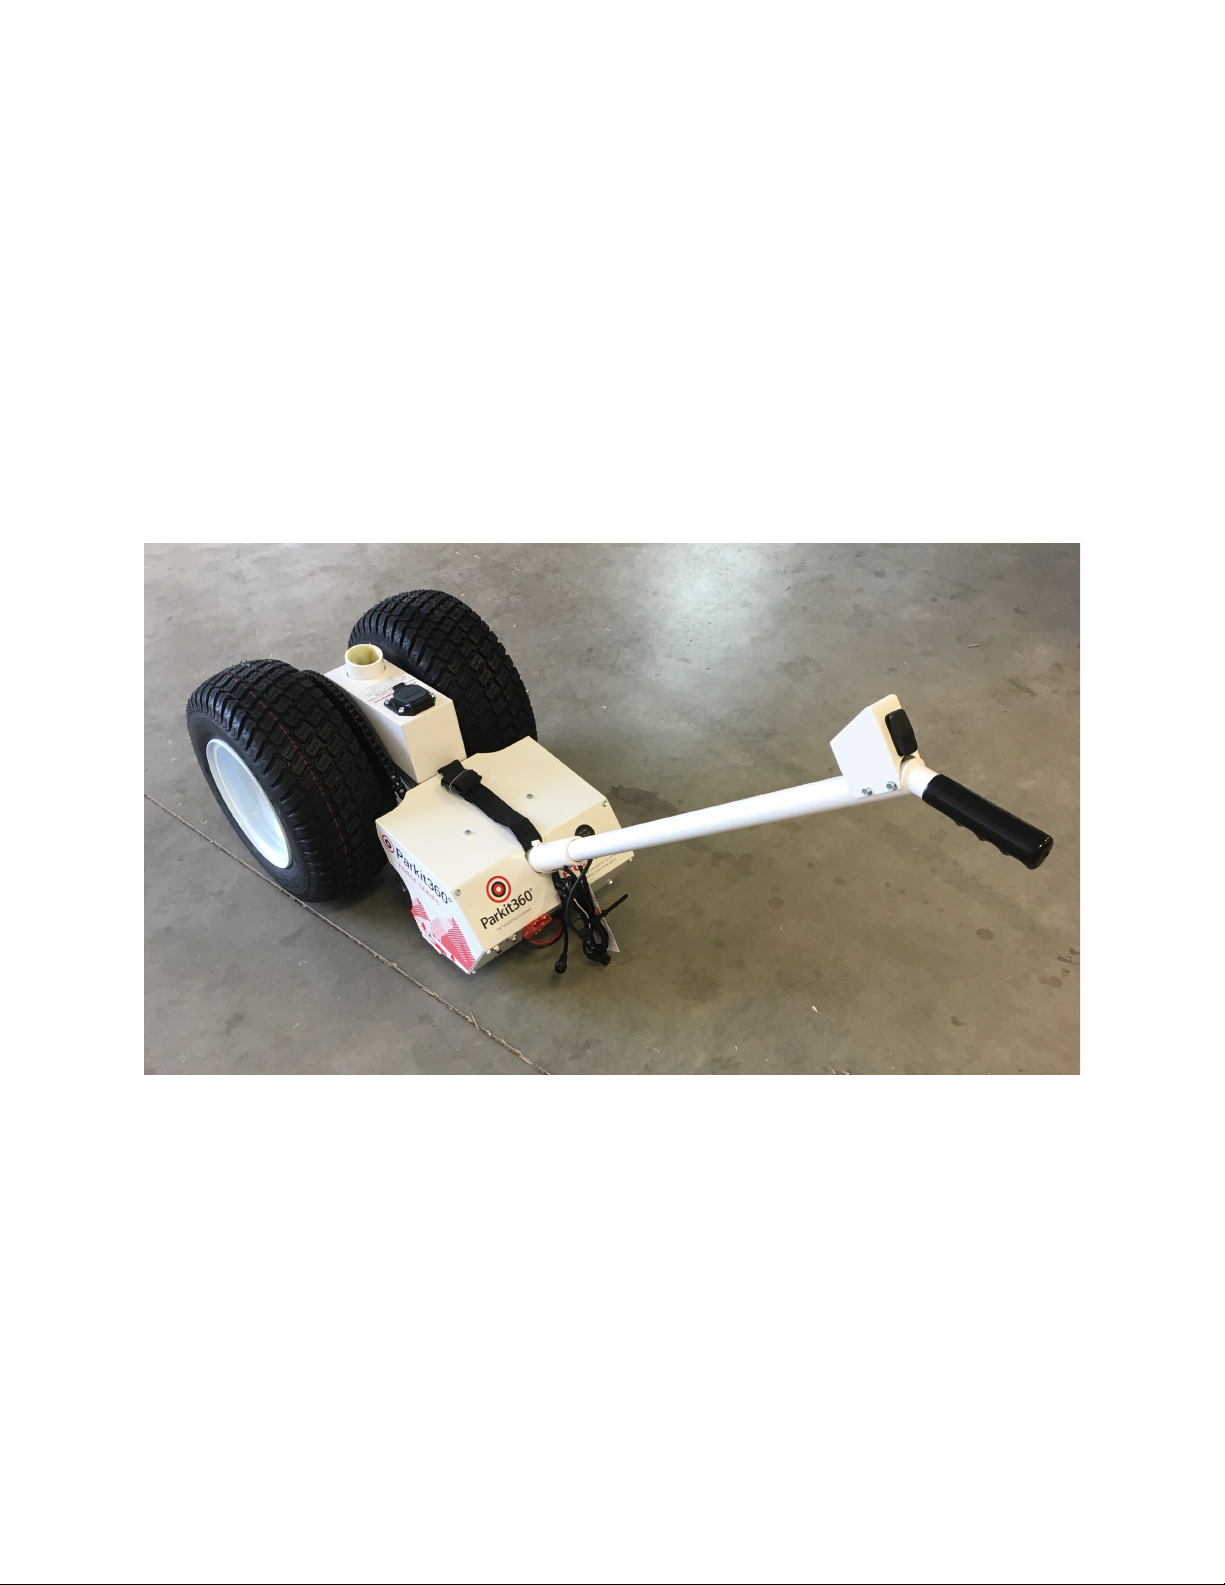
In The Box
The arkit360 Force is shipped in one box on a pallet.
The main arkit360 Force unit will be fully assembled.
In addition to the main unit the box will also include:
oarkit360 Handle
oBall Mount
oBall Mount Tightening Bar
oCustom Hitch Ball
oHardware and Battery Connector (in plastic bag)
If you want to use your trailer
battery, you will need the optional
80” battery connector which may be
purchased online at:
http://www.parkit360.com
www.parkit360.ca
Parkit360 Force Owner’s Manual 4
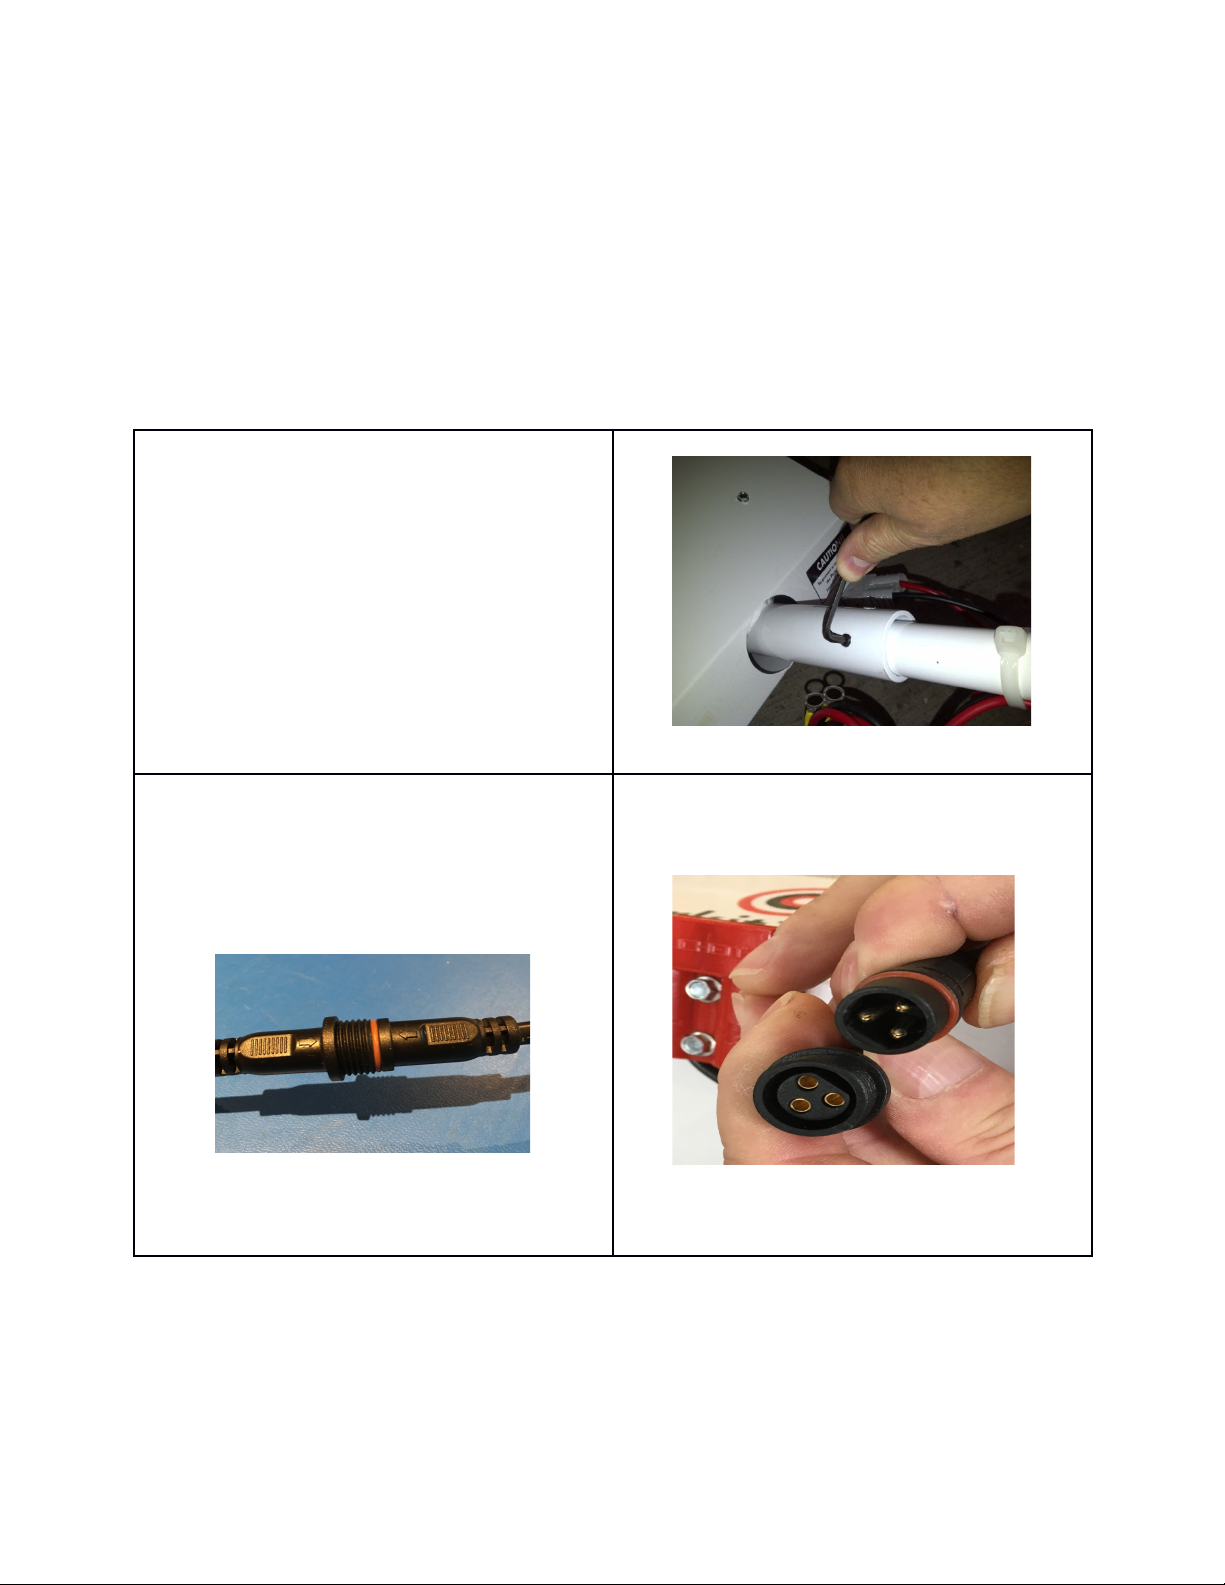
Assembl
lease follow these steps to assemble the arkit360 Force using the assembled unit on
page 2 as a guide:
1. Insert the handle into the main unit
as shown. Tighten the Allen screws to
secure the handle
2. Connect the 2 parts of handle
control cable. The cable connection is
keyed, so please ensure to align the
flat edge on each part. Do not force it
together. Align the arrows as shown.
www.parkit360.ca

Parkit360 Force Owner’s Manual 5
3. If you purchased the unit with the
optional Battery Box, install it now.
(Optional). The arkit360 Force also
has the option of being powered using
your trailer battery.
Skip this step if you are using your
trailer battery to power the arkit360
Force.
4. Install the battery (optional). For the
battery terminals the colour code is as
follows:
a. RED is ositive
b. BLACK is Negative
For the battery charger, the colour
code is as follows:
a. WHITE is ositive
b. BLACK is Negative
5. Connect the battery connection plug
as shown:
Connecting optional 80” cable to trailer battery (or batteries):
-If your trailer has a single 12 volt battery, connect the 80” cable while observing proper
polarity. Red connects to the positive terminal ( +) and the Black to the negative (-)
-If your trailer has 2 batteries (typically these will be 6 volt batteries, in series to provide
12 volts), it is very important to connect the 80” cable to the proper terminals. See
picture below of a typical installation.
www.parkit360.ca

Parkit360 Force Owner’s Manual 6
The 80” cable must be connected across both batteries, and not just one. The easiest
way to check, is to trace the wires and find the single wire (shown in red on picture) that
connects the 2 batteries together. No other wires should be connected to these 2
terminals. If you are unsure about this connection, please call our technical support
phone number. If the 80” cable is not connected properly, it can cause a short-circuit
and serious damage to the trailer and arkit 360 Trailer Dolly.
www.parkit360.ca

Parkit360 Force Owner’s Manual 7
Safet
Please read the following safety notes before operating for the first time.
The Parkit 60 Force is not recommended for use on hills due to the possibility of
a runaway trailer. The Parkit 60 has been tested on grades up to 6% ( % when
using EZ Connect option). Operation on grades steeper than 6% is not
recommended, and could result in damage, injury, or death. The Parkit 60 Force
has been tested using a maximum grade of 6% and a minimum of 10% of the
trailer weight in the hitch. If the hitch weight is too light, the unit could lose
traction in challenging areas like hills or soft ground.
The Maximum Safe Trailer Weight depends on the model purchased:
oP 60SD Standard-Duty Model 5,000 lbs. Max.
oP 60HD Heavy-Duty Model 10,000 lbs. Max.
IMPORTANT:
The unit’s main wheels operate in two modes: engaged, and freewheeling. The
freewheeling mode is to make the unit easy to move into position. The wheels
must NOT be in freewheeling mode when under load, or a runaway trailer could
result.
When charging the battery, it is important to keep the battery level; otherwise,
acid could seep out of the battery during the charging process.
www.parkit360.ca

Parkit360 Force Owner’s Manual 8
Operation
Handle Control Switch:
lease note that there is no “On” indicator… as soon as the power is connected to the
Force unit, the unit is operational and ready to go.
For the following instructions, all of the directional terms used are from the point of view
of the user standing behind the unit during normal operation, for example, when we
refer to “Forward” this means that you are walking forward with the unit, which would
mean that the trailer is backing up.
The arkit360 Force unit is controlled using a single three-position switch. The switch
remains in the neutral position unless Forward or Reverse is pressed.
www.parkit360.ca
Parkit360 Force Owner’s Manual 9
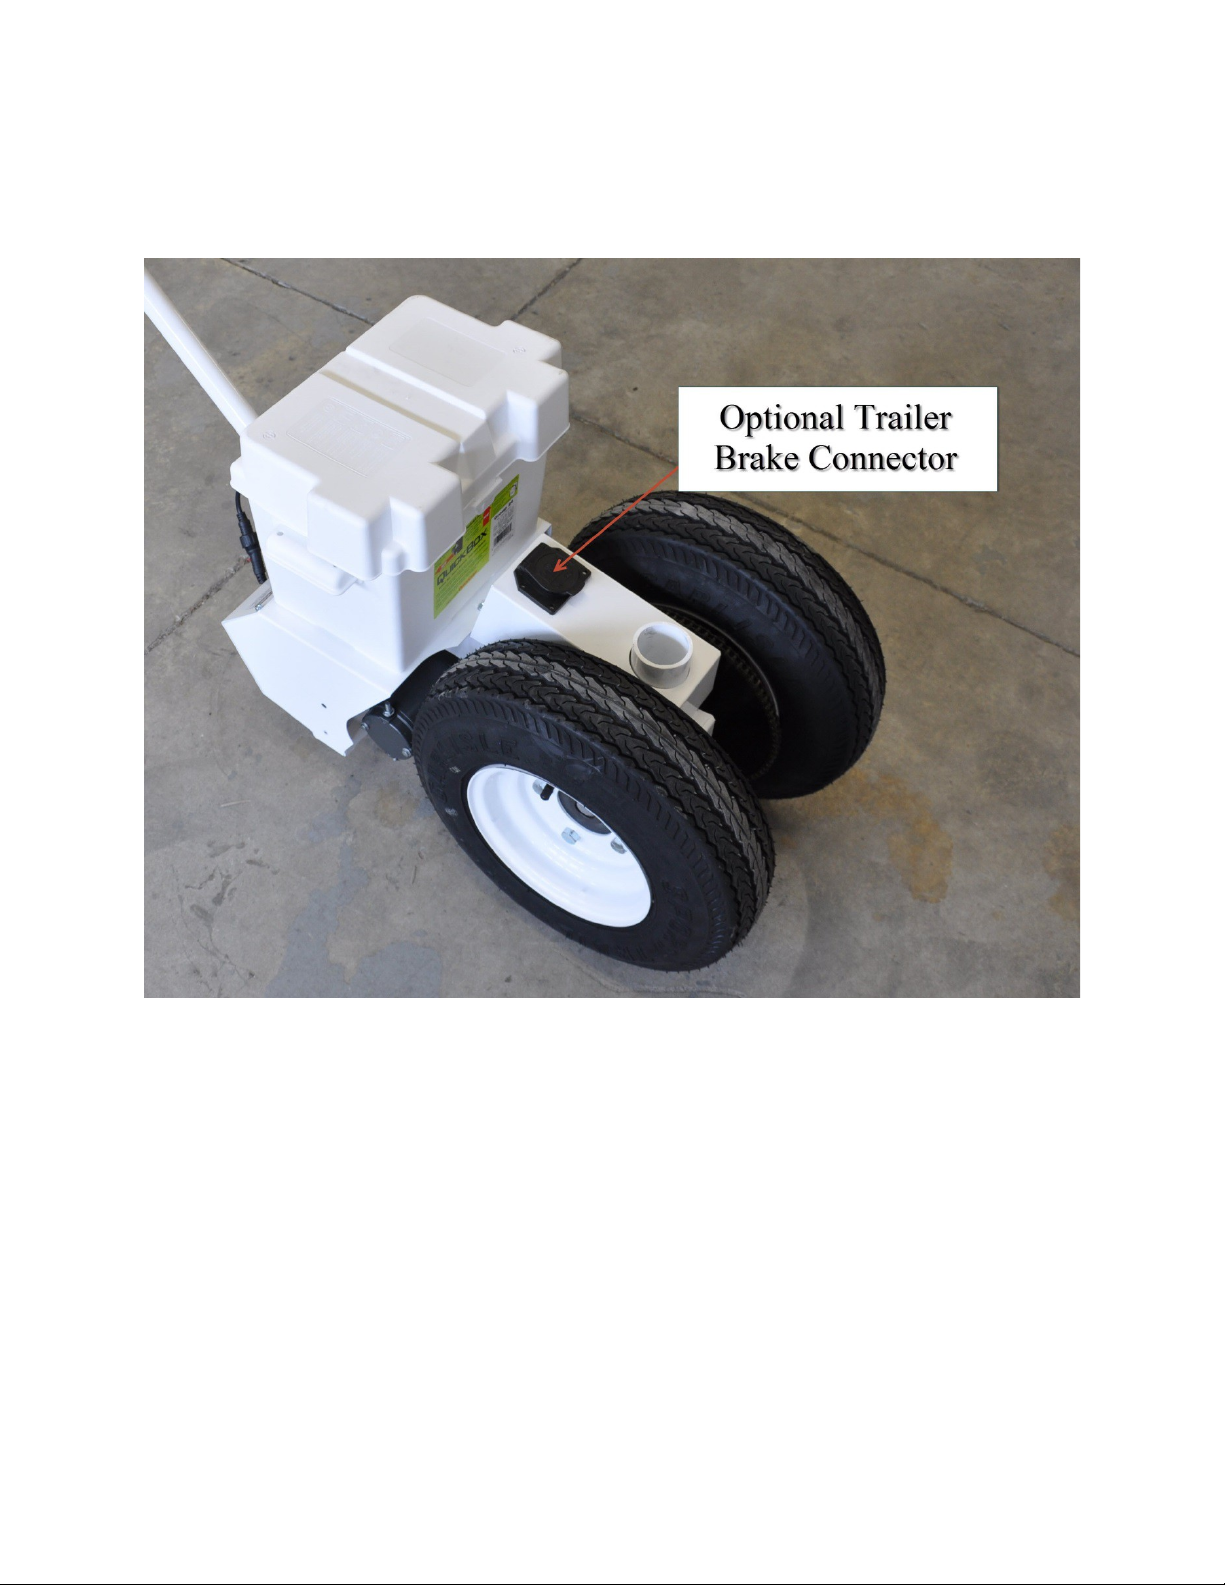
Trailer Brakes:
The arkit360 Force features a connection for your trailer brake system. When
connected and powered on, the trailer brakes will be engaged automatically whenever
the unit isn’t moving. When the motor is activated, in either direction, the brakes are
released automatically.
lease note: Since the brakes are activated as soon as the unit is connected, it’s
possible that if the brakes are left connected for any extended length of time, this will
eventually drain the battery.
www.parkit360.ca

Parkit360 Force Owner’s Manual 0
Engaging the Wheels and Freewheel mode:
The Freewheeling knob is used to change the wheels from engaged to freewheeling
mode.
ull and turn the knob (clockwise) to put the unit into freewheeling mode.
ull and turn the knob (clockwise) to re-engage the wheels.
To engage the wheels, it’s important that the knob return to the fully seated
position or damage may occur to the transmission. When the unit is new, you
may need to move the unit, rocking the wheels back and forth a bit to make sure
it’s properly seated.
www.parkit360.ca
Table of contents
Popular Lawn Mower manuals by other brands


DEWEZE
DEWEZE ATM-725 Operation and service manual

Weed Eater
Weed Eater 180083 owner's manual

Husqvarna
Husqvarna Poulan Pro PP185A42 Operator's manual

Better Outdoor Products
Better Outdoor Products Quick Series Operator's manual

Cub Cadet
Cub Cadet 23HP Z-Force 60 Operator's and service manual

MTD
MTD 795, 792, 791, 790 Operator's manual


