This simplified guide of the Parrot RK8200 gives you the
main instructions to easily use this product. For further
information, refer to the user guide available on our website
www.parrot.com.
Using the PARROT RK8200 for the first time
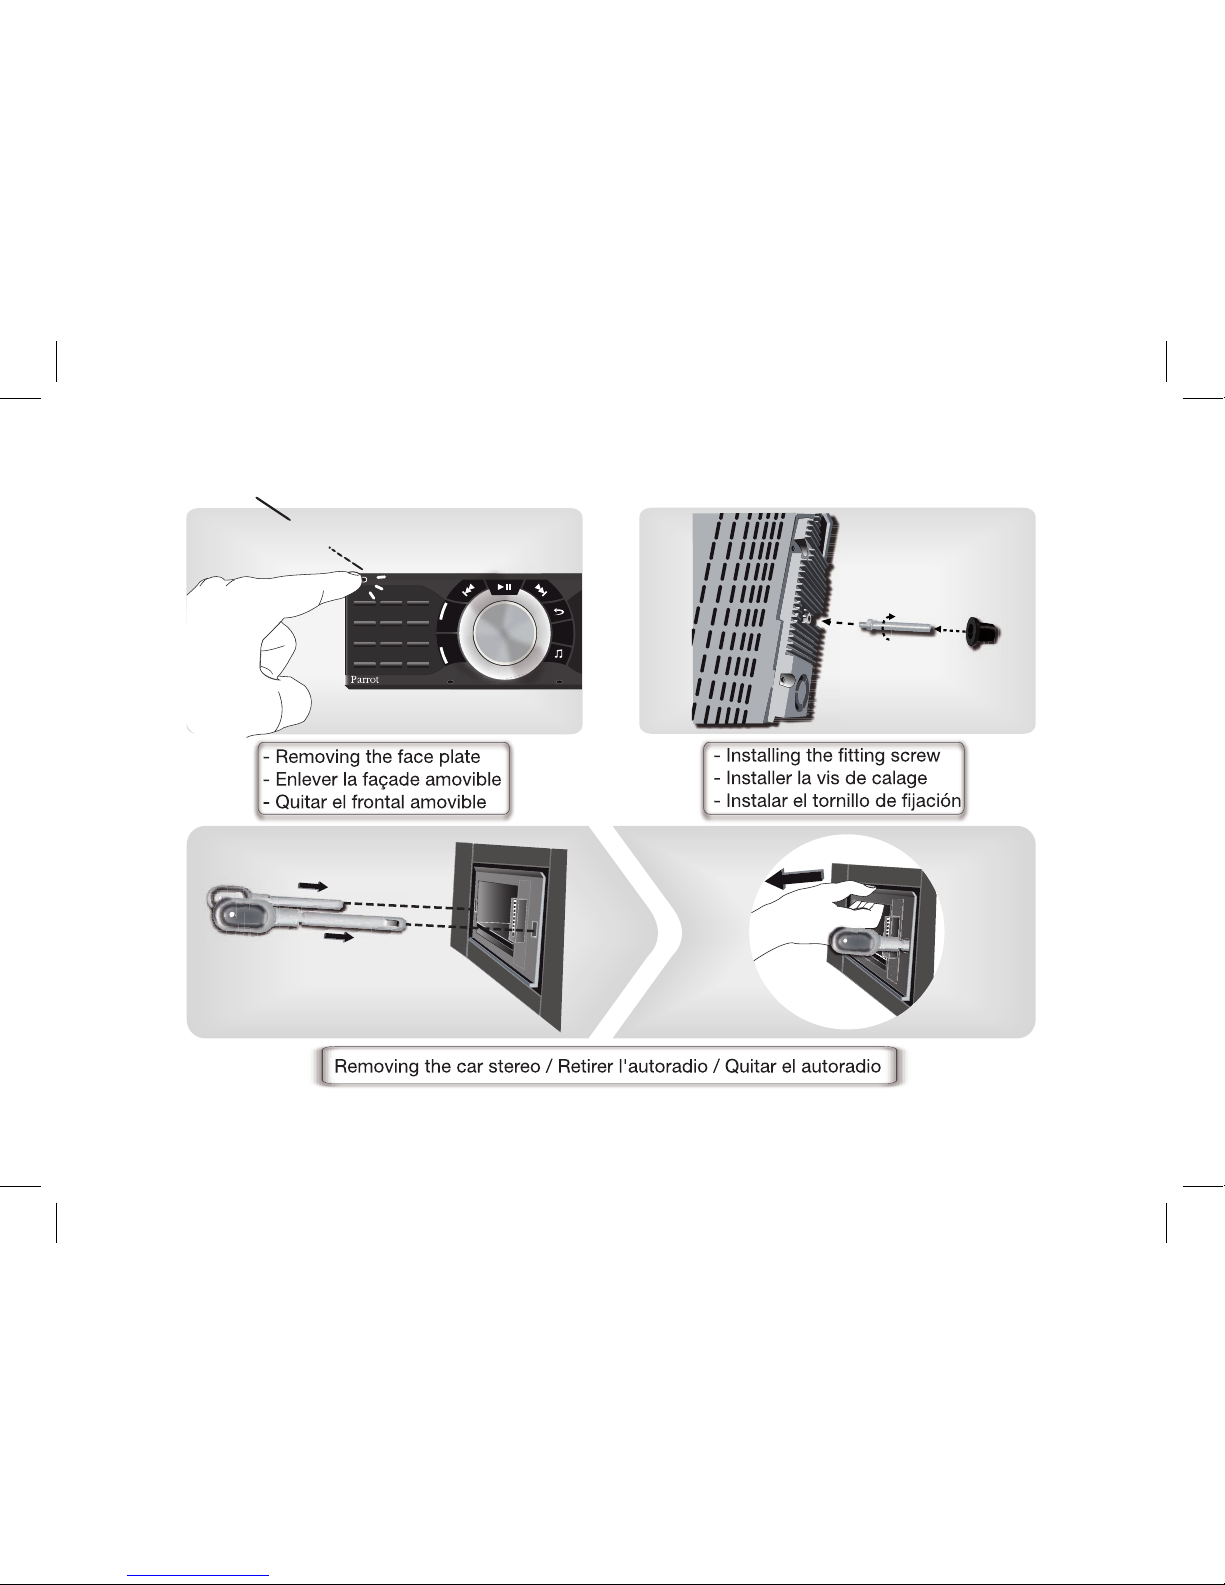
Using the antitheft system
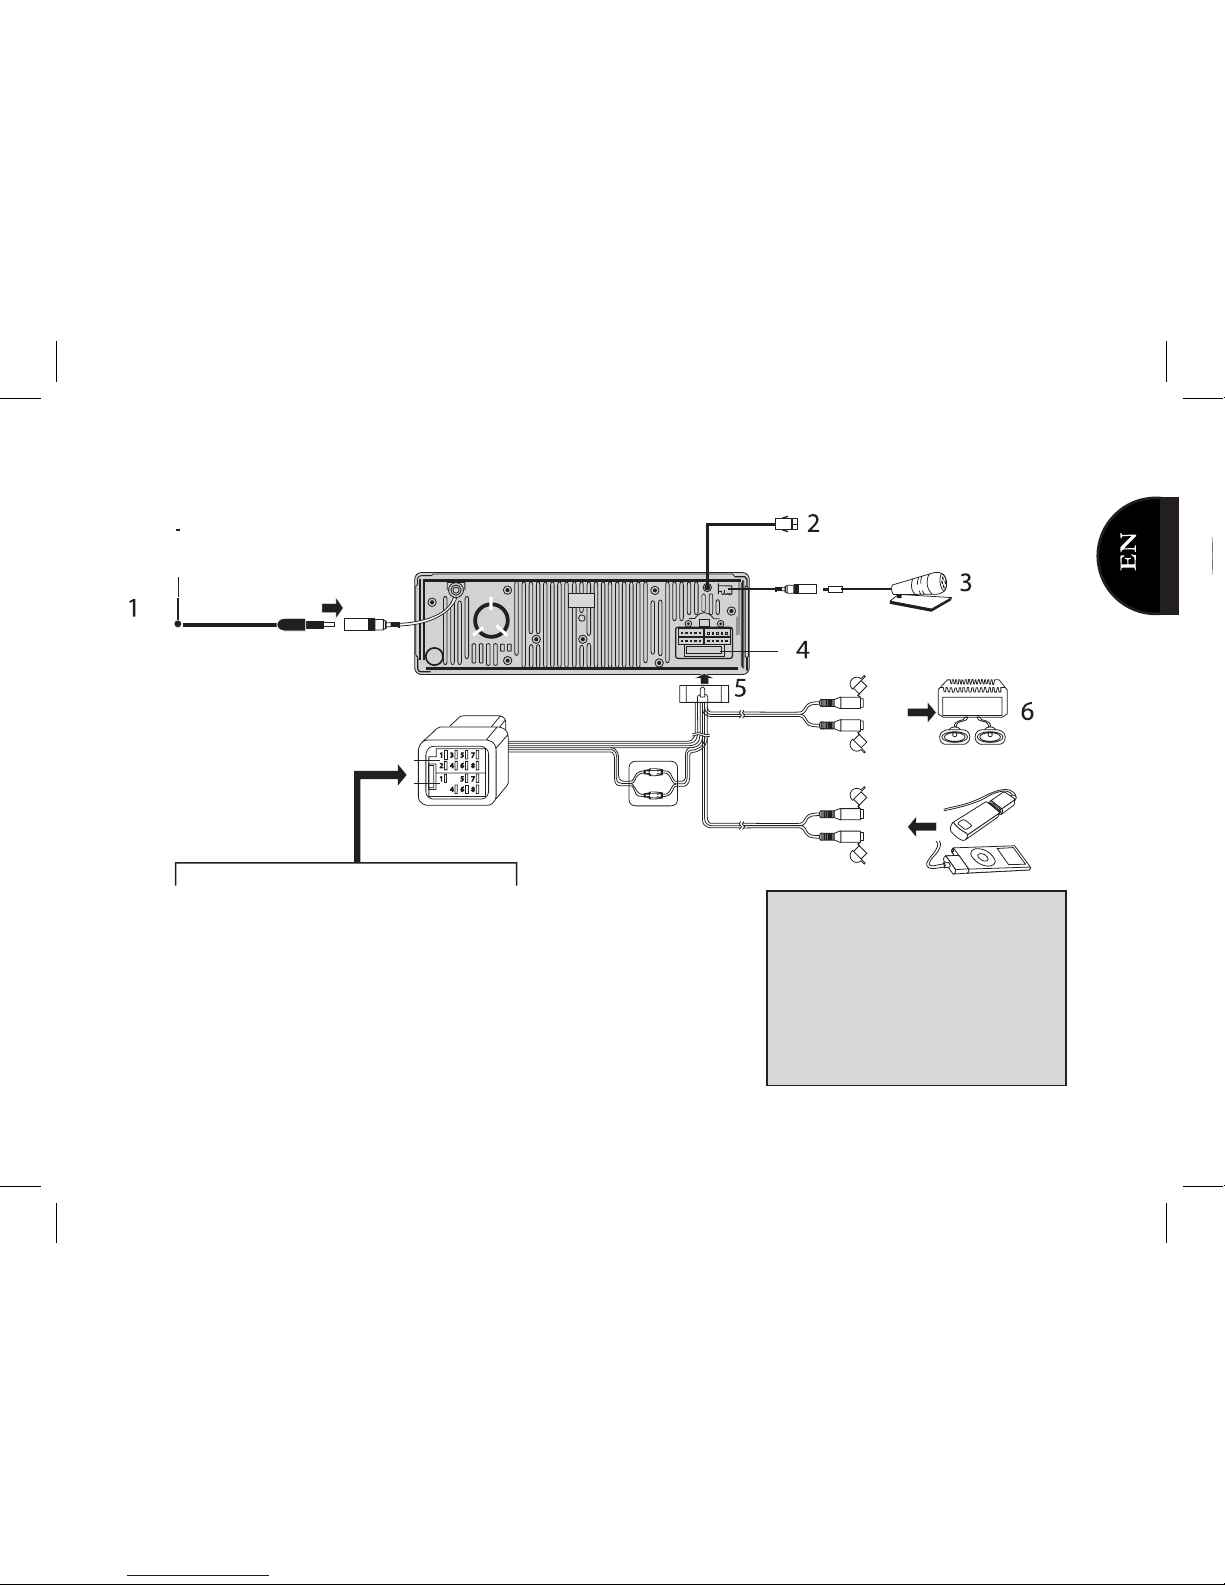
►Refer to the diagrams p.4.
To avoid any risk of theft, do not forget to remove the face-
plate of your Parrot RK8200 when you leave your vehicle.
Without this front, the Parrot RK8200 cannot be used.
• To remove the faceplate, press the eject button in the
top left.
• To replace the faceplate, put it in front of the car stereo
and push it.
• To remove the entire car stereo:
1. Remove the car stereo’s faceplate.
2. Insert the keys into the appropriate holes until they
remain stuck.
3. Pull the device towards you.
To properly save the Parrot RK8200 parameters, make
sure the device is turned off before removing the face
plate.
The availability of some functionality only depends on
your mobile phone.
►Refer to our website www.parrot.com, in the
Compatibility section, for further information.
English
Using the PARROT RK8200 for the first time.................
Using the antitheft system.............................................
Installing the PARROT RK8200......................................
Browsing through the menus.........................................
Connecting a phone via Bluetooth ®..............................
Pairing your phone with the Parrot RK8200..................
Connecting your phone to the Parrot RK8200..............
Using the Telephony function..........................................
Synchronization of the phonebook................................
Receiving a call..............................................................
Making a call..................................................................
Using the voice recognition function.............................
Using the Music Function.................................................
Using the Audio Streaming function...............................
Using the internal memory of the Parrot RK8200...........
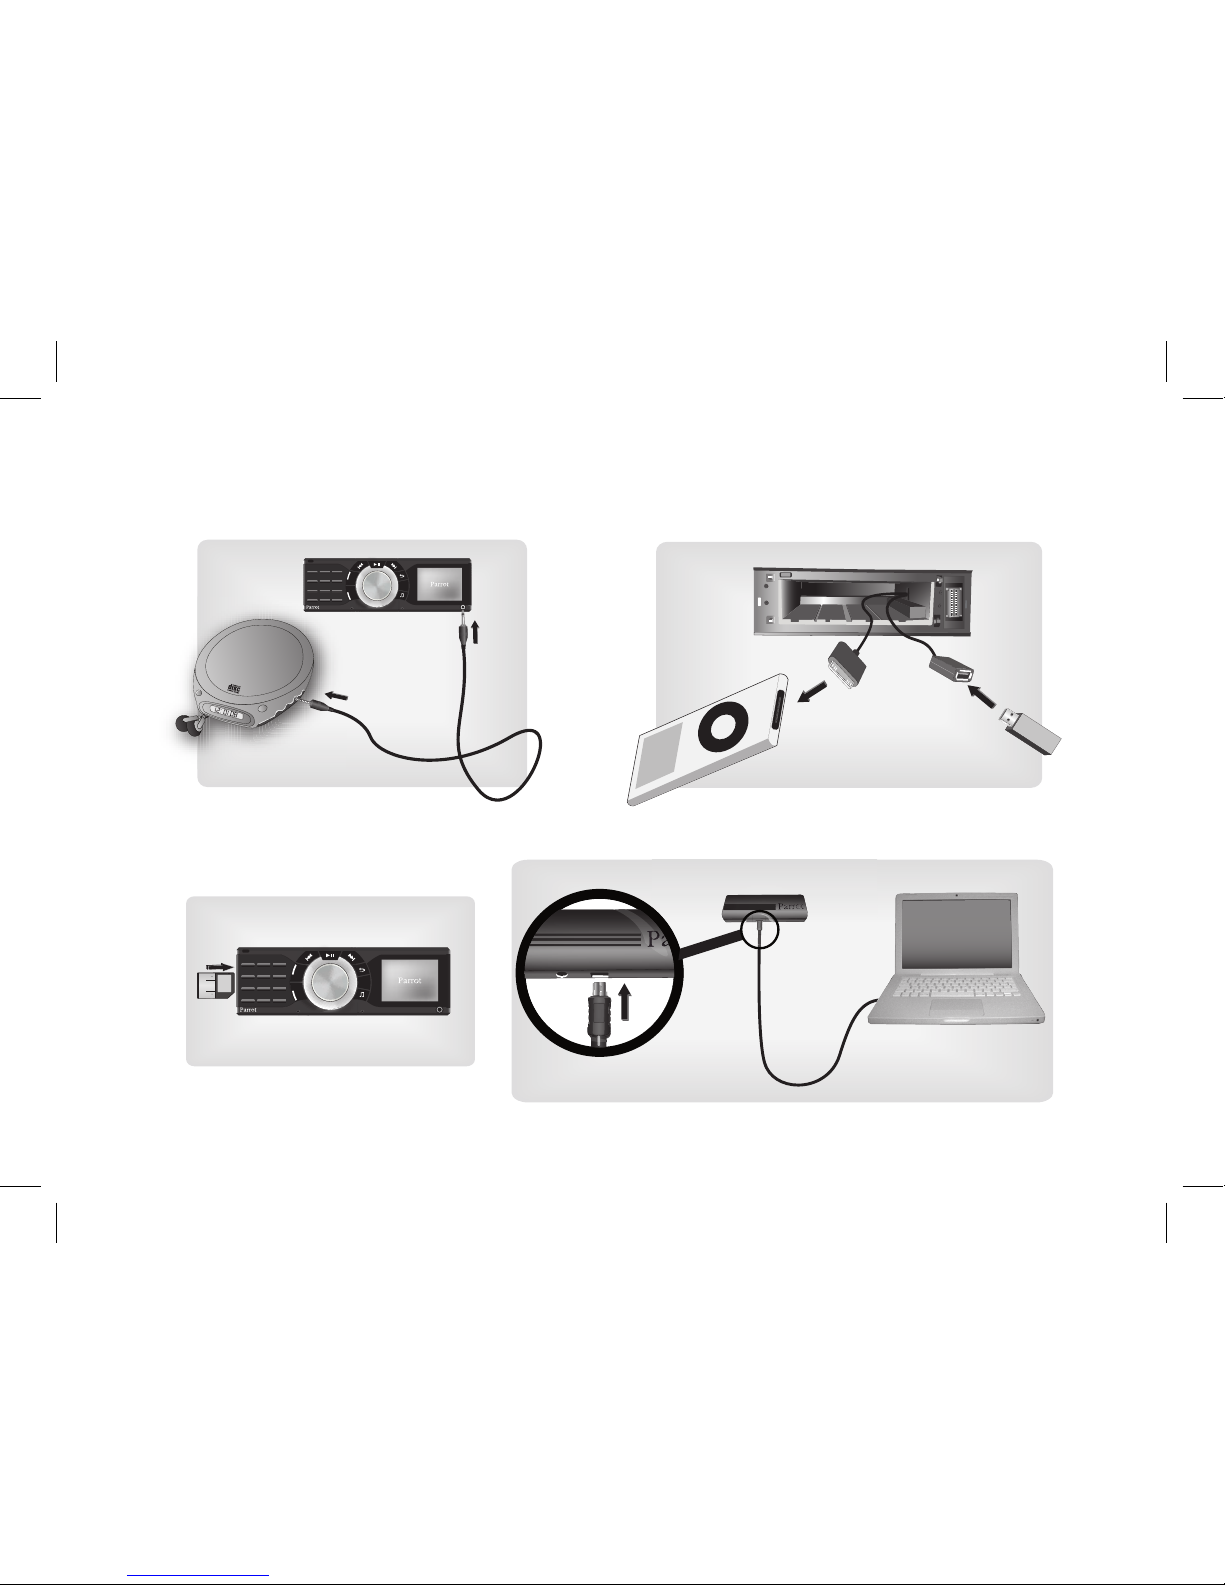
Using the Parrot RK8200 with an external source..........
Using the Parrot RK8200 with an audio cable...............
Using the radio function.................................................
7
7
8
10
10
10
11
11
11
11
12
12
13
13
14
14
15
15
English
7