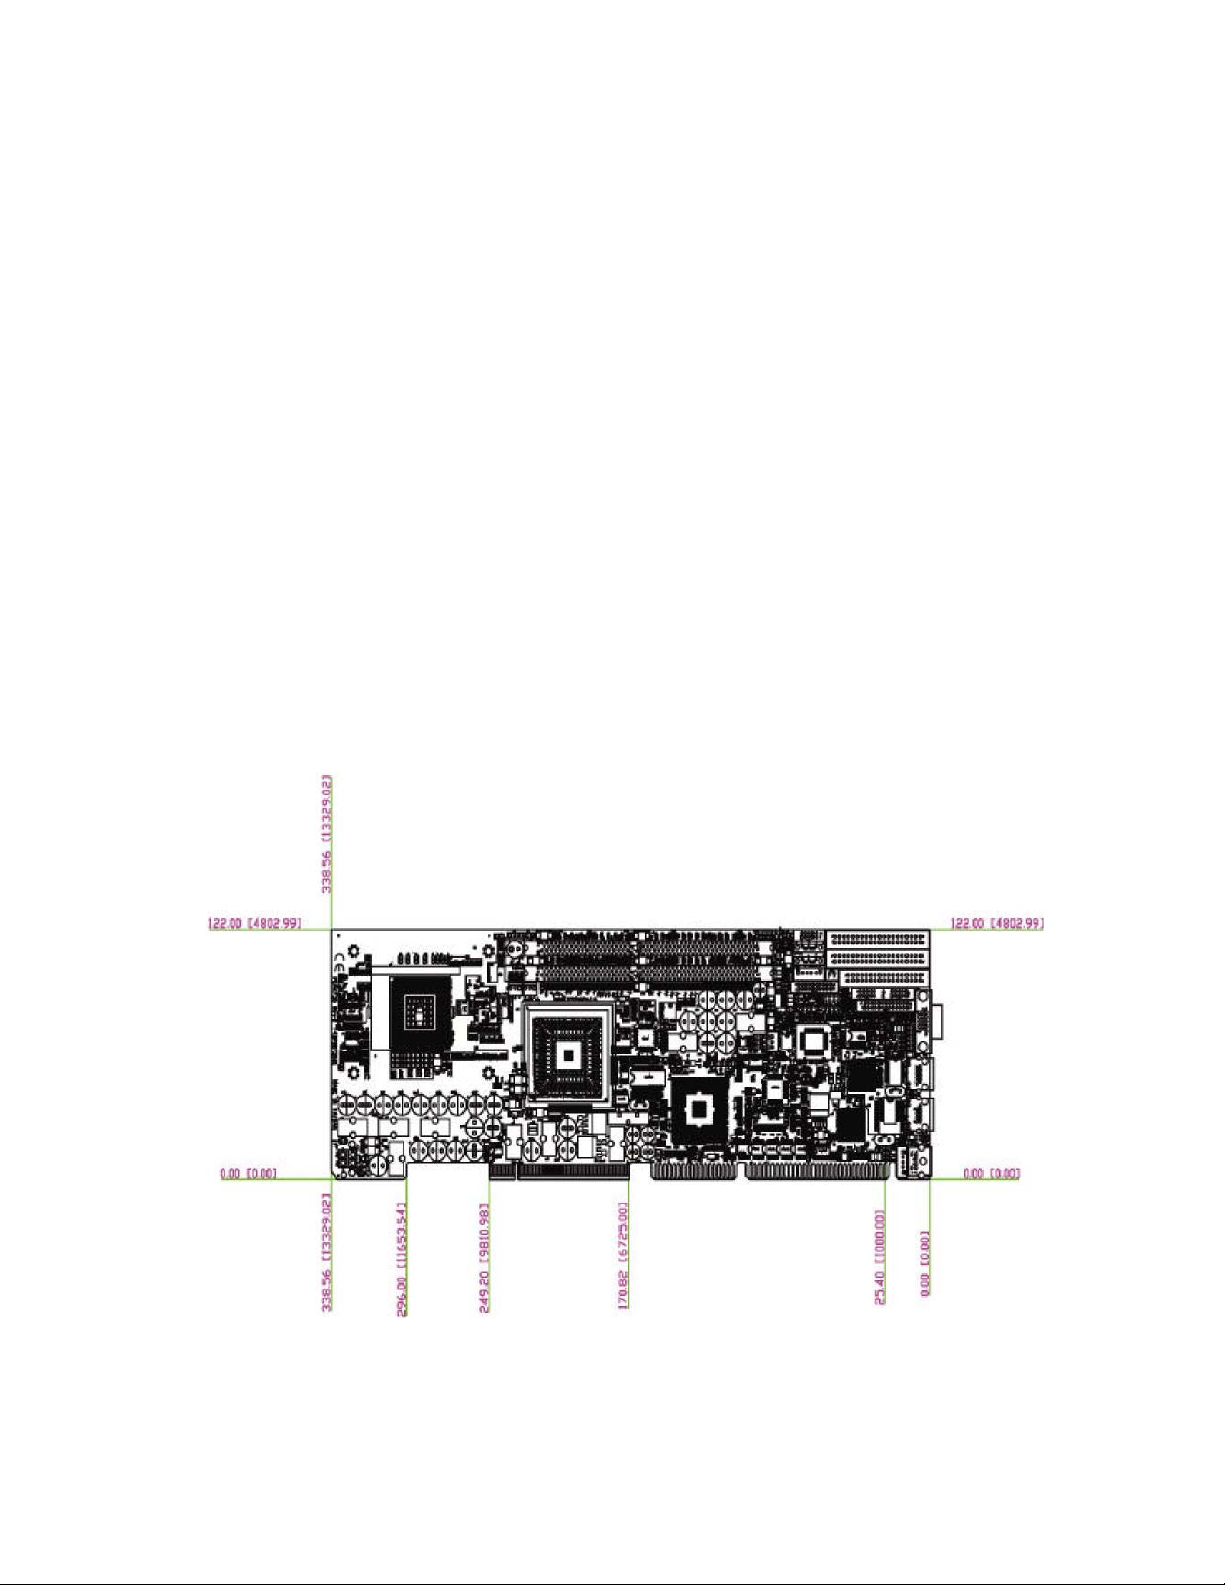
PCW Microsystems SBC2516 User manual

Single Board Computer
SBC2516
User's Manual

1
Preface
Copyright
This document contains information protected by copyright. No part of this manual
may be reproduced, copied, translated or transmitted in any form or by any means
without the prior written consent from PCW Microsystems Inc.
Disclaimer
The information in this document is subject to change without prior notice and does
not represent commitment from PCW Microsystems Inc. However, users may
update their knowledge of any product in use by constantly checking its manual
posted on our website: www.rackmount.com
PCW shall not be liable for direct, indirect, special, incidental, or consequential
damages arising out of the use of any product, nor for any infringements upon the
rights of third parties which may result from such use. Any implied warranties of
merchantability or fitness for any particular purpose is also disclaimed.
Acknowledgements
SBC2516 is a trademark of PCW Microsystems Inc. All other product names
mentioned herein are registered trademarks of their respective owners.
Regulatory Compliance Statements
This section provides the FCC compliance statement for Class A devices and
describes how to keep the system CE compliant.
FCC Compliance Statement for Class A Devices
The product(s) described in this user’s guide has been tested and proved to com-
ply with the limits for a Class A digital device, pursuant to Part 15 of FCC Rules.
These limits are designed to provide reasonable protection against harmful inter-
ference when the equipment is operated in a commercial environment. This equip-
ment generates, uses, and can radiate radio frequency energy and, if not installed
and used in accordance with the user’s guide, may cause harmful interference to
radio communications. Operation of this equipment in a residential area (domestic
environment) is likely to cause harmful interference, in which case the user will be
required to correct the interference (take adequate measures) at their own
expense.
CE Certification
The product(s) described in this user’s guide complies with all applicable
European Union (CE) directives if it has a CE marking.

2
Table of Contents
Chapter 1 General Information......................................... 4
1.1 Features..................................................................................5
1.2 Specifications ..........................................................................5
1.3 Board Layout ..........................................................................8
1.4 Checklist & Mechanical Drawing .................................................9
Chapter 2 Jumper Setting ........................................................10
2.1 Functions of Jumpers..............................................................12
2.2 Setting Jumpers.....................................................................13
2.3 Location of Jumpers ..............................................................14
2.4 Jumping Setting.....................................................................15
2.5 Connector Pin Definition .........................................................16
Chapter 3 Expanded Capabilities ............................................22
3.1 System Memory ....................................................................23
3.2 Installing DIMM .....................................................................24
3.3 Changing CPU ......................................................................26
3.4 Installing Fan Heatsink ...........................................................27
3.5 Serial ATA .............................................................................30

4
Chapter 1
General Information

5
1.1Features
oSocket 478 Intel® Pentium® 4 processor up to 3.2GHz with 800MHz FSB
oIntel® 865G/ICH5 chipsets
oMax. 2GB DDR 400/dual channel memory in 2 DIMM slots
oIntegrated VGA, CRT connector x 1
oIntel 82547EI gigabit Ethernet controller in CSA port and Intel 82551QM
10/100 Ethernet controller
oSerial ATA port (150MB/s) x 2/USB 2.0 port (480Mbps) x 2
1.2 Specifications
System Architecture
- Full size SBC with PCI/ISA golden finger.
- DVI 1.0 compliant (optional)
- PICMG 1.0 (Rev.2.0) compliant
- USB 2.0 compliant
CPU Support
- Intel® Pentium®4 processor with 256K/512K L2 cache on die
- mPGA478 socket supports 400/533/800MHz system bus; CPU speed up to
3.2GHz – Support Hyper-ThreadingTM technology
Main Memory
- DDR SDRAM DIMM x 2 support maximum 2GB (DDR 266/333/400) of
memory – Support two 64-bit DDR channels, 3.2GB/s bandwidth per channel
- Supports no Registered /non-ECC DIMMs only
BIOS - Award System BIOS
- Plug & Play support
- Advanced power management support
- ACPI 1.0b compliant
- 4M bits flash ROM

6
Chipsets
- Intel®865G (GMCH) chipsets
- Intel ICH5 for south bridge (I/O controller hub)
- Firmware hub (FWH) 4Mbits flash ROM x 1
- PCI V2.3 compliant
On Board LAN
- Intel 82547EI gigabit Ethernet controller (dedicated by CSA port directly from the Intel
865G GMCH) and Intel 82551QM 10/100 Ethernet controller x 1 for SBC2516
- Compliant with PCI V2.1/V2.2, IEEE802.3, IEEE 802.3u, IEEE802.3x, IEEE802.3y,
IEEE8023ab – WfM 2.0, PC2001 compliant
- RJ45 with LED connector x 2
On Board VGA
- Intel 865G (GMCH) chipset integrated with graphics controller
- Hardware motion compensation assist for software MPEG/DVD decode
- Access system memory
- Fully PC 98 and PC 99 compliant
- 15 pin CRT connector x 1
On Chip I/O (ICH5)
- On board USB port x 2, USB 2.0 compliant
- Ultra ATA100/66/33 support, 40 pin connector x 2. 2-pin power connector for DOM (Disk
On Module)
- Serial ATA support, SATA connector x 2 ; data transfer bandwidth up to 150MB
On Board I/O
- ITE 8712F-A Super I/O
- SIO x 2, with 2x16C550 UARTs, 10 pin header x 2
- PIO x 1, bi-directional, EPP/ECP support, 26 pin connector x 1
- Floppy disk controller: 34 pin connector x 1
- 6-pin mini DIN connector x 1 for PS/2 keyboard/mouse, and 5-pin connector x 1 for external
keyboard
- On board buzzer x 1
- GPIO (4 in 4 out )
- On board 2 –pin header for I2C
- On board 5-pin header for IrDA
- On board 2-pin header for reset SW, 4-pin for speaker, 5-pin for keylock, 2-pin for IDE active
LED, and 2-pin ATX power SW
- One 3-pin power header for 3-pin power cable connected to backplane board
to support ATX Power On function.
- On board 4-pin additional power source input
. - AC’97 output, 10 pin header x 1

7
System Monitor
-Derived from Super IO ITE 8712F-A to support system monitor
-8 voltage (For +1.5V, +3.3V, +5V, -5V, +12V, -12V, Vcore and +5VSTBY)
-Fan speed connector x 2 (one is for CPU, while the other is for system)
-Temperature sensor x 2 (one is for internal CPU, while the other is for external system)
Real Time Clock
-On-chip RTC with battery back-up
-External Li battery x 1
Watchdog Timer
-Watchdog timeout programmable by software from 1, 2, 4, 8, 16, 32... to 128 seconds
PCI to ISA Bridge & ISAMAX Support
-ITE 8888F x1 PCI to ISA Bridge –Provide 64mA driving capability to
maximize ISA signals for supporting ISA cards up to 20 on the
backplane ISA slot
Dimensions
-338.58mm(L) x 122mm(W) (13.3”(L) x 4.8”(W)
Power Requirements
-+5V, +12V, -12V, ATX/AT
Power Consumption:
Model SBC2516 (G)
CPU 3.0G 2.4G
+12V 6.5A 4.5A
+5V 5.4A 4A
+3.3V 0.5A 0.5A
+5Vsb 0.5A 0.5A
Environments
-Operating temperature: up to 60°C, below -20°C (under certain
condition) –Storage temperature: -20°C to 80°C
-Relative humidity: 10% to 90% (Non-condensing)
Certification
-CE approval
–FCC

Intel865G Chipset
w/integrated VG
A
Controller
Socket 478 Intel Pentium 4 processor
up to 3.2GHz+ with 800MHz FSB
A
TX 5V Standby
Power Connector
S
er
i
a
l
ATA
C
onnec
t
or x
2
Intel 82551QM
10/100 Ethernet
Controller
D
ua
l
LAN
I
Intel 82547EI Gigabit/CS
A
Ethernet Controller or Intel
82562EX 10/100 LCI
Ethernet Controller
Max2GB DDR 400/Dual
Channel Memory in 2
DIMM Slots
8
1.3 Board Layout
Figure 1-1: SBC2516 Front Layout

9
1.4 Checklist
After opening the package of SBC2516 Series, please check and make sure
you have all of the following items:
✍
One SBC2516 series SBC
(A mechanical drawing of this model is shown below.)
✍
One SBC2516 Manual Guide
✍
One 50CM Cable JST 2.5mm 3 pin to 3 pin (5V standby ATX Power-on
Cable)
✍
One Y Cable for Keyboard and Mouse
✍
One 180 mm AUX Power Cable (for J2)
✍
One Cable Set (FDD x1, SIO+PIO x1, SIO x1/Keyboard x1/IDE66 x1)
✍
One USB Cable with Bracket
✍
One Driver / Manual CD
Figure 1-1 : Mechanical Drawing of SBC2516 Series

Chapter 2
Jumper & Switch Settings

11
This chapter of the User’s Manual describes how to set jumpers.
Note: The procedures that follow are generic for all of the SBC2516 models
Before You Begin
Ensure you have a stable, clean working environment. Dust and dirt can get into components and
cause a malfunction. Use containers to keep small components separated.
Adequate lighting and proper tools can prevent you from accidentally damaging the internal components.
Most of the procedures that follow require only a few simple tools, including the following:
- A Philips screwdriver
- A flat-tipped screwdriver
- A set of jewelers Screwdrivers
- A grounding strap
- An anti-static pad
Using your fingers can disconnect most of the connections. It is recommended that you do not use
needle-nosed pliers to disconnect connections as these can damage the soft metal or plastic parts of
the connectors.
Before working on internal components, make sure that the power is off. Ground yourself before touching
any internal components, by touching a metal object. Static electricity can damage many of the electronic
components. Humid environment tend to have less static electricity than dry environments. A grounding
strap is warranted whenever danger of static electricity exists.
Precautions
Computer components and electronic circuit boards can be damaged by discharges of static electricity.
Working on the computers that are still connected to a power supply can be extremely dangerous.
Follow the guidelines below to avoid damage to your computer or yourself.
- Always disconnect the unit from the power outlet whenever you are working inside the case.
- If possible, wear a grounded wrist strap when you are working inside the computer case.
Alternatively, discharge any static electricity by touching the bare metal chassis of the
unit case, or the bare metal body of any other grounded appliance.
- Hold electronic circuit boards (such as the SBC2516 board) by the edges only. Do not
touch the components on the board unless it is necessary to do so. Don’t flex or stress
the circuit board.
- Leave all components inside the static-proof packaging that they shipped with until they
are ready for installation.
- Use correct screws and do not over tighten screws.

12
2.1 Functions of Jumpers
You can use jumpers to set configuration options. The table below defines
function of each jumper:
Connector Function
J1 AC’97
J2 Primary IDE
J3 SATA 0
J4 Secondary IDE
J5 SATA 1
J6 USB 2.0 Connector
J7 USB Exernal Power Connector
J8 Floppy
J9 DVI Connector(optional)
J10 CPU Fan
J11 System Fan
J12 COM1
J13 COM2
J14 PIO
J15 ATX Connector
J16 External Keyboard
JP2 Speaker
JP4 IDE LED
JP7 GPI/O Port
JP8 Keylock/Power LED
JP9 IR Connector
JP10 82551 LAN Speed 100 LED
JP11 82551 LAN ACT/LINK LED
JP12 ATX Push Button
JP13 82747/82562 LAN speed 100 LED
JP16 82747 LAN speed 1000 LED
JP17 Reset
JP18 82747/82562 LAN ACT/LINK LED
JP20 SMBUS
CON1 VGA Connector
CON2 82551 LAN Connector
CON3 82547/82562 LAN Connector
CON4 AUX+12V Power Connector
CON5 Keyboard+Mouse Connector
Table 2-1: Functions of Jumpers

13
2.2 Setting Jumpers
A jumper is the simplest kind of electric switch. It consists of two metal pins and a
cap. When setting the jumpers, ensure that the jumper caps are placed on the
correct pins. When the jumper cap is placed on both pins, the jumper is SHORT. If
you remove the jumper cap, or place the jumper cap on just one pin, the jumper is
OPEN.

14
2.3 Location of Jumpers
The illustration below shows the location of the mainboard jumpers:
*= Pin 1 Figure 2-2 : Location of Jumpers

15
2.4 Jumper Setting
Switch Setting Table (* = default setup)
Device Select
SW1.1 SW1.2 SW1.3 SW1.4
ON Board LAN 82551 Enable *ON ON X OFF
ON Board LAN 82551 Disable OFF ON X OFF
ON Board TMDS Enable X ON * ON OFF
ON Board TMDS Disable X ON OFF OFF
DDR VDDQ Select
*2.5V 2.6V 2.7V 2.8V
JP5 *OFF ON OFF ON
JP6 *OFF OFF ON ON
AT/ATX Power model Select
AT ATX
JP15 *1-2 2-3
JP14 *1-2
RTC Clear
NORMAL Clear CMOS
JP19 *1-2 2-3

Pin Definition Pin Definition
1 IDRST# 2 GND
3 PDD7A 4 PDD8A
5 PDD6A 6 PDD9A
7 PDD5A 8 PDD710A
9 PDD4A 10 PDD711A
11 PDD3A 12 PDD712A
13 PDD2A 14 PDD713A
15 PDD1A 16 PDD714A
17 PDD0A 18 PDD715A
19 GND 20 NC
21 PDREQA 22 GND
23 PDIOW#A 24 GND
25 PDIOR#A 26 GND
27 PIORDYA 28 IDE-PD1
29 PDDACK#A 30 GND
31 HDIRQ14 32 NC
33 PDA1A 34 P66 DET
35 PDA0A 36 PDA2A
37 PDCS#1 38 PDCS#3
39 IDEACTP# 40 GND
Pin Definition Pin Definitio
1 IDRST# 2 GND
3 SDD7A 4 SDD8A
5 SDD6A 6 SDD9A
7 SDD5A 8 SDD710A
9 SDD4A 10 SDD711A
11 SDD3A 12 SDD712A
13 SDD2A 14 SDD713A
15 SDD1A 16 SDD714A
17 SDD0A 18 SDD715A
19 GND 20 NC
21 SDREQA 22 GND
23 SDIOW#A 24 GND
25 SDIOR#A 26 GND
27 SIORDYA 28 IDE-PD2
29 SDDACK#
A
30 GND
31 HDIRQ14 32 NC
33 PDA1A 34 S66 DET
35 SDA0A 36 SDA2A
37 SDCS#1 38 SDCS#3
39 IDEACTP# 40 GND
16
2.5 Connector Pin Definition
AC’97 connector
Pin Definition Pin Definition
1 AC
_
SDOUT
_
R 2 +5V
3 ACRST# 4 GND
5 AC
_
SYNC 6 +12V
7 AC
_
SDIN0 8 AC
_
SDIN1
_
R
9 ACBTCLK 10 ACSDIN2R
J2/J4: IDE connector

17
J3/J5:SATA connector
Pin Definition Pin Definition
1 GN 2 SATA0TXPC
4 GN 3 SATA0TXNC
7 GN 5 SATA0RXNC
6SATA0RXPC
Pin Definition Pin Definition
1 GN 2 SATA1TXPC
4 GN 3 SATA1TXNC
7 GN 5 SATA1RXN
C
6SATA1RXPC
J6:USB connector
Pin Definition Pin Definition
1 +5VSBY 2 DATA0-
3 DATA0+ 4 DATA1-
5 DATA1+ 6 GND
J7:USB External Power connector
Pin Definition Pin Definition
1 +5VSBY
2 GND
J8:FDD connector
Pin Definition Pin Definition
1 GND 2 DENSEL#
3 GND 4 NC
5 GND 6 NC
7 GND 8 INDEX#
9 GND 10 MOTEA#
11 GND 12 DRVB#
13 GND 14 DRVA#
15 GND 16 MOTEB#
17 GND 18 DIR#
19 GND 20 STEP#
21 GND 22 WDATA#
23 GND 24 WGATE#
25 GND 26 TK00#
27 GND 28 WPT#
29 GND 30 RDATA#
31 GND 32 SIDE1#
33 GND 34 DSKCHG#

J12/J13: COM1/COM2
Pin Definition Pin Definiti
o
1 BDCD1# 2 BRXD1
3 BTXD1 4 BDTR1
#
5 GND 6 BDSR1
#
7 BRTS1# 8 BCTS1
9 BRI1# 10 GND
Pin Definition Pin
Definiti
o
1 BDCD2# 2 BRXD2
3 BTXD2 4 BDTR2
#
5GND 6BDSR2
#
7 BRTS2# 8 BCTS2
9 BRI2# 10 GND
18
J9:TMDS DVI connector
Pin Definition Pin Definition
1 TMDSTX2N 2 TMDSTX2P
3 GND 4 TMDSTX1N
5 TMDSTX1P 6 GND
7 +5V 8 GND
9 HotPlugDet 10 TMDSTX0N
11 TMDSTX0P 12 GND
13 TMDSTXCP 14 TMDSTXCN
15 GND 16 GND
17 DVICL
K
18 DVIDATA
19 NC 20 NC
J10/J11:CPU FAN & SYSTEM FAN connector
Pin Definition Pin Definition
1 GND 2 +12V
3 SENSE
J14: PIO connector
Pin Definition Pin Definition
1 PSTB# 14 PAFD#
2 PPD0 15 PERR#
3 P
_
PD1 16 P
_
PINIT#
4 PPD2 17 PSLIN#
5 PPD3 18 GND
6 PPD4 19 GND
7 PPD5 20 GND
8 PPD6 21 GND
9 PPD7 22 GND
10 PACK# 23 GND
11 PBUSY 24 GND
12 PPE 25 GND
13 PSLCT 26 GND
J15:ATX POWER-ON connector
Pin Definition Pin Definition
1 +5VSBY 2 GND
3 PSON#

19
J16:External Keyboard
Pin Definition Pin Definition
1 KBCLK 2 KBDATA
3 NC 4 GND
5 +5V
JP2:SPEAKER External connector
Pin Definition Pin Definition
1 SPEAKERR# 2 GND
3 GND 4 +5V
JP4:IDE Active LED connector
Pin Definition Pin Definition
1 +5V 2 IDE_LED
JP7:GPIO connector
Pin Definition Pin Definition
1 GP27_D_IN1 ( PIN20 ) 2 GP23_D_OUT 1 ( PIN24 )
3 GP26DIN2
(
PIN21
)
4 GP22DOUT 2
(
PIN25
)
5 GP25
_
D
_
IN3
(
PIN22
)
6GP21
_
D
_
OUT 3
(
PIN26
)
7 GP24_D_IN4 ( PIN23 ) 8 GP20_D_OUT 4 ( PIN27 )
JP8:Keylock/Power LED connector
Pin Definition Pin Definition
1 +5V Pull-up (Power LED) 2N.C
3 GND
(
PowerLED
)
4Ke
y
loc
k
5 GND (Key Lock)
JP9:IR connector
Pin Definition Pin Definition
1 +5V 2 CIRRX
3 RIRX 4 GND
5 IRTX
JP10:82551QM LAN External SPEED LED connector
Pin Definition Pin Definition
1 +3VSBY 2 SPEED_LAN
JP11:SMBUS Externalconnector
Pin Definitio
n
Pin Definitio
n
1 SMBCLK
2 SMBDATA
JP12:ATX Push Button connector
Pin Definition Pin Definition
1 GND
2 PWRBT#

20
JP13:82747EI/82562EX LAN External SPEED 100 LED connector
Pin Definitio
n
Pin Definition
1 +3VSBY
2 LINK10
0
JP16:82747EI LAN External SPEED 1000 LED connector
Pin Definition Pin
Definitio
1 +3VSBY
2 LINK1000
JP17:Hardware Reset connector
Pin Definition Pin Definition
1 RESET
2 GND
JP18: 82747EI/82562EX LAN External ACTIVE&LINK LED connector
Pin Definitio
n
Pin Definitio
n
1 LINK_UP
2 ACTIVITY
JP20:SMBUS connector
Pin Definition Pin Definitio
n
1 SMBCLK 2 SMBDAT
A
CON1:VGA connector
Pin Definition Pin Definition
1 RED 2 GREEN
3 BLUE 4 NC
5 GND 6 GND
7 GND 8 GND
9 +5V 10 GND
11 NC 12 DDCDAT
13 HSYNC 14 VSYNC
15 DDCCLK
CON2:82551 RJ45 connector
Pin Definition Pin Definition
1 LAN1TXP 2 LAN1TXN
3 LAN1 RXP 4 TERMPLANE
5 TERMPLANE 6 LAN1RXN
7 TERMPLANE 8 TERMPLANE
9 SPEED LAN1 10 +3VSBY
11 LILED_LAN1 12 ACTLED_LAN1
Table of contents