Data Transfer Icons
The data transfer icons at the bottom of the Field Programmer
window enable you to transfer data between the XTR2 control
and the Field Programmer application, or between the Field
Programmer and your PC. The following icons appear at the
bottom of the screen at all times regardless of the parameters
selected.
Set Control Time
• Sets the time and day of week on the control to match the
current time set on your PC.
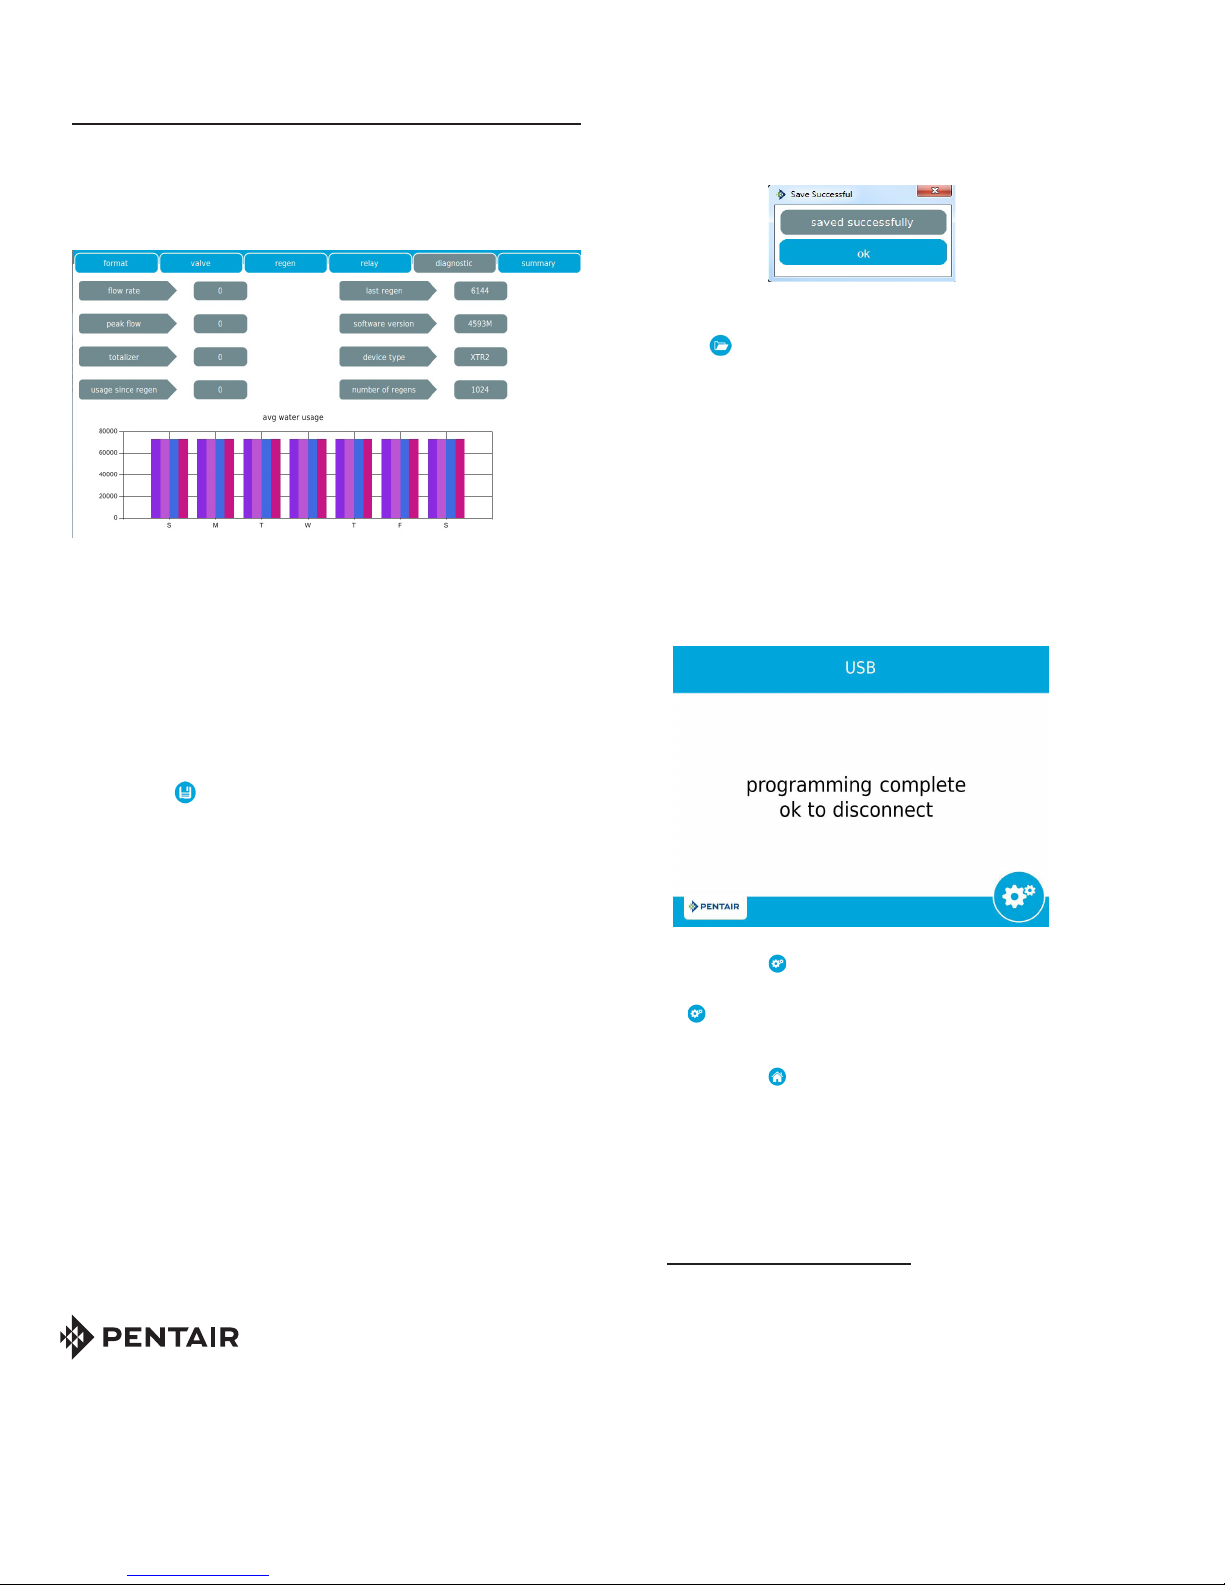
Get Diagnostic Parameters
• Downloads diagnostic data from the XTR2 control to the
Field Programmer application; can be viewed by clicking
the diagnostic menu item.
Reset
• Resets any settings changed in the Field Programmer
application to their default settings.
NOTE: Clicking the Reset button in the Field
Programmer application does not reset any
parameters in the XTR2 control.
Open File
• Displays an Open File window that allows you to load a
saved programming settings configuration file into the
Field Programmer application.
Save Form
• Displays a Save window that allows you to save all
settings programmed in the Field Programmer
application to a configuration file stored on your PC.
Upload Program Settings
• Uploads all parameters set in the Field Programmer
application to the XTR2 control.
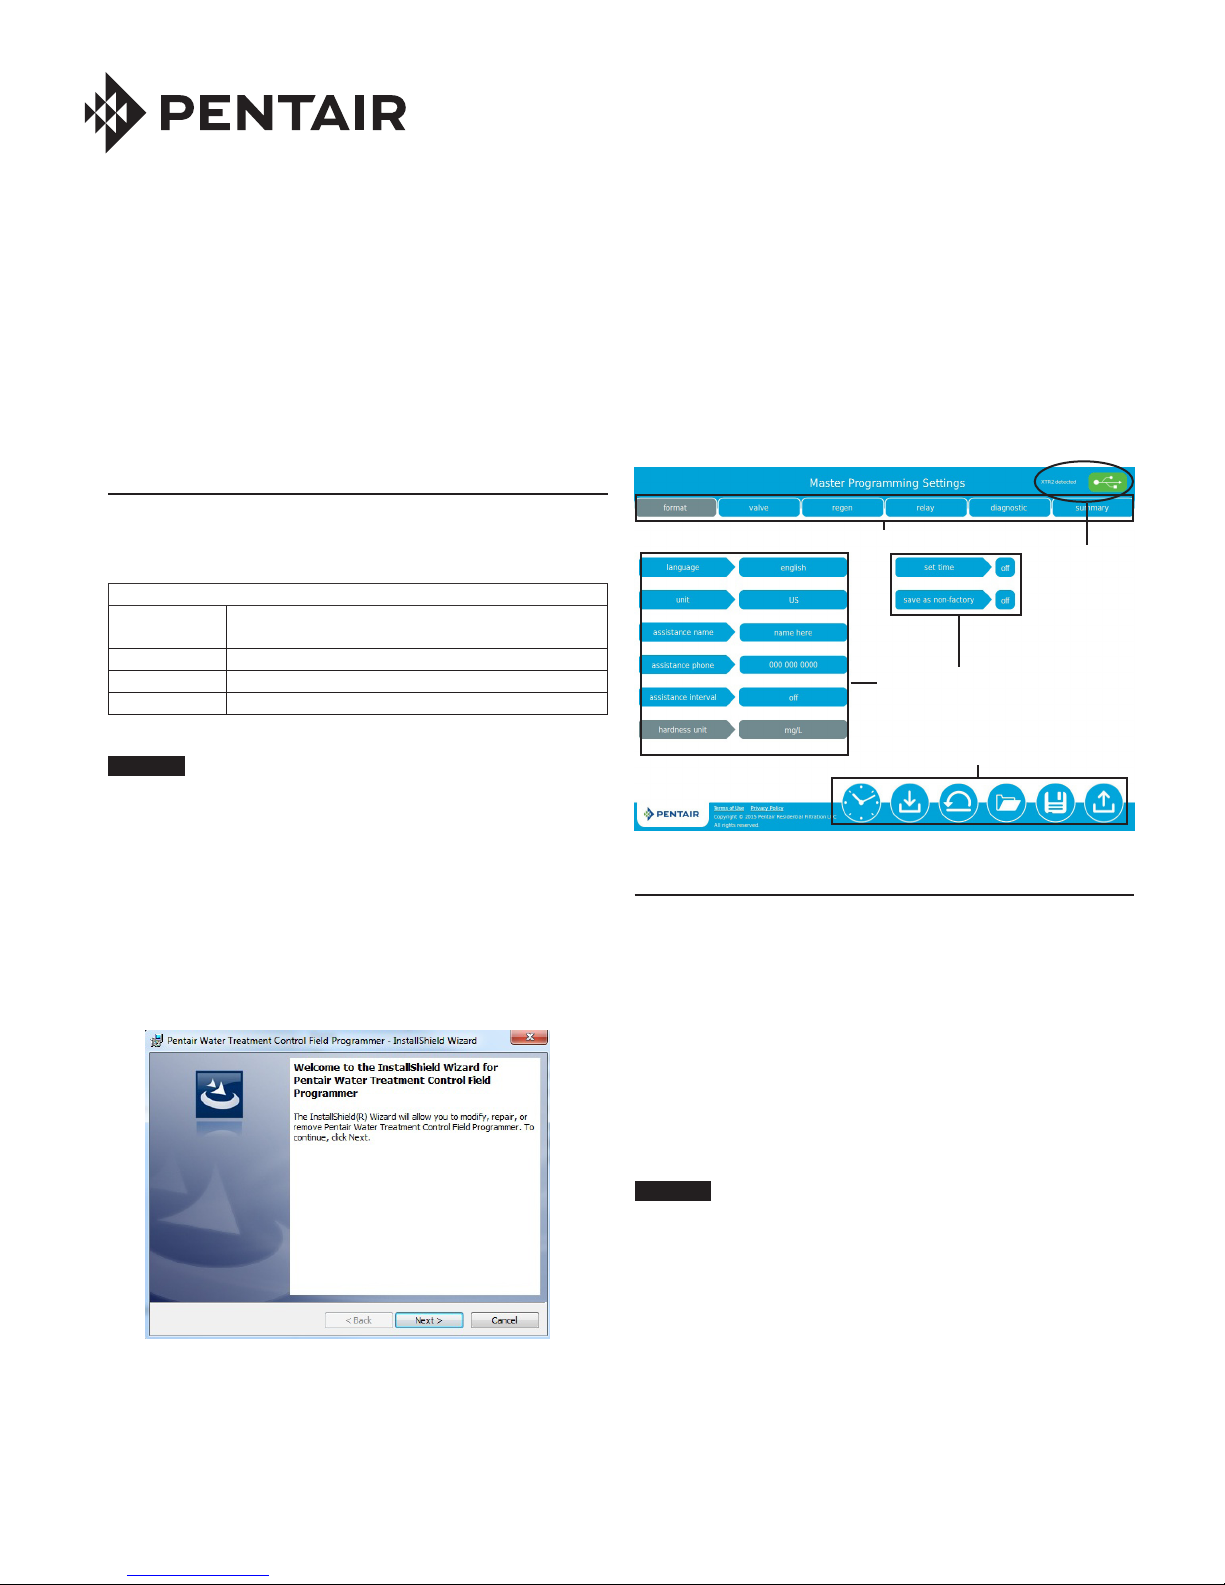
Master Settings Programming
The Master Settings displayed in the Field Programmer
Master Programming Settings window correspond to the
settings available to be programmed in the XTR2 control. The
displayed settings change depending on the Master Settings
Menu item selected, or depending on the selected value of
other settings. Please refer to the Fleck 5800 or 5810/5812
XTR2 Service Manuals for complete master settings parameter
descriptions.
Updating Master Settings
Field Programmer Master Settings are displayed with a label
describing the setting, as well as its current value. Click
either the label or the settings value to select a setting for
editing. Settings change from blue to light gray when selected.
Settings that are displayed in dark gray are not editable based
on current programming settings. Click anywhere in the Field
Programmer Master Programming Settings window to de-
select a selected setting.
The Field Programmer software accepts settings inputs
differently depending on the setting type. The Field
Programmer will display the appropriate options for the
selected setting when clicked.
Selection Menu
Settings with a limited choice of values will display a menu
showing each value available for selection. Select the
appropriate value from the choices listed.
Figure 3 Selecting a Setting from a Selection Menu
Text Field
Settings that accept alphanumeric text will display a cursor
when clicked. Use your computer keyboard to enter the
desired information into the setting field.
Figure 4 Entering Text in a Text Field
On/Off Settings
Settings with only two options (i.e., either an ON or OFF state)
can be toggled from one state to the other by clicking the
setting.
Figure 5 Turning Settings On or Off
Ranged Values
Settings that accept a range of numerical values will display
up and down arrows on either side of the setting value. Click
the arrows to increment the value up or down as necessary, or
click the displayed value and type the desired value into the
field.
Figure 6 Changing a Ranged Value Setting
NOTE: Hover your computer mouse over ranged values to
display the programmable range accepted by the
setting.
Settings Selection Menu
FIELD PROGRAMMER FEATURES continued
2• FLECK XTR2 Field Programmer Installation and Operation Instructions