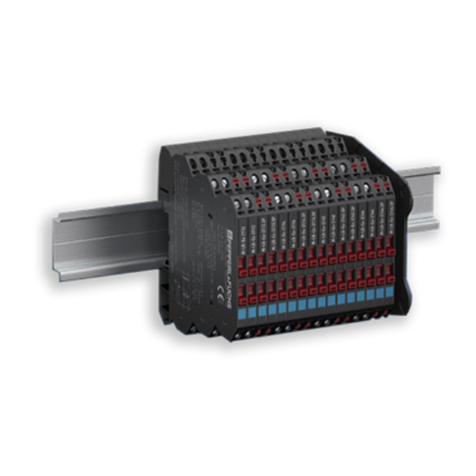
Pepperl+Fuchs M-LB-2000-System User manual

ISO9001
3
M-LB-(Ex-)2000-System
Surge Protection Barriers
Manual

With regard to the supply of products, the current issue of the following document is applicable:
The General Terms of Delivery for Products and Services of the Electrical Industry, published by the Central
Association of the Electrical Industry (Zentralverband Elektrotechnik und Elektroindustrie (ZVEI) e.V.) in its most
recent version as well as the supplementary clause: "Expanded reservation of proprietorship"
Worldwide
Pepperl+Fuchs Group
Lilienthalstr. 200
68307 Mannheim
Germany
Phone: +49 621 776 - 0
E-mail: info@de.pepperl-fuchs.com
North American Headquarters
Pepperl+Fuchs Inc.
1600 Enterprise Parkway
Twinsburg, Ohio 44087
USA
Phone: +1 330 425-3555
E-mail: [email protected].com
Asia Headquarters
Pepperl+Fuchs Pte. Ltd.
P+F Building
18 Ayer Rajah Crescent
Singapore 139942
Phone: +65 6779-9091
E-mail: [email protected]
https://www.pepperl-fuchs.com

M-LB-(Ex-)2000-System – Surge Protection Barriers
Contents
2023-08
3
1 Introduction . . . . . . . . . . . . . . . . . . . . . . . . . . . . . . . . . . . . . . . . . . . . . . . . . . . . . . . 5
1.1 Content of this Document . . . . . . . . . . . . . . . . . . . . . . . . . . . . . . . . . . . . . 5
1.2 Target Group, Personnel. . . . . . . . . . . . . . . . . . . . . . . . . . . . . . . . . . . . . . . 6
1.3 Symbols Used . . . . . . . . . . . . . . . . . . . . . . . . . . . . . . . . . . . . . . . . . . . . . . . 6
2 Product Specifications . . . . . . . . . . . . . . . . . . . . . . . . . . . . . . . . . . . . . . . . . . . . . . 7
2.1 Function . . . . . . . . . . . . . . . . . . . . . . . . . . . . . . . . . . . . . . . . . . . . . . . . . . . . 7
2.2 Application . . . . . . . . . . . . . . . . . . . . . . . . . . . . . . . . . . . . . . . . . . . . . . . . . . 8
2.3 Working Voltage . . . . . . . . . . . . . . . . . . . . . . . . . . . . . . . . . . . . . . . . . . . . . 10
2.4 Surge Protection Barrier. . . . . . . . . . . . . . . . . . . . . . . . . . . . . . . . . . . . . . 11
2.5 Accessories . . . . . . . . . . . . . . . . . . . . . . . . . . . . . . . . . . . . . . . . . . . . . . . . 14
3 Installation . . . . . . . . . . . . . . . . . . . . . . . . . . . . . . . . . . . . . . . . . . . . . . . . . . . . . . . 15
3.1 Mounting. . . . . . . . . . . . . . . . . . . . . . . . . . . . . . . . . . . . . . . . . . . . . . . . . . . 15
3.2 Connection . . . . . . . . . . . . . . . . . . . . . . . . . . . . . . . . . . . . . . . . . . . . . . . . . 19
3.3 Signal Loops Disconnection for Checking. . . . . . . . . . . . . . . . . . . . . . . 24
4 Operation . . . . . . . . . . . . . . . . . . . . . . . . . . . . . . . . . . . . . . . . . . . . . . . . . . . . . . . . 26
5 Dismounting, Maintenance, and Repair . . . . . . . . . . . . . . . . . . . . . . . . . . . . . . . 27
5.1 Signal Loops Disconnection for Checking. . . . . . . . . . . . . . . . . . . . . . . 27
5.2 Disconnection of the Circuits . . . . . . . . . . . . . . . . . . . . . . . . . . . . . . . . . 27
5.3 Dismounting. . . . . . . . . . . . . . . . . . . . . . . . . . . . . . . . . . . . . . . . . . . . . . . . 30
6 Technical Specifications. . . . . . . . . . . . . . . . . . . . . . . . . . . . . . . . . . . . . . . . . . . . 32
6.1 Technical Data . . . . . . . . . . . . . . . . . . . . . . . . . . . . . . . . . . . . . . . . . . . . . . 32
6.2 Model Number Description . . . . . . . . . . . . . . . . . . . . . . . . . . . . . . . . . . . 33
6.3 Dimensions . . . . . . . . . . . . . . . . . . . . . . . . . . . . . . . . . . . . . . . . . . . . . . . . 34

2023-08
4
M-LB-(Ex-)2000-System – Surge Protection Barriers
Contents

M-LB-(Ex-)2000-System – Surge Protection Barriers
Introduction
2023-08
5
1 Introduction
1.1 Content of this Document
This document contains information that you need in order to use your product throughout
the applicable stages of the product life cycle. These can include the following:
•Product identification
•Delivery, transport, and storage
•Mounting and installation
•Commissioning and operation
•Maintenance and repair
•Troubleshooting
•Dismounting
•Disposal
The documentation consists of the following parts:
•Present document
•Instruction manual
•Datasheet
Additionally, the following parts may belong to the documentation, if applicable:
•EU-type examination certificate
•EU declaration of conformity
•Attestation of conformity
•Certificates
•Control drawings
•Functional safety manual
•Additional documents
Note
This document does not substitute the instruction manual.
Note
For full information on the product, refer to the instruction manual and further documentation
on the Internet at www.pepperl-fuchs.com.
Note
For specific device information such as the year of construction, scan the QR code
on the device. As an alternative, enter the serial number in the serial number search
at www.pepperl-fuchs.com.

2023-08
6
M-LB-(Ex-)2000-System – Surge Protection Barriers
Introduction
1.2 Target Group, Personnel
Responsibility for planning, assembly, commissioning, operation, maintenance,
and dismounting lies with the plant operator.
Only appropriately trained and qualified personnel may carry out mounting, installation,
commissioning, operation, maintenance, and dismounting of the product. The personnel
must have read and understood the instruction manual and the further documentation.
Prior to using the product make yourself familiar with it. Read the document carefully.
1.3 Symbols Used
This document contains symbols for the identification of warning messages and of informative
messages.
Warning Messages
You will find warning messages, whenever dangers may arise from your actions.
It is mandatory that you observe these warning messages for your personal safety
and in order to avoid property damage.
Depending on the risk level, the warning messages are displayed in descending order
as follows:
Informative Symbols
Action
This symbol indicates a paragraph with instructions. You are prompted to perform an action
or a sequence of actions.
Danger!
This symbol indicates an imminent danger.
Non-observance will result in personal injury or death.
Warning!
This symbol indicates a possible fault or danger.
Non-observance may cause personal injury or serious property damage.
Caution!
This symbol indicates a possible fault.
Non-observance could interrupt the device and any connected systems and plants,
or result in their complete failure.
Note
This symbol brings important information to your attention.

M-LB-(Ex-)2000-System – Surge Protection Barriers
Product Specifications
2023-08
7
2 Product Specifications
2.1 Function
Surge protection barriers protect C&I circuits against voltage surges caused by lightning
or switching operations.
The M-LB-(Ex-)2000 surge protection system offers a large number of surge protection
barriers for a wide variety of applications:
•Protection of 2 signal lines
•Protection of grounded or not grounded signal lines
•Protection of intrinsically safe or non-intrinsically safe circuits
•Protection of circuits with rated voltage of 1 V or 24 V
A big advantage of using the M-LB-(Ex-)2000 surge protection system is that the devices
are only 6.2 mm thick. This means that the space in the switch cabinet can be optimally used.
Their narrow design allows the devices to replace the disconnect terminals in the cross
connect level.
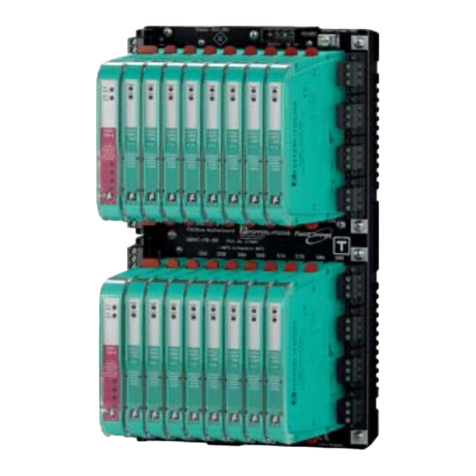
Figure 2.1 Example of surge protection system

2023-08
8
M-LB-(Ex-)2000-System – Surge Protection Barriers
Product Specifications
2.2 Application
The following illustrations show typical applications in connection with isolators
and zener barriers.
Figure 2.2 Example of an application with isolator
Figure 2.3 Example of an application with zener barrier
The surge protection system can also be used to protect field devices in the hazardous area
of zones 0, 1 and 2 resp. 20, 21 and 22. The system components suitable for this application
are marked in blue.
Additional surrounding enclosure
Protected
electrical equipment
Protected
field device
Field side Control side
Surge protection barrier Surge protection barrier Isolator
24 V
2-
1+ 7-
8+
9+
250 Ω
11 +
12-
Power Rail
24 V DC
2
1
3
5
4
2
1
3
5
4
2
1
7
8
x3
Additional surrounding enclosure
Protected
electrical equipment
Protected
field device
Field side Control side
Surge protection barrier Surge protection barrier Zener barrier
24 V
2
1
3
5
4
2
1
3
5
4
Note
For more information on mounting, installation and operation, refer to the following chapters.

M-LB-(Ex-)2000-System – Surge Protection Barriers
Product Specifications
2023-08
9
2.2.1 Surge Protection Barriers for Grounded Signal Lines
Surge protection barriers for grounded signal lines provide a defined protection level from line
to earth by connecting the signal lines to earth via suppressor diodes.
Use this surge protection barrier if the apparatus to be protected is not isolated from earth,
e. g., in the case of applications in a non-hazardous area or for applications with zener barriers,
see Figure 2.3.
Figure 2.4 Example of a surge protection barrier for grounded signal lines
2.2.2 Surge Protection Barriers for Not Grounded Signal Lines
Surge protection barriers for not grounded signal lines are connected with earth via a gas
discharge tube only. This results in a greater insulation voltage from line to earth.
Use these surge protection barriers if the device to be protected is operated in an unearthed
signal loop. Typical applications for this device are galvanically isolated signal loops,
which can be found after isolated barriers or signal conditioners, see Figure 2.2.
The breakdown voltage of the gas discharge tube is less than 500 V AC from line to earth.
Observe the breakdown voltage for insulation tests.
Figure 2.5 Example of a surge protection barrier for not grounded signal lines
M-LB-2144
2
1
3
5
4
M-LB-2142
2
1
3
5
4

2023-08
10
M-LB-(Ex-)2000-System – Surge Protection Barriers
Product Specifications
2.3 Working Voltage
To ensure the best possible protection level, 2 different voltage versions are available.
•Rated voltage U = 24 V DC, maximum continuous operating voltage UC= 30 V DC
The typical area of application for these surge protection barriers are 24 V signal loops,
such as 4 mA …20 mA, digital inputs or digital outputs.
•Rated voltage U = 1 V DC, maximum continuous operating voltage UC=6VDC
These surge protection barriers are optimized for applications with a small voltage increase
in the mV range, such as resistance thermometers, thermocouples or strain gauge bridges.

M-LB-(Ex-)2000-System – Surge Protection Barriers
Product Specifications
2023-08
11
2.4 Surge Protection Barrier
The device limits induced transients of different causes, e. g. lightning or switching operations.
The limitation is achieved by diverting the current to earth and limiting the signal loop voltage
during the duration of the overvoltage pulse.
The devices are distinguished:
•By their working voltage
•By their topology, see chapter 2.2
•By operating location and area of application
•Devices with green marking and equipment protection level Gc for connection
of non-intrinsically safe circuits
•Devices with blue marking and equipment protection level Gb for connection
of intrinsically safe circuits
The device is mounted on a 35 mm x 7.5 mm DIN mounting rail according to EN 60715.
The DIN mounting rail is used to attach the device in the switch cabinet and is responsible
for grounding the surge protection barriers. The DIN rail mounting ensures a grounding
connection with the lowest possible resistance of the device.
Assembly
Figure 2.6 Device assembly
1Surge protection barrier M-LB-21** with screw terminals and equipment protection
level Gc for the connection of non-intrinsically safe circuits
2Surge protection barrier M-LB-21**.SP with spring terminals and equipment protection
level Gc for the connection of non-intrinsically safe circuits
3Surge protection barrier M-LB-Ex-21** with screw terminals and equipment protection
level Gb for the connection of intrinsically safe circuits
4Surge protection barrier M-LB-Ex-21**.SP with spring terminals and equipment
protection level Gb for the connection of intrinsically safe circuits
1
2
3
4
5
6
1
2
3
6
5
4
1
2
3
4
5
6
1
2
3
6
5
4
1
2
3
4

2023-08
12
M-LB-(Ex-)2000-System – Surge Protection Barriers
Product Specifications
Connection
The device has the following connections:
•The unprotected signal lines are connected to terminals 2 and 3 (A). The protected signal
lines are connected to terminals 4 and 5 (B). The specific connection layout depends
on the topology of the connected module and on the operating location.
The connection terminals are screw terminals or spring terminals. The terminals offer
a terminal compartment for conductors with a maximum core cross section
of 1 x 2.5 mm2(14 AWG).
•The device is equipped with a ground connection (C).
•An optional shielding or grounding can be connected to terminal 1 (D).
Figure 2.7 Device connections
AConnection of the unprotected signal lines
BConnection of the protected signal lines
CGround connection
DShield or ground connection (optional)
2
1
3
5
4
AB
C
D

M-LB-(Ex-)2000-System – Surge Protection Barriers
Product Specifications
2023-08
13
Operating Elements
The device has 2 disconnect levers. These disconnect levers can be used to disconnect
the signal loops for the following checks.
•Insulation check of the cable on the unprotected side
•Check of the signal loops
Figure 2.8
1Disconnect lever 1 for terminal 3
2Terminal 3
3Disconnect lever 2 for terminal 2
4Terminal 2
1
2
4
3
Note
See corresponding datasheets for further information.

2023-08
14
M-LB-(Ex-)2000-System – Surge Protection Barriers
Product Specifications
2.5 Accessories
Insulation Spacer M-LB-2800
The insulation spacer M-LB-2800 is available as an accessory.
Use the insulation spacer in the following applications, see chapter 3.1:
•for optical or structural separation of individual device series
•as the termination of a device series for closing the open side wall
Figure 2.9 Insulation spacer M-LB-2800
DIN Mounting Rail, on the User Side
The device is mounted on a 35 mm x 7.5 mm DIN mounting rail according to EN 60715.
Figure 2.10 Example: DIN mounting rail (35 mm x 7.5 mm)
Note
See corresponding datasheets for further information.

M-LB-(Ex-)2000-System Surge Protection Barriers
Installation
2023-08
15
3 Installation
3.1 Mounting
Mounting in the Explosion Hazardous Area
Observe the following warnings when mounting or carrying out installations in the explosion
hazardous area.
Danger!
Explosion hazard from wrong mounting
Mounting the device in the wrong way can impair the intrinsic safety of the signal loops.
This can cause sparks that can ignite a potentially explosive atmosphere.
•Only use the blue marked devices for intrinsically safe circuits.
•Always mount the devices in the same orientation on the DIN mounting rail.
•Observe the derating of the current depending on the ambient temperature.
•The degree of protection IP20 can be achieved under the following conditions:
Mount the devices side by side on the DIN mounting rail. Use the insulation spacer.
Danger!
Explosion hazard from wrong mounting
Mounting the device in the wrong way can impair suitability for specific temperature class.
This can cause surface temperatures which can ignite a potentially explosive atmosphere.
Observe the derating of the current depending on the ambient temperature and the
temperature class.
Danger!
Explosion hazard from wrong mounting of devices with equipment protection level Gc
The device safety can be impaired by external environmental influences and by mechanical
stress. That can lead to sparking that can ignite a surrounding potentially explosive
atmosphere.
Mount the device with equipment protection level Gc in a surrounding enclosure
that complies with IEC/EN 60079–0 and that is rated with the degree of protection IP54
according to IEC/EN 60529.
Danger!
Explosion hazard from live wiring of non-intrinsically safe circuits
If you connect or disconnect energized circuits in a potentially explosive atmosphere,
sparks can ignite the surrounding atmosphere.
Only connect or disconnect energized non-intrinsically safe circuits in the absence
of a potentially explosive atmosphere.

2023-08
16
M-LB-(Ex-)2000-System Surge Protection Barriers
Installation
Mounting the Surge Protection Barrier
Only use a 35 mm x 7.5 mm DIN mounting rail.
Clip the device (1) onto the DIN mounting rail (2).
The device is fixed on the DIN mounting rail. The grounding connection is established.
Figure 3.1 Mounting the device onto the DIN mounting rail
1Surge protection barrier
2DIN mounting rail
2
1

M-LB-(Ex-)2000-System Surge Protection Barriers
Installation
2023-08
17
Mounting the Insulation Spacer between the Devices
1. Use the insulation spacer for optical or structural separation of individual device series (1), (4).
2. Clip the insulation spacer (2) onto the DIN mounting rail (3).
Figure 3.2 Mounting between the devices
Figure 3.3 Mounting the insulation spacer onto the DIN mounting rail
1Surge protection barriers
2Insulation spacer M-LB-2800
3DIN mounting rail
4Surge protection barriers
1Insulation spacer M-LB-2800
2DIN mounting rail
1
2
3
4
5
6
1
2
3
4
5
6
1
2
3
4
5
6
1
2
3
4
5
6
1
2
3
4
5
6
1
2
3
4
5
6
1
2
3
4
5
6
1
2
3
4
5
6
1
4
3
2
2
1

2023-08
18
M-LB-(Ex-)2000-System Surge Protection Barriers
Installation
Mounting the Insulation Spacer as Termination of a Device Series
Due to the small total width of the devices, the side walls of the devices are not completely
closed. Some components are so thick that these components protrude into the housing.
Therefore, a device series must be closed with a insulation spacer to cover the open side wall.
1. Use the insulation spacer as the termination of a device series (4) for closing the open side wall
2. Clip the insulation spacer (1) onto the DIN mounting rail (3).
3. Secure the insulation spacer on the DIN mounting rail against shifting or falling over.
For example, use terminal block USLKG5 (2).
Figure 3.4 Mounting as termination of a device series
Figure 3.5 Mounting the insulation spacer onto the DIN mounting rail
1Insulation spacer M-LB-2800
2Terminal block USLKG5
3DIN mounting rail
4Surge protection barriers
1Insulation spacer M-LB-2800
2DIN mounting rail
1
2
3
4
5
6
1
2
3
4
5
6
1
2
3
4
5
6
1
2
3
4
5
6
1
4
3
2
2
1

M-LB-(Ex-)2000-System Surge Protection Barriers
Installation
2023-08
19
3.2 Connection
3.2.1 Connection of the Circuits
Connecting the Circuits
1. Connect the protected signal lines to terminals 4 and 5.
2. Connect the unprotected signal lines to terminals 2 and 3.
3. If you do not ground the device via the DIN mounting rail, you can connect the grounding
to terminal 1.
4. You can connect an optional shielding to terminal 1.
The terminals are screw terminals or spring terminals. See the figures below.
Danger!
Explosion hazard from live wiring of non-intrinsically safe circuits
If you connect or disconnect energized circuits in a potentially explosive atmosphere,
sparks can ignite the surrounding atmosphere.
Only connect or disconnect energized non-intrinsically safe circuits in the absence
of a potentially explosive atmosphere.
Danger!
Danger to life from electric shock
Absent or insufficient insulation can result in electric shock.
Only connect circuits that provide protection against electric shock (e. g. SELV or PELV).
Danger!
Danger to life from incorrect installation
Incorrect installation of cables and connection lines can compromise the function
and the electrical safety of the device.
•Observe the permissible core cross section of the conductor.
•When using stranded conductors, crimp wire end ferrules on the conductor ends.
•Use only one conductor per terminal.
•When installing the conductors the insulation must reach up to the terminal.
•Observe the tightening torque of the terminal screws.
Caution!
Property damage from use of inappropriate tool
Using an inappropriate tool may damage the screw heads.
•Use a slot-head screwdriver with a size of 3.0 x 0.5.
•Observe the tightening torque of the terminal screws.
The tightening torque is 0.5 Nm to 0.6 Nm.

2023-08
20
M-LB-(Ex-)2000-System Surge Protection Barriers
Installation
Connecting the Cable via the Screw Terminal
1. Plug the cable (C) into the terminal on the device (A).
2. Tighten the terminal screw with the slot-head screwdriver (B). Observe the tightening torque
of the terminal screws. The tightening torque is 0.5 Nm to 0.6 Nm.
Figure 3.6 Screw terminal connection
Connecting the Cable via the Spring Terminal
1. Push the cable (B) into the terminal on the device (A).
2. Check that the cable (B) is fixed.
Figure 3.7 Spring terminal connection with push-in connection technology
ADevice with screw terminals
BSlot-head screwdriver
CCable
5
43
2
1
A
B
C
6
5
4
3
2
1
ADevice with spring terminals with push-in connection technology
BCable
5
43
2
1
A
B
6
5
4
3
2
1
This manual suits for next models
11
Table of contents
Other Pepperl+Fuchs Surge Protector manuals
Popular Surge Protector manuals by other brands

Critec
Critec SES65 120/240 Indoor/outdoor installation & operating instructions

CyberPower
CyberPower 615 Specification sheet

Patton electronics
Patton electronics 500 user manual

Ditek
Ditek DR Series installation instructions

Transtector
Transtector ALPU HT installation instructions

AAxeon
AAxeon RS232 installation guide