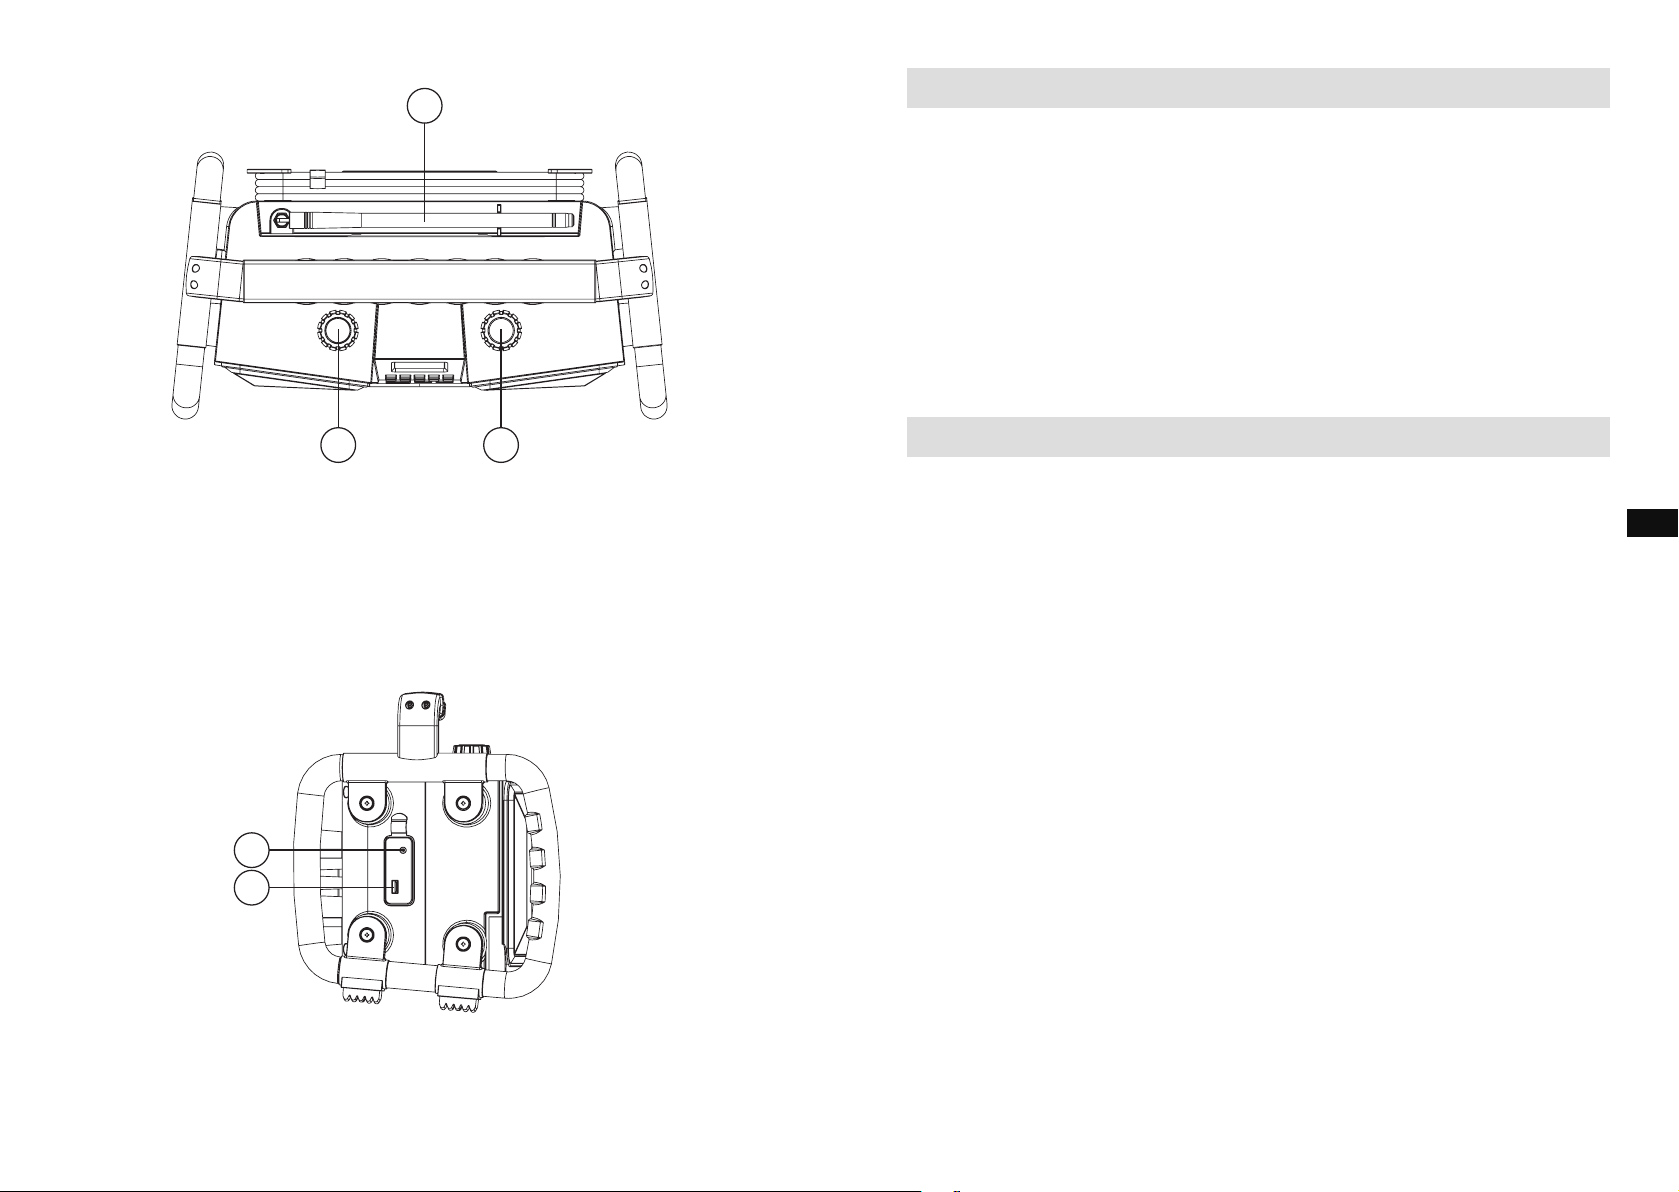
PERFECTPRO Rockbull User manual

GB
E
NL
GBINSTRUCTION MANUAL
MODE D’EMPLOI
BENUTZERHANDBUCH
HANDLEIDING
F
D
NL

1 2
GB
GB
CONTENT
CONTENT ………....................………........……………………………………………… 1
IMPORTANT SAFETY INSTRUCTIONS ………..……………………………………… 3
POWER SUPPLY ……….............………........……………………………………………… 4
AC operation ………..........………........……………………………………………… 4
Lithium Battery Operation and Charging ……….....................…………………… 4
User Safety Precautions ………....................………......……………………………… 5
CONTROL ………....................………........……………………………………………… 6
Front View ………...................…………......………......……………………………… 6
Top View ……….....................…………....………......……………………………… 7
Side View ……….......................………….....………......……………………………… 7
USING THE DEVICE FOR THE FIRST TIME ………................……………………… 8
DAB MODE ………......................…………........………......……………………………… 8
Operating the radio ………....................………......……………………………… 8
Selecting a station ……….............................………......……………………………… 8
Secondary services ………....................…........……......……………………………… 8
Display modes ……….............................………......……………………………… 9
Finding new stations ………....................………......……………………………… 9
Manual tuning ………....................………......……………………………… 9
Dynamic Range Control (DRC) settings ……….......……………………………… 10
Prune stations ………....................……….............……………………………… 10
FM MODE ………................…………..............………......……………………………… 11
Operating FM ………....................…….......…......……………………………… 11
Manual tuning ………....................….......……......……………………………… 11
RDS station service ………....................…........……...……………………………… 11
Scan sensitivity setting ………....................………......……………………………… 12
PRESET STATIONS ………....................………......……………………………… 12
Storing preset stations ………....................………......……………………………… 12
Recalling preset stations ………............................…………………………… 12
USING BLUETOOTH ………....................………......……………………………… 13
Pairing Bluetooth with your mobile phone ………........……………………………… 13
Playing music from your mobile phone ………...........…………………………… 13
Display modes ……….....…………......…………......……………………………… 13
Device List ……….......………………………………....……………………………… 13
Restart Bluetooth pairing ……….................………………………………………… 14
AUX IN MODE ………........………………………………...……………………………… 15
USB MODE ………..……………………………….........……………………………… 15
Insert and remove a USB memory device ………........…………………………… 16
Playingmusicles……….........…………………….....………………………………16
File searching ………......…….....……………….....……………………………… 16
Play mode ……….......…………….…………………....……………………………… 17
Information function ………...........………….......……………………………… 17
SETTING THE CLOCK ………...........…………......……………………………… 17
LOUDNESS ……….........………………………………..……………………………… 18
SURROUND SOUND ………......…………………….....……………………………… 18
EQUALIZER ……….......………………………………....……………………………… 19
LANGUAGE ………........………………………………...……………………………… 19
SOFTWARE VERSION ………....…….........….........….….........………………………… 20
SYSTEM RESET ………...........………………….............….........….........……………… 20
MOBILE DEVICE CHARGE VIA USB ……….......…...........…………………………… 20
BRIGHTNESS ………...........……………….........….........….................………………… 21
WARRANTY ………...........……………...….........….........….........…………………… 21
Environmental note ………...........……….........…......….........……………………… 22
TECHNICAL DATA ………..................................................……………………………… 22
WARNING ! WARRANTY BECOMES VOID ONCE THE DEVISE CABINET HAS BEEN
OPENED OR ANY MODIFICATIONS TO THE ORIGINAL DEVICE HAVE BEEN MADE.
NEVER OPEN THE DEVICE CASING. THE MANUFACTURER WILL NOT ACCEPT
ANY LIABILITY FOR DAMAGE RESULTING FROM IMPROPER HANDLING. THE
TYPE PLATE IS LOCATED ON THE BOTTOM OF THE DEVICE.
The Bluetooth® word mark and logos are registered trademarks owned by Bluetooth
SIG, Inc. and any use of such marks is under license.

3 4
GB
GB
POWER SUPPLY
AC operation
1. Before plugging the AC power cord into the AC socket, be sure the voltage is
correct.
2. AC power cord and plug storage is designed to store the cord and plug when the
radio is not in use.
Note:
In order to disconnect the unit from the AC mains completely, the AC power plug should
be removed from the mains socket completely and it shall remain readily operable and
should not be obstructed during intended use.
In case of malfunction due to electrostatic discharge or fast transient (burst), remove the
power supply and reconnect the power supply after approximate one minute.
Lithium Battery Operation and Charging
NOTE ON FIRST USE: BEFORE OPERATING THE ROCKBULL FOR THE FIRST
TIME ALWAYS FIRST FULLY CHARGE THE BATTERY.
The ROCKBULL can be operated by the built-in Lithium battery. During operation on
battery power the approximate power level of the battery is displayed in the LCD display
of the radio.
Whenthebatterypowerlevelisverylow,thebatterysymbolashesonthedisplay.
Under this condition, the battery should be recharged as soon as possible to continue
normal operation of the ROCKBULL.
Charging time from empty to full battery is approximately 8 - 10 hours (at room
temperature with radio in Standby mode). The ROCKBULL can be charged in Standby
mode as well as in On mode while playing music. While playing music the charging time
will be longer than in Standby mode.
The ROCKBULL, for additional safety, will not start charging when the battery is
already full or nearly full.
NOTE ON PLAYING TIME ON BATTERY POWER: The achieved playing time on
battery power depends on many factors such as: selected volume level, music type (bass
heavy music consumes more energy), selected music source (DAB, FM, Bluetooth, USB
or AUX-IN), selected EQ setting, ambient temperature and age of the battery. Depending
on these variables a playing time of approximately 18 to 24 hours on a medium set
volume level can be achieved.
IMPORTANT SAFETY INSTRUCTIONS
1. Read these instructions.
2. Keep these instructions.
3. Heed all warnings.
4. Follow all instructions.
5. Clean only with dry cloth.
6. Do not block any ventilation openings. Install in accordance with the instructions.
7. Do not install near any heat sources such as radiators, heat registers, stoves or
otherapparatus(includingampliers)thatproduceheat.
8. Do not defect the safety purpose of the polarized or grounding – type plug. A
polarized plug has two blades with one wider than the other. A grounding type
plug has two blades and a third grounding prong. The wide blade or the third prong
isprovidedforyoursafety.Iftheprovidedplugdoesnottintoyouroutlet,consult
an electrician for replacement of the obsolete outlet.
9. Protect the power cord from being walked on or pinched particularly at plug,
convenience receptacles, and the point where they exit from the apparatus.
10. Onlyuseattachments/accessoriesspeciedbythemanufacturer.
11. Useonlywiththecart,stand,tripod,bracket,ortablespeciedbythemanufacturer,
or sold with the apparatus. When a cart is used, use caution when moving the cart/
apparatus combination to avoid injury from tip-over.
12. Unplug this apparatus during lightning storms or when unused for long periods of
time.
13. Referallservicingtoqualiedservicepersonnel.Servicingisrequiredifthe
apparatus has been damaged in any, such as power-supply cord or plug is
damaged, liquid has been spilled or objects have fallen into the apparatus, the
apparatus has been exposed to rain or moisture, does not operate normally, or has
been dropped.
14. Toreducetheriskofreorelectricshock,donotexposethisappliancetorainor
moisture.
15. Do not remove the cover; there are no user-serviceable parts inside.
16. Nonakedamesourcesshallbeplacedontheapparatus.
17. For outdoors use, to avoid electric shock, use battery only during a raining day or
the weather is wet. To prevent electric shock, if the radio has been exposed to rain
or water, the power supply cord and plug must be completely dried before plugging
into the mains socket outlet.
18. The power plug should be close to the apparatus, and easy to be approached that
during emergency, to disconnect the power from the apparatus, just unplug the
power plug from the AC power slot.
19. The marking information is located at the bottom of the apparatus.
20. This apparatus is provided with protection against splashing water (IP65).
21. In case of malfunction due to electrostatic discharge or fast transient (burst),
remove and reconnect the power supply.
22. The apparatus must be used in a moderate climate.
23. To prevent possible hearing damage, do not listen at high volume levels
or long periods.
24. Under the environment with Conducted Immunity disturbance / Radiated Immunity,
the radio may malfunction. It will automatically recover to normal when the
Conducted Immunity disturbance / Radiated Immunity stopped.

5 6
GB
GB
NOTE ON LITHIUM BATTERY LIFE: If the ROCKBULL is not used for any extended
period of time, alwaysrstchargethebuilt-inbatteryuntilitisfull. The optimum working
life from the built-in battery will be obtained if it is kept topped up by recharging after
each use of the ROCKBULL, even if it is only partially discharged. The battery’s working
life will be reduced if the product is left in a discharged condition for a long period of
time.
WARNING:
Do not attempt to replace or repair the built-in lithium battery. If you have any doubts
about the built-in lithium battery, please contact the service department of Perfect Pro for
further assistance.
WARNING:
Danger of explosion if the battery is incorrectly replaced.
Donotexposethebatterytoexcessiveheatsuchassunshine,reorthelike.
Batteries should not be disposed of by incineration and with household waste.
Disposable batteries should be taken to a suitable recycling centre if possible.
Safety information for internal rechargeable Lithium battery
The internal rechargeable lithium-polymer battery used in this device is able to supply
power for a long period of time. However, even lithium-polymer batteries reach a point
where they cannot be recharged. If the battery does not recharge after several attempts,
repair information.
However, if you do not want us to replace the battery, you will need to dispose of used
batteries/ device in accordance to the laws and regulations in your area. In addition, you
can contact your local electronics retailers or recycling centre for disposal.
User Safety Precautions
nCheck the room temperature range is 0°C – 35° C (32° - 95° Fahrenheit) before
charging the battery.
nDo not attempt to disassemble the plastic covering or any parts of the device, as the
materials inside may be toxic and may damage skin and clothes.
nDo not puncture, crush, modify, throw or cause any unnecessary shock to your
battery, as the battery used in this device may present a risk of re, explosion,
or chemical burn if mistreated.
n Donotleave,chargeorusethebatteryinacarunderdirectsunlight,nearreora
heated source.
nDo not immerse, throw, wet the battery in water/ seawater.
nDo not use or charge the battery if it appears to be abnormally hot, discoloration,
deformation or abnormal conditions is detected during use, charge or storage.
nDo not leave a charging battery unattended. Keep the battery away from babies and
children.
CONTROL
Front View
1. LCD display
2. PRESET 1 - 10 buttons
3. ON/OFF button
4. EQUALIZER button
5. SURROUND button
6. LOUDNESS button
7. SOURCE button
8. INFO button
9. MONO/STEREO button
10. MENU button

7 8
GB
GB
Top View
11. VOLUME control
12. TUNING / SEEK / TIME SET control
13. ANTENNA
Side View
14. AUX-IN socket
15. USB device / DC Out (5V/1A)
14
15
11
13
12
USING THE DEVICE FOR THE FIRST TIME
1. Placetheradioonaatsurface.
2. Carefully extend the antenna located on the top of the radio. Adjust the antenna so
it is vertically extending above the radio.
3. Plugging the AC power cord into the AC socket. The radio will start up and
the display will show the Perfect Pro logo for a few seconds. Then the radio will
automatically perform an auto scan of the Band III DAB channels and the FM band
in the back ground.
4. Whenthescaniscompleted,the10strongestFMstationsandtherst10DAB
stations will be stored as presets. The radio will switch to standby with the updated
clock and date showing on the display.
5. If no signals are found, the clock will not be updated. It may be necessary to
relocate the radio to a position giving better reception.
DAB MODE
Operating the radio
1. Carefully extend the antenna. Press the ON/OFF button to switch on the radio.
2. Select DAB by pressing the SOURCE button.
3. Therststationinthelistofstationsfoundwillbeplayed.Thedisplaywillshow
the station name. If the radio has been used before, the last used station will be
selected.
4. If no DAB signals are detected, “No stations available” will be displayed. It may
be necessary to relocate the radio to a position with better reception. You should
thencarryoutanautoscantondstations,pleaserefertothesection“Find new
stations - DAB”.
Selecting a station
1. Press the ON/OFF button to switch on the radio.
2. The display shows the name of the radio station currently selected.
3. Rotate the TUNING control to show the available station list.
4. Rotate the TUNING controltoscrollthroughthelisttondthedesiredstation,
press the TUNING control to select the station.
Note: If after selecting a station the display shows “No stations available”, it may be
necessary to relocate the radio to a position with better reception.
Secondary services
1. Certain radio stations have one or more secondary services associated with them.
If a station has a secondary service associated with it, then the secondary service
will appear immediately after the primary service as you turn the TUNING control.
2. Press the TUNING control to select the secondary service.
Most of secondary services do not broadcast continually and if the selected service
is not available, the radio will re-tune to the associated primary service.

9 10
GB
GB
Display modes
In DAB mode, the radio can display a range of information on the display.
1. Press the INFO button to cycle through the various modes.
a. Scrolling text Displays text message such as artist/track name, phone in
number, etc.
b. Signal strength Displays the signal strength of radio reception.
c. Program type Displays type of station being listened to e.g. Pop, classic,
News, etc.
d. Multiplex name Displays name of multiplex to which the current station
belongs.
e. Channel & frequency Displays channel number and frequency for the currently
tuned DAB station.
f. Bit rate & audio type Displays the digital audio bit rate.
g. Time & date Displays the current time (24 hour clock) and date.
Finding new stations
Fromtimetotime,newstationsmaybecomeavailable.Youmayproceedtondnew
stations as follows:
1. In DAB mode, press the MENU button, and rotate the TUNING control to “Scan”.
2. Press the TUNING control, the radio will perform a scan of the Band III DAB
channels.
As new stations are found, the station counter on the display will increase and
stations will be added to the list.
Manual tuning
Manualtuningisanalternativemethodofndingnewstations.Insteadofscanningthe
entire Band III channels automatically, you may tune the radio directly to a known DAB
channel and store all the multiplex in that channel into the available station list.
1. In DAB mode, press the MENU button and rotate the TUNING control to “Manual
tune”, then press the TUNING control. The display will show DAB channel and
Frequency list.
2. Rotate the TUNING control to select the desired Channel or Frequency and then
press the TUNING control to tune to the chosen frequency.
3. When DAB stations in the tuned channel are found, the display will show the name
of the station. Any new radio stations found will be added to the list stored in the
radio.
4. The antenna icon shows the reception of the station. A cross with antenna icon
indicates no signal with poor reception. The antenna icon bars will go up or down
showing the changing signal strength as you adjust the antenna or the radio
position.
5. Repeat step 1 to 4 for other channels with new stations.
6. Press the MENU button twice to exit manual tuning and return to normal DAB
operation.
Dynamic Range Control (DRC) settings
DRC can make quieter sounds easier to hear when the radio is used in a noisy
environment.
1. In DAB mode, press the MENU button, rotate the TUNING control to “DRC”. Press
the
TUNING control.
2. Rotate the TUNING control to select required DRC setting (default is Off).
DRC Off DRC is switched off. Broadcast DRC will be ignored.
DRC Low DRC level is set to low that sent by broadcaster.
DRC High DRC is set as sent by broadcaster.
3. Press the TUNING controltoconrmthesetting.Thedisplaywillreturntonormal
radio display.
Note: Not all DAB broadcasts use the DRC function. If the broadcast does not provide
DRC information, the DRC setting in the radio will have no effect.
Prune stations
If you move to a different part of the country, some of the stations which were listed
may no longer be available. Also, from time to time, some DAB services may stop
broadcasting, or may change location or frequency. The Prune stations function will
delete the unavailable DAB stations from your station list.
1. In DAB mode, press the MENU button.
2. Rotate the TUNING control to “Prune Invalid”.
3. Press the TUNING control to enter the setting.
4. Rotate the TUNING control to select between “Yes” or “No” (default is No).
Select “Yes” to enable this function if required, otherwise, select “No”.
5. Press the TUNING controltoconrmyoursetting.ThedisplaywillreturntoDAB
menu.
Note: If you have move the radio to a different part of the country, you should also carry
out a search for new stations (please see the section “Finding new stations – DAB”).

11 12
GB
GB
FM MODE
Operating FM
1. Press the ON/OFF button to turn on the radio.
2. Select the FM waveband by pressing the SOURCE button.
3. IfthisisthersttimetoswitchtoFMmode,thestationinpreset1willbeplayed.
If the radio has been used before, the last listened station will be played.
4. To seek station, press the TUNING control. The scan stops automatically when it
ndsastationofsufcientstrength.
5. After a few seconds, the display will update with station name if RDS information is
being received.
6. Tondotherstations,presstheTUNING control again.
7. To seek station in an opposite direction, rotate the TUNING control clockwise (to
scan from low frequency to high frequency) or rotate anti-clockwise (to scan from
high frequency to low frequency), and press the TUNING control.
8. When the waveband end is reached, the radio will recommence tuning from the
opposite waveband end.
Manual tuning
1. Press the ON/OFF button to turn on the radio.
2. Select the FM band by pressing the SOURCE button.
3. Rotate the TUNING control to reach the required FM station.
The radio will change the frequency in steps of 50 kHz.
4. Rotate the rubber antenna to get the best reception. If the radio is tuned to a station
ofsufcientsignalstrengthwithRDSinformationpresent,thedisplaymaychange
to show the station name.
5. When the waveband end is reached, the radio will recommence tuning from the
opposite waveband end.
RDS station service
RDS (Radio Data System) is an information system which inaudible digital information is
transmitted in addition to the normal FM radio programme. When the radio is receiving a
RDSstationandthereceptionstrengthissufcient,thestationnamewillappearinthe
display. It may take some time before the RDS information is available.
Calling up RDS information
When you are listening to a FM station with RDS system, repeatedly press the INFO
button to cycle through the information. This will only function if the reception level is
sufcientandclear.
a. Radio text (RT) Displays the message about the station being listened to as
ticker text.
b. Program type (PTY) Displays the type of station being listened to, e.g. Pop,
Classic, News, etc.
c. Frequency Displays the frequency of the station being listened to.
d. Time & date Displays the current time (24 hour clock) and date.
Scan sensitivity setting
The radio will normally scan all stations from FM broadcasts including the weaker
signals.However,youmaywishtheAuto-scantondonlythosestationswithstrong
enough signals to give good reception.
1. Press the ON/OFF button to turn on the radio.
2. Select the FM band by pressing the SOURCE button.
3. Press the MENU button, rotate the TUNING control to “Scan setting”.
4. Press the TUNING control.
5. Rotate the TUNING control to select between “All stations” or “Strong station”
(default is All stations).
The“Strongstation”optionwillallowtheradiotondstrongsignalsonlywhen
scanning.
6. Press the TUNING controltoconrmyoursetting.ThedisplaywillreturntoFM
menu.
PRESET STATIONS
Storing preset stations
There are 20 memory presets in the radio, 10 for DAB and 10 for FM. Presets are
remembered by the radio in the event of a power failure.
1. Press the ON/OFF button to turn on the radio.
2. Press the SOURCE button to select the desired waveband.
3. Tune to the required station.
4. Press and hold the required PRESET button until the radio shows “Saved to
preset”.
5. Repeat step 3 and 4 for the remaining presets.
6. Stations stored in the preset memories can be over-written by following the above
procedure.
Recalling preset stations
1. Press the ON/OFF button to turn on the radio.
2. Press the SOURCE button to select the desired waveband.
3. BrieyPresstherequiredPRESET button, the display will show, e.g. "P1", in the
bottom side of the display.

13 14
GB
GB
Note: There can be up to 8 device names to be stored in the speaker. If there are more
than 8 mobile devices have been connected and stored into the speakers, the earliest
paired device name will be erased.
Note: If you have ever deleted the “RockBull” from your connected mobile device, the
auto reconnection will be unsuccessful.
Restart Bluetooth pairing
The Bluetooth function can be set to operate in different ways as below:
1. In Bluetooth mode, press the MENU button.
2. Rotate the TUNING control to “Setup Bluetooth” options, and press the TUNING
control to select the setting.
3. The radio will try to disconnect the current paired Bluetooth, then available to be
connected by the new Bluetooth device.
4. Atthestage,theBluetoothindicatorwillbeashingonthescreenuntilthenew
Bluetooth pairing is completed.
Note: “Setup Bluetooth” is the option that force the Bluetooth of this radio to disconnect
from your mobile phone and enter the “discoverable mode”. This is the way to allow
the Bluetooth pairing to another device. If no new device is paired, the Bluetooth will
automatically try to connect to the last device when it is switched off and on again.
The Auto-Power management function will be activated in Bluetooth mode. If there is no
signal from Bluetooth for a period of over 15 minutes, the radio will automatically switch
to standby mode. Pressing the ON/OFF button will wake up the unit.
USING BLUETOOTH
Pairing Bluetooth with your mobile phone
1. Press the ON/OFF button to turn on the radio.
2. Select Bluetooth mode by pressing the SOURCE button.
3. TheLCDdisplaywillshowaashingBluetoothindicatorinthebottomsideofthe
display when radio is not yet paired with your mobile phone.
4. In your mobile phone open the Setting menu and select Bluetooth, then select
“RockBull” in the Bluetooth devices list (Bluetooth pairing instructions may vary
per type of mobile phone, please check your mobile phone manual).
5. When Bluetooth pairing is successful, the Bluetooth indicator will be lit, and the last
played music information of the mobile device will be displayed.
Playing music from your mobile phone
1. Press the ON/OFF button to turn on the radio.
2. Select Bluetooth mode by pressing the SOURCE button.
3. Start playing music by using the media players in the paired mobile phone.
4. Playback can be controlled from the mobile phone or by pressing the numeric
button “3”, “4” or “5” on the radio.
5. After music playback started, the name of the song will be displayed in the LCD.
Display modes
In Bluetooth mode, the radio can display a range of information of the current playing
music on the display. Press the INFO button to cycle through the various types.
a. Artist Displays the artist’s name of the current playback music.
b. Album Displays the album name of current playback music.
Device List
In the radio, you can select the Bluetooth device from the device list to connect again.
ThedevicenameswouldbeshownifthenameoftheBluetoothdeviceswerecongured
in the mobile devices. Please refer to the user manual of your mobile device for the
congurations.
The device lists can be checked as below:
1. In Bluetooth mode, press the MENU button.
2. Rotate the TUNING control to “View details”; press the TUNING control to select
setting.
3. Rotate the TUNING control to “Paired Device list”; press the TUNING control to
select the setting.
4. Rotate the TUNING control to view the name of the devices.
5. Press the TUNING control to start Bluetooth reconnection. The speaker will
automatically connect to this mobile device.

15 16
AUX IN MODE
A 3.5mm stereo Aux In socket is provided on the side behind the rubber cover, for
connecting an external audio device such as MP3 player or CD player (not included with
this radio).
1. Connect an audio source to the Aux In socket.
2. Press the SOURCE button to select AUX input. Display will show “AUX In”.
3. Play the external player.
4. Adjust the volume of both the radio and the player for comfortable listening.
5. After use, close the rubber cover to prevent moist or dust from entering into the
sockets and radio.
Notes: Never use the AUX-IN socket in rainy or moist conditions to prevent moist from
entering the radio. Keep the rubber cover closed under these conditions.
The Auto-Power management function will be activated in AUX mode. If there is no
signal from the AUX input jack for a period over 15 minutes, the unit will automatically
switch to standby mode. The operation indicator and the LCD will go off in such case.
Pressing the On/Off button will wake up the unit.
USB MODE
CONDITIONS TO PREVENT MOIST FROM ENTERING THE RADIO!! KEEP THE
RUBBER COVER CLOSED UNDER THESE CONDITIONS.
USB memory devices can be used with the radio for playback of MP3, AAC, FLAC and
WAVles.
The radio has been tested with a range of USB memory devices up to 32GB. However,
there are many different USB memory device variants available and not all of them can
beguaranteedtoworkinthisradio.MemorymustusetheFATorFAT32lingsystemin
order to operate in this radio.
Audio formats supported for playback are MP3, AAC, FLAC and WAV. Playback does
notsupportlesencodedusingWMAlossless,WMAvoice,WMA10professional,or
lesofanyformatthathaveDRMprotection.
The USB socket are located on the side behind the rubber cover. Make sure the rubber
cover is closed well after use to prevent moist and dirt from entering the radio.
The USB memory device should not be removed during playback as damage or
corruptionoflesmayoccur.
USB memory devices are not included with this radio.
Note: When the radio is playing a USB stick, the batteries will be charged in low current
mode. Once the USB stick is removed normal charging will continue.
GB
GB
Insert and remove a USB memory device
Carefully insert a USB memory device into the USB socket. To remove the USB memory
device, simply pull the device out.
Playing music les
1. Press the ON/OFF button to turn on the radio.
2. Press the SOURCE button to “Music Player”.
3. Rotate the TUNING control to “USB Playback”, and press the TUNING control.
The radio will start to read the USB device. Sometimes, the radio will take a little
more time to read all the music contents from the USB device. This might depend
on the speed of the USB memory device.
After reading the USB memory device, the content list is shown, rotate the TUNING
control to search desired folder(with song). And press the TUNING control to
selectthefolder.Thedisplaywilllistthelesoftheselectedfolder.
4. Rotate the TUNING controltochoosedesiredle(song)tobeplayed,andpress
the
TUNING control to select, the radio will start to play.
5. To pause the playback, press the (PRESET 5) button. Press the (PRESET
5) button again to resume the playback from pause position.
6. Toskiptothenextle,pressthe (PRESET 4) button.
7. Toskiptothepreviousle,pressthe (PRESET 3) button.
8. Whiletheleisplaying,pressandholddowneitherthe (PRESET 4) button
9. or (PRESET 3) button.Releasethebuttonwhenthedesiredpartoftheleis
reached.
10. To skip to the next folder, presses the (PRESET 2) button.
11. To skip to the previous folder, presses the (PRESET 1) button.
File searching
1. Press the MENU button until the USB music contents list is shown.
2. Rotate the TUNING control to search the desired folder(with song). Press the
TUNING control to select the folder.
Thedisplaywillshowthelelistoftheselectedfolder.
3. Rotate the TUNING controltosearchthedesiredle.PresstheTUNING control
toselectthele.Theradiowillstarttoplaytheselectedle.
Theradiosupportsalimitednumberoffoldersandlesinthesearching:
Mode Max. no. of folders supported Max. no. of les supported
Stop 999(withfoldername) 9999(withlename)
Play 999 9999
(1-99withfoldername) (1-999withlename)
(100-999withoutfoldername) (1000-9999withoutlename)

17 18
GB
GB
Play mode
During USB memory device is playing,
1. Press the MENU button until the “Music Player” menu was shown;
2. Then, rotate the TUNING control to “Play mode”. Press the TUNING control.
3. Rotate the TUNING control to the desire play mode and press the TUNING
controltoconrm.
The following options can be chosen:
Repeat off Turn off all the repeat mode.
Repeatone Repeatedlyplaytheleyouarelisteningto.
Repeatfolder Repeatedlyplaytheleswithinthefolderyouarelisteningto.
Repeatall RepeatedlyplayalllesintheUSBmemorydevice.
Repeatshufe PlayalllesintheUSBonceinrandomorder.
The selected Play Mode is indicated on the display by an icon.
No icon is shown when in Repeat off.
Information function
During USB memory device playback, the title and the current playing time of the current
playing music will be shown. Press the INFO button to cycle through the following
information(onlyifthisinformationispresentwiththeleonthememorydevice):
Artistname→Albumname→Filename→Path→Date→Artistnameagain.
SETTING THE CLOCK
The clock can be set when the radio is in standby mode. If no buttons are pressed for 5
seconds, the radio will exit the clock setup and the setting is cancelled.
1. Press and hold the TUNING control for 12 seconds until the menu “Time/Date” is
shown.
2. Rotate the TUNING control to “Set Time/Date”, and press the TUNING control, the
hourdigitsashonthedisplay.
3. Rotate the TUNING control to set the hour.
4. Press the TUNING controltoconrm,theminutedigitsash.
5. Rotate the TUNING control to set the minute.
6. Press the TUNING controltoconrm,thedayashesonthedisplay.
7. Rotate the TUNING control to set the current day.
8. Press the TUNING controltoconrm,themonthashes.
9. Rotate the TUNING control to set the current month.
10. Press the TUNING controltoconrm,theyearwillthenashonthedisplay.
11. Rotate the TUNING control to set the current year.
12. Press the TUNING controltoconrmandnishtheclocksetting.
LOUDNESS
The Loudness function enables to get compensation on lower and higher frequency.
The effect will be more audible when the radio is in a lower volume level (Dynamic
Loudness).
1. Press the LOUDNESS button to enable the loudness, the display shows
“Loudness On”.
2. Press the LOUDNESS button again to disable the loudness, the display shows
“Loudness Off”.
3. The display will return to normal in 3 seconds, and resume operation.
SURROUND SOUND
The ROCKBULL radio uses a digital signal processor to adjust the original audio signal
to reproduce a digital virtual Surround sound. The sound reproduction quality is highly
enrichedofferingyouaspaciousandperspectivesoundeld.
1. Press the ON/OFF button to switch on the radio.
2. Press the SOURCE button to select any of the modes from the radio.
3. Press the SURROUND button alternatively, and then select between “Surround on”
or “Surround off”.
4. The display will return to normal in 3 seconds, and resume operation.
The Surround Sound effect varies strongly per music type. Mostly the best result will be
obtained with “lighter and easy listening” music. “Loud and heavy” music will often result
inaless“opensound”orevendistortion.Allthisisofcoursestronglyinuencedbythe
volume level and selected equalizer setting.
TheSurroundSoundeffectisbestusedinalargerroomwithreectingwallsand
listening at a few metres away from the radio. Very close to the radio the Surround
Sound effect is not optimal.

EQUALIZER
The EQUALIZER function enables you to select a setting from 12 presets. Each presets
EQ contains a group of parametric controls in the digital audio processor, which offer
you optimum adjustments for various kinds of music and applications for different
environments.
1. Press the ON/OFF button to switch on the radio.
2. Press the EQUALIZER button repeatedly to select the desired EQ. The displayed
EQ will be effective immediately:
• EQ1 Normal
• EQ2 Classic
• EQ3 Dance
• EQ4 Soul and Jazz
• EQ5 Rock
• EQ6 Flat
• EQ7 Small room
• EQ8 Spoken word
• EQ9 Acoustic
• EQ10 Indoor
• EQ11 Outdoor
• EQ12 Late night
3. The display will return to normal in 3 seconds, and resume operation.
LANGUAGE
Theradiocanbeconguredtoadifferentlanguage.
1. Press the ON/OFF button to turn on the radio.
2. Press the MENU button, and then rotate the TUNING control to“System settings”.
3. Press the TUNING control; rotate the TUNING control to “Language”.
4. Press the TUNING control to enter the language adjustment menu.
5. Rotate the TUNING control to select the desired language (default is English).
6. Press the TUNING controltoconrmyourchoice.Thedisplaywillchangetothe
chosen language.
SOFTWARE VERSION
The software display cannot be altered and is just for your reference. You can only view
the software version in DAB, FM, Bluetooth, Aux In or USB mode.
1. Press the ON/OFF button to switch on the radio.
2. Press the SOURCE button to select any of the modes.
3. Press the MENU button; rotate the TUNING control to “System settings”.
4. Press the TUNING control; rotate the TUNING control to “Info”.
5. Press the TUNING control to view the software version.
6. Press the MENU button back to the last menu, and press the MENU button again
to return to the normal radio display.
SYSTEM RESET
If the radio fails to operate correctly, or some digits on the display are missing or
incomplete, carry out the following procedure.
1. Press the ON/OFF button to switch on the radio.
2. Press the MENU button;
3. Then, rotate the TUNING control to the “System settings”. Press the TUNING
control.
4. Rotate the TUNING control to the “Factory reset”. Press the TUNING control.
5. Rotate the TUNING control to select between “Yes” or “No”.
Select “Yes” if you wish to reset the radio, otherwise, select “No”.
6. Press the TUNING control to cause the factory reset.
7. A full reset will be performed. All presets and the station list will be erased. All
settings will be set to the default values.
The display will show the Perfect Pro logo for a few seconds, and then the radio will
automatically perform an auto scan of the Band III DAB channels and the FM band.
In case of malfunction due to electrostatic discharge; reset the product as above to
resume normal operation. If you are not able to perform the reset operation as above,
remove and reconnect the power supply.
MOBILE DEVICE CHARGE VIA USB
The radio support to charge mobile device via the USB socket. It can provide 5V,
maximum 1A from the USB socket during charge.
19 20
GB
GB

BRIGHTNESS
LCDbrightnessconguration
1. Press the ON/OFF button to turn on the radio.
2. Press the MENU button, and rotate the TUNNING control to the “System settings”.
Then, press the TUNNING control;
3. Rotate the TUNNING control to the “Brightness”.
4. Press the TUNNING control to enter the LCD brightness adjustment menu.
5. Rotate the TUNNING control to select “Normal” for the LCD brightness level while
the radio is playing;
6. Or rotate the TUNNING control to select “Standby” to setup the brightness level of
the unit in standby mode.
7. Press the TUNNING controltoconrmyourchoice.
Note: When in battery standby, the radio will be turned off to save power. At that
moment, the LCD will also be turned off. When the radio is connected to mains AC
power again, the last user setting will be applied again.
WARRANTY
This radio has a 2 year limited warranty.
WARNING ! Warranty becomes void once the radio cabinet has been opened or
any modications or alterations to the radio have been made !
The terms of the warranty of this radio do not cover the following:
• Damage caused by misuse, abuse, neglect, alterations, accidents or unauthorized
repair.
• Normal wear and tear.
• Breaking or bending of the metal telescopic antenna
Never open the device casing. The manufacturer will not accept any liability for damage
resulting from improper handling. The type plate is located on the bottom of the device.
Environmental note
This product has been manufactured with high quality parts and materials
which can be reused and recycled.
Therefore, do not throw the product away with normal household waste
at the end of its service life. Take it to a collection point for the recycling
of electrical and electronic device. This is indicated by this symbol on the
product, in the operating manual and on the packaging.
Pleasendoutaboutcollectionpointsoperatedbyyourlocalauthority.
Help protect the environment by recycling used products.
TECHNICAL DATA
Power supply
Mains operation: AC 230V ~, 50/60Hz
Power consumption
Operation: < 55 W
Standby: < 0.5 W
Frequency coverage
DAB 174,928 – 239,200 MHz
FM 87.50 – 108.00 MHz
Bluetooth
Version5.0SupportsBluetoothprolesA2DPandAVRCP
Speaker
Woofer 2 x ø130mm, 4 ohms
Tweeter 2 x ø45mm, 8 ohms
Output Power
Nominal: 2 x 25W
Aux In socket
ø3.5 mm
USB socket
USB type A with 5V/1A power output while in mobile phone charging
21 22
GB
GB

1 2
F
TABLE DES MATIÈRES
TABLE DES MATIÈRES ……….………........……………………………………………… 1
CONSIGNES DE SÉCURITÉ IMPORTANTES ………………….....……………………… 3
ALIMENTATION ÉLECTRIQUE ………..……………..........………………………… 4
Fonctionnement sur une prise secteur ………..……………………………………… 4
Fonctionnement et charge de la batterie lithium ………………………………… 4
Consignes de sécurité pour l'utilisateur ………..……………………………………… 6
COMMANDES ……….......…………...................................…………………………… 7
Vue de face ………..………….................................…………………………… 7
Vue de dessus ………..…………....................................…………………………… 8
Vue de coté ……….......................................……………………………………… 8
PREMIÈRE UTILISATION DE LA RADIO ………..….....…………………………………… 9
MODE DAB ………..…...........................................…………………………………… 9
Utilisation de la radio ……….................…………….........………………………… 9
Sélection d’une station ………..…..............…………..........………………………… 9
Services secondaires ………..……....................………………………………… 10
Modes d’affichage ………..…………………....................…………………… 10
Recherche de nouvelles stations ………..………………….....…………………… 10
Syntonisation manuelle ………..………………………................……………… 11
Réglage du niveau du Dynamic Range Control (DRC)………….........…………11
Suppression des stations ………..……………...…………..........……………… 12
MODE FM ………..…………………………........................................…………… 12
Utilisation de la radio en mode FM ………..………………….…………………… 12
Syntonisation manuelle ………..………………..............……………………… 13
Système d’information RDS ………..…………………............…………………… 13
Réglage de la sensibilité de balayage ………..……….....……………………… 13
PRÉSÉLECTION DE STATIONS ………..………………...........……………………… 14
Mémorisation des stations présélectionnées …………………………………… 14
Rappel des stations présélectionnées ………..……………………………………… 14
UTILISATION DE LA FONCTION BLUETOOTH …………………….....………………… 14
Couplage Bluetooth avec votre téléphone portable ……….......………………… 14
Écouter de la musique depuis votre téléphone portable …………………… 15
Modes d'affichage ………..……………............................………………………… 15
Liste des appareils ………..……………........................………………………… 15
Redémarrer le couplage Bluetooth ………..……………………………………… 16
MODE AUX-IN ………..........................................……………………………………… 16
MODE USB ………..…..........................................…………………………………… 17
Insérer et retirer un périphérique de stockage USB ……………………………… 17
Lecture de fichiers musicaux ………..…..........…………………………………… 17
Recherche de fichiers ………..…....................…………………………………… 18
Mode de lecture ………..….........................…………………………………… 18
Fonction d'information ………...……….........……………………………… 19
RÉGLAGE MANUEL DE L’HEURE ET DE LA DATE ………...…………………………… 19
LOUDNESS (INTENSITÉ SONORE) ………....……………………………………… 20
SON SURROUND ………..................................……………………………………… 20
EQUALIZER ………..……..........................………………………………… 21
SÉLECTION DE LA LANGUE ………..……................………………………………… 21
VERSION DU LOGICIEL ………..……………………................………………… 22
RÉINITIALISATION DU SYSTÈME ………..……………………...………………… 22
CHARGER UN APPAREIL PORTABLE VIA LA PRISE USB ………....……………… 23
LUMINOSITÉ DE L’ÉCRAN ………..…………..............…………………………… 23
GARANTIE ………..………………..................................……………………… 24
Protection de l'environnement ………..……………………………………… 24
DONNÉES TECHNIQUES ………. . … . . .......…………………………………… 25
AVERTISSEMENT ! LA GARANTIE PREND FIN LORSQUE LE BOITIER DE
LA RADIO A ÉTÉ OUVERT OU LORSQUE DES MODIFICATIONS ONT ÉTÉ
APPORTÉES À LA RADIO. N’OUVREZ JAMAIS LE BOITIER DE L’APPAREIL.
LE CONSTRUCTEUR N’ACCEPTERA AUCUNE RESPONSABILITÉ POUR
UN DOMMAGE RÉSULTANT D’UNE MAUVAISE UTILISATION. LA PLAQUE
SIGNALÉTIQUE EST SITUÉE AU
DOS DE L’APPAREIL.
La marque et les logos Bluetooth® sont enregistrés comme des marques déposées et
détenues par Bluetooth SIG, Inc.et tout usage de ces marques se fait sous licence.

3 4
F
ALIMENTATION ÉLECTRIQUE
Fonctionnement sur une prise secteur
1. Avantd’insérerlacheducordond’alimentationdelaradiodansuneprisede
courant, assurez-vous que la tension soit correcte.
2. Le logement situé à l’arrière de la radio est prévu pour y ranger le cordon
d’alimentationetlachelorsquelaradion’estpasutilisée.
Remarque :
Andedéconnecterlaradiodelaprisesecteur,lacheducordond’alimentationdoit
êtreretiréecomplètementdelaprisedecourant.Lacheducordond’alimentationdoit
rester accessible en cours d’utilisation de la radio.
En cas d’interférences ou de dysfonctionnement de la radio suite à une décharge
électrostatique ou une surtension après une perturbation transitoire rapide (salves),
retirezunbrefinstantlacheducordond’alimentationdelaprisedecourantet
réinsérez ensuite celle-ci dans la prise de courant.
Fonctionnement et charge de la batterie lithium
REMARQUE CONCERNANT LA PREMIÈRE UTILISATION : AVANT D'UTILISER LE
ROCKBULL POUR LA PREMIÈRE FOIS, TOUJOURS CHARGER COMPLÈTEMENT
LA BATTERIE
Le ROCKBULL peut être utilisé avec la batterie lithium intégrée. Pendant le
fonctionnementsurbatterie,leniveaudechargeapproximatifdelabatterieestafché
sur l'écran LCD de la radio.
Lorsque le niveau de charge de la batterie est très faible, le symbole de la batterie
clignotera sur l'écran. Dans ces conditions, la batterie doit être rechargée dès que
possible pour continuer à utiliser normalement le ROCKBULL.
Le temps de charge d’une batterie vide à une batterie pleine est d'environ 8 à 10 heures
(à température ambiante avec la radio en mode Standby (veille)). Le ROCKBULL peut
être chargé en mode Standby (veille) ainsi qu'en cours d’utilisation pendant la lecture de
musique. Lors de la lecture de musique, le temps de charge sera plus long qu'en mode
standby (veille).
Le ROCKBULL, pour plus de sécurité, ne commencera pas à se charger lorsque la
batterie est déjà pleine ou presque pleine.
REMARQUE SUR LA DURÉE DE LECTURE LORSQUE LA RADIO FONCTIONNE
SUR BATTERIE : la durée de lecture obtenue lorsque la radio fonctionne sur batterie
dépend de nombreux facteurs tels que : le niveau du volume sélectionné, le type de
musique (la musique avec beaucoup de graves consomme plus d'énergie), la source de
musique sélectionnée (DAB, FM, Bluetooth, USB ou AUX-IN), le réglage EQ (égaliseur)
sélectionné, la température ambiante et l’âge de la batterie. En fonction de ces
variables, une durée de lecture d'environ 18 à 24 heures sur un niveau de volume réglé
sur moyen peut être atteinte.
CONSIGNES DE SECURITE IMPORTANTES
1. Lisez ces consignes.
2. Conservez ces consignes.
3. Respectez ces avertissements.
4. Suivez ces consignes.
5. Nettoyez seulement avec un chiffon sec.
6. Ne bloquez aucune ouverture de ventilation. Installez selon les consignes.
7. N'installez pas à proximité de sources de chaleur telles que les radiateurs, grilles de
chauffage,fourneauxouautresappareils(ycomprislesamplicateurs)qui
produisent de la chaleur.
8. Nesupprimezpaslafonctiondesécuritédelachepolariséeouterre–typede
prise.Unechepolariséepossèdedeuxbrochesdontuneestpluslargequel'autre.
Une prise à terre possède deux broches et une troisième broche à terre. La broche
large ou la troisième broche reliée à la terre sont fournies pour des raisons de
sécurité.Silachefournienerentrepasdansvotreprise,consultezunélectricien
pour qu'il vous change l'ancienne prise.
9. Protégezlecordond'alimentationanqu'ilnesoitpaspiétinéouserré,
particulièrementauniveaudelache,delapriseélectriqueetl'endroitoilsort
de l'appareil.
10. Utilisez seulement des cordons/accessoires précisés par le fabricant.
11. Utilisez seulement avec le chariot, le support, le trépied, la console ou la table
précisés par le fabricant ou vendus avec l'appareil. En utilisant un chariot, faites
attention en déplaçant la combinaison chariot/appareil pour éviter de vous blesser
en cas de chute.
12. Débranchez cet appareil pendant les orages ou lorsque vous ne l'utilisez pas
pendant de longues périodes.
13. Coneztouteslesréparationsdupersonnelderéparationqualié.Laréparation
est requise si cet appareil a été endommagé de quelque manière que ce soit, par
exemplesilecordond'alimentationoulacheontétéendommagés,siduliquidea
été renversé ou si des objets sont tombés sur l'appareil, si l'appareil a été exposé à
la pluie ou à de l'humidité, s'il ne fonctionne pas correctement ou s'il est tombé.
14. Pour réduire les risques de feu ou de choc électrique, n'exposez pas cet appareil à
la pluie ou à de l'humidité.
15. N'enlevez pas le dessus de l'appareil, il n'y a pas de pièces de réparation a l'intérieur.
16. Neplaceraucunesourcedeammenuesurl’appareil.
17. Lors d’une utilisation en extérieur,pour éviter les chocs électriques, utilisez
seulementdespilesencasdepluieoudetempshumide.And’évitertout
risque d’électrocution lorsque la radio a été exposée à la pluie ou à l’eau, le cordon
d’alimentationetlachedoiventêtreséchéscomplètementavantd’insérerlache
dans la prise de courant.
18. La prise de courant doit être à proximité de l'appareil et facile d'accès pour
qu'en cas d'urgence, pour couper le courant de l'appareil, vous puissiez simplement
débrancher la prise de courant.
19. Les informations légales concernant la radio se trouvent sur la face inférieure de
celle-ci.
20. Cet appareil est protégé contre les projections et éclaboussures d’eau (IP65).
21. En cas de perturbations provoquées par une décharge électrostatique ou une
pointedetension,lacheducordond’alimentationdelaradiodoitêtreretiréeun
bref instant de la prise de courant et réinsérée ensuite dans celle-ci.
22. Cet appareil doit être utilisé en climat modéré.
23. Pour éviter d’endommager l’audition, ne pas écouter à volume élevé
pendant de longues périodes.
24. Sous l'environnement avec une perturbation de l'immunité conduite / Immunité rayonnée,
la radio peut mal fonctionner. Il se récupérera automatiquement à la normale lorsque
la perturbation de l'immunité entraînée / l'immunité rayonnée s'est arrêtée.

5 6
F
REMARQUE SUR LA DURÉE DE VIE DE LA BATTERIE LITHIUM : si le ROCKBULL
n'est pas utilisé pendant une période prolongée, chargez toujours la batterie intégrée
avant la première utilisation jusqu'à ce qu'elle soit pleine. La durée de vie optimale de la
batterie intégrée sera obtenue si elle est maintenue rechargée après chaque utilisation
du ROCKBULL, même si elle n'est que partiellement déchargée. La durée de vie de la
batterie sera réduite si le produit est laissé déchargé pendant une longue période.
ATTENTION :
N'essayez pas de remplacer ou de réparer la batterie lithium intégrée. Si vous avez
des doutes sur la batterie lithium intégrée, veuillez contacter le service après-vente de
PerfectPro pour obtenir de l'aide.
ATTENTION :
Risque d'explosion si la batterie n'est pas remplacée correctement.
N'exposez pas la batterie à une chaleur excessive telle qu’une exposition directe aux
rayons du soleil, à proximité d’un feu ou autre source de chaleur.
Les batteries ne doivent pas être éliminées avec les ordures ménagères ordinaires ni
par incinération ou être jetées dans un feu.
Les batteries jetables doivent être transportées dans un centre de recyclage approprié
si possible.
Informations de sécurité sur la batterie lithium rechargeable interne
La batterie lithium-polymère rechargeable interne utilisée dans cet appareil est capable
de fournir de l'énergie pendant une longue période. Cependant, même les batteries
lithium-polymèreatteignentunpointoellesnepeuventplusêtrerechargées.Sila
batterie ne se recharge pas après plusieurs tentatives, elle est peut-être épuisée (sa
des informations de réparation.
Cependant, si vous ne souhaitez pas que nous remplacions la batterie, vous
devrez vous débarrasser des batteries / appareils usagés conformément aux lois et
réglementations en vigueur dans votre région. De plus, vous pouvez contacter votre
revendeur local de matériel électronique ou votre centre de recyclage pour obtenir une
élimination appropriée.
Consignes de sécurité pour l'utilisateur
n Vériezquelaplagedetempératureambianteestcompriseentre0°Cet35°C(32
° et 95 ° Fahrenheit) avant de charger la batterie.
nN'essayez pas de démonter le revêtement en plastique ou toute pièce de l'appareil,
car les matériaux à l'intérieur peuvent être toxiques et endommager la peau et les
vêtements.
n Nepercezpas,n'écrasezpas,nemodiezpas,nejetezpasounecausezaucun
choc inutile à votre batterie, car la batterie utilisée dans cet appareil peut
présenter un risque d'incendie, d'explosion ou de brûlure chimique si elle est
maltraitée.
nNe laissez pas, ne chargez pas et n'utilisez pas la batterie dans une voiture sous la
lumière directe du soleil, à proximité d'un feu ou d'une source de chaleur.
nNe plongez pas, ne jetez pas et ne mouillez pas la batterie avec de l'eau / l'eau de
mer.
nN'utilisez pas et ne chargez pas la batterie si elle semble être anormalement
chaude, fait état d’une décoloration, d’une déformation ou de conditions anormales
pendant l'utilisation, la charge ou le stockage.
nNe laissez pas une batterie en charge sans surveillance. Gardez la batterie hors de
portée des bébés et des enfants.

7 8
F
Vue du dessus
11. Commande du VOLUME
12. Réglage TUNING / SEEK / TIME SET
13. ANTENNE
Vue de côté
14. Prise AUX-IN
15. Appareil USB / DC Out (5V/1A)
COMMANDES
Vue de face
1. Écrand’afchageLCD
2. Boutons PRESET 1 - 10
3. Bouton ON/OFF
4. Bouton EQUALIZER
5. Bouton SURROUND
6. Bouton LOUDNESS
7. Bouton SOURCE
8. Bouton INFO
9. Bouton MONO/STEREO
10. Bouton MENU
14
15
11
13
12

9 10
F
Services secondaires
1. Certaines stations de radio possèdent un ou plusieurs service(s) secondaire(s)
associé(s). Si la station possède un service associé, le service secondaire
apparaîtra ensuite immédiatement après le service primaire dès que vous avez
tourné
le bouton de réglage TUNING.
2. Appuyez sur le bouton de réglage TUNINGandesélectionnerunservice
secondaire. La plupart des services secondaires ne sont pas diffusés en
permanence et si le service sélectionné n’est pas disponible, la radio repassera sur
le premier service associé.
Modes d’afchage
Votreradiopossèdeplusieursoptionsd’afchageenmodeDAB.
1. Appuyez sur le bouton Info pour naviguer entre les différents modes.
a.Scrollingtext afchelesmessagestextedéroulantstelsque:lenom
de l’artiste/ du morceau, le numéro d’appel, etc.
b.Signalstrength afchelaforcedusignalderéceptiondelaradio.
c.Programtype afcheletypedestationécoutée:parex.Pop,
Classique, Actualités, etc..
d.Multiplexname afchelenomdumultiplexauquellastationécoutée
appartient.
e.Channel&frequency afchelenuméroducanaletlafréquencedelastation
DAB que vous écoutez.
f.Bitrate&audiotype afcheledébitbinaireaudionumériqueetletypeaudio.
g.Time&date afchel’heureactuelle(mode24h)etladate.
Recherche de nouvelles stations
Avec le temps, de nouvelles stations peuvent devenir disponibles. Pour trouver de
nouvelles stations, veuillez procéder comme suit :
1. En mode DAB, appuyez sur le bouton MENU, et tournez le bouton de réglage
TUNING pour lancer le balayage
2. Appuyez sur le bouton de réglage TUNING pour balayer les canaux Band III
DAB. Lorsque de nouvelles stations sont trouvées, le compteur de stations sur
l’écran augmentera et les stations seront ajoutées à la liste.
PREMIÈRE UTILISATION DE LA RADIO
1. Placez la radio sur une surface stable et plane.
2. Relevez prudemment l’antenne située sur la face supérieure de la radio. Orientez
l’antenne verticalement par rapport à la radio.
3. Insérezlacheducordond’alimentationdelaradiodansuneprisedecourant.
La radio s’allumera automatiquement et le logo PerfectPro apparaîtra pendant
quelques secondes à l’écran. La radio effectuera ensuite automatiquement un
balayage des bandes de fréquences Band III DAB et FM.
4. Lorsque le balayage est terminé, les 10 stations FM et les 10 premières stations
DAB offrant le meilleur signal de réception seront mémorisées en tant que
préréglages. Après ce premier balayage, la radio se mettra automatiquement en
modeStandby(Veille)etl’heureetladateactualiséesserontensuiteafchées
l’écran.
5. En l'absence de réception d'un signal radio, l'heure ne sera pas actualisée. Il peut
alors être nécessaire de placer la radio dans un autre endroit offrant une meilleure
réception.
MODE DAB
Utilisation de la radio
1. Relevez prudemment l’antenne. Appuyez ensuite sur le bouton ON/OFF pour
allumer la radio.
2. Appuyez sur le bouton SOURCE pour sélectionner le mode DAB.
3. La première station de la liste de stations disponibles sera alors audible et le nom
delastationseraafchél’écran.Silaradioadéjétéutiliséedanslepassé,la
dernière station sélectionnée sera dans ce cas audible.
4. Lorsqu’aucun signal DAB n’a été trouvé, le message « No stations available »
(aucunestationdisponible)seraafchél’écran.Ilpeutêtrenécessairedansce
cas de placer la radio dans un autre endroit offrant une meilleure réception. Vous
devez ensuite effectuer un balayage automatique (Auto Scan) pour rechercher des
stations. Voir le point « Recherche de nouvelles stations en mode DAB ».
Sélection d’une station
1. Appuyez sur le bouton ON/OFF pour allumer la radio.
2. Lenomdelastationactuellementsélectionnéeseraensuiteafchél’écran.
3. Tournez
le bouton de réglage TUNING pour parcourir la liste des stations
disponibles.
4. Tournez
le bouton de réglage TUNING pour naviguer et trouver la station désirée.
Appuyez ensuite sur le bouton de réglage TUNING pour sélectionner la station.
Remarque : si après avoir sélectionné une station, le message « No stations available »
(aucunestationn’estdisponible)estafché,ilpeutêtrenécessairededéplacerlaradio
dans un endroit avec une meilleure réception.

11 12
F
Syntonisation manuelle
Une syntonisation manuelle vous offre la possibilité de trouver de nouvelles stations. Au
lieu de balayer automatiquement les stations dans la DAB Bande III, vous pouvez régler
directement la radio sur un canal DAB connu et tous les multiplexes dans la station en
question seront mémorisés dans la liste de stations disponibles.
1. En mode DAB, appuyez sur le bouton MENU et tournez le bouton de réglage
TUNING jusqu’à ce que l’option “Manual tune” (Syntonisation manuelle) soit
afchéel’écran.LecanalDABetlalistedefréquenceserontalorsafchés
l’écran.
2. Tournez
le bouton de réglage TUNING pour sélectionner le canal ou la fréquence
souhaitée et appuyez ensuite sur le bouton de réglage TUNINGpourconrmer
votre choix de la fréquence en question.
3. Lorsque des stations DAB souhaitées ont été trouvées, le nom des stations DAB
seraalorsafchél’écran.Lesnouvellesstationsquiontététrouvéesseront
ajoutées à la liste de stations mémorisées par la radio.
4. L’afchagedel’icônedel’antenneindiqueleniveaudusignaldelastation.L’icône
de l’antenne avec une croix indique le niveau minimum du signal voire aucun
signal.L’icônedel’antenneindiquantlaforcedusignal,changelorsquevous
changez la position de l’antenne et/ou de la radio.
5. Répétez les points 1 à 4 ci-dessus pour rechercher d’autres canaux avec des
stations.
6. Appuyez deux fois sur le bouton MENU pour quitter le mode de syntonisation
manuelle de stations et revenir au menu DAB standard.
Réglages du niveau du Dynamic Range Control (DRC)
La fonction DRC permet de rendre des sons doux plus audibles lorsque la radio est
utilisée dans un environnement ou un endroit particulièrement bruyant.
1. En mode DAB, appuyer sur le bouton MENU, tournez le bouton de réglage
TUNINGjusqu’ceque“DRC”soitafchél’écran.Appuyezensuitesurle bouton
de réglage TUNINGpourconrmer.
2. Tournez
le bouton de réglage TUNING pour choisir le réglage DRC souhaité (le
réglage par défaut est Off).
DRC Off Le DRC est désactivé. La diffusion de la RDC sera ignorée.
DRC Low Le niveau DRC est réglé à la moitié du niveau émis par le diffuseur.
DRC High Le niveau DRC est réglé au max du réglage du diffuseur.
3. Appuyez sur le bouton de réglage TUNINGpourconrmerleréglage.L’écran
reviendraaumoded’afchageradiohabituel.
Remarque : certains diffuseurs DAB ne peuvent utiliser la fonction DRC. Si le diffuseur
n’utilise pas le DRC, alors le réglage DRC effectué sur la radio n’aura aucun effet.
Suppression des stations ( fonction Prune )
Lorsque vous vous rendez dans une autre région ou dans un autre pays, il se peut que
certaines stations ne soient plus disponibles. Il se peut également que certains services
DAB arrêtent d’émettre, changent d’emplacement ou de fréquence. La fonction « Prune
» (Suppression) permettra de supprimer de la liste des stations, les stations qui ne sont
plus disponibles.
1. En mode DAB, appuyez sur le bouton MENU.
2. Tournez
le bouton de réglage TUNING jusqu’à ce que « Prune Invalid » soit
afchél’écran.
3. Appuyez ensuite sur le bouton de réglage TUNINGpourconrmerleréglage.
4. Tournez
le bouton de réglage TUNING pour sélectionner « Oui » ou « Non » (par
default No). Pour activer la fonction Prune, sélectionner « Yes » (oui) ou sinon « no
» pour désactiver.
5. Appuyez ensuite sur le bouton de réglage TUNINGpourconrmerleréglage.
L'afchageretourneraaumenuDAB.
Remarque :
Sivousvousrendezdansuneautrerégionoudansunautrepays,ilestconseillé
d’effectuer une recherche des nouvelles stations disponibles. (Voir à cet effet le point «
Recherche de nouvelles stations »).
MODE FM
Utilisation de la radio en mode FM
1. Appuyez sur le bouton ON/OFF pour allumer la radio.
2. Appuyez sur le bouton SOURCE pour sélectionner la bande FM.
3. Si c'est la première fois que vous passez en mode FM, la station de la présélection
1 sera lue. Si la radio a déjà été utilisée, la dernière station écoutée sera lue.
4. Pour rechercher une station, appuyez sur le bouton de réglage TUNING. Le
balayages'arrêteautomatiquementlorsqu'iltrouveunestationsufsamment
puissante.
5. Aprèsquelquessecondes,l'afchagesemettrajouraveclenomdelastationsi
des informations RDS sont reçues.
6. Pour rechercher d'autres stations, appuyez à nouveau sur le bouton de réglage
TUNING.
7. Pour rechercher la station dans une direction opposée, tournez le bouton de
réglage TUNING dans le sens des aiguilles d'une montre (pour balayer des basses
fréquences aux hautes fréquences) ou dans le sens contraire des aiguilles d’une
montre (pour balayer des hautes fréquences aux basses fréquences), et appuyez
sur
le bouton de réglage TUNING.
8. Lorsquelandelabandedefréquencesestatteinte,laradiorecommencerala
syntonisation à partir de l'extrémité de la bande de fréquences opposée.

13 14
F
Syntonisation manuelle
1. Appuyez sur le bouton ON/OFF pour allumer la radio.
2. Appuyez sur le bouton SOURCE pour sélectionner la bande FM.
3. Tournez
le bouton de réglage TUNING pour atteindre la station FM souhaitée. La
fréquence changera par incréments de 50 kHz.
4. Tournez éventuellement l'antenne en caoutchouc pour obtenir une meilleure
réception. Lorsque la radio est réglée sur une station offrant une bonne réception et
captedesinformationsRDS,lenomdelastationseraafchél’écran.
5. Lorsquelandelaplagedefréquencesestatteinte,laradiorecommencerala
recherche depuis l'autre extrémité de la plage de fréquences.
Système d’information RDS
Le RDS (Radio Data System) est un système d'information par lequel des informations
numériques non audibles sont émises en plus du programme radio FM normal. Lorsque
laradiocapteunestationRDSetquelaréceptionestsufsammentbonne,lenomdela
station apparaîtra à l'écran. Un certain temps peut s’écouler avant que les informations
RDS soient disponibles.
Consultation des informations RDS
Lorsque vous écoutez une station FM comportant le système RDS, appuyez plusieurs
fois sur le bouton INFO pour parcourir les informations RDS disponibles. Ceci
fonctionneuniquementlorsquelaréceptionestsufsammentbonneetclaire.
a.Radiotext(RT) Afchedesmessagesdelastationquevousécoutez,
souslaformed’untextedélant.
b.Programtype(PTY) Afcheletypedestationquevousécoutez.Exemples:
Pop, Classique, Actualités, etc..
c.Frequency Afchelafréquencedelastationquevousécoutez.
e.Time&date Afchel’heureexacte(horloge24heures)etladate.
Réglage de la sensibilité de balayage
La radio effectue normalement un balayage de toutes les stations FM disponibles, y
compris celles dont le signal est faible. Il est toutefois possible de régler la fonction de
balayage automatique (Auto-scan) de telle sorte que seules les stations FM dont le
signal est assez fort pour offrir une bonne réception soient captées.
1. Appuyez sur le bouton ON/OFF pour allumer la radio.
2. Appuyez sur le bouton SOURCE et sélectionnez la bande FM.
3. Appuyez sur le bouton MENU. Tournez le bouton de réglage TUNING et
sélectionnez « Scan Setting » (Réglage de la sensibilité de balayage).
4. Appuyez sur le bouton de réglage TUNING.
5. Tournez
le bouton de réglage TUNING et sélectionnez « All Stations » (toutes les
stations) ou « Strong Stations » (Stations au signal fort). Le réglage par défaut est «
All stations » (toutes les stations).
Lorsque l’option « Strong stations » (Stations au signal fort) a été sélectionnée, la
radio recherchera, lors du balayage des stations, uniquement les stations dont le
signal est fort.
6. Appuyez sur le bouton de réglage TUNINGpourconrmervotresélectionet
revenir au menu FM standard.
PRÉSÉLECTION DE STATIONS
Mémorisation de stations présélectionnées
La radio possède 20 emplacements de mémoire de stations présélectionnées, 10 pour
la bande FM et 10 pour la bande DAB. Les stations présélectionnées seront conservées
dans la mémoire de la radio même en cas de coupure de courant.
1. Appuyez sur le bouton ON/OFF pour allumer la radio.
2. Appuyez sur le bouton SOURCE et sélectionnez la bande de fréquence souhaitée.
3. Sélectionnez la station souhaitée
4. Maintenez enfoncé le bouton de PRESETsouhaitéejusqu'cequelaradioafche
« Saved to preset ».
5. Répétez les points 3 et 4 ci-dessus pour les autres présélections.
6. Les stations présélectionnées et mémorisées peuvent être écrasées en répétant les
points 3 et 4 ci-dessus.
Rappel de stations présélectionnées
1. Appuyez sur le bouton ON/OFF pour allumer la radio.
2. Appuyez sur le bouton SOURCE et sélectionnez la bande de fréquence souhaitée.
3. Appuyez brièvement sur le bouton PRESET souhaité. Le numéro de la
présélection,parexemple«P1»,seraensuiteafchédanslecoininférieurdroitde
l'écran.
UTILISATION DE LA FONCTION BLUETOOTH
Couplage Bluetooth avec votre téléphone portable
1. Appuyez sur le bouton ON/OFF pour allumer la radio.
2. Sélectionnez le mode Bluetooth en appuyant sur le bouton SOURCE.
3. L'écranLCDafcheraunvoyantBluetoothclignotantdanslapartieinférieurede
l'écran lorsque la radio n'est pas encore couplée avec votre téléphone portable.
4. Dans votre téléphone portable, ouvrez le menu Paramètres et sélectionnez
Bluetooth, puis sélectionnez « RockBull » dans la liste des appareils Bluetooth
(les instructions de couplage Bluetooth peuvent varier selon le type de téléphone
portable, veuillez consulter le manuel de votre téléphone portable).

15 16
F
5. Lorsque le couplage Bluetooth est réussi, le voyant Bluetooth s'allumera et les
dernièresinformationsmusicalesluessurl'appareilportables'afchent.
Écouter de la musique depuis votre téléphone portable
1. Appuyez sur le bouton ON/OFF pour allumer la radio.
2. Sélectionnez le mode Bluetooth en appuyant sur le bouton SOURCE.
3. Commencez à lire de la musique en utilisant les lecteurs multimédias du téléphone
portable couplé.
4. Lalecturepeutêtrecontrôléepartirdutéléphoneportableouenappuyant sur le
bouton numérique « 3 », « 4 » ou « 5 » de la radio.
5. Unefoislalecturedelamusiquecommencée,lenomdelachansons'afcherasur
l'écran LCD.
Modes d'afchage
EnmodeBluetooth,laradiopeutafcherunegammed'informationssurlamusiqueen
cours de lecture sur l'écran. Appuyez sur le bouton INFO pour parcourir les différents
types.
a.Artist Afchelenomdel’artistedelapisteencoursdelecture.
b.Album Afchelenomdel’albumdelapisteencoursdelecture.
Liste des appareils
Dans la radio, vous pouvez sélectionner l’appareil Bluetooth à partir de la liste d’appareils
pour vous connecter à nouveau.
Lesnomsdel’appareilserontafchéssilenomdesappareilsBluetoothétaitconguré
dans les appareils portables. Veuillez consulter le manuel d’utilisation de votre appareil
mobilepourlescongurations.
Leslistesd’appareilspeuventêtrevériéescommeci-dessous:
1. En mode Bluetooth, appuyez sur le bouton MENU.
2. Tournez
le bouton de réglage TUNINGsur«Viewdetails»(Afcherlesdétails);
appuyez sur le bouton de réglage TUNING pour sélectionner le paramètre.
3. Tournez
le bouton de réglage TUNING vers la « Liste d’appareils couplés » ;
appuyez sur le bouton de réglage TUNING pour sélectionner le paramètre.
4. Tournez
le bouton de réglage TUNINGpourafcherlenomdesappareils.
5. Appuyez sur le bouton de réglage TUNING pour démarrer la reconnexion
Bluetooth. Le haut-parleur se connectera automatiquement à cet appareil portable.
Remarque : Il peut y avoir jusqu’à 8 noms d’appareil à stocker dans le haut-parleur. S’il
y a plus de 8 appareils mobiles connectés et stockés dans le haut-parleur, le nom de
l’appareil couplé le plus ancien sera effacé.
Remarque : si vous avez déjà supprimé le « RockBull » de votre appareil mobile
connecté, la reconnexion automatique sera infructueuse.
Redémarrer le couplage Bluetooth
La fonction Bluetooth peut être réglée pour fonctionner de différentes manières comme
ci-dessous :
1. En mode Bluetooth, appuyez sur le bouton MENU.
2. Tournez
le bouton de réglage TUNING vers les options « Setup Bluetooth »
(CongurationduBluetooth)etappuyezsurle bouton de réglage TUNING pour
sélectionner le paramètre.
3. La radio va essayer de déconnecter le Bluetooth déjà couplé, puis va être
disponible pour être connecté au nouvel appareil Bluetooth.
4. À ce moment, le voyant Bluetooth clignotera à l’écran jusqu’à ce que le nouveau
couplage Bluetooth soit terminé.
Remarque :«SetupBluetooth»(CongurationduBluetooth)estl’optionquiforcele
Bluetooth de cette radio à se déconnecter de votre téléphone portable et à entrer dans
le « mode de détection ». C’est la façon de permettre le couplage Bluetooth à un autre
appareil. Si aucun nouvel appareil n’est couplé, le Bluetooth essaiera automatiquement
de se connecter au dernier appareil lorsqu’il sera éteint et allumé à nouveau.
La fonction de gestion de l’alimentation automatique sera activée en mode Bluetooth.
S’il n’y a pas de signal Bluetooth pendant plus de 15 minutes, la radio passera
automatiquement en mode veille. Appuyer sur le bouton ON/OFF pour réveiller
l’appareil.
MODE AUX-IN
Une prise AUX-INstéréode3,5mmestprévuesurlecôtédelaradio,derrièrelecache
de protection en caoutchouc. Celle-ci permet d’y brancher des appareils audio externes
tels qu’un lecteur MP3 ou lecteur de CD (non fournis avec la radio).
1. Raccordez un câble audio à la prise AUX-IN.
2. Appuyez sur le bouton SOURCE pour sélectionner le mode AUX-IN. « AUX IN »
seraalorsafchél’écran.
3. Allumez et démarrez le lecteur externe.
4. Réglez le volume de la radio et du lecteur externe au niveau d’écoute souhaitée.
5. Après utilisation de la prise AUX-IN, replacez le cache de protection en caoutchouc
surlapriseand’éviterquedelapoussièreoudel’humiditépénètredanslaprise
et la radio.
Remarques : n’utilisez jamais la prise AUX-IN dans un environnement pluvieux ou
humide, de façon à éviter que de l’humidité pénètre dans la radio. Conservez dans ce
cas le cache de protection en caoutchouc toujours bien fermé.
La fonction de gestion automatique de l’alimentation sera activée en mode AUX-IN. En
l’absence de signal d’entrée de la prise AUX-IN pendant 15 minutes, la radio se mettra
automatiquement en mode standby (veille). Le voyant de fonctionnement et l’écran
s’étendront alors. Pour rallumer la radio, appuyez sur la touche ON/OFF (Marche/
Arrêt).
Other manuals for Rockbull
1
Table of contents
Languages: