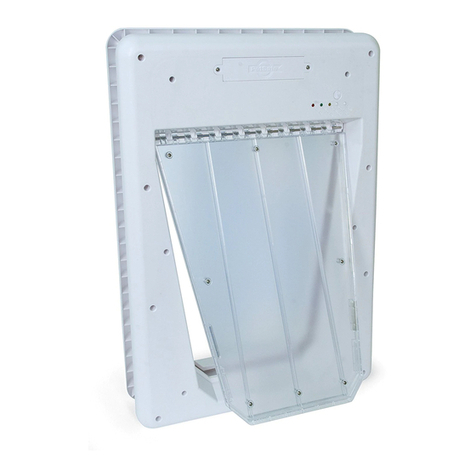
Petsafe Freedom PPA11-13098 User manual

Freedom™Patio Panel Pet Door
Panneau vitré Freedom™
Puerta para mascotas en Panel de patio Freedom™
Installation Guide / Manuel d’installation /
Manual de instalación
Model Numbers / Numéros de modèles /
Números de modelo
PPA11-13098
PPA11-13121
PPA11-13122
PPA11-13123
PPA11-13124
PPA11-13125
PPA11-13127
PPA11-13128
PPA11-13129
PPA11-13130
PPA11-13131
PPA11-13132
PPA11-13134
PPA11-13135
PPA11-13141
Please read this entire guide before installing.
Veuillez lire tout ce manuel avant de commencer.
Por favor, lea completamente esta guía antes de comenzar.

2 1-800-732-2677
Important Safety Information
Explanation of Attention Words and Symbols used in this guide
This is the safety alert symbol. It is used to alert you to potential personal injury
hazards. Obey all safety messages that follow this symbol to avoid possible injury
or death.
WARNING indicates a hazardous situation which, if not avoided, could
result in death or serious injury.
CAUTION, used with the safety alert symbol, indicates a hazardous
situation which, if not avoided, could result in minor or moderate injury.
NOTICE is used to address safe use practices not related to
personal injury.
• When children are present in the home, it is important to consider
the pet door during child proofing activities. The pet door may
be misused by a child resulting in the child accessing potential
hazards that may be on the other side of the pet door. Purchasers/
Homeowners with swimming pools should ensure that the pet
door is monitored at all times and that the swimming pool has
adequate barriers to entry. If a new hazard is created inside or
outside of your home, which may be accessed through the pet
door, Radio Systems®Corporation recommends that you properly
guard access to the hazard or remove the pet door. The closing
panel or lock, if applicable, is provided for aesthetic and energy
efficiency purposes and is not intended as a security device. Radio
Systems®Corporation will not be liable for unintended use and the
purchaser of this product accepts full responsibility for oversight of
the opening it creates.
• Power Tools. Risk of severe injury; follow all safety instructions for
your power tools. Be sure to always wear your safety goggles.
The user, prior to installation, must become familiar with all building
codes that may affect the installation of the pet door and determine,
along with a licensed contractor, its suitability in a given installation.
This pet door is not a fire door. It is important for the owner and
contractor to consider any risks that may be present inside or
outside of the pet door, and any risks that may be created by
subsequent changes to your property and how they may relate to
the existence and use, including misuse of the pet door.
• Keep these instructions with important papers; be sure to transfer these
instructions to the new owner of the property.
• Prior to installation and drilling, consult your sliding glass door
manufacturer’s warranty. Unauthorized changes or modifications may
void the warranty. Installing screws into vinyl door frames or door jambs
may crack the vinyl.
www.petsafe.net 3
Thank you for choosing the PetSafe®brand. You and your pet deserve a companionship that
includes memorable moments and a shared understanding together. Our products and training
tools promote a lifestyle of protection, teaching, and love—essentials that influence memories
for a lifetime. If you have any questions about our products or training your pet, please visit our
website at www.petsafe.net or contact our Customer Care Center.
PRODUCT WARRANTY
To get the most protection out of your warranty, please register your product within 30 days
at www.petsafe.net. By registering and keeping your receipt, you will enjoy the product’s
full warranty and should you ever need to call the Customer Care Center, we will be able to
help you faster. Most importantly, PetSafe®will never give or sell your valuable information to
anyone. Complete warranty information is available online at www.petsafe.net.
____________________________________________________________________________
Table of Contents
Components.................................................................................................................................. 4
Tools Needed ................................................................................................................................ 4
Key Definitions .............................................................................................................................. 4
Operating Temperatures................................................................................................................ 5
INSTALLING FREEDOM™PATIO PANEL PET DOOR
Measure..................................................................................................................................... 5
Install Patio Panel...................................................................................................................... 6
Attach Patio Panel..................................................................................................................... 7
Install Lock ................................................................................................................................ 8
Install Glass Sweep and Weather Stripping .............................................................................. 9
Train Your Pet .......................................................................................................................... 10
Closing Panel .............................................................................................................................. 11
Replacement Flaps...................................................................................................................... 11
Replacement Parts and Accessories .......................................................................................... 12
Terms of Use and Limitations of Liability..................................................................................... 12
Français...................................................................................................................................... 13
Español....................................................................................................................................... 24

4 1-800-732-2677
Components
Glass
Sweep
Weather Stripping
Panel Mounting Screws
(⅝" Sheet Metal Screws)
(6 pcs.)
Latch Mounting Screws
(¾" Flat Head Sheet Metal Screws)
(4 pcs.)
Closing Panel
Installation Guide
Freedom™
Patio Panel
Latch Assembly
Tools Needed
• Electric Drill
• 9/64” (3.5 mm) Drill Bit
• 7/64” (2.5 mm) Drill bit
• Phillips Screwdriver
• Tape Measure
• Scissors
• Tape
• Pencil
• Safety Glasses
NOTE: The PetSafe®Freedom™Patio Panel Pet Door can be installed in a recessed sliding glass
door frame. Contact our Customer Care Center or visit www.petsafe.net to purchase a metal
bracket kit, MPA00-12891, and installation instructions for a recessed frame installation.
Key Definitions
Replacement Flap Size- Overall flap size when removed from pet door
Flap Opening Size – Useable flap space for pet to enter and exit through the pet
door
Top Door Section- Section of Patio Panel with the glass

www.petsafe.net 5
Bottom Door Section - Section of Patio Panel with the pet door
Height Adjuster - A metal panel with springs located above the top door section to
adjust Patio Panel height
Sliding Glass Door Frame Opening - Opening in sliding glass door between the
upper door track and the lower door track
Exposed Sliding Glass Frame - Sliding glass door frame that is visible and exposed
in interior and exterior wall
Recessed Sliding Glass Frame - Sliding glass door frame that is flush with or barely
visible in interior or exterior wall
Rise - The height from the floor to the bottom of the flap in the pet door. It is the
height the pet must step over to enter or exit the pet door.
Patio Panel Rib Line - Raised ribbed lines on left and right side of Patio Panel frame
to indicate drilling outside of rib line area. Do not drill inside of the rib line as glass is
present and will break if drilling occurs in this area.
Operating Temperature Range: 0º F to 100º F (-18º C to 38º C)
Installing Your Freedom™Patio Panel
THE STEPS BELOW ARE FOR AN EXPOSED SLIDING GLASS FRAME INSTALLATION. IF
INSTALLING THE PATIO PANEL INTO A RECESSED SLIDING GLASS DOOR FRAME, CONTACT OUR
CUSTOMER CARE CENTER OR VISIT WWW.PETSAFE.NET FOR A METAL BRACKET KIT,
MPA00-12891 AND INSTALLATION INSTRUCTIONS.
NOTICE
Prior to installation and drilling, consult your sliding glass door manufacturer’s warranty.
Unauthorized changes or modifications may void the warranty. Installing screws into vinyl door
frames or door jambs may crack the vinyl.
Step
1
Measure
11
Prior to any Freedom™Patio Panel Pet Door
purchase, you must determine the height of
your sliding glass door frame opening. Measure
from highest point in upper door track to lowest
point in lower door track.

6 1-800-732-2677
Step
2
Install Patio Panel
Connection
Bar
Factory
Installed
Screws
On Each
Side
Bottom
Door
Section
2A
2A
NOTE: If you purchased a 96” Patio
Panel, first assemble the bottom section
to the top section before proceeding with
the installation. Remove the four factory
installed screws from sides of connection
bars on bottom door section. Align and slide
connection bars on bottom section into top
section. Reinstall and tighten the four screws
through the four pre-drilled holes on sides of
top door section into the connection bars.
NOTE: Remove all packaging materials,
including cardboard inserts inside the height
2B
adjuster.
2B
The Freedom™Patio Panel Pet Door inserts
into the opening in your sliding glass door
against the doorjamb. Your sliding glass door
will close against the Patio Panel.
With sliding glass door open, insert top of Patio
Panel with height adjuster into upper door track
on interior side of sliding glass door. Lift up and
position bottom of Patio Panel into lower door
track on interior side of the sliding glass door.
Ensure the side of the Patio Panel showing
flap screw heads is on the interior side of your
sliding glass door.
NOTE: You may need to pull down the height adjuster to fit the Patio Panel in your
sliding glass door track. Firmly pull down one side and then the other.
2C 2C
Move the Patio Panel against the
doorjamb.
The Patio Panel should fit flush
against the doorjamb without any gaps. Make
sure the height adjuster is fully extended and
not tilted to one side. Ensure you are satisfied
with the fit of the Patio Panel before drilling

www.petsafe.net 7
Step
3
Attach the Patio Panel
Pre-drilled
Holes
Height
Adjuster
3A 3A
Slide the Patio Panel out slightly from
door jamb to show pre-drilled holes in height
adjuster. Drill 7/64” (2.5 mm) holes through the
two pre-drilled holes on interior side of height
adjuster. Secure height adjuster to Patio Panel
using two 5/8” sheet metal screws. Slide Patio
Panel back against door jamb. Make sure it is
flush without any gaps.
12"
30.48 cm
1"
2.54 cm
3B
NOTE: If installing the Patio Panel into
a recessed sliding glass door frame,
contact our Customer Care Center or visit
www.petsafe.net for a Metal Bracket Kit,
MPA00-12891 and installation instructions.
NOTICE
Prior to installation and drilling, consult your
sliding glass door manufacturer’s warranty.
Unauthorized changes or modifications may
void the warranty. Installing screws into vinyl
door frames or door jambs may crack the vinyl.
3B
To install the Patio Panel into an exposed
sliding glass door frame, find the Patio Panel
center at top and mark on the sliding glass
door frame. Measure 12” from the top down the side of sliding glass door frame
and mark. Measure 1” above the pet door in the Patio Panel and mark on the
sliding glass door frame. Measure the center of the Patio Panel at the bottom and
mark on the sliding glass door frame.
3C 3C
Drill 9/64” (3.5 mm) clearance
holes through your sliding glass
door frame ONLY at the locations
you just marked. DO NOT DRILL
INTO THE PATIO PANEL AT THIS
TIME.

8 1-800-732-2677
3D 3D
Before drilling into the Patio
Panel, it is important not to drill
inside the Patio Panel rib lines
where the glass is located. Only
drill into outer edge section. You
may need to slide Patio panel
over slightly to correct before
drilling.
3E
Drill 7/64” (2.5 mm) holes through
the sliding glass door frame clearance
holes into the Patio Panel.
3E
3F
Fasten the Patio Panel to the
interior side of sliding glass door
frame using four 5/8” sheet metal
screws. DO NOT OVERTIGHTEN.
Step
4
Install Lock
DOOR MATING LINE
KEEPERLATCH
Patio
Panel
Vertical
Center Line
4A
NOTICE
Prior to installation and drilling, consult your
sliding glass door manufacturer’s warranty.
Unauthorized changes or modifications may
void the warranty. Installing screws into vinyl
door frames or door jambs may crack the vinyl.
4A
Close the sliding glass door tightly against
the Patio Panel. Determine the location for the
Latch at a convenient height for you from the
floor. Using the template provided (located on
the last page of the Installation Guide) align
vertical center line on template with the door
line between the sliding glass door and the
Patio Panel. Keep the latch side of the template to the right. Tape template in
place and mark locations for the mounting screws. Remove template.
3F

www.petsafe.net 9
NOTE: Inspect location of screw marks to make sure they will not be in contact
with glass on either the sliding glass door or the Patio Panel when drilling. If
needed, move the template over slightly and remark the screw holes.
Patio
Panel
4B 4B
Drill four 7/64” (2.5 mm) holes. DO NOT
drill completely through the other side of the
sliding glass door or Patio Panel.
Patio
Panel
4C 4C
Secure the latch and keeper with four
3/4” flat head sheet metal screws. DO NOT
OVERTIGHTEN.
Helpful Tip: If overtightening results and you
have stripped the connection, move the latch
slightly up or down and re-drill mounting
holes. Another option is to drill existing holes
to a larger size and install plastic anchors.
Plastic anchors can be purchased at any local
hardware or home improvement store.
Step
5
Install Glass Sweep and Weather Stripping
5A
Patio door shown here slightly open
Freedom™Patio Panel Pet Door
Install glass sweep here
Install weather stripping here
5A
The glass sweep should be
installed on the back edge of the
sliding glass door to form a seal
between the sliding glass door
and the stationary glass door. The
weather stripping should be
installed on the front edge of the sliding glass door to form a seal between the
Freedom™Patio Panel and the sliding glass door.

10 1-800-732-2677
5B 5B
Close the sliding glass door against the
Patio Panel. Clean and dry the back edge
of the sliding glass door. Position the glass
sweep at the top glass edge with the flexible
part touching the glass of the stationary door.
Carefully peel away the backing and press the
glass sweep in place as you move down to
the bottom of the door. Trim any excess with
scissors.
5C 5C
Open the sliding glass door. Clean and dry
the front edge of the sliding glass door. Position
the weather stripping at the top front edge
toward the interior side. Carefully peel away the
backing and press the weather stripping into
place as you move down to the bottom of the
door. Trim any excess with scissors.
Step
6
Train Your Pet
66
It may help for you to be on one side of the
door and your pet on the other. Lift the flap a
few inches and try to talk your pet through the
door. After your pet has gone through a few
times, allow the flap to touch your pet’s back
so they will become comfortable using the pet
door. If your pet will not go through the door,
tape the flap open until they use it on their own.
Helpful Tip: Try treats to encourage your
pet to go through the pet door and become
comfortable using it.

www.petsafe.net 11
Closing Panel
The Closing Panel slides in the track on the interior side of the
Freedom™Patio Panel Pet Door. It is useful during inclement
weather or to keep your pet from using the pet door.
Replacement Flaps
Replace & Adjust
During extreme changes in weather, vinyl flaps can shrink during cold months and stretch in
warmer months. Easily replace or adjust to ensure a snug fit during seasonal changes.
13
2
To Replace remove screws
from the interior frame of pet
door.
To Adjust slightly loosen
screws from interior frame of
pet door.
Remove bar and flap.
Slightly move bar away from
flap.
Replace new vinyl flap and
position horizontally and
vertically to fit into door frame.
Replace existing bar and tighten
screws in place.
Adjust flap horizontally
and/or vertically to fit
into door frame. Push bar
towards flap and tighten screws
in place.

12 1-800-732-2677
Replacement Parts and Accessories
To purchase replacement parts for your PetSafe®Freedom™Patio Panel Pet Door, contact
our Customer Care Center at 1-800-732-2677 or visit our website at www.petsafe.net.
Component Replacement Part Number
Small Replacement Flap PAC11-11037
Medium Replacement Flap PAC11-11038
Large and Large-Tall Replacement Flap PAC11-11039
Small Closing Panel MPA00-12831
Medium Closing Panel MPA00-12832
Large and Large-Tall Closing Panel MPA00-12833
Satin Latch Lock Assembly MPA00-12622
Bronze Latch Lock Assembly MPA00-12621
White Latch Lock Assembly MPA00-12620
Installation Hardware Kit MPA00-11823
Metal Bracket Kit MPA00-12891
Terms of Use and Limitation of Liability
1. Terms of Use
This Product is offered to you conditioned upon your acceptance without modification of the terms,
conditions and notices contained herein. Usage of this Product implies acceptance of all such terms,
conditions, and notices.
2. Proper Use
This Product is designed for use with pets where training is desired. The specific temperament of your
pet may not work with this Product. If you are unsure whether this is appropriate for your pet, please
consult your veterinarian or certified trainer. Proper use includes reviewing the entire Operating Guide
provided with your Product and any specific Caution statements.
3. No Unlawful or Prohibited Use
This Product is designed for use with pets only. This pet training device is not intended to harm, injure,
or provoke. Using this Product in a way that is not intended could result in violation of Federal, State
or local laws.
4. Limitation of Liability
In no event shall Radio Systems® Corporation be liable for any direct, indirect, punitive, incidental,
special or consequential damages, or any damages whatsoever arising out of or connected with the
use or misuse of this Product. Buyer assumes all risks and liability from the use of this Product.
5. Modification of Terms and Conditions
Radio Systems Corporation reserves the right to change the terms, conditions and notices under
which this Product is offered.

www.petsafe.net 13
Renseignements importants sur la sécurité
Explication des termes et des symboles d'avertissement dans ce guide
Ce symbole indique un avertissement de sécurité. Il sert à vous signaler d'éventuels risques
de blessure. Le non respect des consignes de sécurité accompagnées de ce symbole peut
engendrer des blessures graves ou fatales.
AVERTISSEMENT indique une situation dangereuse qui, si elle n'est pas évitée,
pourrait entraîner la mort ou des blessures graves.
ATTENTION, accompagné du symbole d'alerte de sécurité, indique une situation
dangereuse qui, si elle n'est pas évitée, pourrait causer une blessure légère ou de
gravité moyenne.
AVIS, indique les pratiques qui ne sont pas relatives aux blessures
corporelles.
• Si vous avez de jeunes enfants à la maison, il est important d'être
conscient des dangers que peut présenter la chatière. Un enfant pourrait
essayer de se glisser par la chatière et pourrait ainsi s'exposer aux
dangers se trouvant de l'autre côté de la porte. Si vous avez une piscine,
assurez-vous de toujours surveiller la chatière et que la piscine soit
entourée de barrières adéquates. Si vous effectuez une installation qui
pourrait créer un nouveau danger à l'extérieur ou à l'intérieur de votre
maison et que la chatière y donne accès, Radio Systems®Corporation
vous recommande de bloquer l'accès à ce danger potentiel ou de retirer la
chatière. Le battant à verrou et le bloc de verrou sont fournis dans un but
esthétique et de conservation d'énergie; ce ne sont pas des dispositifs de
sécurité. Radio Systems®Corporation ne saurait être tenue responsable
d'une utilisation incorrecte du produit; la responsabilité de surveiller
l'ouverture créée par ce dispositif revient entièrement à l'acheteur.
• Outils électriques. Risque de blessure grave; respectez toutes les
consignes de sécurité fournies avec vos outils électriques. Assurez-vous
de toujours porter des lunettes de protection.
Avant l'installation, l'utilisateur doit se familiariser avec les codes du
bâtiment pertinents à l'installation de la chatière et déterminer, avec
l'aide d'un professionnel dûment autorisé, si elle convient au bâtiment
concerné. Cette chatière n'est pas une sortie d'urgence. Il est important
que le propriétaire et le professionnel prennent en compte tous les
risques qui pourraient être présents d'un côté ou de l'autre de la chatière,
et tous les risques qui pourraient être créés suite à des modifications
futures effectuées sur la propriété en vertu de l'existence et de l'utilisation
(incorrecte) de la chatière.
• Conservez ce mode d'emploi avec vos autres papiers importants, et assurez-
vous de le mettre à la disposition de tout nouveau propriétaire.
• Avant l'installation et le perçage, consultez la garantie du fabricant de vos portes
coulissantes. Certaines modifications non autorisées pourraient rendre nulle
votre garantie. L'installation de vis dans des cadres en vinyle pourrait fendre le
vinyle.

14 1-800-732-2677
Merci d'avoir choisi la marque PetSafe®. Votre relation avec votre animal doit être faite de moments
mémorables et d'une complicité mutuelle. Nos produits et nos outils de dressage favorisent la protection,
le dressage et l'affection, des éléments essentiels pour garder des souvenirs pour la vie. Si vous avez
des questions sur nos produits ou sur le dressage de votre chien, visitez notre site, www.petsafe.net ou
communiquez avec notre Centre de service à la clientèle.
GARANTIE DU PRODUIT
Pour bénéficier pleinement de votre garantie, veuillez enregistrer votre produit dans un délai de 30 jours
sur le site www.petsafe.net. Pour que le produit soit totalement couvert par notre garantie, enregistrez-
le et conservez votre reçu; ceci permettra à notre service à la clientèle de vous aider plus rapidement.
PetSafe®promet de ne jamais communiquer ou vendre vos renseignements personnels à des tiers. Pour
obtenir tous les détails de votre garantie, visitez www.petsafe.net.
____________________________________________________________________________
Table des matières
Pièces........................................................................................................................................................... 15
Outils nécessaires ........................................................................................................................................ 15
Termes clés .................................................................................................................................................. 15
Température tolérée...................................................................................................................................... 16
INSTALLATION DU PANNEAU VITRÉ AVEC CHATIÈRE FREEDOM™
Prise des dimensions............................................................................................................................... 16
Installation du panneau............................................................................................................................ 17
Fixation du panneau ................................................................................................................................ 18
Installation du verrou ............................................................................................................................... 19
Installation de la raclette et du coupe-froid............................................................................................. 20
Apprenez à votre animal comment utiliser la chatière............................................................................. 21
Battant à verrou............................................................................................................................................ 22
Battants de rechange................................................................................................................................... 22
Pièces et accessoires de rechange.............................................................................................................. 23
Modalités d'utilisation et responsabilité limitée............................................................................................ 23

www.petsafe.net 15
Pièces
Coupe-froid
Raclette
Vis de fixation du panneau
(Vis à tôle de 5/8 po
à tête plate) (6 unités)
Vis de fixation du verrou
(Vis à tôle de 3/4 po à tête plate)
(4 unités)
Battant
Guide d'installation
Panneau vitré
Freedom™
Bloc de verrou
Outils
nécessaires
• Perceuse électrique
• Mèche de 3.5 mm (9/64 po)
• Mèche de 2.5 mm (7/64 po)
• Tournevis cruciforme
• Mètre
• Ciseaux
• Ruban adhésif
• Crayon
• Lunettes de protection
REMARQUE : Le panneau vitré avec chatière PetSafe®Freedom™peut être installé sur un cadre de porte
coulissante encastré. Communiquez avec notre Centre de service à la clientèle ou visitez
www.petsafe.net pour acheter un ensemble d'accessoires de fixation métalliques (MPA00-12891) et
obtenir un guide d'installation si vous souhaitez installer le panneau sur ce type de cadre.
Termes clés
Taille du battant de rechange - Taille du battant lorsqu'il n'est pas fixé à la chatière
Taille de l'ouverture – Espace nécessaire pour que les animaux puissent entrer et sortir par la
chatière
Section supérieure de la porte - Section vitrée de la porte

16 1-800-732-2677
Section inférieure de la porte - Section de la porte comportant la chatière
Sélecteur de hauteur - Panneau en métal muni de ressorts placé au dessus de la section
supérieure pour régler la hauteur du panneau vitrée
Ouverture du cadre de porte coulissante - Distance entre le rail supérieur et le rail inférieur
du cadre de porte coulissante
Cadre de porte coulissante apparent - Cadre de porte coulissante visible de l'intérieur et de
l'extérieur
Cadre de porte coulissante encastré - Cadre de porte coulissante qui longe un mur ou
rentre dans un mur
Hauteur de la chatière - La hauteur entre le sol et l'extrémité inférieure du battant de la
chatière. Il s'agit de la hauteur de l'obstacle que l'animal doit franchir pour entrer ou sortir par
la chatière.
Nervure du panneau vitré - Les nervures de chaque côté du cadre du panneau vitré
indiquent la zone dans laquelle il ne faut pas percer de trous. Ne percez pas de trous entre les
nervures, car la vitre est située en dessous de cette zone et pourrait être endommagée par
une perceuse.
Température tolérée : 0 ºF à 100 ºF (-18 °C à 38 °C)
Installation de votre panneau vitré Freedom™
LES INSTRUCTIONS QUI SUIVENT SONT POUR UN CADRE DE PORTE COULISSANTE APPARENT.
SI VOUS SOUHAITEZ INSTALLER LE PANNEAU SUR UN CADRE DE PORTE COULISSANTE
ENCASTRÉ, COMMUNIQUEZ AVEC NOTRE CENTRE DE SERVICE À LA CLIENTÈLE OU
VISITEZ WWW.PETSAFE.NET POUR OBTENIR UN ENSEMBLE D'ACCESSOIRES DE FIXATION
MÉTALLIQUES (MPA00-12891) ET UN GUIDE D'INSTALLATION.
AVIS
Avant l'installation et le perçage, consultez la garantie du fabricant de vos portes coulissantes.
Certaines modifications non autorisées pourraient rendre nulle votre garantie. L'installation de vis
dans des cadres en vinyle pourrait fendre le vinyle.
Étape
1
Prise des dimensions
11
Avant d'acheter un panneau vitré avec
chatière Freedom™, déterminez la hauteur du
cadre de vos portes coulissantes. Mesurez du
point le plus haut du rail supérieur au point le
plus bas du rail inférieur.

www.petsafe.net 17
Étape
2
Installation du panneau
Barre
de connexion
Vis
installées
en usine
de chaque
côté
Partie
inférieure
(section porte)
2A
2A
REMARQUE : Si vous avez acheté un panneau
vitré de 96 po, commencez par assembler la
partie inférieure et la partie supérieure avant de
poser le panneau. Retirez les quatre vis déjà
présentes sur les barres de connexion de la
section inférieure. Alignez les barres de connexion
de la section inférieure et insérez-les dans la
section supérieure. Revissez ensuite les quatre vis
en les plaçant dans les trous prévus à cet effet sur
les côtés de la section supérieure.
REMARQUE : Retirez tous les matériaux
d’emballage, y compris les morceaux de carton
dans le sélecteur de hauteur.
2B
2B
Le panneau vitré avec chatière Freedom™
s'insère dans l'espace entre la porte vitrée
coulissante et le cadre de la porte. Votre porte
coulissante se fermera ainsi contre le panneau
vitré.
Ouvrez la porte vitrée coulissante et insérez la
partie supérieure du panneau vitré équippé du
sélecteur de hauteur dans le rail de guidage
supérieur du côté intérieur de la porte coulissante.
Soulevez et positionnez la partie inférieure du
panneau vitré afin de l'insérer dans le rail de
guidage inférieur du côté intérieur de la porte
coulissante. Assurez-vous que les vis du battant
soient du côté intérieur de la porte coulissante.
REMARQUE : Il peut être nécessaire d'abaisser le sélecteur de hauteur pour pouvoir
insérer le panneau vitré dans le rail de guidage de votre porte vitrée coulissante. Pour le
descendre, appuyez fermement d'un côté, puis de l'autre.
2C 2C
Poussez le panneau vitré contre le cadre de la
porte.
Le panneau vitré devrait être collé
contre le cadre de la porte sans aucun espace.
Assurez-vous que le sélecteur de hauteur soit bien
sorti et qu'il ne soit pas oblique. Avant de percer
des trous, assurez-vous que le panneau vitré soit
installé correctement.

18 1-800-732-2677
Étape
3
Fixation du panneau
Trous
préforés
Adaptateur
de hauteur
3A
3A Faites glisser le panneau vitré afin de voir les
trous préforés du sélecteur de hauteur. Percez des
trous de
2.5 mm (7/64 po)
dans le panneau en
faisant passer la mèche de la perceuse dans les
trous préforés du côté intérieur du sélecteur de
hauteur. Vissez le sélecteur de hauteur à l'aide de
deux vis à tôle à tête plate de 5/8 po. Faites glisser
le panneau contre le cadre de porte. Assurez-vous
qu'il soit collé contre le cadre sans aucun espace.
12 po
30.48 cm
1 po
2.54 cm
3B
REMARQUE : Si vous souhaitez installer le
panneau sur un cadre de porte coulissante
encastré, communiquez avec notre Centre de
service à la clientèle ou visitez www.petsafe.net
pour obtenir un ensemble d'accessoires de
fixation métalliques (MPA00-12891) et un guide
d'installation.
AVIS
Avant l'installation et le perçage, consultez
la garantie du fabricant de vos portes
coulissantes. Certaines modifications non
autorisées pourraient rendre nulle votre
garantie. L'installation de vis dans des cadres
en vinyle pourrait fendre le vinyle.
3B
Pour installer le panneau vitré dans un cadre
de porte coulissante apparent, trouvez le centre du
panneau vitré et faites une marque sur la partie
supérieure du cadre de la porte. Faites une marque à 12 po de l'extrémité supérieure du
cadre de porte. Faites une autre marque à 1 po au dessus de la chatière sur le cadre de
porte. Faites une marque sur la partie inférieure du cadre de porte au niveau du centre du
panneau vitré.
3C 3C
Percez des trous de
3.5 mm
(9/64 po)
dans le cadre de la porte
UNIQUEMENT aux endroits marqués.
NE PERCEZ PAS DE TROUS
DANS LE PANNEAU VITRÉ POUR
L'INSTANT.

www.petsafe.net 19
3D 3D
Avant de percer des trous dans
le panneau vitré, il faut faire attention
de ne pas percer de trous à l'intérieur
des nervures, qui indiquent où se
trouve le verre. Ne percez des trous
qu'à l'extérieur des nervures. Il se
peut que vous deviez faire glisser
légèrement le panneau avant de le
percer.
3E
Percez des trous de
2.5 mm
(7/64 po)
dans le panneau vitré
en faisant passer la mèche de la
perceuse par les trous percés dans
le cadre de porte.
3E
3F
Fixez le panneau au côté intérieur du
cadre de porte en le vissant avec quatre
vis à tôle à tête plate de
5/8
po. NE PAS
SERRER TROP FORT.
Étape
4
Installation du verrou
DOOR MATING LINE
KEEPER LATCH
Panneau
Ligne
verticale
centrée
4A
AVIS
Avant l'installation et le perçage, consultez
la garantie du fabricant de vos portes
coulissantes. Certaines modifications non
autorisées pourraient rendre nulle votre
garantie. L'installation de vis dans des cadres
en vinyle pourrait fendre le vinyle.
4A
Fermez la porte coulissante contre le panneau
vitré. Déterminez l'emplacement du verrou en
choisissant la hauteur la plus pratique. Utilisez
le gabarit fourni (que vous trouverez en dernière
page du guide d'installation), et alignez la ligne de
contact de la porte avec l'espace entre la porte
coulissante et le panneau vitré. Gardez le côté loquet du gabarit à droite. Collez le
gabarit à l'aide de ruban adhésif et faites des marques pour indiquer l'emplacement
des vis. Retirez le gabarit.
3F

20 1-800-732-2677
REMARQUE :
Vérifiez l'emplacement des marques afin de vous assurer qu'elles ne
nécessitent pas de percer des trous dans le verre, aussi bien sur la porte coulissante que sur
le panneau. Si nécessaire, déplacez légèrement le gabarit et faites de nouvelles marques.
Panneau
4B 4B
Percez quatre trous de
2.5 mm (7/64 po)
. NE
PERCEZ PAS complètement au travers de la porte
coulissante ou du panneau vitré.
Panneau
4C 4C
Vissez le loquet et le mentonnet à l'aide de
quatre vis à tôle à tête plate de
3/4
po. NE PAS
SERRER TROP FORT.
Conseil utile : Si une vis a été trop serrée et qu'elle
ne tient plus en place, déplacez légèrement le
verrou et percez de nouveaux trous. Vous pouvez
également percer des trous plus gros au même
endroit et installer des chevilles en plastique. Vous
trouverez ce type de cheville dans la plupart des
quincailleries et des magasins de bricolage.
Étape
5
Installation de la raclette et du coupe-froid
5A
La porte vitrée est illustrée ici,
légèrement ouverte
Panneau vitré avec chatière Freedom™
Installez la raclette ici
Installez le coupe-froid ici
5A
La raclette doit être installée
sur le bord arrière de la porte vitrée
coulissante afin de former un joint entre
la porte coulissante et la porte fixe. Le
coupe-froid doit être installé à l’avant de la porte vitrée coulissante afin de former un
joint entre le panneau vitré Freedom™
et la porte coulissante.
This manual suits for next models
14
Table of contents
Languages:
Other Petsafe Door manuals
Popular Door manuals by other brands

Johnson Hardware
Johnson Hardware 100SD Series installation instructions

Thermador
Thermador LFTD30M Use and care/installation manual

Horton
Horton REVOLVING DOOR owner's manual

JR Home
JR Home RetractAway Installation instructions / warranty

Norton
Norton 8341ST installation instructions

Johnson Hardware
Johnson Hardware 1138 Series instructions