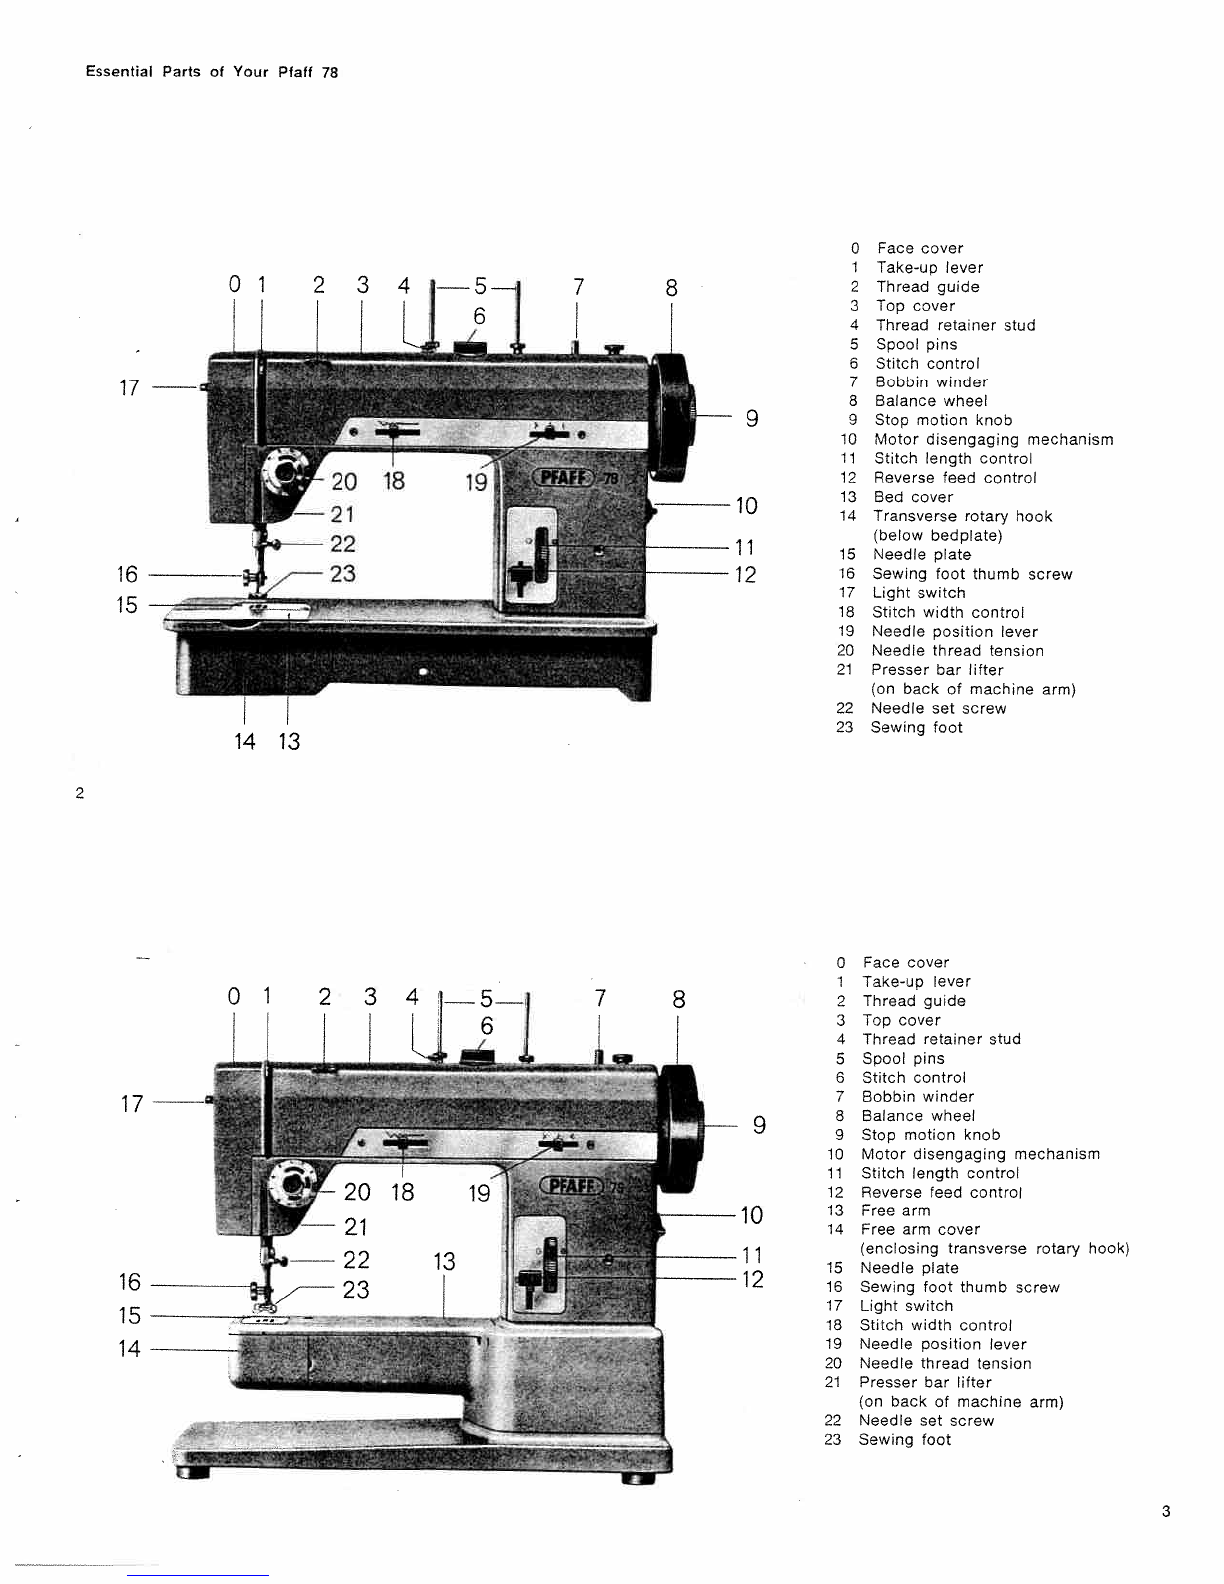
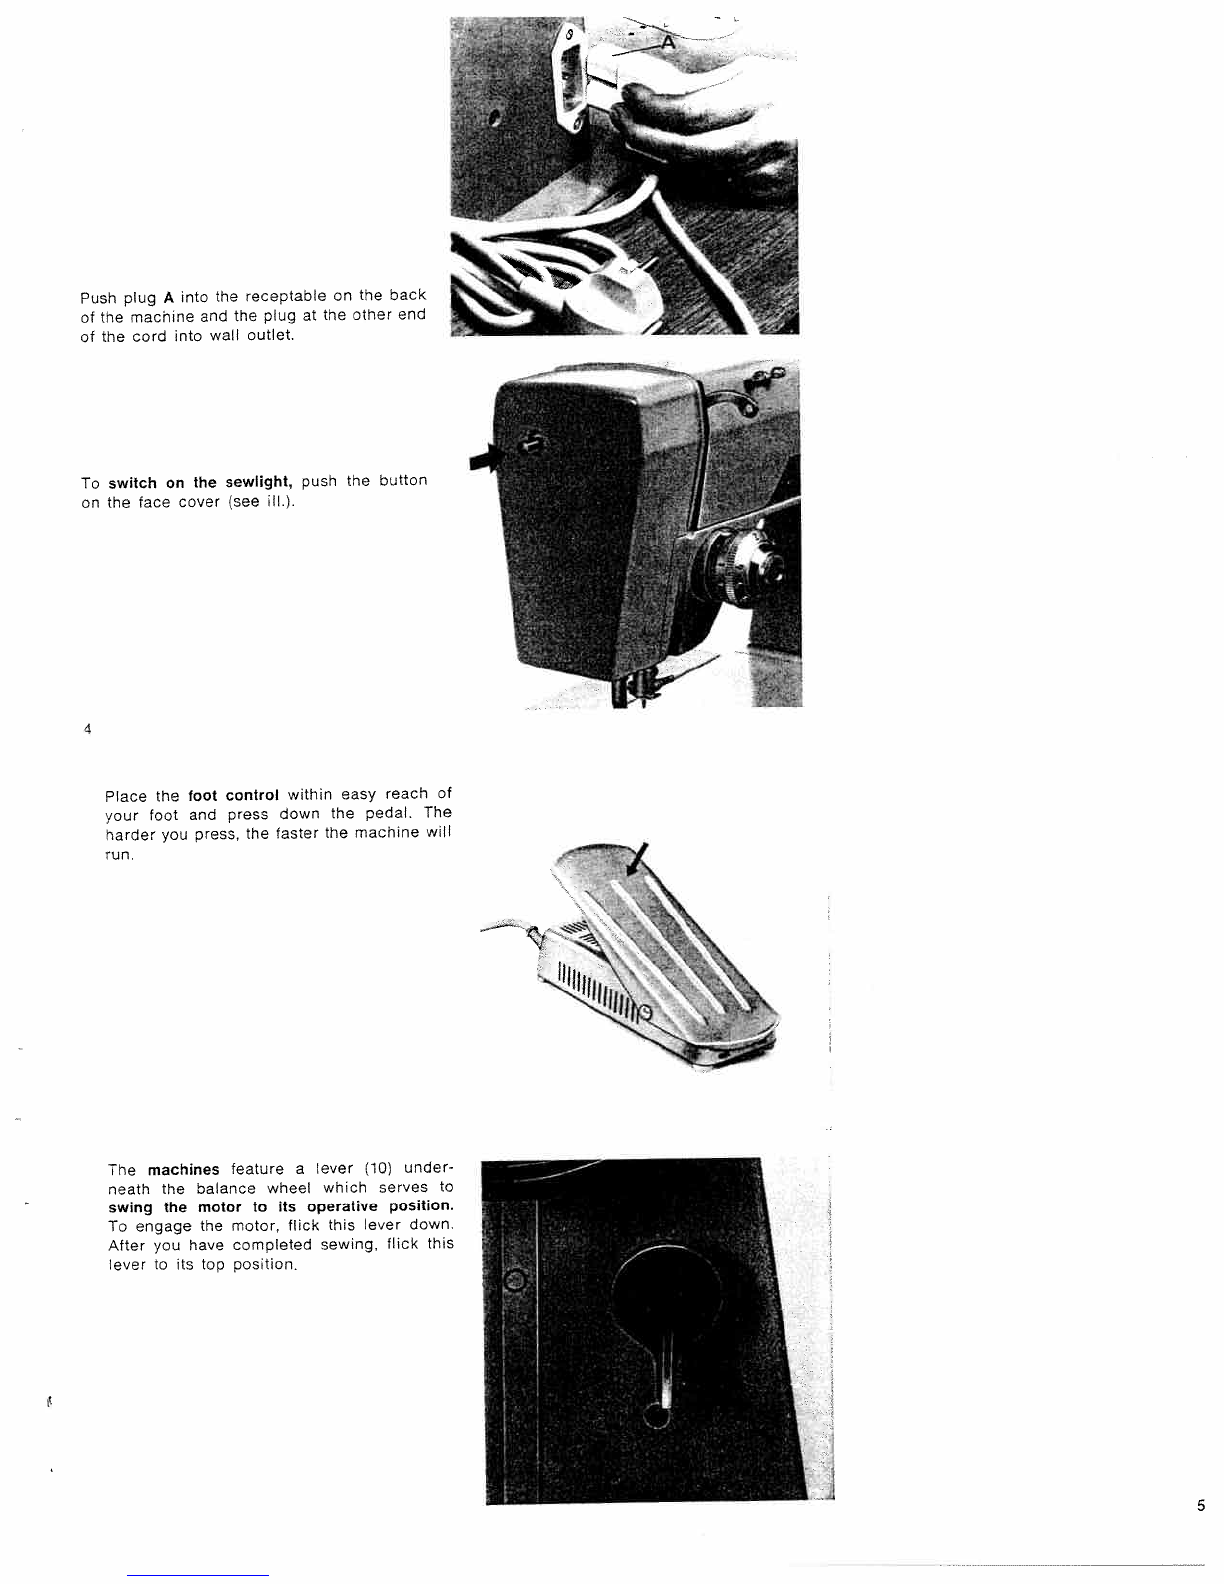
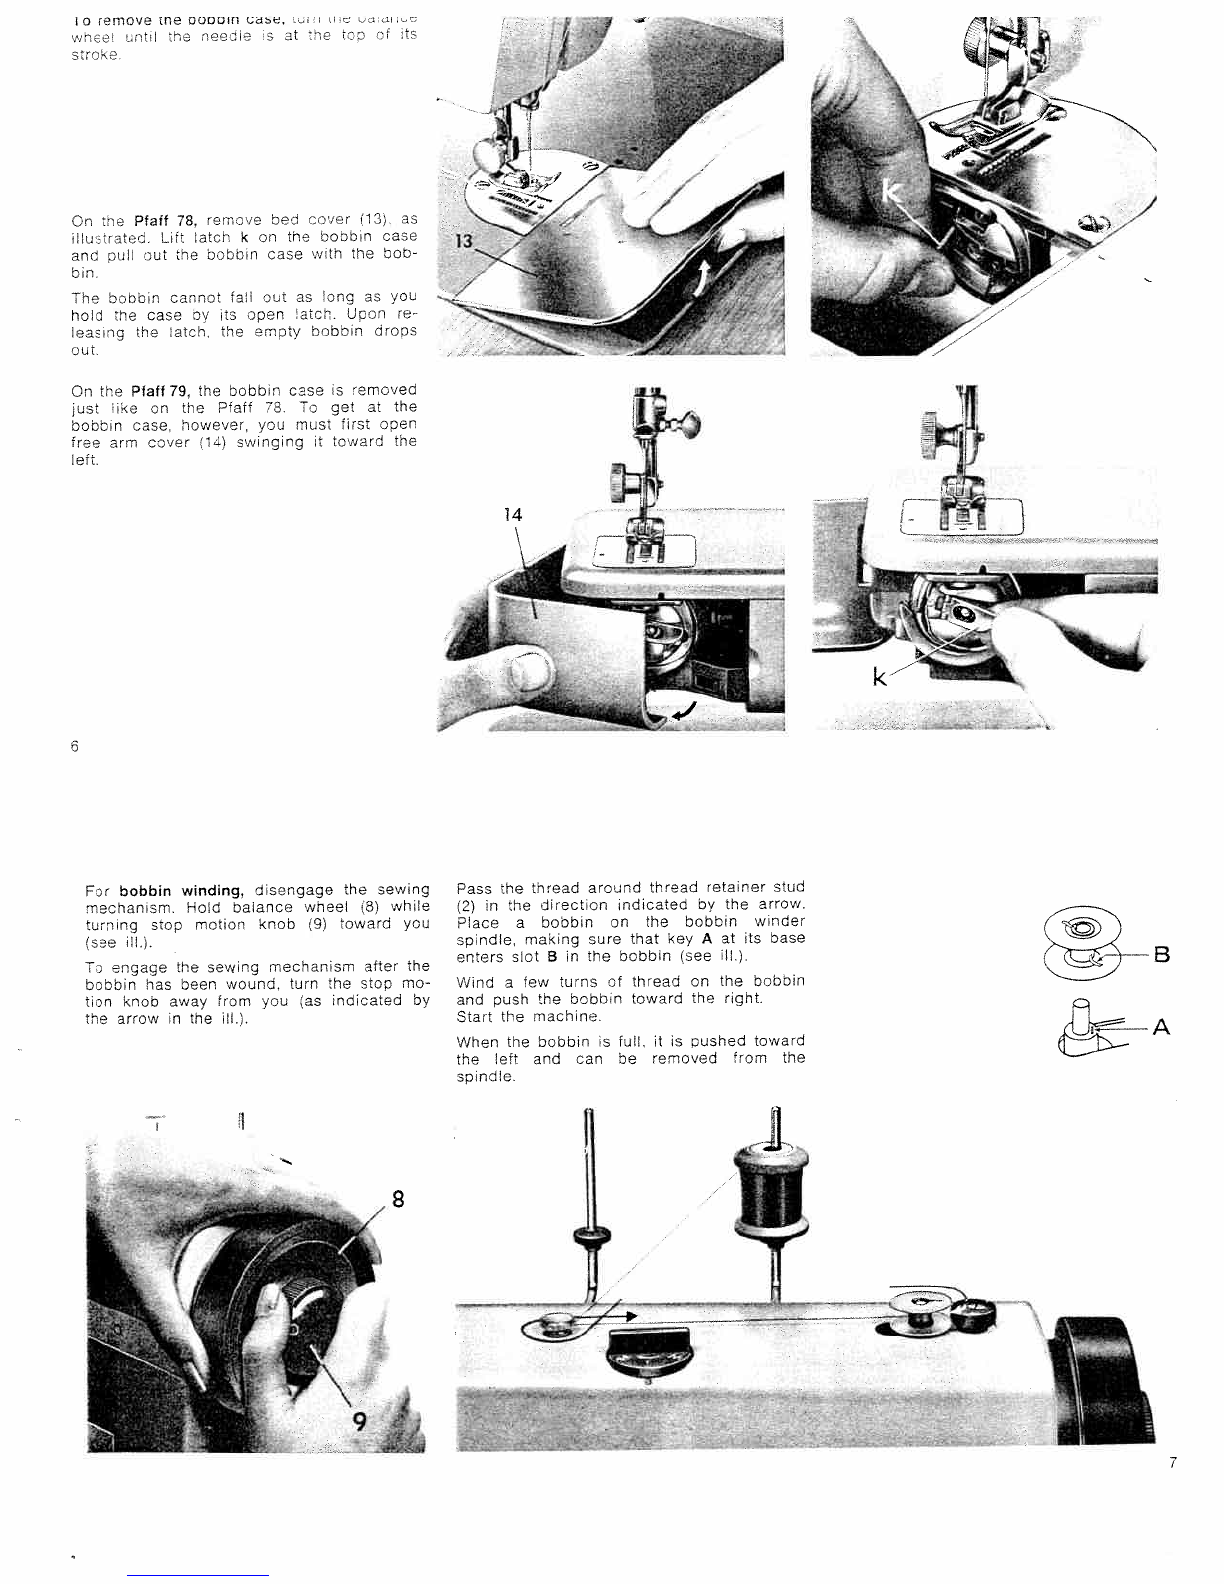
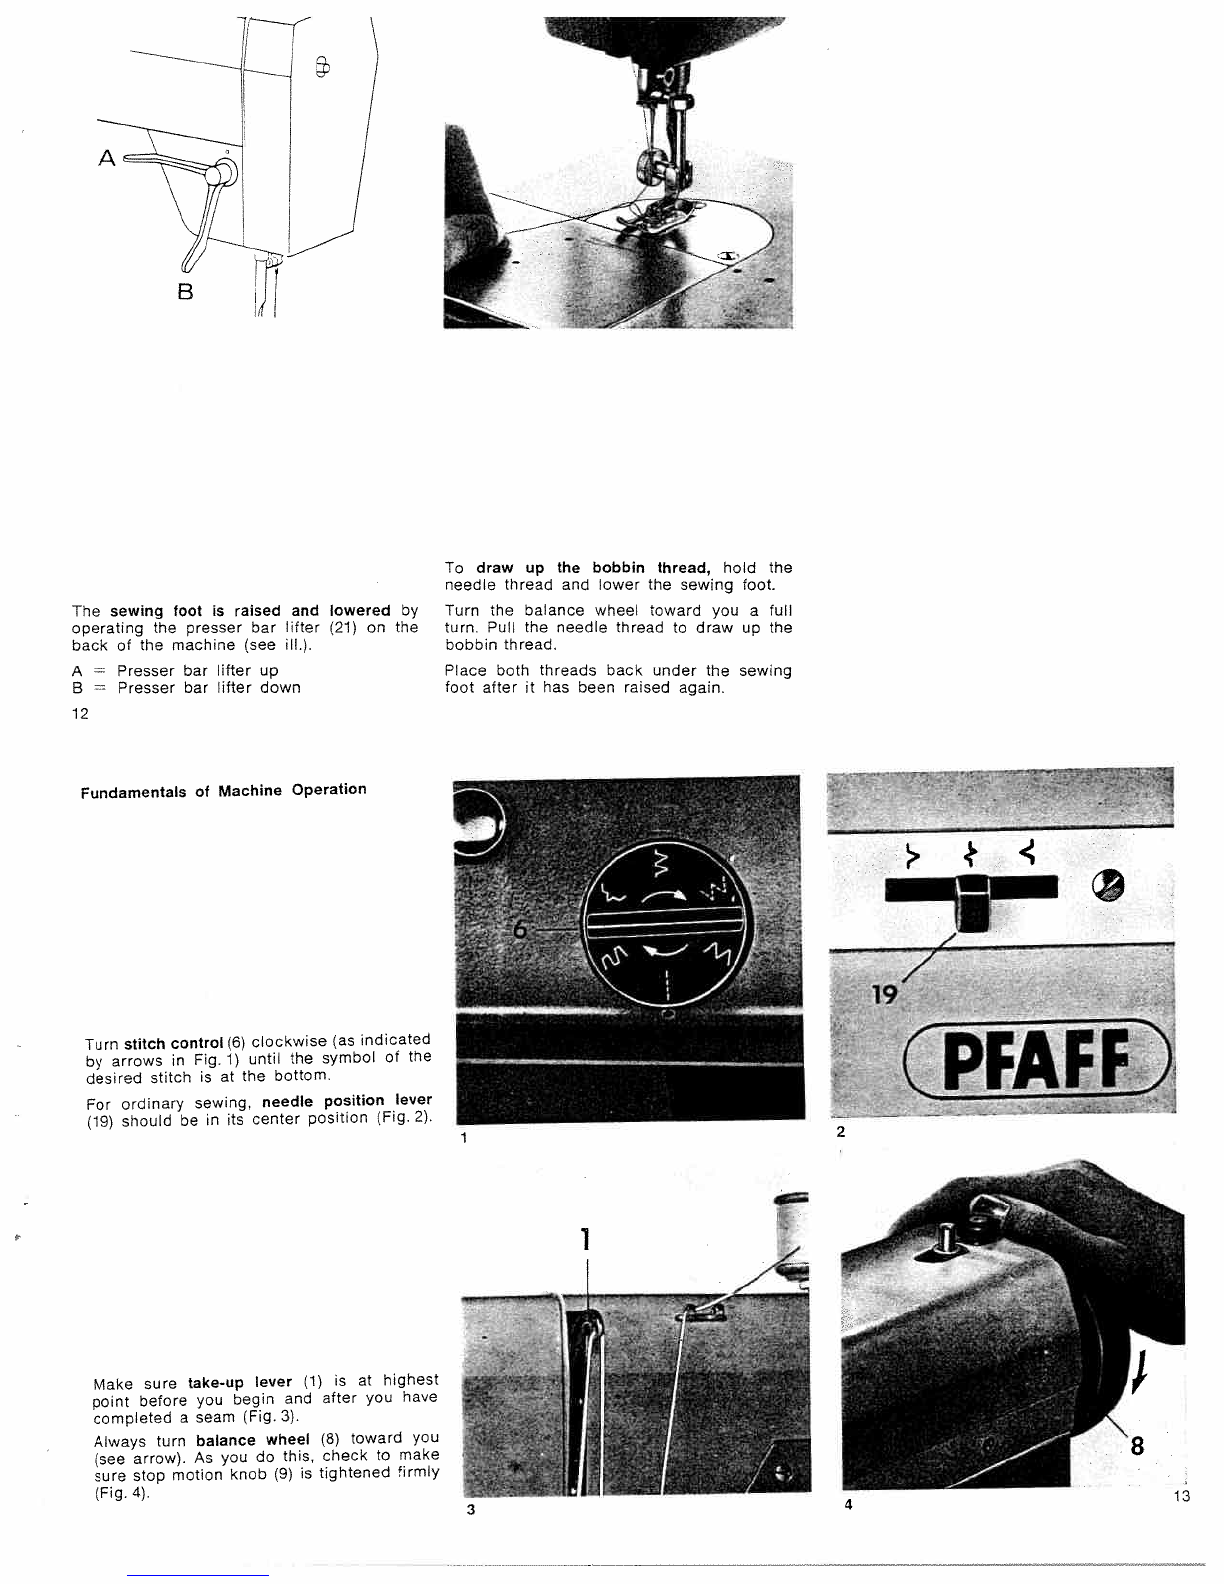
Pfaff 78 User manual
Other Pfaff Sewing Machine manuals

Pfaff
Pfaff Cover style 4850 User manual

Pfaff
Pfaff 1243 Guide

Pfaff
Pfaff 1183 User manual

Pfaff
Pfaff 130-6 User manual

Pfaff
Pfaff 3339 User manual

Pfaff
Pfaff Hobby 350 p User manual

Pfaff
Pfaff Coverstyle User manual

Pfaff
Pfaff 3811-3/55 User manual

Pfaff
Pfaff 1571 User manual

Pfaff
Pfaff Creative 2140 User manual

Pfaff
Pfaff 1245 User manual

Pfaff
Pfaff CREATIVE 4.0 - User manual

Pfaff
Pfaff tipmatic tiptronic 1151 User manual

Pfaff
Pfaff 3827-4/33 User manual

Pfaff
Pfaff CREATIVE 4.0 - Quick start guide

Pfaff
Pfaff 422 User manual

Pfaff
Pfaff QUILT EXPRESSION 4 User manual

Pfaff
Pfaff Punching Machine Hobby 350p User manual

Pfaff
Pfaff 583 User manual

Pfaff
Pfaff 63 User manual