Phason AutoFlex Connect II User manual

Phason 34440600
AutoFlex Connect II display kit
This procedure explains how to install AutoFlex Connect II
display kit (model KAFXC2-DISPLAY). Follow the steps in the order
they are listed.
A. Create a new database backup
B. Shut down AutoFlex Connect
C. Verify the database backup
D. Remove the old display
E. Install the new display
F. Power on and test the system
A. Create a new database backup
If your AutoFlex Connect II is not functioning, skip to section B.
Create the backup on the new USB drive that DOES NOT have the WARNING label.
Your control might look different than the pictures in the examples but the
procedure is the same.
1. At the control, press the main menu and then
Administration.
2. On the Admin Panel, press Diagnostics.
3. Press Eject USB and then press Yes. Follow
the instructions on the screen. If a message
displays that it is safe to remove the USB
drive, DO NOT press Okay.
4. Loosen the three screws that secure the cover
and then open the cover.
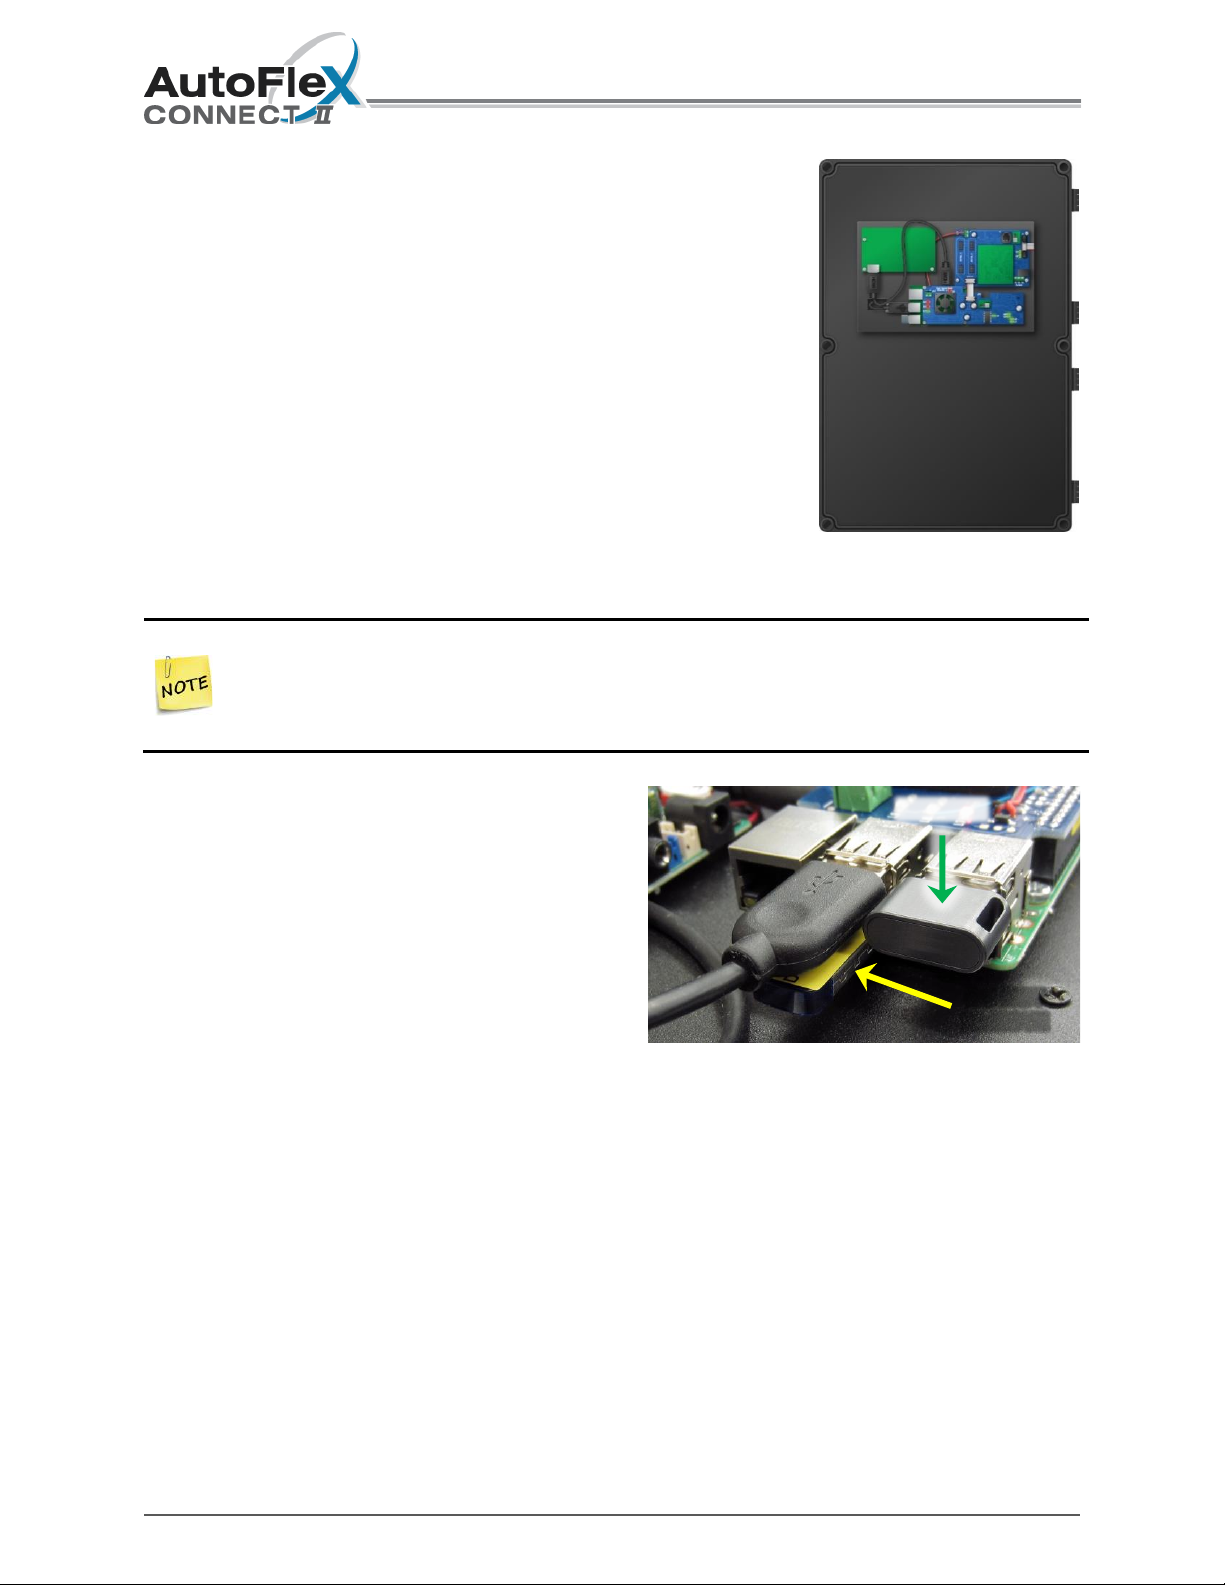
5. Remove the USB drive that DOES NOT have the WARNING label.
6. On the new display, remove the USB drive that DOES NOT have the WARNING label.
7. Plug the new USB drive into the port where you removed the old USB drive from in step 4.
8. Press Okay.
9. Swipe to the right or left until you see the Backup Database icon.
10. Press Backup Database.
11. Press Yes and then wait for the backup to complete.
12. Eject the USB drive as you did in step 3.
13. Remove the USB drive.
14. Plug the old USB drive into the port and then press Okay.
REMOVE
DO NOT
REMOVE

Phason 34440600
B. Shut down AutoFlex Connect II
If you can access the menus at the control or from a web browser, start at step 1. If
you cannot access the menus, start at step 3.
1. On the Diagnostics screen, swipe right or left until you see the Shut Down Display icon.
2. Press Shut Down Display.
The control goes through a shutdown process. When the message “It is now safe to turn off the
control.” displays, you can go to the next step.
3. Open the cover of the control.
4. Switch off or disconnect the power to the control.
5. Wait for the red light on the controller board to go off. This can take from 3 to 5 minutes.
C. Verify the database backup
If you successfully completed section A, skip this section and go to section D.
1. Loosen the three screws that secure the cover and then open the cover.
2. Remove the USB drive that DOES NOT have the WARNING label.
3. Plug the USB drive into a USB port on a computer.
4. Find the Backups folder on the USB drive. The
folder should have all the backups that have been
saved. The file names include the date of the
backup.
5. Save a copy of the most recent valid backup to your
computer. The file size must be greater than 0.
i. Right-click the latest backup and then select
Copy.
ii. Right-click the folder on your computer where you would like to save the file and then
select Paste. A copy of your backup should now be in the folder you selected.
NOTE: If you do not have a valid backup, you will need to reprogram the control after replacing
the display. Skip to section D.
Not a valid backup.
File size must be larger, like the other ones.

Phason 34440600
6. Right-click the USB drive and then select Eject.
7. Unplug the USB drive from your computer.
8. Plug the USB drive from the new display into the computer.
9. Find the Backups folder on the USB drive.
10. Locate the backup file that you copied to your computer and then copy it to the new USB drive.
a. Right-click the backup file and then select Copy.
b. Right-click the Backups folder on the USB drive and then select Paste.
A copy of your backup should now be in the folder.
11. Right-click the USB drive and then select Eject.
12. Unplug the USB drive from your computer.
13. Plug the USB drive into the new display controller.
D. Remove the old display
Switch OFF the incoming power at the source.
1. Make sure the red light in step 5 from section B is off.
2. Unplug the ribbon cable that connects the display to the module
mounting board.
3. Remove the two screws and washers from each of the four hinges.
Start from the bottom and move up to the top. Save the screws and
washers for later.
4. Place the display aside.
E. Install the new display
1. Remove any silicone or debris from the hinge mounting holes.
2. Place a small amount of silicone in each of the holes; just enough to fill them.
3. Have someone align and hold the display in place while you fasten each hinge to the base using
two washers and two screws. Start at the top hinge and then work downward.
4. Connect the ribbon cable from the module mounting board to the Communication Controller.
5. Verify all wires, cables and USB drives are properly connected.

F. Power on and test the system
1. Read the Important power supply information below.
2. Switch on the power to the control and wait for the startup process to complete.
3. Make sure the system is functioning normally.
If there is no power or no display make sure the ribbon cables are properly connected.
If there is no display, make sure the HDMI and power cables are properly connected.
Screen does not respond to touches, make sure the USB cable is properly connected.
4. Close the cover and tighten the three screws.
Important information about the power supply
Immediately after powering up the control, remove the plastic tab (A) from between
the battery and contact of the battery holder.
If the control will be powered off for more than two days
1. Shut down the control normally.
2. Wait for L6 (B) to go OFF.
3. Reinsert the tab between the battery and contact. L1 and L2 (C) will be OFF when the tab is
correctly inserted.
A
C
B
Phason
2 Terracon Place Phone: 204-233-1400
R2J 4G7 Web: www.phason.ca
Other manuals for AutoFlex Connect II
2
This manual suits for next models
1
Table of contents