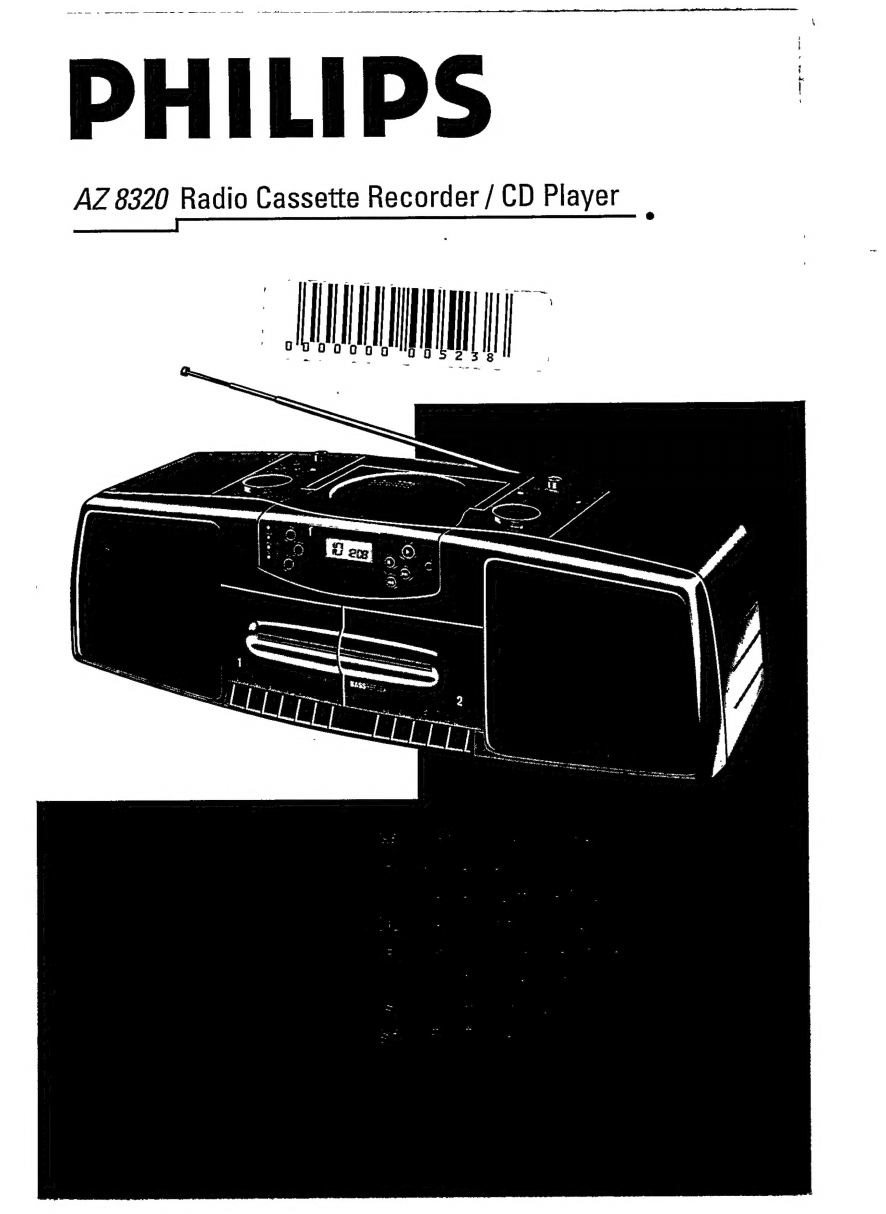
Philips AZ8320 User manual

PHILIPS
AZ
8320
Radio
Cassette
Recorder
/
CD
Player
RIT
RE
moi
0000

CE)
Espana
Declaración
de
conformidad
con
normas
El
que
suscribe,
en
nombre
y
representación
de:
Audio
Electronics
Sdn.
Berhad
-
Penang
declara,
bajo
su
propia
responsabilidad,
que
el
equipo:
radiocasete
-
lector
de
CD
fabricado
por:
Audio
Electronics
Sdn.
Berhad
en:
Far
East
marca:
Philips
modelo:
AZ
8320
objeto
de
esta
declaración,
cumple
con
la
normativa
siguiente:
Reglamento
sobre
Perturbaciones
Ra-
dioeléctricas,
Real
Decreto
138/1989,
Anexo
V.
Hecho
en:
Malaysia,
01-08-1992
Firma:
rebas
e
Nombre:
Khoo
Bee
Im
Cargo:
Safety
Coordinator
@ex)
México
KOM
PRECAUCION
-
ADVERTENCIA
“No
abrir,
riesgo
de
choque
eléctrico
IN
ATENCIÓN
Verifique
que
el
voltaje
de
alimentación
sea
el
requerido
para
su
aparato
Para
evitar
el
riesgo
de
choque
eléctrico,
no
quite
la
tapa.
En
caso
de
requerir
servicio,
diríjase
al
personal
calificado.
Es
necesario
que
lea
cuidadosamente
su
instructivo
de
manejo.
Garantía
y
Seguridad
........................
sess
página
37
Danmark
Typeskiltet
findes
pà
undersiden
af
apparaten.
Dette
produkt
overholder
kravene
til
radio-interferens
af
Europæisk
Fællesskab.
Bemærk:
Netafbryderen
er
sekundært
indkoblet
og
afbryder
ikke
strømmen
fra
nettet.
Den
indbyggede
netdel
er
derfor
tilsluttet
til
lysnettet
så
længe
net-
stikket
sidder
i
stikkontakten.
Advarsel:
Usynlig
laserudstráling
ved
ábning
når
sikkerhetsafbrydere
er
ude
af
funktion.
Undgå
udsættelse
for
stråling.
(ND)
Norge
Typeskilt
finnes
på
apparatens
underside.
Observer:
Nettbryteren
er
sekundert
innkoplet.
Den
innebygde
netdelen
er
derfor
ikke
frakoplet
nettet
sà
lenge
apparatet
er
tilsluttet
nettkontakten.
Australia
Guaramee,..
cileni
page
36
(iz
New
Zealand
GUANO
allea
page
36
2
INDEX
English
Illustrations
page
3
CF)
Francais
|
Illustrations
page
8
page
3
Francais
©)
Deutsch
Abbildungen
Seite
12
Seite
3
pagina
16
pagina
3
(D
Nederlands
Afbeeldingen
CE)
Espanol
llustraciones
_
página
20
'
pàgina
3
CD
Italiano
Illustrazioni
pagina
24
pagina
3
italiano
sida
28
sida
3
Cs)
Svenska
Figurer
Svenska
CLASS
1
LASER
PRODUCT

AC
MAINS
VOLTAGE

CONTROLS
TOP
AND
FRONT
PANEL
-
fig.
1
(
VOLUME
control
(2HIGH
SPEED
DUBBING
-
to
copy
a
cassette
at
high
speed
(S
POWER
-
on/off
switch
@
DYNAMIC
BASS
BOOST
-
bass
button,
press
to
boost
the
bass
response
©)
FM
STEREO
-
FM
stereo/mono
button
(STONE
control
(MODE
-
to
select
the
sound
source
(S)
OPEN-CLOSE
-
to
open
the
CD
cover
@
BAND
SELECTOR
-
to
select
the
wave
band
FINE
TUNING
-
for
SW
stations
(not
on
all
versions)
a)
TUNING
knob
42
POWER
-
on/off
indicator
(3
DBB
:%
-
Dynamic
Bass
Boost
switched
on
HIGH
SPEED
%
High
Speed
Dubbing
switched
on
(5
FM
STEREO
3%
FM
stereo
reception
(9
cassette
deck
1
keyboard
(recording/playback):
RECORD
e
PLAY
>
REWIND
««
-
fast
rewind
F.FWD
»»
-
fast
forward
wind
STOP-EJECT
E
PAUSE
It
@
CD
keyboard
and
display:
PLAY-PAUSE
»
play
and
pause
button
STOP
Il
button
4
PREVIOUS/NEXT
>»:
in
position
playback
or
STOP,
press
briefly
to
jump
to a
previous
He
or
next
»»
track
during
playback,
keep
pressed
to
search
fast
back-
ward
m«
or
forward
»»:
.
INTROSCAN
-
to
play
only
the
beginning
of
each
track
MEMORY
-
press
briefly
to
store
the
displayed
track
number
in
the
memory
press
longer
than
1
second
to
display
all
stored
track
numbers
MODE
-
press
so
many
times
until
the
required
function
appears
in
the
display:
SHUFFLE
play
all
tracks
in
a
random
order
SHUFFLE
REPEAT
continuously
repeat
the
CD
in
the
SHUFFLE
mode
REPEAT
ALL
(MEMORY)
continuously
repeat
the
CD
(or
the
stored
selection
-
MEMORY)
REPEAT
1
continuously
repeat
1
title
CD
display,
shows:
na
di
-
no
CD
inserted
TRACK-the
total
number
of
tracks,
and
during
play
the
number
of
the
track
being
played.
TIME-
the
total
playing
time
of
the
CD,
and
during
play
the
elapsed
time
of
that
track
REPEAT
(ALL
or
1)
activated
SHUFFLE
activated
MEMORY
-the
stored
selection
(memory)is
played
INTROSCAN
activated
PAUSE
activated
cassette
deck
2
keyboard
(playback
only):
PLAY»
REWIND««
-
fast
rewind
F.FWD
»»-
fast
forward
wind
STOP-EJECT
RN
PAUSE
11
N
stereo
headphone
socket
4
—
A
TR
a
HU
m
tp
m
o
m
PC
y
a
n
ne
SUPPLY
BACK
PANEL
-
fig.
2
Q9
AC
MAINS
-
socket
for
mains
lead
@
VOLTAGE
selector
(not
on
all
versions)
@
MIC
MIXING
-
microphone
socket
The
type
plate
is
located
on
the
base
of
the
set
SUPPLY
Battery
supply
*
Open
the
battery
compartment
(fig.
2)
and
insert
as
indicated
eight
batteries,
type
R20,
UM1
or
D-cells.
e
Remove
the
batteries
if
exhausted
or
if
they
will
not
be
used
again
for
a
long
period.
The
battery
supply
is
switched
off
when
the
set
is
connected
to
the
mains.
To
change
over
to
battery
supply,
pull
out
the
plug
from
the
AC
MAINS
socket.
Mains
supply
e
Check
if
the
mains
voltage
as
shown
on
the
type
plate
(on
the
base
of
the
set)
corresponds
to
your
local
mains
voltage.
If
it
does
not,
consult
your
dealer
Or
Service organisation.
If
the
set
is
equipped
with
a
VOLTAGE
selector
23
(fig.
3),
set
this
selector
to
the
local
mains
voltage.
*
Connect
the
mains
lead
to
the
AC
MAINS
socket
Q9
(fig.
3)
and
the
wall
socket.
The
mains
supply
is
switched
on.
e
To
disconnect
the
set
from
the
mains
completely,
withdraw
the
mains
plug
from
the
wall
socket.
Important
notes
for
users
in
the
U.K.:
Mains
Plug
This
apparatus
is
fitted
with
an
approved
moulded
13
Amp
plug.
To
change
a
fuse
in
this
type
of
plug
proceed
as
follows
e
Remove
fuse
cover
and
fuse.
e
Fixnew
fuse
which
should
be
a
BS1362
5
A,
AS.T.A.
or
BS!
approved
type.
e
Refit
the
fuse
cover.
If
the
fitted
plug
is
not
suitable
for
your
socket
outlets,
it
should
be
cut
off
and
an
appropriate
plug
fitted
in
its
place.
lf
the
mains
plug
contains
a
fuse,
this
should
have
a
value
of
5
A.
Ifa
plug
without
a
fuse
is
used,
the
fuse
at
the
distribution
board
should
not
be
greater
than
5
A.
Note:
The
severed
plug
must
be
destroyed
to
avoid
a
possible
shock
hazard
shoulditbe
inserted
mtoa
13
A
socket
elsewhere.
How
to
connect
a
plug
The
wires
in
the
mains
lead
are
coloured
with
the
following
code:
blue
=
neutral
(N),
brown
=
live.
(L)
As
these
colours
may
not
correspond
with
the
colour
markings
identifying
the
terminals
in
your
plug,
proceed
as
follows
o
cued
the
blue
wire
to
the
terminal
marked
N
or
coloured
ack.
°
RE
brown
wire
tothe
terminalmarked
Lor
coloured
red.
*
Donot
connect
either
wire
to
the
earth
terminal
in
the
plug,
marked
E
(or
+)
or
coloured
green
(or
green
and
yellow)
Before
replacing
the
plug
cover,
make
certain
that
the
cord
grip
is
clamped
over
the
sheath
of
the
lead
-not
simply
over
the
two
wires.
Copyright:
Recording
and
playback
of
material
may
require
consent.
See
Copyright
Act
1956
and
The
Performer's
Protec-
tion
Acts
1958
to
1972.

etm
S
-
—
—
—
——
--—
—
CONNECTIONS
CONNECTIONS
-
fig.
1-2
Stereo
headphones
socket
£3
You
may
connect
stereo
headphones
with
3.5
mm
plug
to
the
€
socket
(3.
The
loudspeakers
are
then
muted.
Microphone
socket
MIC
MIXING
@
For
a
microphone
with
3.5
mm
plug.
You
can
reproduce
your
voice
amplified
through
the
speakers
or
you
can
mix
your
voice
with
the
radio,
CD
or
cassette
signal
(‘Karaoke’).
You
can
record
it
all
on
deck
1.
e
Connect
a
microphone
to
the
MIC
MIXING
@
socket.
To
avoid
disturbing
noise,
reduce
the
volume
before
connection.
Set
the
MODE
selector
@)
to
the
desired
position:
—
Microphone
only:
set
the
MODE
selector
to
TAPE.
-
Mixing
with
cassette:
set
the
MODE
selector
to
TAPE
and
play
a
cassette
in
deck
2.
—
Mixing
with
radio:
set
the
MODE
selector
to
TUNER
-
Mixing
with
CD:
set
the
MODE
selector
to
CD.
e
Adjust
the
sound
with
the
controls
VOLUME
(9),
TONE
©
and
DYNAMIC
BASS
BOOST
(2).
e
|f
a
howling
sound
occurs:
keep
the
microphone
away
from
the
speakers,
or
reduce
the
volume,
or,
when
recording,
use
headphones
for
monitoring.
RADIO
RECEPTION
e
Switch
on
the
set
using
the
POWER
(3)
button.
POWER
:
42
lights
up.
e
Set
the
MODE
selector
@
to
TUNER.
e
Adjust
the
sound
with
the
controls
VOLUME
@),
TONE
©
and
DYNAMIC
BASS
BOOST
(2).
e
Select
the
wave
band
using
BAND
SELECTOR
@).
(LW
and
SW
not
on
all
versions)
e
Tune
to
a
radio
station
using
the
TUNING
knob
@.
For
SW
stations
use
the
FINE
TUNING
knob
(40)
(not
on
all
versions).
—
For
FM,
pull
out
the
telescopic
aerial.
To
improve
FM-reception,
incline
and
turn
the
aerial.
Reduce
its
length
if
the
FM-signal
is
too
strong
(very
close
to
a
transmitter).
—
For
AM/MW
and
LW,
the
set
is
provided
with
a
built-in
aerial,
so
the
telescopic
aerial
is
not
need-
ed.
Direct
the
aerial
by
turning
the
whole
set.
—
For
SW,
the
telescopic
aerial
must
be
pulled
out
and
placed
in
the
vertical
position.
To
improve
reception,
vary
the
length
of
the
aerial.
e
When
FM
STEREO
*
@
lights
up,
you
are
receiv-
ing
a
FM-stereo
transmitter.
A
disturbing
noise,
due
to
a
weak
FM-stereo
signal,
can
be
suppressed
by
pressing
the
FM
STEREO
button
©).
FM
STEREO
x:
45)
will
then
go
out
and
you
will
hear
(and
record)
the
FM
programme
in
mono.
e
Always
switch
off
the
set
after
use
with
the
POWER
(3)
button.
RADIO
COMPACT
DISC
PLAYING
A
CD
e
Switch
on
the
set
using
the
POWER
©
button.
POWER
43
lights
up.
e
Set
the
MODE
selector
(7)
to
CD.
e
Press
OPEN-CLOSE
@
to
open
the
CD
cover.
e
Insert
the
CD,
printed
side
facing
up
(fig.
4).
e
Close
the
cover.
The
CD-player
starts
and
scans
the
contents
list
of
the
CD.
After
that,
the
total
play-
ing
time
and
the
number
of
tracks
appear
on the
dis-
play
and
the
CD-player
stops.
e
Playback
will
start
by
pressing
PLAY
b.
As
soon
as
playback
starts,
the
display
shows
the
track
number
and
the
elapsed
playing
time.
e
Adjust
the
sound
with
the
controls
VOLUME
(1),
TONE
($)
and
DYNAMIC
BASS
BOOST
(2).
e
For
brief
interruptions,
press
PLAY-PAUSE
».
The
word
PAUSE
then
appears.
To
continue
playback,
press
PLAY-PAUSE
>
again.
e
To
stop
playback,
press
STOP
E.
The
CD
player
also
goes
to
position
STOP:
—
by
pressing
OPEN-CLOSE
(3);
—
when
the
end
of
the
CD
is
reached;
—
if
you
move
the
MODE
selector
(7);
—
if
the
batteries
run
down
or
if
the
power
supply
is
interrupted
in
another
way.
*
To
take
out
the
CD,
open
the
CD
cover
by
pressing
OPEN-CLOSE
@).
Open
the
CD
cover
only
if
the
CD-
player
is
in
position
STOP.
e
Always
switch
off
the
set
after
use
with
the
POWER
button
(3).
Remarks
—
|f
the
battery
voltage
is
not
sufficient
any
more
for
playing
a
CD,
the
CD-player
will
not
start.
—
If
^a
Y
(Sf
appears,
the
CD-player
cannot
read
the
CD.
Possible
causes
are:
—
you
did
not
insert
a
CD;
—
you
inserted
the
CD
the
wrong
way:
the
label
should
face
up
(fig.
4);
—
the
surface
of
the
CD
is
badly
scratched
or
dirty,
see
‘Maintenance’;
—
the
lens
(9)
(fig.
5)
is
steamed
up,
see
'Mainte-
nance’.
INTROSCAN
The
INTROSCAN
function
can
be
switched
on
from
the
STOP
and
PLAY
mode.
e
Press
INTROSCAN.
The
word
INTROSCAN
then
appears.
Only
the
first
few
seconds
of
each
track
are
played.
e
The
moment
you
press
PLAY
>,
the
INTROSCAN
function
is
defeated
(the
word
INTROSCAN
disap-
pears)
and
the
CD
is
played
in
the
normal
way
from
this
title.
e
If
you
press
NEXT
»»
or
4
PREVIOUS,
the
INTROSCAN
function
remains
operative
and
the
beginning
of
the
next
»»i
or
previous
e
track
is
played.
e
|f
INTROSCAN
is
not
defeated
by
pressing
PLAY
»
or
STOP
Ili,
the
CD
player
returns
to
STOP
as
soon
as
all
the
tracks
are
scanned.
`
Français
English
Deutsch
©
c
<
G
=
Svenska
Suomi

ys:¡Su3
COMPACT
DISC
MODE
(SHUFFLE
and
REPEAT)
By
pressing
the
MODE
button
several
times,
all
play
modes
will
successively
appear
on
the
display:
1x
SHUFFLE
to
play
all
tracks
in
a
random
order;
2x
SHUFFLE
REPEAT
to
repeat
the
CD
continuously
in
a
random
order;
3x
REPEAT
ALL
to
repeat
the
CD
(or
the
pro-
grammed
selection
-
MEMORY)
continuously;
4x
REPEAT
1
to
repeat
the
actual
title
continuously.
5x
normal
(no
display
indication)
to
defeat
the
SHUFFLE
and
REPEAT
modes.
To
defeat
the
REPEAT
and
SHUFFLE
modes,
choose
the
normal
position
(no
display
indication).
ma
PREVIOUS/NEXT
>»
1.
Go
to
the
next
or
previous
track
press
briefly
(less
than
1
second)
a.
During
PLAY
and
INTROSCAN:
NEXT
»»
-
go
to
the
next
track
(title)
You
can
jump
to
the
next
title
by
pressing
»»
once
briefly.
If
you
want
to
skip
more
than
one
track,
then
press
»»
more
than
once
briefly
until
the
display
shows
the
desired
track
number.
4
PREVIOUS
-
go
to
the
previous
track
(title)
If
you
want
to
repeat
the
running
title
from
the
beginning,
press
««
once
briefly.
If
you
want
to
repeat
one
of
the
previous
titles,
press
m4
more
than
once
briefly
until
the
display
shows
the
required
track
number.
b.
In
position
STOP
with
a
CD
inserted
you
can
select
the
desired
title
by
pressing
««
and
»»
briefly,
once
or
more
than
once,
until
the
display
shows
the
required
track
number.
2.
Search
during
PLAY
keep
pressed
(longer
than
1
second)
During
PLAY,
keep
»»
for
search
forward
and
te
for
search
backward
pressed.
The
CD
is
played
partly
and
at
high
speed,
however,
the
sound
is
still
recognizable.
Release
the
button
as
soon
as
you
recognize
the
required
passage:
the
CD
will
be
played
in
the
nor-
mal
way
from
this
passage.
If
the
button
is
pressed
longer
than
5
seconds,
the
search
speed
increases.
PROGRAMMING
TRACK
NUMBERS
You
may
select
a
number
of
tracks
and
store
these
in
the
memory
in
the
desired
sequence.
When
playing,
you
will
only
hear
the
stored
titles
in
the
selected
sequence.
Manual
selecting
e
Load
the
CD,
but
do
not
press
PLAY
P
yet.
e
Select
the
desired
track
using
the
buttons
#«
PRE-
VIOUS
and
NEXT
»»
until
the
display
shows
the
required
track
number.
*
Store
this
track
by
pressing
MEMORY.
e
Select
and
store
in
this
way
all
desired
titles.
Storing
during
INTROSCAN
*
Press
INTROSCAN
to
play
the
first
few
seconds
of
each
track.
6
CASSETTE
*
Press
MEMORY
as
soon
as
you
recognize
a
desired
title
Storing
during
PLAY
*
During
normal
PLAY
you
may
store
the
running
title
by
pressing
MEMORY
—
After
pressing
MEMORY
the
character
*
(PRO-
GRAM)
appears,
indicating
that
the
track
has
been
stored.
—
Store
all
desired
titles
in
the
required
sequence
You
may
store
each
track
more
than
once.
—
At
most,
20
tracks
can
be
stored
in
the
memory
When
the
memory
is
full,
the
character
^
(FULL)
appears.
-
When
pressing
MEMORY
for
longer
than
1
sec-
ond,
the
display
shows
in
sequence
the
remaining
stored
track
numbers.
—
You
can
simply
erase
the
whole
memory
by
press-
ing
STOP
E
twice:
the
character
Z
for
CLEAR
appears
now.
The
contents
of
the
memory
are
also
erased:
-
by
opening
the
CD
cover
using
OPEN-CLOSE
(6);
—
if
you
move
the
MODE
selector
(2);
-
if
the
batteries
get
exhausted
or
if
the
power
sup-
ply
is
interrupted
in
another
way.
How
to
play
the
stored
selection
To
play
your
selection,
the
CD-player
should
be
in
position
STOP;
then
press
PLAY
>:
now,
the
word
MEMORY
appears.
To
repeat
the
selection
continuously,
choose
the
mode
REPEAT
ALL.
Playing
the
selection
in
the
SHUF-
FLE
or
SHUFFLE
REPEAT
mode
is
not
possible
RECORDING
(on
deck
1
only)
Preparation
Recording
is
permissible
insofar
as
copyright
or
other
rights
of
third
parties
are
not
infringed.
During
recording,
the
deck
2
buttons
should
not
be
pressed
(except
for
PLAY
»
during
dubbing).
e
Switch
on
the
set
using
the
POWER
button
(3).
POWER
*
@
lights
up.
e
Press
on
deck
1
STOP-EJECT
E
to
open
the
cas-
sette
holder.
*
|nsert
the
cassette
into
deck
1
(fig.
7).
For
recording
you
must
use
a
NORMAL
cassette
(IEC
type
I)
on
which
the
tabs
(fig.
8)
are
not
broken
out.
At
the
very
beginning
and
end
of
the
tape,
no
record-
ing
will
take
place
during
the
first
7
seconds
when
the
leader
tape
passes
the
recorder
heads.
e
Safeguarding
against
erasure:
Keep
the
cassette
side
to
be
safeguarded
in
front
of
you
(fig.
8)
and
break
out
the
left
tab.
Now,
recording
on
this
side
is
no
longer
possible.
e
When
monitoring
during
recording,
adjust
the
sound
with
the
controls
VOLUME
@,
TONE
©
and
DYNAMIC
BASS
BOOST
(2).
These
controls
do
not
affect
the
recording.
*
For
fast
winding,
press
REWIND
««
or
F.FWD
»».
To
stop,
press
STOP
E.
Recording
from
the
CD-player
e
Set
the
MODE
selector
(7)
to
CD.
It's
not
neces-
sary
to
start
the
CD-player
separately:
if
you
press
RECORD
6,
the
CD-player
starts
automatically:

CASSETTE
-
if
the
CD-player
is
in
position
STOP,
recording
will
start
from
the
beginning
of
the
CD
(or
from
the
beginning
of
the
programmed
selection);
-
if
the
CD-player
is
in
position
PAUSE,
recording
will
start
from
this
very
position;
-
in
position
INTROSCAN
the
CD-player
will
first
return
to
the
beginning
of
that
track
and
then
recording
will
start.
Recording
from
the
radio
e
Set
the
MODE
selector
@
to
TUNER.
e
In
case
of
FM
radio
recordings,
set
the
FM
STEREO
button
©
to
the
desired
position.
Microphone
recording
*
Connect
the
microphone
to
the
socket
MIC
MIX-
ING
@
and
set
the
MODE
selector
(2
to
the
desired
position,
see
‘CONNECTIONS’
Starting
and
stopping
e
Start
recording
by
pressing
RECORD
0.
*
For
brief
interruptions,
press
PAUSE
IL
To
restart
recording,
press
this
button
once
more.
e
To
stop
recording,
press
STOP
li.
On
pressing
again,
the
cassette
holder
will
open.
e
Always
switch
off
the
set
after
use
with
the
POWER
button
(3).
DUBBING
-
Copying
from
deck
2
to
1
When
copying,
it
is
recommended
to
use
fresh
bat-
teries
or
to
connect
the
set
to
the
mains
supply.
*
Switch
on
the
set
using
the
POWER
button
(3).
POWER
¥
@
lights
up.
e
Set
the
MODE
selector
@
to
TAPE.
Do
not
move
this
selector
during
dubbing.
e
For
high
speed
copying
press
the
HIGH
SPEED
DUBBING
button
(2).
HIGH
SPEED
=
ás)
lights
up.
Do
not
switch
the
button
during
dubbing.
e
Press
both
STOP-EJECT
W
buttons
and
insert
a
recorded
cassette
into
deck
2
and
a
cassette
which
is
suited
for
recording
into
deck
1
(fig.
7).
e
Press
on
deck
1
PAUSE
II
and
then
RECORD
@.
e
To
start
dubbing,
press
PLAY
>
on
deck
2.
PAUSE
Il
is
then
released.
e
By
pressing
PAUSE
tl
on
deck
1,
you
can
omit
undesired
passages
while
deck
2
continues.
To
restart
copying,
press
PAUSE
Il
once
more.
e
Using
PAUSE
Il
of
deck
2,
deck
1
will
record
a
blank
part.
e
To
stop
dubbing,
press
both
STOP
lil
buttons.
*
Always
switch
off
the
set
after
use
with
the
POWER
button
(3).
CASSETTE
PLAYBACK
Playback
on
deck
1
or
2
Deck
1
will
not
play
if
the
PLAY
>
and
PAUSE
II
but-
tons
on
deck
2
are
pressed.
e
Switch
on
the
set
using
the
POWER
button
(3).
POWER
+
42
lights
up.
e
Set
the
MODE
selector
(7)
to
TAPE.
e
Press
STOP-EJECT
iil
and
insert
a
recorded
cas-
sette
(fig.
7).
*
For
fast
winding,
press
REWIND
««
or
F.FWD
»».
To
stop,
press
STOP
li.
e
Press
PLAY
>
and
playback
will
start.
e
Adjust
the
sound
with
the
controls
VOLUME
(1),
TONE
©
and
DYNAMIC
BASS
BOOST
(2.
—
A
—
A
A
—
—
-
-
——————
———
—
-
A
a:
TL
nn
MAINTENANCE
e
To
stop,
press
STOP
lil.
On
pressing
again,
the
cas-
sette
holder
will
open.
When
the
end
of
the
tape
is
reached,
the
recorder
buttons
are
released.
*
Always
switch
off
the
set
after
use
with
the
POWER
button
(3).
Continuous
play
e
Switch
on
the
set
using
the
POWER
button
(3).
POWER
=
(2
lights
up.
e
Set
the
MODE
selector
(7)
to
TAPE.
e
Press
both
STOP-EJECT
lii
buttons
and
insert
a
recorded
cassette
into
both
decks
(fig.
7).
e
Press
on
deck
2
PLAY
>
and
on
deck
1
PAUSE
Il
and
then
PLAY
>:
deck
2
will
now
play
and
deck
1
stands
still.
As
soon
as
deck
2
stops
(at
the
end
of
the
cassette
or
when
its
STOP
Bi
button
is
pressed),
PAUSE
Il
is
released
and
deck
1
will
start
playing
back.
e
To
stop,
press
STOP
E.
*
Always
switch
off
the
set
after
use
with
the
POWER
button
(3).
MAINTENANCE
CD-player
and
CDs
—
The
lens
®
(fig.
5)
should
never
be
touched
or
cleaned.
The
lens
may
steam
up
when
the
set
is
taken
from
a
cold
into
a
warm
environment.
Playing
a
CD
is
not
possible
then.
Do
not
clean
the
lens,
but
let
the
set
acclimatize
for
a
while.
—
Always
pick
up
the
CD
by
the
edge
and
put
it
back
in
its
box
immediately
after
use.
To
clean,
breathe
on
the
CD
and
wipe
it
off
in
a
straight
line
from
centre
to
edge
(fig.
6)
using
a
soft,
lint-free
cloth.
Cleaning
agents
may
harm
the
CD.
Cassette
deck
To
ensure
a
good
recording
and
playback
quality,
clean
the
parts
indicated
in
fig.
9
after
every
50
hours
of
operation
or,
on
average,
once
a
month.
e
Open
the
cassette
holder
using
STOP-EJECT
B.
*
Use
a
cotton
bud
slightly
moistened
with
alcohol
or
a
special
head
cleaning
fluid.
e
Press
PLAY»
and
clean
the
pressure
roller
©).
e
Then
press
PAUSE
Il
and
clean
the
capstan
©,
recording/playback
head
(8)
and
erase
head
(à).
e
After
cleaning,
press
STOP
B.
Cleaning
of
the
heads
(à)
and
(&)
can
also
be
done
by
playing
a
cleaning
cassette
through
once.
Remarks
—
The
CD-player
and
the
cassette
decks
are
fitted
with
self-lubricating
bearings
which
must
not
be
oiled
or
greased.
—
Fingerprints,
dust
and
dirt
on
the
apparatus
can
be
removed
using
a
soft,
clean
and
slightly
damp
leather
cloth.
Do
not
use
any
cleaning
agents,
since
they
may
affect
and
harm
the
cabinet.
—
Keep
the
set,
batteries,
CDs
and
cassettes
away
from
rain,
moisture,
sand
and
excessive
heat,
e.g.
near
heating
equipment
or
in
cars
parked
in
the
sun.
This
product
complies
with
the
radio
interference
requirements
of
the
European
Community.
English

Australia
Guarantee
and
Service
valid
for
Australia
The
benefits
given
to
the
purchaser
by
this
warranty
are
in
addition
to
all
other
rights
and
remedies,
which,
under
the
Trade
Practices
Act
or
other
Commonwealth
or
State
law,
the
purchaser
or
owner
has
in
respect
of
the
product.
The
Philips
product
carries
the
following
warranties:
—
C-series
HiFi-systems
12
months.
—
Compact
Disc
Players:
12
months.
-
Home
Audio
Systems:
6
months.
—
Clock
radios,
portable
radios,
cassette
recorders,
cassette
players
and
radio
recorders:
90
days.
Any
defect
in
materials
or
workmanship
occurring
within
the
specified
period
from
the
date
of
delivery,
will
be
rectified
free
of
charge
by
the
retailer
from
whom
this
product
was
purchased.
Note:
Please
retain
your
purchase
docket
to
assist
prompt
service.
Conditions
of
this
warranty
1.
All
claims
for
warranty
service
must
be
made
to
the
retailer
from
whom
this
product
was
pur-
chased.
All
transport
charges
incurred
in
connec-
tion
with
warranty
service
or
replacement
will
be
paid
by
the
purchaser.
2.
These
warranties
do
not
cover
batteries
and
extend
only
to
defects
in
materials
or
workman-
ship
occurring
under
normal
use
of
the
product
where
operated
in
accordance
with
our
instruc-
tions.
Philips
Consumer
Products
Division,
Technology
Park
Figtree
Drive,
Australia
Centre
Homebush
2140,
New
South
Wales
36
QZ
New
Zealand
Guarantee
and
Service
for
New
Zealand
Thank-you
for
purchasing
this
quality
Philips
product.
Philips
New
Zealand
Ltd
guarantees
this
product
against
defective
components
and
faulty
workman-
ship
for
a
period
of
12
months.
Any
defect
in
materi-
als
or
workmanship
occurring
within
12
months
from
the
date
of
purchase
subject
to
the
following
condi-
tions
will
be
rectified
free
of
charge
by
the
retailer
from
whom
this
product
was
purchased.
Conditions
1.
The
product
must
have
been
purchased
in
New
Zealand.
As
proof
of
purchase,
retain
the
original
invoice
or
cash
receipt
indicating
the
date
of
pur-
chase.
2.
[he
guarantee
applies
only
to
faults
caused
by
defective
components,
or
faulty
workmanship
on
the
part
of
the
manufacturer.
3.
The
guarantee
does
not
cover
failures
caused
by
misuse,
neglect,
normal
wear
and
tear,
accidental
breakage,
use
on
the
incorrect
voltage,
use
contra-
ry
to
operating
instructions,
or
unauthorised
modi-
fication
to
the
product
or
repair
by
an
unauthorised
technician.
4.
Reasonable
evidence
(in
the
form
of
a
sales
docket
or
completed
guarantee
card)
must
be
supplied
to
indicate
that
the
product
was
purchased
no
more
than
12
months
prior
to
the
date
of
your
claim.
5.
In
the
event
of
a
failure,
Philips
shall
be
under
no
liability
for
any
injury,
or
any
loss
or
damage
caused
to
property
or
products
other
than
the
product
under
guarantee.
This
guarantee
does
not
prejudice
your
rights
under
common
law
and
statute,
and
is
in
addition
to
the
normal
responsibilities
of
the
retailer
and
Philips.
How
to
claim
Should
your
Philips
product
fail
within
the
guarantee
period,
please
return
it
to
the
retailer
from
whom
it
was
purchased.
In
most
cases
the
retailer
will
be
able
to
satisfactorily
repair
or
replace
the
product.
However,
should
the
retailer
not
be
able
to
conclude
the
matter
satisfactorily,
or
if
you
have
other
difficul-
ties
claiming
under
this
guarantee,
please
contact
The
Guarantee
Controller
Philips
New
Zealand
Ltd.
EJ
P.O.
Box
41.021
Auckland
T
(09)
84
44
160

@
México
TUE
Garantía
para
México
10H
Este
aparato
está
fabricado
con
materiales
de
alta
calidad
y
ha
sido
cuidadosamente
verificado.
Philips,
por
lo
tanto,
da
a
usted
una
garantía
de
12
meses
a
partir
de
su
fecha
de
compra.
La
garantiá
ampara
la
reposición
de
las
piezas
defec-
tuosas
debidas
a
fallas
en
su
montaje
o
en
los
materi-
ales,
incluyendo
la
mano
de
obra
necesaria
para
su
eer
en
nuestras
Sucursales
o
talleres
autoriza-
OS.
En
caso
de
fallas
en
su
aparato
le
rogamos
se
sirva
poner
en
contacto
con
su
distribuidor.
Esta
garantía
no
cubrirá
las
averías
que
resulten
como
consecuencia
de
una
instalación
incorrecta
del
aparato,
manifiesto
maltrato
o
uso
inadecuado
del
mismo.
Philips
se
obliga
a
reparar
y
devolver
a
usted
su
apa-
rato
en
un
plazo
no
mayor
de
30
días
hábiles
conta-
dos
a
partir
de
la
fecha
de
haber
ingresado
su
aparato
a
uno
de
nuestros
talleres.
Con
la
presentacíon
de
la
factura
o
remisión
de
su
aparato
podrá
hacer
efectiva
la
garantía.
Si
usted
tiene
alguna
duda
o
pregunta
que
no
le
pue-
da
solucionar
su
distribuidor,
por
favor
ponerse
en
contacto
con:
Oficinas
Centrales
de
Servicio,
Av.
Coyoacán
No.
1051,
Col.
del
Valle,
03100
México,
D.F.
T
5-75-20-22
o
5-75-01-00
eee
—
e
Ln
i
+e
37

This
sign
on
the
packaging
is
only
meant
for
Germany.
©
Ce
signal
sur
l'emballage
concerne
uniquement
l'Allemagne.
CD»
Dieses
Zeichen
auf
der
Verpackung
gilt
nur
für
Deutschland.
(iD
Dit
teken
op
de
verpakking
geldt
alleen
voor
Duitsland.
CE)
Este
símbolo
en
el
embalaje
es
únicamente
para
Alemania.
CD
Questo
contrassegno
sull'imballaggio
interessa
solo
la
Germania.
CP)
Este
símbolo
na
embalagem
é
só
para
a
Alemanha.
Dette
maerke
har
kun
betydning
i
Tyskland.
C»
Recirkulationsmarket
pá
förpackningen
avsedd
endast
för
Tyskland.
GF)
Tämä
merkki
pakkauksessa
koskee
vain
Saksaa.
|
¡ouedsy
epuerieper|
yos}naq
|
SIESUPAJ
|
Usb
ug
|
ouele}]
o
<
c
3
o
~
£o
o
c
o
3,
3139
116
1410.2
AZ
8320
EvM
9233
i
res
a
ae
re
ee
pt
TN]
On
Eletto
0...
a
e
a
A
RT
I
A
A
A
A
AA
AAA
A
o
Table of contents
Other Philips CD Player manuals

Philips
Philips EXP3361 User manual

Philips
Philips EXP3460 Expanium User manual

Philips
Philips AZ7160 User manual

Philips
Philips AZ2000 User manual

Philips
Philips CD 750 User manual

Philips
Philips AZ1017 User manual

Philips
Philips AZ1307 User manual

Philips
Philips AX5202 User manual

Philips
Philips AZT3201 User manual

Philips
Philips AZ 8210 User manual

Philips
Philips PSS010 User manual

Philips
Philips AX5319 User manual

Philips
Philips AZ5741/98 User manual

Philips
Philips PX840T User manual

Philips
Philips AZ302S User manual

Philips
Philips AX5212 User manual

Philips
Philips EXP2540 User manual

Philips
Philips AZ1307 User manual

Philips
Philips AZ 7356 User manual

Philips
Philips AX5210 User manual