manuals.online logo
Brands
  1. Home
  2. •
  3. Brands
  4. •
  5. Philips
  6. •
  7. Home Cinema Speakers
  8. •
  9. Philips HTS3563 User manual

Philips HTS3563 User manual

©Copyright 2010 Philips Consumer Electronics B.V. Eindhoven, The Netherlands
All rights reserved. No part of this publication may be reproduced, stored in a retrieval system or
transmitted, in any form or by any means, electronic, mechanical, photocopying, or otherwise without
the prior permission of Philips.
Version 1.Version 0.0
LASER PRODUCT
©
TABLE OF CONTENTS
Page
Production Specifications ...............................................................................................1-3
D Instruction................................................................................................................2-1
Mechanical and Dismantling Instructions ........................................................................3-1
Software Upgrades........................................................................................................... -1
Trouble Shooting Chart .................................................................................................... -1
Set Mechanical Exploded view ....................................................................................... -1
Revision List ...................................................................................................................
Location of PCB Boards & version variation & repair scenario matrix.....................1-2
CLASS 1
GB
313978536071
Published by Helen-RY 1205 Service Audio Printed in The Netherlands Subject to modification
Wiring Diagrams ................................................................................................6-1
Electrical Diagrams and Print-layouts .................................................................7-1
Safety Instruction, Warning & Notes................................................................................1-
8
9-1
Version 1.1
6
Home Theater BD Player
FU
4
5
Service
HTS3563/12/98/51
GB
Version Variation
HTS3563
Type/Versions
Features /12 /98 /51
Power supply rating:220-240V ,50Hz X X
Power supply rating:110-240V ,50~60Hz X
Power consumption:110W X X X
Repair Scenario Matrix
HTS3563
Type/Versions
Board in used /12 /98 /51
Main Board Bd C C
Front Control Board Bd C Bd
Amplifier Board C C C
Power Board C C C
*Bd:Board Level Replacement
*C:Component Level Repair
AMPLIFIER BOARD
MAIN BOARD
LOADER
POWER BOARD
PCB BOARD LOCATION:
1-2
Product
Specifications
Note
6SHFLÀFDWLRQVDQGGHVLJQDUHVXEMHFWWRFKDQJHZLWKRXW
notice.
Region codes
The type plate on the back or bottom of the
home theater shows which regions it supports.
Media formats
 AVCHD, BD, BD-R/ BD-RE, BD-Video,
DVD-Video, DVD+R/+RW, DVD-R/-RW,
DVD+R/-R DL, CD-R/CD-RW, Audio CD,
9LGHR&'69&'3LFWXUHÀOHV03PHGLD
WMA media, DivX Plus HD media, USB
storage device
 509%$YDLODEOHRQO\LQ$VLD3DFLÀFDQG
China)
Country DVD BD
Europe,
United Kingdom
Korea
Latin America
Australia,
New Zealand
Russia, India
China
AA
AA
CC
CC
Asia Pacific, Taiwan,
File formats
 Audio: .aac, .mka, .mp3, .wma, .wav, .mp4,
.m4a
 Video:
 .avi, .divx, .mp4, .mkv, .asf, .mpg, .mpeg,
 .wmv, .rmvb, .rm (Available only in Asia
3DFLÀFDQG&KLQD
 Picture: .jpg, .jpeg, .gif, .png
Audio formats
Your home theater supports the following
DXGLRÀOHV
Extension Container Audio
codec
Bit rate
.mp3 MP3 MP3 32 kbps ~
320 kbps
.wma ASF WMA 64 kbps ~
160 kbps
.aac AAC AAC, HE-
AAC
192 kbps
.wav WAV PCM 1.4 Mbps
.m4a MKV AAC 192 kbps
.mka MKA PCM 27.648
Mbps
.mka MKA Dolby
Digital
640 kbps
.mka MKA DTS core 1.54 Mbps
.mka MKA MPEG 912 kbps
.mka MKA MP3 32 kbps ~
320 kbps
.mka MKA WMA 64 kbps ~
160 kbps
.mka MKA AAC,
HE-
AAC
192 kbps
Video formats
,I\RXKDYHDKLJKGHÀQLWLRQ79\RXUKRPH
WKHDWHUDOORZV\RXWRSOD\\RXUYLGHRÀOHVZLWK
 Resolution: 1920 x 1080 pixels at
 Frame rate: 6 ~ 30 frames per second.
HTS3563/12/98/51:
1-3
DYLÀOHVLQ$9,FRQWDLQHU
Audio
codec
Video codec Bit rate
PCM,
Dolby
Digital,
DTS
core,
MP3,
WMA
DivX 3.11,
DivX 4.x, DivX 5.x,
DivX 6.x
10 Mbps max
MPEG 1, MPEG 2 20 Mbps
(peak 40
Mbps)
MPEG 4 ASP 10 Mbps max
H.264/AVC
[email protected]/4.0;
[email protected]/3.1/3.0
20 Mbps
(peak 40
Mbps)
GLY[ÀOHVLQ$9,FRQWDLQHU
Audio
codec
Video codec Bit rate
PCM,
Dolby
Digital,
MP3,
WMA
DivX 3.11,
DivX 4.x,
DivX 5.x, DivX 6.x
10 Mbps max
MPEG 1, MPEG 2 20 Mbps
(peak 40
Mbps)
MPEG 4 ASP 10 Mbps max
PSRUPYÀOHVLQ03FRQWDLQHU
Audio
codec
Video codec Bit rate
Dolby
Digital,
MPEG,
MP3,AAC,
HE-AAC
MPEG 1, MPEG
2
20 Mbps (peak
40 Mbps)
MPEG 4 ASP 10 Mbps max
H.264/AVC
[email protected]/4.0;
[email protected]/3.1/3.0
20 Mbps (peak
40 Mbps)
PNYÀOHVLQ0.9FRQWDLQHU
Audio codec Video codec Bit rate
PCM, Dolby
Digital, DTS
core, MPEG,
MP3,WMA,
AAC, HE-
AAC
MPEG 1, MPEG
2
20 Mbps
(peak 40
Mbps)
MPEG 4 ASP 10 Mbps
max
H.264/AVC
[email protected]/4.0;
[email protected]/3.1/3.0
20 Mbps
(peak 40
Mbps)
DVIÀOHVLQ$6)FRQWDLQHU
Audio codec Video codec Bit rate
PCM, Dolby
Digital, MP3,
WMA
MPEG 4 ASP 10 Mbps
max
H.264/AVC
[email protected]/4.0;
[email protected]/3.1/3.0
20 Mbps
(peak 40
Mbps)
PSJDQGPSHJÀOHVLQ36FRQWDLQHU
Audio
codec
Video codec Bit rate
PCM,
DTS core,
MPEG, MP3
MPEG 1,
MPEG 2
20 Mbps (peak 40
Mbps)
MPEG 1,
MPEG 2
20 Mbps (peak 40
Mbps)
$PSOLÀHU
 Total output power: 600W RMS (30%
THD)
 Frequency response: 20 Hz-20 kHz / ±3
dB
 Signal-to-noise ratio: > 65 dB (CCIR) /
(A-weighted)
 Input sensitivity:
 AUX: 2V
 Music iLink: 1 V
1-4
Video
 Signal system: PAL / NTSC
 HDMI output: 480i/576i, 480p/576p, 720p,
1080i, 1080p, 1080p24
Audio
 S/PDIF Digital audio input:
 Coaxial: IEC 60958-3
 Optical:TOSLINK
 Sampling frequency:
 MP3: 32 kHz, 44.1 kHz, 48 kHz
 WMA: 44.1 kHz, 48 kHz
 Constant bit rate:
 MP3: 32 kbps - 320 kbps
 WMA: 48 kbps - 192 kbps
Radio
 Tuning range:
 Europe/Russia/China: FM 87.5-108
MHz (50 kHz)
 $VLD3DFLÀF/DWLQ$PHULFD)0
MHz (50/100 kHz)
 Signal-to-noise ratio: FM > 45 dB
 Frequency response: FM 180 Hz-12.5 kHz
/ ±3 dB
USB
 Compatibility: Hi-Speed USB (2.0)
 Class support: USB Mass Storage Class
(MSC)
 File system: FAT16, FAT32, NTFS
 Maximum memory support: < 160 GB
Main unit
 Power supply:
 Europe/China/Russia/India: 220-240
V~, 50 Hz
 /DWLQ$PHULFD$VLD3DFLÀF9a
50-60 Hz
 Power consumption: 110 W
 Standby power consumption: 0.9 W - 0.5
W
 Dimensions (WxHxD): 360 x 58 x 325
mm
 Weight: 2.4 kg
Subwoofer
 Output power: 100 W RMS (30% THD)
 Impedance: 4 ohm
 Speaker drivers: 133 mm (5.25") woofer
 Dimensions (WxHxD): 160 x 267.5 x 265
mm
 Weight: 2.61 kg
Speakers
Center speaker:
 Output power: 100 W RMS (30%
THD)
 Speaker impedance: 4 ohm
 Speaker drivers: 1 x 63.5 mm (2.5")
woofer
 Dimensions (WxHxD): 160 x 85 x 95
mm
 Weight: 0.26 kg
Front/Rear speaker:
 Output power: 4 x 100 W RMS (30%
THD)
 Speaker impedance: 4 ohm
 Speaker drivers: 1 x 63.5 mm (2.5") woofer
 Dimensions (WxHxD):
 Satellite (small) speakers: 85 x160 x
95 mm
 Tallboy (tall) speakers: 240 x 1007 x
240 mm
 Weight:
 Satellite (small) speakers: 0.34 kg each
 Tallboy (tall) speakers: 1.57 Kg each
Remote control batteries
 2 x AAA-R03-1.5 V
Laser
 LaserType (Diode): InGaN/AIGaN (BD),
AIGaInP (DVD/CD)
1-5
Safety instruction
1. General safety
Safety regulations require that during a repair:
. Connect the unit to the mains via an isolation transformer.
. Replace safety components indicated by the symbol ,
only by components identical to the original ones. Any
other component substitution (other than original type)
may increase risk of fire or electrical shock hazard.
Safety regulations require that after a repair, you must
return the unit in its original condition. Pay, in particular,
attention to the following points:
. Route the wires/cables correctly, and fix them with the
mounted cable clamps.
. Check the insulation of the mains lead for external
damage.
. Check the electrical DC resistance between the mains
plug and the secondary side:
1) Unplug the mains cord, and connect a wire between
the two pins of the mains plug.
2) Set the mains switch the “on” position (keep the
mains cord unplug).
3) Measure the resistance value between the mains
plug and the front panel, controls, and chassis
bottom.
4) Repair or correct unit when the resistance
measurement is less than 1M
¡
.
5) Verify this, before you return the unit to the
customer/user (ref. UL-standard no. 1492).
6) Switch the unit “off”, and remove the wire between
the two pins of the mains plug.
2.Laser safety
This unit employs a laser. Only qualified service personnel
may remove the cover, or attempt to service this device
(due to possible eye injury).
Laser device unit
Type :SemiconductorlaserGaAlAs
Wavelength : 650nm (DVD)
: 780nm (VCD/CD)
Output power : 7mW (DVD)
:10mW(DVD/CD)
Beam divergence: 60 degree
Note: Use of controls or adjustments or performance of
procedure other than those specified herein, may result in
hazardous radiation exposure. Avoid direct exposure to
beam.
Safet
y
instruction, Warnin
g
& Notes
1-6
Warning
1.General
. All ICs and many other semiconductors are susceptible to
electrostatic discharges (ESD). Careless handing during
repair can reduce life drastically. Make sure that, during
repair, you are at the same potential as the mass of the
set by a wristband with resistance. Keep components and
tools at this same potential. Available ESD protection
equipment:
1) Complete kit ESD3 (small tablemat, wristband,
connection box, extension cable and earth cable)
4822 310 10671.
2) Wristband tester 4822 344 13999.
. Be careful during measurements in the live voltage
section. The primary side of the power supply , including
the heat sink, carries live mains voltage when you
connect the player to the mains (even when the player is
“off”!). It is possible to touch copper tracks and/or
components in this unshielded primary area, when you
service the player. Service personnel must take
precautions to prevent touching this area or components
in this area. A “lighting stroke” and a stripe-marked
printing on the printed wiring board, indicate the primary
side of the power supply.
. Never replace modules, or components, while the unit is
“on”.
2. Laser
. The use of optical instruments with this product, will
increase eye hazard.
. Only qualified service personnel may remove the cover
or attempt to service this device, due to possible eye
injury.
. Repair handing should take place as much as possible
with a disc loaded inside the player.
. Text below is placed inside the unit, on the laser cover
shield:
Notes: Manufactured under licence from Dolby
Laboratories. The double-D symbol is trademarks of Dolby
Laboratories, Inc. All rights reserved.
CAUTION: VISIBLE AND INVISIBLE LASER
RADIATION WHEN OPEN, AVOID EXPOSURE
TO BEAM.
1-7
 6HUYLFH+LQWV
 &$87,21
&+$5*('&$3$&,7256217+(6(592%2$5'0$<'$0$*(7+('5,9(
(/(&7521,&6:+(1&211(&7,1*$1(:'5,9(7+$7¶6:+<%(6,'(67+(6$)(7<
0($685(6/,.(
  6:,7&+2))32:(56833/<
  (6'3527(&7,21
$'',7,21$/$&7,2160867%(7$.(1%<7+(5(3$,57(&+1,&,$1
 7KHIROORZLQJVWHSVKDYHWREHGRQHZKHQUHSODFLQJWKHGHIHFWLYHORDGHU

  'LVPDQWOLQJRIWKHORDGHUWRDFFHVVWKH(6'SURWHFWLRQSRLQWLIQHFHVVDU\
   6ROGHUWKH(6'SURWHFWLRQSRLQW    
  'LVFRQQHFWÀH[IRLOFDEOHIURPWKHGHIHFWLYHORDGHU
  3XWDSDSHUFOLSRQWKHÀH[IRLOWRVKRUWFLUFXLWWKHFRQWDFWV¿J
  5HSODFHWKHGHIHFWLYHORDGHUZLWKDQHZORDGHU
  5HPRYHSDSHUFOLSIURPWKHÀH[IRLODQGFRQQHFWLWWRWKHQHZORDGHU
  5HPRYHVROGHUMRLQWRQWKH(6'SURWHFWLRQSRLQW

$77(17,217KHODVHUGLRGHRIWKLVORDGHULVSURWHFWHGDJDLQVW(6'E\DVROGHUMRLQWZKLFKVKRUWFLUFXLWVWKHODVHUGLRGHWRJURXQG
)RUSURSHUIXQFWLRQDOLW\RIWKHORDGHUWKLVVROGHUMRLQWPXVWEHUHPRYHDIWHUFRQQHFWLRQORDGHUWRWKHVHW



 2QO\DSSOLFDEOHIRUGHIHFWLYHORDGHUQHHGHGWREHVHQWEDFNWRVXSSOLHUIRUIDLOXUHDQDO\VLVDQGWRVXSSRUWEDFNFKDUJLQJ 
 HYLGHQFH
 7KLVLVDOVRDSSOLFDEOHIRUDOOSDUWQHUVKLSZRUNVKRSV
(6'SURWHFWLRQSRLQWLVDFFHVVLEOHIURPWRSRIORDGHU
SolderJoint
1-8
Lead-Free requirement for service
INDENTIFICATION:
Regardless of special logo (not always indicated)
One must treat all sets from 1.1.2005 onwards, according
next rules.
Important note: In fact also products a little older can also
be treated in this way as long as you avoid mixing
solder-alloys (leaded/ lead-free). So best to always use
SAC305 and the higher temperatures belong to this.
Due to lead-free technology some rules have to be
respected by the workshop during a repair:
xUse only lead-free solder alloy Philips SAC305 with
order code 0622 149 00106. If lead-free solder-paste is
required, please contact the manufacturer of your
solder-equipment. In general use of solder-paste within
workshops should be avoided because paste is not easy
to store and to handle.
xUse only adequate solder tools applicable for lead-free
solder alloy. The solder tool must be able
oTo reach at least a solder-temperature of 400°C,
oTo stabilize the adjusted temperature at the
solder-tip
oTo exchange solder-tips for different applications.
xAdjust your solder tool so that a temperature around
360°C – 380°C is reached and stabilized at the solder
joint. Heating-time of the solder-joint should not exceed
~ 4 sec. Avoid temperatures above 400°C otherwise
wear-out of tips will rise drastically and flux-fluid will be
destroyed. To avoid wear-out of tips switch off un-used
equipment, or reduce heat.
xMix of lead-free solder alloy / parts with leaded solder
alloy / parts is possible but PHILIPS recommends
strongly to avoid mixed
solder alloy types (leaded and lead-free). If one cannot
avoid, clean carefully the
solder-joint from old solder alloy and re-solder with new
solder alloy (SAC305).
xUse only original spare-parts listed in the
Service-Manuals. Not listed standard-material
(commodities) has to be purchased at external
companies.
xSpecial information for BGA-ICs:
- always use the 12nc-recognizable soldering
temperature profile of the specific BGA (for
de-soldering always use highest lead-free
temperature profile, in case of doubt)
- lead free BGA-ICs will be delivered in so-called
‘dry-packaging’ (sealed pack including a silica gel
pack) to protect the IC against moisture. After
opening, dependent of MSL-level seen on
indicator-label in the bag, the BGA-IC possibly
still has to be baked dry. This will be
communicated via AYS-website.
Do not re-use BGAs at all.
xFor sets produced before 1.1.2005, containing
leaded soldering-tin and components, all needed
spare-parts will be available till the end of the
service-period. For repair of such sets nothing
changes.
xOn our website:
www.atyourservice.ce.Philips.com
You find more information to:
BGA-de-/soldering (+ baking instructions)
Heating-profiles of BGAs and other ICs used in
Philips-sets
You will find this and more technical information
within the “magazine”, chapter “workshop news”.
For additional questions please contact your local
repair-helpdesk.
Notes
1-9
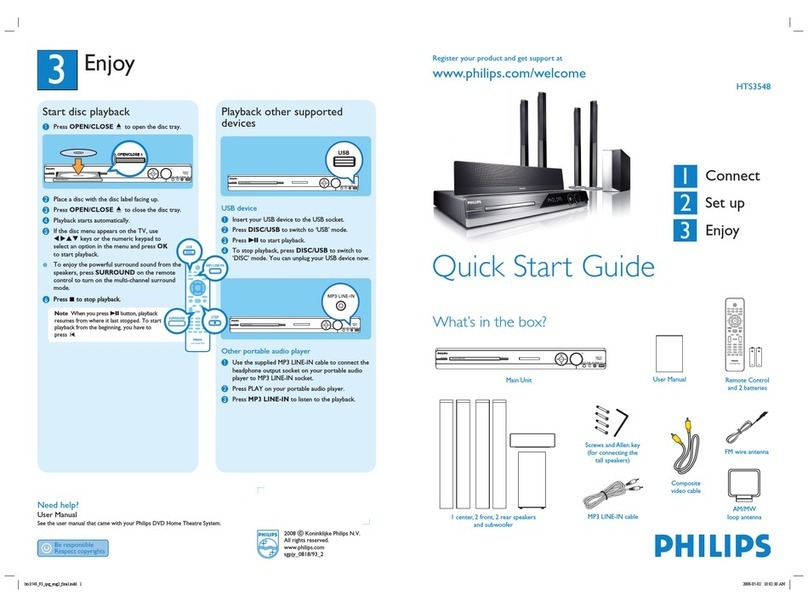
Quick start guide
FM Antenna
EN Before using your product, read all accompanying safety
information
CS Pŏed použitím produktu si pŏeĈtĖte doprovodné
bezpeĈnostní informace
DA Læs alle medfølgende sikkerhedsoplysninger, inden du
tager produktet i brug
DE Lesen Sie vorVerwendung dieses Produkts alle
begleitenden Sicherheitsinformationen
EL ƑƱƩƭ ƷƱƧƳƩƬƯưƯƩƞƳƥƴƥ ƴƯ ưƱƯƺƼƭ,ƤƩơƢƜƳƴƥ ƼƫƥƲ ƴƩƲ
ươƱƥƷƼƬƥƭƥƲ ưƫƧƱƯƶƯƱƟƥƲ ơƳƶƜƫƥƩơƲ
ES Antes de usar el producto, lea toda la información de
seguridad adjunta
FI Lue kaikki turvallisuustiedot ennen tuotteen käyttöä
FR Avant d’utiliser votre produit, lisez l’intégralité des con-
signes de sécurité jointes
HU A termék használata elʼntt alaposan olvassa el a mellékelt
biztonsági tudnivalókat
IT Prima di utilizzare il prodotto, leggere tutte le relative
informazioni sulla sicurezza
NL Lees voordat u het product gaat gebruiken eerst alle
bijbehorende veiligheidsinformatie
NO Lees voordat u het product gaat gebruiken eerst alle
bijbehorende veiligheidsinformatie
PL Przed rozpoczĔciem korzystania z produktu naleůy
zapoznaĂsiĔz informacjami dotyczĀcymi bezpieczeļstwa
PT Antes de utilizar o produto, leia todas as informações de
segurança que o acompanham
RO Înainte de a utiliza acest produs, citiŗi toate informaŗiile de
siguranŗþ care îl însoŗesc
SK Pred použitím produktu si preĈítajte všetky sprievodné
bezpeĈnostné informácie maklumat keselamatan yang
disertakan
SV Innan du använder produkten ska du läsa all tillhörande
säkerhetsinformation
TR Ürününüzü kullanmadan önce ilgili tüm güvenlik bilgilerini
okuyun
MS Sebelum menggunakan produk anda, baca semua
maklumat keselamatan yang disertakan
2-1
1
FRONT
RIGHT
FRONT
CENTER
FRONT
RIGHT
FRONT
LEFT
FRONT
CENTER
REAR
RIGHT
REAR
LEFT
SUB-
WOOFER
SUB
WOOFER
SUB
WOOFER FRONT
LEFT FRONT
CENTER
FRONT
RIGHT
REAR
RIGHT
REAR
LEFT
REAR
LEFT
REAR
RIGHT
FRONT
LEFT
EN Connect the home theater
CS Pŏipojte domácí kino
DA Tilslut hjemmebiografen
DE Anschließen des Home
Entertainment-Systems
EL ƓƵƭƤƝƳƴƥ ƴƯ home cinema
ES Conecta el sistema de cine en casa
FI Kotiteatterin liitännät
FR Connecter les enceintes au Home Cinéma
HU A házimozi csatlakoztatása
IT Collegamento del sistema HomeTheater
NL Sluit de home cinema aan
NO Koble til hjemmekinoanlegget
PL PodãĀczanie zestawu kina domowego
PT Efectuar as ligações ao sistema de cinema em casa
RO Conectaŗi sistemul home theater
SK Pripojenie k domácemu kinu
SV Anslut hemmabiosystemet
TR Ev sinemasını baĚlayın
MS Sambungkan teater rumah
2-2
2
OPTICAL
OPTICAL
HDMI OUT (ARC)
HDMI
OPTICAL HDMI
HDMI IN
HDMI ARC
HDMI + OPTICAL
HDMI OUT (ARC)
HDMI IN (ARC)
EN Connect toTV in one of these ways
CS Pŏipojení k televizoru proveĊte jedním z následujících
zpţsobţ
DA Tilslut tilTV på en af følgende måder
DE Herstellen einer Verbindung mit dem Fernseher über
einer dieser Möglichkeiten
EL ƓƵƭƤƥƨƥƟƴƥ ƳƴƧƭ ƴƧƫƥƼƱơƳƧ Ƭƥ Ɲƭơƭ ơưƼ ƴƯƵƲ
ươƱơƪƜƴƹ ƴƱƼưƯƵƲ
ES Conexión al televisor de una de estas maneras
FI Liitä televisioon jommallakummalla tavalla
FR Connectez-vous au téléviseur via l’une de ces méthodes
HU Csatlakoztassa a tv-készülékhez az alábbi módok egyike
szerint
IT Esegui il collegamento alTV in uno dei modi indicati di
seguito
NL Maak op een van de volgende manieren verbinding met
deTV
NO Koble tilTVen på en av følgende måter
PL PodãĀcz do telewizora przy uůyciu jednej z tych metod
PT Ligar ao televisor de uma destas formas
RO Conectaŗi-vþla televizor într-unul din aceste moduri
SK Pripojte zariadenie k televízoru jedným z týchto spôsobov
SV Anslut tillTV:n på något av följande sätt
TR AŕaĚıdaki yöntemlerden biriyle TV’ye baĚlanın
MS Sambung kepadaTV dalam salah satu cara berikut
2-3
LR
AUDIO IN
HDMI OUT (ARC)
HDMI OUT (ARC)
HDMI IN
DIGITAL IN
COAXIAL COAXIAL
LR
AUDIO OUT
HDMICOAXIAL
HDMI + COAXIAL
HDMI IN
HDMI + AUDIO L/R
AUDIO L/R HDMI
2-4
3
2
3
1
EN Switch on the home theater
CS ZapnĖte domácí kino
DA Tænd for hjemmebiografen
DE Einschalten des Home
Entertainment-Systems
EL ƆƭƥƱƣƯưƯƩƞƳƴƥ ƴƯ home cinema
ES Enciende el sistema de cine en casa
FI Virran kytkeminen kotiteatteriin
FR Mettre sous tension le Home Cinéma
HU A házimozi bekapcsolása
IT Accensione del sistema HomeTheater
NL Schakel de home cinema in
NO Slå på hjemmekinoanlegget
PL WãĀczanie zestawu kina domowego
PT Ligar o sistema de cinema em casa
RO Porniŗi sistemul home theater
SK Zapnutie domáceho kina
SV Sätt på hemmabiosystemet
TR Ev sinemasını açın
MS Hidupkan teater rumah
2-5
4
HDMI
TV
1
HOME THEATER
HOME THEATERHOME THEATER
HOME THEATER
HOME THEATERHOME THEATER
3
3OHDVHVHOHFW\RXU
ODQJXDJHDQGSUHVV2.
$XWR(1*
(QJOLVK
'HXWVFK
,WDOLDQR
3RUWXJXrV
1HGHUODQGV
)UDQoDLV
'DQVN
3OHDVHVHOHFW\RXU
ODQJXDJHDQGSUHVV2.
$XWR(1*
(QJOLVK
'HXWVFK
,WDOLDQR
3RUWXJXrV
1HGHUODQGV
)UDQoDLV
'DQVN
1RUVN
6YHQVND
(VSDxRO
%HOJLXP
&URDWLD
&]HFK5HSXEOLF
'HQPDUN
(VWRQLD
%XOJDULD
)LQODQG
%DFN
$XVWULD
)UDQFH
*HUPDQ\
*UHHFH
6HOHFW\RXUFRXQWU\WRFKRRVH
WKH1HW79SRUWDOIRU\RXU
ORFDWLRQWKHQSUHVV2.
2
4
EN Complete the first time setup
CS DokonĈili jste nastavení pŏi prvním zapnutí
DA Fuldfør den indledende opsætning
DE Abschließen der Ersteinrichtung
EL ƐƫƯƪƫƧƱƾƳƴƥ ƴƧ ƱƽƨƬƩƳƧ ƣƩơ ưƱƾƴƧ ƶƯƱƜ
ES Finaliza la configuración inicial
FI Ensiasennuksen suorittaminen loppuun
FR Effectuer la configuration initiale
HU Az elsʼnüzembe helyezés
IT Completamento della configurazione iniziale
NL Voltooi de eerste installatie
NO Fullføre den første konfigureringen
PL Pierwsza konfiguracja
PT Executar a configuração inicial
RO Realizaŗi prima configurare
SK DokonĈenie prvého nastavenia
SV Slutför förstagångsinställningen
TR īlk kullanım öncesi kurulumunu tamamlayın
MS Lengkapkan persediaan kali pertama
2-6
HOME THEATER
1
2
5
EN Need help with your product? Select Help to access the
onscreen user manual
CS Potŏebujete poradit s vaším výrobkem?VýbĖrem možnosti
NápovĖda zobrazíte elektronickou uživatelskou pŏíruĈku
DA Har du brug for hjælp til dit produkt?Vælg Hjælp for at
åbne brugervejledningen på skærmen
DE Benötigen Sie Hilfe mit Ihrem Produkt? Wählen Sie “Hilfe”
aus, um auf das elektronische Benutzerhandbuch zuzugreifen
EL ƗƱƥƩƜƦƥƳƴƥ ƢƯƞƨƥƩơ;ƆưƩƫƝƮƴƥ “ƃƯƞƨƥƩơ”ƣƩơ ƭơ ƤƥƟƴƥ ƴƯ
ƥƣƷƥƩƱƟƤƩƯ ƷƱƞƳƧƲ ƳƴƧƭ ƯƨƼƭƧ
ES ¿Necesita ayuda con su producto? Seleccione la ayuda
para acceder al manual de usuario en pantalla
FI Tarvitsetko apua laitteesi käytössä? Avaa käyttöopas näyt-
töön valitsemalla Ohje
FR Besoin d’aide pour votre produit ? Sélectionnez Aide pour
accéder au mode d’emploi à l’écran
HU Segítségre van szüksége? A súgóra kattintva megtekintheti
a képernyʼnn látható felhasználói útmutatót
IT Hai bisogno di aiuto per il tuo prodotto? Fai clic sul pulsante
di aiuto per accedere al manuale dell’utente su schermo
NL Hulp nodig bij uw product? Selecteer Help om de
gebruikershandleiding op het scherm te openen
NO Trenger du hjelp med produktet? Velg Hjelp for å få tilgang
til brukerveiledningen på skjermen
PL Potrzebujesz pomocy w obsãudze produktu? Wybierz
opcjĔpomocy, aby przejőĂ do ekranowej instrukcji obsãugi
PT Precisa de ajuda com o seu produto? Seleccione Ajuda
para aceder ao manual do utilizador no ecrã
RO Aveŗi nevoie de ajutor pentru produs? Selectaŗi Asistenŗþ
pentru a accesa manualul de utilizare de pe ecran
SK Potrebujete pomoc k vášmu výrobku?Výberom pomoc-
níka spustite návod na používanie na obrazovke
SV Behöver du hjälp med produkten? Öppna användarhand-
boken på skärmen genom att välja Hjälp
TR Ürünle ilgili yardıma mı ihtiyacınız var? Kullanım kılavuzuna
eriŕmek için Yardım’a tıklayın
MS Perlukan bantuan dalam pengendalian produk anda? Klik
Bantuan untuk mengakses manual pengguna atas skrin
2-7
)0
ANTENNA
1
2
1
3
2
3
4
5
6
EN Use your home theater
CS Použití domácího kina
DA Brug af din hjemmebiograf
DE Verwenden des Home
Entertainment-Systems
EL ƗƱƧƳƩƬƯưƯƩƞƳƴƥ ƴƯ home cinema
ES Uso del sistema de cine en casa
FI Kotiteatterin käyttäminen
FR Utiliser votre Home Cinéma
HU A házimozi használata
IT Utilizzo del sistema HomeTheater
NL Uw home cinema bedienen
NO Bruke hjemmekinoanlegget
PL Korzystanie z zestawu kina domowego
PT Utilizar o sistema de cinema em casa
RO Utilizaŗi sistemul home theater
SK Používanie domáceho kina
SV Använda hemmabiosystemet
TR Ev sinema sisteminin kullanılması
MS Gunakan teater rumah anda
2-8
MUSIC iLINK
213
DCK306x
DOCK for iPod
1
2
3
3.5MM
STEREO
2-9
1
LAN
LAN
1
2
3
2-10
Your Home Theater
Congratulations on your purchase, and
ZHOFRPHWR3KLOLSV7RIXOO\EHQHÀWIURPWKH
support that Philips offers, register your product
at www.philips.com/welcome.
Remote control
This section includes an overview of the
remote control.
a(Standby-On)
 Switch the home theater on or to
standby.
 When EasyLink is enabled, press
and hold for at least three seconds
to switch all connected HDMI CEC
compliant devices to standby.
b(Home)
Access the home menu.
cSource buttons
 DISC/POP-UP MENU:Access or exit
the disc menu when you play a disc.
 RADIO: Switch to FM radio.
 AUDIO SOURCE: Select an audio
input source.
dTOP MENU
Access the main menu of a video disc.
Open or close the disc compartment, or
eject the disc.
d(Play/Pause)
Start, pause or resume play.
eSOURCE
Select an audio or video source for the
home theater.
f(Standby-On)
Switch the home theater on or to standby.
Main unit
This section includes an overview of the main
unit.
aDisc compartment
bDisplay panel
c(Open/Close)
HTS3563/12/98/51
2-11

Other manuals for HTS3563

3

This manual suits for next models

3

Other Philips Home Cinema Speakers manuals

Philips Fidelio HTB9550D User manual

Philips

Philips Fidelio HTB9550D User manual

Philips HTL2160/F7 User manual

Philips

Philips HTL2160/F7 User manual

Philips LX3950W/05 User manual

Philips

Philips LX3950W/05 User manual

Philips HTS5520 User manual

Philips

Philips HTS5520 User manual

Philips HTS7111/12 User manual

Philips

Philips HTS7111/12 User manual

Philips HSB2351/98 User manual

Philips

Philips HSB2351/98 User manual

Philips HTL3120 User manual

Philips

Philips HTL3120 User manual

Philips HTL1180B User manual

Philips

Philips HTL1180B User manual

Philips HTS8562/98 User manual

Philips

Philips HTS8562/98 User manual

Philips htb5141k User manual

Philips

Philips htb5141k User manual

Philips HTS9140 User manual

Philips

Philips HTS9140 User manual

Philips HTL3140B User manual

Philips

Philips HTL3140B User manual

Philips HTS2501/94 User manual

Philips

Philips HTS2501/94 User manual

Philips HSB2351X/78 User manual

Philips

Philips HSB2351X/78 User manual

Philips HTS5120 User manual

Philips

Philips HTS5120 User manual

Philips HTS8141/98 User manual

Philips

Philips HTS8141/98 User manual

Philips HTS4561/12 User manual

Philips

Philips HTS4561/12 User manual

Philips HTD3500X User manual

Philips

Philips HTD3500X User manual

Philips FB 602 User manual

Philips

Philips FB 602 User manual

Philips htl1193b User manual

Philips

Philips htl1193b User manual

Philips HTL5110 User manual

Philips

Philips HTL5110 User manual

Philips HTD3514 User manual

Philips

Philips HTD3514 User manual

Philips MX6050D/37B Operating manual

Philips

Philips MX6050D/37B Operating manual

Philips CSS5530B User manual

Philips

Philips CSS5530B User manual

Popular Home Cinema Speakers manuals by other brands

Onkyo SKS-HT870 - 7.1-CH Home Theater Speaker Sys user guide

Onkyo

Onkyo SKS-HT870 - 7.1-CH Home Theater Speaker Sys user guide

Onkyo SKW-580 quick start guide

Onkyo

Onkyo SKW-580 quick start guide

Yamaha NS-P620 owner's manual

Yamaha

Yamaha NS-P620 owner's manual

Sony SA-VA10 operating instructions

Sony

Sony SA-VA10 operating instructions

Panasonic SADK20 - MINI CD/DVD CHANGER Service manual

Panasonic

Panasonic SADK20 - MINI CD/DVD CHANGER Service manual

Yamaha NS-P430 owner's manual

Yamaha

Yamaha NS-P430 owner's manual

Aaron ATS-4 brochure

Aaron

Aaron ATS-4 brochure

Vizio SB3651ns-H6 user manual

Vizio

Vizio SB3651ns-H6 user manual

KEF HTS3001 Satellite Brochure & specs

KEF

KEF HTS3001 Satellite Brochure & specs

Samsung HW-N650 user manual

Samsung

Samsung HW-N650 user manual

Sony SA-VA500 Service manual

Sony

Sony SA-VA500 Service manual

Sony SA-VS300H user manual

Sony

Sony SA-VS300H user manual

Panasonic Viera Link SC-ALL30T operating instructions

Panasonic

Panasonic Viera Link SC-ALL30T operating instructions

Sven HT-440 Operation manual

Sven

Sven HT-440 Operation manual

Panasonic SCHT920 - RECEIVER W/5-DISK DV operating instructions

Panasonic

Panasonic SCHT920 - RECEIVER W/5-DISK DV operating instructions

Yamaha NS-P446 owner's manual

Yamaha

Yamaha NS-P446 owner's manual

Yamaha YHT-493 owner's manual

Yamaha

Yamaha YHT-493 owner's manual

Onkyo HTP-420 Service manual

Onkyo

Onkyo HTP-420 Service manual

manuals.online logo
manuals.online logoBrands
  • About & Mission
  • Contact us
  • Privacy Policy
  • Terms and Conditions

Copyright 2025 Manuals.Online. All Rights Reserved.