manuals.online logo
Brands
  1. Home
  2. •
  3. Brands
  4. •
  5. Philips
  6. •
  7. Projection TV
  8. •
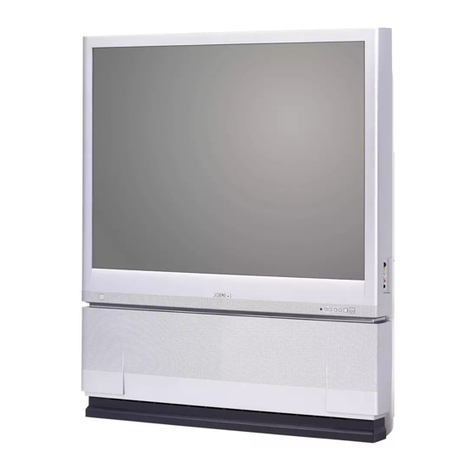
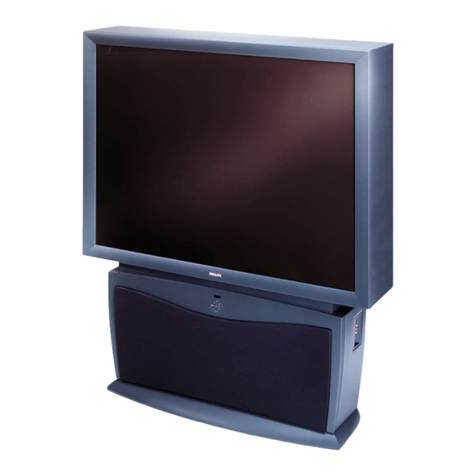
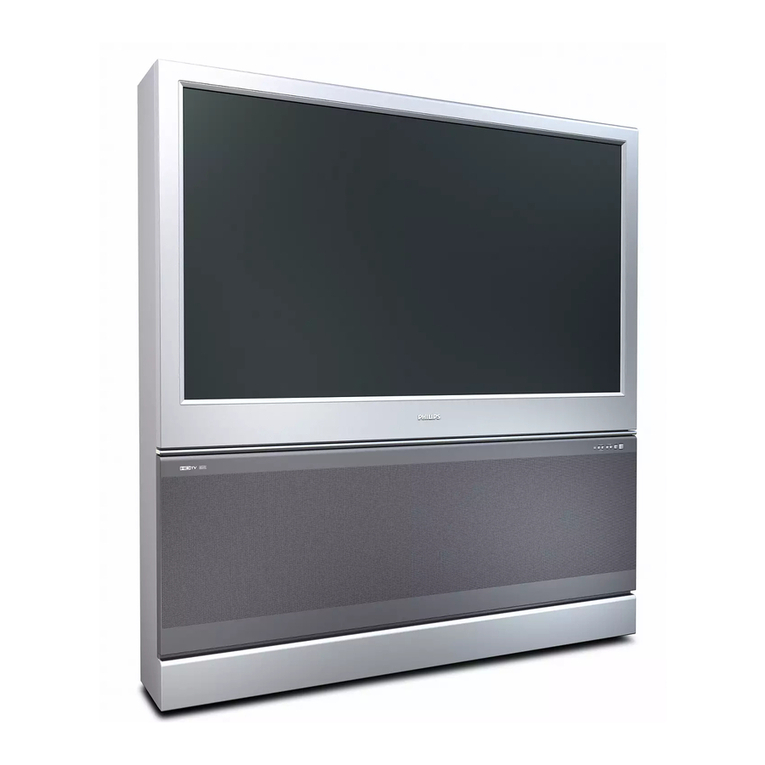
  9. Philips TP4841 User manual

Philips TP4841 User manual

0
PROJECTION TELEVISION
P
IIII I
NO
IMAGE
AVAI
SAFETYINSTRUCTIONS- Readbeforeoperatingequipment
ThisproductwasdesignedandmanLdacturedtomeetstrictqualityand
safetystandards.Thereare,however,someinstallationand operation
precautionswhichyoushouldbeparticularlyawareof.
1. ReadInstructions- Allthesafetyandoperatinginstructionsshould
bereadbeforetheapplianceisoperated.
2. RetainInstructions- Thesafetyandoperatinginstructionsshould
beretainedforfuturereference.
3. HeedWarnings- Allwarningsontheapplianceandintheoperating
instructionsshouldbeadheredto.
4. Followinstructions- Alloperatinganduseinstructionsshouldbe
followed.
5. WaterandMoisture- Theapplianceshouldnotbeusednearwater
- forexample,nearabathtub,washbowl,kitchensink,laundrytub,
inawetbasementornearaswimmingpool,etc.
6. CartsandStands- Theapplianceshouldbeusedonlywithacartor
standthatisrecommendedbythemanufacturer.
6A. _An applianceand cartcombinationshouldbemoved
with care.Quick stops,excessiveforce,anduneven
surfacesmaycausetheapplianceandcartcombination
tooverturn.
7. Wallor CeilingMounting- Theapplianceshouldbemountedtoa
wallorceilingonlyasrecommendedbythemanufacturer.
8. Ventilation- Theapplianceshouldbesituatedsothatits locationor
positiondoesnotinterferewithitsproperventilation.Forexample,
theapplianceshouldnotbesituatedona bed,sofa,rug,orsimilar
surfacethatmay blockthe ventilationopenings;or, placedin a
built-ininstallation,suchasa bookcaseorcabinetthatmayimpede
theflowofairthroughtheventilationopenings.
9. Heat- Theapplianceshouldbesituatedawayfromheatsources
suchas radiators,heatregisters,stoves,or otherappliances
(includingamplifiers)thatproduceheat.
10. PowerSources-Theapplianceshouldbeconnectedto a power
supplyonlyofthetypedescribedintheoperatinginstructionsoras
markedontheappliance.
11. Power-CordProtection- Powersupplycordsshouldberoutedso
thattheyarenotlikelyto bewalkedonorpinchedbyitemsplaced
uponor againstthem,payingparticularattentionto cordsand
plugs,conveniencereceptacles,andthepointwheretheyexitfrom
theappliance.
12. Cleaning- Theapplianceshouldbecleanedonlyasrecommended
bythemanufacturer.
13. PowerLines- Anoutdoorantennashouldbelocatedaway
powerlines.
14. OutdoorAntennaGrounding- Ifanoutsideantennaisconnectedto
the receiver,be suretheantennasystemis groundedso asto
providesomeprotectionagainstvoltagesurgesandbuiltupstatic
charges.
Section810oftheNationalElectricCode,ANSI/NFPANo.70-1984,
providesinformationwithrespectto propergroundingof themats
and supporting structure groundingof the lead-in wire to an
antennadischargeunit, sizeof groundingconnectors,locationof
antenna-dischargeunit, connectionto groundingelectrodesand
requirementsfor thegroundingelectrode.SeeFig.below.
15. Non-usePeriods - Thepower cordof the applianceshould be
unpluggedfrom the outlet whenleft unusedfor alongperiodof
time.
16. 0bjecl andLiquid Entry- Careshouldbetakensothat objectsdo
not fall andliquids arenot spilled intothe enclosurethrough
openings.
17. DamageRequiringService-Theapplianceshouldbeservicedby
qualifiedservicepersonnelwhen:
A. Thepowersupplycordortheplughasbeendamaged;or
B. Objects have fallen, or liquid has beenspilled intothe
appliance;or
C. Theappliancehasbeenexposedtorain;or
D. Theappliancedoesnotappeartooperatenormallyor exhibits
amarkedchangeinperformance;or
E Theappliancehasbeendropped,ortheenclosuredamaged.
18. Servicing- Theusershouldnotattempttoservicetheappliance
beyondthat describedin theoperating instructions.Allother
servicingshouldbereferredtoqualifiedservicepersonnel.
NotetotheCATVsysteminstaller:Thisreminderisprovidedto call,,..
CATVsysteminstaller'sattentionto Article 820-40 of the NEC that
providesguidelinesforpropergroundingand,inparticular,specifiesthat
thecablegroundshallbeconnectedto thegroundingsystemof the
building,asclosetothepointofcableentryaspractical.
EXAMPLEOFANTENNAGROUNDINGASPERNATIONALELECTRICALCODE(NEC)
ExampleofAntennaGrounding
asper NEC- NationalElectricCode
GROUNDCLAMP ANTENNALEADIN WIRE
ANTENNADISCHARGEUNIT(.ec szcnoanlo-20)
GROUNDINGCONDUCTORS(NECSeCnO_ele._)
GROUND CLAMPS
"--_"_""_ POWERSERVICEGROUNDINGELECTRODESYSTEM (N_cART250,PARTH)
ELECTRICSERVICEEQUIPMENT I
: i. ¸
_Getting Started
Welcome/Product Registration ................... 2
Safety/Precautions ..................................................... 3
Table of Contents .................................... _.................. 4
Features, Model and Cabinet Information ................. 5
_"--] On-Screen Features
PICTURE MENU
€Adjusting Color, Brightness, Sharpness,
Tint, and Picture Controls ................................... 6
€Using the Clearview Control ............................... 7
€Adjusting the TV's Convergence Control ........... 8
€Using the Flesh Correction Control .................... 9
FEATURES MENU
¢Selecting a Picture Source/RF Switch .............. I0
€Setting the TV for Closed Captioning ............... 11
_Setting the TV for Cable or Antenna Signals.... 12
€Adding Channels in Memory (Automatically). 13
€Adding Channels in Memory (Manually) ......... 14
€Setting the "IV Clock ......................................... 15
eTum-On Timer .................................................. 16
€Using the Sleep Timer Control ......................... 17
"ffAdjusting the Channel Display Control ............ 18
€Using the Time/Channel Reminder Control ...... 18
€Using Parental Control to Censor Channels 19-20
€Using the Channel Label Control ...................... 21
€Using the Language Selection Control .............. 22
SOUND MENU
€Adjusting Bass, Treble, and Balance Sound
Ci_ntrols ............................................................. 23
"_Setting the Bass Boost Control ........................ 23
€Setting the TV for Stereo and SAP Programs ..24
€Using the Incredible Stereo Control ................. 25
€Using the Volume Display Control ................... 25
_Using the TV Speaker On/Off Control with
the Audio Output jacks ..................................... 26
€Surround Sound Speaker Connections and
Variable Audio Output Control ........................ 27
€Using the TV's Audio/Video Input and
Output Jacks ............................................... 28-31
iRemote (_ontrol Operation
Using the Remote Locator Feature ....... 3
Setting the Smart Picture Control ..........3,+-35
Using Smart Sound Control ..................................... 36
Using the Smart Surf Control .................................. 37
Setting the Remote to Work VCRs .................... 38-39
Setting the Remote to Work
Cable TV Converters .......................................... 40-41
Setting the Remote to Work VCRs or Cable
Converters - "Search Method". ................................ 42
Using the Remote's VCR buttons ............................ 43
---_ Picture-ln-Picture (piP)
How to Use PIP (Connections) ............. 44-45
How to Use PIP with the TV Remote ...................... 46
Selecting the Picture Source for PIP ........................ 47
Adjusting Picture-in-Picture Color and Tint ............ 48
More PIP Connections (Cable Converter) ............... 49
I General Information
TV Help Menu ........................................... 50
Tips if Something Isn't Working ..................... 51
Glossary of "IV Terms ............................................. 52
Index ........................................................................ 53
Factory Service Locations .................................. 54-5.'
Warranty .................................................................. 5(
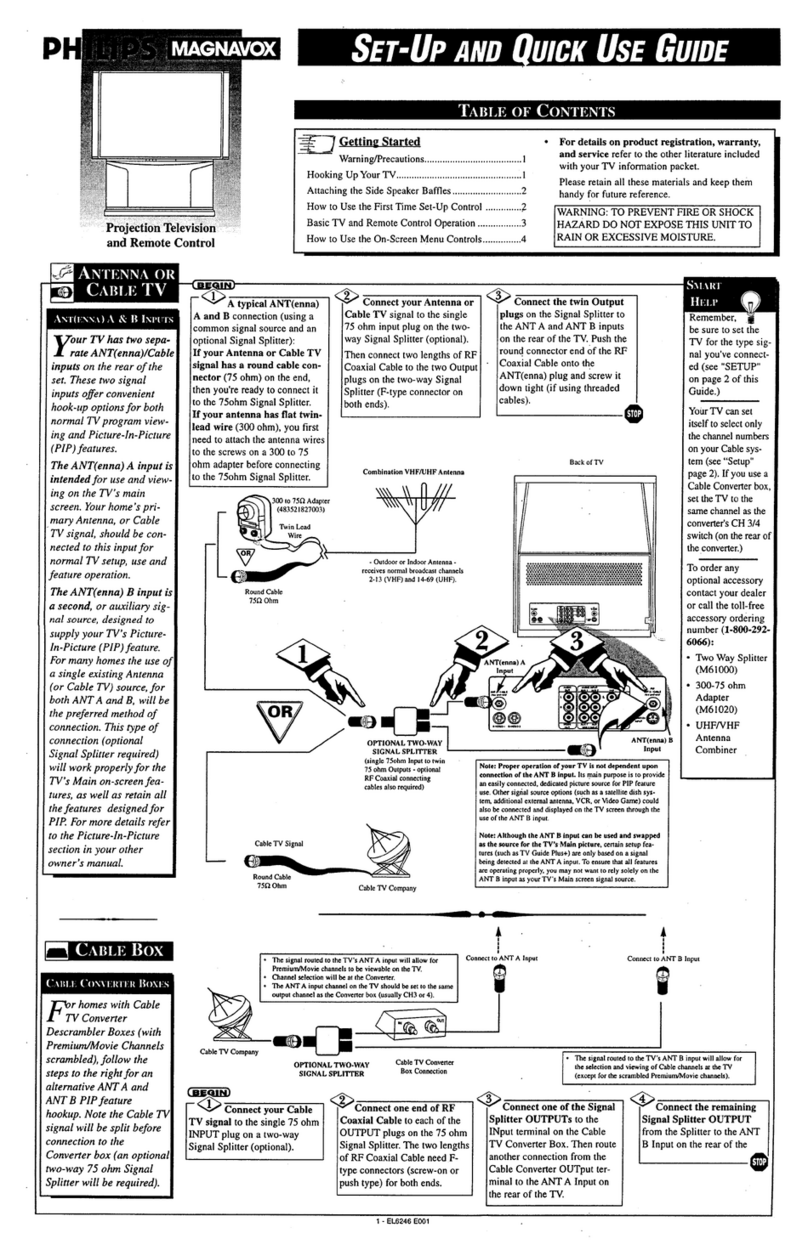
Use the simple Set-Up Guide (supplied witt
your TV information packet) for details on:
• Antenna Hook-ups
•First Time Set-Up
(Automatic Settings)
• Basic TV and Remote
Control Operation
.... R.,_ I
• On-Screen Menu Use
Copyright © 1997 Philips Consumer Electronics Company. All rights reset
4
.i/ !
iFirst Time Set Up -automatically sets the TV for
local channels, the correct picture signal (antenna or
cable), and assists inthe setting of TV's Smart Clock
feature.
Infrared Remote Control - operates your "IV set and
a variety of wireless remote control VCRs and Cable
TV Converters. A special "Locator" feature can also
help you find the remote when it has been stuck out of
sight or misplaced.
Standard TV broadcast (VHFAIHF) or Cable TV
(CATV) channel capability.
Closed Captioning - allows the viewer to read TV
program dialogue or voice conversations as on-screen
text.
Automatic Programming of channels - forquick and
easy selection of favorite stations available in your
area.
Picture-In-Picture (PIP) -can show a TV program
and the direct video output from an accessory (VCR,
etc.) onto the TV screen at the same time.
Parental Control for "Censoring" -this feature can
block out channels to keep children from watching
undesirable programming.
Stereo-TV - with a built-in audio amplifier and atwin
speaker system, reception of TV programs in both
broadcast stereo sound or(SAP) bilingual broadcast
are available.
Twin Antenna (A/B) Inputs - for easy displaying of
two separate signal sources on the TV. An A/B button
on the remote cont_l switches the TV's Main screen
between the two Antenna (A & B) Input options.
Audio/Vidoo Jacks - fordirect connections with
VCRs (and other accessories) for quality TV picture
and sound playback.
Surround Sound - this TV set contains external;
audio speaker connections for amore dynamic sound
effect.
Sleep-Timer - automatically turns the TV OFF at
preset time intervals.
Smart Button - for the control of TV Sound and the
Picture levels. Use the Smart Button on the remote to
quickly adjust Smart Sound (to set "IV Volume levels
during program changes or commercial breaks); Smart
Picture (for programmed video video level
adjustments on a variety of program sources); and
Smart Surf (for quick one button channel selection of
up to l0 of your favorite channels).
As you unpack your TV please note that the
following items have been included with your set.
•Owner's Manual
Safety Tip Information
- Factory Service Center Locations
•Warranty Registration Card
• Remote Control Transmitter
•Batteries for Remote Control Use
Please take a few minutes to complete your
registration card. The serial number for the TV is
on the back of the set.
Refer to the back of this manual for instructions
on the cleaning and care of the TV.
An accessory storage shelf compartment has been
designed into some Projection TV Cabinets for the
placement of such items as VCRs, CD-i (Compact
Disc Interactive) Players, or other pieces of
audio/video equipment.
If your Projection TV is so equipped, use the
connection tunnel (located on the rear wall of the
storage compartment) to route Antenna, Cable, or
other signal supply wires from the accessories to the
TV's rear cabinet jackpanel.
Note: A Projection TV Screen Enhancement Filter
may also be present on certain select models. Refer
to the Cleaning and Care Instructions provided for
directions on how to remove the framed filter if it
should ever be necessary.
Select BRIGHTNESS,
PICTURE, COLOR, TINT, or
SHARPNESS picture control.
With the PICTURE MENU on
screen, move the RED highlight
with the MENU (M) (_) buttons.
Then press the MENU button.
<_ Press the (+) or (-) buttons to
adjust the selected control.
<_ Press the STATUS button to
clear the screen.
Remember. When the bar
scale is centered, control
settings are at normal mid-range
levels.
_d_[._l.T_-a_ Press (-) or (+) until
dark parts of the picture show good
detail.
PICTURE Press (-) or (+) until
whitest pa°rts of the picture are as
bright as you prefer.
Press (-) or (+) to add or
eliminate color.
TINT Press (-) or (+) to obtain
natural skin tones. (Also see Flesh
Correction on page 9 for more
information).
SHARPNESS Press (-) or (+) to
improve detail in the picture.
MAIN
__ • L
HOW TO SELECT FEATURES
(WITH BUTI'ONS ON THE REMOTE)
Press MENU (M)
to select RED
highlighted Press MENU (M)
•• to move Up
and Down within
the Menu.
PressMENU(M)(I•
to move from Side-to-
Side within the Menu.
<
lwearview is a sharpness feature
hich smoothes out
background snow (or picture noise)
without losing picture image detail
or crispness.
[_ Select CLEARVIEW control.
With the PICTURE MENU on
screen, move the RED highlight
with the MENU (M) 4_ buttons.
Then press the MENU button.
Press the MENU A_' buttons
to move the RED highlight. Press
the MENU button to select (t,*')the
ENHANCED mode.
Press the STATUS button to
iclear the screen.O
>
PIG"TUBE MENU
nvergence is the correct
ining up of the red and blue
light paths on the TVscreen.
NOTE: If no color fringing (see
Smart Help) shows, then no
Convergence adjustments are
necessary for your TV.
<_ Select CONVERGENCE
control.
With PICTURE MENU (2 of 2) on
screen, move the REDhighlight
with the MENU (M)4_ buttons.
Then press the MENU button.
<_If there is RED or BLUE color
fringing on the White cross, press
the MENU button to continue.
<_ Press the MENU 4_ buttons
to move the red or blue cross
directly over the white cross on the
TV screen.
The red or blue cross is properly
adjusted when it is completely
merged with the white cross. (No
color appears around the edge of
the white cross).
<_ Press the STATUS button to
clear the screen when convergence
adjustments are complete.
Remember. Convergence
! has been set at the factory for
best viewing, but if one or more of
the (red or blue) colors appear
around the edges of objects (color
fringing) follow the steps given in
this section.
4PlP_
RCTURE MENU
<
PICTURE MENU
tIt, I if=I
rm 20F2_
If thereisREDor BLUE
fringeontheWHITEcross,
usethis adjustmentto
improvethepicture.
Press "M"to Continue
- or -
Press"_"toReturn
H
I
_:oi_ ¸
se the Flesh Correction
ontrol to keep skin tone hues
(orfacial tint)from varying from
TV channel to TV channel.
<,,_ Select FLESH
CORRECTION control.
With PICTURE MENU (2 of 2) on
screen, move the RED highlight
with the MENU (M)4_ buttons.
Then press the MENU button.
<,_ Press the MENU A_' buttons
to move the RED highlight. Press
the MENU button to turn (I,,') the
FLESH CORRECTION control
ON.
¢,_ Press the STATUS button to
clear the screen.
@
MAIN
st, I ,l_
_ J
RCTURE MENU
PICTURE MENU
IICON','ERGEN_II
20F 2_
FLESH
D
D
9
he picture for the TV can come
rough either the ANTENNA
plug or the AUDIO/VIDEO INput
jacks (on the rear of the TV). The
Picture Source control simply tells
the TV which one of these picture
sources it is to show on the TV
screen.
_ Select PICTURE SOURCE
ELECT control.
With the FEATURES MENU on
screen, move the RED,highlight
with the MENU (M) _* buttons.
Then press the MENU button.
<_ Press the MENU &_' buttons
to move the RED highlight. Press
the MENU button to turn the
desired PICTURE SOURCE
control ON (v').
ANT A or B- for a picture signal
coming from either the ANT(enna)
A or B Input plugs on the TV.
AUX 1- for a picture signal
coming from the AUX 1 Video
Input jack on the rear of the TV.
AUX 2- for a picture signal
coming from the AUX 2 Video
Input jack on the rear of the "IV.
AUX 3- for a picture signal
coming from the Video Input jack
on the front of the TV.
<_ Press the STATUS button to
I clear the screen_
n optional RF Switcher is available
that will allow an AntennaICable TV
sigt_al and another video accessory
VCR, Video Disc Player, etc.) to be
connected to the TV at the same time.
Connection instructions are given with
the accessory RF Switcher, but be sure
to turn the TV's power OFF (and
unplug its AC power cord) when
connecting the RF Switcher to the RF
Switch Input jack on the rear of the TV.
Replug the TV' s AC Power Cord into
the wall outlet and turn the TV ON. The
TV's Picture Source Menu will now
show an Accessory Signal Source option
available for selection.
The accessory RF Switcher can be
purchased or ordered from your dealer.
If your dealer does not carry the
accessory, call the Information Center
number (listed with your warranty)for
further assistance.
Remember,
the AUX 1, AUX
2, and AUX 3
modes must have a
video signal source
connected (to their
INPUT plug) or the
TV screen will be
blank. (See page 28
for connection
details).
__ •L
@@
.... .._iiiiiil
10
i
lyOSedCaptioning (CC) allows
ou to read the voice content of
television programs on the TV
screen. Designed to help the hearing
impaired this feature uses on-screen
"text boxes" to show dialogue and
conversations while the TV program
is in progress.
'@ Select CLOSED
CAPTIONING control.
With the FEATURES MENU on
screen, move the REDhighlight
with the MENU (M) 4_lbbuttons.
Then press the MENU button.
_Press the MENU &Y buttons
to move the RED highlight. Press
the MENU button to select (t,,') the
desired Closed Caption mode - For
Example: "ALWAYS ON" and
"CAPTION 1".
CAPTION 1, 2, 3, 4:
dialogue (anddescriptions)
for the action on the captioned
TV program shows on-screen.
(See Important Note on this
page.)
TEXT 1, 2, 3, 4:
often used for channel guide,
schedules, or bulletin board
information for CC programs.
_,,_ After making your Caption mode
selection, press the STATUS button
to clear the TV_creen. The selected
Closed Caption mode will be active.
To cancel, set the Closed Captioned
feature t_ OFF when finished.
Remember. Broadcast
gstations will often use
spelling abbreviations, symbols,
dropouts and other grammatical
shortcuts in order to keep pace
with the on-screen action. These
type factors vary upon the source
of the captioned text material and
do not indicate a need for service
on the part of the TV.
NOTE: Not all TV programs and product commercials are made for broadcast -]
with Closed Caption (CC) information included. Neither are all Closed Caption
modes (CAPTION 1-4; or TEXT 1-4) necessarily being used by a broadcast station
during the transmission of a closed caption program. Usually "CAPTION 1"is the
most used mode to view captioned material. Refer to your area's TV program
listings for the stations and times of Closed Caption shows.
MAIN MEN_
set the TV to
q" whenever the
FEATURE MENU
10F5_
ALWAYS ON
ALWAYS OFF
ON DURING MUTE ONLY
rE_ 43
TEXT
CAPTION I mode
Closed Caption information will usually appear
in black and white (although some broadcasters
or networks may occasionally use color to
highlight or draw attention to certain areas.)
FULL SCREEN TEXT
will block TV screen from viewing
11
.._ ,.,.!_
ou need to make sure the TV is
et to pick up either Cable TV
or Antenna signals. In other words,
the TV needs to know if you
connected a Cable TV signal or a
normal antenna to its ANTENNA
plug.
NOTE: If you went through First
Time Setup (in your Quick Use
Guide), this task has already been
completed for you.
<_ Select CABLE CHANNEL
TUNING control.
With the FEATURES MENU on
screen, move the REDhighlight
with the MENU (M)4_ buttons.
Then press the MENU button.
<_ Press the MENU &Y buttons
to move the RED highlight. Press
the MENU button to select (t,,e) th_
desired mode - For Example:
CABLE.
CABLE- If you DO have
Cable TV connected
to the TV. Channels
1-125 available.
NORMAL- If you have an
Antenna connected
to the TV. Channels
2-69 available.
<_ Press the STATUS button to
clear the screen.
O
MAIN MENU
¢f=i Itl
PlP_
=FEATUREMENU
10FS=
12
Ur TV can automatically set itself
r local area (or Cable TV)
channels. This makes it easy for you
to select only the TV stations in your
area when the CHANNEL • •
buttons are pressed.
NOTE: lf you went through First
Time Setup (in your Quick Use
Guide), this task has already been
completed for you.
_Select CHANNEL MEMORY
(START AUTO-PROGRAMMING)
control.
With the FEATURES MENU on
screen, move theRED highlight with
the MENU (M)4*) buttons. Then
press the MENU button.
",_ Press the MENU button to turn
AUTO-PROGRAMMING ON.
The TV shows which channel
numbers are "SAVED" (t,,') as they
are added into memory.
"Auto-programming CHANNEL
MEMORY is finished" shows when
the TV is through adding channels.
c,_ Press the STATUS or Menu (M)
Ibutton to clear the screen.
0
@
+tTry it out. Press the
CHANNELJk• buttons
and see which channels you can
select.
Remember, an Antenna or Cable
TV signal must first be connected
to your TV so that channels can be
saved.
If you want to delete any
unwanted channels from the TV's
memory, see "ADD/DELETE
CHANNELS" on the next page.
MAIN MENU
,l.l,I_
13
Saved inMemory
AUTO-PROGRAMMING CHANNEL
MEMORY FOR ANT A
1 2v _ 3_ 4€"
5v" 6tz 7_ 8_
9_ 10 11 12
_3 14 15 16
17 18 19 20
21 22 23 24
_:_.,_ ;:_
uto-Programming (see
previous page) adds all the
channels it can find (on your
Antenna or Cable TV system) into
the TV's memory. Add/Delete
Channels makes it easy for you to
add other channels, or drop
unwanted channels, from the list of
channels in the TV's memory.
Select CHANNEL MEMORY
(ADD/DELETE CHANNELS)
control.
With the FEATURES MENU on
screen, move the RED highlight
with the MENU (M) 4-_buttons.
Then press the MENU button.
'_ Press the CHANNEL AY or
number buttons to select the
channel you want to add ordelete.
<_ Press the MENU button to
ADD the channel into the TV's
memory.
Press the MENU _1 button to
DELETE the channel from
memory.
Repeat steps 2 and 3 for each
channel you wish to add or delete.
<_ Press the STATUS MENU
or
button to clear the screen when
through.
Remember. You can also
add the AUX 1, AUX 2, or
AUX 3 modes just like a channel.
Then by pressing the CHANNEL
AV buttons the AUX(iliary)
mode can quickly be selected to
use the desired set of Input jacks
on the TV (see page 28).
Note: AUX 1, AUX 2, and AUX 3
modes are located between the
lowest and highest channel
numbers within the
ADD/DELETE CHANNEL
control screen.
MAIN MENU
tram
FEATURE MENU
10FS_
CHANNEL MEMORY
_'t tItI ,IrlJ
,J, J,_;.' L_I._.'
II AUTO4::'ROGRAMMING II
SELECT CHANNEL
(_} to DELETE CHANNEL
for" ANT B
NOTE: A separate ADD/DELETE CHANNEL memory
may also be created for the ANT(enna) B Input on the
rear of the set (if an Antenna or Cable TV signal has been
connected). Just press the _ button on the remote,
while in the ADD/DELETE CHANNEL mode, to switch
between the ANT A and ANT Bchahnel memory lists.
Then follow steps 2 and 3 as shown to the left to add or
delete the desired channels.
14
I
Select SET CLOCK control.
With FEATURES MENU (2 of 5)
on screen, move the RInD highlight
with the MENU (M)4o_ buttons.
Then press the MENU button.
_,,_ Press the remote's number
Ibuttons to set the time clock.
Press the STATUS button to
set the clock in operation andclear
the screen.
=MAIN MENU
et I I tIt
Remember, be sure to
tpress "0" first and then the
hour number for single digit
entries.
The remote's MENU (M) _
buttons can also be used to set the
hours, minutes and AM/PM
portions of the _lock.
TV Clock settings may be lost
when the TV is unplugged (or AC
power to'the set is interrupted.) .t
FEATURE MENU
FEATURE MENU
,I=i,I,
20F5_
SET CLOCK & ON TIMER
rm
!15
ust like an alarm clock you can
et the TV to turn itself on at the
same time everyday.
<_ Select SET ON TIMER
control.
With FEATURES MENU (2 of 5)
on screen, move the RED highlight
A
with the MENU (M) 4-k buttons.
Then press the MENU button.
<_ Press the MENU A,V and
MENU (M) buttons to highlight
and select "ON" (tl).
<_ Press the MENU •V and
Ithen the MENU (M) buttons to
select "SET ON TIME".
<_ Press the remote's number
buttons to set the 'q'URN ON"
time for the TV. (Press MENU •
• for AM or PM.)
<_ Press the STATUS button to
Iset the '_)N TIME" and clear thescreen. @
It*l,It
FEATURE MENU
,t,l,r,
t
FEATURE MENU
Ll,l,lt
20F5_
SLL'TCLOCK & ON TIMER
i t = J _
,ijI ' \,
SET ON TIMER
eiiI_tI
rm
16
Veyou ever fallen asleep in
nt of the TV only to have it
wake you up at two in the morning
with a test pattern screeching in
your ears? Well, your TV can save
you all that trouble by
automatically turning itself off.
!1",,_ Select SLEEP TIMER control.
With FEATURES MENU (2 of 5)
on screen, move the RInD highlight
with the MENU (M) 4_) buttons.
Then press the MENU button.
<_ Press the MENU •l_buttons
to pick the amount of time (15
minutes to 2 hours ahead) before
the "IV will turn itself off.
_Press the STATUS or MENU
(lVl)button to clear the screen after
you have set the time for the TV to
turn off. 1_
Remember, to see how
! many minutes are left before
the TV shuts itself off, reselect the
SLEEP TIMER control screen.
To stop a SLEEP TIMER setting,
reset the timer back to OFF.
(Turning the TV off and on, or
pressing a button during the last
minute of a timer setting, will also
cancel asetting)
A few seconds before the TV is to
shut off a message will come on the
screen t611ingyou GOOD NIGHT.
MAIN MENU _x_i_
r-at1
17
:_-.. _*_:_:_i_
_!_:_:_$ ....
FEATURE MENU
)
FEATURE MENU
20F 5_
T
-1
th the Channel Display
ontrol you can change the
size and location of the on screen
channel and clock information.
<_ Select CHANNEL DISPLAY
control,
With FEATURES MENU (2 of 5)
on screen, move the RED
highlight with the MENU (M) 4_k
buttons. Then press the MENU
button.
I_" _ the MENU AV and
Press
MENU (M) buttons to highlight
and select 0") the LARGE or
SMALL display control.
Ii_leParreSthS tshcereSeTA_USbutt°n t°
FEATUf_ MENU
FEATURE MB'qU
Try it out.
Press the
CHANNEL AV
buttons and you
should see the
Display Size you
selected.
Remember. The
SMALL SIZE
display shows only
the channel number,
not the time (or
clock).
th the Half Hour Reminder
ontrol the TV automatically
shows you the current time and
channel every thirty minutes.
:_ Select I_LF HOUR
REMINDER control.
Witl_FEATURES MENU (2 of 5)
on screen, move the RED
highlight with the MENU (M) 4_
buttons. Then press the MENU
button.
<_ Press the MENU AV and
MENU (M) buttons to highlight
and select (tJ) the EVERY HALF
HOUR item.
<_ Press the STATUS button to
clear the screen.
FEATURE MENU
EOFS_
18
arental Control allows parents
to block out, or "censor", any
channels they think children should
not watch. A channel placed under
Parental Control cannot be viewed
until a correct access code is used to
unlock the channel for viewing.
First let's set your Parental Code:
c-a-warm
@_ Select the PARENTAL
CONTROL.
With FEATURES MENU (3 of 4)
on screen, move the RED highlight
with the MENU (M) (_k buttons.
Then press the MENU button.
"BLOCK CHANNELS" and
"SETUP CODE" show on screen.
_,' _ Press the MENU AV and
[ MENU (M) buttons to highlight
] and select the SETUP CODE item.
0, 7, 1, on remote.
Press 1 the
"XXXX" shows on the ACCESS
CODE SETUP screen as you press
the number buttons.
"INCORRECT ACCESS CODE -
TRY AGAIN" will also show on the
screen.
> Press 0, 7, 1, I on the remote
again.
"Next Enter Your New Access
Code" shows on the screen.
Enter a new=four digit number
code using the remote.
"Access Code Changed" shows on
the scrden to let you know the new
code has been set.
Continue to the next page to find
out how to "block" channels from
viewing.
Parents - it isn'tpossible
gto unlock or defeat your
Censor Code without changing to
a new code number. So if your
Code number changes, and you
didn't change it yourself, then you
will know that someone has
altered the code and the blanked
out channel has been viewed.
leftthe factory with the Parental Code setto '_00". Ifyouare using
Parental Control forthe firsttime, and don't want to SETUP a new
V
FEATUt_ MENU ,,,l,I,
30FS_
FEATURE MENU _
_2 b__'_ "
i
PARENTAL CONTROL
"l'l',"
!
......... •3
EXIT EXIT
....... d
to EXIT EXIT
Press MENU II_ to go on and start
to "block" channels
Press MENU to return to the
Parental Control-Menu screen.
Press STATUS to clear the screen.
19
I
fter your personal Parental
ode number has been set (see
previous page), you are now ready
to select the channels you want to
block out or censor.
_ Select the BLOCK
CHANNELS control.
With FEATURES MENU (3 of 4)
on screen, move the RI_=Dhighlight
with the MENU (M) 4_buttons.
Then press the MENU button.
'_ Press the MENU AV and
MENU (M) buttons to highlight
and select the BLOCK
CHANNELS item.
_Enter the correct Parental
Code number.
,_ Press Channel &V Channel
or
Number buttons to select the
channel you want to block.
<_ Press the MENU button to
"BLOCK VIEWING" on the
selected channel.
Press the MENU • button to
"ALLOW VIEWING" on a
blocked channel.
Repeat steps 3 and 4 for any other
channels you wish to block out.
O
IxxxxJ
Remember, to make TV
'viewing easier all channels
(and Audio/Video Input jacks)
will be unblocked, once the
correct Parental Code number has
been entered.
When the TV is turned OFF and
then back ON again, Parental
Control is back in place for all
channels.
.... FEATURE MENU _FEATURE MENU
t" ...................... ,,I
I
t
r-_ FEATURE MENU
rm...... 30F5---_
_+ PARENTAL CONTROL
I
........ .4
To Block or Un-Block
channels _Enter
Ww Access Code, _,
V
CHANNEL 1_1
BLOCI_r-D BY PARENTAL CONTROL
Pleaee enter Acce_s Code
-OP,-
Select another Channel
for viewing.
SELECT CHANNEL
(_ to ALLOW ViI_NING
(_ to EXIT
.......... .i
Note: You can also block out the
use of the Audio/Video Input jacks
on the TV. This stops the viewing
of VCR programs which can be
shown through the A/V IN jacks.
Just select VCR/AUX 1, AUX 2, or
AUX 3(located between the lowest
and highest channel numbers) on
the Channel Blocking screen, and
select "blocked".
BLOCKED CHANNEL SCREEN MESSAGE
(Appears when an attempt to _lect a blocked
channel is made and Parental Control is ON.)
20

This manual suits for next models

1

Other Philips Projection TV manuals

Philips Match Line 60PP9753/17 User manual

Philips

Philips Match Line 60PP9753/17 User manual

Philips 46PP9302 Manual

Philips

Philips 46PP9302 Manual

Philips Magnavox 8P5441C User manual

Philips

Philips Magnavox 8P5441C User manual

Philips 51PP9100D - Hook Up Guide User manual

Philips

Philips 51PP9100D - Hook Up Guide User manual

Philips 9P5040C1 User manual

Philips

Philips 9P5040C1 User manual

Philips 60PP9363H/17B Instruction and safety manual

Philips

Philips 60PP9363H/17B Instruction and safety manual

Philips 43PP8441 User manual

Philips

Philips 43PP8441 User manual

Philips Magnavox 8P5444C199 User manual

Philips

Philips Magnavox 8P5444C199 User manual

Philips Magnavox 8P4844C User manual

Philips

Philips Magnavox 8P4844C User manual

Philips Magnavox 7P5441C User manual

Philips

Philips Magnavox 7P5441C User manual

Philips 60PP9200D User manual

Philips

Philips 60PP9200D User manual

Philips 55P834199 Manual

Philips

Philips 55P834199 Manual

Philips Magnavox 8P6054C User manual

Philips

Philips Magnavox 8P6054C User manual

Philips 55P 9161 User manual

Philips

Philips 55P 9161 User manual

Philips Matchline 50PP925 User manual

Philips

Philips Matchline 50PP925 User manual

Philips Magnavox 9P5514C User manual

Philips

Philips Magnavox 9P5514C User manual

Philips 8P6054C199 User manual

Philips

Philips 8P6054C199 User manual

Philips 46PP9501/05 User manual

Philips

Philips 46PP9501/05 User manual

Philips 50PP8541-93Y Manual

Philips

Philips 50PP8541-93Y Manual

Philips Magnavox 51MP6200D/37 User manual

Philips

Philips Magnavox 51MP6200D/37 User manual

Philips 46PP9302H User manual

Philips

Philips 46PP9302H User manual

Philips 43PP8545/69 User manual

Philips

Philips 43PP8545/69 User manual

Philips Magnavox 8P6041C User manual

Philips

Philips Magnavox 8P6041C User manual

Philips 60P916 User manual

Philips

Philips 60P916 User manual

Popular Projection TV manuals by other brands

Mitsubishi Electric WD-52525 Technical training

Mitsubishi Electric

Mitsubishi Electric WD-52525 Technical training

Sears LXI 626.54462950 owner's manual

Sears

Sears LXI 626.54462950 owner's manual

Toshiba 46HM84 - 46" Rear Projection TV Service manual

Toshiba

Toshiba 46HM84 - 46" Rear Projection TV Service manual

Samsung HCL5515W Owner's instructions

Samsung

Samsung HCL5515W Owner's instructions

Sony KP-41PX1K instruction manual

Sony

Sony KP-41PX1K instruction manual

Mitsubishi Diamond LT-52246 Specification sheet

Mitsubishi

Mitsubishi Diamond LT-52246 Specification sheet

Mitsubishi WS-48511 Guide Service manual

Mitsubishi

Mitsubishi WS-48511 Guide Service manual

Magnavox FP5230W owner's manual

Magnavox

Magnavox FP5230W owner's manual

Toshiba 46HM94P Service manual

Toshiba

Toshiba 46HM94P Service manual

Toshiba ColorStream TP50H60 owner's manual

Toshiba

Toshiba ColorStream TP50H60 owner's manual

Toshiba TheaterWide 62HM94 specification

Toshiba

Toshiba TheaterWide 62HM94 specification

Hitachi 55VS69A Specifications

Hitachi

Hitachi 55VS69A Specifications

Hitachi 57T500A operating guide

Hitachi

Hitachi 57T500A operating guide

Sony KP-41T35 - 41" Projection Tv operating instructions

Sony

Sony KP-41T35 - 41" Projection Tv operating instructions

Toshiba 56MX195 - 56" Rear Projection TV owner's manual

Toshiba

Toshiba 56MX195 - 56" Rear Projection TV owner's manual

Toshiba ColorStream TP61G90 owner's manual

Toshiba

Toshiba ColorStream TP61G90 owner's manual

Sony KP-43T85T Service manual

Sony

Sony KP-43T85T Service manual

Samsung HC-R5245W Specifications

Samsung

Samsung HC-R5245W Specifications

manuals.online logo
manuals.online logoBrands
  • About & Mission
  • Contact us
  • Privacy Policy
  • Terms and Conditions

Copyright 2025 Manuals.Online. All Rights Reserved.