manuals.online logo
Brands
  1. Home
  2. •
  3. Brands
  4. •
  5. Philips
  6. •
  7. Projector
  8. •
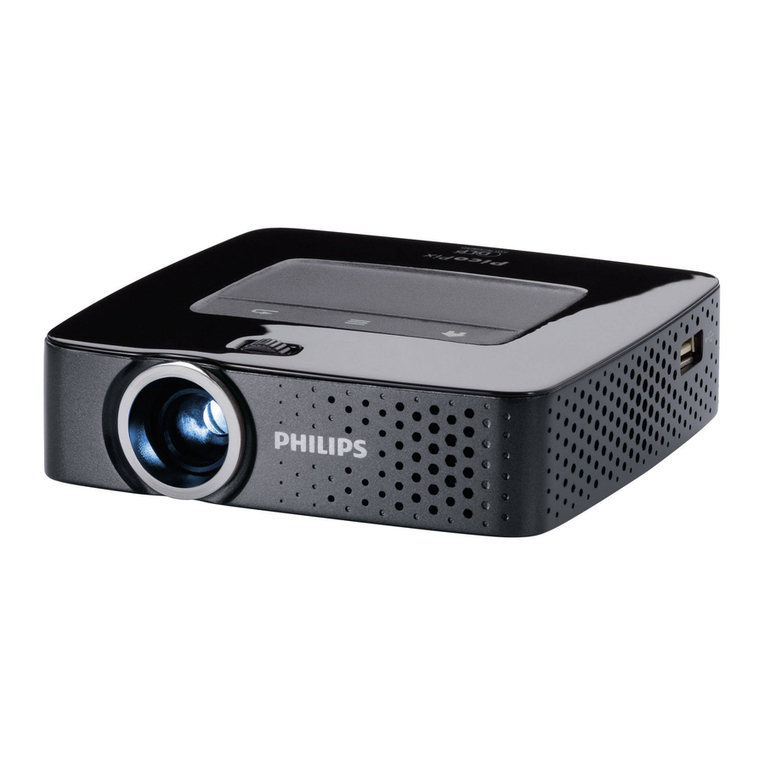
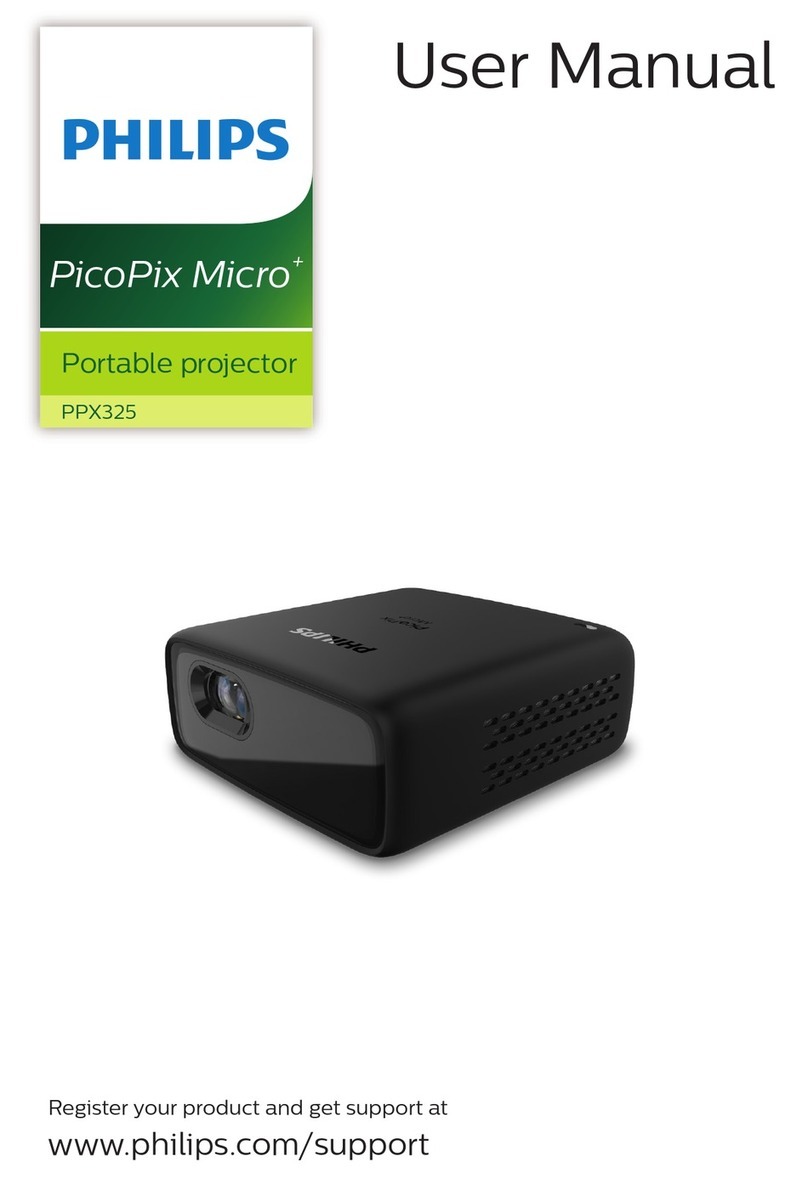
  9. Philips PicoPix X PROJECT WIFI PPX3610 User manual

Philips PicoPix X PROJECT WIFI PPX3610 User manual

EN
PPX3610
User Manual
Register your product and get support at
www.philips.com/welcome
X PROJECT WIFI
1 Philips · PPX3610
Table of Contents
Overview ................................................... 2
Dear Customer ................................................................... 2
About this User Manual ..................................................... 2
What's in the Box ............................................................... 2
Product Highlights .............................................................. 2
1 General Safety nformation................ 3
Setting u the Device ......................................................... 3
Re airs ................................................................................... 3
Power Su ly ....................................................................... 4
Wireless Network (WLAN) ............................................ 4
2 Overview............................................... 5
To of the Device ............................................................... 5
Bottom of the Device ........................................................ 5
Side View ............................................................................... 5
Pico Station ........................................................................... 6
Touch ad / Gestures .......................................................... 7
Remote Control .................................................................. 9
Overview of the Menu Functions ................................. 10
Symbols in the Statusbar ................................................ 10
3 nitial Operation ................................ 11
Setting u the Device ...................................................... 11
Connect Power Su ly / Charge Battery ................... 11
Installing or Changing the Batteries of the Remote
Control ............................................................................... 11
Using the Remote Control ............................................ 12
Initial Installation ............................................................... 13
4 Connect to the Playback Device ...... 14
Connecting to Devices with HDMI Out ut .............. 14
Connecting to an iPhone/iPad/iPod ............................. 14
Connecting to a Com uter (VGA) .............................. 15
Connecting Using an Audio/Video (CVBS) Ada ter
Cable ................................................................................... 15
Connecting using Com onent-Video (YPbPr/YUV)
Cable ................................................................................... 16
Directly Connecting Projector to Com uter using
WLAN (WiFi Streaming) ............................................... 17
Connecting the head hones .......................................... 17
5 Memory............................................... 18
Inserting a Memory Card ............................................... 18
Connecting USB Storage Medium ................................ 18
Connect to a Com uter (USB) .................................... 19
6 Wireless Network (WLAN) ............. 20
Switching Wireless Networking (WLAN) on/off ..... 20
Setting u a Wireless Network (WLAN) .................. 20
Setting u a Wireless Network (WLAN) Using the
Wizard ................................................................................ 21
Digital Living Network Alliance (DLNA) ................... 21
7 Media Playback................................... 22
Video layback .................................................................. 22
Photo Playback ................................................................. 23
Music Playback .................................................................. 24
Office Playback (YOZO Office) ................................... 25
Managing Files ................................................................... 25
8 Digital TV Playback........................... 27
Connecting the Aerial ..................................................... 27
First Playback ..................................................................... 28
Television ............................................................................ 29
9 Android............................................... 30
Calling Android ................................................................. 30
Exiting Android ................................................................. 30
Resetting Android ............................................................ 30
Installing Android-A s ................................................... 30
Adjust Browser Mode ..................................................... 32
10 Settings............................................... 34
Overview of the Menu Functions ................................. 34
11 Service ................................................ 36
Care Instructions for the Battery ................................. 36
Battery dee discharge .................................................... 36
Cleaning .............................................................................. 37
Device Overheated .......................................................... 37
U date Firmware with Memory Card ......................... 37
Troubleshooting ................................................................ 38
12 Appendix ............................................ 40
Technical Data ................................................................... 40
Accessories ........................................................................ 40
2
Overview
Dear Customer
Thank you for urchasing our Pocket Projector.
We ho e you enjoy your device and its many functions!
About this User Manual
With the installation guide on the following ages, you
can start using your device quickly and easily. Detailed
descri tions can be found in the following sections of
this user manual.
Read the entire user manual carefully. Follow all safety
instructions in order to ensure ro er o eration of
your device. The manufacturer acce ts no liability if
these instructions are not followed.
Symbols Used
Troubleshooting
This symbol designates ti s that will hel you
to use your device more effectively and easily.
Damage to the Device or Loss of Data!
This symbol gives warning of damage to the
device and ossible loss of data. This damage
can result from im ro er handling.
Danger to Persons!
This symbol gives warning of danger to er-
sons. Physical injury or damage can result
from im ro er handling.
What's in the Box
 – Remote Control
 – PicoPix Projector
 – Power su ly
 – USB cable
 – HDMI cable
 – Quick Start Guide
 – Pouch
d
e
f
g
bc
a
Product Highlights
Connecting to devices with HDM output
With the HDMI to mini HDMI cable you can connect
the rojector to a com uter or la to (see also Con-
nect to the Playback Device, age 14).
Directly connecting projector to compu-
ter using WLAN (WiFi streaming)
With the software PicoPixWlink you can connect the
rojector to a com uter or a la to over your wireless
network. For this ur ose, both devices must be con-
nected to the same wireless network (see also Directly
Connecting Projector to Com uter using WLAN (WiFi
Streaming), age 17).
Office playback (YOZO Office)
You can dis lay documents with YOZO Office (see also
Office Playback (YOZO Office), age 25).
Notice
CAUT ON!
DANGER!
3 Philips · PPX3610
1 General Safety nformation
Do not make any changes or settings that are not
described in this user manual. Physical injury or damage
to the device or loss of data can result from im ro er
handling. Take note of all warning and safety notes indi-
cated.
Setting up the Device
The unit is for indoor use only. The device should be
laced securely on a stable, flat surface. Position all
cables in such a way that no one will stumble on them,
thus avoiding ossible injuries to ersons or damage to
the device itself.
Do not lug in the device in moist rooms. Never touch
the mains cable or the mains connection with wet
hands.
The device must have sufficient ventilation and may not
be covered. Do not ut your device in closed cabinets
or boxes.
Do not lace the machine on soft surfaces such as table-
cloths or car ets and do not cover the ventilation slits.
Otherwise the device could overheat or catch fire.
Protect the device against direct sunlight, heat, large
tem erature fluctuations and moisture. Do not lace
the device in the vicinity of heaters or air conditioners.
Observe the information on tem erature and humidity
in the technical data.
When the device is running for a long eriod of time,
the surface becomes hot and a warning symbol a ears
on the rojection (see also Symbols in the Statusbar,
age 10). The device behaves as follows:
1The fan turns to maximum level.
2At maximum level of brightness the overheat symbol
a ears in the status bar and the device turns auto-
matically to minimum level of brightness.
3At minimal level of brightness the overheat symbol
shows for three seconds in the middle of the screen.
Then the device turns off automatically.
After the device has cooled down, you can continue
layback.
Do not allow liquids to enter into the device. Switch off
the device and disconnect it from the mains su ly if liq-
uids or foreign substances end u inside the device.
Have the unit ins ected by a technical service de art-
ment.
Always handle the unit with care. Avoid touching the
lens. Never lace heavy or shar objects on the rojec-
tor or the ower cable.
If the rojector gets too hot or emits smoke, shut it
down immediately and un lug the ower cable. Arrange
for your device to be investigated by a technical service
centre. To revent the s read of fire, o en flames
should be ke t away from the device.
Under the following conditions, a layer of moisture can
a ear inside the device which can lead to malfunctions:
• if the device is moved from a cold to a warm
area;
• after a cold room is heated;
• when this device is laced in a dam room.
Proceed as follows to avoid any moisture build-u :
1Seal this device in a lastic bag before moving it to
another room, in order for it to ada t to room con-
ditions.
2Wait one to two hours before you take the device
out of the lastic bag.
The device should not be used in a very dusty environ-
ment. Dust articles and other foreign objects may
damage the unit.
Do not ex ose the device to extreme vibrations. It may
damage the internal com onents.
Do not allow children to handle the device without
su ervision. The acking materials should be ke t out of
the hands of children.
Repairs
Do not re air the device yourself. Im ro er mainte-
nance can result in injuries or damage to the device.
Your device must be re aired by an authorised service
centre.
Find details of authorised service centres on the war-
ranty card.
Do not remove the ty e label from your device; this
would void the warranty.
General Safety nformation 4
Power Supply
Use only the enclosed ower ada ter (see cha ter A en-
dix / Technical Data). Check whether the mains voltage of
the ower su ly matches the mains voltage available at
the setu location. This equi ment com lies with the volt-
age ty e s ecified on the unit.
The ca acity of the battery diminishes with time. If the
device functions only with the ower su ly, the battery
is defective. Contact an authorised service centre to
re lace the battery.
Do not try to re lace the battery yourself. Incorrect
handling of the battery or using the wrong ty e of bat-
tery can cause damage to the device or cause injury.
Risk of explosion with incorrect type of
batteries
Do not try to re lace the battery yourself.
There is a risk of explosion if the incor-
rect battery type is used.
Switch the device on or off using the ower switch
before removing the ower su ly from the socket.
Turn off the device and remove it from the ower su -
ly before cleaning the surface. Use a soft, lint-free
cloth. Never use liquid, gaseous or easily flammable
cleansers (s rays, abrasives, olishes, alcohol). Do not
allow any moisture to reach the interior of the device.
High Power LED
This device is equi ed with an high ower
LED (Light Emitting Diode), which emits very
bright light. Do not look directly into the ro-
jector lens. This could cause eye irritation or
damage.
Danger of hearing damage
Do not use the device over a longer time at
high volume – es ecially when using head-
hones. This could lead to the risks of hearing
damage.
Wireless Network (WLAN)
The functioning of security systems, medical equi ment
or sensitive devices can be disru ted by the transmis-
sion ower of the device. Observe any usage regula-
tions (or restrictions) in the vicinity of such equi ment.
The use of this device can affect the o eration of insuf-
ficiently shielded medical devices and hearing aids and
acemakers through the release of high frequency radi-
ation. Also consult a doctor or the manufacturer of the
medical device to establish whether these are suffi-
ciently shielded from external high frequency radiation.
DANGER!
DANGER!
DANGER!
5 Philips · PPX3610
2 Overview
Top of the Device
 – Touch ad for navigation and o eration of the
mouse ointer (see also Touch ad / Gestures, age 7)
 – LED status bar
Blue: device switched on / device in standby
Off: device off
 – Focus wheel for image shar ness.
Note that the distance to the rojection sur-
face must be a minimum of 0.5 meters and a
maximum of 5 meters. If the Pocket Projector
is located outside of this range, it will not be
ossible to focus the image. Turn the focus
wheel carefully so as to avoid damaging the
lens.
c
a
b
Bottom of the Device
 – Pico Station connection socket
 – Tri od socket
 – Pico Station ort
b
c
a
Side View
 – Reset hole
The Pocket Projector is unres onsive or hung u : insert
a slim, ointy object into the reset hole to trigger a
hardware reset.
 – Battery status monitor
Charge indicator with connected ower su ly:
red: Charging battery
Green: battery is fully charged
  – On/Off switch
  – A/V ort for a layback device
 – Remote-control signal receiver
  – Audio out ut – head hone connection or con-
nection for external s eakers
  – HDMI ort for a layback device (with
ada ter cable)
  – Memory card slot (SD/SDHC/SDXC/
MMC)
  – USB ort for connection to a com uter (data
exchange)
  – Power su ly ort
VGA
Y-Pb-Pr
HDMI
j
i
h
ge
d
c
b
a
f
Notice
Overview 6
  – USB ort for a USB storage medium, DVB-T
stick, mouse or keyboard.
 – Lens
ba
Pico Station
(not included)
The Pico Station docking station has its own battery,
with which you can extend the re lay time of the device.
The inbuilt s eakers ensure im roved sound quality
during layback. The Pico Station has a DVB-T ada ter
so that you can directly connect a DVB-T ada ter.
Available as accessories
Pico Station with battery and s eakers
................................................ PPA7300 / 253529749
Pico Station with battery, s eakers and DVB-T ada ter
................................................. PPA7301 / 253532895
Top of the Device
 – PicoPix coennction socket
 – PicoPix ort
b
a
Bottom of the Device
 – Tri od socket
a
Front View
 – PicoPix ort
 – Eject button
a
b
Rear View
  – Power su ly ort
 – Battery status monitor
red: battery em ty
Charge indicator with connected ower su ly:
red: Charging battery
Green: battery is fully charged
  – Aerial socket
c
b
a
7 Philips · PPX3610
Touchpad / Gestures
The touch ad is a touch-sensitive surface. Touch the
touch ad with one or more fingers to move the cursor,
navigate in the menu, select menu o tions or carry out
other actions.
Ballpoint Pens!
Do not use a ball- oint en or other objects
to o erate the touch ad. Hard and shar
objects may damage the touch ad.
– Calling the main menu
 – Calling the menu
 – One menu ste back, one directory level back /
cancelling functions
Navigation Area / Scrolling Area
Swi e u and down on the right edge of the touch ad
to use vertical scroll.
Swi e left and right on the bottom edge of the touch ad
to use horizontal scroll.
nput Area
The in ut area is limited by the navigation area/scrolling
area. You can control the cursor using gestures in the
in ut area.
Hidden Cursor
After a short time, the cursor fades out. Move
the cursor using a brief gesture in the in ut
area to reveal the cursor before you call a
function by ta ing/clicking.
Connecting a USB Mouse
You can connect a USB mouse to the USB
ort on the side of the device.
Gestures
Sim le gestures, which you carry out on the touch ad
for quick navigation. Most gestures are carried out with
one or two fingers. Carry out the gestures using your
fingerti s.
Move cursor – Swi e over the in ut area, to move the
cursor. The gesture involves swi ing the surface of the
touch ad with the fingerti without exerting any res-
sure.
Tap / click – Ta briefly in the in ut area to confirm an
entry. After ta ing remove your finger from the touch-
ad. The reaction occurs after you have lifted your fin-
ger. The click is executed at the oint where the cursor
is located, even if the cursor is hidden.
Scroll – Swi e over the touch ad with two fingers to
execute the following actions: during music layback
rewind and fast forward / during miniature hotos over-
view go to revious or next age.
CAUT ON!
Notice
Notice
Overview 8
Zoom – Place the thumb and forefinger in the middle
of the in ut area and se arate them slowly to magnify
an image or document. Zoom – Place the thumb and
forefinger in the corners of the in ut area and bring
them slowly together to magnify an image or document.
Rotate – Touch the touch ad with the thumb and
swi e the forefinger in a circular attern in the direction
in which you want to rotate the image.
Software Keyboard
1Click in the in ut field (see also Touch ad / Ges-
tures, age 7) using the touch ad or a mouse.
2The software keyboard a ears..
3Using the touch ad or a mouse enter the text on the
software keyboard.
9 Philips · PPX3610
Remote Control – Switches the device hibernation mode
 – Call the menu
– Call the main menu
 – Call the search menu
 – One menu ste back, one directory level back /
cancelling a function
 – Switch to the external video in ut HDM ,,
or VGA
 – DVB-T mode: change to favourites
Navigation keys
– Confirms selection
,  – Navigation keys / navigate the menu /
modify settings
 – Modify settings / during music layback select
revious, next title
 – During music layback adjust volume level /
during video layback review, cue
Playback keys
 – Rewind
– Start / sto layback
 – Fast-forward
DVB-T keys
 – Select revious channel
 – Call electronic rogram guide
 – Select the next channel
Volume keys
– Decrease the volume
 – Mute the sound
 – Increase the volume
Overview 10
Overview of the Menu
Functions
1After switching on the device the main menu
a ears.
2Select the desired menu using the navigation keys
.
3Confirm with .
4By ressing the key you will return to the main
menu.
Source – Switch to the external video in ut HDM ,
,  or VGA
Videos – Selecting files for video layback
Pictures – Selecting files for the slideshow
Music – Selecting music files for layback
Android – Call the android o erating system
Settings – Configure settings for layback and for
the device
Folder View – Selecting files for Playback. Co y or
Delete Files (Mark the files with  and confirm
using ).
Digital TV – Television
Symbols in the Statusbar
123456
 – WLAN status dis lay
 – USB storage medium
 – Memory card
 – Internal memory
 – Overheat symbol
 – Charge level of the internal battery. The icon will
be red, when the battery needs to be recharged.
11 Philips · PPX3610
3 nitial Operation
Setting up the Device
You can osition the device so that it lies flat on a table
in front of the rojection surface; it is not necessary to
tilt it towards the rojection surface. The device com-
ensates for the distortion from the slanted rojection
( incushion distortion).
Connect Power Supply /
Charge Battery
Mains Voltage at the Site of nstallation!
Check whether the mains voltage of the
ower su ly matches the mains voltage avail-
able at the setu location.
1Insert the small lug of the ower su ly into the
socket on the rear side of your device.
2Plug the ower su ly into the mains.
3During the charging rocess, the indicator light on
the side of the device will be red. When the battery
is fully charged, it will turn green.
4Charge the built-in battery com letely before using
for the first time. This will rolong the life of the bat-
tery.
VGA
Y-Pb-Pr
HDMI
Pico Station
The battery of the Pico Station will not be
charged while the rojector is in use.
Charging via Pico Station
The battery of the rojector will not be
charged while the rojector is in use.
Operate via Pico Station
The battery of the Pocket Projector is em ty:
Connect the Pico Station to use the Pocket
Projector.
Battery Empty
The battery of the Pocket Projector is em ty:
Connect the Pico Station or the ower su ly
to use the Pocket Projector.
Connect the ower su ly to the Pocket Pro-
jector or the Pico Station to recharge the bat-
tery.
Disconnect the ower su ly only if the
Pocket Projector is sufficiently charged. Oth-
erwise the Pocket Projector turns off.
nstalling or Changing the
Batteries of the Remote
Control
Risk of Explosion with ncorrect Type of
Batteries
Only use the CR 2025 ty e battery.
There is a risk of explosion if the incor-
rect battery type is used.
1To access the battery, disengage the locking mecha-
nism () and slide out the battery com artment
().
CAUT ON!
Notice
Notice
Notice
Notice
DANGER!
nitial Operation 12
2Insert the new batteries into the battery com art-
ment with the ositive and negative oles as shown
on the back of the remote control. Make sure the
olarities(+ and -) are aligned correctly.
3Push the battery com artment back into the remote
control until the locking mechanism engages.
Normally the batteries will last for around
one year. If the remote control sto s working,
lease re lace the batteries. If the device is
not used for a long time, take out the batter-
ies. This will revent leakage and ossible
damage to the remote control.
The used batteries should be dis osed of
according to the recycling regulations of your
country.
Using the Remote Control
Point the remote control at the remote sensor on the
back of the device. The remote can be used within an
angle of 60 degrees and u to 5 meters from the device.
When using the remote control, no obstacle should be
laced between the remote control and remote sensor.
VGA
Y-Pb-Pr
HDMI
Notice
CAUT ON!
• The im ro er use of batteries can lead
to overheating, ex losion, risk of fire
and injury. Leaking batteries can ossibly
damage the remote control.
• Never ex ose the remote control to
direct sunlight.
• Avoid deforming, dismantling or charg-
ing the batteries.
• Avoid ex osure to o en fire and water.
• Re lace em ty batteries immediately.
• Remove the battery from the remote
control if not in use for long eriods of
time.
13 Philips · PPX3610
nitial nstallation
1Push for about 3 seconds the on/off switch on the
side to turn the device on.
2Turn the device towards a suitable rojection sur-
face or wall. Note that the distance to the rojection
surface must be a minimum of 0.5 meters and a max-
imum of 5 meters. Make sure the rojector is in a
secure osition.
3Use the focus wheel on the to to adjust the image
shar ness.
4Select the desired menu language using .
5Confirm with .
The Main Menu Appears nstead of
the Language Selection
The device has already been installed. In
order to change the menu language, ro-
ceed as follows:
1Use the navigation keys to select Set-
tings.
2Confirm with .
3Select with  Language.
4Confirm with .
5Select the desired language with .
6Confirm with .
7Exit with .
Notice
Connect to the Playback Device 14
4 Connect to the Playback Device
Only use the su lied cable or cables that are available
as accessories to connect the rojector.
Supplied cables
HDMI cable
USB cable
Cables available as accessories
Com onent Video Cable YUV / YPbPr
.............................................. (PPA1210 / 253447083)
Video-(CVBS) cable ................... (PPA1320 / 253526178)
VGA cable ................................... (PPA1250 / 253447070)
iPhone/iPad/iPod-HDMI cable . (PPA1280 / 253447091)
iPhone/iPad/iPod-A/V cable...... (PPA1160 / 253372471)
MHL cable .................................... (PPA1240 / 253520048)
Connecting to Devices with
HDM Output
Use the HDMI to mini HDMI cable to connect the ro-
jector to a com uter or la to .
VGA
Y-Pb-Pr
HDMI
1Switch the device on using the on/off switch on the
side.
2After the initial screen the main menu a ears.
3Select Menu > Source and switch to HDMI.
4Connect the HDMI cable to the rojector's HDM
socket.
5Connect the cable to the mini-HDMI socket of the
layback device.
Connecting to an iPhone/
iPad/iPod
Use the iPhone/iPad/iPod-HDMI cable (not su lied) to
connect the rojector to an iPhone/iPad/iPod.
VGA
Y-Pb-Pr
HDMI
1Select Menu > Source and switch to Component.
2Connect the cable to the rojector's HDM socket.
3Connect the cable to the layback device.
Supported devices
All devices with 30- in dock connector are su orted.
Device Generation
iPod nano u to generation 6
iPod touch u to generation 4
iPhone u to generation 4
iPad u to generation 2
Connecting to Smartphone
Use the HML cable (not su lied) to connect the ro-
jector to a smart hone.
VGA
Y-Pb-Pr
HDMI
1Select Menu > Source and switch to HDMI.
2Connect the cable to the rojector's HDM and 
sockets.
3Connect the cable to the layback device.
15 Philips · PPX3610
Connecting to a Computer
(VGA)
Many la to s do not activate the external
video out ut automatically when you connect
a second dis lay such as a rojector. Check
your la to 's manual to find out how to acti-
vate the external video out ut.
Use the VGA cable (not included) to connect the ro-
jector to a com uter, la to , or some PDAs. The ro-
jector su orts the following resolutions: VGA/SVGA/
XGA. For best results, set the com uter's resolution to
SVGA (800x600).
VGA
Y-Pb-Pr
HDMI
1Connect the VGA cable to the rojector's HDM
socket.
2Connect the VGA lug to the VGA socket of the
com uter and the audio lug to the com uter's
audio out ut.
3Adjust the com uter's resolution to the correct set-
ting and switch the VGA signal to an external moni-
tor. The following resolutions are su orted:
Resolution mage
refresh rate
VGA 640 x 480 60 Hz
SVGA 800 x 600 60 Hz
XGA 1024 x 768 60 Hz
WXGA 1280 x 768 60 Hz
FULL HD 1920 x 1080 60 Hz
Screen Resolution
You can obtain the best results with the
800¦×¦600 (60Hz) resolution.
4Select Menu > Source and switch to V A.
Connecting Using an Audio/
Video (CVBS) Adapter
Cable
Use the rojector's audio/video ada ter cable (A/V
cable) (not included) to connect camcorders, DVD
layers or digital cameras. The jacks for these devices
are yellow (video), red (audio right) and white (audio
left).
VGA
Y-Pb-Pr
HDMI
1Connect the su lied A/V cable to the  socket of
the rojector.
2Connect the video device's audio/video sockets to
the A/V cable using a conventional com osite video
(RCA) cable.
3Select Menu > Source and switch to AV.
Connecting to mobile multimedia devices
Some video devices (e.g.: ocket multimedia layers, ...)
require s ecific connection cables. There are either
su lied with the device or acquired from the manufac-
turer of the multimedia device. Please note that only the
original cables from the device manufacturer may func-
tion.
VGA
Y-Pb-Pr
HDMI
Switching to the Multimedia Device Sig-
nal Output
See the multimedia device instruction manual
to find out how to switch the signal out ut to
this jack.
Notice
Notice
Notice

Other Philips Projector manuals

Philips LC4331 User manual

Philips

Philips LC4331 User manual

Philips LC4331/00 User manual

Philips

Philips LC4331/00 User manual

Philips PicoPix PPX 1430 User manual

Philips

Philips PicoPix PPX 1430 User manual

Philips NeoPix Easy Play User manual

Philips

Philips NeoPix Easy Play User manual

Philips Screeneo HDP1650 User manual

Philips

Philips Screeneo HDP1650 User manual

Philips PicoPix PPX3414 User manual

Philips

Philips PicoPix PPX3414 User manual

Philips PPX 4350 User manual

Philips

Philips PPX 4350 User manual

Philips PicoPix PPX2230 User manual

Philips

Philips PicoPix PPX2230 User manual

Philips NeoPix Ultra NPX640 User manual

Philips

Philips NeoPix Ultra NPX640 User manual

Philips PicoPix User manual

Philips

Philips PicoPix User manual

Philips LC4745 User manual

Philips

Philips LC4745 User manual

Philips Screeneo HDP1550 User manual

Philips

Philips Screeneo HDP1550 User manual

Philips NPX730 User manual

Philips

Philips NPX730 User manual

Philips PicoPix PPX3407 User manual

Philips

Philips PicoPix PPX3407 User manual

Philips Screeneo U5 User manual

Philips

Philips Screeneo U5 User manual

Philips PicoPix PPX5110/INT User manual

Philips

Philips PicoPix PPX5110/INT User manual

Philips DTR2610/28 User manual

Philips

Philips DTR2610/28 User manual

Philips LC1345 Reference guide

Philips

Philips LC1345 Reference guide

Philips PicoPix Max PPX620 User manual

Philips

Philips PicoPix Max PPX620 User manual

Philips NeoPix 330 User manual

Philips

Philips NeoPix 330 User manual

Philips LC 3000 User manual

Philips

Philips LC 3000 User manual

Philips LC4043 User manual

Philips

Philips LC4043 User manual

Philips PPX340 User manual

Philips

Philips PPX340 User manual

Philips NPX641/INT User manual

Philips

Philips NPX641/INT User manual

Popular Projector manuals by other brands

Epson PowerLite Pro Cinema 800 HQV HQV video... user guide

Epson

Epson PowerLite Pro Cinema 800 HQV HQV video... user guide

NEC UM351W user manual

NEC

NEC UM351W user manual

InFocus IN5132 Specifications

InFocus

InFocus IN5132 Specifications

AAXA Technologies M2 specification

AAXA Technologies

AAXA Technologies M2 specification

Barco UDM 4K15 user manual

Barco

Barco UDM 4K15 user manual

Acer PH730 series user manual

Acer

Acer PH730 series user manual

Yaber Pro U9 user manual

Yaber

Yaber Pro U9 user manual

Toshiba TDP-SC35U Characteristics

Toshiba

Toshiba TDP-SC35U Characteristics

ViewSonic WPG-150 - Wireless Video Extender Specifications

ViewSonic

ViewSonic WPG-150 - Wireless Video Extender Specifications

BenQ PX9510 quick start guide

BenQ

BenQ PX9510 quick start guide

JVC DLA-HD550 instructions

JVC

JVC DLA-HD550 instructions

Christie DWU951 user manual

Christie

Christie DWU951 user manual

Knoll HD272 Addendum sheet

Knoll

Knoll HD272 Addendum sheet

Epson PowerLite 7550C Specifications

Epson

Epson PowerLite 7550C Specifications

Sony VPL-EW246 operating instructions

Sony

Sony VPL-EW246 operating instructions

Sanyo BUNDLE PLC-WL2500S Quick reference guide

Sanyo

Sanyo BUNDLE PLC-WL2500S Quick reference guide

BOXLIGHT CP-322i user manual

BOXLIGHT

BOXLIGHT CP-322i user manual

Epson EB-W7 Specifications

Epson

Epson EB-W7 Specifications

manuals.online logo
manuals.online logoBrands
  • About & Mission
  • Contact us
  • Privacy Policy
  • Terms and Conditions

Copyright 2025 Manuals.Online. All Rights Reserved.