QUICK START
QUICK START FOR THE TEMPO
Log into photoSentinel Control Hub
to view your system.
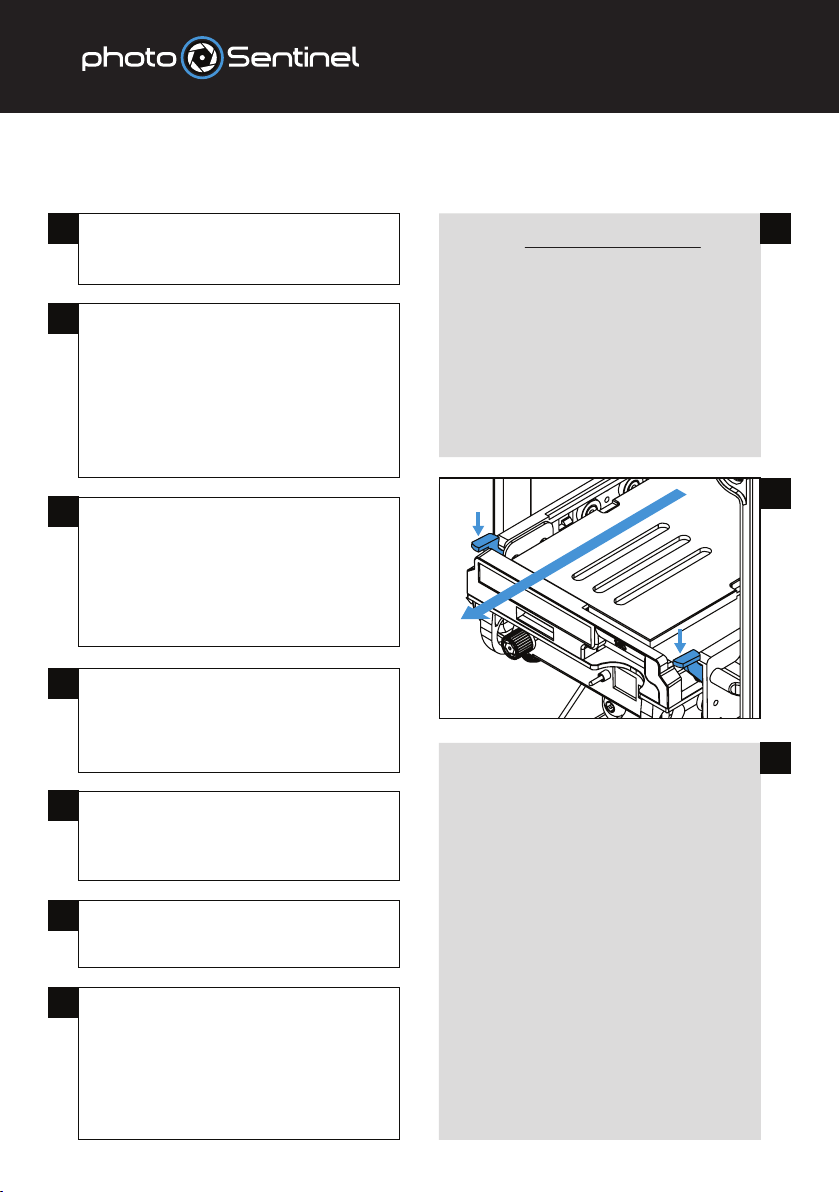
Open the housing. Push down on
the thumb tabs to unclip and slide
out the carriage (2A).
Unclip and slide the camera plate
to the right, out of the carriage.
(2B opposite)
Plug the battery insert into the
camera battery port.
Mount your camera to the
camera plate and secure back
into the carriage.
2
3
4Insert SD card, trigger cable and
USB cable into the camera.
Insert SIM card into the controller.
5Slide the carriage back into the
housing. Push firmly until both
sides click into place.
6Switch the controller into Setup
mode.
7Turn camera on, frame the image
and configure the camera settings.
After setting up the camera, leave
it switched on for normal
photoSentinel operation.
7a
a.
b.
c.
d.
To frame the image, switch the camera to
Live View and adjust the three-axis housing
mount, securing the bolts using the security
hex bit in the accessories box.
Check the camera’s on-board time and date
are correct.
Adjust all camera settings as appropriate. As
a general rule, long-term timelapse is best
captured in Aperture Priority, with all other
settings locked down to manual.
IMPORTANT: Save on-board camera settings
by switching the camera off and back on.
Note: Some cameras do not allow settings
to be changed while the USB cable is plugged
in. Simply disconnect the USB from the
camera and re-connect when the camera
set-up is complete.
2a
4
1a.
b.
c.
d.
Log in to setup.photosentinel.com.auwith
your username and password.
If you have not yet created an installation,
follow the instructions on page 3.
Select your installation from the dropdown
menu, then navigate to the Config page.
See page 7 for our default Schedule settings.
You can change these sessions if you would
like different settings.
1a