Pidion BIP-5000 User manual

•Please read the following warnings before using the product.
•Shapes and colors of the images shown in this manual may differ from the actual products.
•Contents of the manual may differ based on the software version of products or conditions of the wireless provider.
BIP-5000 GPS
User Manual
BIP-5000 (Black) User Manual

※Please read “Cautions and Instructions” before using the product.
PIDION is a Leading Brand in the mobile industry. Bluebird Soft Inc. is a trusted global company which
represents high technology and is currently registered worldwide with its PIDION trademark legally protected
by law.
This manual is protected by Copyright Laws and has been produced by Bluebird Soft Inc.
(Please note that there may be editorial mistakes or possible omission of information.)
Programs embedded in the products are legally protected. Unauthorized copying, transferring, or deletion is strictly prohibited by
law.
There may be a few operational problems caused by the application environment, application program, or other surrounding
machinery. This product generates, uses and can radiate radio frequency energy and if not installed and used in accordance with
the instructions, it may cause harmful interference to radio communications. Service related to human security is not provided as
there may be a possibility of confusion in the electric waves of the product.
Registered Trademark
User Manual
This wireless product might cause radio jamming or there may be a possibility of confusion in the electric
waves of the product. Service related to human security cannot be provided under these circumstances
so it is up to the user to take precautions.
Registered Form
This machinery has been registered for electromagnetic emission sufficiency so the attention of both the
sellers and users are required. If an inappropriate product is sold or bought, exchange it with a product for
domestic use.
A-Class Machinery
(Information Communication
Device for Business)
Users ManualModel

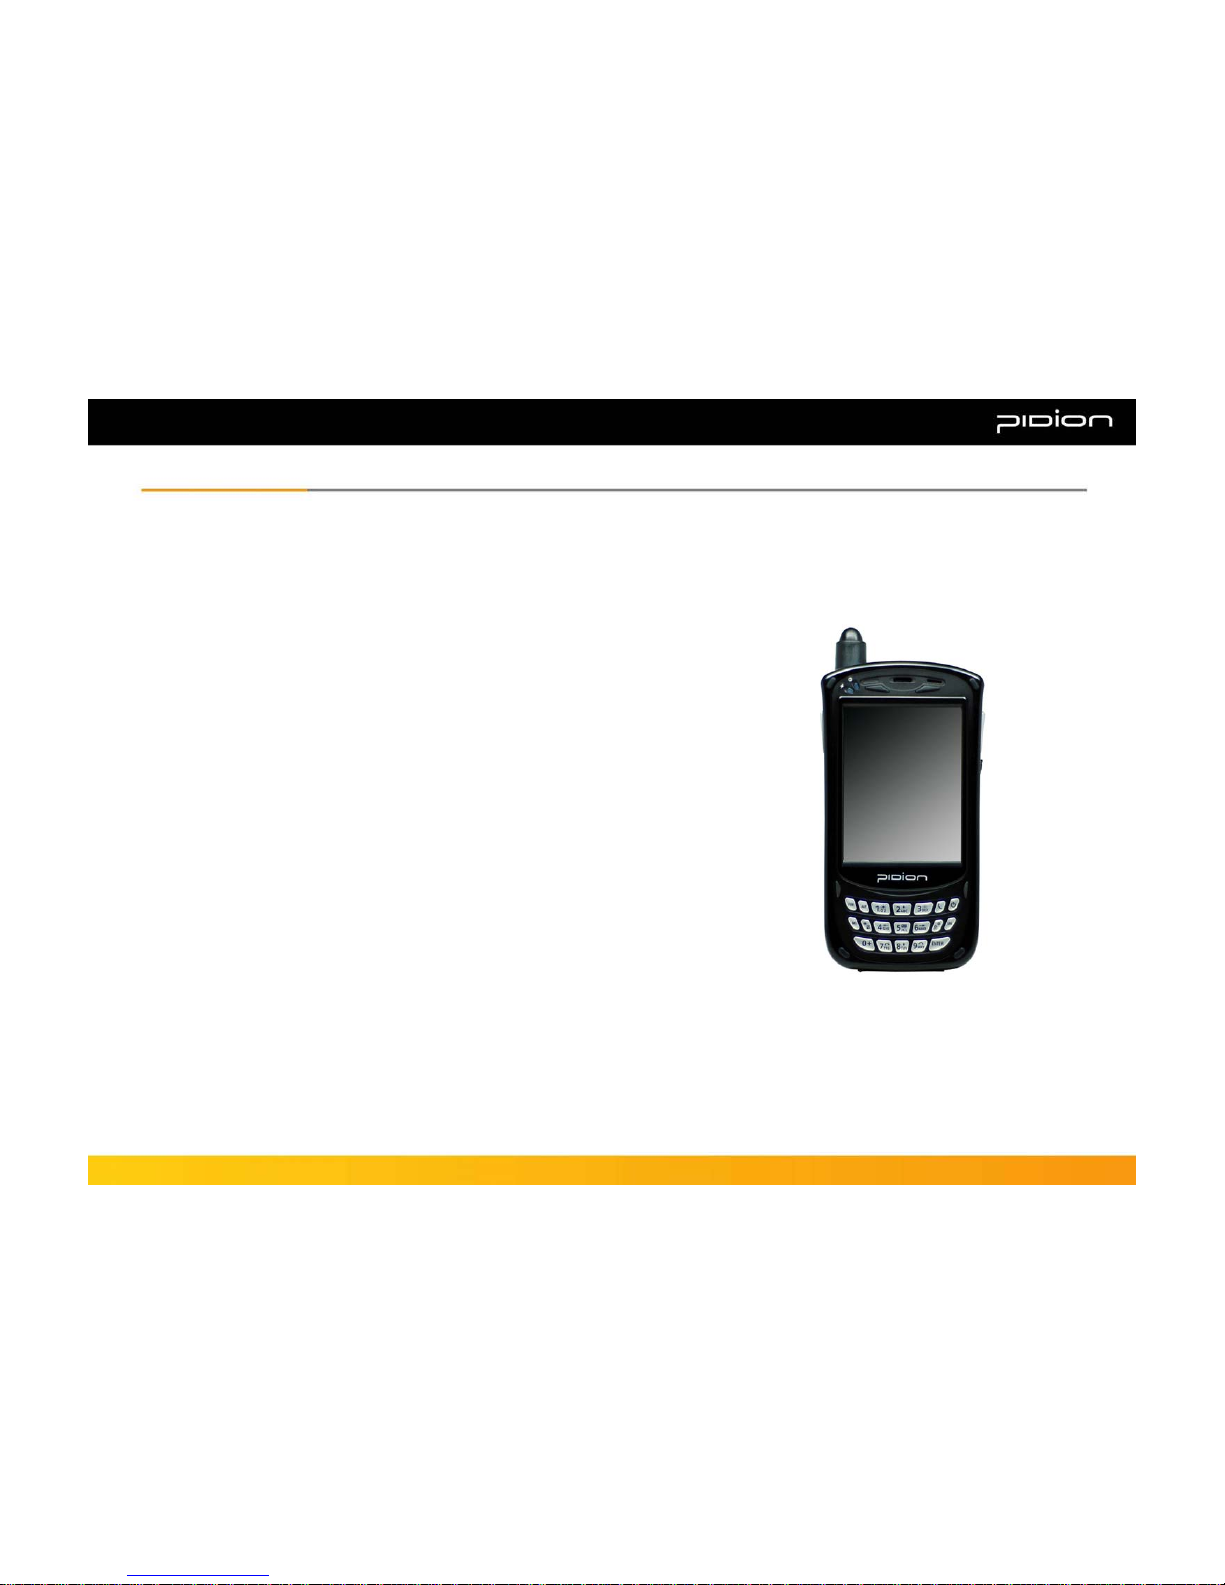
This PDA device has passed the standard for the emission of electromagnetic waves. However, for the users health and safety please only use the authentic
products provided by Bluebird Soft Inc. Otherwise your safety cannot be guaranteed.
1. Precautions for Storing and Charging the Battery
• If the product or battery has been submerged under water, do not attempt to dry it by heater or microwave.
(In case of water damage, if the label inside the PDA changes color, you will not be able to receive free customer service for repair, so please be careful.)
• Ensure that necklaces, coins, etc. does not contact the battery’s connection terminal (the metal plate part).
• If you do not use the battery for a certain period of time, you must charge it first, and then store it in room temperature. This will ensure that the battery’s capacity
and durability are unaffected.
• Even when the battery is fully charged, usage time for a charge may shorten due to lowered voltage generated from the usage of the product.
• Use only original or authentic batteries and adaptors, and do not use them for applications other than those of the PDA.
(If you do otherwise there is a risk of explosion, or possibilities for shorter durability of the PDA, battery, and adaptor.)
• Plug in the adaptor firmly so it does not jiggle. If symptoms such as smoke, odor, or noise occurs, immediately turn the product off and detach the adaptor from
the outlet. Also in cases of thunder or lightening, please detach the adaptor from the outlet as well.
2. Precautions for the Phone and Product
• Make sure you are aware of all information related to the products electromagnetic waves.
- This product transmits and receives high-frequency energy (RF energy) while it is on. The Department of Information and Communication has legislated and is
enforcing the safety standards of these effects on the human body. This product meets all the standards.
(If you do not use the authentic product, we cannot guarantee the user’s safety related to electromagnetic transmission.)
• Please turn off the product in places where the use of it is prohibited (e.g.- airplanes, hospitals, etc.) or when you are in dangerous areas which may be
associated to electric waves.
• Do not put items using magnets such as credit cards, bankbooks, or transportation cards near the PDA. The magnetic waves from the PDA may damage the
data saved in the PDA.
• Record or store data from the PDA by making a backup copy. There may be cases where important data is deleted when repairing damage or upgrading the
PDA, so please backup your important data in advance.
• If the PDA has a RF Card reader we recommend that you do not use CDMA/GSM communications at the same time.
- If you use RF Card Reader and CDMA/GSM communication at the same time, calls may be cut off, incoming calls may not be received, or data connections
might became slow or completely cease. If you do not use it together, no problems with the connections will occur.
3. Other Precautions
• Data might be damaged by carelessness of the user or during reparation of the product. The producers are not responsible for the loss caused by it, so please
record or store your important data in advance.
• Do not remodel, disassemble or try to fix the product by yourself. Please contact customers service for reparations or inquiries.
• If you experience an allergic reaction from the product, stop using the PDA immediately and consult your doctor.
• Do not put dye or paint on the PDA. It may cause damage to the appearance or screen, or may cause the product to malfunction.
• Using the product in an environment with high temperature or humidity for a long period of time may cause damage to the product.
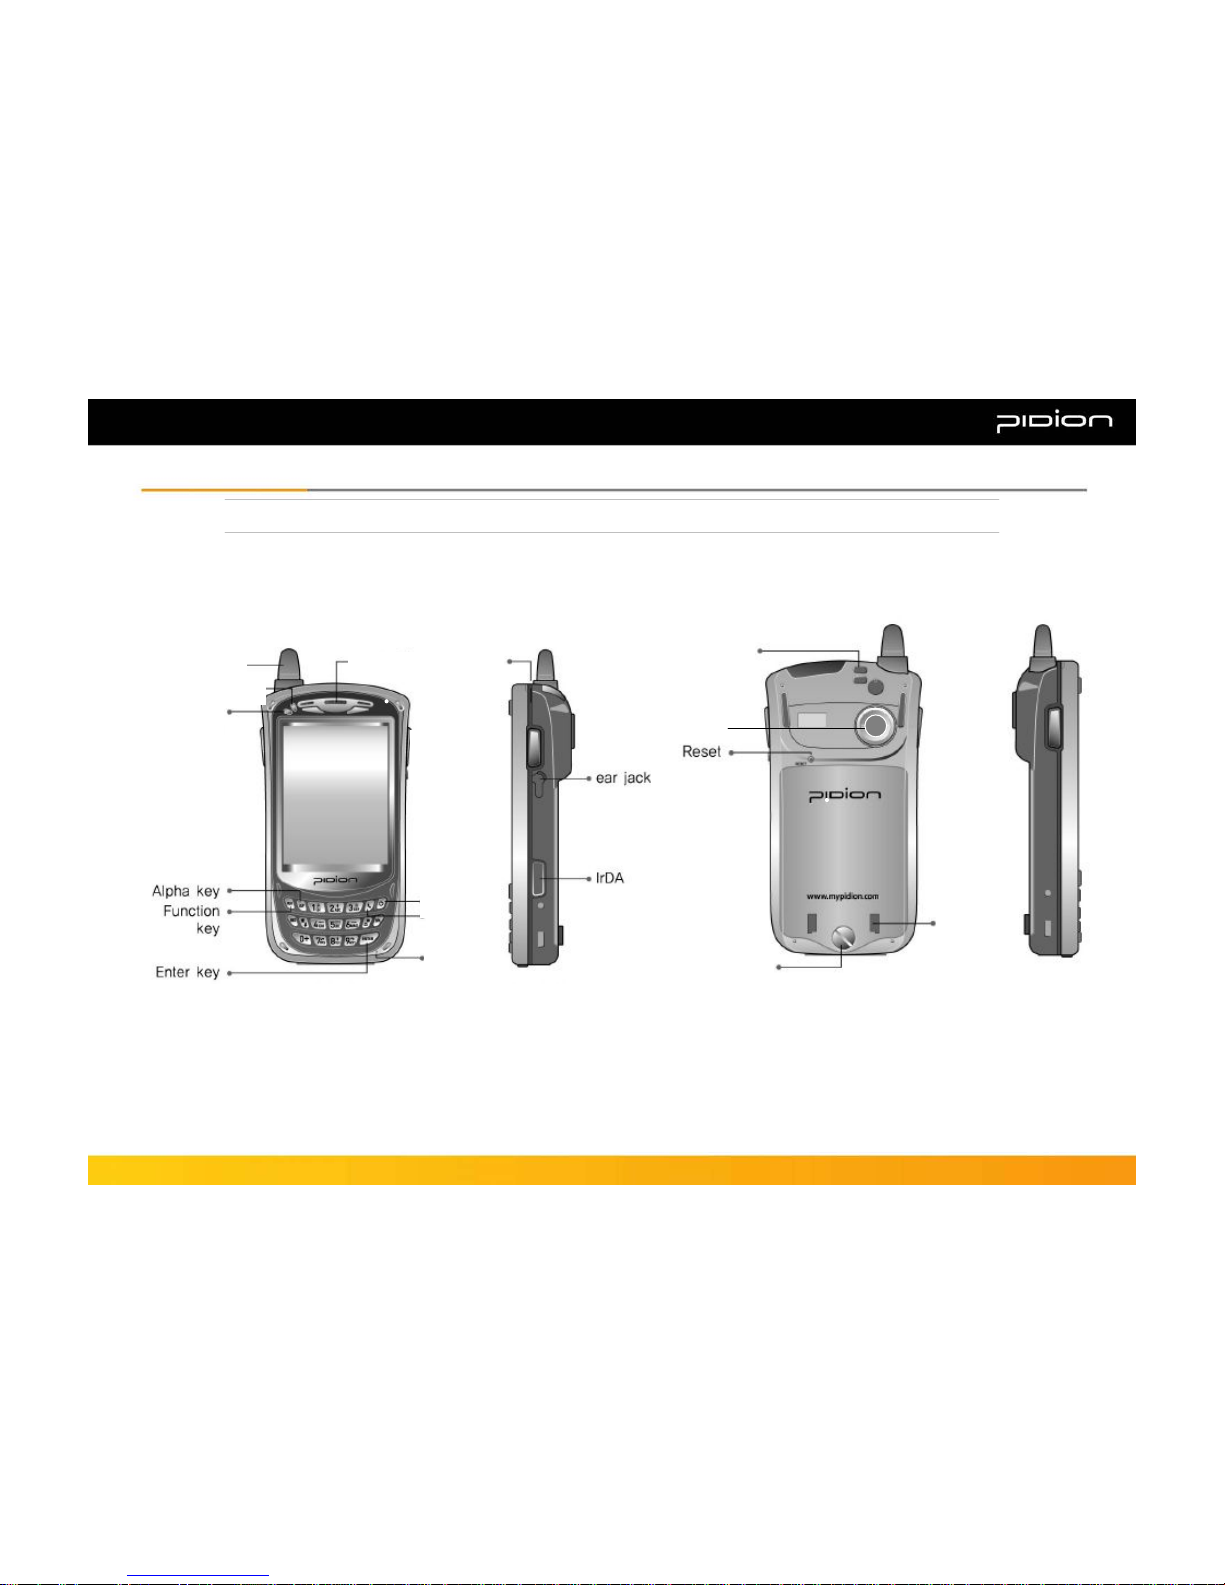
• If you use a drill, nail, or pen instead of the product’s Stylus Pen, it may cause damage to the LCD screen.
• Avoid external vibrations or shocks. When not in use and after detaching the power code, store it in a safe place where it cannot be dropped.
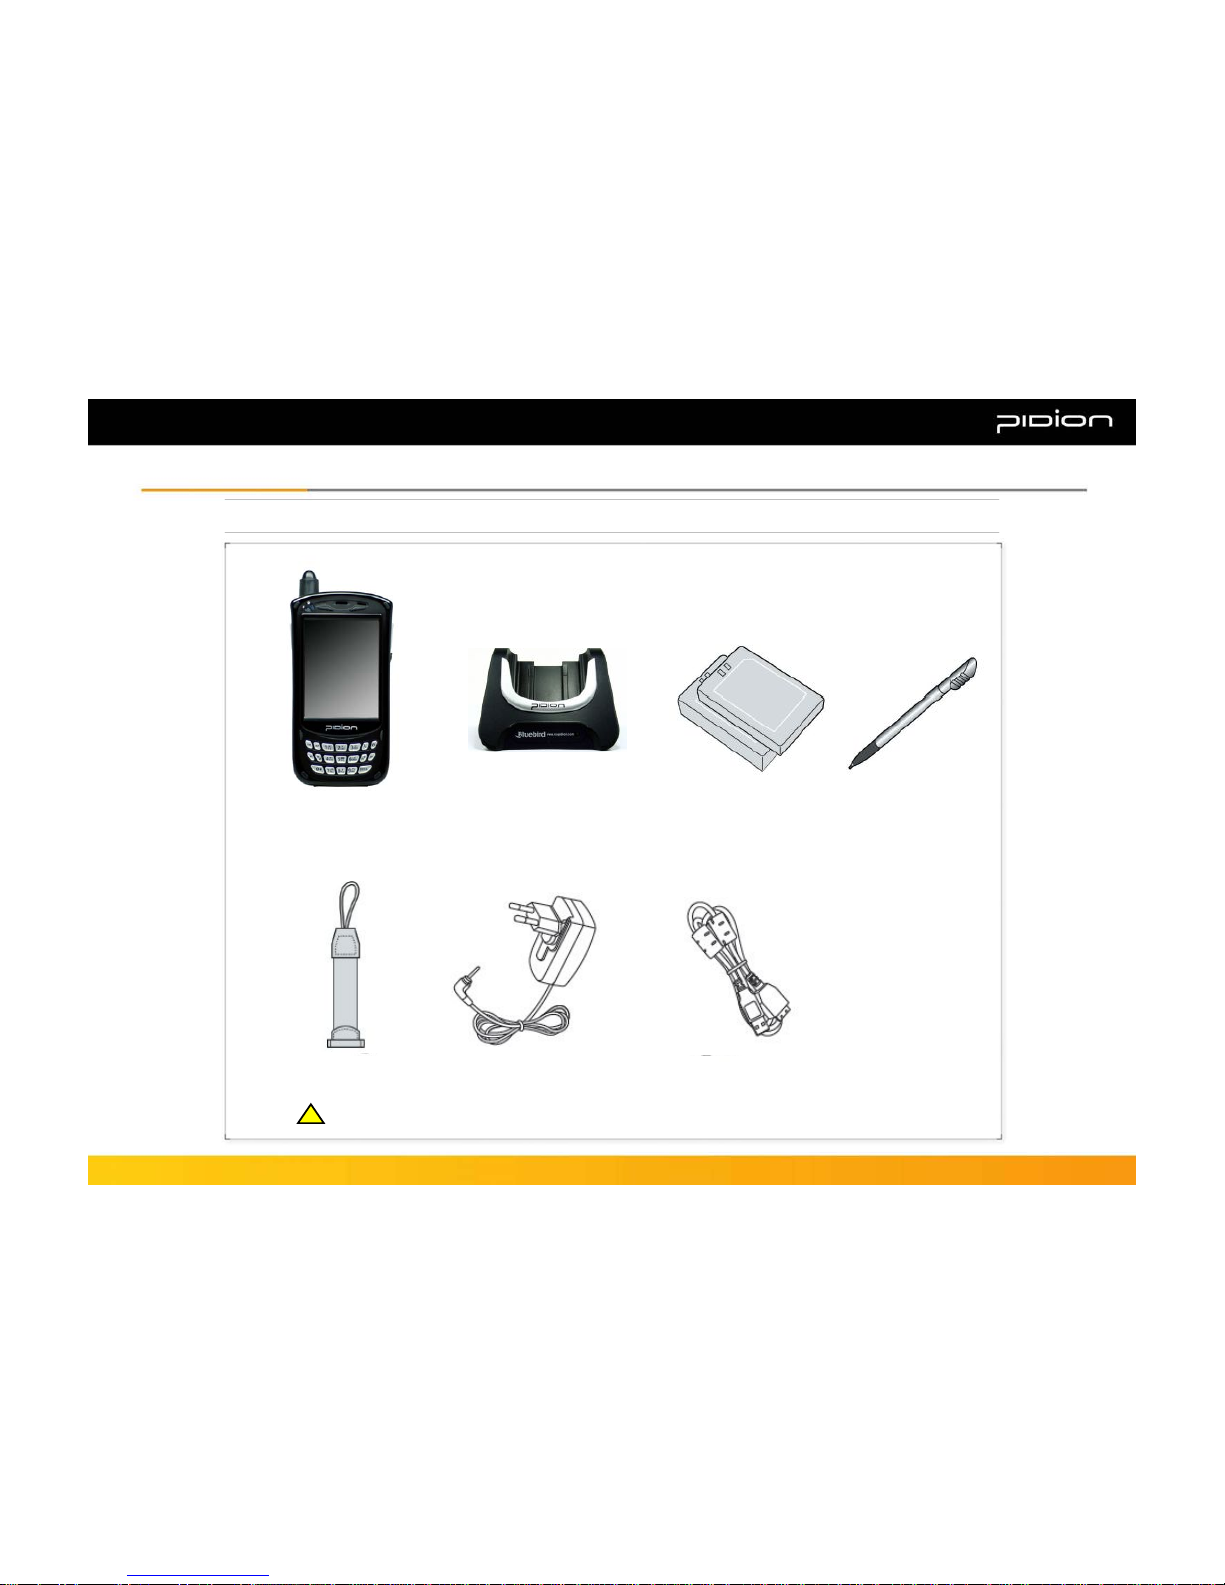
Cautions and InstructionsCautions and Instructions Please follow the instructions to properly use the product and avoid accidents in advance.

BIP-5000(Black)
※ The CE certification of the BIP-5000 communication.
Model: BIP-5000
TYPE: PDA
Satisfies all the technical regulations applicable to the product
within the scope of Council
Directives 99 /5/EC, 89 /336 /EEC, and 73 /23 /EEC:
All essential radio test suites have been carried out.
NOTIFIED BODY : EMCCert Dr.Rasek
-Address
Boelwiese 5, 9132 0 Ebermannstadt, Germany,
Identification Number : 0678
MANUFACTURER or AUTHORISED REPRESENTATIVE :
-Address
Bluebird Soft., Inc.
1242 , Gaepo-dong, Gangnam-gu, Seoul, Korea
This declaration is issued under the sole responsibility of the
manufacturer and, if applicable, his authorized representative
POINT OF CONTRACT: Bluebird Soft.Inc Tel:+82 -2-548 -074 0
EN 301 511
EN 300 328
EN 300 440-1/-2
Radio
EN 301 489-1/-3/-7/-17
EMC
EN 60950-1+A11
Safety
EN 50360, EN 62209-1
Health
Certification
Certification
Certification

Table of ContentsTable of Contents
Ⅰ. Knowing the Product
1. Components • 5
2. Basic Terms • 6
3. Button Description • 7
4. Function Key Description • 8
5. Attaching/Detaching the Battery • 9
6. Charging the Battery • 10
7. About Batteries • 11
8. PDA Specification • 12
Ⅱ. Learning the Basics
1. Turning On/Off • 14
2. Using the Stylus Pen• 14
3. Starting the PDA • 15
4. Making/Receiving Calls • 17
5. Typing • 19
6. Using SD Memory Card • 21
7. Software Reset (Initialization) • 22
8. Hardware Reset (Memory Format) • 22
9. Using SIM Card • 23
Ⅲ. Functions
1. Using Barcode Reader • 24
2. Using Camera • 27
3. Using Infrared Port (IrDA) • 29
4. Using Bluetooth • 30
5. Using Wireless Admin • 32
6. Using Wireless LAN Features • 33
7. Host PC Connection method • 34
8. Using ear jack • 35
Ⅳ. Connecting ActiveSync
1. Installing ActiveSync• 36
2. Downloading Files • 38
V. setting
1. Phone •39
VI. Appendix
1. Q&A • 40
2. Customer Service • 41
3. Certifications of the Product • 42

[BIP-5000 PDA 1 unit] [BIP-5000 Cradle 1 unit] [Battery (standard/Extend)] [Stylus]
1. Components
I. Knowing the ProductI. Knowing the Product
The pictures or the figures in this manual may differ from the actual product.
If you would like to purchase an additional or optional version, please contact Customers Service.
!!
Thank you for purchasing a PIDION product.
Please check and make sure the following components are included in the package.
[Handstrap] [Adapter] [USB cable]

[Front] [Right side] [Back] [Left side]
2. Basic Terms
Please familiarize yourself with the basic terms of the PDA product.
I. Knowing the ProductI. Knowing the Product
Antenna
GSM
(LED)
Speaker
Power (LED)
Power
button
Barcode
scanner
Window
Barcode/
Camera
Button
Camera
Barcode/
Camera
Button
Flash
MIC Battery Case
Fixed screw
Hand
strap
fixed
Hand
strap
fixed
Camera
Send
button

Press 3 seconds to lock the PDA. Password must be inserted to use the PDA.
Press 3 seconds to enable/disable silent mode
Move one space to the right.
Delete a character by moving the cursor one space to the left.
Execute program and make phone connection. Press once to execute phone program, press
twice to view recent calls, press three times to call the selected number.
Change character input mode. Default mode is numeric. Press once for lower case English,
press twice for capital English, press three times for special characters.
Execute after user input
Laser(1D,2D) Barcode / Camera Type : Press left button to use barcode scanner
Press right button to use camera
CMOS Barcode Type : Use right and left button to activate barcode.
Use it to turn on/turn off the PDA
3. Button Description
I. Knowing the ProductI. Knowing the Product

Moving one space down
Function + 8
Page Down
Function + 7
Moving one space to the right
Function + 6
Execute the sign input
Function + 5
Moving one space up
Function + 2
LCD getting brighter
Function + 3
Moving one space to the left
Function + 4
Page Up
Function + 9
Run the sign character
Function + 0
LCD getting darker
Function + 1
Change display.
Function + 1
Starting menu.
Function + 1
Description
Contents
- To use the Function keypad
- The following functions will be executed after pressing the function key and button.
4. Function Key Description
I. Knowing the ProductI. Knowing the Product

• Sit the battery to the groove,
Put the cover and swivel the screw.
• Swivel the screw in arrow direction until
detached, take off battery.
5. Attaching/Detaching the Battery
[Attaching the Battery] [Detaching the Battery]
I. Knowing the ProductI. Knowing the Product
※Detach the battery only after you turn off the product.
※Abruptly turning off the product may cause damage, and you may lose saved data.
!!

[While connecting the adapter to the table charging cradle]
* Connect the adapter with table charging cradle as showed.
• Note: Using the provided/approved adapter is the most safely and effective way to use PDA.
6. Charging the Battery
I. Knowing the ProductI. Knowing the Product

[Battery charging and working time]
* The Charging time is subject to change of charging condition, please purchase the new one when it’s working
time is shortened by 50%.
12 hours (LCD on,
backlight off),
200hours (LCD off)
Standby time
6 hoursTalk time
Standard (2200mhA)Working time
Less than 4 hours (main
battery), less than 72
hours (backup battery)
Time
Standard (2200mhA)Charging Time
* Modem power turns off automatically to prevent the battery power damage. Use is after recharging.
* The battery talk time and standby time can be different from the specification in various conditions.
[Battery Charging condition]
Red
Charging
Green
Charging
Lamp
Fully charged
* It is fully charged when table charging cradle and PDA’s charging lamp turn to green, there is no harm if keep
charging the PDA.
7. About Batteries
I. Knowing the ProductI. Knowing the Product

GSM/GPRS/EDGEGSM
Integrated GPS
GPS
5V 3A
ADAPTER
314 gWEIGHT
79.5(width) x 150.3(length) x 34.9thickness) mm
SIZE
Standard battery: 3.7V Li-ion :22000mAH / Extend battery : 3.7V Li-ion 3700 mAHBATTERY
2.0M pixel cameraCAMERA
1 x USB 1.1 Client / Host
1 x RS-232C
Mini-SD slot
IrDA 1.2 (Option: Bluetooth class )
INTERFACE
3.5”, 240 x 320 / 260,000 color
DISPLAY
Window Mobile 6.1OS
Marvell PXA320 806MHzCPU
DescriptionContents
8. PDA Specification
I. Knowing the ProductI. Knowing the Product

!!
1. Turning On/Off
II. Learning the BasicsII. Learning the Basics
* Press power button to turn on the PDA
* Depress power button for 2 seconds in the condition
of PDA is turned on, the Front light will be turned on
or turned off.
- Power Button
▪Stylus Pen is an input device that can be used for selecting, launching, and moving
items on the touch screen LCD.
▪Pressing the Stylus Pen (Tap): Select or launch an item by touching an icon on the
screen with the tip of the Stylus Pen.
▪Dragging the Stylus Pen (Drag): Used to select multiple items, select characters or
images by dragging.
▪Holding the Stylus Pen Down (Tap and Hold): See the functions of the selected
item(s) that show up in a popup box when you tap the screen with the Stylus Pen.
※The product can be damaged if you use a pen, nail, pin, etc. instead of the authentic Stylus Pen.
2. Using the Stylus Pen

3. Starting the PDA
II. Learning the BasicsII. Learning the Basics
[Adjusting the Screen] [Windows Mobile Starting Screen]
▪Optimize the screen input by using the Stylus Pen on
the LCD screen.
▪When you press the middle of the cross in the center using the
Stylus Pen, the target moves. Press it again precisely with the
Stylus Pen.
▪Once you complete the initial wizard, you will see
the starting screen as shown below.
Title Bar
Today’s
Section

3. Starting the PDA
II. Learning the BasicsII. Learning the Basics
[Starting Windows Mobile]
▪When you press the Start button on the upper left-hand corner of the title bar, the start menu will
appear.
Start
Button
Start Menu
Running
Programs and
Settings

[Receiving Calls]
1) With ringing ‘Calling’ sign will be shown on the screen.
2) Push and it will be connected.
3) Push the disconnect button will make you disconnected with line.
4) Push the disconnected button longer, then modem will be off.
[Making Calls]
1) Push and make a start the phone program.
2) Enter the phone number.
3) Edit the phone number with .
4) or make you phone call.
• Re-send function: Automatically make a phone call which is the last number you input
5) Connecting.
• Talking time will show up on the screen.
4. Making/Receiving Calls
II. Learning the BasicsII. Learning the Basics

[Using call program]
1) Dial number
a. Dial a phone number or a speed dial number
b. Number can be cleared by using [CLR] button
c. Press [SEND] button to make a call
- Redial function: Without inputting numbers, press the [SEND] button to redial the lasted call number
d. Communication is available after the call being connected
- Redial option and times can be set in SETTING-OPTION automatically when the connection failed.
- Call time is shown on the screen
e. Press [END] button to end the call
2) Receive the call
a. An incoming call message is shown when the bell rings.
b. Press any key to receive the call.
c. Press [END] to finish the call .
* Keep pressing [END] button can turn on/off the phone modem.
4. Making/Receiving Calls
II. Learning the BasicsII. Learning the Basics

5. Typing
II. Learning the BasicsII. Learning the Basics
[ Keyboard ] [ Letter Recognizer ] [ Transcriber ]
This input method displays
an on-screen keyboard that
can be used to input
characters by tapping
the screen using
the stylus pen.
This option allows you to
enter texts using your own
handwriting.
The screen is divided into
three different sections.
A capital letter area,
lowercase letter area,
and a number area.
Characters are entered by
printing letters in each area.
The character is then
analyzed and typed on the
screen automatically.
The transcriber option is
similar to the letter
recognizer. However,
instead of entering
characters into a designated
area, you can enter entire
words and sentences using
your own handwriting.
Transcriber supports both
printing and cursive writing
styles and then automatically
types the information on the
screen.

[ Selecting Text Input Mode ] [ Block Recognizer ] [ Built-in Numeric Keypad ]
5. Typing
II. Learning the BasicsII. Learning the Basics
Using Keypad, you can type
letters, punctuations,
numbers, and other
Special characters
into the text entry fields
or other applications
available on your PDA.
There are five different
character input
methods available:
1. Block Recognizer
2. Built-in Numeric Keypad
3. Keyboard
4. Letter Recognizer
5. Transcriber
This input method uses the
traditional writing area box
split in the middle.
The left side is used to write
letters and the right side is
for number entries.
Symbols and common
functions are located in other
smaller boxes located in the
right of the writing box area.
Other manuals for BIP-5000
2
Table of contents
Other Pidion Cell Phone manuals