manuals.online logo
Brands
  1. Home
  2. •
  3. Brands
  4. •
  5. Pioneer
  6. •
  7. Car Receiver
  8. •
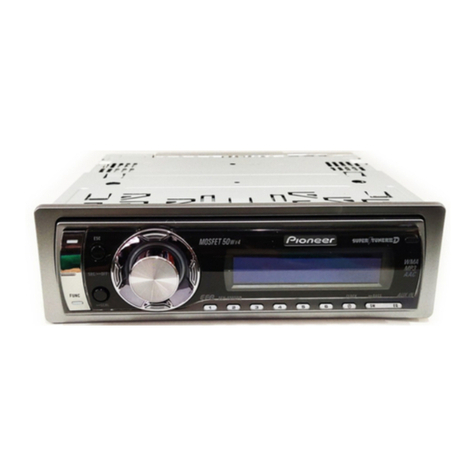
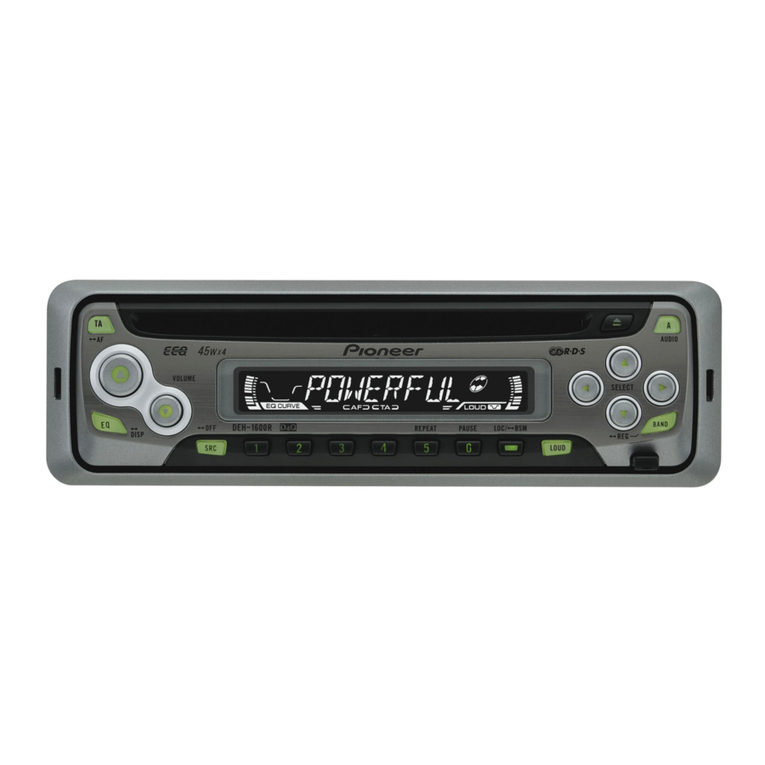
  9. Pioneer DEH-1610 User manual

Pioneer DEH-1610 User manual

Other manuals for DEH-1610

1

Other Pioneer Car Receiver manuals

Pioneer DEH-3200UB User manual

Pioneer

Pioneer DEH-3200UB User manual

Pioneer AVH-P6500DVD User manual

Pioneer

Pioneer AVH-P6500DVD User manual

Pioneer DEH-6150BT User manual

Pioneer

Pioneer DEH-6150BT User manual

Pioneer CT-660BK User manual

Pioneer

Pioneer CT-660BK User manual

Pioneer DEH-6150BT User manual

Pioneer

Pioneer DEH-6150BT User manual

Pioneer deh-p3590mp User manual

Pioneer

Pioneer deh-p3590mp User manual

Pioneer DEH-P4700MP User manual

Pioneer

Pioneer DEH-P4700MP User manual

Pioneer KEH-P580 User manual

Pioneer

Pioneer KEH-P580 User manual

Pioneer DEH-P3550MP XM User manual

Pioneer

Pioneer DEH-P3550MP XM User manual

Pioneer AVH-Z9100DAB User manual

Pioneer

Pioneer AVH-Z9100DAB User manual

Pioneer DEH-P7800MP User manual

Pioneer

Pioneer DEH-P7800MP User manual

Pioneer AVH-P6400CD User manual

Pioneer

Pioneer AVH-P6400CD User manual

Pioneer Super Tuner IIID AVH-P3100DVD User manual

Pioneer

Pioneer Super Tuner IIID AVH-P3100DVD User manual

Pioneer MVH-X360BT User manual

Pioneer

Pioneer MVH-X360BT User manual

Pioneer DEH-X2900UI User manual

Pioneer

Pioneer DEH-X2900UI User manual

Pioneer DEH-P8200R User manual

Pioneer

Pioneer DEH-P8200R User manual

Pioneer DEH-P77MP User manual

Pioneer

Pioneer DEH-P77MP User manual

Pioneer KEH-1033 User manual

Pioneer

Pioneer KEH-1033 User manual

Pioneer DEH-P770MP User manual

Pioneer

Pioneer DEH-P770MP User manual

Pioneer AVH-P7650DVD User manual

Pioneer

Pioneer AVH-P7650DVD User manual

Pioneer DEH-1200MP User manual

Pioneer

Pioneer DEH-1200MP User manual

Pioneer DEH-1800R User manual

Pioneer

Pioneer DEH-1800R User manual

Pioneer Super Tuner IIID DEH-P4200UB User manual

Pioneer

Pioneer Super Tuner IIID DEH-P4200UB User manual

Pioneer AVM-P7000R User manual

Pioneer

Pioneer AVM-P7000R User manual

Popular Car Receiver manuals by other brands

Linear Series LS5050 Operation and installation manual

Linear Series

Linear Series LS5050 Operation and installation manual

Kenwood KRC-160 instruction manual

Kenwood

Kenwood KRC-160 instruction manual

Sony XR-CA430X Service manual

Sony

Sony XR-CA430X Service manual

T+A Elektroakustik K1 CD-RECEIVER operating instructions

T+A Elektroakustik

T+A Elektroakustik K1 CD-RECEIVER operating instructions

SoundMax SM-CDM1052 instruction manual

SoundMax

SoundMax SM-CDM1052 instruction manual

Xtrons HD107HD user manual

Xtrons

Xtrons HD107HD user manual

Mopar RB3 manual

Mopar

Mopar RB3 manual

Clarion ADDZEST DMZ615 owner's manual

Clarion

Clarion ADDZEST DMZ615 owner's manual

Sony XAV-601BT Specifications

Sony

Sony XAV-601BT Specifications

PIE GM12-POD/S Operation manual

PIE

PIE GM12-POD/S Operation manual

Hyundai H-910H instruction manual

Hyundai

Hyundai H-910H instruction manual

Sony XR-C6100 Service manual

Sony

Sony XR-C6100 Service manual

Sony CDX-L600X - Fm/am Compact Disc Player Installation/connections

Sony

Sony CDX-L600X - Fm/am Compact Disc Player Installation/connections

Motorola VWA63 Service manual

Motorola

Motorola VWA63 Service manual

Sound Storm STM93R user manual

Sound Storm

Sound Storm STM93R user manual

Nextar D3201 instruction manual

Nextar

Nextar D3201 instruction manual

Alpine CDE-163BT owner's manual

Alpine

Alpine CDE-163BT owner's manual

Kenwood KDC-X303 quick start guide

Kenwood

Kenwood KDC-X303 quick start guide

manuals.online logo
manuals.online logoBrands
  • About & Mission
  • Contact us
  • Privacy Policy
  • Terms and Conditions

Copyright 2025 Manuals.Online. All Rights Reserved.

Operation Manual
C:>2>4AB2> ?> M:A?;C0B0F88
High power CD player with FM/MW/LW tuner
@>83@K20B5;L :><?0:B-48A:>2 2KA>:>9 <>I=>AB8
AFM/MW/LW BN=5@><
DEH-1610
English CAA:89
Thank you for buying this Pioneer product.
Please read through these operating instructions so you will know how to operate
your model properly. After you have finished reading the instructions, put them away
in a safe place for future reference.
Before You Start
About this unit 3
About this manual 3
Precautions 3
In case of trouble 3
Protecting your unit from theft 3
Removing the front panel 3
Attaching the front panel 4
Whats What
Head unit 5
Power ON/OFF
Turning the unit on 6
Selecting a source 6
Turning the unit off 6
Tuner
Listening to the radio 7
Storing and recalling broadcast
fre uencies 7
Tuning in strong signals 8
Storing the strongest broadcast
fre uencies 8
Built-in C Player
Playing a CD 9
Playing tracks in a random order 9
Repeating play 9
Pausing CD playback 10
Audio Adjustments
Introduction of audio adjustments 11
Using balance adjustment 11
Using the e ualizer 11
Recalling e ualizer curves 11
Adjusting e ualizer curves 12
Fine adjusting e ualizer curve 12
Adjusting loudness 13
Front image enhancer (F.I.E.) 13
Adjusting source levels 13
Other Functions
Setting the clock 14
Turning the clock display on or off 14
Additional Information
Understanding built-in CD player error
messages 15
Cellular telephone muting 15
CD player and care 15
CD-R/CD-RW discs 16
Specifications 17
Contents
En
2
About this unit
The tuner fre uencies on this unit are allo-
cated for use in Europe, Asia, the Middle East,
Africa and Oceania. Use in other areas may re-
sult in improper reception.
About this manual
This unit features a number of sophisticated
functions ensuring superior reception and op-
eration. All the functions have been designed
for the easiest possible use, but many are not
self-explanatory. This operation manual will
help you benefit fully from this units potential
and to maximize your listening enjoyment.
We recommend that you familiarize yourself
with the functions and their operation by read-
ing through the manual before you begin
using this unit. It is especially important that
you read and observe precautions on this
page and in other sections.
Precautions
CAUTION:
USE OF CONT OL O ADJUSTMENT O
PE FO MANCE OF P OCEDU ES
OTHE THAN THOSE SPECIFIED HE EIN
MAY ESULT IN HAZA DOUS ADIATION
EXPOSU E.
CAUTION:
THE USE OF OPTICAL INST UMENTS
WITH THIS P ODUCT WILL INC EASE
EYE HAZA D.
!Keep this manual handy as a reference for
operating procedures and precautions.
!Always keep the volume low enough so you
can hear sounds outside of the car.
!Protect this unit from moisture.
!If the battery is disconnected or dis-
charged, the preset memory will be erased
and must be reprogrammed.
In case of trouble
Should this product fail to operate properly,
contact your dealer or nearest authorized Pio-
neer Service Station.
Protecting your unit from
theft
The front panel can be detached from the
head unit and stored in the protective case
provided to discourage theft.
!Keep the front panel closed while driving.
Important
!Never use force or grip the display and the
buttons tightly when removing or attaching.
!Avoid subjecting the front panel to excessive
shocks.
!Keep the front panel out of direct sunlight and
high temperatures.
Removing the front panel
1 Press DETACH to release the front
panel.
Press DETACH and the right side of the panel
is released from the head unit.
2 Grab the front panel and remove.
Grab the right side of the front panel and pull
away to the left. The front panel will be de-
tached from the head unit.
Before You Start
En 3
English
Section
01
3 Put the front panel into the protective
case provided for safe keepin .
Attaching the front panel
1 Place the front panel flat a ainst the
head unit.
2 Press the front panel into the face of
the head unit until it is firmly seated.
Before You Start
En
4
Section
01
Head unit
1CLOCK button
Press to change to the clock display.
2EJECT button
You can eject a CD by pressing EJECT.
3AUDIO button
Press to select various sound uality con-
trols.
4a/b/c/dbuttons
Press to do manual seek tuning, fast for-
ward, reverse and track search controls.
Also used for controlling functions.
5BAND button
Press to select among three FM and one
AM bands and cancel the control mode of
functions.
6DETACH button
Press DETACH to release the front panel.
7LOUDNESS button
Press to turn loudness on or off.
8LOCAL/BSM button
Press to turn local function on or off.
Press and hold to turn BSM function on or
off.
916 buttons
Press for preset tuning.
aSOURCE button
This unit is turned on by selecting a source.
Press to cycle through all of the available
sources.
bVOLUME
Press to increase or decrease the volume.
cEQ button
Press to select various e ualizer curves.
1
1
1
2
5
5
5
6
6
6
7
7
7
8
8
8
9
9
9
a
a
a
3
4
b
b
c
c
c
Whats What
En 5
English
Section
02
Turning the unit on
%Press SOURCE to turn the unit on.
When you select a source the unit is turned
on.
Selecting a source
You can select a source you want to listen to.
To switch to the built-in CD player, load a disc
in this unit (refer to page 9).
%Press SOURCE to select a source.
Press SOURCE repeatedly to switch between
the following sources:
Built-in CD playerTuner
Notes
!When no disc has been set in the unit, the
source will not switch to the built-in CD player.
!When this units blue/white lead is connected
to the cars auto-antenna relay control term-
inal, the cars antenna extends when this
units source is turned on. To retract the an-
tenna, turn the source off.
Turning the unit off
%Press SOURCE and hold until the unit
turns off.
Po er ON/OFF
En
6
Section
03
Listening to the radio
123 4
1Band indicator
Shows which band the radio is tuned to,
MW, LW or FM.
2Frequency indicator
Shows to which fre uency the tuner is
tuned.
3Stereo (5) indicator
Shows that the fre uency selected is being
broadcast in stereo.
4Preset number indicator
Shows what preset has been selected.
1 Press SOURCE to select the tuner.
2 Use VOLUME to adjust the sound level.
3 Press BAND to select a band.
Press BAND until the desired band is dis-
played, F1,F2,F3 for FM or MW/LW.
!The FM bands cover different fre uency
ranges as below:
F1:6574 MHz
F2,F3: 87.5 108 MHz
4 To perform manual tunin , press cor
dwith quick presses.
The fre uencies move up or down step by
step.
5 To perform seek tunin , press and hold
cor dfor about one second and release.
The tuner will scan the fre uencies until a
broadcast strong enough for good reception is
found.
#You can cancel seek tuning by pressing either
cor dwith a uick press.
#If you press and hold cor dyou can skip
broadcasting stations. Seek tuning starts as soon
as you release the buttons.
Note
When the fre uency selected is being broadcast
in stereo the stereo (5) indicator will light.
Storing and recalling
broadcast frequencies
If you press any of the preset tuning buttons
16you can easily store up to six broadcast
fre uencies for later recall with the touch of a
button.
%When you find a frequency that you
want to store in memory press a preset
tunin button 16 and hold until the preset
number stops flashin .
The number you have pressed will flash in the
preset number indicator and then remain lit.
The selected radio station fre uency has been
stored in memory.
The next time you press the same preset tun-
ing button 16the radio station fre uency is
recalled from memory.
Notes
!Up to 12 FM stations, 6 for each of the two FM
bands, and 6 MW/LW stations can be stored
in memory.
!You can also use aand bto recall radio sta-
tion fre uencies assigned to preset tuning
buttons 16.
Tuner
En 7
English
Section
04
Tuning in strong signals
Local seek tuning lets you tune in only those
radio stations with sufficiently strong signals
for good reception.
1 Press LOCAL/BSM to turn local seek
tunin on.
LOC appears in the display.
2 When you want to return to normal
seek tunin , press LOCAL/BSM to turn local
seek tunin off.
Storing the strongest
broadcast frequencies
BSM (best stations memory) lets you automa-
tically store the six strongest broadcast fre-
uencies under preset tuning buttons 16and
once stored there you can tune in to those fre-
uencies with the touch of a button.
%Press LOCAL/BSM and hold until the
BSM turns on.
BSM begins to flash. While BSM is flashing
the six strongest broadcast fre uencies will be
stored under preset tuning buttons 16in
order of their signal strength. When finished,
BSM stops flashing.
#To cancel the storage process, press
LOCAL/BSM.
Note
Storing broadcast fre uencies with BSM may re-
place broadcast fre uencies you have saved
using 16.
Tuner
En
8
Section
04
Playing a CD
12
1Track number indicator
Shows the track currently playing.
2Play time indicator
Shows the elapsed playing time of the cur-
rent track.
1 Insert a CD into the CD loadin slot.
Playback will automatically start.
CD loading slot
#You can eject a CD by pressing EJECT.
2 After a CD has been inserted, press
SOURCE to select the built-in CD player.
3 Use VOLUME to adjust the sound level.
4 To perform fast forward or reverse,
press and hold cor d.
5 To skip back or forward to another
track, press cor d.
Pressing dskips to the start of the next track.
Pressing conce skips to the start of the cur-
rent track. Pressing again will skip to the pre-
vious track.
Notes
!The built-in CD player plays one, standard, 12-
cm or 8-cm (single) CD at a time. Do not use
an adapter when playing 8-cm CDs.
!Do not insert anything other than a CD into
the CD loading slot.
!If you cannot insert a disc completely or if
after you insert a disc the disc does not play,
check that the label side of the disc is up.
Press EJECT to eject the disc, and check the
disc for damage before inserting the disc
again.
!If the built-in CD player does not operate prop-
erly, an error message such as ERROR-11
may be displayed. Refer to Understanding
built-in CD player error messages on page
15.
Playing tracks in a random
order
Random play lets you play back tracks on the
CD in a random order.
1 Press 4 to turn random play on.
RDM appears in the display. Tracks will play in
a random order.
2 Press 4 to turn random play off.
Tracks will continue to play in order.
Repeating play
Repeat play lets you hear the same track over
again.
1 Press 5 to turn repeat play on.
RPT appears in the display. The track currently
playing will play and then repeat.
Built-in CD Player
En 9
English
Section
05
2 Press 5 to turn repeat play off.
The track currently playing will continue to
play and then play the next track.
Note
If you perform track search or fast forward/re-
verse, repeat play is automatically cancelled.
Pausing CD playback
Pause lets you temporarily stop playback of
the CD.
1 Press 6 to turn pause on.
PAUSE appears in the display. Play of the cur-
rent track pauses.
2 Press 6 to turn pause off.
Play will resume at the same point that you
turned pause on.
Built-in CD Player
En
10
Section
05