Pioneer X-SMC00 User manual

CAUTION
TO PREVENT THE RISK OF ELECTRIC SHOCK, DO NOT
REMOVE COVER (OR BACK). NO USER-SERVICEABLE
PARTS INSIDE. REFER SERVICING TO QUALIFIED
SERVICE PERSONNEL. D3-4-2-1-1_B1_En
WARNING
This equipment is not waterproof. To prevent a fire or
shock hazard, do not place any container filled with
liquid near this equipment (such as a vase or flower
pot) or expose it to dripping, splashing, rain or
moisture.
D3-4-2-1-3_A1_En
WARNING
To prevent a fire hazard, do not place any naked flame
sources (such as a lighted candle) on the equipment.
D3-4-2-1-7a_A1_En
WARNING
Slots and openings in the cabinet are provided for
ventilation to ensure reliable operation of the product,
and to protect it from overheating. To prevent fire
hazard, the openings should never be blocked or
covered with items (such as newspapers, table-cloths,
curtains) or by operating the equipment on thick carpet
or a bed.
D3-4-2-1-7b*_A1_En
Operating Environment
Operating environment temperature and humidity:
+5 °C to +35 °C (+41 °F to +95 °F); less than 85 %RH
(cooling vents not blocked)
Do not install this unit in a poorly ventilated area, or in
locations exposed to high humidity or direct sunlight
(or strong artificial light)
D3-4-2-1-7c*_A1_En
This product is for general household purposes. Any
failure due to use for other than household purposes
(such as long-term use for business purposes in a
restaurant or use in a car or ship) and which requires
repair will be charged for even during the warranty
period.
K041_A1_En
CAUTION
The STANDBY/ON switch on this unit will not
completely shut off all power from the AC outlet.
Since the power cord serves as the main disconnect
device for the unit, you will need to unplug it from the
AC outlet to shut down all power. Therefore, make
sure the unit has been installed so that the power
cord can be easily unplugged from the AC outlet in
case of an accident. To avoid fire hazard, the power
cord should also be unplugged from the AC outlet
when left unused for a long period of time (for
example, when on vacation).
D3-4-2-2-2a*_A1_En
CAUTION
This product is a class 1 laser product classified
under the Safety of laser products, IEC 60825-1:2007.
CLASS 1 LASER PRODUCT
D58-5-2-2a_A1_En
WARNING
Store small parts out of the reach of children and
infants. If accidentally swallowed, contact a doctor
immediately.
D41-6-4_A1_En
When using this product, confirm the safety
information shown on the bottom of the unit and the
AC adapter label.
D3-4-2-2-4_B1_En
X-SMC_VXE8_En.book 2 ページ 2013年3月25日 月曜日 午後2時17分

Information for users on collection and disposal of old equipment and used batteries
These symbols on the products, packaging, and/or accompanying documents mean
that used electrical and electronic products and batteries should not be mixed with
general household waste.
For proper treatment, recovery and recycling of old products and used batteries,
please take them to applicable collection points in accordance with your national
legislation.
By disposing of these products and batteries correctly, you will help to save valuable
resources and prevent any potential negative effects on human health and the
environment which could otherwise arise from inappropriate waste handling.
For more information about collection and recycling of old products and batteries,
please contact your local municipality, your waste disposal service or the point of sale
where you purchased the items.
These symbols are only valid in the European Union.
For countries outside the European Union:
If you wish to discard these items, please contact your local authorities or dealer and
ask for the correct method of disposal.
K058a_A1_En
Symbol examples
for batteries
Symbol for
equipment
Pb
AC adapter caution
• Make sure to grasp the body of the AC adapter
when removing it from the power outlet. If you pull
the power cord, it may become damaged which
could lead to fire and/or electrocution.
• Do not attempt to plug in or remove the AC
adapter with wet hands. This may result in
electrocution.
• Insert the prongs of the AC adapter all the way into
the power outlet. If the connection is incomplete,
heat may be generated which could lead to fire.
Furthermore, contact with the connected prongs
of the adapter may result in electrocution.
• Do not insert the AC adapter into a power outlet
where the connection remains loose despite
inserting the prongs all the way into the outlet.
Heat may be generated which could lead to fire.
Consult with the retailer or an electrician
regarding replacement of the power outlet.
• Do not place the unit, a piece of furniture, etc., on
the power cord, or pinch the cord. Never make a
knot in the cord or tie it with other cords. The
power cords should be routed such that they are
not likely to be stepped on. A damaged AC adapter
and power cord can cause a fire or give you an
electrical shock. Check the AC adapter and the
power cord once in a while. When you find it
damaged, ask your nearest PIONEER authorized
service center or your dealer for a replacement.
POWER-CORD CAUTION
Handle the power cord by the plug. Do not pull out the
plug by tugging the cord and never touch the power
cord when your hands are wet as this could cause a
short circuit or electric shock. Do not place the unit, a
piece of furniture, etc., on the power cord, or pinch the
cord. Never make a knot in the cord or tie it with other
cords. The power cords should be routed such that they
are not likely to be stepped on. A damaged power cord
can cause a fire or give you an electrical shock. Check
the power cord once in a while. When you find it
damaged, ask your nearest PIONEER authorized service
center or your dealer for a replacement.
S002*_A1_En
X-SMC_VXE8_En.book 3 ページ 2013年3月25日 月曜日 午後2時17分

4
En
Thank you for buying this Pioneer product.
Please read through these operating instructions so that you will know how to operate your model properly. After you
have finished reading the instructions, put them in a safe place for future reference.
Contents
01 Before you start
What’s in the box . . . . . . . . . . . . . . . . . . . . . . . . . . . . . . . 5
Loading the batteries in the remote control . . . . . . . . . 5
Using the remote control . . . . . . . . . . . . . . . . . . . . . . . . . 6
02 Part names and functions
Remote control . . . . . . . . . . . . . . . . . . . . . . . . . . . . . . . . 7
Hang from the wall to use . . . . . . . . . . . . . . . . . . . . . . . 8
Front panel . . . . . . . . . . . . . . . . . . . . . . . . . . . . . . . . . . . . 9
Top panel/Rear panel . . . . . . . . . . . . . . . . . . . . . . . . . . 10
Change the interchangeable panel . . . . . . . . . . . . . . . 11
03 Connections
Connecting antenna . . . . . . . . . . . . . . . . . . . . . . . . . . . 12
Using external antennas . . . . . . . . . . . . . . . . . . . . . . . . . 12
Plugging in . . . . . . . . . . . . . . . . . . . . . . . . . . . . . . . . . . . 12
04 Getting started
To turn the power on . . . . . . . . . . . . . . . . . . . . . . . . . . . 13
Setting the clock . . . . . . . . . . . . . . . . . . . . . . . . . . . . . . 13
General control . . . . . . . . . . . . . . . . . . . . . . . . . . . . . . . 13
Input function. . . . . . . . . . . . . . . . . . . . . . . . . . . . . . . . . . 13
Display brightness control . . . . . . . . . . . . . . . . . . . . . . . 13
Volume auto setting. . . . . . . . . . . . . . . . . . . . . . . . . . . . . 13
Volume control. . . . . . . . . . . . . . . . . . . . . . . . . . . . . . . . . 13
Muting. . . . . . . . . . . . . . . . . . . . . . . . . . . . . . . . . . . . . . . . 13
Sound controls . . . . . . . . . . . . . . . . . . . . . . . . . . . . . . . 14
Equalizer . . . . . . . . . . . . . . . . . . . . . . . . . . . . . . . . . . . . . . 14
P.BASS control . . . . . . . . . . . . . . . . . . . . . . . . . . . . . . . . 14
Bass/treble control . . . . . . . . . . . . . . . . . . . . . . . . . . . . . 14
Setting the wake-up timer . . . . . . . . . . . . . . . . . . . . . . . 14
Calling the wake-up timer . . . . . . . . . . . . . . . . . . . . . . . . 15
Cancelling the wake-up timer. . . . . . . . . . . . . . . . . . . . . 15
Using the wake-up timer . . . . . . . . . . . . . . . . . . . . . . . . . 15
Using the sleep timer . . . . . . . . . . . . . . . . . . . . . . . . . . 15
Using Headphones . . . . . . . . . . . . . . . . . . . . . . . . . . . . 15
05 iPod/iPhone/iPad mini playback
Confirming what iPod/iPhone/iPad mini models are
supported . . . . . . . . . . . . . . . . . . . . . . . . . . . . . . . . . . . . 16
Connecting your iPod/iPhone . . . . . . . . . . . . . . . . . . . 16
Connecting iPod/iPhone/iPad mini using supplied iPhone
stand . . . . . . . . . . . . . . . . . . . . . . . . . . . . . . . . . . . . . . . . . 17
Playing iPod/iPhone/iPad mini . . . . . . . . . . . . . . . . . . 17
06 Disc playback
Playing discs or files . . . . . . . . . . . . . . . . . . . . . . . . . . . 18
Advanced CD or MP3/WMA disc playback . . . . . . . . . 19
Direct track search . . . . . . . . . . . . . . . . . . . . . . . . . . . . . 19
Repeat play. . . . . . . . . . . . . . . . . . . . . . . . . . . . . . . . . . . . 19
Random play . . . . . . . . . . . . . . . . . . . . . . . . . . . . . . . . . . 19
Programmed play (CD or MP3/WMA) . . . . . . . . . . . . . . 20
About downloading MP3/WMA . . . . . . . . . . . . . . . . . . . 20
About folder playback order . . . . . . . . . . . . . . . . . . . . . . 20
Specify the folder to play. . . . . . . . . . . . . . . . . . . . . . . . . 21
Switch the display contents . . . . . . . . . . . . . . . . . . . . . . 21
07 USB playback
Playing USB storage devices . . . . . . . . . . . . . . . . . . . . 22
Repeat play. . . . . . . . . . . . . . . . . . . . . . . . . . . . . . . . . . . . 22
Random play . . . . . . . . . . . . . . . . . . . . . . . . . . . . . . . . . . 22
Specify the folder to play. . . . . . . . . . . . . . . . . . . . . . . . . 23
Switch the display contents . . . . . . . . . . . . . . . . . . . . . . 23
Playing in the desired order (Programmed Play) . . . . 23
08 Using the tuner
Listening to the radio broadcasts . . . . . . . . . . . . . . . . 24
Tuning. . . . . . . . . . . . . . . . . . . . . . . . . . . . . . . . . . . . . . . . 24
Saving station presets. . . . . . . . . . . . . . . . . . . . . . . . . . . 24
To recall a memorised station . . . . . . . . . . . . . . . . . . . . 25
To scan the preset stations. . . . . . . . . . . . . . . . . . . . . . . 25
To erase entire preset memory. . . . . . . . . . . . . . . . . . . . 25
Listening to the DAB+ . . . . . . . . . . . . . . . . . . . . . . . . . 25
About DAB+ (Digital Audio Broadcasting) . . . . . . . . . 25
Auto Scan. . . . . . . . . . . . . . . . . . . . . . . . . . . . . . . . . . . . . 25
Selecting a station in the station list . . . . . . . . . . . . . . . 25
Manual tune. . . . . . . . . . . . . . . . . . . . . . . . . . . . . . . . . . . 26
Changing the information display . . . . . . . . . . . . . . . . . 26
Memorising a station . . . . . . . . . . . . . . . . . . . . . . . . . . . 26
DAB Frequency table (BAND III) . . . . . . . . . . . . . . . . . . 27
09 Other connections
Connecting auxiliary components . . . . . . . . . . . . . . . . 28
10 Additional information
Troubleshooting . . . . . . . . . . . . . . . . . . . . . . . . . . . . . . . 29
Playable discs and formats . . . . . . . . . . . . . . . . . . . . . 31
Regarding copy protected CDs . . . . . . . . . . . . . . . . . . . 31
Supported audio file formats . . . . . . . . . . . . . . . . . . . . . 31
Cautions on use . . . . . . . . . . . . . . . . . . . . . . . . . . . . . . . 31
When moving this unit . . . . . . . . . . . . . . . . . . . . . . . . . . 31
Place of installation. . . . . . . . . . . . . . . . . . . . . . . . . . . . . 31
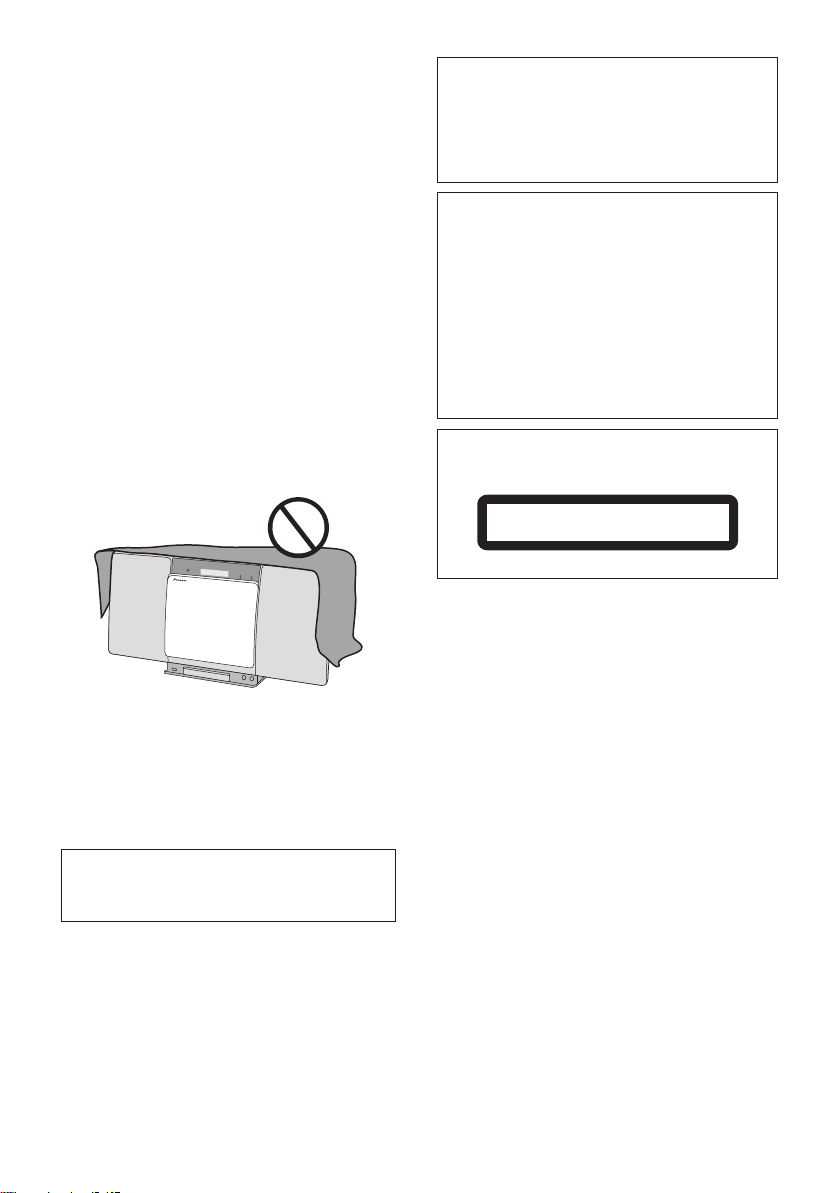
Do not place objects on this unit . . . . . . . . . . . . . . . . . . 32
About condensation . . . . . . . . . . . . . . . . . . . . . . . . . . . . 32
Cleaning the product. . . . . . . . . . . . . . . . . . . . . . . . . . . . 32
Cleaning the lens. . . . . . . . . . . . . . . . . . . . . . . . . . . . . . . 32
Handling discs . . . . . . . . . . . . . . . . . . . . . . . . . . . . . . . . 32
Storing . . . . . . . . . . . . . . . . . . . . . . . . . . . . . . . . . . . . . . . 32
Cleaning discs . . . . . . . . . . . . . . . . . . . . . . . . . . . . . . . . . 32
About specially shaped discs. . . . . . . . . . . . . . . . . . . . . 32
About iPod/iPhone . . . . . . . . . . . . . . . . . . . . . . . . . . . . 33
Restoring all the settings to the defaults . . . . . . . . . . 33
Specifications . . . . . . . . . . . . . . . . . . . . . . . . . . . . . . . . 34
X-SMC_VXE8_En.book 4 ページ 2013年3月25日 月曜日 午後2時17分

Before you start 01
5
En
Chapter 1:
Before you start
What’s in the box
Please confirm that the following accessories are in the box
when you open it.
• Remote control
• AC adapter
• Changeable panel x 2
(X-SMC00DAB-W do not have an interchangeable panel
in the box)
• AAA batteries (R03) x 2
• DAB/FM wire antenna
•iPhonestand
• Warranty card
• Operating instructions (this document)
Loading the batteries in the
remote control
1 Open the rear lid and load the batteries as
illustrated below.
2 Close the rear lid.
The batteries included with the unit have been provided to
allow you check product operation and may not last long. We
recommend using alkaline batteries that have a longer life.
CAUTION
• When inserting the batteries, make sure not to damage
the springs on the battery’s terminals. This can cause
batteries to leak or over heat.
• Do not use any batteries other than the ones specified.
Also, do not use a new battery together with an old one.
• When loading the batteries into the remote control, set
them in the proper direction, as indicated by the polarity
marks (and ).
• Do not heat batteries, disassemble them, or throw them
into flames or water.
• Batteries may have different voltages, even if they are the
same size and shape. Do not use different types of
batteries together.
• To prevent leakage of battery fluid, remove the batteries
if you do not plan to use the remote control for a long
period of time (1 month or more). If the fluid should leak,
wipe it carefully off the inside of the case, then insert new
batteries. If a battery should leak and the fluid should get
on your skin, flush it off with large quantities of water.
• When disposing of used batteries, please comply with
governmental regulations or environmental public
institution’s rules that apply in your country/area.
•WARNING
Do not use or store batteries in direct sunlight or other
excessively hot place, such as inside a car or near a
heater. This can cause batteries to leak, overheat,
explode or catch fire. It can also reduce the life or
performance of batteries.
Insert the battery by
aligning the pole
against the remote
control’s terminal
If a battery pushes and
bends the terminal out
of shape, there is
possibility of the alkaline
battery shorting out
The terminal is bent
out of shape
X-SMC_VXE8_En.book 5 ページ 2013年3月25日 月曜日 午後2時17分

Before you start01
6
En
Using the remote control
The remote has a range of about 7 m at an angle of about 30º
from the remote sensor.
Keep in mind the following when using the remote control:
• Make sure that there are no obstacles between the
remote and the remote sensor on the unit.
• Remote operation may become unreliable if strong
sunlight or fluorescent light is shining on the unit’s
remote sensor.
• Remote controllers for different devices can interfere
with each other. Avoid using remotes for other
equipment located close to this unit.
• Replace the batteries when you notice a fall off in the
operating range of the remote.
30°
7 m
30°
X-SMC_VXE8_En.book 6 ページ 2013年3月25日 月曜日 午後2時17分

Part names and functions 02
7
En
Chapter 2:
Part names and functions
Remote control
1STANDBY/ON
Switches the receiver between standby and on (page 13).
2 Input function buttons
Use to select the input source to this receiver (pages 17, 18,
22, 24 and 28).
3 Control buttons
CLOCK/TIMER
Use for setting the clock, as well as for setting and
checking the timers (page 13).
SLEEP
See Using the sleep timer on page 15.
4 Numeric buttons (0 to 9)
Use to enter the number (page 19).
5
CLEAR
Use to clear the programmed play (page 20).
6 Control buttons
DISPLAY
Press to change the display for songs playing back from
CD or USB (page 21).
FOLDER
Use to select the folder of the MP3/WMA disc or USB
mass storage device (page 20).
MENU
Use to access the menu.
MEMORY/PROGRAM
Use to memory or program the MP3/WMA disc
(page 20).
7
/
/
/
(TUNE +/–), ENTER
Use to select/switch system settings and modes, and to
confirm actions.
Use TUNE +/– can be used to find radio frequencies
(page 24).
8
PRESET +/–
Use to select preset radio stations (page 25).
9
MUTE
Mutes/unmutes the sound (page 13).
10 Playback control buttons
Use to control each function after you have selected it using
the input function buttons (page 18).
STANDBY/ON
CD USB TUNER AUDIO IN
DISPLAY FOLDER
MENU
PRESET VOLUME
ST/MONO SCAN ENTER DISPLAY
+
MUTE
TUNE–
TUNE+
DIMMER
–
+
–
MEMORY
/PROGRAM
123
456
789
0
BT AUDIO
iPod
CLOCK/TIMER SLEEP
EQUALIZER
P. B A S S
BASS/TREBLE
RANDOM
CLEAR REPEAT
OPEN/CLOSE
DAB
ENTER
4
5
1
3
2
6
7
8
12
17
13
14
9
10
11
16
15
X-SMC_VXE8_En.book 7 ページ 2013年3月25日 月曜日 午後2時17分

Part names and functions02
8
En
11
Tuner
control buttons
ST/MONO
Use to switch the sound mode between stereo and
monaural. (page 24)
DAB SCAN
Use to scan for DAB radio station (page 25).
DAB ENTER
Use to confirm the DAB radio station (page 25).
DAB DISPLAY
Press to change the DAB display for information mode
(page 26).
12 OPEN/CLOSE
Use to open or close the electric slide CD door (page 18).
13 Sound control buttons
Adjust the sound quality (page 14).
14 RANDOM
Randomize order of track playback from a CD, iPod or USB
(page 19).
15
REPEAT
Press to change the repeat play setting from a CD, iPod or
USB (page 19).
16 Volume control buttons
Use to set the listening volume (page 13).
17
DIMMER
Dims or brightens the display. The brightness can be
controlled in four steps (page 13).
Note
•TheBT AUDIO button is not available for this unit.
Hang from the wall to use
When hanging the unit from a wall, firmly screw the wall
hanging screws (sold separately) into the wall, and confirm
that the wall is capable of holding the unit safely. If the
materials or strength of the wall cannot support the weight of
the unit, then there is the possibility of the unit falling off.
1 Screw the wall hanging screws into the
wall, putting them the specified attachment
measurement (130 mm) apart.
2 Insert the wall hanging screws into the lock
holes.
3
Slide to the left to secure in place.
(Slide
distance is around 10 mm)
Note
• When attaching the unit to the wall, there is the
possibility of it falling depending on how it is attached.
Take due care to avoid any accidents.
• Select a location for the placement/installation of unit
that is sufficiently strong enough to hold the weight of
the unit. If you do not know the strength etc. of the wall,
then consult with a professional.
• The company bears no responsibility for accidents or
damages caused by inadequate installation/attachment,
incorrect use, modifications, natural disasters etc.
• Place all cables along the wall to prevent anyone from
tripping over them.
• Do not exchange the changeable panel while the unit is
hanging from a wall.
• When the unit is hanging from a wall, pay extra attention
to make sure your iPod/iPhone does not fall.
• Do not hold the unit by grabbing onto the iPod/iPhone
connector.
ANTENNADCIN
Lock holes
Wall hanging screws
(commercially available)
6 mm to 7 mm
2 mm to 3 mm
150 mm 130 mm 150 mm
Attachment measurement for
wall hanging screws
Suggested screw
diameter
(Please use screws that
match the wall strength
and wall materials)
Screw head
ø9 mm to ø12 mm
Screw diameter
ø4 mm
AUDIOIN
PUSHOPEN
POWERON TIMER
X-SMC_VXE8_En.book 8 ページ 2013年3月25日 月曜日 午後2時17分

Part names and functions 02
9
En
Front panel
1 Electric slide CD door
2
Remote sensor
Receives the signals from the remote control.
3
Main display
4 Display panel
5
POWER ON
indicator
When the power is on, this indicator lights.
6
TIMER
indicator
Lit when the unit power is off but when the timer setting is
activated.
7Speaker
8 iPod/iPhone terminal
Use to connect your USB mass storage device or Apple iPod/
iPhone/iPad mini as an audio source (pages 17 and 22).
9 iPod/iPhone connector port
To connect the iPod/iPhone, press the PUSH OPEN tab
(page 16).
10
AUDIO IN
socket
Use to connect an auxiliary component using a stereo
minijack cable (page 28).
11 Headphone socket
Use to connect headphones. When the headphones are
connected, there is no sound output from the speakers
(page 15).
AUDIO IN
PUSH OPEN
POWER ON TIMER
7 8 9 10 11 7
2 3 4 5 61
X-SMC_VXE8_En.book 9 ページ 2013年3月25日 月曜日 午後2時17分

Part names and functions02
10
En
Top panel/Rear panel
1STANDBY/ON
button
Switches the receiver between standby and on (page 13).
2 INPUT button
Selects the input source.
3
EQ
button
Used when switching sound mode (page 14).
4 Playback control buttons
Select the desired track or file to be played back. Stop current
playback. Stop playback or resume playback from the point
where it was paused.
5VOLUME–/+
Use to set the listening volume (page 13).
6 Disc tray open/close button
Use to open or close the electric slide CD door (page 18).
7 DC IN terminal
Plug the supplied AC adapter (page 12).
8 DAB/FM antenna socket
Connect provided DAB/FM wire antenna here (page 12).
X-SMC00DAB
STANDBY/ON INPUT
VOLUME
+–
ANTENNADCIN
EQ
1 2 3 4 5 6
7 8
X-SMC_VXE8_En.book 10 ページ 2013年3月25日 月曜日 午後2時17分

Part names and functions 02
11
En
Change the interchangeable panel
(X-SMC00DAB-W do not have an interchangeable panel in the
box)
CAUTION
• Exchange of the changeable panel should be performed
on a stable surface.
• Do not exchange the changeable panel while the unit is
hanging from a wall.
• Be careful not to scratch or damage the display panel
when exchanging the changeable panel.
• Do not apply excessive force to the changeable panel.
• If the panel is not attached correctly there is a chance
that opening and closing operations will not be
performed correctly. Because incorrect attachment can
also be the cause of irregular or unwanted noise, make
sure the panel is attached in the correct position.
• Be sure to turn off the power and unplug the power cord
from the power outlet whenever making or changing
connections.
1 Make sure the electric slide CD door is
closed.
2 Using both hands, slide the changeable
panel up to remove it.
3 Align the line below the arrow and the
bottom of the changeable panel, then slide
downward using both hands until you hear a
clicking sound.
Arrows
X-SMC_VXE8_En.book 11 ページ 2013年3月25日 月曜日 午後2時17分

Connections03
12
En
Chapter 3:
Connections
CAUTION
• Be sure to turn off the power and unplug the power cord
from the power outlet whenever making or changing
connections.
• Connect the power cord after all the connections
between devices have been completed.
Connecting antenna
Connect the DAB/FM wire antenna as shown below. To
improve reception and sound quality, connect external
antennas (see Using external antennas below).
1 Connect the DAB/FM wire antenna into the
DAB/FM antenna socket.
For best results, extend the DAB/FM antenna fully and fix to a
wall or door frame. Don’t drape loosely or leave coiled up.
Using external antennas
To improve DAB/FM reception
Use a PAL connector (not supplied) to connect an external
DAB/FM antenna.
Plugging in
CAUTION
• Do not use any power cord other than the one supplied
with this unit.
• Do not use the supplied power cord for any purpose
other than that described below.
• The cord on the AC adaptor is 1.5 m long. Make sure that
the body of the AC adaptor is not suspended off the
ground during use, as this will place unnecessary force
on the DC plug.
• When inserting the AC adapter into a wall socket, make
sure that there is no gap between the AC adaptor and the
wall socket. Such a gap may cause a poor connection,
and metal items like coins or paperclips falling into it
may cause a short circuit and start a fire.
Connect the AC adaptor into a wall socket. Only connect the
AC adapter when all other connections to the unit have been
completed.
1
One-touch PAL
connector
75 coaxial
cable
In contact with the
ground
Suspended off the
ground
Front view Side view Side view
Metal objects such as
coins and paperclips
To AC outlet
Power cord
X-SMC_VXE8_En.book 12 ページ 2013年3月25日 月曜日 午後2時17分

Getting started 04
13
En
Chapter 4:
Getting started
To turn the power on
Press the STANDBY/ON to turn the power on.
After use:
Press the STANDBY/ON to enter the power stand-by mode.
Note
• In standby mode, if iPod/iPhone/iPad mini is connected,
the unit turns charge mode.
Setting the clock
1 Press
STANDBY/ON
to turn the power on.
2 Press
CLOCK/TIMER
on the remote control.
“CLOCK” is shown on the main display.
3 Press
ENTER
.
4 Press
/
to set the day, then press ENTER.
5 Press
/
to set the hour, then press
ENTER.
6 Press
/
to set the minute, then press
ENTER to confirm.
7 Press
ENTER
.
To confirm the time display:
Press the CLOCK/TIMER. The time display will appear for
about 10 seconds.
To readjust the clock:
Perform “Setting the clock” from step 1.
Note
• When power supply is restored after unit is plugged in
again or after a power failure, reset the clock.
General control
Input function
When the INPUT on main unit is pressed, the current function
will change to different mode. Press the INPUT repeatedly to
select desired function.
X-SMC00
X-SMC00DAB
Display brightness control
Press DIMMER to dims the display brightness. The
brightness can be controlled in four steps.
Volume auto setting
If you turn off and on the main unit with the volume set to 31
or higher, the volume starts at 30 and sets in to the last set
level.
Volume control
Press the VOLUME –/+ on the unit or press VOLUME +/– on
the remote control to increase or decrease the volume.
CAUTION
• The sound level at a given volume setting depends on
speaker efficiency, location, and various other factors. It
is advisable to avoid exposure to high volume levels. Do
not turn the volume on to full at switch on. Listen to
music at moderate levels. Excessive sound pressure
from earphones and headphones can cause hearing
loss.
Muting
The volume is muted temporarily when pressing the MUTE on
the remote control. Press again to restore the volume.
STANDBY/ON
CD USB TUNER AUDIO IN
123
BT AUDIO
iPod
CLOCK/TIMER SLEEP
EQUALIZER
OPEN/CLOSE
DISPLAY FOLDER
MENU
PRESET VOLUME
TUNE–
TUNE+
MEMORY
/PROGRAM
ENTER
CD FM
IPOD USB/IPOD
AUDIO IN
CD FM
DAB
IPOD USB/IPOD
AUDIO IN
X-SMC_VXE8_En.book 13 ページ 2013年3月25日 月曜日 午後2時17分

Getting started04
14
En
Sound controls
Equalizer
When the EQUALIZER is pressed, the current mode setting
will be displayed. To change to a different mode, press the
EQUALIZER repeatedly until the desired sound mode
appears.
P.BASS control
When the power is first turned on, the unit will enter the
P.BASS mode which emphasises the bass frequencies. To
cancel the P.BASS mode, press the P.BASS on the remote
control.
Bass/treble control
Press the BASS/TREBLE, then press /// to adjust the
bass or treble.
Note
•TheEQUALIZER and P.BASS cannot operate
simultaneously. The most recently selected of these two
functions will be the one used.
•BASS/TREBLE can operate alongside either the
EQUALIZER or P.BASS.
When one of the above two functions is
selected, the function that is not selected
will be displayed as follows.
1 When P.BASS setting (ON/OFF) is changed
•EQUALIZER : FLAT
2 When EQUALIZER setting (ON/OFF) is
changed
•P.BASS : OFF
Setting the wake-up timer
Used to change the existing timer setting, or to set a new
timer.
1Press
STANDBY/ON
to turn the power on.
2 Press and hold
CLOCK/TIMER
.
3Press
/
to select “ONCE” or “DAILY”,
then press ENTER.
ONCE – Works once only at a preset time.
DAILY – Works at the preset time on a preset day.
4Press
/
to select “TIMER SET”, then
press ENTER.
5Press
/
to select the timer playback
source, then press
ENTER
.
•CD, DAB, FM, USB/IPOD, IPOD and AUDIO IN can be
selected as the playback source.
6Press
/
to select the timer day, then
press ENTER.
7Press
/
to set the hour, then press
ENTER.
8Press
/
to set the minute, then press
ENTER.
• Set the time to finish as in steps 7 and 8 above.
9 Adjust the volume press
VOLUME +/–
, then
press ENTER.
10 Press
STANDBY/ON
to enter the power
standby mode.
•TheTIMER indicator lights up.
NIGHT
FLAT A flat and basic sound.
ACTIVE
DIALOGUE
A sound that can be enjoyed
at night even with lower volume.
A powerful sound that
emphasizes low and high tones.
A sound that allows the radio or
vocals to be heard more easily.
X-SMC_VXE8_En.book 14 ページ 2013年3月25日 月曜日 午後2時17分

Getting started 04
15
En
Calling the wake-up timer
An existing timer setting can be reused.
1 Follow steps 1 to 3 in “Setting the wake-up
timer”.
2 Press
/
to select “TIMER ON”, then press
ENTER.
Cancelling the wake-up timer
Turn off the timer setting.
1 Follow steps 1 to 3 in “Setting the wake-up
timer”.
2 Press
/
to select “TIMER OFF”, then
press ENTER.
Using the wake-up timer
1 Press
STANDBY/ON
to turn the power
off.
2 At the wake-up time, this unit will turn on
automatically and play the selected input
function.
Note
• If at the wake-up time an iPod/iPhone/iPad mini is not
connected to the unit or a disc is not inserted, the unit
will be turned on but will not play back the track.
• Some discs may not be played automatically at the wake-
up time.
• When setting the timer set at least one minute between
the start and end time.
Using the sleep timer
The sleep timer switches off the unit after a specified time so
you can fall asleep without worrying about it.
1 Press
SLEEP
repeatedly to select a switch off
time.
Choose between 10 min, 20 min, 30 min, 60 min, 90 min, 120
min, 150 min, 180 min or OFF. The newly set value displays for
3 seconds, and then the setting is completed.
Note
• The sleep timer can be set by pressing SLEEP while the
remaining time is displayed.
Using Headphones
Connect the headphones plug to the PHONES terminal.
When the headphones are connected, there is no sound
output from the speakers.
• Do not turn the volume on to full at switch on and listen
to music at moderate levels. Excessive sound pressure
from earphones and headphones can cause hearing
loss.
• Before plugging in or unplugging the headphone,
reduce the volume.
• Be sure your headphone has a 3.5 mm diameter plug
and impedance between 16 and 50 . The
recommended impedance is 32 .
• Audio from the iPod/iPhone/iPad mini cannot be heard
via the headphones connected to the unit. “HP MUTE”
will be displayed if you connect the headphones when
the iPod/iPhone/iPad mini function is selected.
AUDIOIN
PUSHOPEN
POWERON TIMER
X-SMC_VXE8_En.book 15 ページ 2013年3月25日 月曜日 午後2時17分

iPod/iPhone/iPad mini playback05
16
En
Chapter 5:
iPod/iPhone/iPad mini playback
Merely by connecting your iPod/iPhone/iPad mini to this unit,
you can enjoy high-quality sound from your iPod/iPhone/iPad
mini. Playback setting for iPod/iPhone/iPad mini music can
be performed from this unit or the iPod/iPhone/iPad mini
itself.
Confirming what iPod/iPhone/iPad
mini models are supported
The iPod/iPhone/iPad mini playable on this unit are shown
below.
Note
• Pioneer does not guarantee that this unit plays iPod/
iPhone/iPad mini models other than the ones specified.
• Some functions may be restricted depending on the
model or software version.
• iPod/iPhone/iPad mini is licensed for reproduction of
non-copyrighted materials or materials the user is legally
permitted to reproduce.
• Features such as the equalizer cannot be controlled
using this system, and we recommend switching the
equalizer off before connecting.
• Pioneer cannot under any circumstances accept
responsibility for any direct or indirect loss arising from
any inconvenience or loss of recorded material resulting
from iPod/iPhone/iPad mini failure.
• For detailed instructions on using the iPod/iPhone/iPad
mini, please refer to the manual supplied with the iPod/
iPhone/iPad mini.
• This system has been developed and tested for the
software version of iPod/iPhone/iPad mini indicated on
the website of Pioneer (http://pioneer.jp/homeav/
support/ios/eu/).
• Installing software versions other than indicated on the
website of Pioneer to your iPod/iPhone/iPad mini may
result in incompatibility with this system.
• This unit cannot be used to record CD, tuner or other
content on an iPod/iPhone/iPad mini.
Connecting your iPod/iPhone
CAUTION
• When connecting iPod/iPhone devices, always use the
dock adapter provided with iPod/iPhone devices, or a
commercially available adapter designed to support
iPod/iPhone. The iPod/iPhone cannot be connected
without a dock adapter; attempting to connect an iPod/
iPhone without it will cause damage or malfunction.
• An iPod/iPhone universal dock adapter is not supplied
with this unit.
Important
• If you use a commercially available protective cover with
your iPod/iPhone, you may not be able to connect your
iPod/iPhone to the unit.
1 Press the PUSH OPEN.
2 Attach the dock adapter to iPod/iPhone
connector port.
When attaching the dock adapter, be sure to orient the
frontback directions of the dock adapter correctly. To attach,
first place the protruding tabs on the front side of the adapter
into the depressions on the iPod/iPhone connector port and
press into position. When attaching the adapter, be careful
not to strike the connectors.
3 Connect your iPod/iPhone.
iPod/iPhone/iPad mini Dock connector iPod/iPhone
Terminal
iPod nano 3G/4G/5G/6G
iPod nano 7G
iPod touch 1G/2G/3G/4G
iPod touch 5G
iPhone
iPhone 3G
iPhone 3GS
iPhone 4
iPhone 4S
iPhone 5
iPad mini
PUSH OPEN
Push
PUSH OPEN
2
3
X-SMC_VXE8_En.book 16 ページ 2013年3月25日 月曜日 午後2時17分

iPod/iPhone/iPad mini playback 05
17
En
• When iPod/iPhone is not connected to the unit, close
the iPod/iPhone connector port firmly.
CAUTION
• Do not use an adaptor that converts into a Lightning
connector on the unit’s dock connector to connect an
iPod/iPhone/iPad mini. This may lead to malfunction/
damage to the connector.
Connecting iPod/iPhone/iPad mini
using supplied iPhone stand
1 Connect the iPod/iPhone/iPad mini cable to
the
iPod/iPhone
terminal on the front of the
unit.
2 Pass the iPod/iPhone/iPad mini cable
through the bottom of the stand and connect it
to the iPod/iPhone/iPad mini.
3 Set the iPod/iPhone/iPad mini on the stand.
Playing iPod/iPhone/iPad mini
1 Connect your iPod/iPhone/iPad mini.
• If an iPod/iPhone/iPad mini is connected while the unit
is turned on, playback of the iPod/iPhone/iPad mini will
not begin.
2 Press
iPod
or
USB
as the input source.
“IPOD” or “USB/IPOD” is shown on the main display.
3 When the recognition is completed, will
begin playing automatically.
• The available iPod/iPhone/iPad mini playback controls
from the unit are , , .
• In the following case, operate your iPod/iPhone/iPad
mini directly:
- Searching a file by artist name or genre.
- Playing in the repeat or random mode.
CAUTION
• When your iPod/iPhone/iPad mini is connected to this
unit and you wish to operate the iPod/iPhone/iPad mini
directly, be sure to steady the iPod/iPhone/iPad mini
with the other hand to prevent malfunctions due to faulty
contacts.
Note
• For detailed instructions on using the iPod/iPhone/iPad
mini, please refer to the manual supplied with the iPod/
iPhone/iPad mini.
• iPod/iPhone/iPad mini recharging occurs whenever an
iPod/ iPhone/iPad mini is connected to this unit. (This
function is supported in standby mode as well.)
• When input is switched from iPod to another function,
iPod/iPhone/iPad mini playback is temporarily stopped.
Important
If this unit cannot play your iPod/iPhone/iPad mini, perform
the following troubleshooting checks:
• Check whether the iPod/iPhone/iPad mini is supported
by this unit.
• Reconnect the iPod/iPhone/iPad mini to the unit. If this
doesn’t seem to work, try resetting your iPod/iPhone/
iPad mini.
• Check that iPod/iPhone/iPad mini software is supported
by the unit.
If the iPod/iPhone/iPad mini cannot be operated, check the
following items:
• Is the iPod/iPhone/iPad mini connected correctly?
Reconnect the iPod/iPhone/iPad mini to the unit.
• Is the iPod/iPhone/iPad mini experiencing a hangup? Try
resetting the iPod/iPhone/iPad mini, and reconnect it to
the unit.
PUSH OPEN
Push
X-SMC_VXE8_En.book 17 ページ 2013年3月25日 月曜日 午後2時17分

Disc playback06
18
En
Chapter 6:
Disc playback
This system can play back a standard CD, CD-R/RW in the CD
format and CD-R/RW with MP3 or WMA files, but cannot
record on them. Some audio CD-R and CD-RW discs may not
be playable due to the state of the disc or the device that was
used for recording.
MP3:
MP3 is a form of compression. It is an acronym which stands
for MPEG Audio Layer 3. MP3 is a type of audio code which is
processed by significant compression from the original audio
source with very little loss in sound quality.
• This system supports MPEG-1/2 Audio Layer 3 (Sampling
rates: 8 kHz to 48 kHz; Bit rates: 64 kbps to 384 kbps).
• During VBR file playback, time counter in the display
may differ from its actual playback time.
WMA:
WMA (Windows Media Audio) files are Advanced System
Format files that include audio files which are compressed
with Windows Media Audio codec. WMA is developed by
Microsoft as an audio format file for Windows Media Player.
• This system supports WMA (Sampling rates: 32 kHz/44.1
kHz/48 kHz; Bit rates: 64 kbps to 320 kbps).
• During VBR file playback, time counter in the display
may differ from its actual playback time.
Playing discs or files
1 Press
STANDBY/ON
to turn the power on.
2 Press
CD
on the remote control or
INPUT
repeatedly on the main unit to select CD input.
3 Press
OPEN/CLOSE
to open the
electric
slide CD door.
4
Insert the disc
.
Inset the disc with the printed label facing outward (you can
see it).
5 Press
OPEN/CLOSE
to close the
electric
slide CD door
.
6 Press
to start playback.
After the last track is played, the unit will stop automatically.
CAUTION
• Do not touch the lens.
• Be careful not to get your hand or headphone cable
caught when opening and closing the slide door.
• Do not insert two or more discs into the disc tray at once.
• Do not play discs of special shapes (heart, octagon, etc).
It may cause malfunctions.
• Do not touch the electric slide CD door when it is
moving.
• If power is lost while the electric slide CD door is open,
wait until the power is restored.
Note
• Due to the structure of the disc information, it takes longer
to read an MP3/WMA disc than a normal CD
(approximately 20 to 90 seconds).
• When the beginning of the first track is reached during fast
reverse, the unit will enter the playback mode (only for CD).
• If TV or radio interference occurs during CD operation,
move the unit away from the TV or radio.
Tip
• When no operation has done in CD mode and the audio
file is not played for more than 30 minutes, the power will
automatically turn off.
Various disc functions
AUDIOIN
PUSHOPEN
POWERON TIMER
Inset the disc while pressing down on it
until the centre of the disc is held in place
(until you hear a clicking sound).
Function Main
unit
Remote
control
Operation
Play
Press in the stop mode.
Stop
Press in the playback mode.
Pause
Press in the playback mode.
Press
to resume playback
from the paused point.
Track up/
down
Press in the playback or stop
mode.
If you press the button in the
stop mode, press
to start
the desired track.
Fast
forward/
reverse
Press and hold down in the
playback mode.
Release the button to resume
playback.
X-SMC_VXE8_En.book 18 ページ 2013年3月25日 月曜日 午後2時17分

Disc playback 06
19
En
Advanced CD or MP3/WMA disc
playback
Direct track search
By using the numeric buttons, the desired tracks on the
current disc can be played.
Use the numeric buttons on the remote control to
select the desired track whilst playing the selected
disc.
Note
• A track number higher than the number of tracks on the
disc cannot be selected.
To stop playback:
Press .
Repeat play
Repeat play can play one track, all tracks or a programmed
sequence continuously.
To repeat one track:
Press REPEAT repeatedly until “RPT ONE” appears. Press
ENTER.
To repeat all tracks:
Press REPEAT repeatedly until “RPT ALL” appears. Press
ENTER.
To repeat desired tracks:
Perform steps 1 to 5 in “Programmed play (CD or MP3/WMA)”
section on next page and then press REPEAT repeatedly until
“RPT ALL” appears. Press ENTER.
To cancel repeat play:
Press REPEAT repeatedly until “RPT OFF” appears. Press
ENTER.
Note
• After performing repeat play, be sure to press .
Otherwise, the disc will play continuously.
• During repeat play, random play is not possible.
Random play
The tracks on the disc can be played in random order
automatically.
To random play all tracks:
Press RANDOM repeatedly until “RDM ON” appears. Press
ENTER.
To cancel random play:
Press RANDOM repeatedly until “RDM OFF” appears. Press
ENTER.
Note
• If you press the during random play, you can move
to the track selected next by the random operation. On
the other hand, the does not allow you to move to
the previous track. The beginning of the track being
played will be located.
• In random play, the unit will select and play tracks
automatically. (You cannot select the order of the
tracks.)
• During random play, repeat play is not possible.
STANDBY/ON
CD USB TUNER AUDIO IN
DISPLAY FOLDER
TUNE+
123
456
789
0
BT AUDIO
iPod
CLOCK/TIMER SLEEP
EQUALIZER
P. B A S S
BASS/TREBLE
RANDOM
CLEAR REPEAT
OPEN/CLOSE DISPLAY FOLDER
MENU
PRESET VOLUME
ST/MONO SCAN ENTER DISPLAY
+
MUTE
TUNE–
TUNE+
DIMMER
–
+
–
MEMORY
/PROGRAM
0
DAB
ENTER
X-SMC_VXE8_En.book 19 ページ 2013年3月25日 月曜日 午後2時17分

Disc playback06
20
En
Programmed play (CD or MP3/WMA)
You can choose up to 32 selections for playback in the order
you like.
1 Whilst in the stop mode, press
MEMORY
/
PROGRAM
on the remote control to enter the
programming save mode.
2 Press
or the numeric buttons on the
remote control to select the desired tracks.
3 Press ENTER to save folder and track
number.
4 Repeat steps 2 to 3 for other folder/tracks.
Up to 32 tracks can be programmed.
• If you want to check the programmed tracks, press
MEMORY/PROGRAM.
• If you make a mistake, the last programmed tracks will
be canceled by pressing CLEAR.
5 Press
to start playback.
To cancel the programmed play mode:
To cancel the programmed play, press twice on the remote
control. The display will show “PRG CLR” and all the
programmed content will be cleared.
Adding tracks to the program:
Press the MEMORY/PROGRAM. Then follow steps 2 to 3 to
add tracks.
Note
• When a disc is ejected anything programmed is cleared.
• If you press the STANDBY/ON to enter the standby
mode or change the function from CD to another, the
programmed selections will be cleared.
• During the program operation, random play is not
possible.
About downloading MP3/WMA
There are many music sites on the internet that you can
download MP3/WMA music files. Follow the instructions
from the website on how to download the music files. You can
then play back these downloaded music files by burning them
to a CD-R/RW disc.
• Your downloaded song/files are for personal use only.
Any other usage of the song without owner’s permission,
is against the law.
About folder playback order
If MP3/WMA files are recorded in several folders, a folder
number will be set to each folder automatically.
These folders can be selected by the FOLDER on the remote
control. If there is no supported file formats inside the
selected folder, the folder is skipped and the next folder will be
selected.
Example: How the folder numbers are assigned if MP3/WMA
format files are recorded are as shown below.
1 ROOT folder is set as FOLDER 1.
2 As for folders inside ROOT folder (FOLDER A
and FOLDER B), the folder which is recorded
earlier on the disc will be set as FOLDER 2 and
FOLDER 3.
3 As for folder inside FOLDER A (FOLDER C and
FOLDER D), the folder which is recorded earlier
on the disc will be set as FOLDER 4 and FOLDER
5.
4 FOLDER E that is inside FOLDER D will be set
as FOLDER 6.
• The folder and file order information which is recorded
on the disc depends on the writing software. There
maybe possibilities that this unit will playback the files
not according to our expected playback order.
• From a disc with MP3/WMA files up to 255 folders and
999 files (including non playable files) can be read.
ROOT
(FOLDER 1)
FOLDER A
(FOLDER 2)
FOLDER B
(FOLDER 3)
FILE 9
FILE 10
FILE 3
FILE 4
FILE 5
FILE 6
FILE 7
FILE 8
FOLDER E
(FOLDER 6)
FOLDER C
(FOLDER 4)
FOLDER D
(FOLDER 5)
FILE 1
FILE 2
X-SMC_VXE8_En.book 20 ページ 2013年3月25日 月曜日 午後2時17分
Other manuals for X-SMC00
1
This manual suits for next models
2
Table of contents
Other Pioneer Micro Music System manuals