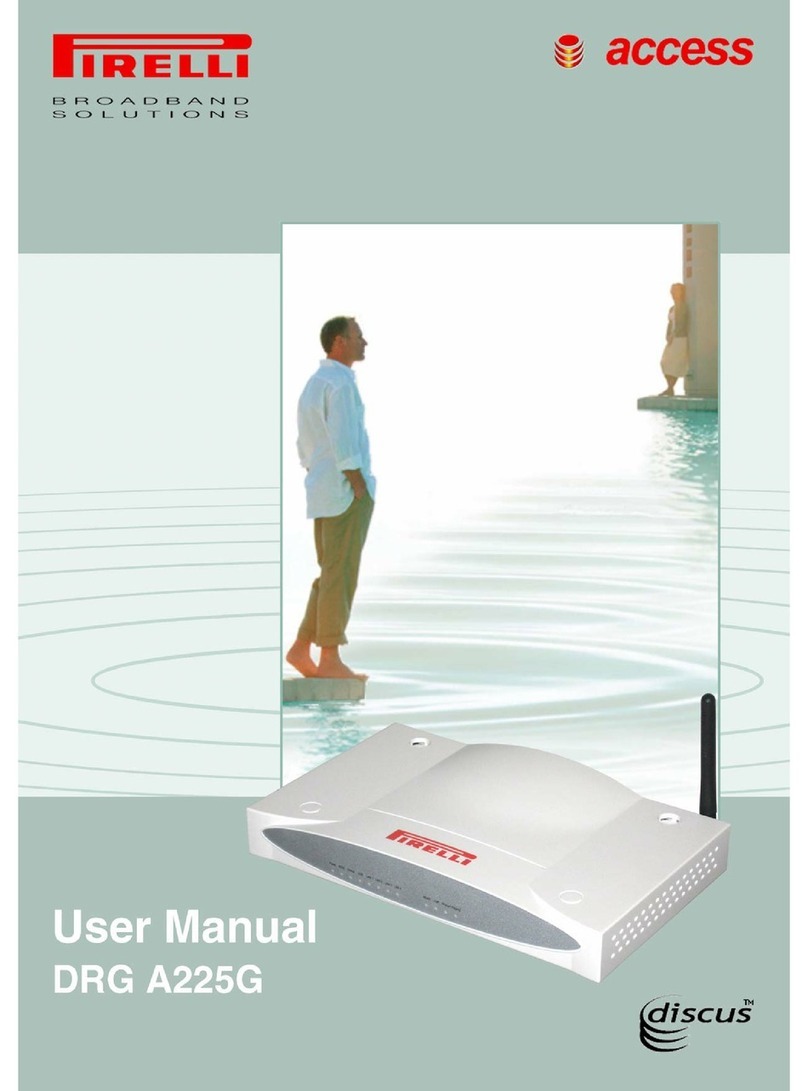
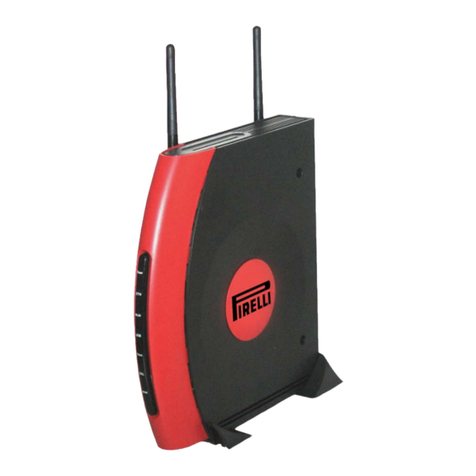
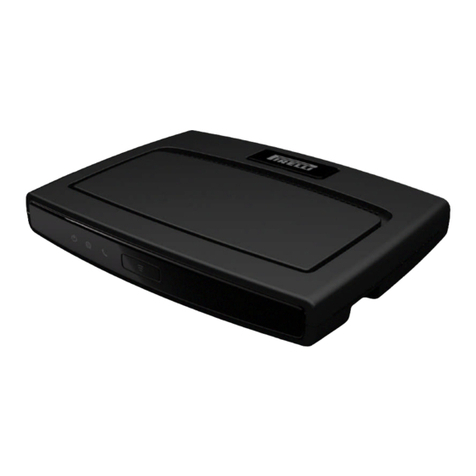
Pirelli ARV3515J-A-GP User manual

ARV3515J-A-GP
March 2005
150000007300J
VoIP ADSL Router (SIP)
DRAFT


iii
T
ABLE
OF
C
ONTENTS
1 Introduction . . . . . . . . . . . . . . . . . . . . . . . . . . . . . . . . . .1-1
About the VoIP ADSL Router . . . . . . . . . . . . . . . . . . . . . . . . . . . . . . . . 1-1
Voice over IP (VoIP) . . . . . . . . . . . . . . . . . . . . . . . . . . . . . . . . . . . . . . . . 1-2
Features and Benefits . . . . . . . . . . . . . . . . . . . . . . . . . . . . . . . . . . . . . . . . 1-4
VoIP Features and Benefits . . . . . . . . . . . . . . . . . . . . . . . . . . . . . . . . . . . 1-4
Applications . . . . . . . . . . . . . . . . . . . . . . . . . . . . . . . . . . . . . . . . . . . . . . . 1-5
2 Installation . . . . . . . . . . . . . . . . . . . . . . . . . . . . . . . . . . 2-1
Package Contents . . . . . . . . . . . . . . . . . . . . . . . . . . . . . . . . . . . . . . . . . . . 2-1
System Requirements . . . . . . . . . . . . . . . . . . . . . . . . . . . . . . . . . . . . . . . . 2-2
Hardware Description . . . . . . . . . . . . . . . . . . . . . . . . . . . . . . . . . . . . . . . 2-3
LEDs . . . . . . . . . . . . . . . . . . . . . . . . . . . . . . . . . . . . . . . . . . . . . . . 2-5
Hardware Installation . . . . . . . . . . . . . . . . . . . . . . . . . . . . . . . . . . . . . . . . 2-7
ADSL Connection . . . . . . . . . . . . . . . . . . . . . . . . . . . . . . . . . . . . 2-7
Fast Ethernet Connection . . . . . . . . . . . . . . . . . . . . . . . . . . . . . . 2-7
USB Connection . . . . . . . . . . . . . . . . . . . . . . . . . . . . . . . . . . . . . . 2-7
FXS Connection . . . . . . . . . . . . . . . . . . . . . . . . . . . . . . . . . . . . . . 2-7
ISP Settings . . . . . . . . . . . . . . . . . . . . . . . . . . . . . . . . . . . . . . . . . . . . . . . . 2-8
Connect the System . . . . . . . . . . . . . . . . . . . . . . . . . . . . . . . . . . . . . . . . . 2-8
Connect the ADSL Line . . . . . . . . . . . . . . . . . . . . . . . . . . . . . . . . 2-8
Phone Line Configuration . . . . . . . . . . . . . . . . . . . . . . . . . . . . . . 2-9
Attach to Your Network Using Ethernet Cabling . . . . . . . . . . 2-11
Connect the Power Adapter . . . . . . . . . . . . . . . . . . . . . . . . . . . . 2-12
3 Configuring The Client PC . . . . . . . . . . . . . . . . . . . . . 3-1
TCP/IP Configuration . . . . . . . . . . . . . . . . . . . . . . . . . . . . . . . . . . . . . . . 3-2
Configuring Your Computer in Windows 2000 . . . . . . . . . . . . . 3-3
Obtain IP Settings From Your VoIP Router . . . . . . . . . . . . . . . 3-5
Manual IP Configuration . . . . . . . . . . . . . . . . . . . . . . . . . . . . . . . 3-7
Configuring Your Computer in Windows XP . . . . . . . . . . . . . . 3-9
Disable HTTP Proxy . . . . . . . . . . . . . . . . . . . . . . . . . . . . . . . . . 3-14
Configuring Your Macintosh Computer . . . . . . . . . . . . . . . . . . . . . . . . 3-15
Disable HTTP Proxy . . . . . . . . . . . . . . . . . . . . . . . . . . . . . . . . . 3-17

T
ABLE
OF
C
ONTENTS
iv
4 Configuring the VoIP ADSL Router . . . . . . . . . . . . . . 4-1
Navigating the Web Browser Interface . . . . . . . . . . . . . . . . . . . . . . . . . . 4-2
Making Configuration Changes . . . . . . . . . . . . . . . . . . . . . . . . . . 4-3
Setup Wizard . . . . . . . . . . . . . . . . . . . . . . . . . . . . . . . . . . . . . . . . . . . . . . 4-4
Getting Started . . . . . . . . . . . . . . . . . . . . . . . . . . . . . . . . . . . . . . . 4-4
Parameter Setting . . . . . . . . . . . . . . . . . . . . . . . . . . . . . . . . . . . . . 4-5
Parameter Setting - Others . . . . . . . . . . . . . . . . . . . . . . . . . . . . . . 4-6
Confirm . . . . . . . . . . . . . . . . . . . . . . . . . . . . . . . . . . . . . . . . . . . . 4-13
Advanced Setup . . . . . . . . . . . . . . . . . . . . . . . . . . . . . . . . . . . . . . . . . . . 4-14
Making Configuration Changes . . . . . . . . . . . . . . . . . . . . . . . . . . . . . . . 4-15
System Settings . . . . . . . . . . . . . . . . . . . . . . . . . . . . . . . . . . . . . . . . . . . . 4-16
Time Settings . . . . . . . . . . . . . . . . . . . . . . . . . . . . . . . . . . . . . . . 4-16
Password Settings . . . . . . . . . . . . . . . . . . . . . . . . . . . . . . . . . . . . 4-17
Remote Management . . . . . . . . . . . . . . . . . . . . . . . . . . . . . . . . . 4-18
DNS . . . . . . . . . . . . . . . . . . . . . . . . . . . . . . . . . . . . . . . . . . . . . . 4-19
WAN . . . . . . . . . . . . . . . . . . . . . . . . . . . . . . . . . . . . . . . . . . . . . . . . . . . . 4-20
ATM PVC . . . . . . . . . . . . . . . . . . . . . . . . . . . . . . . . . . . . . . . . . . 4-20
ATM Interface . . . . . . . . . . . . . . . . . . . . . . . . . . . . . . . . . . . . . . 4-22
Clone MAC Address . . . . . . . . . . . . . . . . . . . . . . . . . . . . . . . . . 4-25
LAN . . . . . . . . . . . . . . . . . . . . . . . . . . . . . . . . . . . . . . . . . . . . . . . . . . . . 4-26
NAT . . . . . . . . . . . . . . . . . . . . . . . . . . . . . . . . . . . . . . . . . . . . . . . . . . . . 4-28
NAT Settings . . . . . . . . . . . . . . . . . . . . . . . . . . . . . . . . . . . . . . . 4-28
Address Mapping . . . . . . . . . . . . . . . . . . . . . . . . . . . . . . . . . . . . 4-29
Virtual Server . . . . . . . . . . . . . . . . . . . . . . . . . . . . . . . . . . . . . . . 4-30
Special Applications . . . . . . . . . . . . . . . . . . . . . . . . . . . . . . . . . . 4-31
NAT Mapping Table . . . . . . . . . . . . . . . . . . . . . . . . . . . . . . . . . 4-33
Route . . . . . . . . . . . . . . . . . . . . . . . . . . . . . . . . . . . . . . . . . . . . . . . . . . . . 4-34
Static Route Parameters . . . . . . . . . . . . . . . . . . . . . . . . . . . . . . . 4-34
RIP Parameter . . . . . . . . . . . . . . . . . . . . . . . . . . . . . . . . . . . . . . . 4-36
Routing Table . . . . . . . . . . . . . . . . . . . . . . . . . . . . . . . . . . . . . . . 4-38
Firewall . . . . . . . . . . . . . . . . . . . . . . . . . . . . . . . . . . . . . . . . . . . . . . . . . . 4-39
Access Control . . . . . . . . . . . . . . . . . . . . . . . . . . . . . . . . . . . . . . 4-40
Access Control Add PC . . . . . . . . . . . . . . . . . . . . . . . . . . . . . . . 4-41
MAC Filter . . . . . . . . . . . . . . . . . . . . . . . . . . . . . . . . . . . . . . . . . 4-42
URL Blocking . . . . . . . . . . . . . . . . . . . . . . . . . . . . . . . . . . . . . . . 4-43
Schedule Rule . . . . . . . . . . . . . . . . . . . . . . . . . . . . . . . . . . . . . . . 4-44
Edit Schedule Rule . . . . . . . . . . . . . . . . . . . . . . . . . . . . . . . . . . . 4-45

T
ABLE
OF
C
ONTENTS
v
Intrusion Detection . . . . . . . . . . . . . . . . . . . . . . . . . . . . . . . . . . 4-46
DMZ . . . . . . . . . . . . . . . . . . . . . . . . . . . . . . . . . . . . . . . . . . . . . . 4-51
SNMP . . . . . . . . . . . . . . . . . . . . . . . . . . . . . . . . . . . . . . . . . . . . . . . . . . . 4-52
Community . . . . . . . . . . . . . . . . . . . . . . . . . . . . . . . . . . . . . . . . . 4-52
Trap . . . . . . . . . . . . . . . . . . . . . . . . . . . . . . . . . . . . . . . . . . . . . . . 4-53
ADSL . . . . . . . . . . . . . . . . . . . . . . . . . . . . . . . . . . . . . . . . . . . . . . . . . . . 4-54
ADSL Parameters . . . . . . . . . . . . . . . . . . . . . . . . . . . . . . . . . . . . 4-54
Status . . . . . . . . . . . . . . . . . . . . . . . . . . . . . . . . . . . . . . . . . . . . . . 4-55
VoIP . . . . . . . . . . . . . . . . . . . . . . . . . . . . . . . . . . . . . . . . . . . . . . . . . . . . 4-58
Port Setting . . . . . . . . . . . . . . . . . . . . . . . . . . . . . . . . . . . . . . . . . 4-58
SIP Setting . . . . . . . . . . . . . . . . . . . . . . . . . . . . . . . . . . . . . . . . . . 4-60
VoIP Advanced Setting . . . . . . . . . . . . . . . . . . . . . . . . . . . . . . . 4-62
Port Advanced Setting . . . . . . . . . . . . . . . . . . . . . . . . . . . . . . . . 4-65
Dialing Plans . . . . . . . . . . . . . . . . . . . . . . . . . . . . . . . . . . . . . . . . 4-66
Quick Dialing Plans . . . . . . . . . . . . . . . . . . . . . . . . . . . . . . . . . . 4-67
VoIP Status and Call Logs . . . . . . . . . . . . . . . . . . . . . . . . . . . . . 4-68
UPnP . . . . . . . . . . . . . . . . . . . . . . . . . . . . . . . . . . . . . . . . . . . . . . . . . . . . 4-69
QoS . . . . . . . . . . . . . . . . . . . . . . . . . . . . . . . . . . . . . . . . . . . . . . . . . . . . . 4-70
QoS Settings . . . . . . . . . . . . . . . . . . . . . . . . . . . . . . . . . . . . . . . . 4-70
Traffic Mapping . . . . . . . . . . . . . . . . . . . . . . . . . . . . . . . . . . . . . 4-72
Edit Traffic Class . . . . . . . . . . . . . . . . . . . . . . . . . . . . . . . . . . . . 4-73
Edit Traffic Class - Advanced Config . . . . . . . . . . . . . . . . . . . . 4-74
Traffic Statistics . . . . . . . . . . . . . . . . . . . . . . . . . . . . . . . . . . . . . 4-75
DDNS . . . . . . . . . . . . . . . . . . . . . . . . . . . . . . . . . . . . . . . . . . . . . . . . . . . 4-76
Tools . . . . . . . . . . . . . . . . . . . . . . . . . . . . . . . . . . . . . . . . . . . . . . . . . . . . 4-78
Configuration Tools . . . . . . . . . . . . . . . . . . . . . . . . . . . . . . . . . . 4-78
Firmware Upgrade . . . . . . . . . . . . . . . . . . . . . . . . . . . . . . . . . . . 4-79
Reset . . . . . . . . . . . . . . . . . . . . . . . . . . . . . . . . . . . . . . . . . . . . . . 4-80
Status . . . . . . . . . . . . . . . . . . . . . . . . . . . . . . . . . . . . . . . . . . . . . . . . . . . . 4-81

T
ABLE
OF
C
ONTENTS
vi
A Troubleshooting . . . . . . . . . . . . . . . . . . . . . . . . . . . . . .A-1
B Cables . . . . . . . . . . . . . . . . . . . . . . . . . . . . . . . . . . . . . .B-1
Ethernet Cable . . . . . . . . . . . . . . . . . . . . . . . . . . . . . . . . . . . . . . . . . . . . . B-1
Specifications . . . . . . . . . . . . . . . . . . . . . . . . . . . . . . . . . . . . . . . . B-1
Wiring Conventions . . . . . . . . . . . . . . . . . . . . . . . . . . . . . . . . . . . B-1
RJ-45 Port Ethernet Connection . . . . . . . . . . . . . . . . . . . . . . . . . . . . . . . B-2
Pin Assignments . . . . . . . . . . . . . . . . . . . . . . . . . . . . . . . . . . . . . . B-3
ADSL Cable Connection . . . . . . . . . . . . . . . . . . . . . . . . . . . . . . . . . . . . . B-5
Specifications . . . . . . . . . . . . . . . . . . . . . . . . . . . . . . . . . . . . . . . . B-5
Wiring Conventions . . . . . . . . . . . . . . . . . . . . . . . . . . . . . . . . . . . B-5
C Specifications . . . . . . . . . . . . . . . . . . . . . . . . . . . . . . . .C-1
Glossary . . . . . . . . . . . . . . . . . . . . . . . . . . . . . . . . . . . . . 1-1

1-1
C
HAPTER
1
I
NTRODUCTION
Congratulations on your purchase of the VoIP ADSL Router
(ARV3515J-A-GP), hereafter referred to as the VoIP Router. We are
proud to provide you with a powerful yet simple communication device
for connecting your local area network (LAN) to the Internet. For those
who want to surf the Internet in the most secure way, this router provides
a convenient and powerful solution. The VoIP Router also enables service
providers to provide their residential and small office home office
(SOHO) customers with high-quality VoIP service using traditional analog
telephones and fax machines.
About the VoIP ADSL Router
The VoIP Router provides Internet access to multiple users by sharing a
single-user account. It is a cost-efficient means for service providers to
migrate their customers’ traditional analog telephones and fax machines
onto IP-based networks. This new technology provides many secure and
cost-effective functions. It is simple to configure and can be up and
running in minutes.

V
OICE
OVER
IP (V
O
IP)
1-2
Voice over IP (VoIP)
An Introduction
Using Voice over IP (VoIP), instead of making calls over the regular
telephone network, calls are made over computer (IP) networks, either
through your Internet Service Provider’s connection or through your local
network. Calls made to another Internet telephone, anywhere in the world,
are generally free, while calls made to a regular telephone are generally
much cheaper than traditional long distance calls.
The basic steps involved in VoIP include the conversion of an analog voice
signal to digital, the encoding and then compression of the signal into
Internet Protocol (IP) packets. The VoIP Router is equipped with a digital
signal processor (DSP), which segments the voice signal into frames and
stores them in voice packets. Using the industry standard codecs, G.711,
G.723.3 and G.729, these packets are encoded. These IP packets are then
transmitted in accordance with International Telecommunications Union
specification SIP over the Internet to their destination where the process is
reversed.
Advantages of Using VoIP
The main advantage of VoIP the traditional Plain Old Telephone System
(POTS) is the ability to make low-cost calls over the IP network. One of
the greatest benefits is local long distance. By using a virtual phone
number with a different area code, you can keep a phone number in
Washington D.C. even though you live in San Francisco. This way, you
won’t pay expensive toll charges when calling Washington D.C., nor will
your Washington D.C. friends when they call you.
Past Problems
Internet-based telephony has been around for years but, until now, has not
reached the mainstream market. Some of the most common problems are
listed on the next page.

I
NTRODUCTION
1-3
• Products with a true cost-saving advantage over standard telephones
do not have comparable call quality. Users experience a prolonged
delay making conversation difficult.
• Call-completion rates are very low due to firewalls and the use of
Network Address Translation (NAT), which renders over 50% of
residential computers unable to communicate with traditional VoIP
software.
• The user interface is complicated, and requires substantial
configuration and technical skills.
Recent Developments
Even as streaming audio and video over the Internet became common,
VoIP quality was still sub-par. What, you may ask, is the reason for this?
While it’s relatively easy to convert a song or even a video into IP-based
packets and have it arrive in decent shape, the Internet was not designed as
a two-way street, i.e., to support two-way communications as in your
typical conversation. Early VoIP calls were much like walkie-talkie speech,
halting and unsynchronized. A common trick was to let the other speaker
know you had finished talking by ending your statement with the word
“Over.” For example,
“How are you today? Over.”
“Not too good, I think I’ve the flu. Are you busy? Over.”
This method was effective, but hardly conducive to a comfortable
conversation! Therefore, substantial cost savings, although attractive, were
not enough to make up for unacceptably poor call quality. Now, however,
thanks to dedicated hardware processing and protocols like SIP, VoIP can
be as smooth as a session that uses the regular telephone network, greatly
increasing its appeal.
Equally as important to VoIP’s recent surge has been the widespread
adoption of broadband in both homes and businesses, which delivers the
bandwidth required to come close to PSTN quality.

F
EATURES
AND
B
ENEFITS
1-4
Features and Benefits
• Internet connection to an ADSL modem via an RJ-11 ADSL port
• Local network connection via four 10/100 Mbps Ethernet ports
• DHCP for dynamic IP configuration, and DNS for domain name
mapping
• Firewall with Stateful Packet Inspection, client privileges, intrusion
detection, and NAT
• NAT also enables multi-user Internet access via a single user account,
and virtual server functionality (providing protected access to Internet
services such as web, FTP, email, and Telnet)
• VPN pass-through (IPSec-ESP Tunnel mode, L2TP, PPTP)
• User-definable application sensing tunnel supports applications
requiring multiple connections
• Easy setup through a web browser on any operating system that
supports TCP/IP
• Compatible with all popular Internet applications
VoIP Features and Benefits
• Two independent phone lines (FXS)
• Full SIP support
• Voice Activity Detection (VAD) conserves bandwidth
• Quality of Service (QoS) provides superior voice quality

I
NTRODUCTION
1-5
Applications
Many advanced networking features are provided by the VoIP Router:
• VoIP Telephony
The VoIP Router has two analog voice lines (FXS) that support
independent telephone numbers. The voice ports interface directly
with analog telephones or fax machines. Advanced VoIP features
include, QoS, support for call waiting and call forwarding, caller ID
and VAD.
•WiredLAN
The VoIP Router provides connectivity to 10/100 Mbps devices,
making it easy to create a network in small offices or homes.
• Internet Access
This device supports Internet access through an ADSL connection.
Since many ADSL providers use PPPoE or PPPoA to establish
communications with end users, the VoIP Router includes built-in
clients for these protocols, eliminating the need to install these
services on your computer.
• Shared IP Address
The VoIP Router provides Internet access for up to 253 users via a
single shared IP address. Using only one ISP account, multiple users
on your network can browse the web at the same time.
•VirtualServer
If you have a fixed IP address, you can set the VoIP Router to act as a
virtual host for network address translation. Remote users access
various services at your site using a constant IP address. Then,
depending on the requested service (or port number), the VoIP

A
PPLICATIONS
1-6
Router can route the request to the appropriate server (at another
internal IP address). This secures your network from direct attack by
hackers, and provides more flexible management by allowing you to
change internal IP addresses without affecting outside access to your
network.
• DMZ Host Support
Allows a networked computer to be fully exposed to the Internet.
This function is used when NAT and firewall security prevent an
Internet application from functioning correctly.
• Security
The VoIP Router supports security features that deny Internet access
to specified users, or filter all requests for specific services that the
administrator does not want to serve. The VoIP Router’s firewall also
blocks common hacker attacks, including IP Spoofing, Land Attack,
Ping of Death, IP with zero length, Smurf Attack, UDP port
loopback, Snork Attack, TCP null scan, and TCP SYN flooding.
• Virtual Private Network (VPN Pass-through)
The VoIP Router supports three of the most commonly used VPN
protocols – PPTP, L2TP, and IPSec. The VPN protocols supported
by the VoIP Router are briefly described below.
• Point-to-Point Tunneling Protocol – Provides a secure tunnel for
remote client access to a PPTP security gateway. PPTP includes
provisions for call origination and flow control required by ISPs.
• L2TP merges the best features of PPTP and L2F – Like PPTP,
L2TP requires that the ISP’s routers support the protocol.
• IP Security – Provides IP network-layer encryption. IPSec can
support large encryption networks (such as the Internet) by using
digital certificates for device authentication.

2-1
C
HAPTER
2
I
NSTALLATION
Before installing the VoIP ADSL Router, verify that you have all the items
listed under “Package Contents.” If any of the items are missing or
damaged, contact your local distributor. Also be sure that you have all the
necessary cabling before installing the VoIP Router. After installing the
VoIP Router, refer to “Configuring the VoIP ADSL Router” on page 4-1.
Package Contents
After unpacking the VoIP Router, check the contents of the box to be sure
you have received the following components:
•VoIPADSLRouter
• Power adapter
• One CAT-5 Ethernet cable
• Telephone patch cable
• One driver and documentation CD
• Quick Install Guide
Immediately inform your dealer in the event of any incorrect, missing, or
damaged parts. If possible, please retain the carton and original packing
materials in case there is a need to return the product.

I
NSTALLATION
2-2
System Requirements
You must meet the following minimum requirements:
• Internet access from your Internet Service Provider (ISP) using an
ADSL modem.
• A PC using a dynamic IP address assigned via DHCP, as well as a
gateway server address and DNS server address from your service
provider.
• A computer equipped with a 10 Mbps, 100 Mbps, or 10/100 Mbps
Fast Ethernet card.
• TCP/IP network protocols installed on each PC that will access the
Internet.
• A Java-enabled web browser, such as Microsoft Internet Explorer 5.0
or above installed on one PC at your site for configuring the VoIP
Router.

H
ARDWARE
D
ESCRIPTION
2-3
Hardware Description
The VoIP Router contains an integrated ADSL modem and connects to
the Internet or to a remote site using its RJ-11 port. It can be connected
directly to your PC or to a local area network using the Fast Ethernet LAN
ports. There is also one USB 1.1 connection to connect to your printer or a
secondary storage device.
Access speed to the Internet depends on your service type. Full-rate ADSL
provides up to 8 Mbps downstream and 640 kbps upstream. G.lite (or
splitterless) ADSL provides up to 1.5 Mbps downstream and 512 kbps
upstream. However, you should note that the actual rate provided by
specific service providers may vary dramatically from these upper limits.
The VoIP Router comes with two FXS ports to connect with a phone or
fax, turning your regular phone into an IP phone. Through your telephone
or fax, your can dial out through the gateway to another VoIP gateway or
IP Phone. It also comes with one FXO port for connection to your PSTN
line or PBX.
Data passing between devices connected to your local area network can
run at up to 100 Mbps over the four Fast Ethernet ports.

I
NSTALLATION
2-4
The VoIP Router connections are described in the following figure and
table.
Figure 2-1. Rear Panel
Item Description
ADSL Port ADSL port (RJ-11). Connect your ADSL line to this port.
Power Inlet Connect the included power adapter to this inlet.
Warning: Using the wrong type of power adapter may cause
damage.
Reset Button Use this button to reset the power and restore the default
factory settings. To reset without losing configuration settings,
see “Reset” on page 4-80.
Power Switch Push to power on the device.
USB Port Connect to print server.
LAN Port Fast Ethernet port (RJ-45). Connect devices on your local area
network to this port (i.e., a PC, hub, or switch).
FXS Ports RJ-11 port. Connect to standard analog telephone set or fax
machine.

H
ARDWARE
D
ESCRIPTION
2-5
LEDs
The VoIP Router includes an LED display for system power and port
indications that simplifies installation and network troubleshooting. The
power and port LED indicators are explained by the following figure and
table.
Figure 2-2. LEDs
LED Status Description
Phone1/2 On VoIP activity, i.e., phone is in use.
Flashing Incoming call, i.e., phone is ringing.
Off No VoIP activity.
VoIP On VoIP activity.
Off No VoIP activity.
USB On USB link.
Off No USB link.
LAN On Ethernet link.
Flashing The LAN port is sending or receiving data.
Off No Ethernet link.
Online Flashing The indicated ADSL port is sending or
receiving data.
Off No data being transferred.
Phone1 Phone2 VoIP ONLINE ADSL PWR
USB LAN

I
NSTALLATION
2-6
ADSL On ADSL connection is functioning correctly.
Flashing Startup.
Off ADSL connection is not established.
PWR
(Power)
On The VoIP Router is receiving power. Normal
operation.
Off Power off or failure.
LED Status Description

H
ARDWARE
I
NSTALLATION
2-7
Hardware Installation
ADSL Connection
Connect your ADSL line to this port.
Fast Ethernet Connection
Connect a PC to the RJ-45 port on the VoIP Router with the provided
network cable. When inserting an RJ-45 plug, be sure the tab on the plug
clicks into position to ensure that it is properly seated.
The LAN port is dual-speed RJ-45 ports. It supports auto-negotiation, so
the optimum communication mode (half or full duplex) and data rate (10
Mbps or 100 Mbps) are selected automatically.
USB Connection
Using the USB port, connect to a secondary storage device or printer. This
port allows you to, for example, share your USB printer over the network
without needing to leave a host PC switched on.
FXS Connection
Connect a standard analog telephone set or fax machine to either of the
FXS ports on the rear panel. The FXS ports are like your local phone
service provider in that they can generate and provide a ring signal.
Note: When you have connected a device to the FXS port as you will
hear a dial tone provided by the FXS port once the handset is off-
hook.

I
NSTALLATION
2-8
ISP Settings
Please collect the following information from your ISP before setting up
the VoIP Router:
• ISP account user name and password
• Protocol, encapsulation and VPI/VCI circuit numbers
• DNS server address
• IP address, subnet mask and default gateway (for fixed IP users only)
Connect the System
The VoIP Router can be positioned at any convenient location in your
office or home. No special wiring or cooling requirements are needed. You
should, however, comply with the following guidelines:
• Keep the VoIP Router away from any heating devices.
• Do not place the VoIP Router in a dusty or wet environment.
You should also remember to turn off the power, remove the power cord
from the outlet, and keep your hands dry when you install the VoIP
Router.
Connect the ADSL Line
Run standard telephone cable from the wall jack providing ADSL service
to the RJ-11 (“ADSL”) port on your VoIP Router. When inserting an
ADSL RJ-11 plug, be sure the tab on the plug clicks into position to ensure
that it is properly seated. If you are using splitterless ADSL service, be sure
you add low-pass filters between the ADSL wall jack and your telephones.
(These filters pass voice signals through but filter data signals out.)
Table of contents
Other Pirelli Network Router manuals