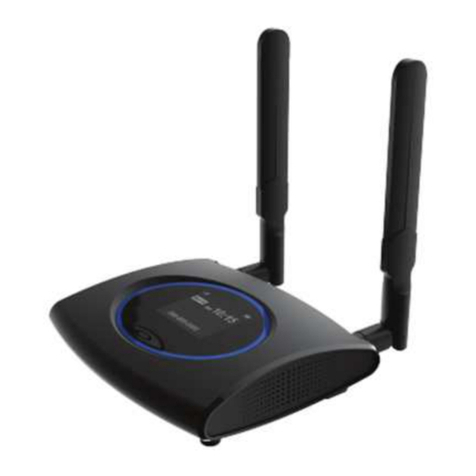
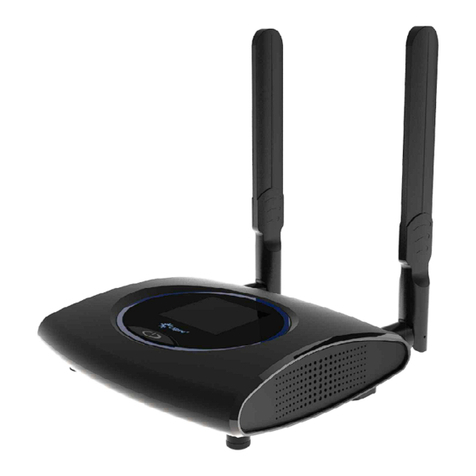
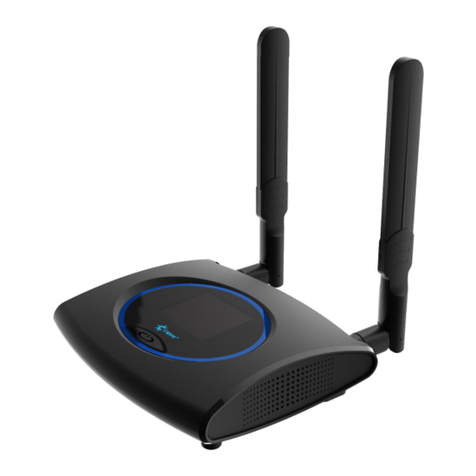
Franklin Wireless FX20 User manual

FX20 Wi-Fi 6 Router
i
FX20 WIRELESS ROUTER
USER MANUAL
JEXtream AX1800
Franklin Wireless Corp

FX20 Wi-Fi 6 Router
ii
Table of Contents
Introduction .................................................................................................................................................. 3
Before You Begin ................................................................................................................................. 3
Router Setup ................................................................................................................................................ 4
Parts and Functions ............................................................................................................................. 4
This box contains ................................................................................................................................. 5
Router Overview .................................................................................................................................. 5
Front Panel LED .................................................................................................................................. 7
Rear Panel Button and Connector ....................................................................................................... 8
Basic Connection ......................................................................................................................................... 9
Connect to ISP Modem ........................................................................................................................ 9
Connect to ethernet cable .................................................................................................................. 10
Router Placement .............................................................................................................................. 10
Connect Device .......................................................................................................................................... 12
Connect the device via LAN ............................................................................................................... 12
Connect the device via Wi-Fi ............................................................................................................. 12
Router Login ...................................................................................................................................... 12
Settings ...................................................................................................................................................... 13
Web UI Overview ............................................................................................................................... 13
Admin Login ....................................................................................................................................... 13
Dashboard ......................................................................................................................................... 13
Wireless ............................................................................................................................................. 17
Internet ............................................................................................................................................... 23
Forwarding ......................................................................................................................................... 29
Security .............................................................................................................................................. 33
System Tools ..................................................................................................................................... 38
Appendix .................................................................................................................................................... 43
Troubleshooting ................................................................................................................................. 43
Specifications ..................................................................................................................................... 45
Warranty and Service ........................................................................................................................ 48
Customer Service .............................................................................................................................. 48
Trademarks and Copyright Information ............................................................................................. 48
FCC Compliance ................................................................................................................................ 49
FX20 Wi-Fi 6 Router
3
Introduction
The following topics describe the basics of using this guide and your Wi-Fi router.
Before You Begin
Thank you for purchasing your new Jextream Wi-Fi 6 router!
The following topics explain how best to use this guide to get the most out of your mobile broadband
device.
Other Notations
In the user guide, the Jextream Wi-Fi 6 router may be referred to either as "Wi-Fi 6 device", "Jextream
Wi-Fi", "device," or "Wi-Fi router."

FX20 Wi-Fi 6 Router
4
Router Setup
The following topics give you all the information you need to set up your router for the first time.
Parts and Functions
The FX20 Wi-Fi 6 Router delivers better performance by ensuring more available bandwidth with less
congestion for all connected devices on network. With FX20’s Wi-Fi 6 capacity, it allows more users and
devices to connect to the network at the same time without impacting speed or reliability.
The router provides fast central storage, backup, and streaming to every device in your home with the
Giga Ethernet port. Sharing content across your network is easy, whether it’s accessing stored photos
and music or wirelessly printing.
This chapter contains the following sections:
• This Box Contains
• Router Overview
• Attach Stand
• Turn on the Device with Adapter
• LED Indicators
For more information about the topics covered in this manual, visit the support website at
https://www.jextream.net/support.

FX20 Wi-Fi 6 Router
5
This Box Contains
Your package contains the following items:
Router Overview
The following numbers on Front and Rear panels indicate interface detail:

FX20 Wi-Fi 6 Router
6
Attach Stand
Attach the stand to the router by lining up and inserting the stand’s bolts to the bottom bolt holes of the
device. Then push up to lock:
Turn on the Device
Plug DC charger to device, then connect to wall. The device should automatically turn on.

FX20 Wi-Fi 6 Router
7
Front Panel LED
The following table describes the LED indicators that is located on the router front view and bottom.
: Router Bottom and Front View
LED
Description
WAN
• Solid amber – The router detected an Ethernet cable connection to the modem.
• Blinking amber – The router is sending or receiving the internet traffic.
• Off – Power is not supplied to the router.
L1 (LAN 1)
to L4 (LAN4)
• Solid amber – The LAN port detected an Ethernet cable connection from an external
device.
• Blinking amber – The LAN port is sending or receiving traffic.
• Off – No device is connected to this Ethernet port.
Wi-Fi 2.4G
• Solid amber – The 2.4GHz Wi-Fi radio is running.
• Blinking amber – The router is sending or receiving Wi-Fi traffic.
• Off – The 2.4GHz Wi-Fi radio is turned off.
Wi-Fi 5G
• Solid amber – The 5GHz Wi-Fi radio is running.
• Blinking amber – The router is sending or receiving Wi-Fi traffic.
• Off – The 5GHz Wi-Fi radio is turned off.

FX20 Wi-Fi 6 Router
8
LED
Description
WPS
• Blinking amber – Pressing the WPS button on the Rear side for a few seconds, this
LED is blinking during this process, and let your device can join this Wi-Fi network
without typing the Wi-Fi password.
• Off – No WPS action.
Power
• Solid amber – The router is starting.
• Blinking amber – Pressing the Reset button on the Rear side for over 10 seconds,
the router will reset.
• Off – Power is not supplied to the router.
Rear Panel Button and Connector
: Router Bottom and Rear View
Button
Description
DC-IN
Power Connector
W
Internet WAN Port
L1 ~ L4
Ethernet LAN Ports 1 – 4
WPS
Pressing the WPS button for few seconds, this LED is blinking during this process, and
let your device can join this Wi-Fi network without typing the Wi-Fi password.
RST
(RESET)
Pressing the RST button for 5 seconds, your device will restart. Pressing the RST
button at least 10 seconds, your device will restore the factory settings.

FX20 Wi-Fi 6 Router
9
Basic Connection
The following topics give you all the information you need to set up your device and wireless service for
the first time.
Connect to ISP Modem
Connect the router to your modem with RJ-45 cable to WAN port:
1. Unplug your ISP(Internet Service Provider) modem’s power, leaving the modem connected to the
wall jack for your internet service. If your modem uses a battery backup, remove the battery.
2. Plug in and turn on your modem. If your modem uses a battery backup, insert the battery.
3. Connect your modem to the Internet WAN port of your device using the Ethernet Cable.
4. Plug DC Charger to your router, then plug the power adapter into an outlet. The device will
automatically turn on.

FX20 Wi-Fi 6 Router
10
5. Configure with your ISP modem
a. To connect to an ISP, you need a modem and an active account.
b. Make certain the ISP modem had already provided DSL Broadband Service (PPPoE).
c. Login to Web Admin page, go to Internet > IP Settings.
d. Change the WAN Connection Type to PPPoE and enter your PPPoE username and
password provided by ISP.
Connect to Ethernet Cable
For the best performance, we recommend using CAT6 ethernet cable:
Router Placement
The distance or range of your wireless connection can vary significantly depending on the physical
placement of your router. Moving your router won't make your Internet connection faster, but it should
make it more reliable and stable which can be important when it comes to video streaming or online
gaming.
Below are simple steps to help improve your wireless Internet signal:

FX20 Wi-Fi 6 Router
11
1. Place your router near the center of the area where your computers and other devices operate,
and within line of sight to your wireless devices.
2. Make sure that the router is within reach of an AC power outlet and near Ethernet cables for
wired computers.
3. Place the router in an elevated location, minimizing the number walls and ceilings between the
router and your other devices.
4. Place the router away from electrical devices or large metal and glass surfaces such as these:
a. Kitchen
b. Microwaves
c. Computers
d. Solid metal door
e. Aluminum studs
f. Walls
g. Brick
h. Concrete
i. Mirrors and fish tanks

FX20 Wi-Fi 6 Router
12
Connect Device
The following topics give you all the information you need to set up your device and wireless service for
the first time.
Connect the Device via LAN
You can connect your computer to the router using an Ethernet cable and join the router’s local area
network (LAN).
To connect your computer to the router with an Ethernet cable:
1. Connect an Ethernet cable to an Ethernet port on your computer.
2. Connect the other end of the Ethernet cable to one of the numbered Ethernet ports (L1, L2, L3,
L4).
Once your computer connects to the router’s local area network, and you might be notified a message
might on your computer screen regarding an Ethernet cable is connected.
Connect the Device via Wi-Fi
You can find and select the router’s Wi-Fi network on your computer or mobile device.
1. Wi-Fi SSID and password information can be found on the back of the device label.
2. Join the Wi-Fi network and enter the Wi-Fi password.
3. Your device connects to the Wi-Fi network.
Router Login
To login to the router:
1. Launch an internet browser from a computer or wireless device that is connected to the network.
2. Type http://router.jextream.net or http://192.168.10.1. A login window opens.
3. Enter the router password. The default password can be found on the back of the device label.
The password is case-sensitive.

FX20 Wi-Fi 6 Router
13
Settings
The following topics provide an overview of items you can change using the device’s setting menu
accessed through the router’s Web UI.
Web UI Overview
Once you log in to your router, and you can use the router’s Web UI in a browser to check or change the
basic settings.
Admin Login
Launch an internet browser from a computer or mobile device that is connected to the network. Accessing
other menus requires admin log in.
1. Type http://router.jextream.net or http://192.168.10.1.
2. Login window open and enter password. The default password can be found on the back of the
device label. The password is case-sensitive.
3. Enter the password and click "Log in" button.
Note: The default password is "password." It's recommended to change the password for your security.
Dashboard
Select the Dashboard icon on the top left conner, you can check the status of device information, system
information, and WAN/LAN/Wireless network connection.

FX20 Wi-Fi 6 Router
14
LAN
Configure IP Setting and DHCP Server.
IP Settings
By default, the router sets on a DHCP(Dynamic Host Configuration Protocol) server, and the router
assigns IPv4 address, IPv6 address, and default gateway addresses to the device which is connected
through the LAN. The assigned default gateway address is the LAN address.
Set the IP Settings for your device.
■ From the Web UI, click LAN > IP Settings to display the LAN information shown in the following
figure.

FX20 Wi-Fi 6 Router
15
1. To set up an IPv4 address on LAN
o IP Address: The LAN IP address of your router.
o Subnet Mask: The subnet mask associated with the LAN IP address. Subnet
Mask is usually 255.255.255.0.
2. To set up an IPv6 address on LAN
o Link-Local Address Mode
§ Auto: It is the default setting. Assign IPv6 addresses to the computers in
your LAN.
§ Static: If your network environment is unusual or if you are a network
expert, you can change following settings.
o Link-Local Address: Enter the IPv6 address in your LAN
o IPv6 DNS Mode: Configure the DNS Server mode in your LAN
§ Auto: This is the default setting.
§ WAN Connection: Use the DNS server addresses that are configured
for the IPv6 internet connection automatically.

FX20 Wi-Fi 6 Router
16
§ Static: Configure another DNS IPv6 address provided by your ISP. If
your ISP gives you one or two DNS IPv6 addresses, enter IPv6 Primary
and Secondary DNS server address manually.
o IPv6 Prefix Mode: IPv6 address prefix of subnet hosts.
§ WAN Delegated: Use the IPv6 address prefix from the ISP
automatically, and the router will delegate it to the LAN.
§ Static: Configure the Prefix Address and Prefix Length manually. You
may need to connect your ISP to get more information before you
configure them.
• Prefix Address: Enter the IPv6 address in your LAN
• Prefix Length: Enter the length of IPv6 address prefix in your
LAN

FX20 Wi-Fi 6 Router
17
DHCP Server
By default, the router sets on a DHCP (Dynamic Host Configuration Protocol) server, and the router
assigns IP, DNS server, and default gateway addresses to the device which is connected through the
LAN. The assigned default gateway address is the LAN address.
Set the DHCP Server for your device.
■ From the Web UI, click LAN > DHCP Server to display the preset parameters.
1. DHCP Server: OFF or ON of DHCP Server function.
2. IP Pool Starting/Ending Address: Allocate start and end IP address for IP Range.
3. Lease Time (SEC): Define how long the leased IP address will be in use before expiration.
The new IP address will be assigned.
4. Default Gateway: IP address of the default gateway.
5. Click Save Changes to save your settings.
Wireless
Configure Basic and Advanced Wireless Setting, Easy Mesh, and WPS.
Basic Settings
The router comes with preset security. This means that the Wi-Fi network name (SSID), network key
(password), and security option (authentication and cipher suit) are preset in the factory for each wireless
network: 2.4GHz and 5GHz. You can add a guest SSID to each wireless network to two SSIDs.

FX20 Wi-Fi 6 Router
18
Set the Basic Settings for your device.
■ From the Web UI, click Wireless > Basic Settings to display the basic wireless network
parameters.
Note: The preset SSID and password are uniquely generated for every device to protect and maximize
your wireless security.
If you use a wireless computer to change the SSID or other wireless security settings, your devices will
be disconnected when you click the “Save Changes” button.
■ From the Basic Settings, click Edit or Add button to change the basic wireless network
parameters.

FX20 Wi-Fi 6 Router
19
1. SSID Name: Service Set Identifier (SSID). To change it, enter a string less than 32
characters as the name for your wireless local area network (WLAN).
2. Password: To change, enter the new Wi-Fi password. The password needs to be at least 8
characters long.
3. Authentication Method: Use this setting to select the desired type of Wi-Fi security used to
encrypt the wireless network.
Mode
Description
WPA3
WPA3 is the latest, updated implementation of WPA2
WPA3/WPA2 Mixed
Apply both the WPA2 and WPA3 scheme.
WPA2
WPA-PSK is the securer version of WPA with
implementation of the 802.11i standard.
WPA2/WPA Mixed
Apply both the WPA-PSK and WPA2-PSK scheme
OPEN
Authentication and encryption won't be performed. There
are risks that private info will be intercepted or network
will be used by unauthorized individuals
4. Encryption Method: Advanced Encryption Standard (AES) is the latest and most secure
option for your wireless network, so it’s set on by default according to a selected
Authentication Method.
5. SSID Stealth: If Enable is selected, the Wi-Fi name will not appear in the list of available
networks. You need to manually enter Wi-Fi name and connect.

FX20 Wi-Fi 6 Router
20
6. Save Changes: Make sure to click Save Changes after you set your desired settings.
Advanced Settings
Set the Basic Settings for your device.
■ From the Web UI, click Wireless > Advanced Settings to display the advance wireless network
parameters.
1. 802.11 Mode: Use this setting to change the Wi-Fi mode. The router supports 802.11b, 802.11g,
802.11n, and 802.11ax modes in the 2.4GHz band and supports three mixed modes. 5GHz band
supports 802.11n mode, 802.11ac, and 802.11ax mode respectively.
2. Wi-Fi Channel: Use this setting to change the Wi-Fi channel of 2.4GHz band or 5GHz band. This
field determines which operating frequency will be used. The default channel is set to Auto. It is
not necessary to change the wireless channel unless you notice interference problems with
another nearby access point.
3. Wi-Fi Bandwidth: Use this setting to change the Wi-Fi Bandwidth of 2.4GHz band or 5GHz band.
This field determines which operating frequency will be used. It is not necessary to change the
wireless bandwidth unless you notice interference problems with another nearby access point. If
you select Auto, then AP will choose the best bandwidth automatically.
4. Save Changes: Make sure to click Save Changes after you set your desired settings.
Other manuals for FX20
1
Table of contents
Other Franklin Wireless Network Router manuals

Franklin Wireless
Franklin Wireless FX20 User manual

Franklin Wireless
Franklin Wireless T720 User manual

Franklin Wireless
Franklin Wireless T720G User manual

Franklin Wireless
Franklin Wireless C801 User manual

Franklin Wireless
Franklin Wireless C773 User manual

Franklin Wireless
Franklin Wireless T720C User manual