PitLab Dedalus User manual

Dedalus autopilot– user's manual
Dedalus autopilot
User's manual
Introduction
Thank you for purchasing Dedalus Autopilot. We have put our many year
experience in electronics, automatics and control of model planes into this
device.
Dedalus was designed to stabilize the flight and save your model in case
you re out of your RC radio range, lose eye contact with the model or get
stuck in the thermals and is pulled into clouds. When you lose control over
the model, you can turn on automatic “return to base” function using spare
channel on your transmitter. It is also highly recommended to program Fail-
Safe mode in your receiver as to automatically switch to the return to base in
case the receiver loses signal.
In addition, Dedalus can stabilize the model s flight, which is helpful when
flying on the edge of visibility with the model becoming a small dot in the sky.
Small size (30 x 60 x 10mm) and less than 55g weight of the kit allows you to
place it in almost every model. All basic airframe systems with T-tail, V-tail
and tailless designs like delta or flying wing are supported. It may be useful for
flight stabilization during air tow operations, to secure glider against escape
into thermals or controlling fast flying models with a very short reaction time,
where short moment of inattention results in the loss of the model.
© PitLab 2015 http://www.pitlab.com/dedalus-autopilot.html page 1 of 20

Dedalus autopilot– user's manual
What you find in the box?
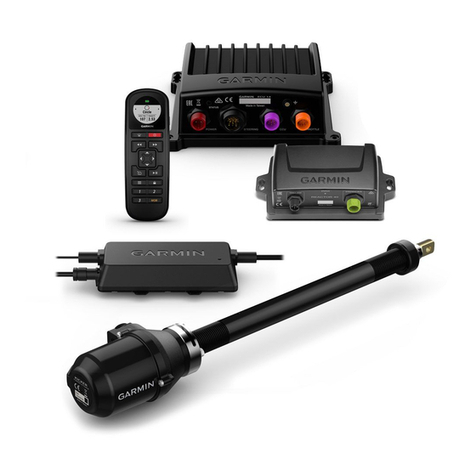
A complete kit of Dedalus autopilot consist of following components:
Main autopilot unit,
GPS-GLONASS receiver (GNSS) with external magnetometer,
Operator s panel with OLED display and keyboard,
Set of connection cables.
Figure 1 Dedalus Autopilot kit
The operator s panel can be connected and disconnected at any moment of
autopilot work. Using it is not necessary, but it is useful to check GPS status
and readiness to work. It also shows flight statistics and allows adjusting
parameters in the field, without connecting to PC application.
Electrical connection
Electrical connection to GNSS module and to operator s panel is done using
special polarized connectors, ensuring proper connection. Attention should
be paid to polarization tabs on plug and socket when connecting these
devices, particular attention to the 4-pin operator s panel connector.
Autopilot can be connected to a remote control receiver in two ways,
depending on the characteristics of the receiver and the autopilot settings:
Parallel connection where every channel is connected with separate
wire.
Serial connection (CPPM or SBus) where all channels are connected
using one wire.
NOTE: Improper connection of power or external devices may cause damages
that are not subject to warranty.
© PitLab 2015 http://www.pitlab.com/dedalus-autopilot.html page 2 of 20

Dedalus autopilot– user's manual
Parallel connection to receiver
Usual remote control receivers with separate outputs of all signals (parallel)
are connected with the autopilot in such a way that the outputs of
appropriate channels of the receiver are connected with the corresponding
input channels of the Autopilot.
NOTE: Only first row has pin layout compatible with standard pin connection
sequence in receivers (signal, power, ground). The remaining rows of
connector has 2 inputs and ground on the lower pin.
Figure 2 Autopilot inputs in parallel mode
The RC kits from different manufacturers may use different order of channels
used for functions like ailerons, throttle, elevator or rudder. Pay attention to
the order of receiver outputs and autopilot inputs while connecting channels.
Serial connection of the receiver
If you use a receiver equipped with serial PPM output (CPPM or SBus),
connection of all channels to the autopilot can be made by a single signal 3-
wire cable connecting grounds, +5V power and receiver output signal to
autopilot input.
Figure 3 Autopilot inputs in serial mode (CPPM, SBus)
If you connect Serial PPM signal (CPPM), it is necessary to set this option up
up with FPV_manager application on your PC. Please connect autopilot board
to the computer (via USB). Then, in configuration application, choose the
socket pin of the Serial Input PPM (CPPM) - Input 1, and assign channels of
CPPM signal to corresponding functions of the autopilot.
In serial mode you can configure the unused PPM inputs as outputs for
additional channels from CPPM signal (output Aux 2 to Aux 5, up to 11
channels total). This eliminates the need to purchase an additional CPPM
© PitLab 2015 http://www.pitlab.com/dedalus-autopilot.html page 3 of 20

Dedalus autopilot– user's manual
decoder. In this case it may be necessary to build suitable cable with +5V
power for powering the devices on these extra channels.
onnecting servos and motor controller
Autopilot directly controls servos and the electric motor speed controller
(ESC) in the model. These devices must be connected to the appropriate
terminals, according to their description.
Figure 4 Autopilot outputs
The autopilot in stabilization and AUTO mode actively stabilizes the position
of the model in response to external perturbations, like wind gusts or
turbulence. Thus, is moves servos much more actively than human pilot does.
This makes them consume significantly more power in flight. Thus, normally
used linear voltage regulators that built in motor speed controllers are often
unable to supply enough current to servos . This may cause brownouts or
even damage the ESC. For this reason, we recommend the use of external
switching controllers (UBEC) rated for 3A or more, depending on the size of
the model and amount of servos used, or motor controllers with built-in pulse
regulators. In the case of external UBEC please pull the red wire from the
plug of motor controller and insulate it.
GNSS receiver connection
The GNSS receiver (actually GPS+GLONASS) is connected using dedicated
cable to the blue 8-pin polarized connector on the front edge of autopilot.
The right connector profile protect it against reverse connection. The GNSS
receiver module should be mounted vertically with ceramic antenna pointing
up. Don t cover it with conductive materials like metal or carbon, as they
would block the signal reception. Non-conductive materials can be used to
protect it against dirt and humidity. It can also be placed inside the fuselage,
on account that it is not made of conductive materials, such as carbon fiber.
Sometimes external magnetometer built into GPS unit can be used instead of
the one in the autopilot itself. In this case, the module should be mounted
with X axis pointing in flight direction. The direction of the axis is marked on
the magnetometer upper side. When using GPS or internal magnetometer as
a source of heading info, mounting orientation has no meaning.
© PitLab 2015 http://www.pitlab.com/dedalus-autopilot.html page 4 of 20

Dedalus autopilot– user's manual
Figure Connection if the GNSS receiver module
Location of autopilot board inside a model
Autopilot has an integrated inertial measurement unit (IMU), which allows
determining the attitude of the autopilot board. By using this information the
autopilot can maintain the level flight of the model.
However, in order for this information to be correct about model s attitude
about the orientation of autopilot board in respect to the model must be
correct. The autopilot board should be mounted in such way that at the stable
level flight of the model, the autopilot board is horizontal and is facing the
direction of flight.
Figure 6 Correct locations of the autopilot inside the model
Figure 7 Impact of incorrect autopilot location on model flight
© PitLab 2015 http://www.pitlab.com/dedalus-autopilot.html page 5 of 20

Dedalus autopilot– user's manual
Figure 8 Impact of incorrect autopilot location on model flight
Small, on the order of few degrees autopilot orientation errors can be
compensated in menu settings, Settings->pitch cor. for pitch and settings-
>roll cor. for roll. Perfect location (or perfect compensation) is reached when
properly trimmed model flies straight and horizontal in autopilot OFF mode,
and the attitude stays same when you turn stabilization on.
Autopilot board does not have to be fixed exactly in the model’s center of
gravity, other convenient places inside the model can be used.
Vibration protection
Autopilot should be protected against vibrations (which affects the position
sensors: accelerometers and gyroscopes). If needed, you can use special
dampers, sponge, thick double-sided tape or other methods. Dampers should
dampen vibrations but still keep autopilot in correct orientation, and they
should not resonate (do not use springs ).
The vibration level can be checked with the engine running using
FPV_manager.exe PC application.
The sensors and algorithms of the autopilot are designed to operate in
presence of certain vibrations, but keep in mind that during the flight, there
are additional loads (turbulence, the centrifugal force, etc.). Generally, the
lower the vibration, the more accurate is the autopilot. You must therefore
strive to achieve a minimum level of vibrations from the engine.
NOTE: Too high level of vibrations can cause model flying tilted or not
straight in stabilization and autonomous flight modes.
Magnetic noise prevention
The autopilot and GNSS receiver board have magnetometers that used to
measure Earth magnetic field and determine the magnetic course. Every
magnetic field other than the Earth s can be an interference source. Try to
avoid putting permanent magnets, such as for holding the canopy, closer that
20cm from the autopilot.
Electric wires, especially the ones conducting high currents for the motor
should be arranged parallel to each other and tied together to prevent
making magnetic loop during current flow.
The magnetometer sensor is placed on the autopilot board near the „a”
character of the Dedalus logo. If you have to place wires near autopilot, place
them near opposite side like on picture below.
© PitLab 2015 http://www.pitlab.com/dedalus-autopilot.html page 6 of 20

Dedalus autopilot– user's manual
Figure 9 Way of placing current ires in the model: a) orst possible – big loop, b) better –
ithout a loop but still close to the sensor, c) optimal.
© PitLab 2015 http://www.pitlab.com/dedalus-autopilot.html page 7 of 20

Dedalus autopilot– user's manual
Reverses and alignment of servos
Adjusting RC apparatus for controlling a particular model means setting
correctly reverses and mixers so that the control stick movement causes
correct control surface deflection. In the same way it is necessary to set the
autopilot up for a specific model to ensure proper control of autonomous
model flight.
NOTE: Model configuration can be done using FPV_manager.exe application
on PC or with keyboard and display. Simplest way of configuration is to run
menu command Settings->Easy Setup.
The first step is to select the type of model tail.
When one stick is attached to two servos and two control surfaces (delta, V-
tail, flaperons), we can choose between two options of servos concurrency,
(aligned) and (opposite), depending on whether for the proper control the
opposite – or non-opposite movement of servos is required.
NOTE: Mixing for the selected tail type should be always turned on in your
radio. Autopilot will demix the inputs itself to get raw stick position needed
for stabilisation, then mix it back for servos.
In the second step set correct value of reverse for every control surface in the
Stabilization panel.
Check the proper servo alignment and reverse mode can be done after
turning on the STAB mode, observing the behavior of the control surfaces to
the movements of the model. When alignment and reverse mode are
positioned properly, the control surfaces must deflect in the direction needed
to return model to level flight.
© PitLab 2015 http://www.pitlab.com/dedalus-autopilot.html page 8 of 20

Dedalus autopilot– user's manual
Figure 10 The correct setting of concurrency and servos reverses
Figure 11 incorrectly set servos concurrency
Figure 12 Incorrect setting of the reverse (correct concurrency setting)
Since the rudder is not used for the stabilization of flight, it is not possible to
set its reverse on the basis of observation of the reaction of the model to
movements. Therefore, after any change to reverse of the rudder the
autopilot moves the rudder like to the right for about 1 second. If you see the
rudder turn left after the change of the reverse setting, it means that the
setting is incorrect.
© PitLab 2015 http://www.pitlab.com/dedalus-autopilot.html page 9 of 20

Dedalus autopilot– user's manual
Easy Setup
The simplest way of correct configure the model is use the menu command
Settings->Easy Setup. The wizard helps setting all parameters (servos
alignment, mixers, reverses) in 4 simple steps by asking for moving sticks in
your transmitter and confirming it by keyboard click.
The Easy setup should be run only after correct connection and configuration
of input RC channels.
NOTE: To avoid surprising deflections of the control surfaces during
calibration (if no mixers set yet), set the autopilot mode to OFF. Autopilot
mode does not affect the settings are correct, only to swing them when the
wizard is running.
On the every step of wizard you should move the correct transmitter s stick in
accordance with the information on the screen and confirm the position with
[Next] button while holding the stick in that position.
After completing all steps, the screen will display detected model
configuration.
In order to verify the settings, turn the STAB mode on and, while, leaving the
sticks in the neutral position, tilt the model with the right wing down. Right
aileron should deflect downward and left upward "preventing" this
movement of the model. Then lean model nose down, keeping the wings
horizontal. The elevator (or elevon for the delta) should deflect up, leveling
the model.
Autopilot modes
Autopilot mode control is done by a three-position RC channel connected to
the MODE input as follows:
Channel at minimum (PPM pulse duration less than 1.2 ms): OFF -
autopilot off (pass the signal through directly from receiver to servos
without any modifications).
The center-channel (pulse duration 1.3 ms to 1.7 ms): STAB -
stabilization mode
Channel for maximum (pulse duration more than 1.8 ms): AUTO -
autonomous flight
Actual autopilot mode is displayed on last line of OLED screen.
NOTE: To automatically return the model to the starting point in case of lost
RC signal, the fail-safe mode in the RC receiver should set correctly the MODE
control channel to maximum value (pulse > 1.8ms).
Turning the autopilot off
In the OFF mode, all RC input signals are transmitted to the output without
any interference (except for disregarding false PPM pulse outside the
acceptable range of 0.8 ms to 2.3 ms).
If the autopilot is connected to only one aileron signal (input # 1 "aileron 1"),
the autopilot transmits the same signal on both ailerons outputs - works as a
"Y" cable, making it easy to control two servos from one RC channel.
© PitLab 2015 http://www.pitlab.com/dedalus-autopilot.html page 10 of 20
Dedalus autopilot– user's manual
STAB mode - stabilization of the model
Stabilization of model is used in order to prevent unexpected or uncontrolled
changes of model attitude, both as reaction to control inputs and to wind
gusts. It is also useful when a model is very responsive to stick deflection,
which could end up in stalling the model, a spin or flipping over and,
consequently, loss of control and crash. Proper configuration of stabilization
mode is also required for the correct operation in autonomous flight mode.
When model attitude becomes different than the desired one, stabilization
system causes appropriate control surface deflection to eliminate these
deviations. Proportionality of control surface deflection in relation to the
position deviation is defined by Stabilization menu setting, adjustable
independently for roll and pitch.
Figure 13 Illustration of operation of banking stabilization algorithm
Figure 14 Illustration of operation of inclination stabilization algorithm
The correct setup of the stabilization mode is necessary for autonomous
mode of the autopilot to work.
The value of the roll stabilization force should be set to the highest value at
which the model is still flying steadily without falling into oscillation. Too high
a value is indicated by rapid rocking of the wings, especially at high speed.
Too low roll stabilization force could prevent proper flight in AUTO mode
(unstable flight, too small or too great banking of model during turns).
The pitch stabilization force should be set so that the diving model, gets back
to the level flight without oscillating, and after zeroing the throttle it soars
without deceleration and stall. After increasing throttle it should slowly gain
altitude, but not pitch up rapidly.
© PitLab 2015 http://www.pitlab.com/dedalus-autopilot.html page 11 of 20

Dedalus autopilot– user's manual
Small values of pitch stability may cause phugoid long-period vertical
oscillations of the model and too rapid climb when applying throttle.
Too high inclination stabilization force can cause quick, short oscillating up
and down, especially at higher speeds, and also cause stall of the model
without engine power, and poor ascending on power (model accelerates,
without ascending), causing problems in autonomous flight.
Autopilot in stabilization mode does not hold directly the setpoint direction of
flight, but by keeping the level of the model largely eliminates the unplanned
deviations from the current model course.
© PitLab 2015 http://www.pitlab.com/dedalus-autopilot.html page 12 of 20

Dedalus autopilot– user's manual
AUTO mode -automatic return to start place
In autonomous mode, the autopilot controls the model flight on its own,
maintaining the correct attitude and altitude, as well as preventing too rapid
model banking, which could cause loss of control (framing the wing,
corkscrew, etc.).
Banking limit
In order to maintain control over the model it is necessary to determine the
maximum safe allowed model banking during maneuvers in autonomous
mode. Settings are made in FPV_manger application in Autonomous (RTH)
panel, or in Autonomous->Roll limit menu:
Figure 15 Maximum banking of the model in autonomous flight
Too small value of the maximum banking increases turn radius, or may even
impede turning in strong wind. Too large values can cause cause the loss of
altitude during the turn or may even lead to stall, and cause significant
deviation of the course provided by the GPS from the real course of the
model, so the model will zigzag when flying to the base.
NOTE: For models with a large agility (large aileron deflections) or with lower
stabilization force set it may be necessary to decrease the limit of the banking
angles.
© PitLab 2015 http://www.pitlab.com/dedalus-autopilot.html page 13 of 20

Dedalus autopilot– user's manual
Force of getting back on course
When the model is in the autonomous flight and the current heading is
different from the desired the autopilot performs a turning maneuver in order
to return to the right course. Accuracy of staying the course, and the
deflection of the ailerons and rudder in case of deviation from the course is
defined by menu parameter Autonomous->back to course. This is illustrated
in figure:
Figure 16 Illustration of the algorithm to maintain the course
The greater the deviation of the course, the stronger the deflections of
ailerons and rudder that cause getting back on course. This means that if
deviation of the course is high, then also the turning speed of the model is
high, and with getting closer to the expected course the speed of turn
decreases.
If this value is too low, the model will be turning slowly and will not be coming
to the course to the base. Too high a value causes the model to perform a
quick turn also when the deviation from the course is low, so that the model
significantly exceeds the course and oscillates around the course flying zigzag.
Mixer aileron->direction
Turn of the model is generally obtained by ailerons, but it is also possible to
add steering with the rudder. This is done by the mixer set Aileron->rudder.
In models with ailerons its use and value is at the discretion of the pilot. Too
large values of the mixing can cause excessive model banking in relation to
the value of the banking limit set in autopilot menu.
NOTE: in aerobatic models where the ailerons turn the model very slowly,
the values of aileron-direction mixer should be high, and the banking value
limit should be small.
© PitLab 2015 http://www.pitlab.com/dedalus-autopilot.html page 14 of 20

Dedalus autopilot– user's manual
The slowdown the turn
Since small values of the maximum model banking can cause problems in the
event of strong winds, it is necessary to use average values of the banking
limit, aided by dynamic constraint (slow down) of the turn speed, which
prevents problems with GPS course.
Figure 17 The error of indication of the course during a quick turn PS model
The slowdown in turn can be set in the menu Autonomous->Turn slo do n.
NOTE: When using the magnetic heading it is not necessary to slow down the
bend more, as the used magnetometer has a sufficient speed and precision of
operation, even with a stronger heel and high-speed turns.
ompensation of crosswinds
If some factor, such as crosswind (but also bad trimming or bad position
compensation of autopilot) causes the model is still relegated from the course
and does not pull to the course to the base, this error is constantly monitored
and if it does not disappear, the autopilot is steadily increasing aileron
deflection to compensate for this error. It takes a relatively long time (up to
several seconds or even longer) and makes systematic "pulling" the autopilot
to the correct course.
Compensation is selected at the discretion of pilot, keeping in mind that too
high a value may result in exceeding the line of the course by the model and a
slow return to the course (or zigzag flight or a slow change in the course),
because the adjustment changes slowly.
© PitLab 2015 http://www.pitlab.com/dedalus-autopilot.html page 15 of 20

Dedalus autopilot– user's manual
Maintaining altitude
Maintaining the altitude of the autonomous flight is performed depends
situation. If the model is above the limit the model use elevator to descend.
Figure 18 The use of the elevator during descent from a high altitude
If the model is below requested altitude then autopilot expects that model
flying would climb at after increasing throttle. The autopilot doesn t force
ascend by using elevator to prevent stall and loss of control.
Figure 19 Ascending of the model on engine flight
© PitLab 2015 http://www.pitlab.com/dedalus-autopilot.html page 16 of 20

Dedalus autopilot– user's manual
Throttle limit
The Autopilot use constant level of throttle during autonomous flight set by
parameter Throttle. Value set in this parameter should ensure ascend the
model above terrain obstacles like a trees or descending thermal currents.
Value of throttle should be set experimentally, taking in account lower
voltage of discharged main battery.
Reducing throttle allows for a more economical flight and limits the maximum
cruise speed in models with a powerful engine. It also decreases the risk of
overheating the motor or speed controller (ESC) during the autonomous flight
after a long tour on some setups.
Saving the trimmers
Before the first flight, and after each change of trim settings, save new trim
offsets corresponding to level flight of the model. Use this option in the menu
Store->Store trims.
Saving the trimmers is important from the point of view of the autopilot, as in
AUTO mode the autopilot takes over the role of RC transmitter and needs to
know the PPM signal values (modulation of servos) corresponding to free
flight in a straight line, with no banking and level flight. Changing the trim
without saving it in the autopilot will result in banking and turning of model in
STAB mode, and a worse operation during autonomous flight (asymmetric
turns and, in extreme cases, stall or problems with maintaining altitude).
As usually, changing the trim settings can be done both on the ground and in
flight. Trimming the model in flight should be made in OFF mode (with
stabilization off) in order to correctly observe the behavior of the model in
free flight.
The GPS course
GPS determines the course on the basis of the position of the model
calculated in the consecutive points in time. So it is always the actual direction
of movement of the model, including leeway angle caused by the wind
pushing the model sideways. This is called the Course Made Good (CMG).
Autopilot uses GPS course to fly to the base in a straight line, along the
shortest route. However, side wind may push the model off this course. Thus,
this drift must be compensated. This deviation may be up to about 90
degrees, with a very strong wind. For the pilot who observes view from a
camera mounted on the model for the first time, this can be a surprise and
may cause confusion, because the model gives the impression of flying in the
wrong direction (too much into the wind).
Figure 20 Flight in strong winds according to PS (CM )
© PitLab 2015 http://www.pitlab.com/dedalus-autopilot.html page 17 of 20

Dedalus autopilot– user's manual
hoosing GPS or barometer altimeter
Autopilot allows you to select the type of altimeter, which is used to maintain
altitude in AUTO mode.
Barometric altimeter is recommended for most flights. It provides high
precision of determining the altitude, but it is sensitive to changes in
atmospheric pressure. Due to changing weather the altitude indicated by the
altimeter can change within a few meters in comparison to the initial value
during the flight.
GPS altimeter is insensitive to weather conditions and provides a small
percentage error at high altitudes. However, it provides a significant absolute
error of indications and its reading can change unexpectedly and jump up or
down even more than 20m. It should be taken in account while selecting
flight altitude in AUTO mode.
P application configuration
Autopilot can be configured and updated via the USB port using FPV manager
software, running on a computer that is running Windows XP, Vista, Win7 and
Win8, in both 32 and 64 bit versions.
Configuration application (executable file FPV_manager.EXE) requires the.
NET Framework software version 3.5, which is shipped with the newer
versions of Windows and does not require any additional installation. Older
versions of Windows XP, however, may not have it. Then it must be
downloaded from the Microsoft and installed on your system:
http://www.microsoft.com/downloads/pl-pl/details.aspx?
FamilyID=333325fd-ae52-4e35-b531-508d977d32a6
The latest version of the configuration software can always be found on the
manufacturer s website:
http://www.pitlab.com/dedalus-autopilot/download.html
The configuration application is ready for use immediately after saving it to
local or removable drive and does not require installation on Windows. The
application can be run from anywhere, even from removable media such USB
flash drive or directly from a network location, on any Windows computer.
The application communicates with the controller pad via USB and standard
mini-USB cable. Windows automatically recognizes the connected device,
without the need to install additional drivers. The device is seen in Windows
as Pitlab & Zbig AP. Once the FPV manager application is started, go to the
Autopilot tab. If the device is connected to your computer, it will be the
automatically identified. The Firm are subpage displays basic information
about the device.
© PitLab 2015 http://www.pitlab.com/dedalus-autopilot.html page 18 of 20

Dedalus autopilot– user's manual
Software Update
Manufacturer makes updated Autopilot software and firmware available on
its website. It includes functional enhancements and bug fixes. To update the
software, the file with the new firmware version (with .de extension) should
be copied to the local disk. After that, click Upload Firm are button and
select the new firmware file. The update process takes from a few to several
seconds, and the progress is indicated by a progress bar in an application.
R Setup
Configuration and the correct connection of the receiver verification can be
made in the FPV_manager application, Autopilot->Radio PPM.
In the PPM Input panel current signal levels from each receiver channel or
decoded PPM (CPPM or SBus) signals are presented.
In the PPM Output panel are the current output signals of autopilot servos
and motor controller values are presented.
In the PPM Input mode and mapping panel you can find settings for
communication with RC receiver through parallel connection (parallel inputs),
or one of the two Serial PPM (CPPM or SBus) inputs connected to input 1.
Here we make the appropriate channel assignments of the CPPM signal to the
autopilot function, and additional PPM Aux2 to AUX5 outputs.
alibrations
Autopilot is factory calibrated and ready to operate, and you will not need to
calibrate the device on your own.
However, there can be special circumstances in which it will be necessary to
re-calibrate the system if there are problems with its proper operation.
Problems may arise as a result of strong mechanical or thermal shocks, or
natural aging of electronic components. This FPV_manager application allows
you to perform additional Autopilot calibration (in order to shorten the
maintenance of the device), but before using any calibration function you
© PitLab 2015 http://www.pitlab.com/dedalus-autopilot.html page 19 of 20

Dedalus autopilot– user's manual
should contact the manufacturer to determine the nature and cause of the
problem, and obtain instructions on how to calibrate it properly.
heck list before the flight
Set the autopilot in AUTO mode and tilt the model left and right check if
ailerons counteract the tilting in correct direction.
Check on screen if GNSS receiver started to track satellites and the displayed
status is Ready to Fly. The LED on the GPS receiver should also blink when
there is no lock and become dark when the satellites are acquired.
You should also verify reported distance from a base. It should be not bigger
then 10m. In case is bigger please store new base position using menu
command Store->Store base.
If something is still not known
We have endeavored to describe all aspects of the configuration and use of
the autopilot. If, despite that, some things are not clear, please ask. Together
with a group of experienced users we are available online on RC Groups.
Traditionally, at this point in the section "UAV - Unmanned Aerial Vehicles"
we discuss our products, share our experiences and talk about the new
functionality of devices, as well as inform about new releases of software and
firmware.
Service and warranty
We strive to make our equipment reliable. This is reflected in the free
warranty repair of all our equipment for 2 years from time of purchase. We
also provide after sales service.
If something is damaged please contact to us and send the unit to our office
at the following address:
PitLab Piotr Laskowski
ul. Jana Olbrachta 58a/163
01-111 Warszawa
Poland
NOTE: When sending the hardware to service please remember to include
sheet of paper with return address and detailed description of the problem.
Declaration of onformity
The Dedalus autopilot is conformed with essential requirements in the range:
Protection of health and the safety of the user
art. 3.1 directive 1999/8/WE, EN 60950-1:2004
Electromagnetic compatibility (EMC)
art. 3.1b directive 1999/5/WE, EN 301 489-1 V1.6.1
© PitLab 2015 http://www.pitlab.com/dedalus-autopilot.html page 20 of 20
Table of contents